6 drum processing techniques to help you program state-of-the-art beats
Learn some of the most essential tools and techniques for getting a modern drum sound
DRUMS WEEK 2025: As technology marches on, drum processing is another ever-evolving field. Once, engineers may have made their way with a stereo pair of microphones above the drum kit, as well as a smattering of EQ and compression, but today’s modern music demands a lot.
It could be, pumping, light-but-complex, heavy-hitting, impactful, artful or biting drums – and it also demands the processors, techniques and knowledge to be worthy of that level of sound quality.
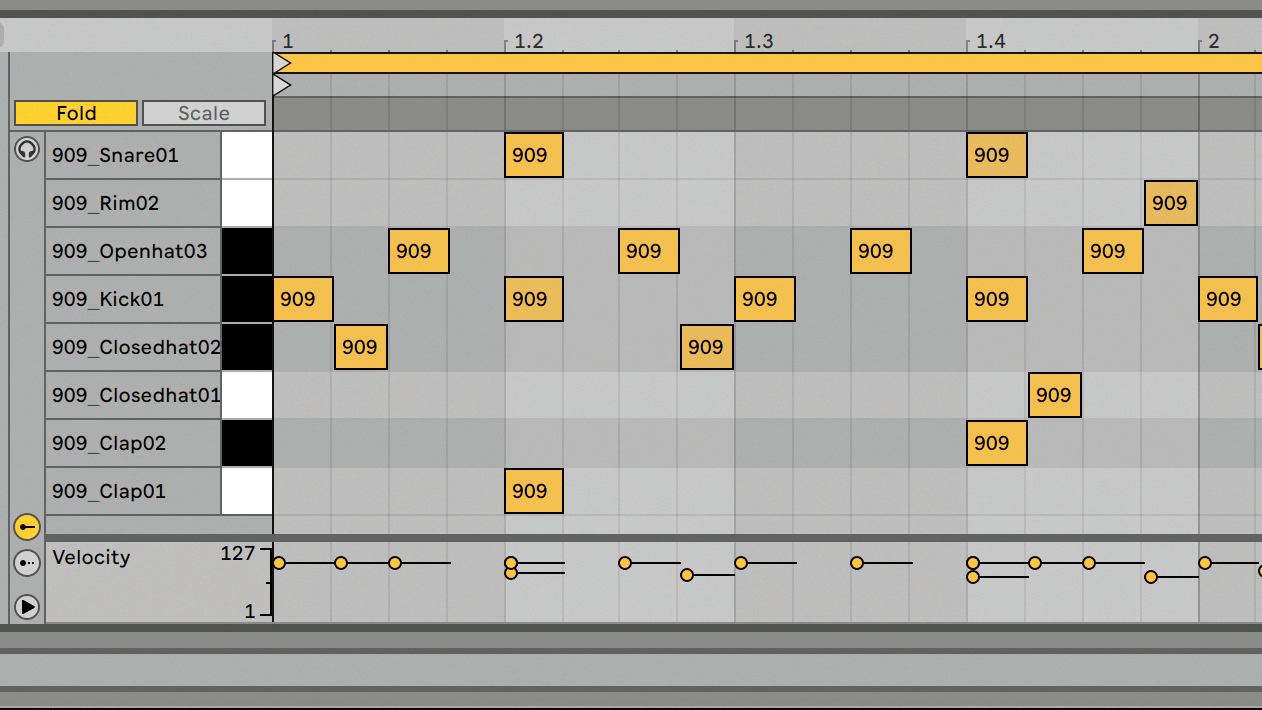
So how do today’s drum parts tick, production-wise? One end of the spectrum requires the drums be as powerful and full-bodied as possible, fitting other instruments in around them. Another end sees the other instruments take over, leaving sparse drums that have to make use of whatever room they’re left with. Either way, you’ll need to know how to use your tools to make everything work together.
Article continues belowThat’s where this guide will come in. We're taking you through some of the most essential techniques and tools for getting a modern drum sound: from the basics like multiband compression that were once envelope-pushing supertools, to modern treatments for layering, stereo enhancement and sophisticated reverb processors.
So grab your tuning key, limber up, and chalk up your hands for some… clicking and dragging in your DAW!
Processing a drum bus with multiband compression
Multiband compression is one of the finest tools available in the digital world. Whereas once we had simple compressors, today we get to have several – one for every band of the frequency spectrum.
Multiband compressors are often used in mastering, and shine when placed on a drum bus. Here, the broad range of different frequencies on display, plus their different transient profiles, makes multiband dynamics processing an obvious, effective choice.
Want all the hottest music and gear news, reviews, deals, features and more, direct to your inbox? Sign up here.
5 pro compression techniques to take your sound to another level
The first step in using a multiband compressor is often in fine-tuning the bands you have available. Solo a single band and listen as you adjust its crossover frequency (or crossover frequencies). What tonal and transient elements are occurring in this range of frequencies? Set your crossover frequencies at a point where a certain function is fulfilled – weighty and powerful bass in the lows, or high-end sheen in the highs, say.
From here, a great way to progress in multiband dynamics is to make use of the solo and audition functions available to you. How do individual bands sound on their own, with and without processing?
And how does the whole output sound with a certain band’s compression deactivated? Comparisons like this help you find your way with these devices.
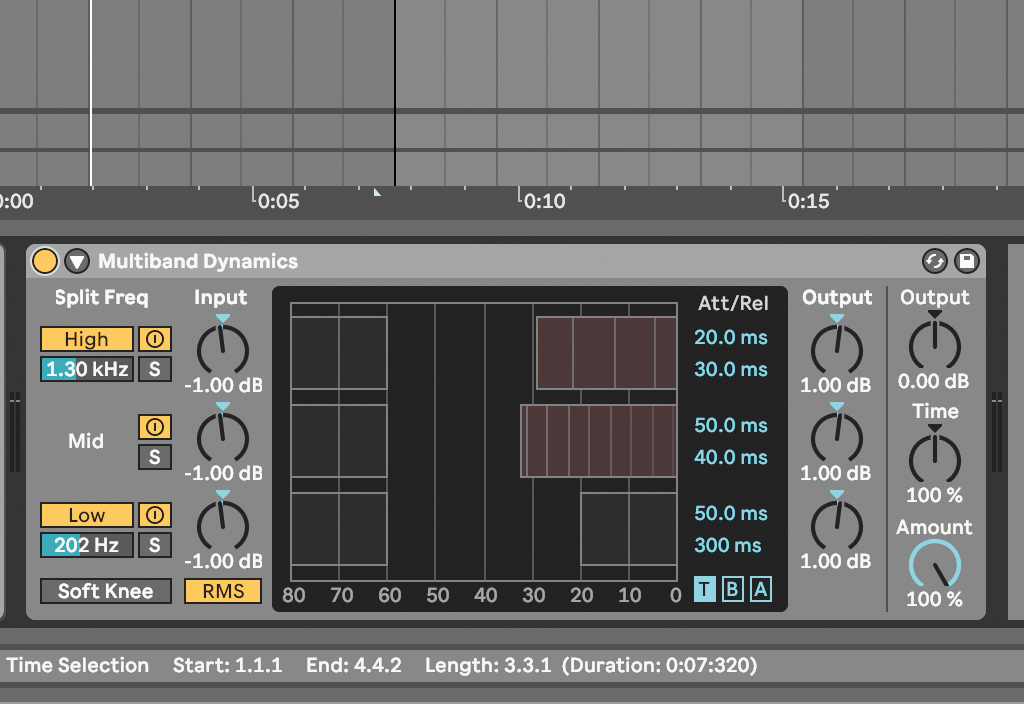
Multiband dynamics processors like Live’s let you set attack/release times for each band. On a drum bus with piercing hi-hats, we’ve given the high band a faster attack to tame transients. The mid band has slower attack to let tom/kick transients through.
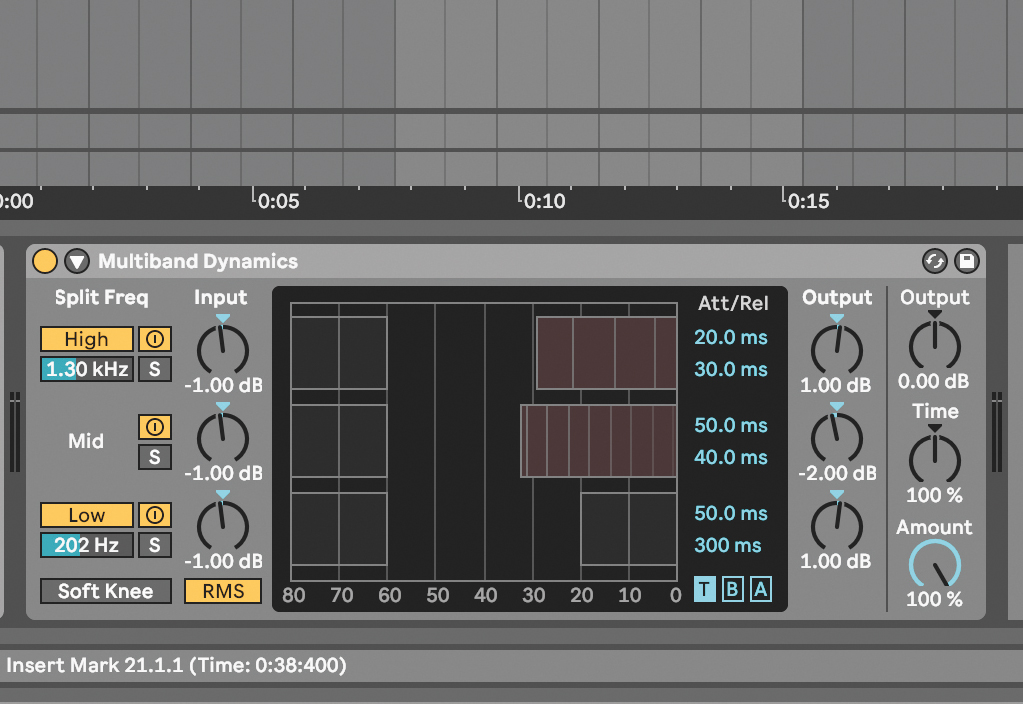
Use the solo buttons to hear individual bands and fine-tune your processing. While the tom’s transient shape is now more pronounced, the overall level is too loud. To adjust this, we can use the output gain on the right-hand side of that band.
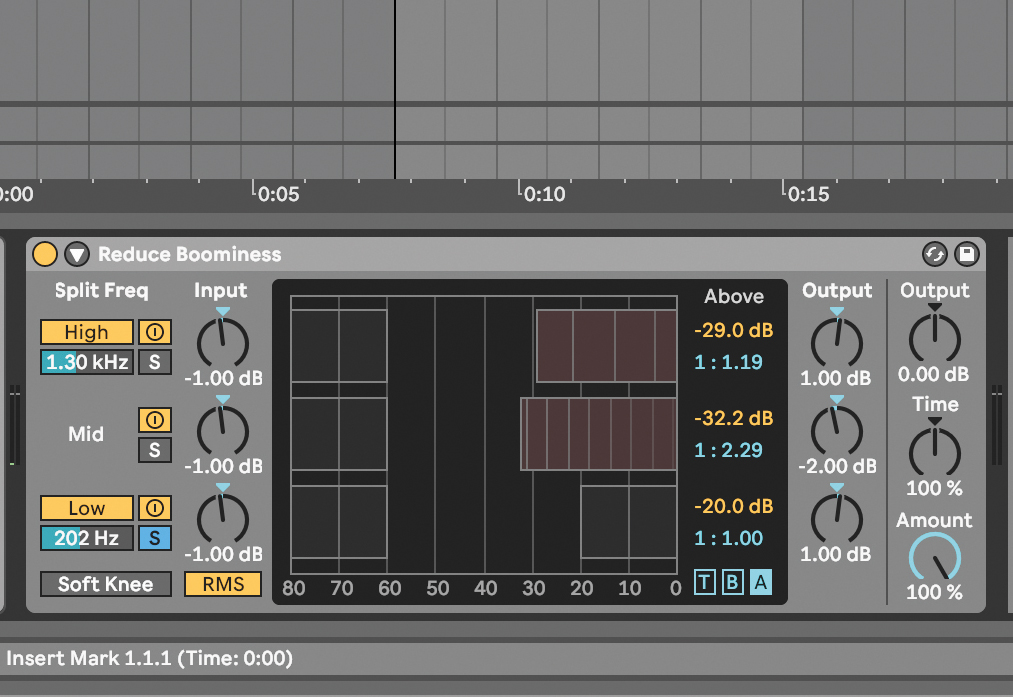
The bodies of the kick and toms are clashing slightly and causing boominess. We can use Multiband Dynamics to apply downward expansion to our low end, reducing everything below a certain point, essentially acting as a gate.
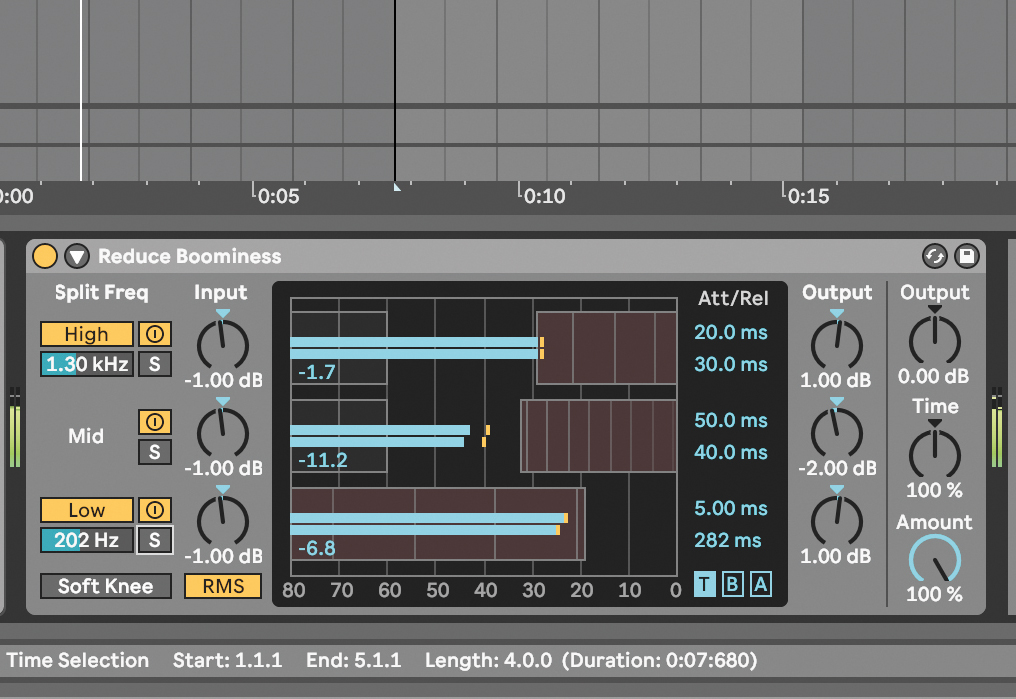
Click B to enter the Before view, then adjust the threshold until only the peaks exceed it. Then reduce the Ratio till you hear the sustain of the low end reducing. Set a fast Attack and adjust the Release until you hear the desired groove.
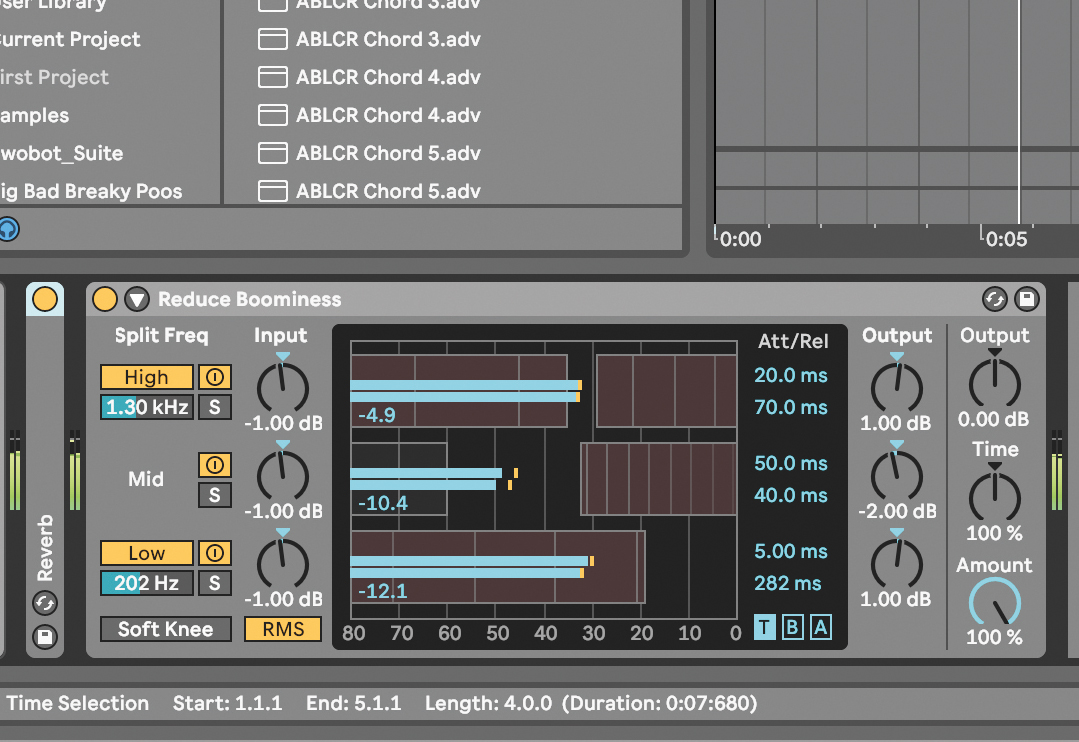
You can use the same technique on the high end to attenuate unwanted high frequency noise, such as room noise, tape hiss and vinyl crackle. You may need to use shorter release times to achieve the desired effect, though.
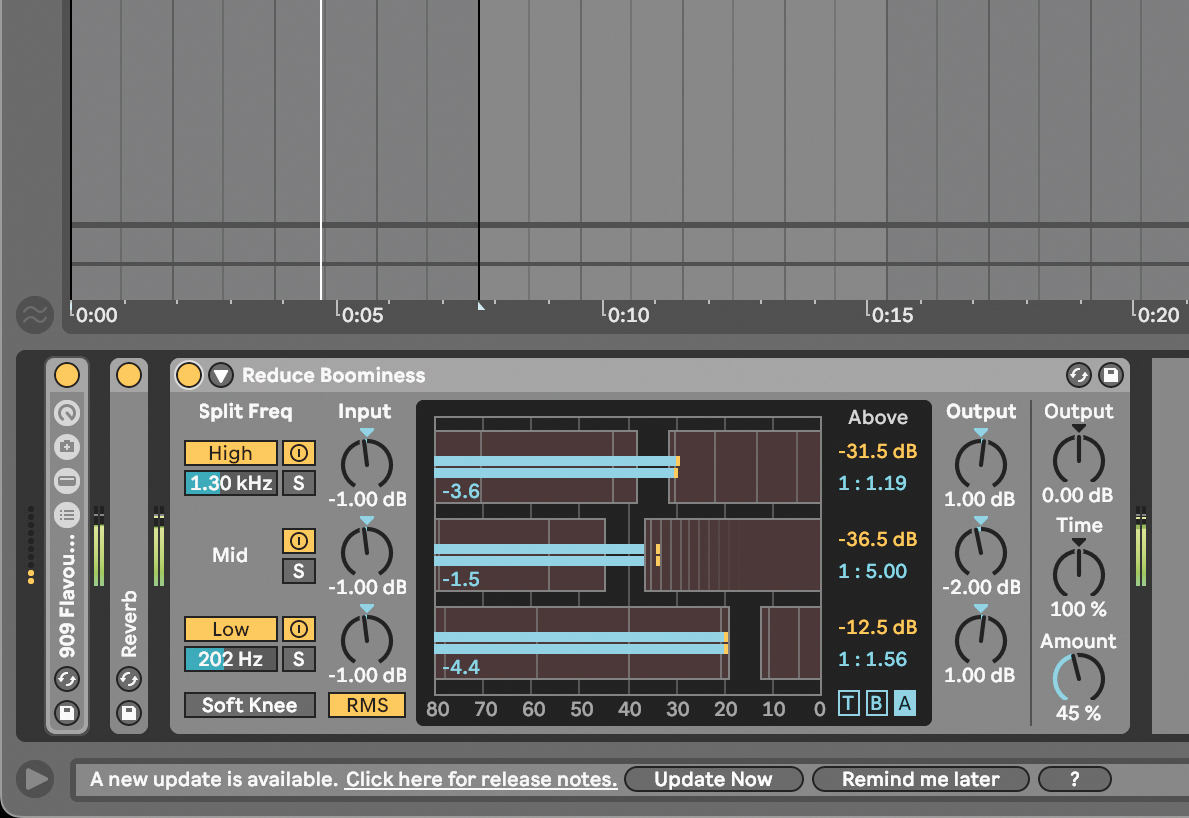
Multiband dynamic processing can be hard to get right, and it’s quite easy to go overboard. That’s not always a bad thing, though. In this case, we’ve gone nuclear with parameters, then dialled back the mix amount to reintroduce dry signal.
Mid/side EQ processing for better stereo drums
Drums carry a lot of a track’s crucial properties: transient information that makes it all pop; tone and pitch that extends right from the low bass drum to the sheen of crash cymbals; the room sound that’s particularly audible with loud and quick impulses flying back and forth; and of course, stereo information, both from the room and the panning of kit elements.
That stereo side of the equation has become a big part of modern music, thanks to digital sound-sculpting tools that can use maths where only electronics were available before. Now we can analyse the stereo field, check phase correlation, work any processing into a mid/side technique, and show off the full stereo panorama.
Here we’ll see mid/side EQ processing on drums, using FabFilter’s Pro-Q 3, which lets us make particular EQ bands work on either mid or side portions of the signal only. Mid/side was originally a recording technique, but is now a mixing/mastering definition for processing a signal based on two components: its ‘mid’ information (the same in both speakers); and its ‘side(s)’ information (different between left/right).
We’ll show you how to wield mid/side processing in an EQ context, but there are many more ways that we can use this particular signal split to our advantage.
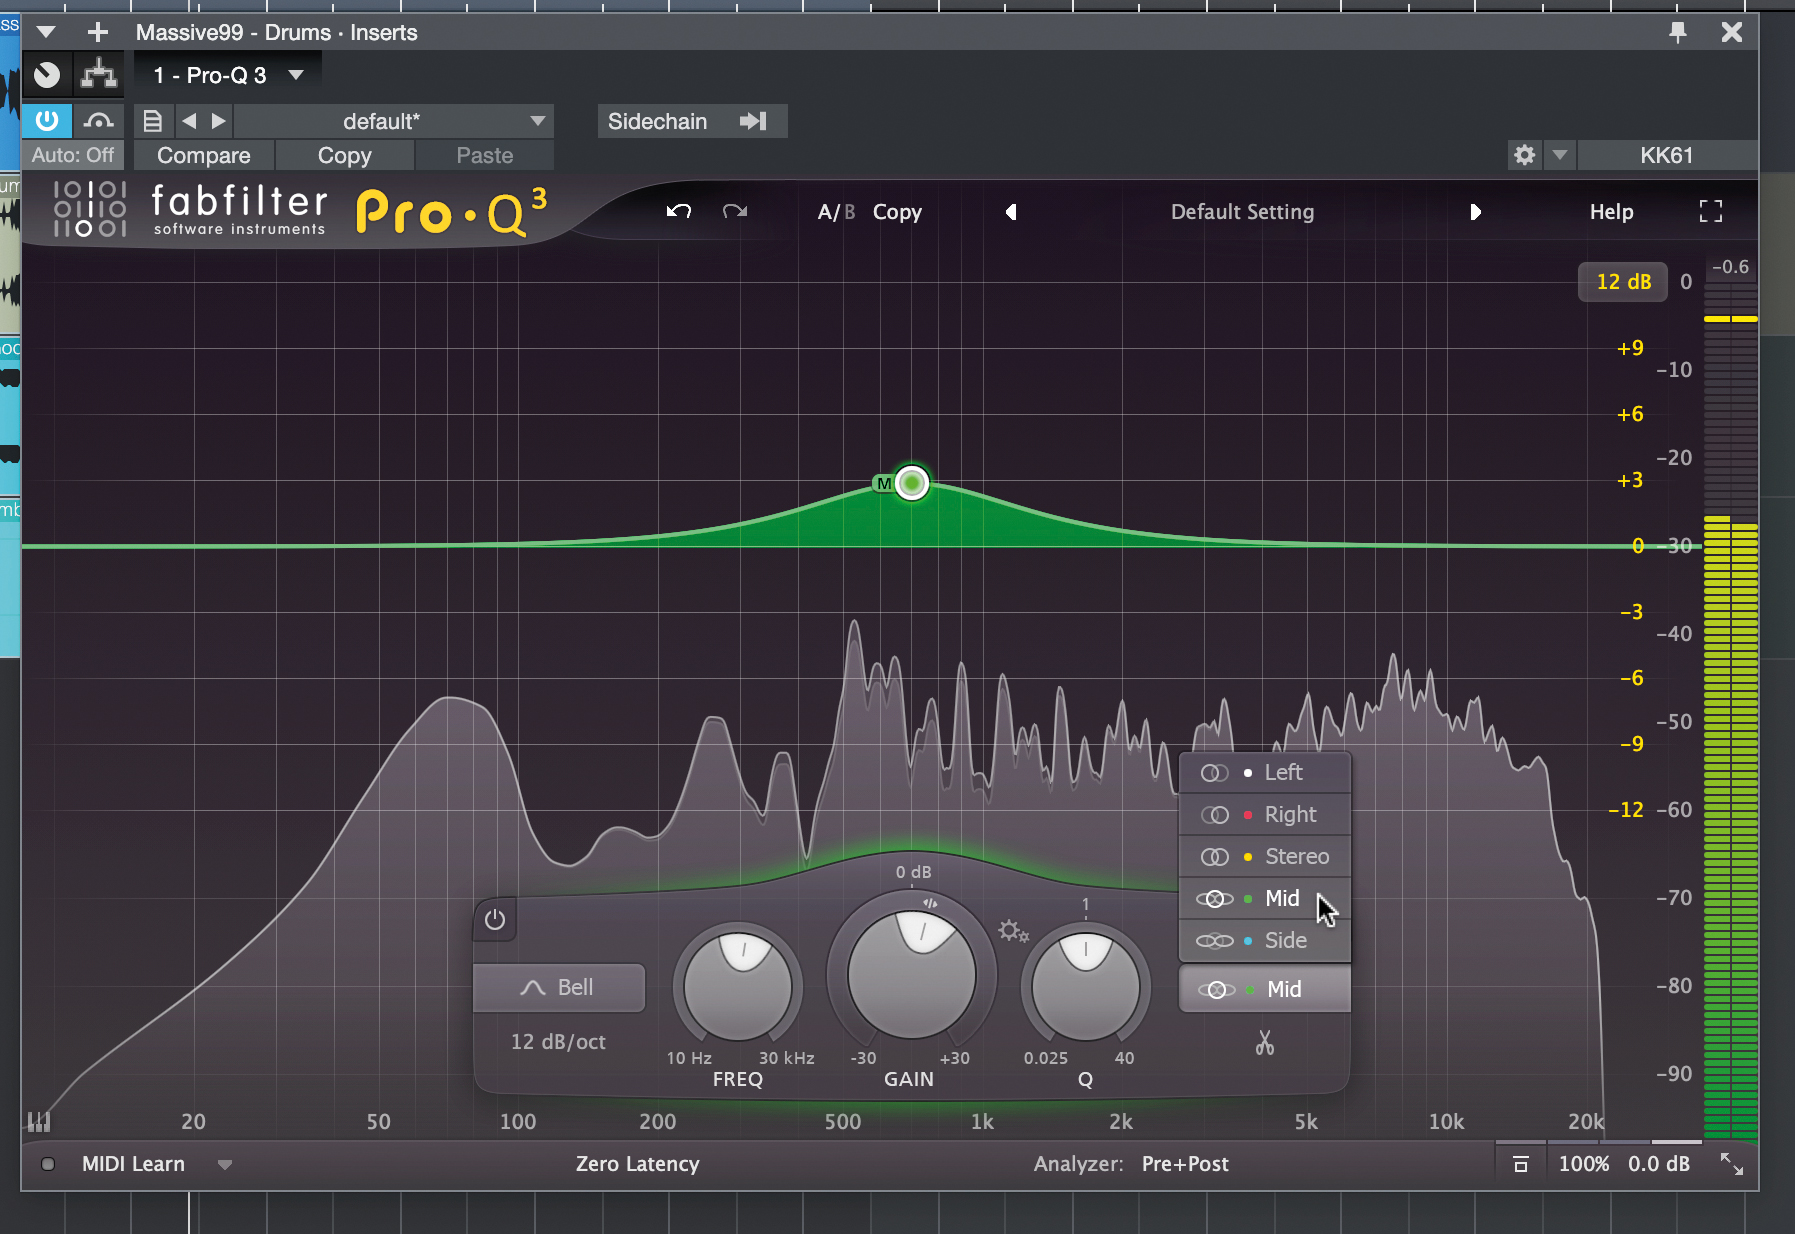
Starting with FabFilter Pro-Q3 on a drum bus, we set a band to work only on the mid (ie both speakers at once) information on the channel. We find an area of snare that we can boost without affecting the wider overheads or room components of the signal.
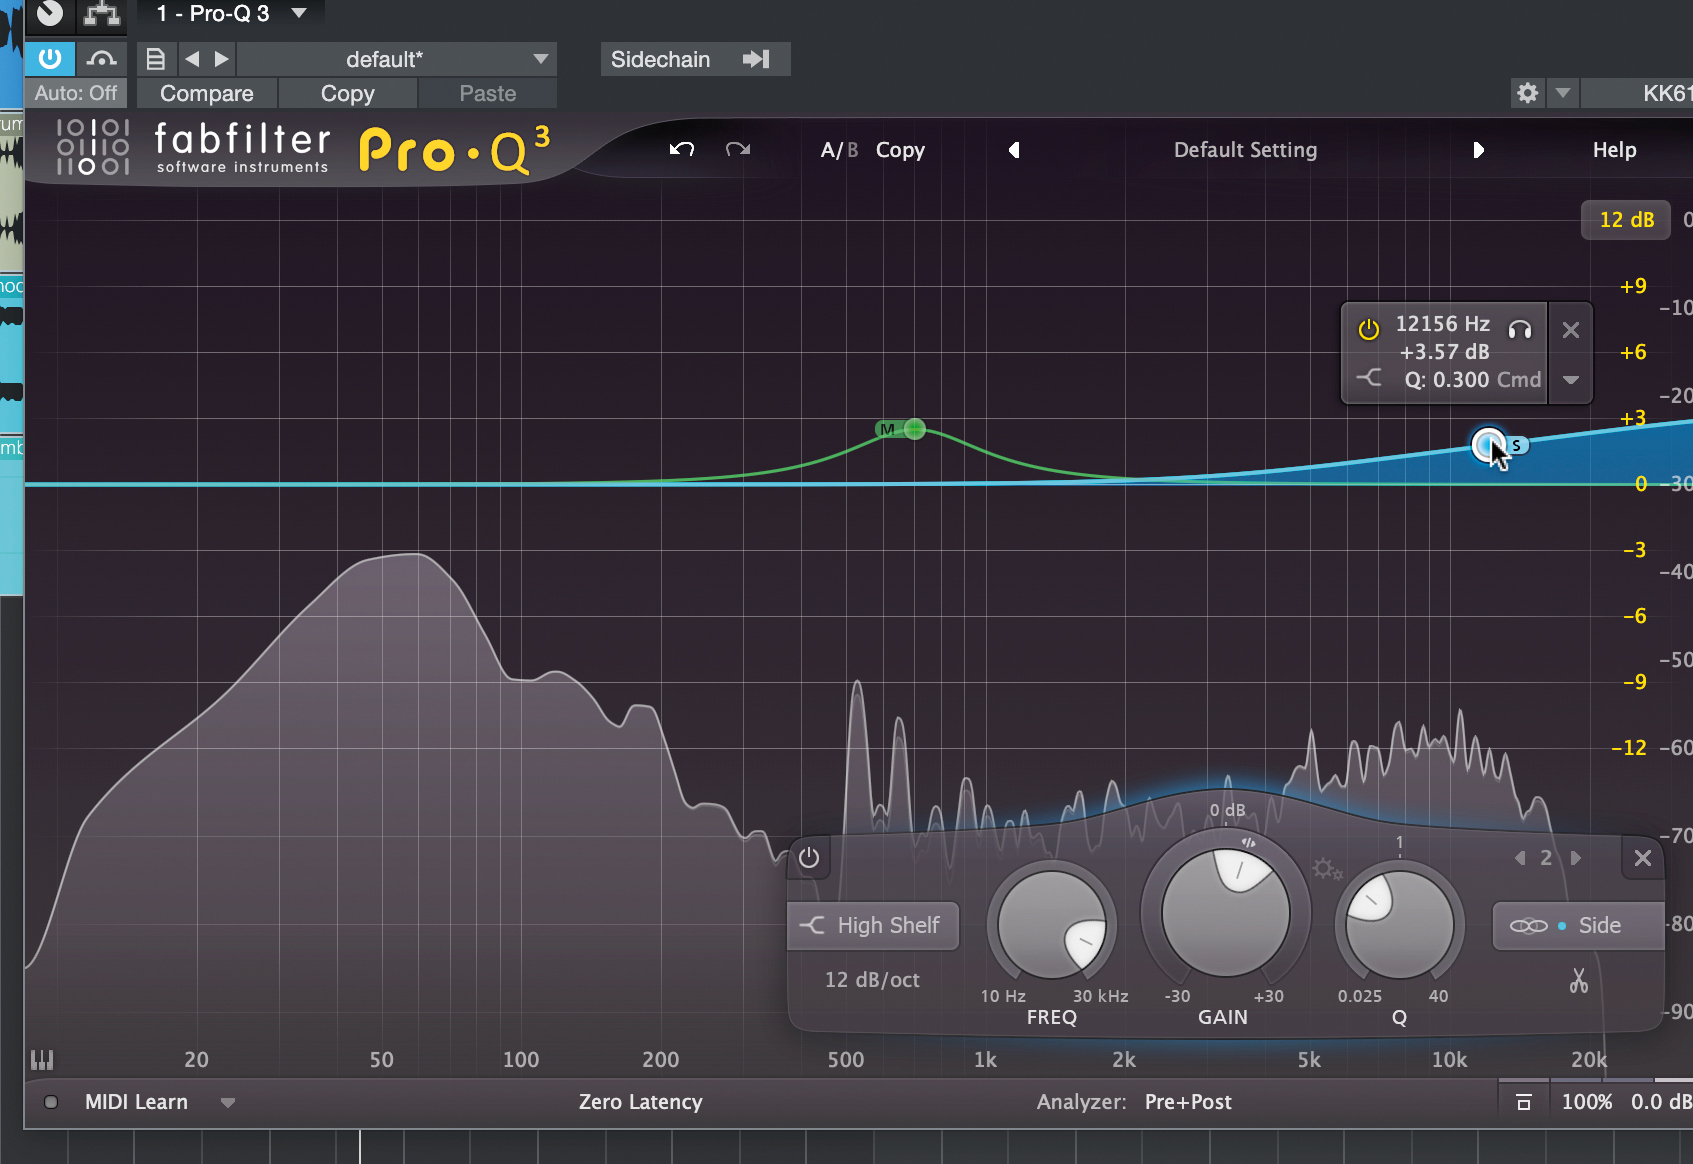
Next, we’ll add a nice, airy lift with a high-shelf, targeted only at the sides portion of the signal. This helps our hats and overheads to come up, without getting to those mid-panned mono channels from the original mix.
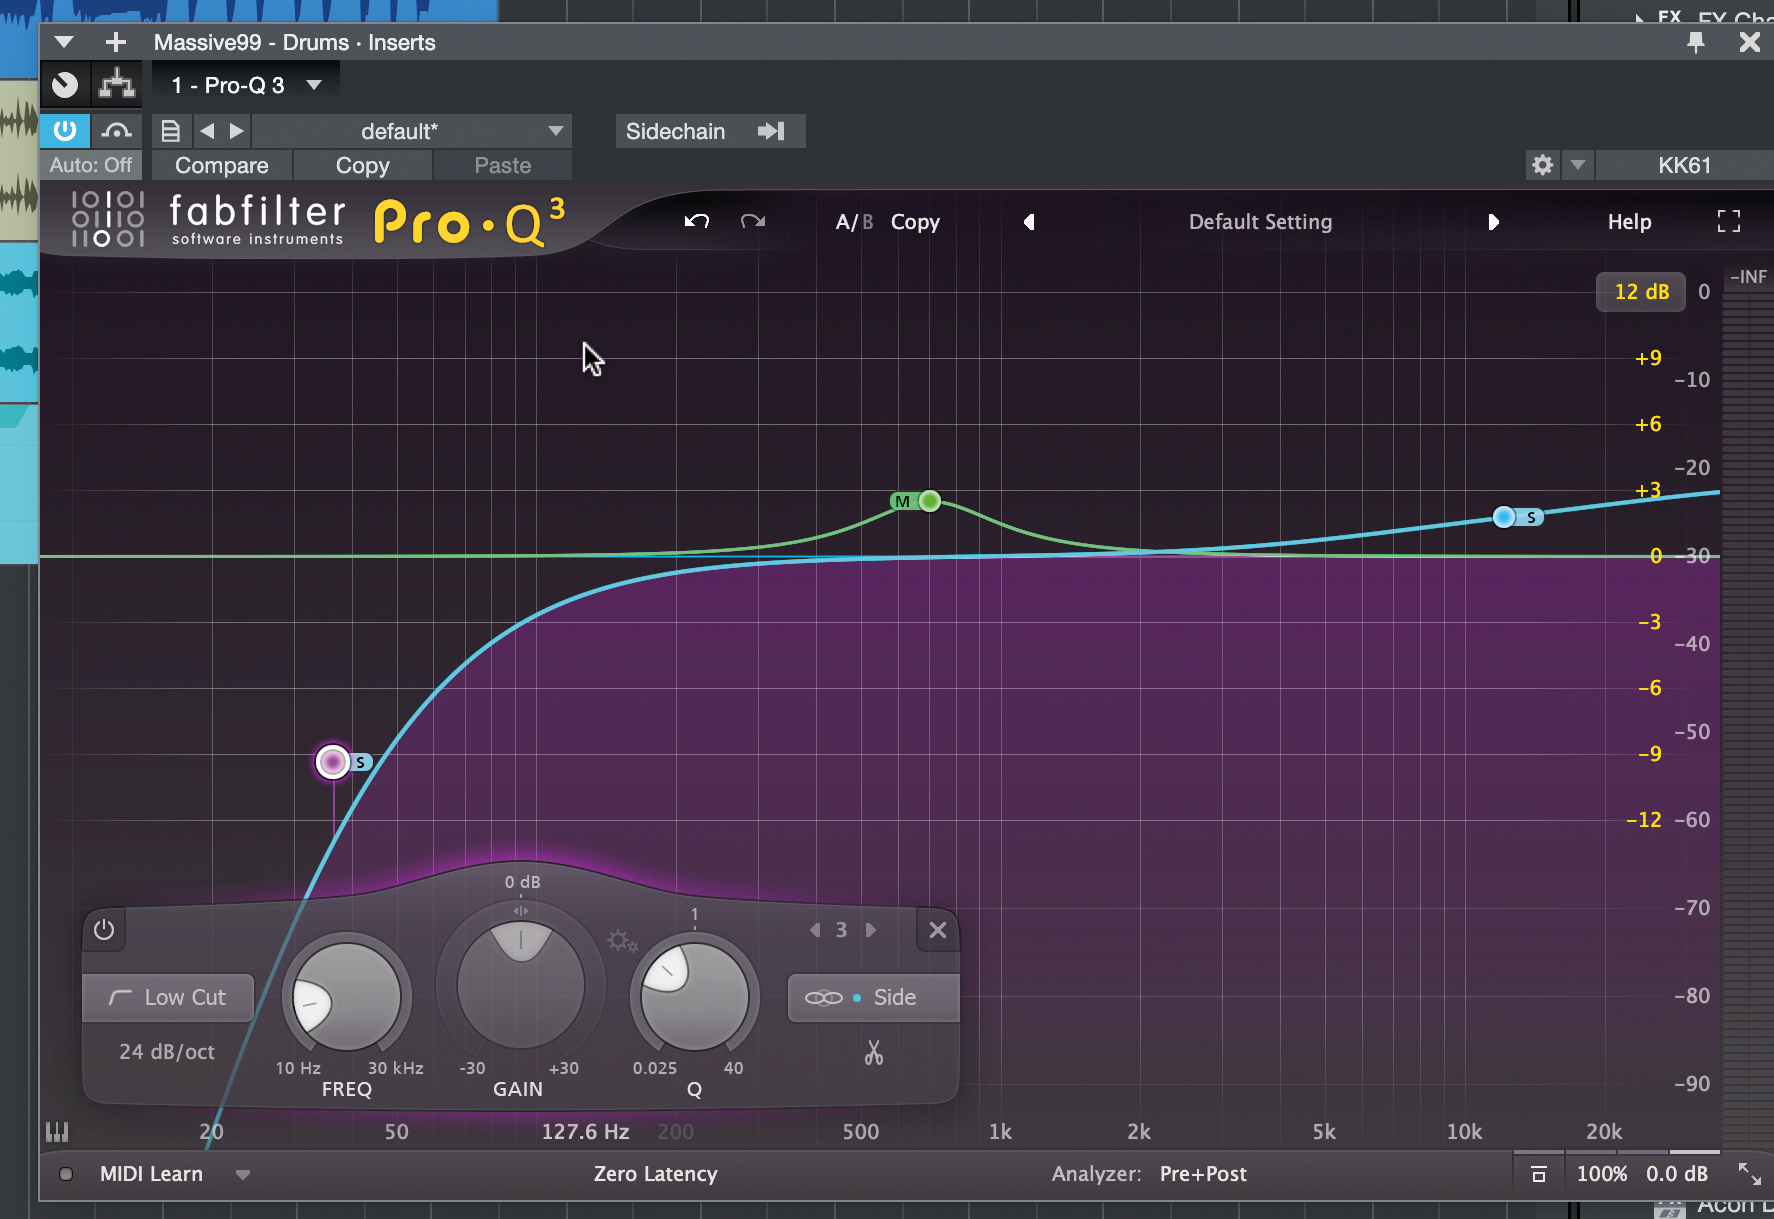
Next, we carry out an essential mixing step via our EQ – narrowing the bass frequencies to ensure they’re not stereo by adding a low-cut filter set to sides only. This removes all the sides signal and leaves only the mono mids.
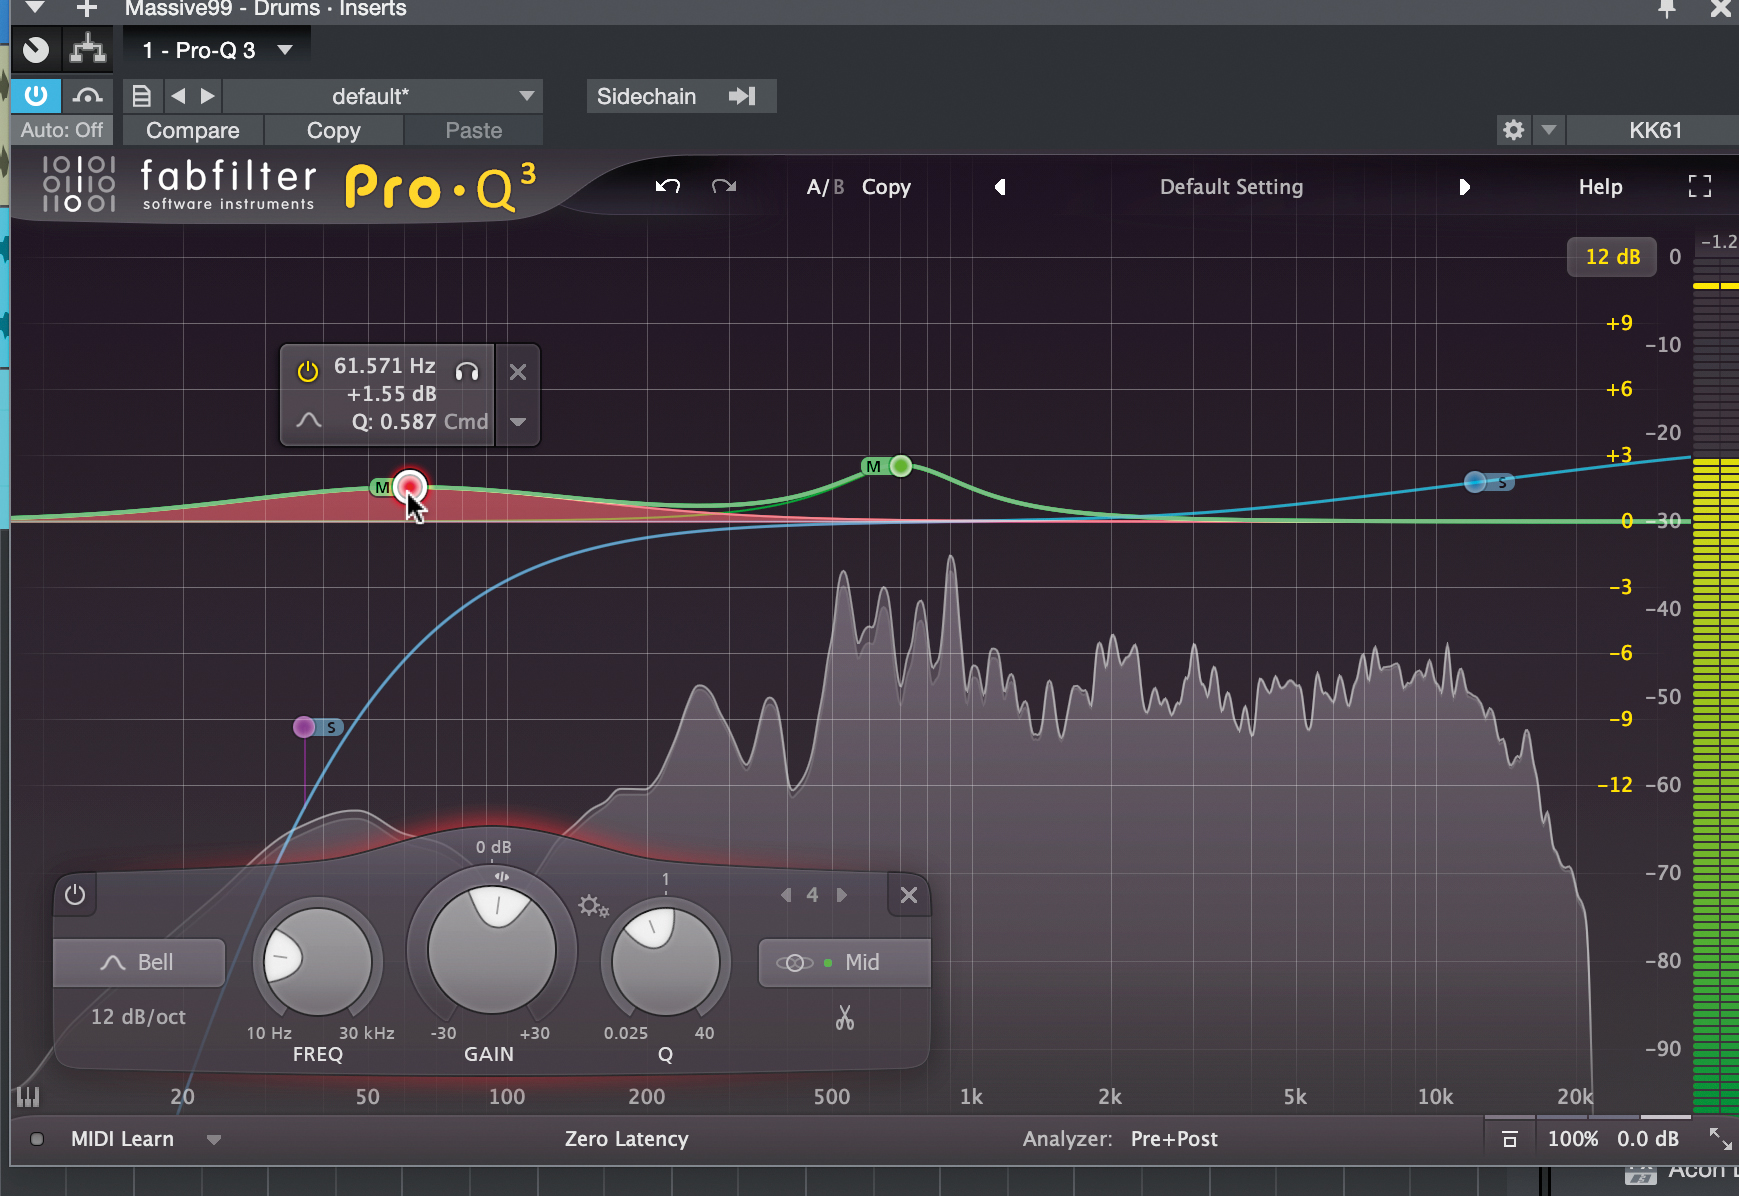
Another, wider, lower mid-only band gives us more power in our kick, without affecting stereo information just above – such as panned floor toms. But let’s use another Pro-Q 3 feature to take this even further…
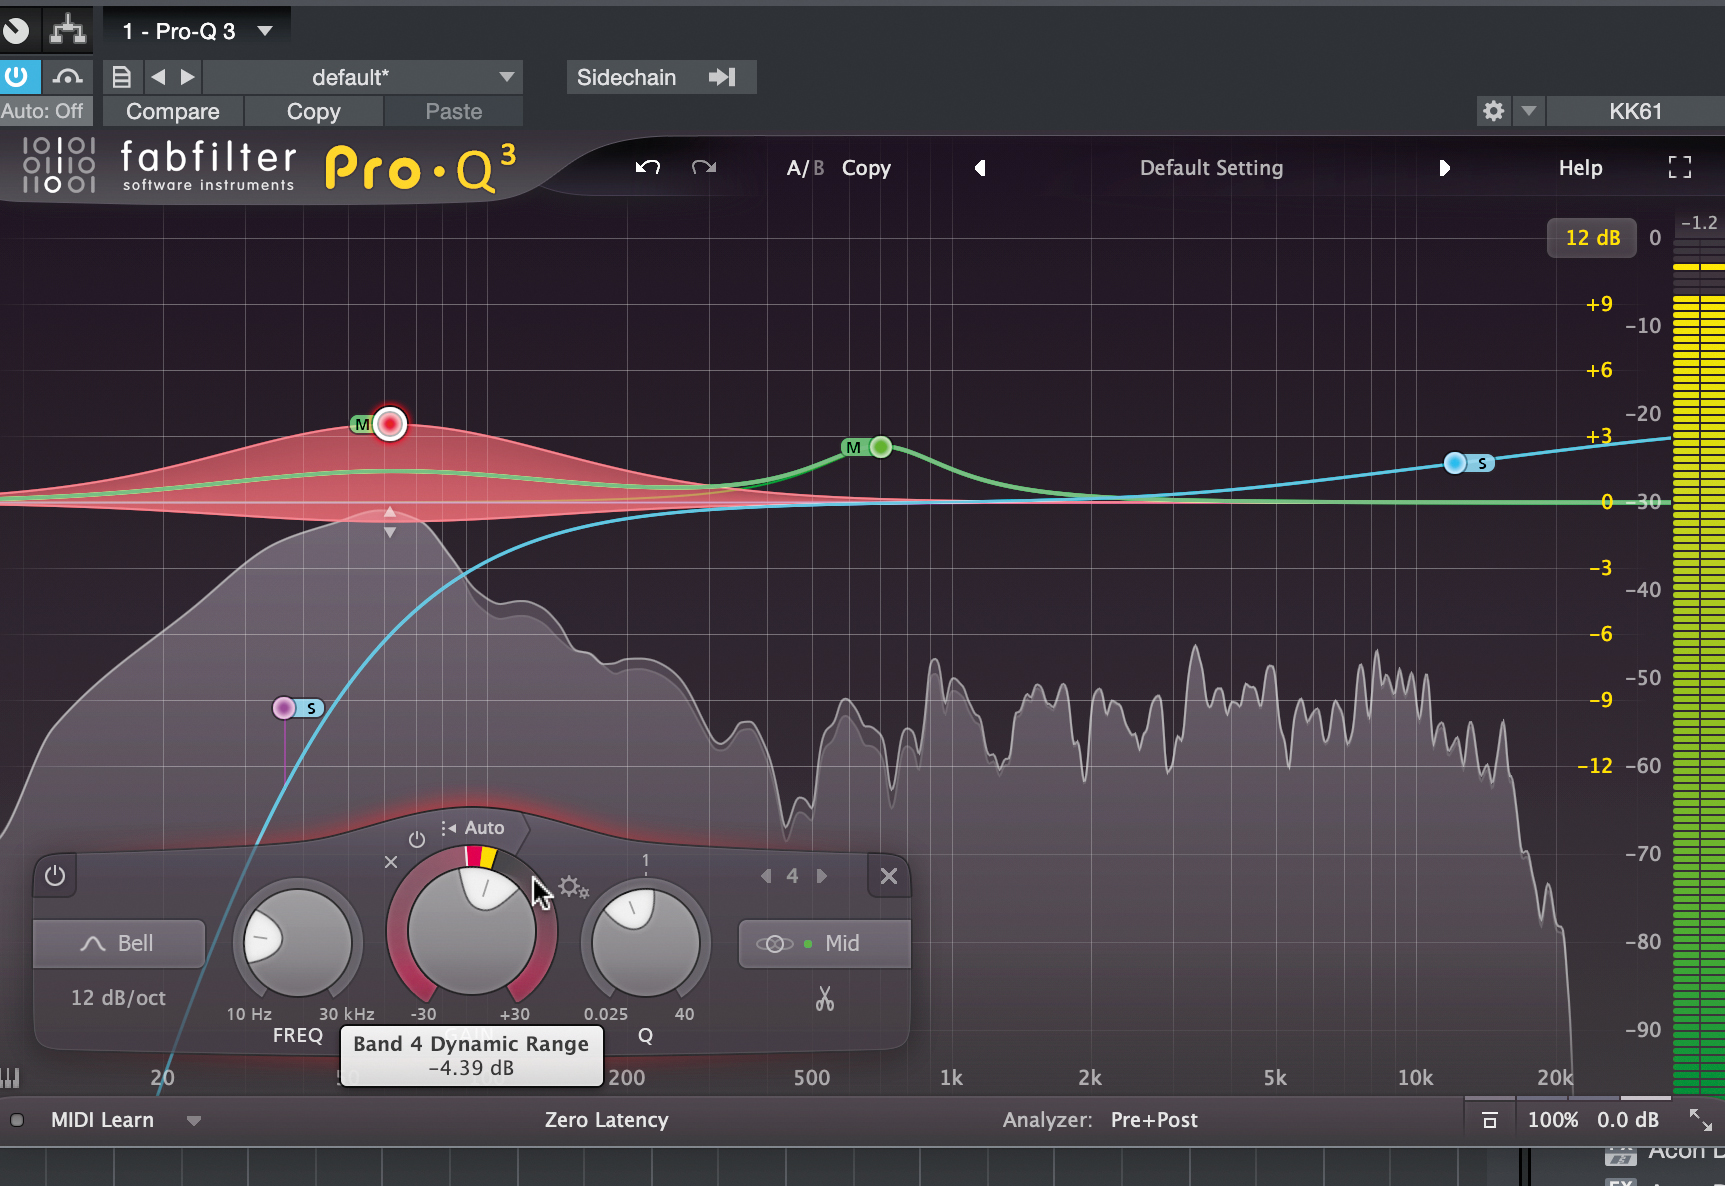
By pulling the collar around the band’s Gain control, we kick in dynamic EQ on this band only, for the mid-signal portion only. Here, we control the kick in the drum bus, without affecting its click higher, or any stereo information nearby.
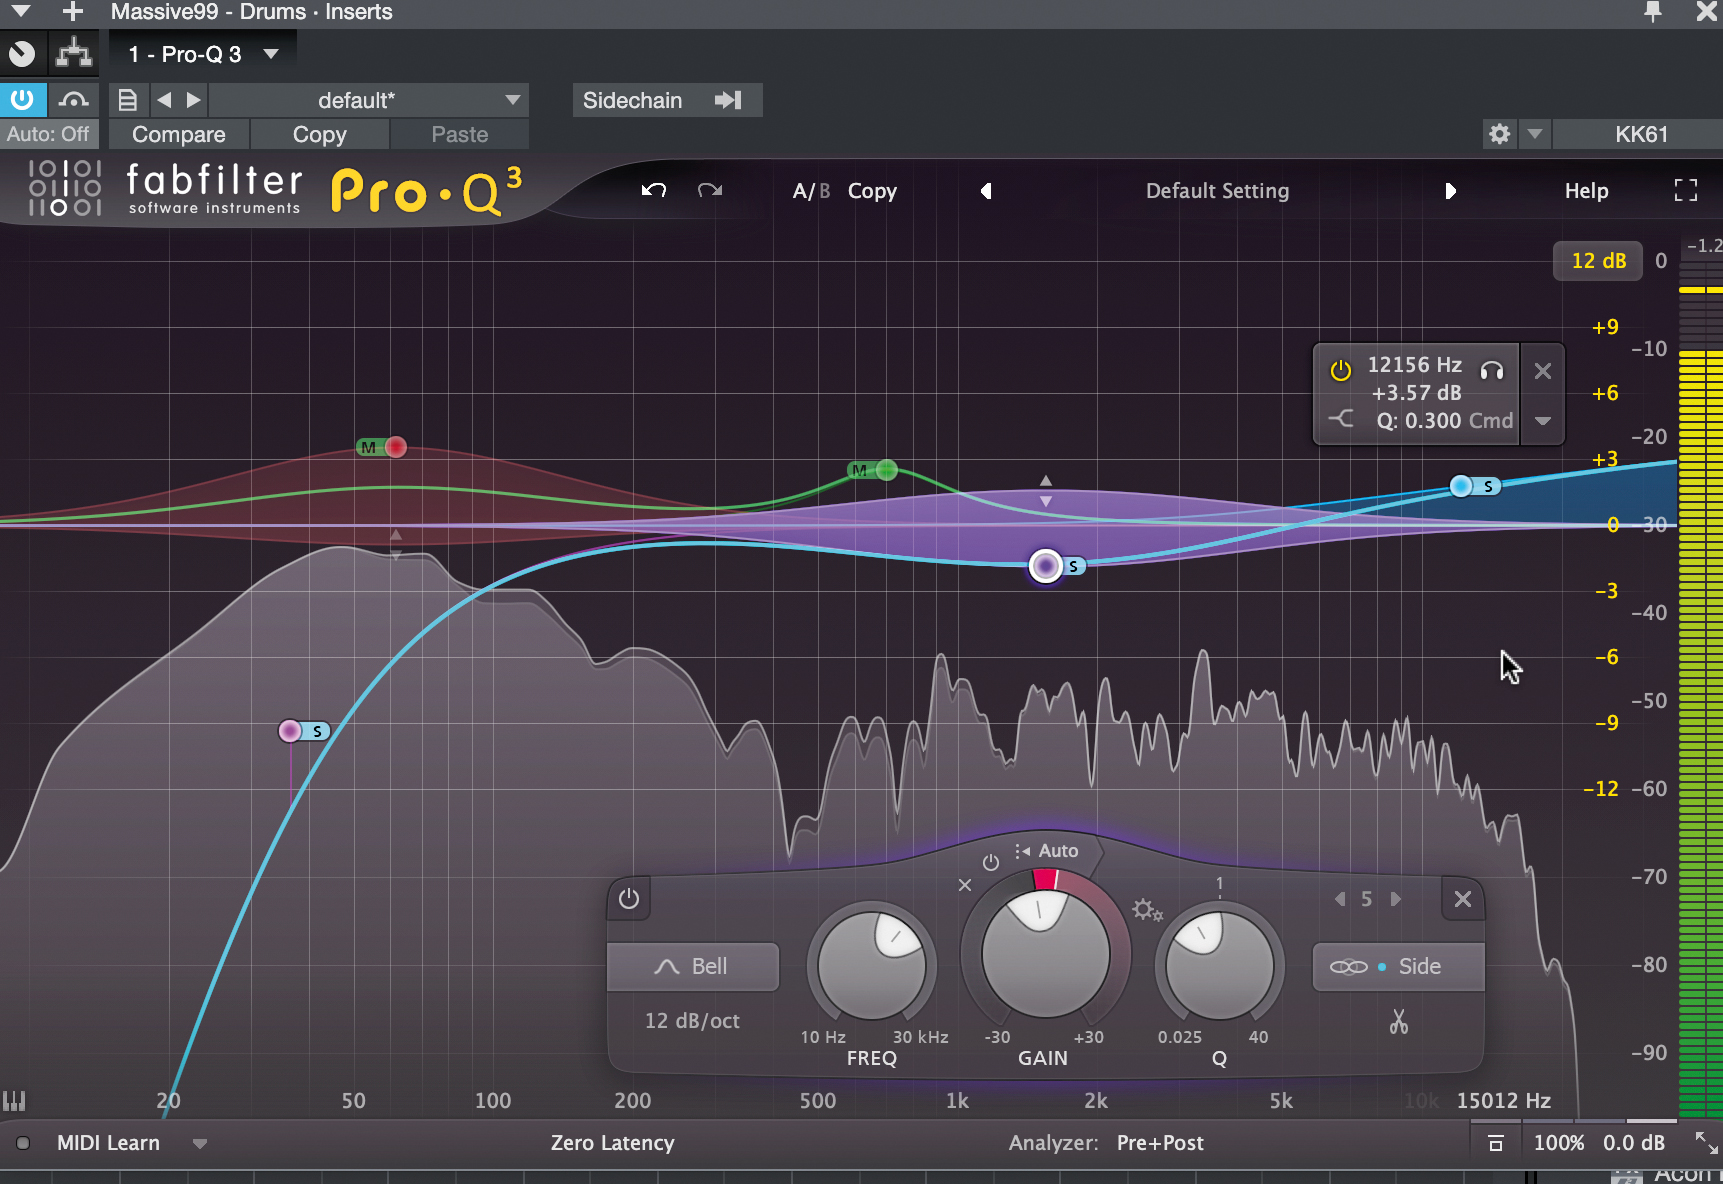
We can use dynamic bands in mid/side in other ways and make bands for compression or expansion, plus gain changes, for mid-only, side-only or any other combo of stereo options given – stereo, left-only and right-only are also here.
High-passing kicks with Iceberg Audio Sub Cut
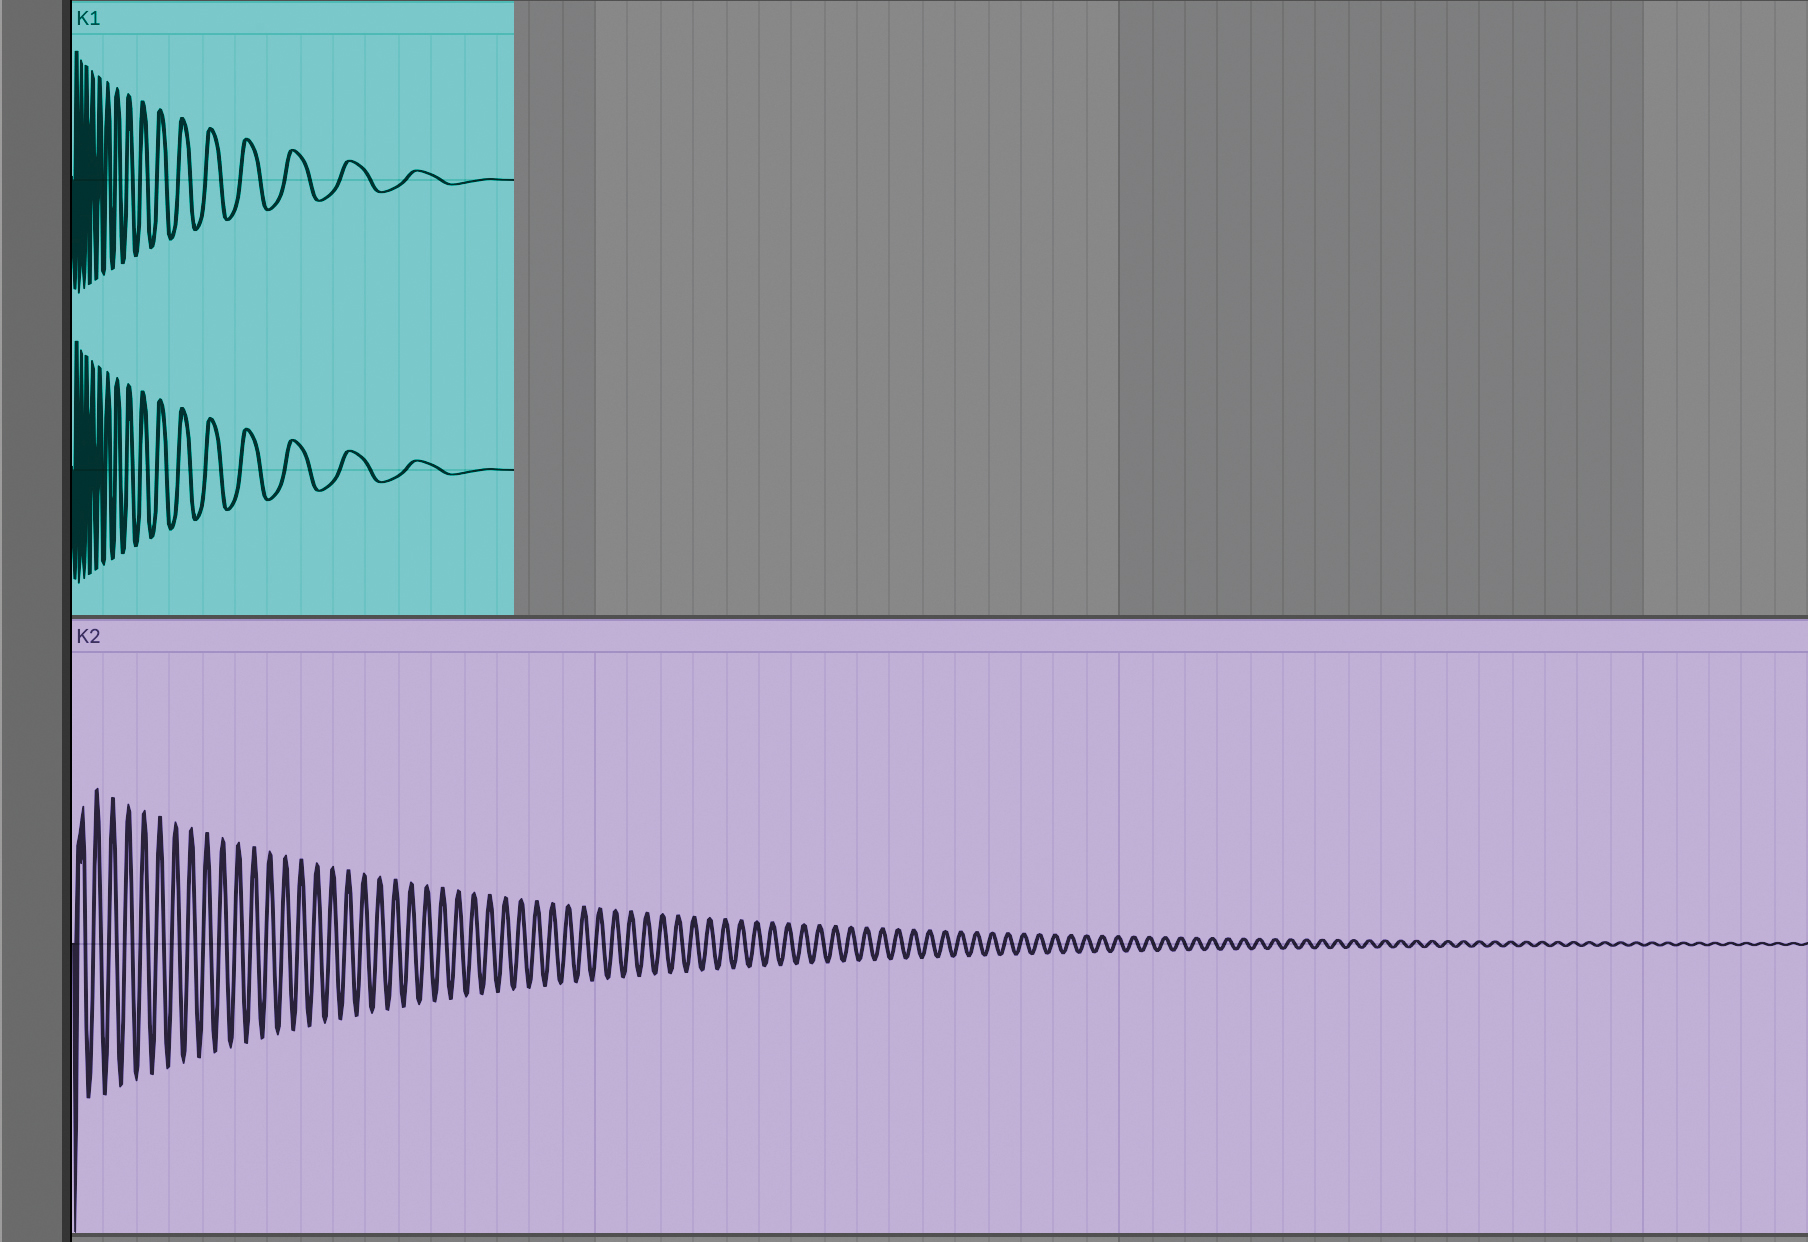
With a near endless number of kick drums out there, sometimes you just can’t find your Cinderella sample. Combining the transient from one kick with the body of another lets you conjure up the perfect kick. Iceberg Audio’s Sub Cut can help…
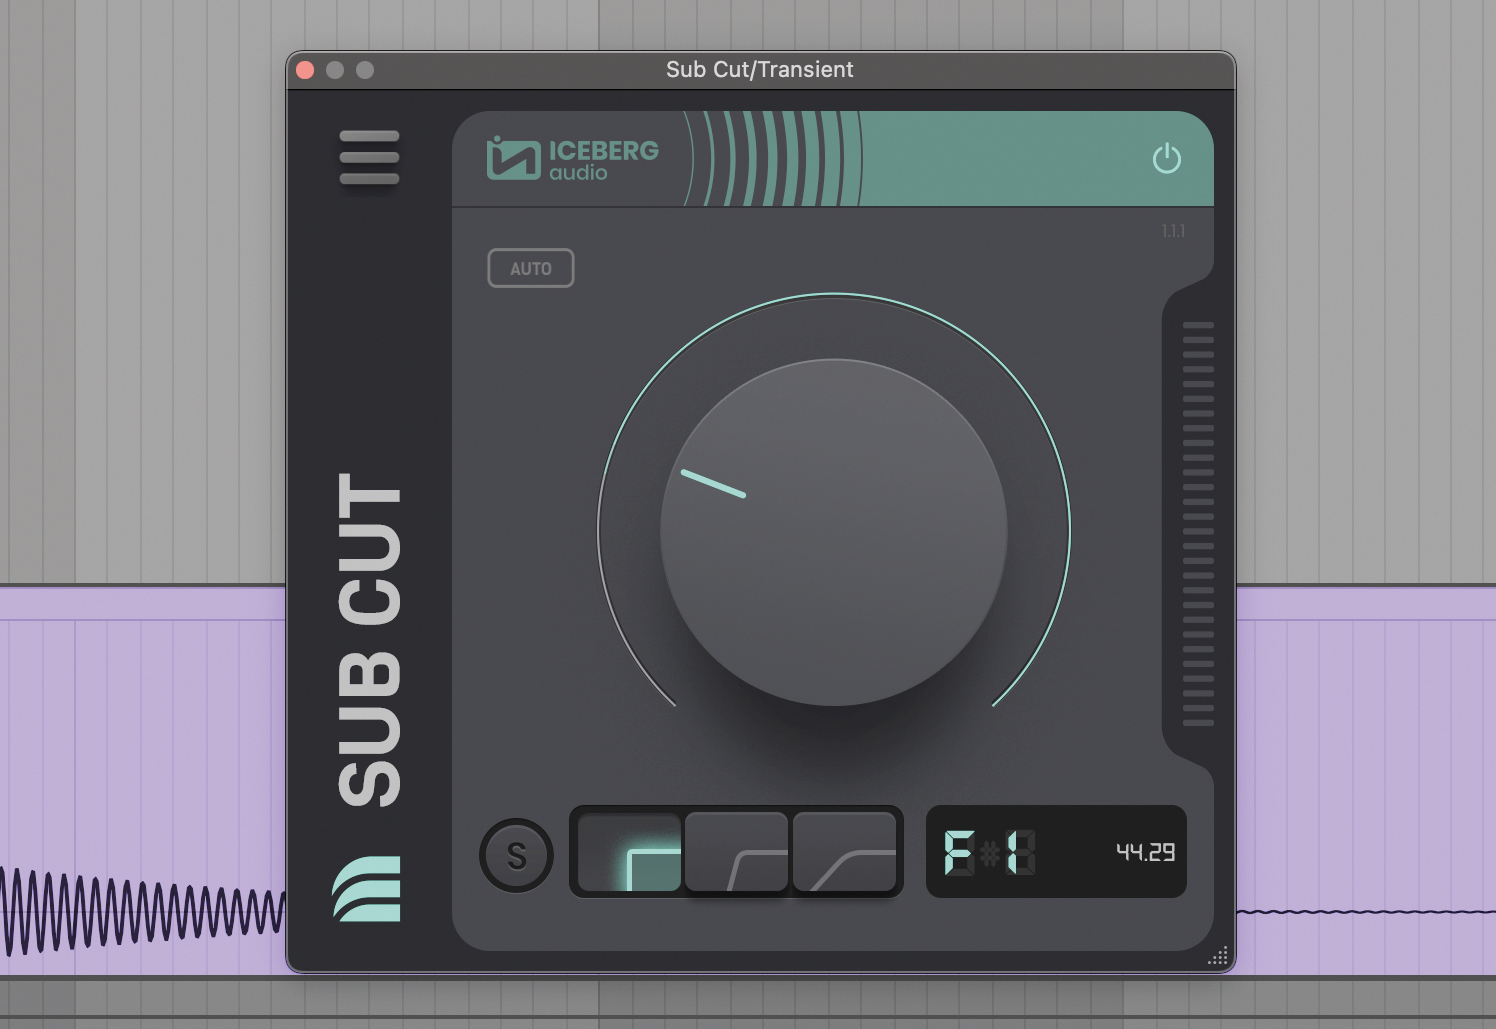
When layering kicks, the combined subs can create phasing issues and muddiness. Sub Cut lets you precisely remove low end sub bass from kicks, giving your other kick room to breathe. Load Sub Cut onto the kick you want to remove the sub from.
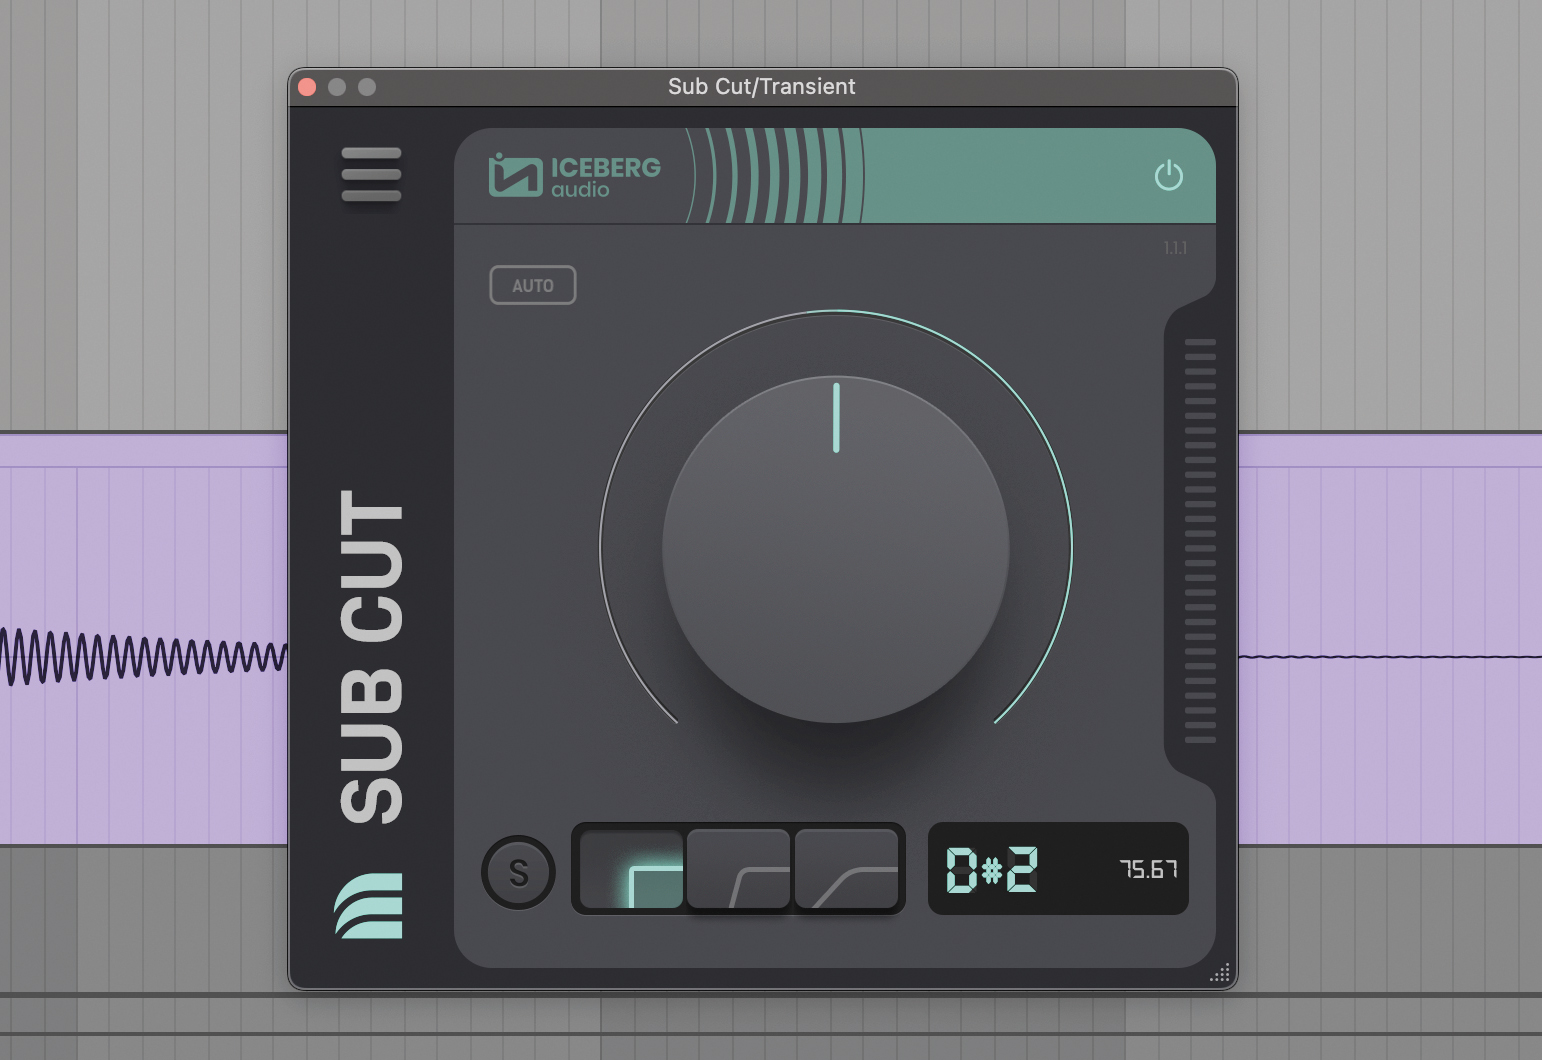
A spectrum analyser shows that the fundamental frequency of kick two is 75Hz, so we know to cut below that on the first kick. Sub Cut’s central dial adjusts cutoff frequency, and tells you the frequency as well as the note you cut at.
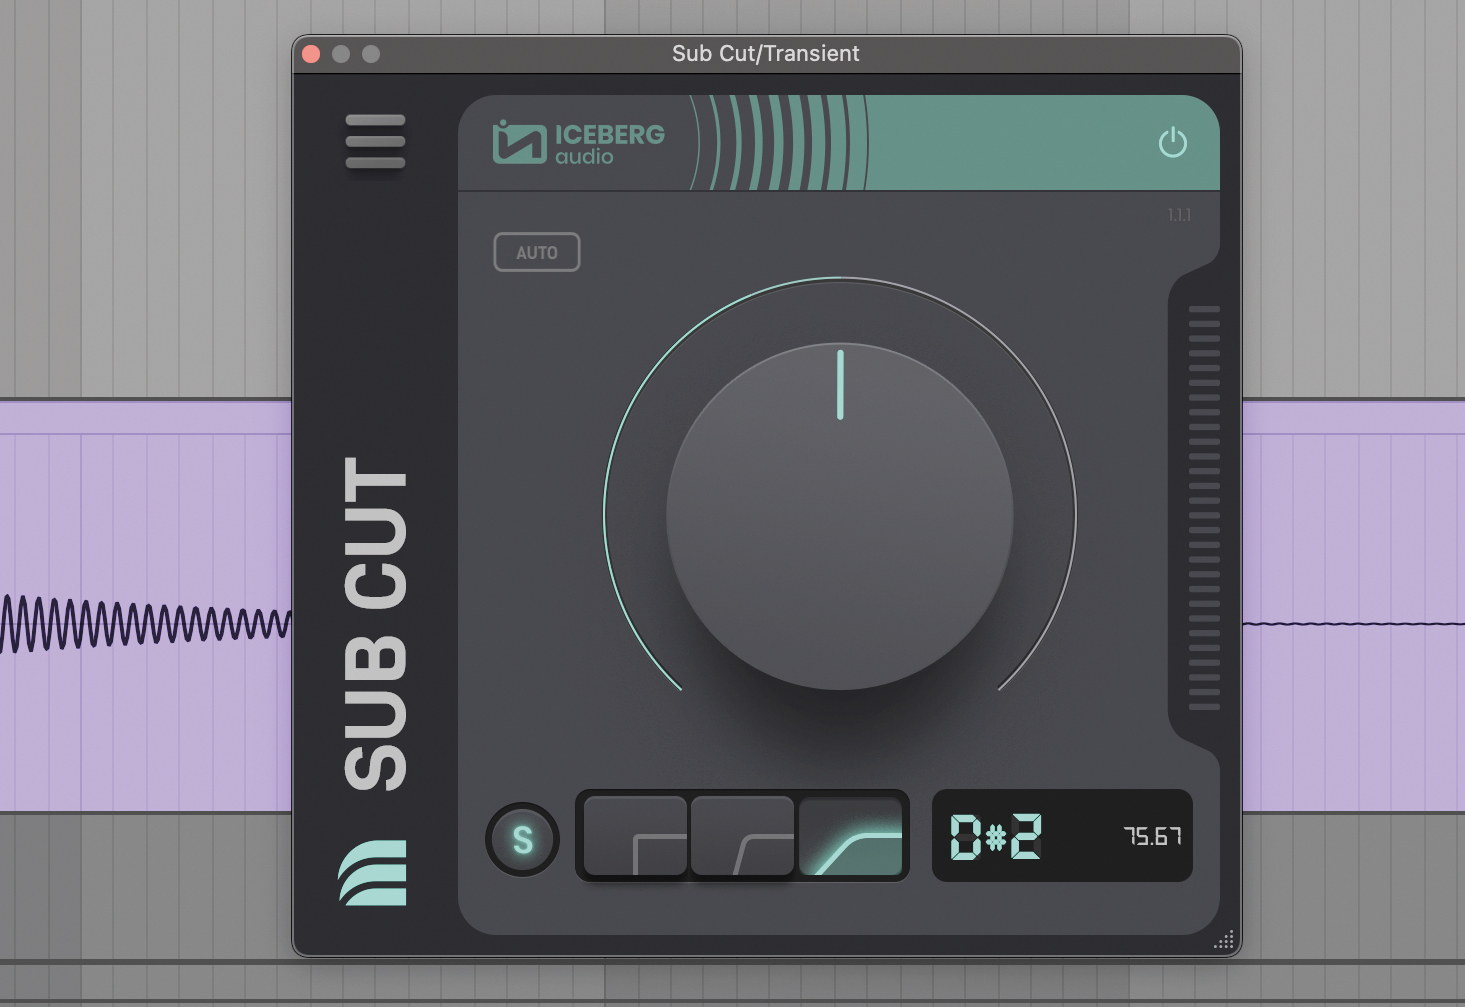
Try all three filter slopes. You can also audition the frequencies being cut by toggling the S icon. You may also want to remove the transient information from the second kick using a fade if it clashes with the transient from the first.
Modern drum reverb with Sonible Smart:Reverb
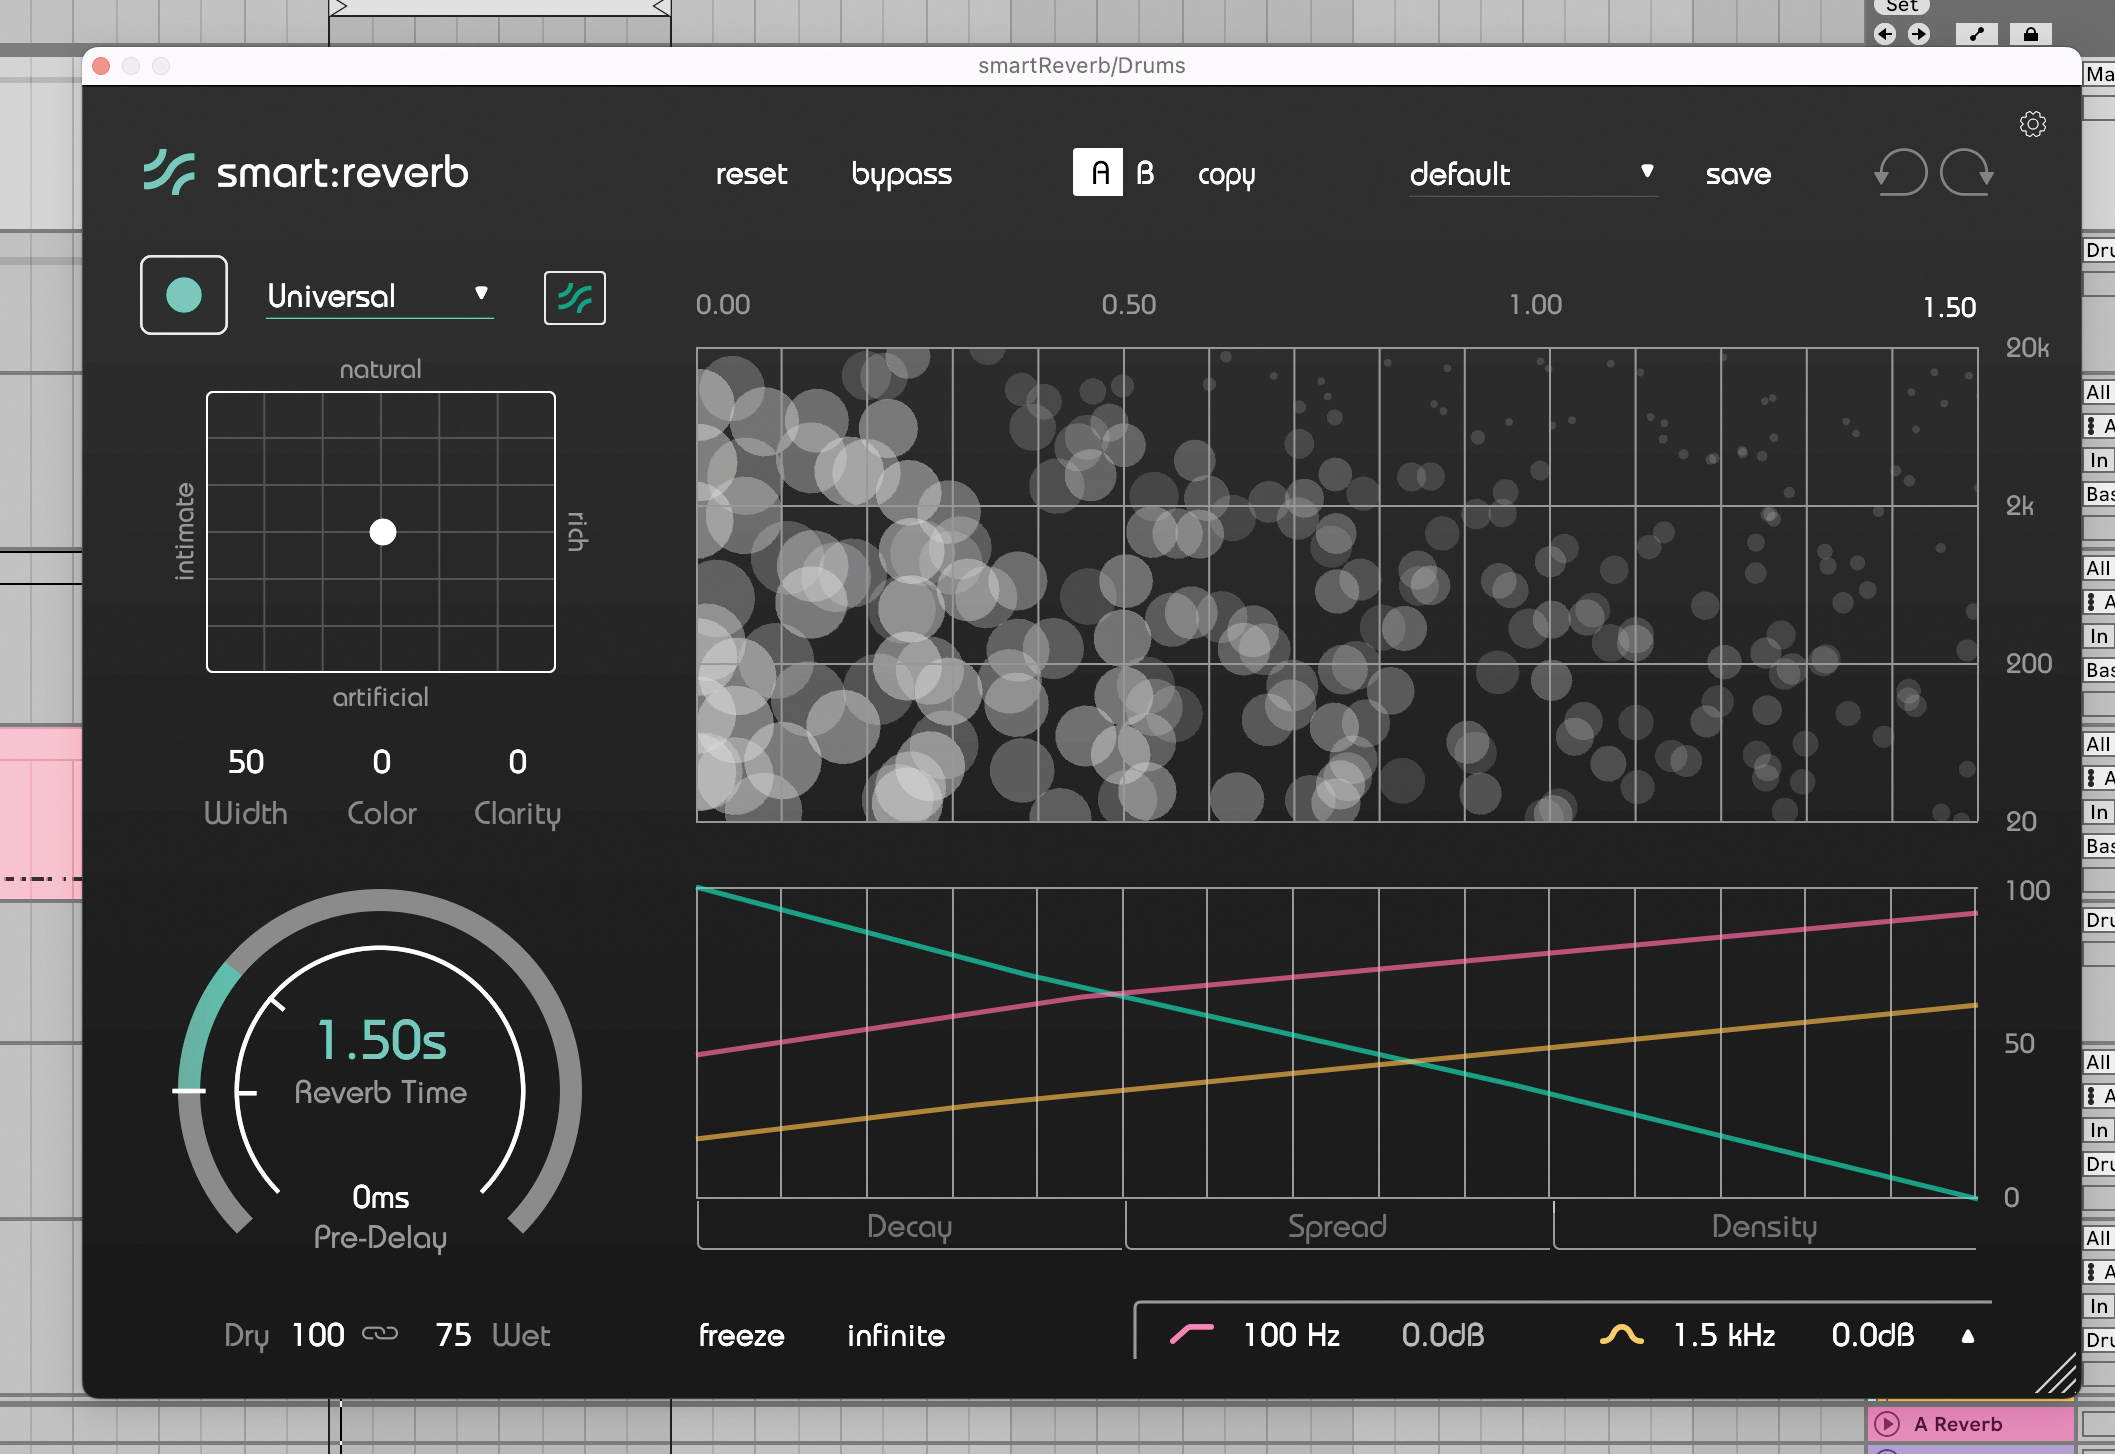
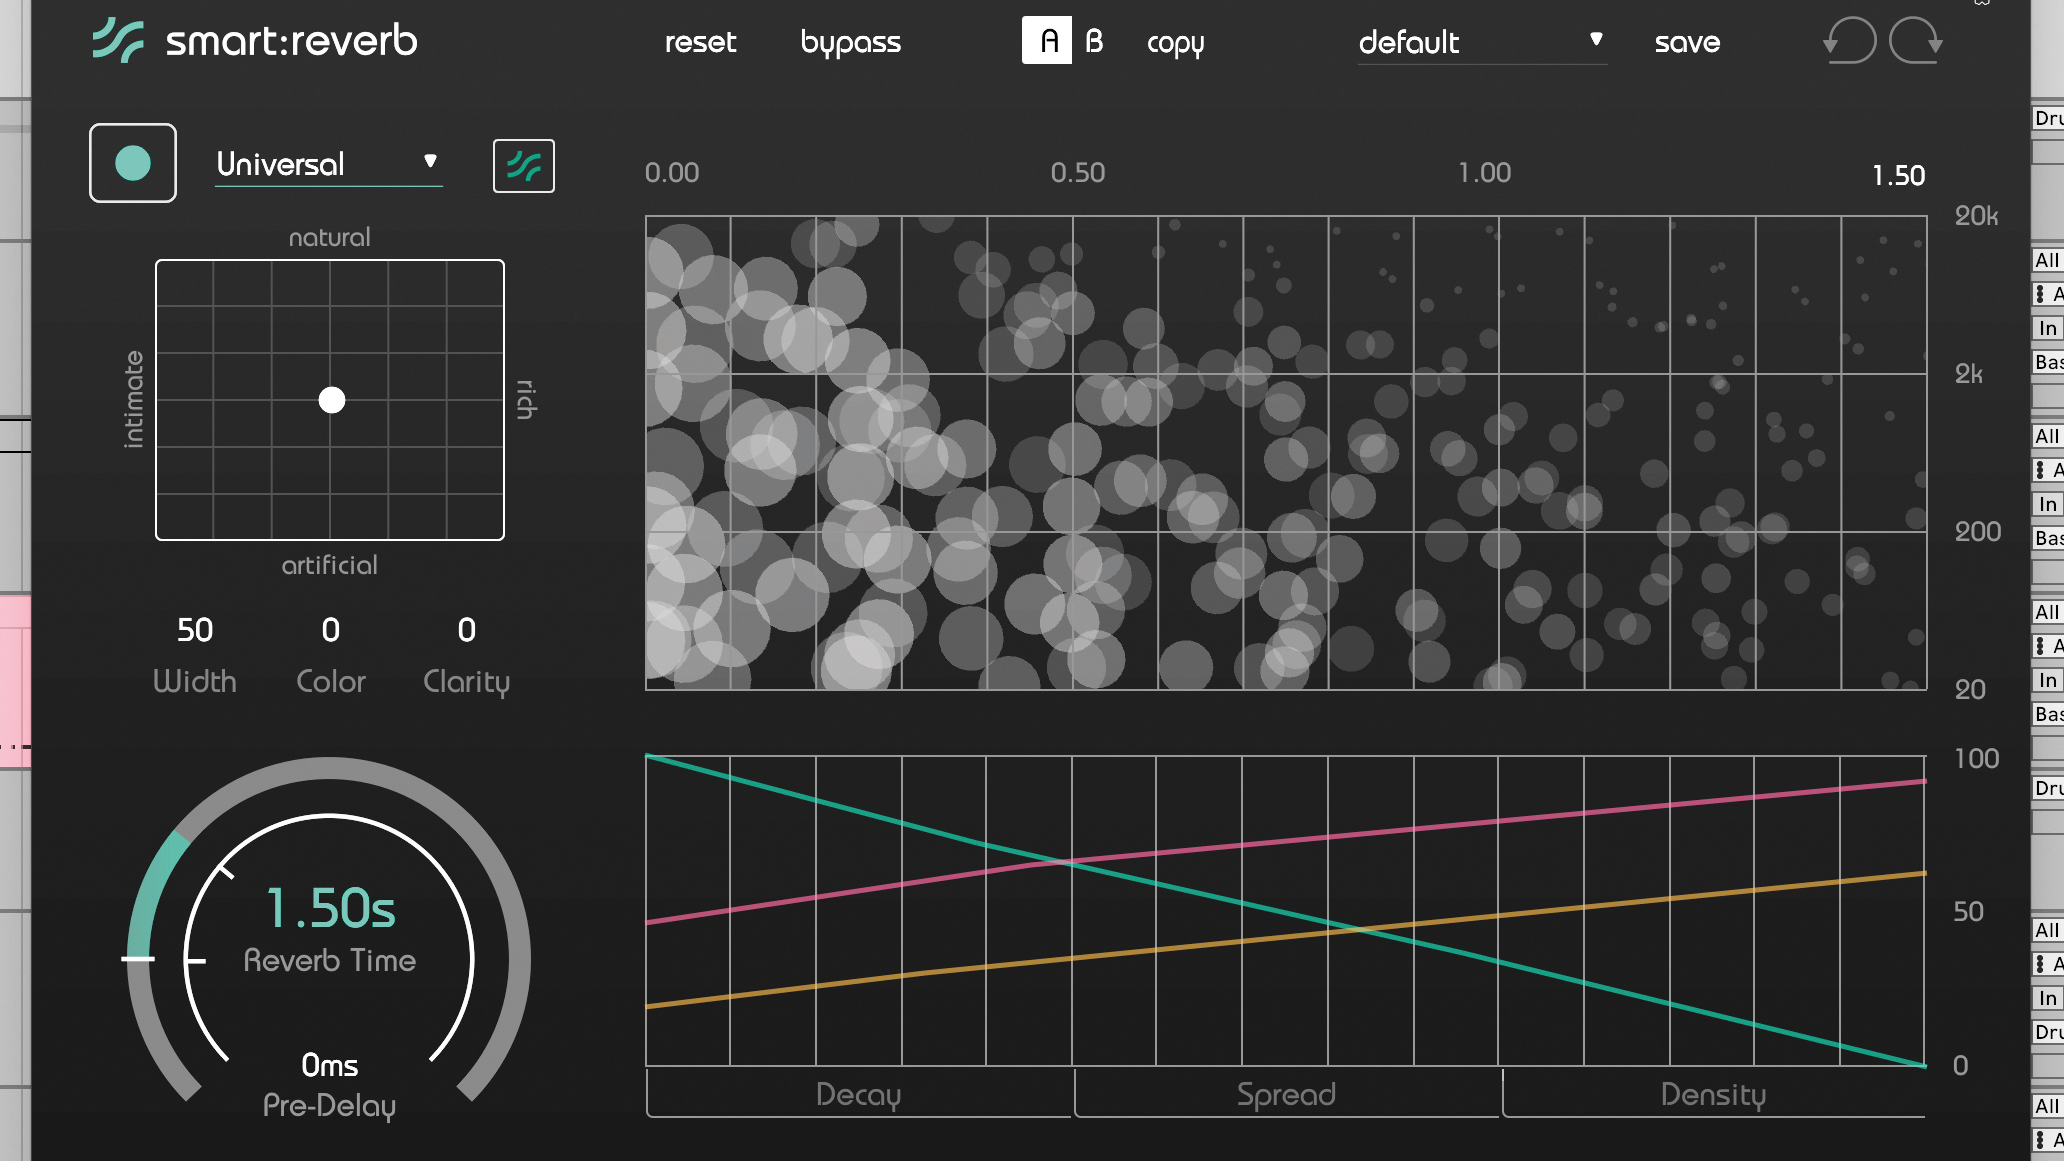
Let’s use sonible smart:reverb to add modern reverb sound to a house beat. Load up smart:reverb on the drum group. smart:reverb is one of sonible’s many audio tools that use AI to help you make mixing decisions, but here we’ll do everything manually.
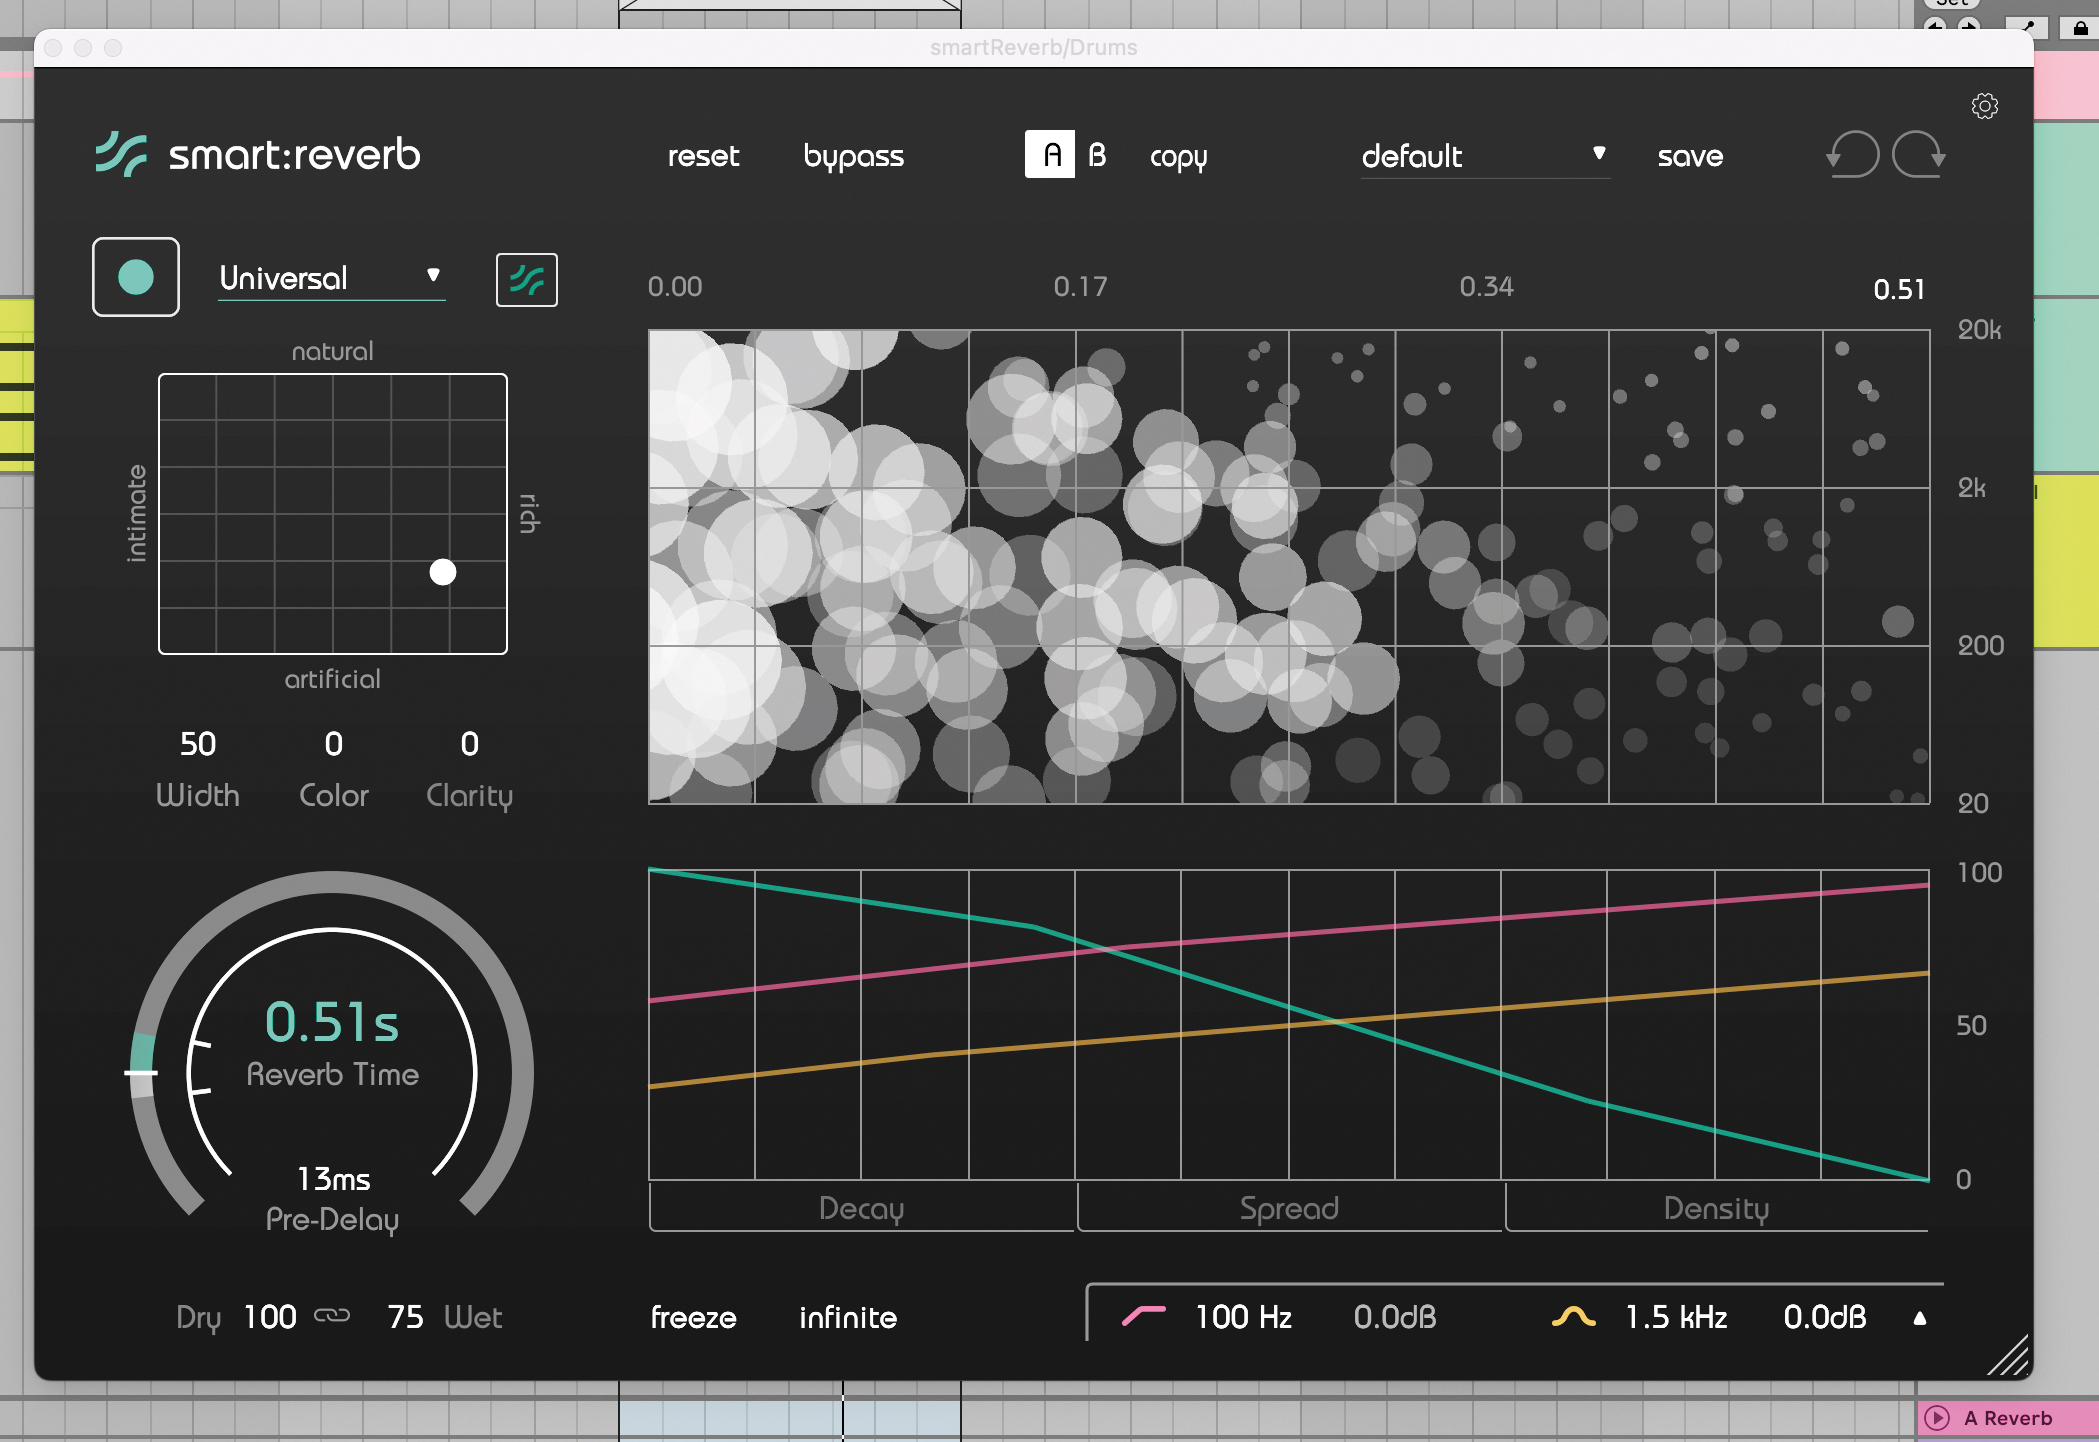
Filter the incoming audio so nothing below 200Hz gets through. Set reverb time to 0.5s and the pre-delay to 13ms. smart:reverb controls the character of the reverb via an X/Y pad. For a modern reverb, set the reverb to artificial and rich.
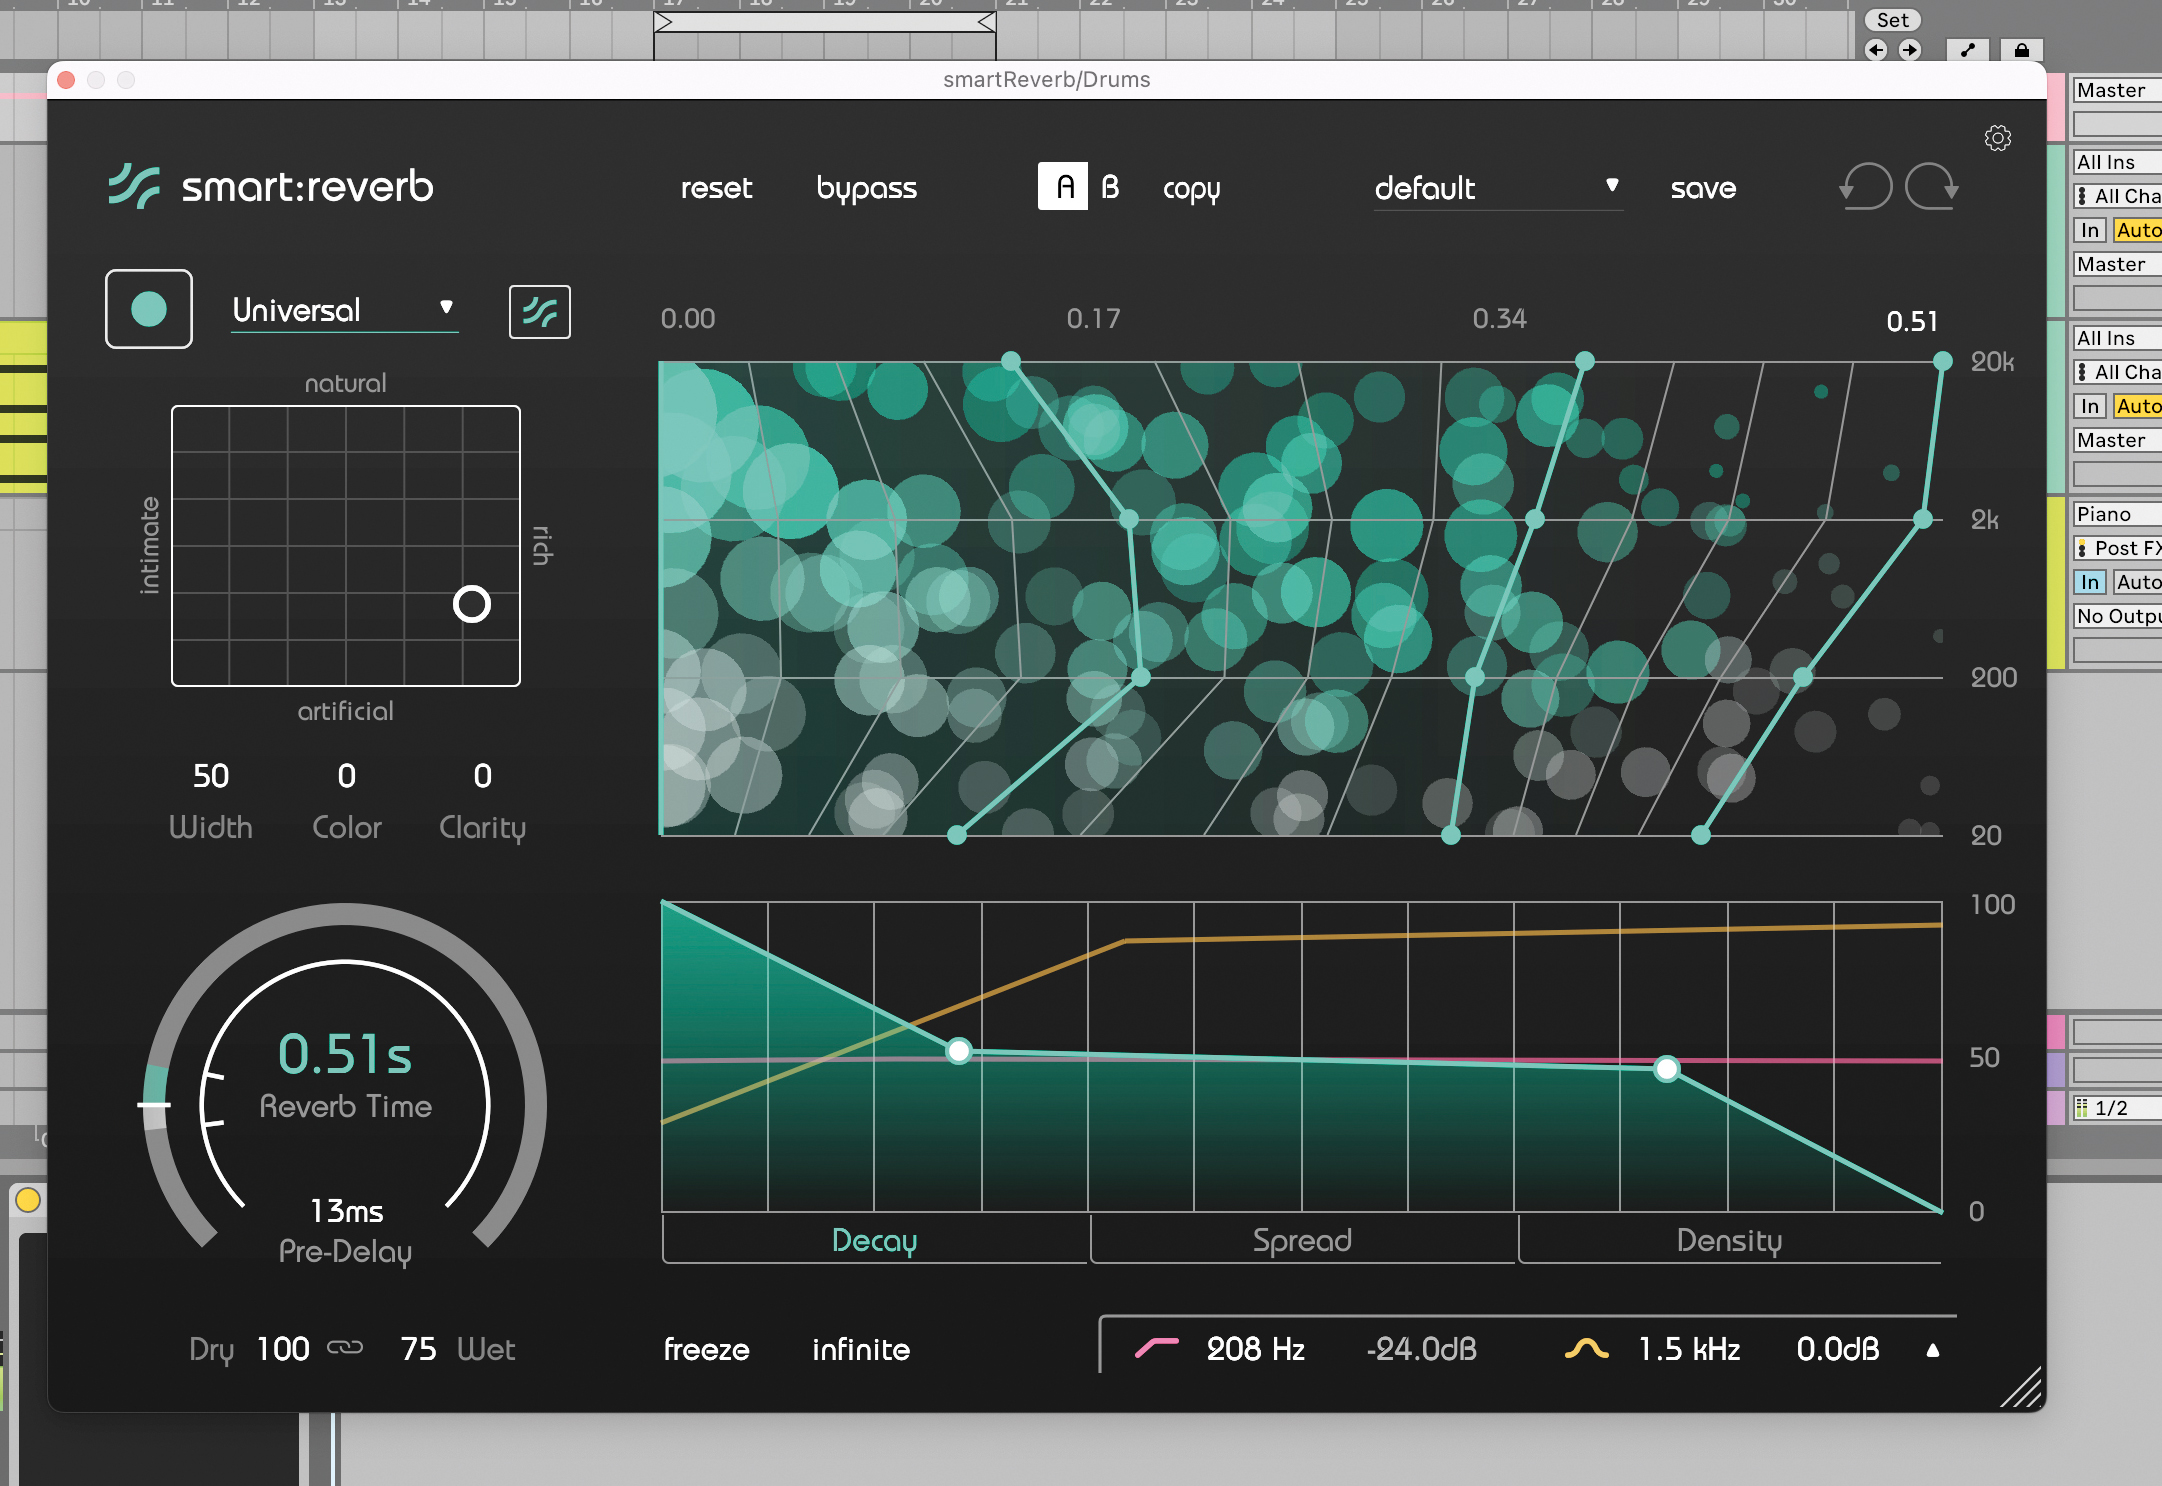
Finally, try smart:reverb’s unique spectral decay editor. This lets us change how different areas of the frequency spectrum decay over time. Here we’ll limit the highs and lows at the start of the reverb tail, but then open high frequencies for air.
Layering drums with Devious Machines Texture
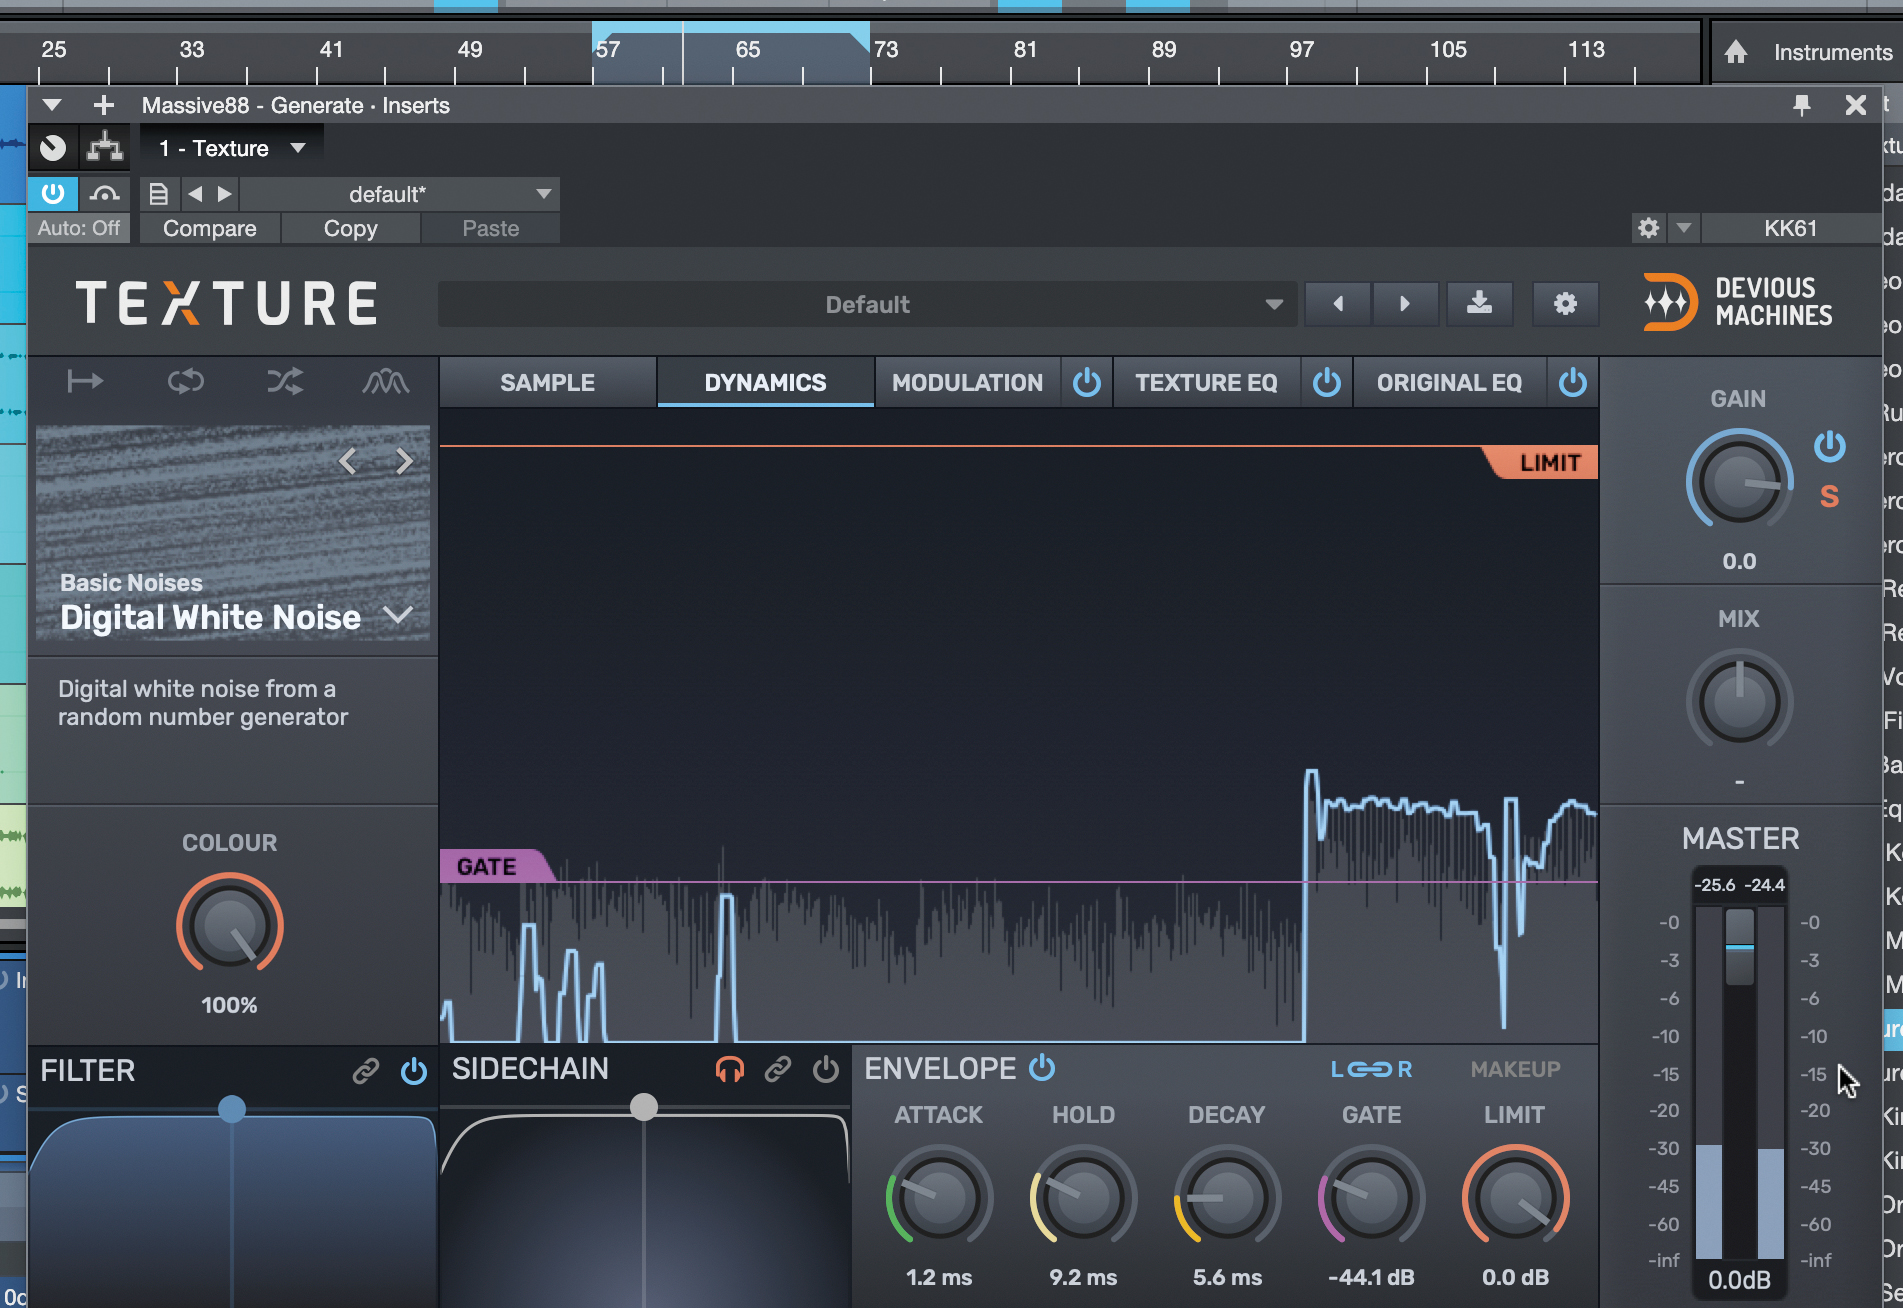
Texture is an automatic layering plugin that can reinforce an input sound with extra impact and power, or enhance an existing signal with extra creative layers. As we load it up and set the Gate, it adds a layer of white noise on top of our input.
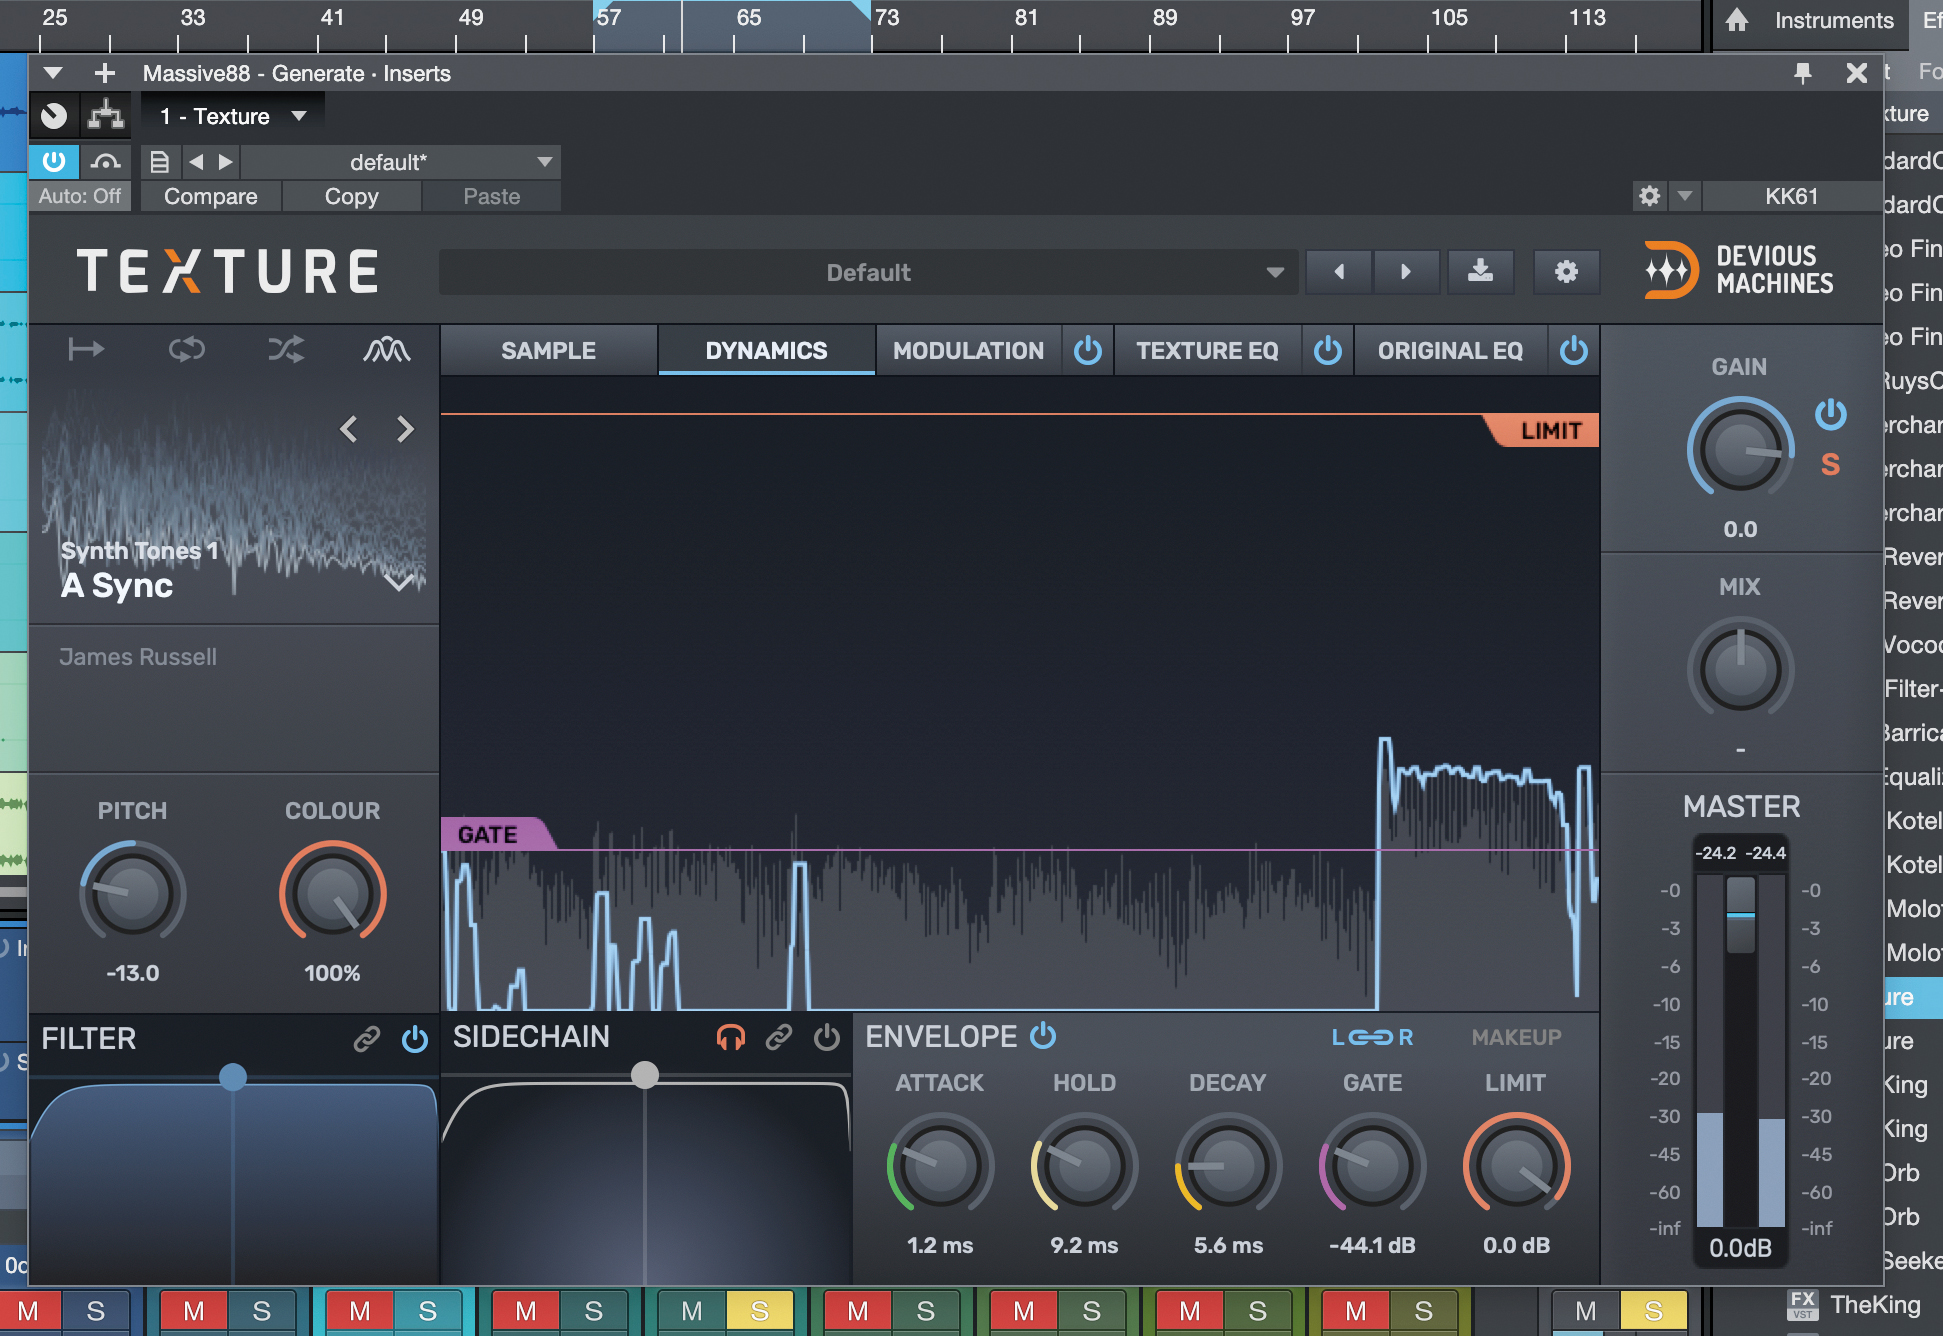
We can change the sound we’re adding by selecting one from the extensive library. Here, our AC Sync tone has an interesting character, but it’s not exactly right. We can change it though, bringing its pitch down to fit our sound better.
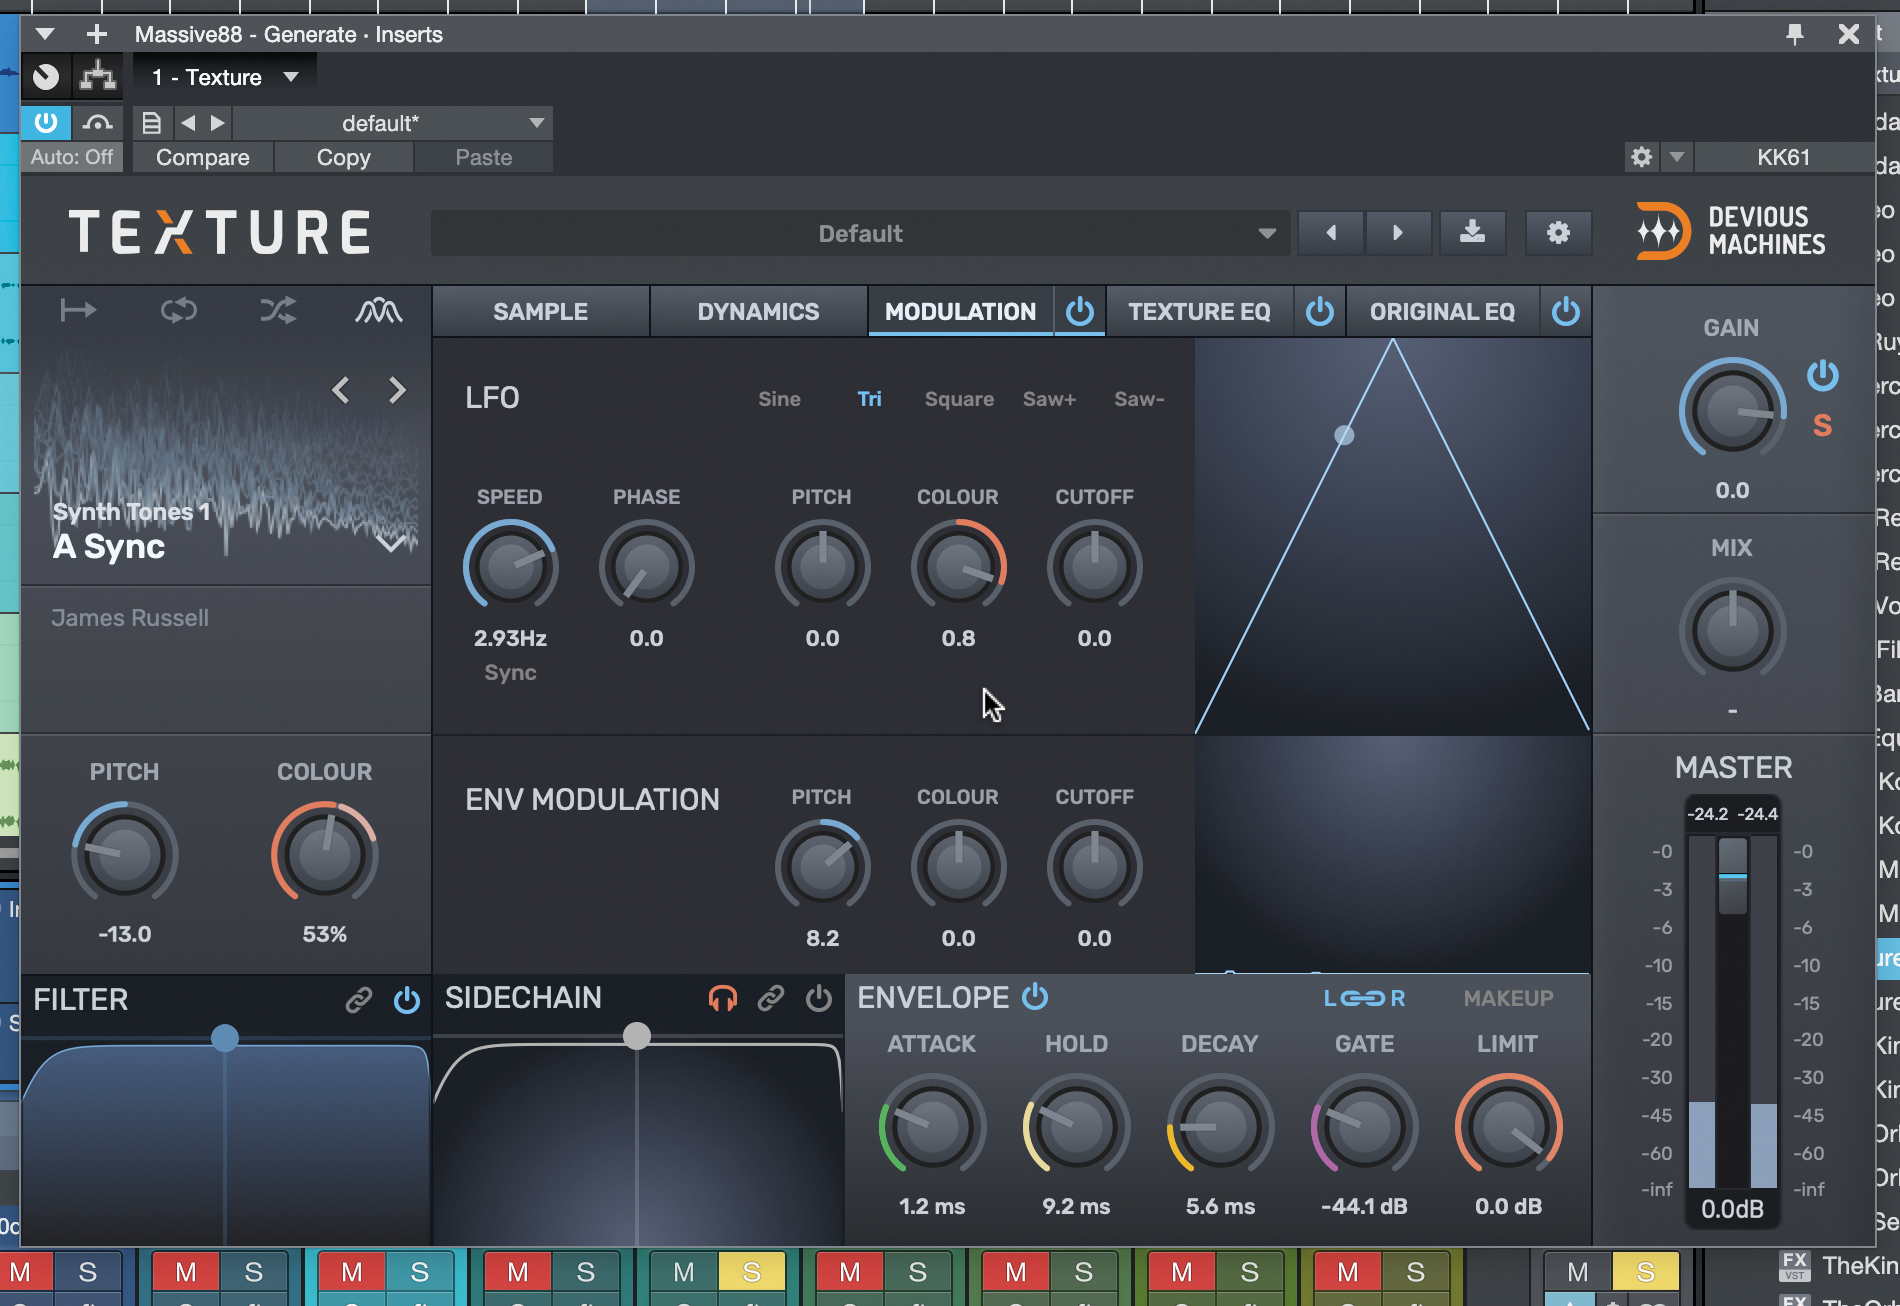
We can add some modulation to the properties of our texture layer, as well as some envelope-triggered modulation, over in the Modulation tab. There’s also EQ on-hand to affect the texture layer, or the original, or both.
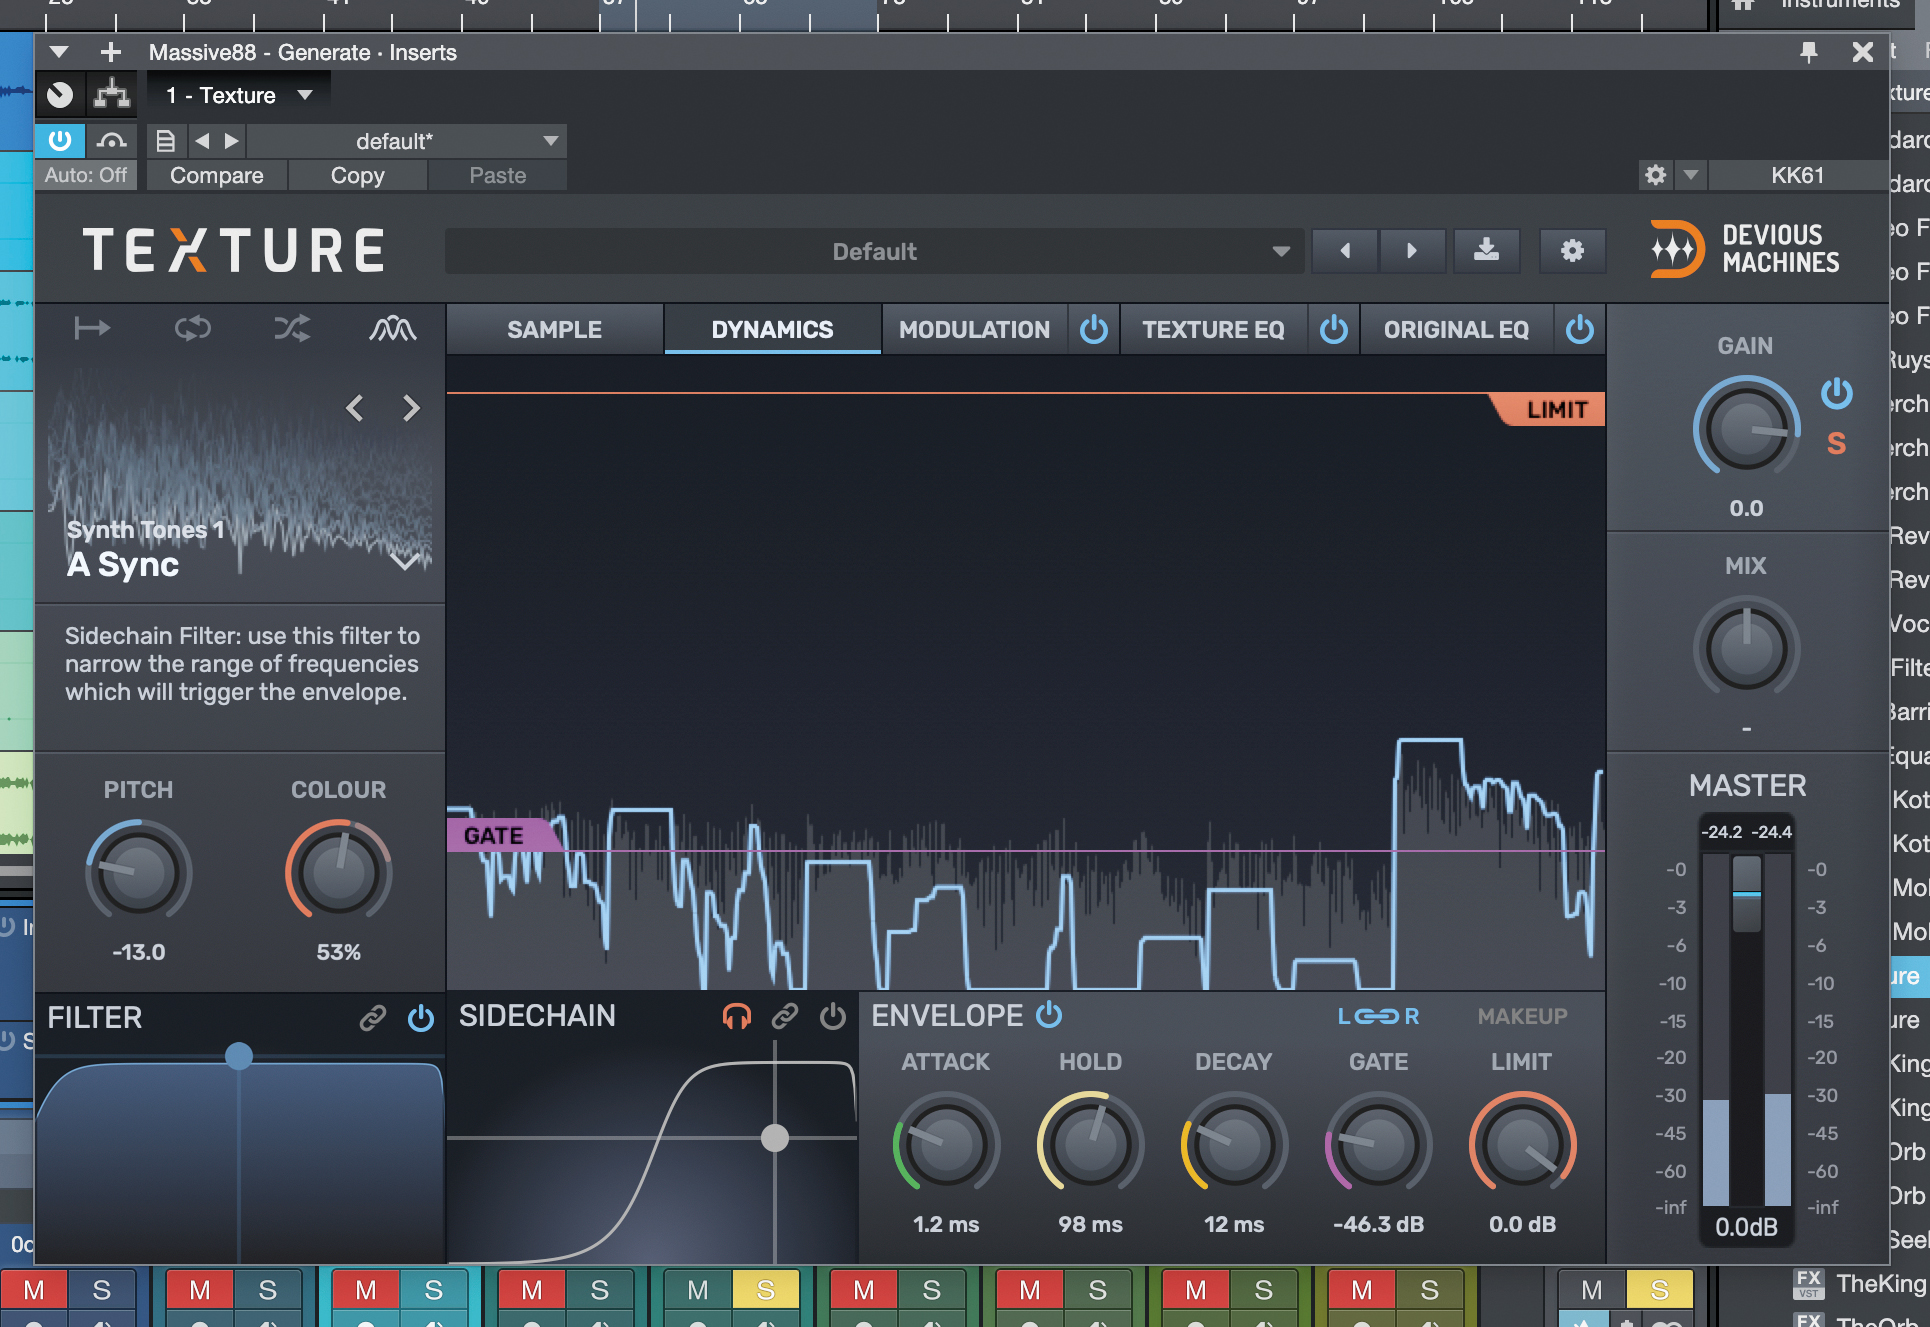
Especially useful for drum tracks, and busses too, is the sidechain filter. With this, you can separate out the detection of what triggers your texture layer using a filter. There’s also filtering on-hand for the texture layer itself, too.
Tuning and transient shaping for hard-hitting drums
How does a drum’s transient work? For an acoustic drum, there are two obvious components: the stick or beater hitting the drum, and the drum’s initial movement created by it, before it moves to a state where it rings out as it loses energy. In drum synthesis, these characteristics are emulated by the stick or ‘click’ layer, and the fast pitch envelope of the electronic drum’s main tone.
So what’s a drum transient? In both cases, the transient is marked as a higher frequency sound coming before the body – whether the much higher impact sound, or higher pitch ringing of the drum’s membrane itself. To enhance a transient, we can bring up the level at the start of the sound, or do anything that enhances higher frequencies.
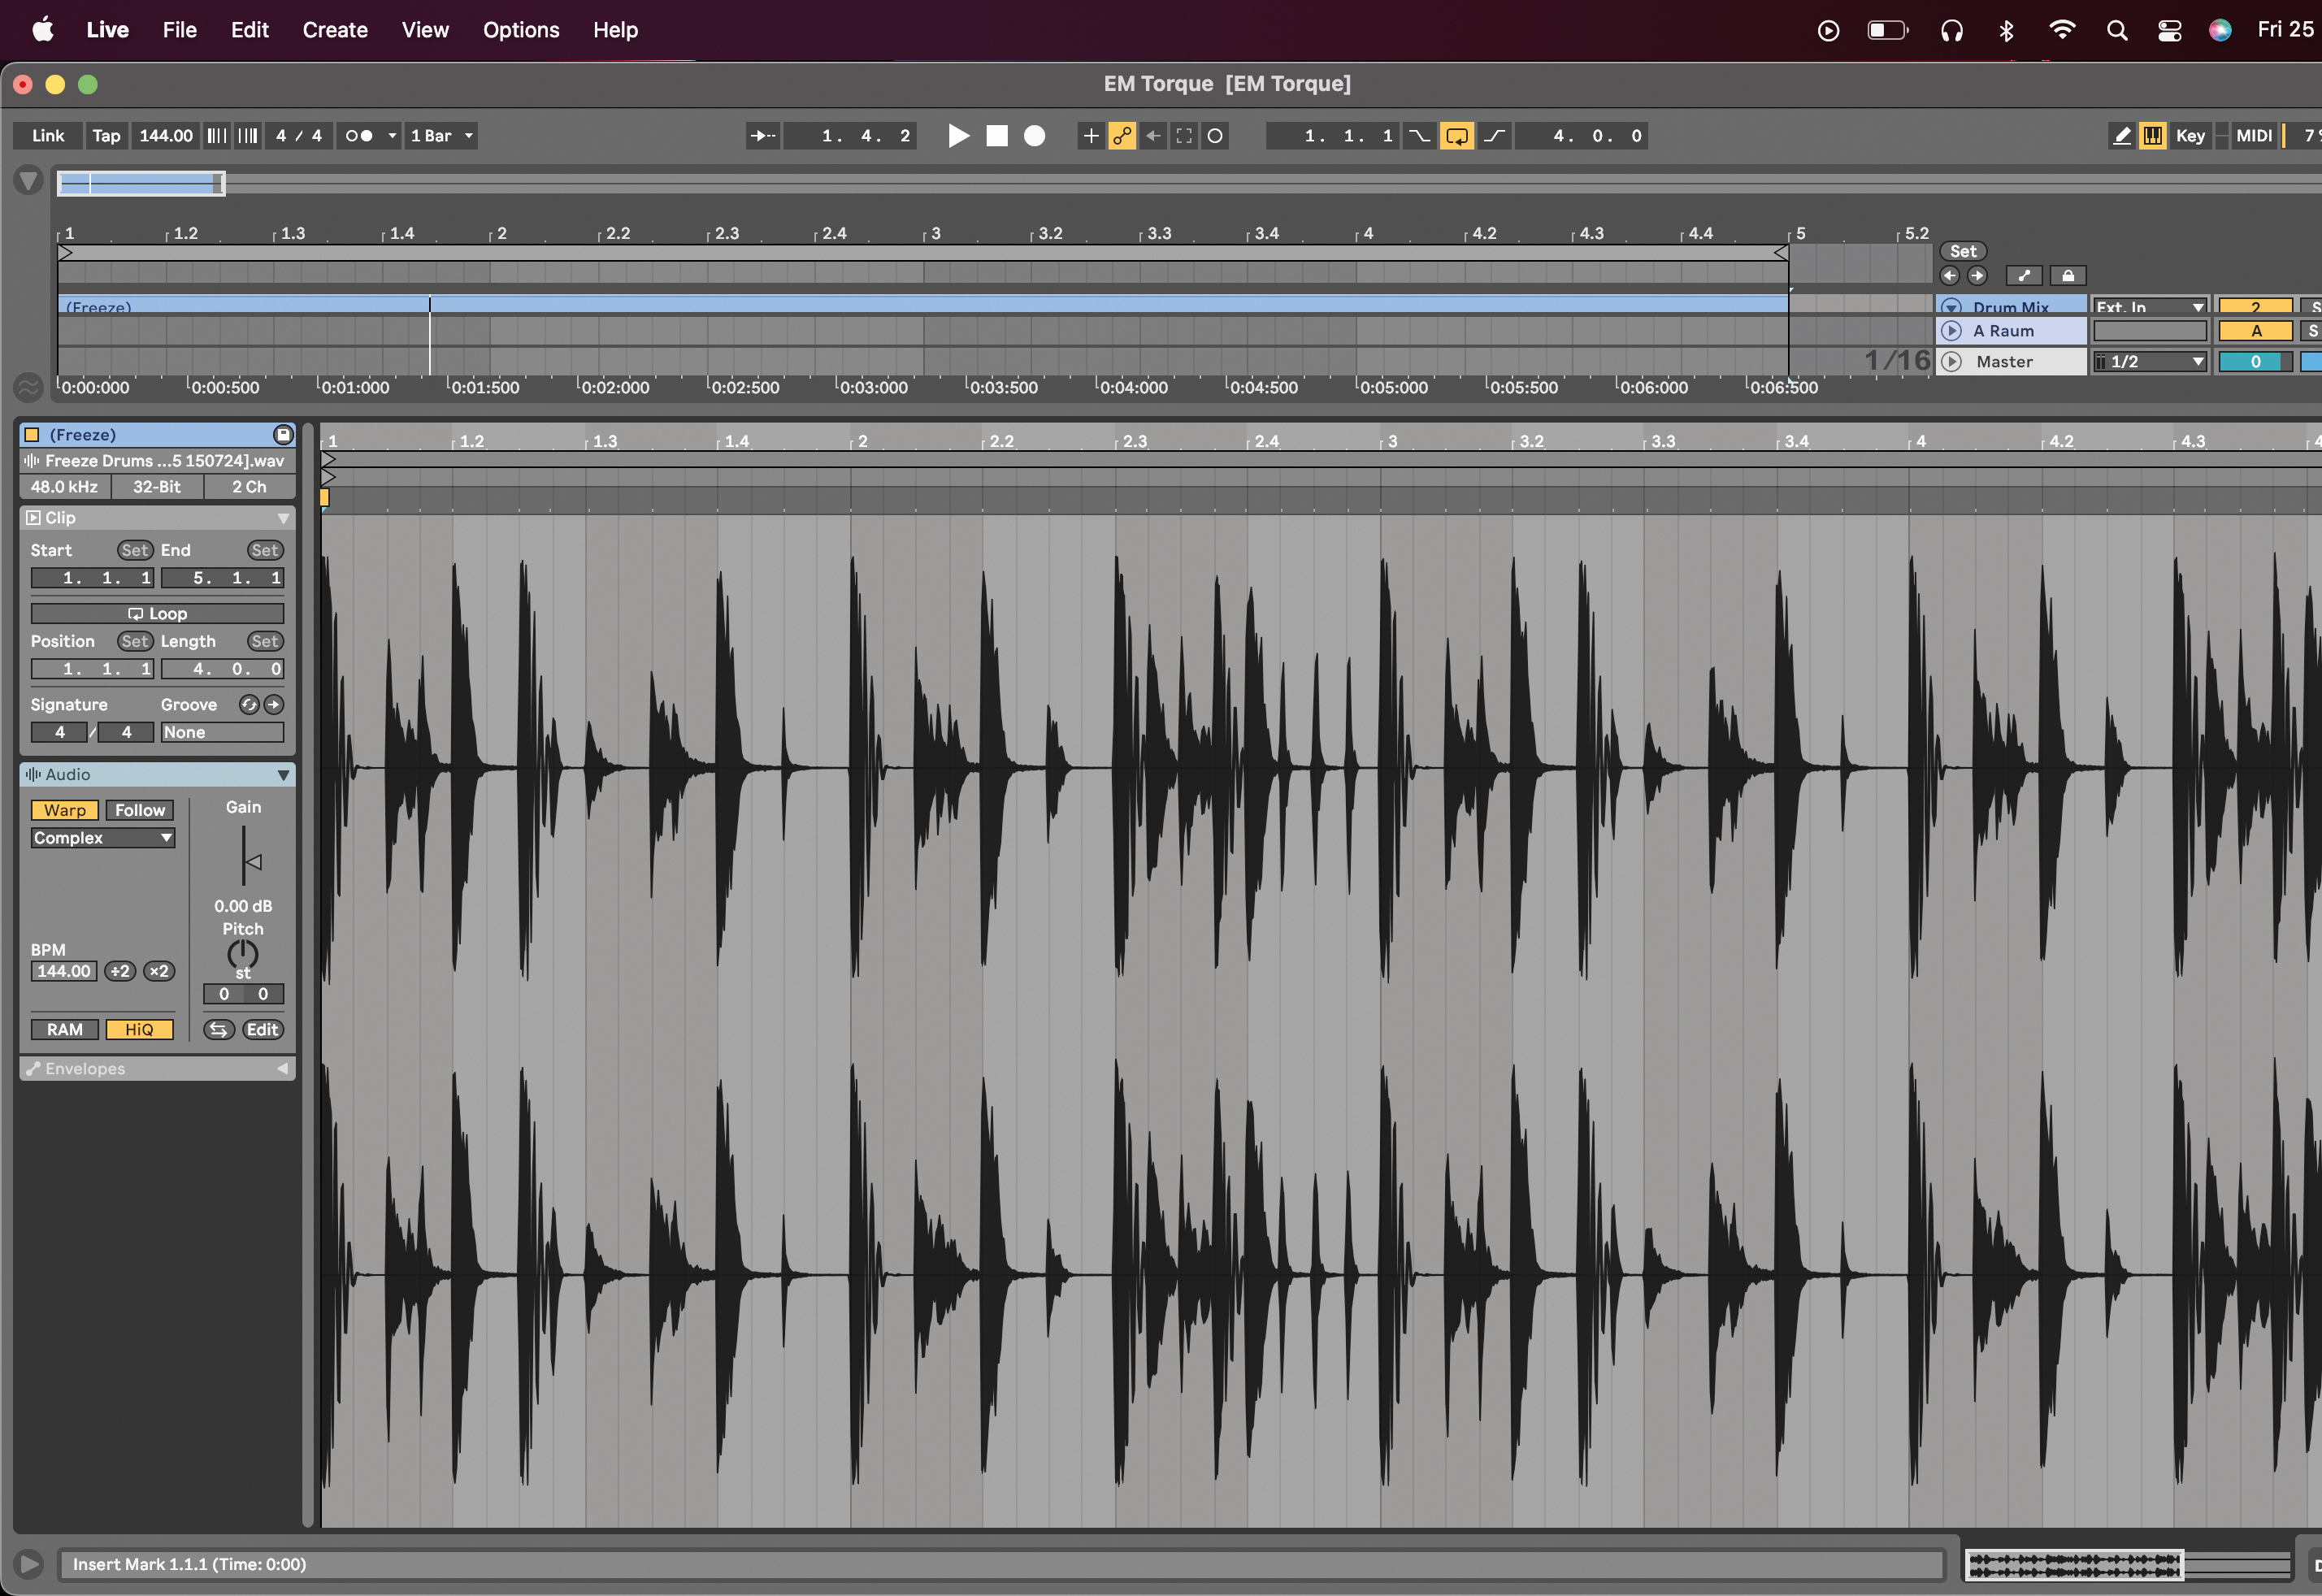
When you have a whole group of instruments that are intended to sound like they’re coming from the same place, it can be useful to group them together and process as one entity. Once they’re recorded or bounced together, though, it is tricky to process any of the elements individually.
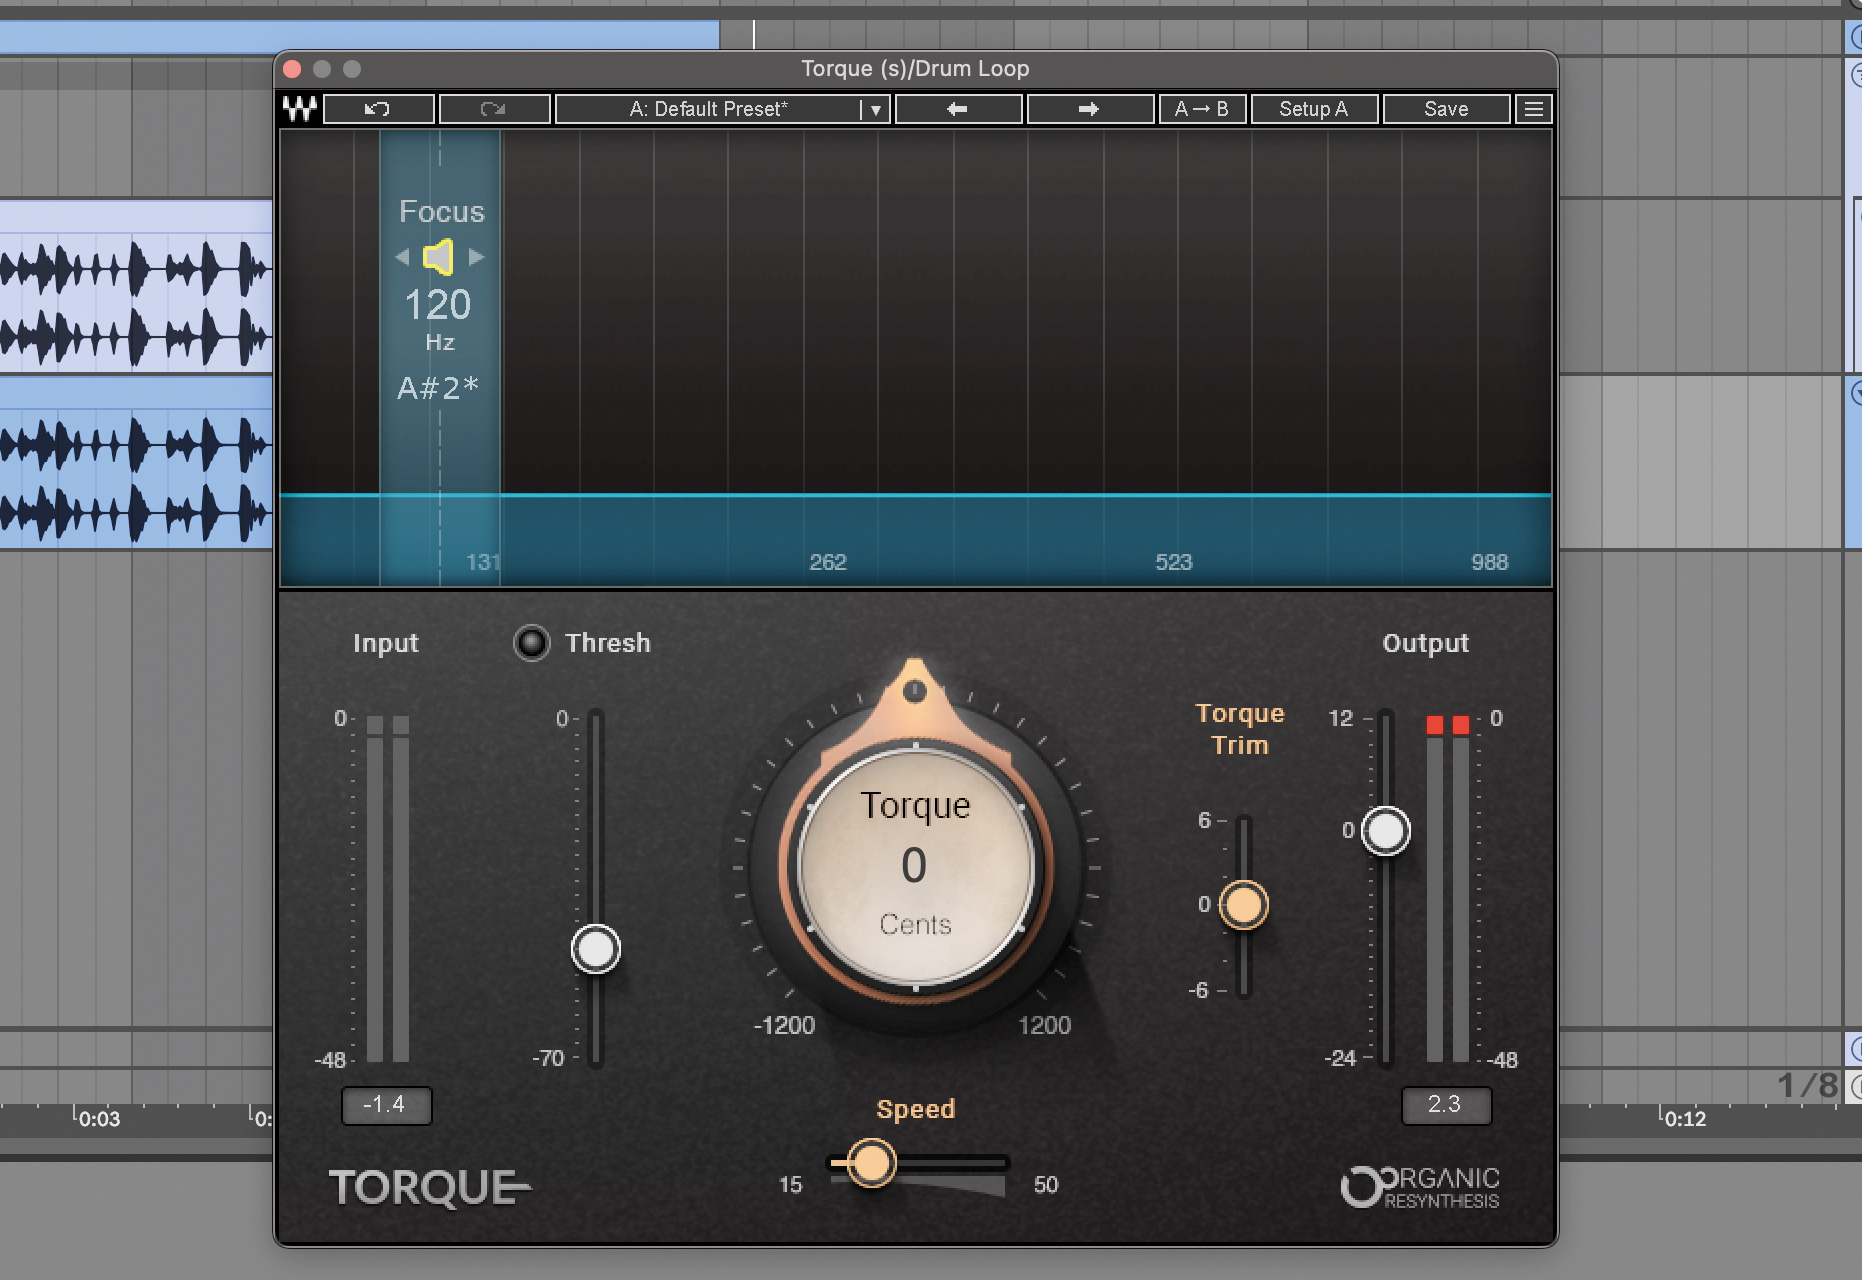
In this case, we have a drum loop and we want to tune the kick to be in key with the rest of the track. First, load Waves Torque, then drag the speaker arrow in the focus bar to audition the frequency spectrum and find your kick’s fundamental.
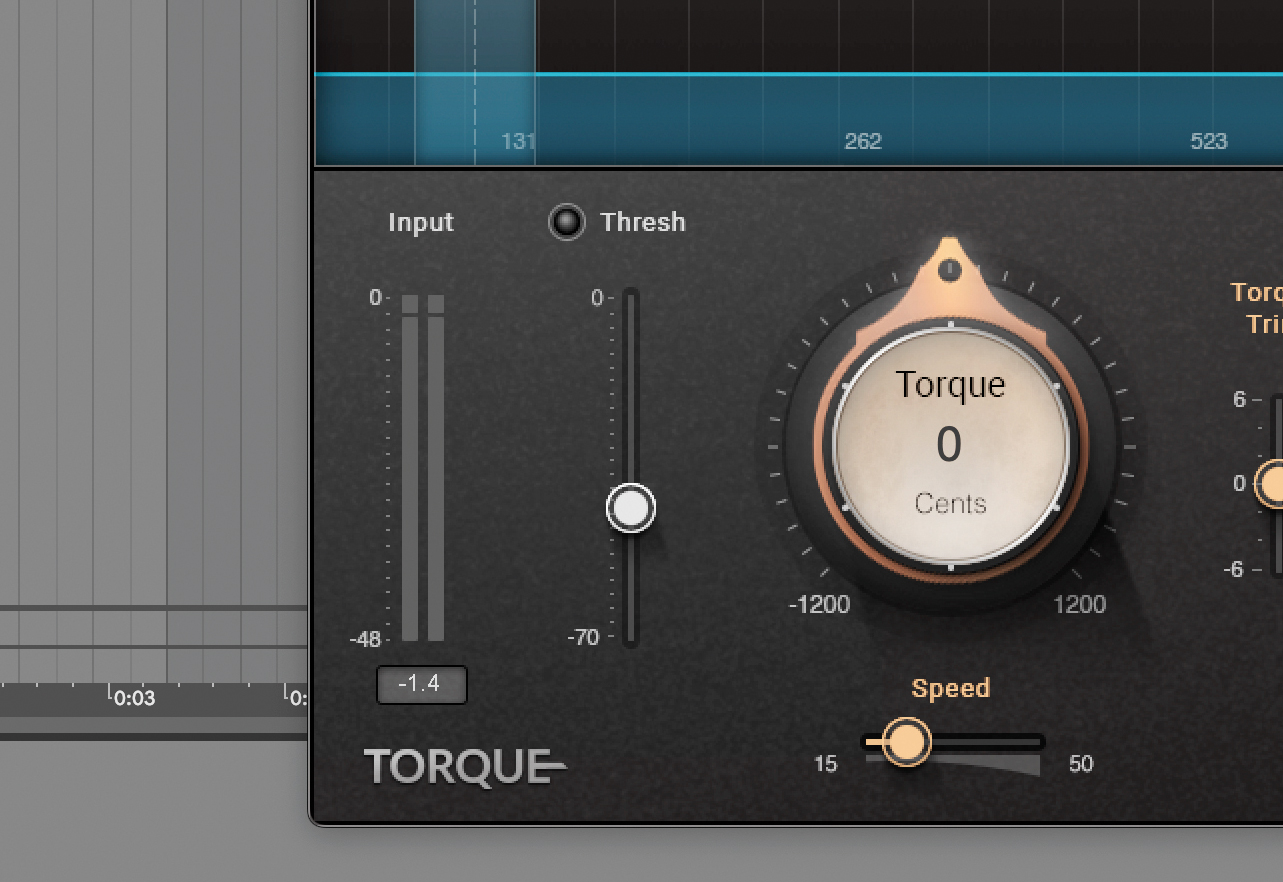
Now we need to adjust the threshold so that Torque is catching all of the kick hits, regardless of their velocity. The Threshold indicator light should go from green to yellow when each kick drum hits.
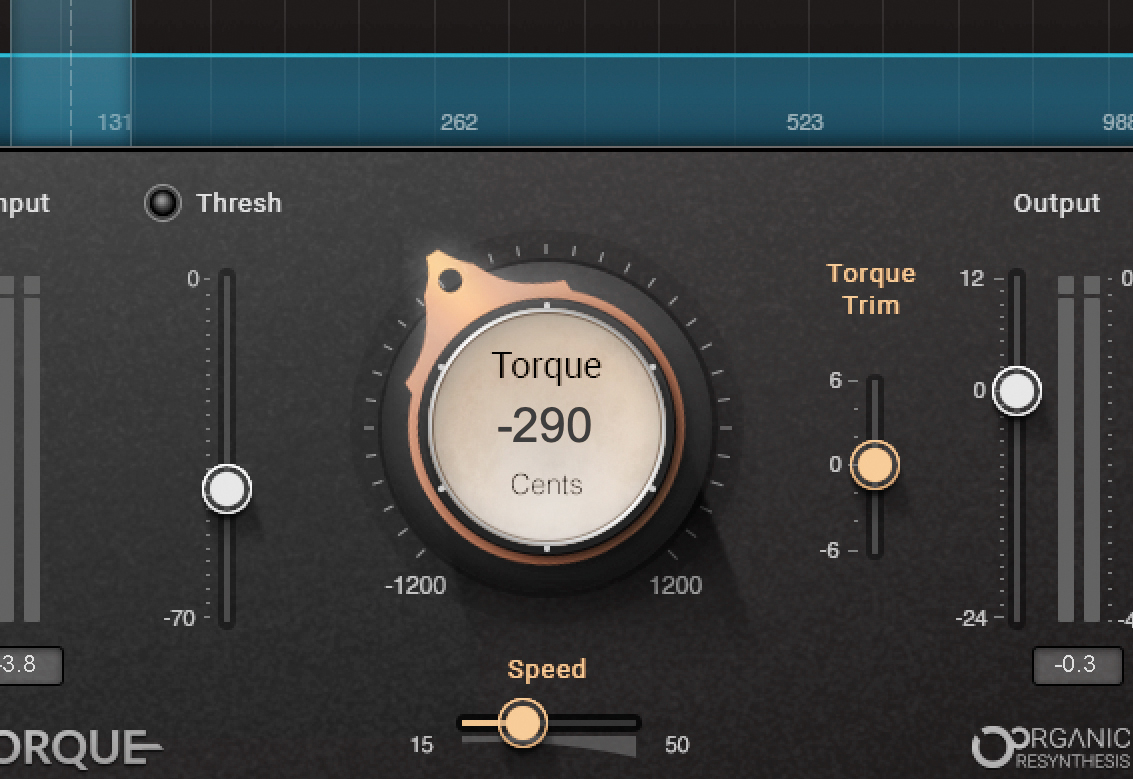
Use the Torque dial in the middle of the GUI to adjust the pitch of your kick, without adjusting the pitch of any other drum elements. You can also adjust the speed at which Torque adjusts the pitch of your kick, similar to how a vocal auto-tune plugin works.
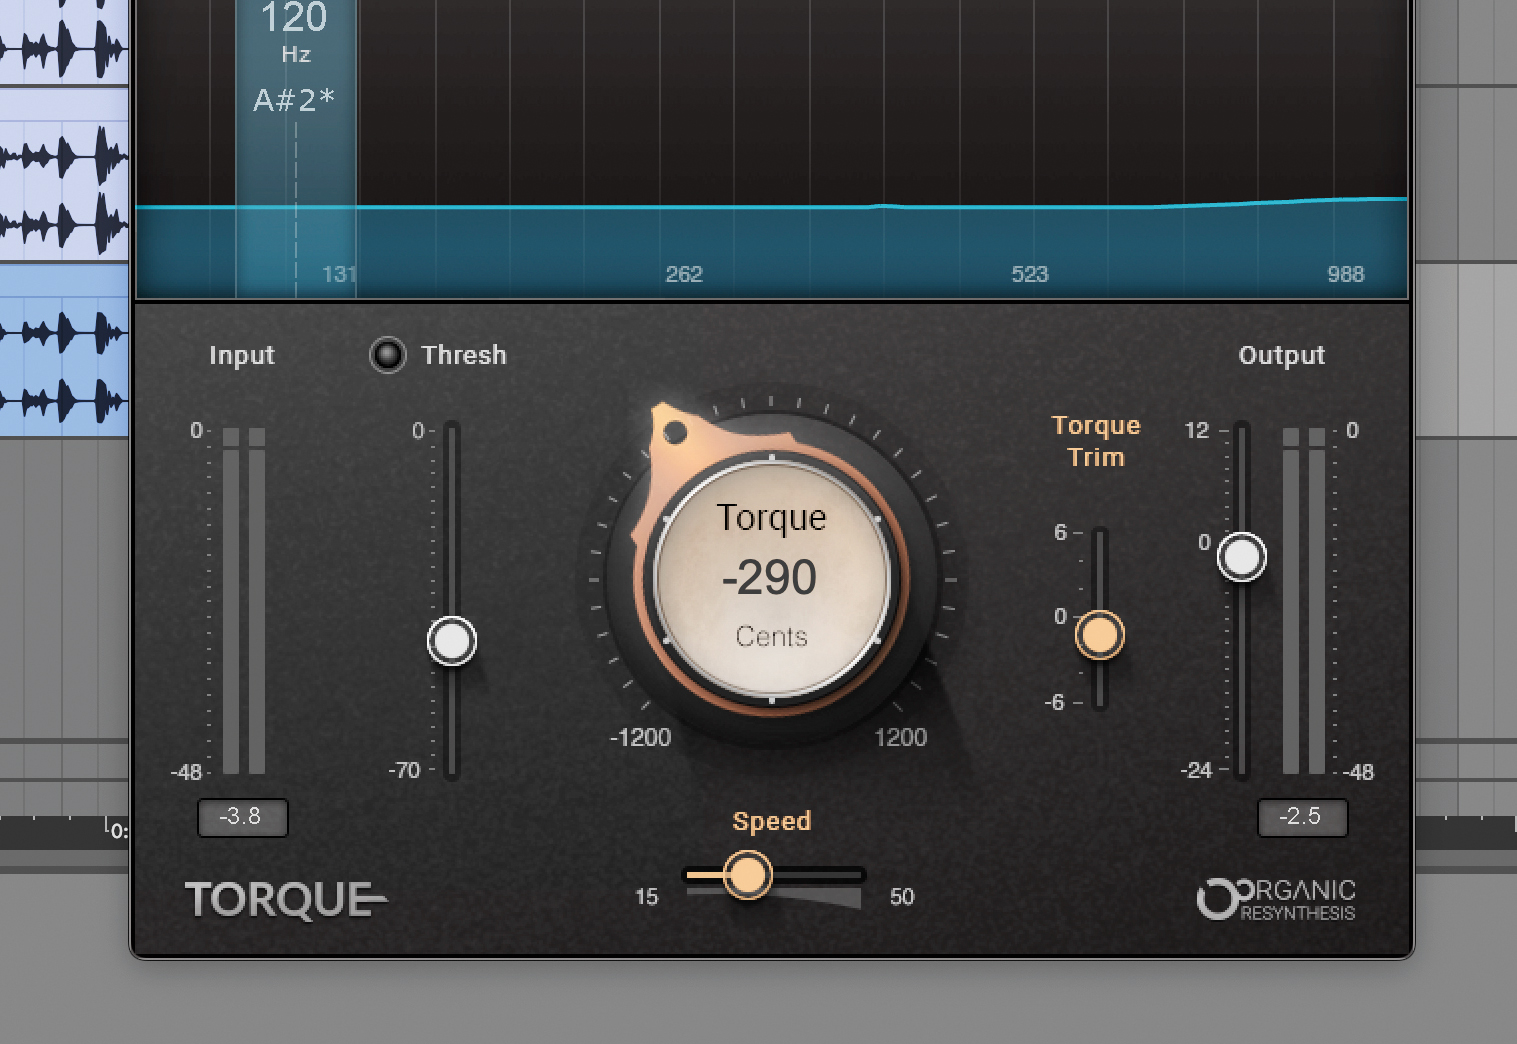
You may need to dial back the level of your newly tuned drum loop using the Torque Trim and Output Level faders. The Input and Output level meters help you level match, and the clip indicators at the top of the meters tell you if your signal is too loud.
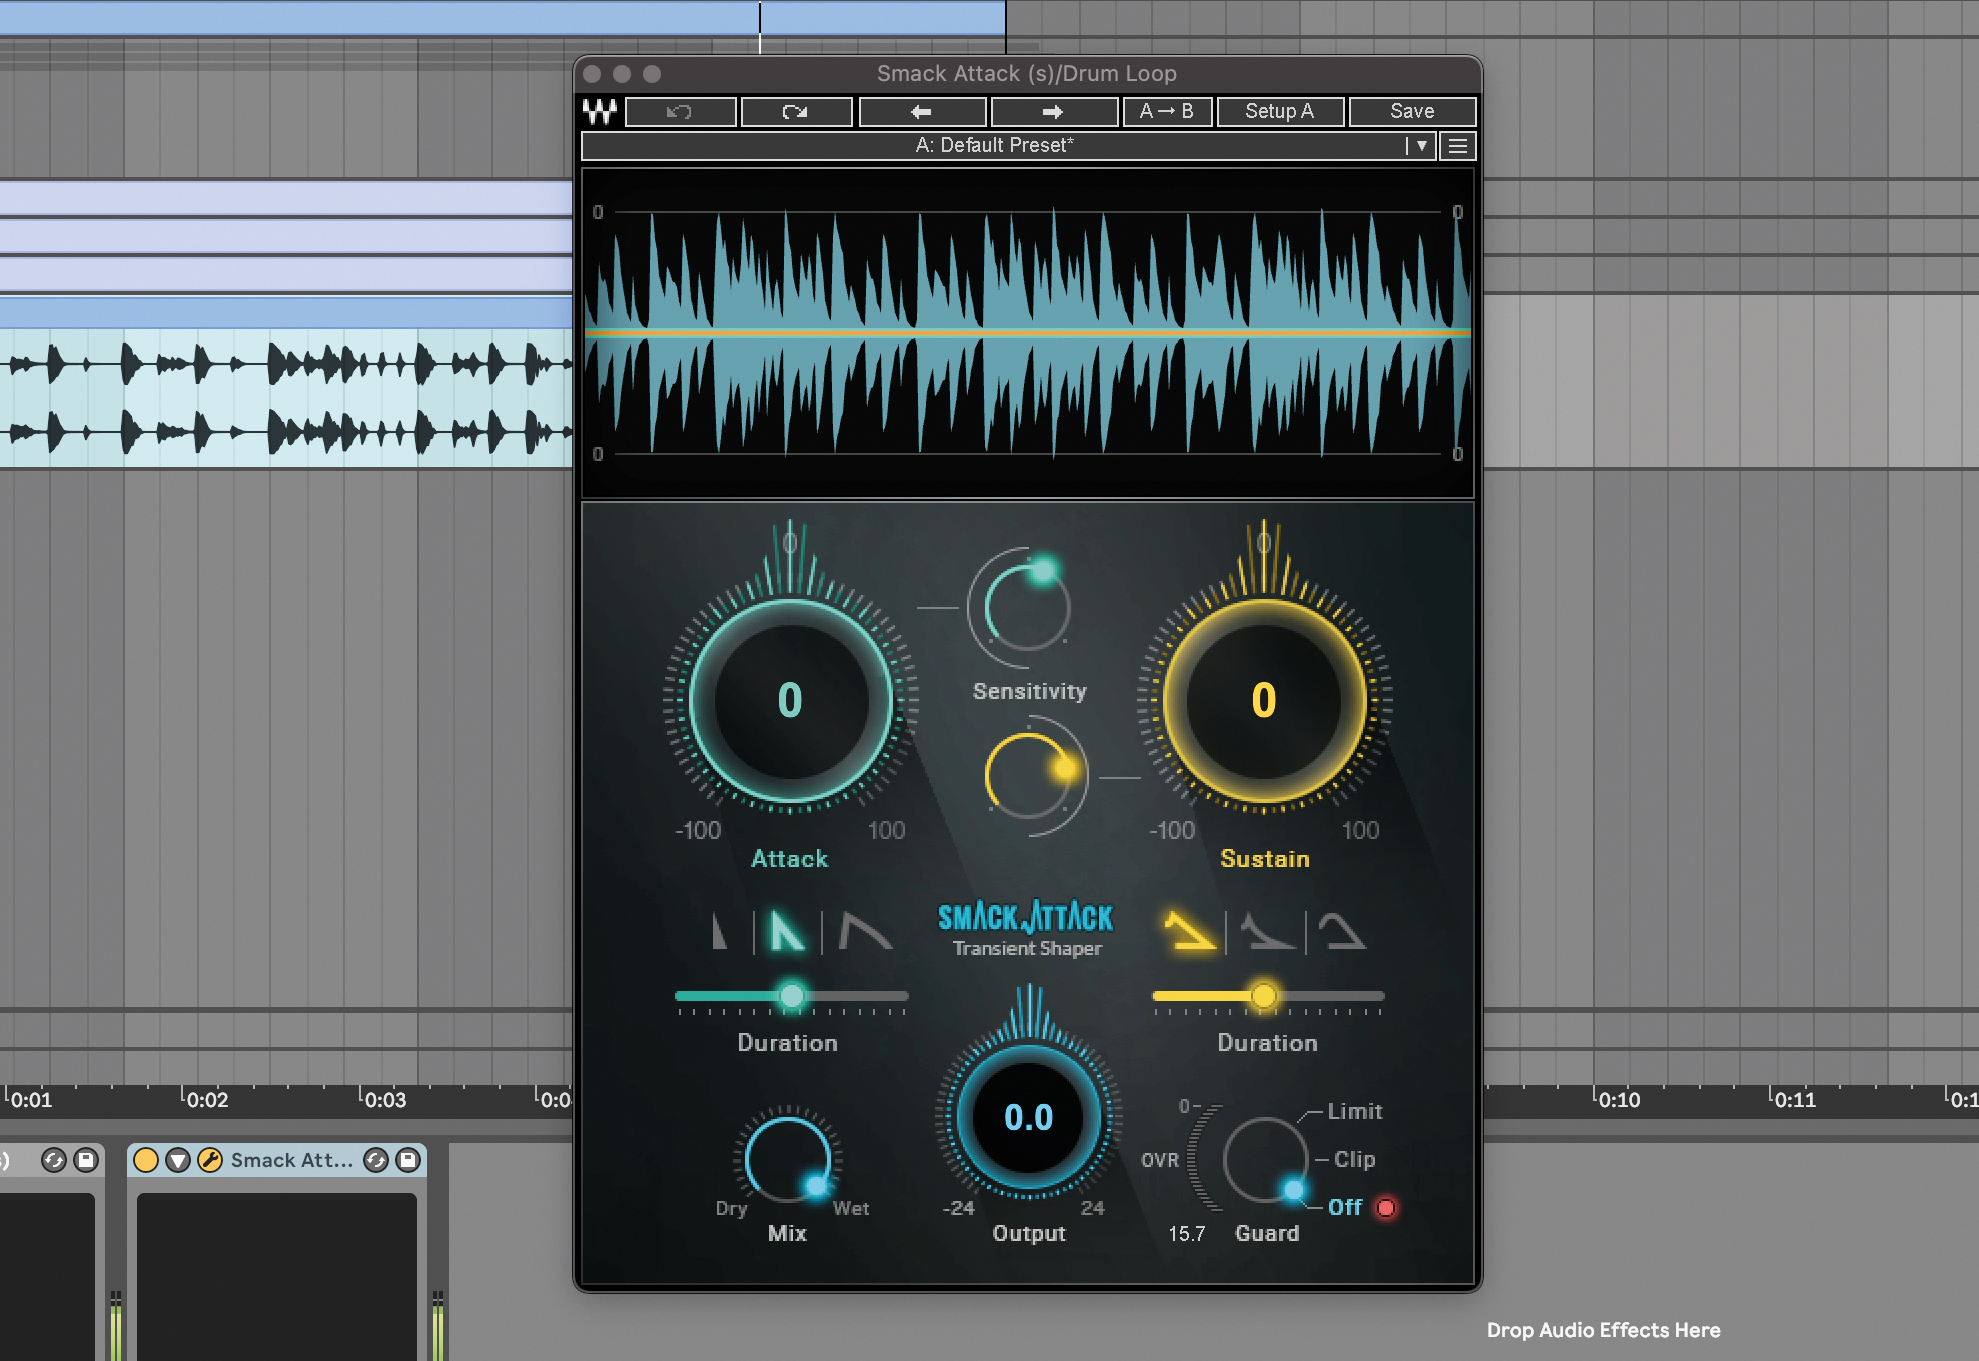
We can now turn our attention to the transient shape of the rest of the drum elements by loading Waves Smack Attack onto your loop. The waveform gives you a handy visualisation of the dynamics of your drums, both before and after you’ve shaped their transients.
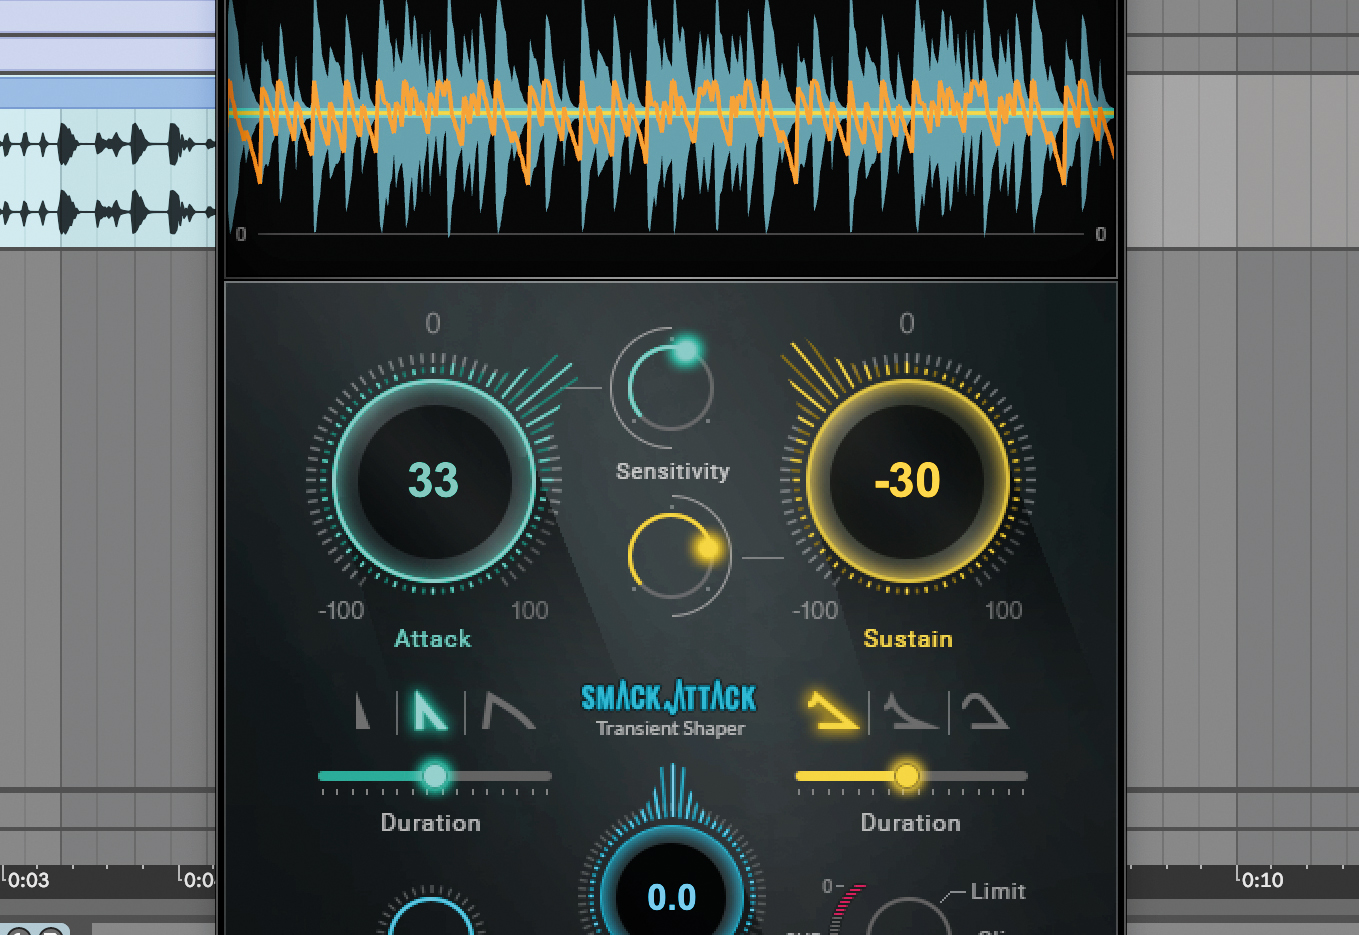
The blue knob adjusts transients, while the yellow knob adjusts sustain. Start by tweaking the attack knob until you get enough knock, then you can dial back some of the sustain with the yellow knob to help your drums’ groove.
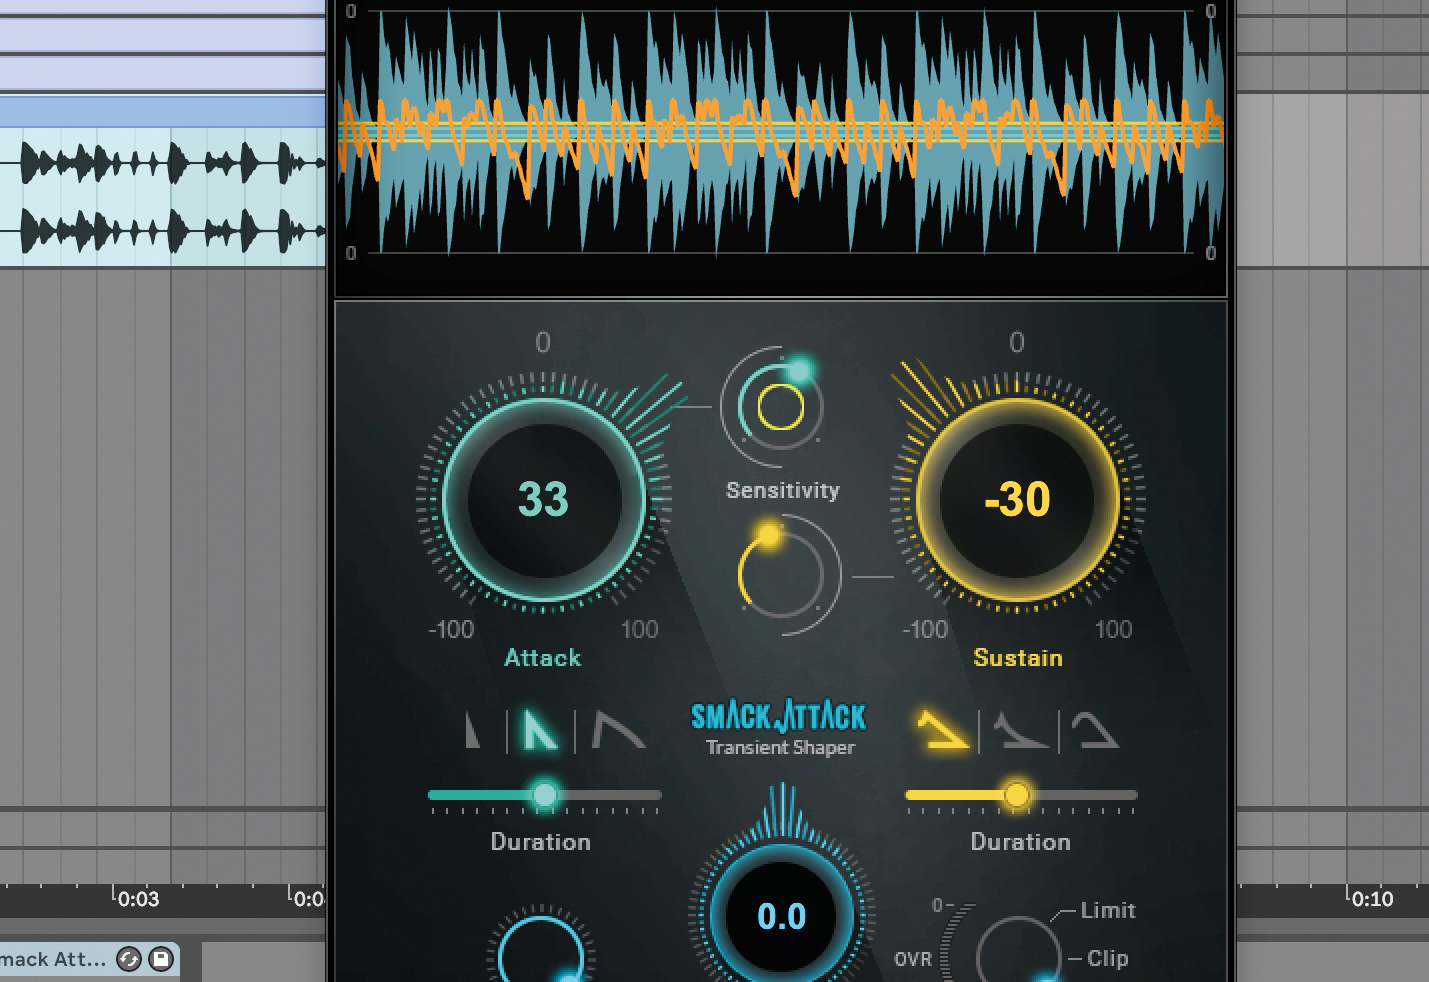
The Sensitivity knobs act as a kind of threshold for the corresponding Attack and Sustain dials, at which point Smack Attack will start to control the transients. Toy with these to further hone in on the groove and dynamics of your drum loop.
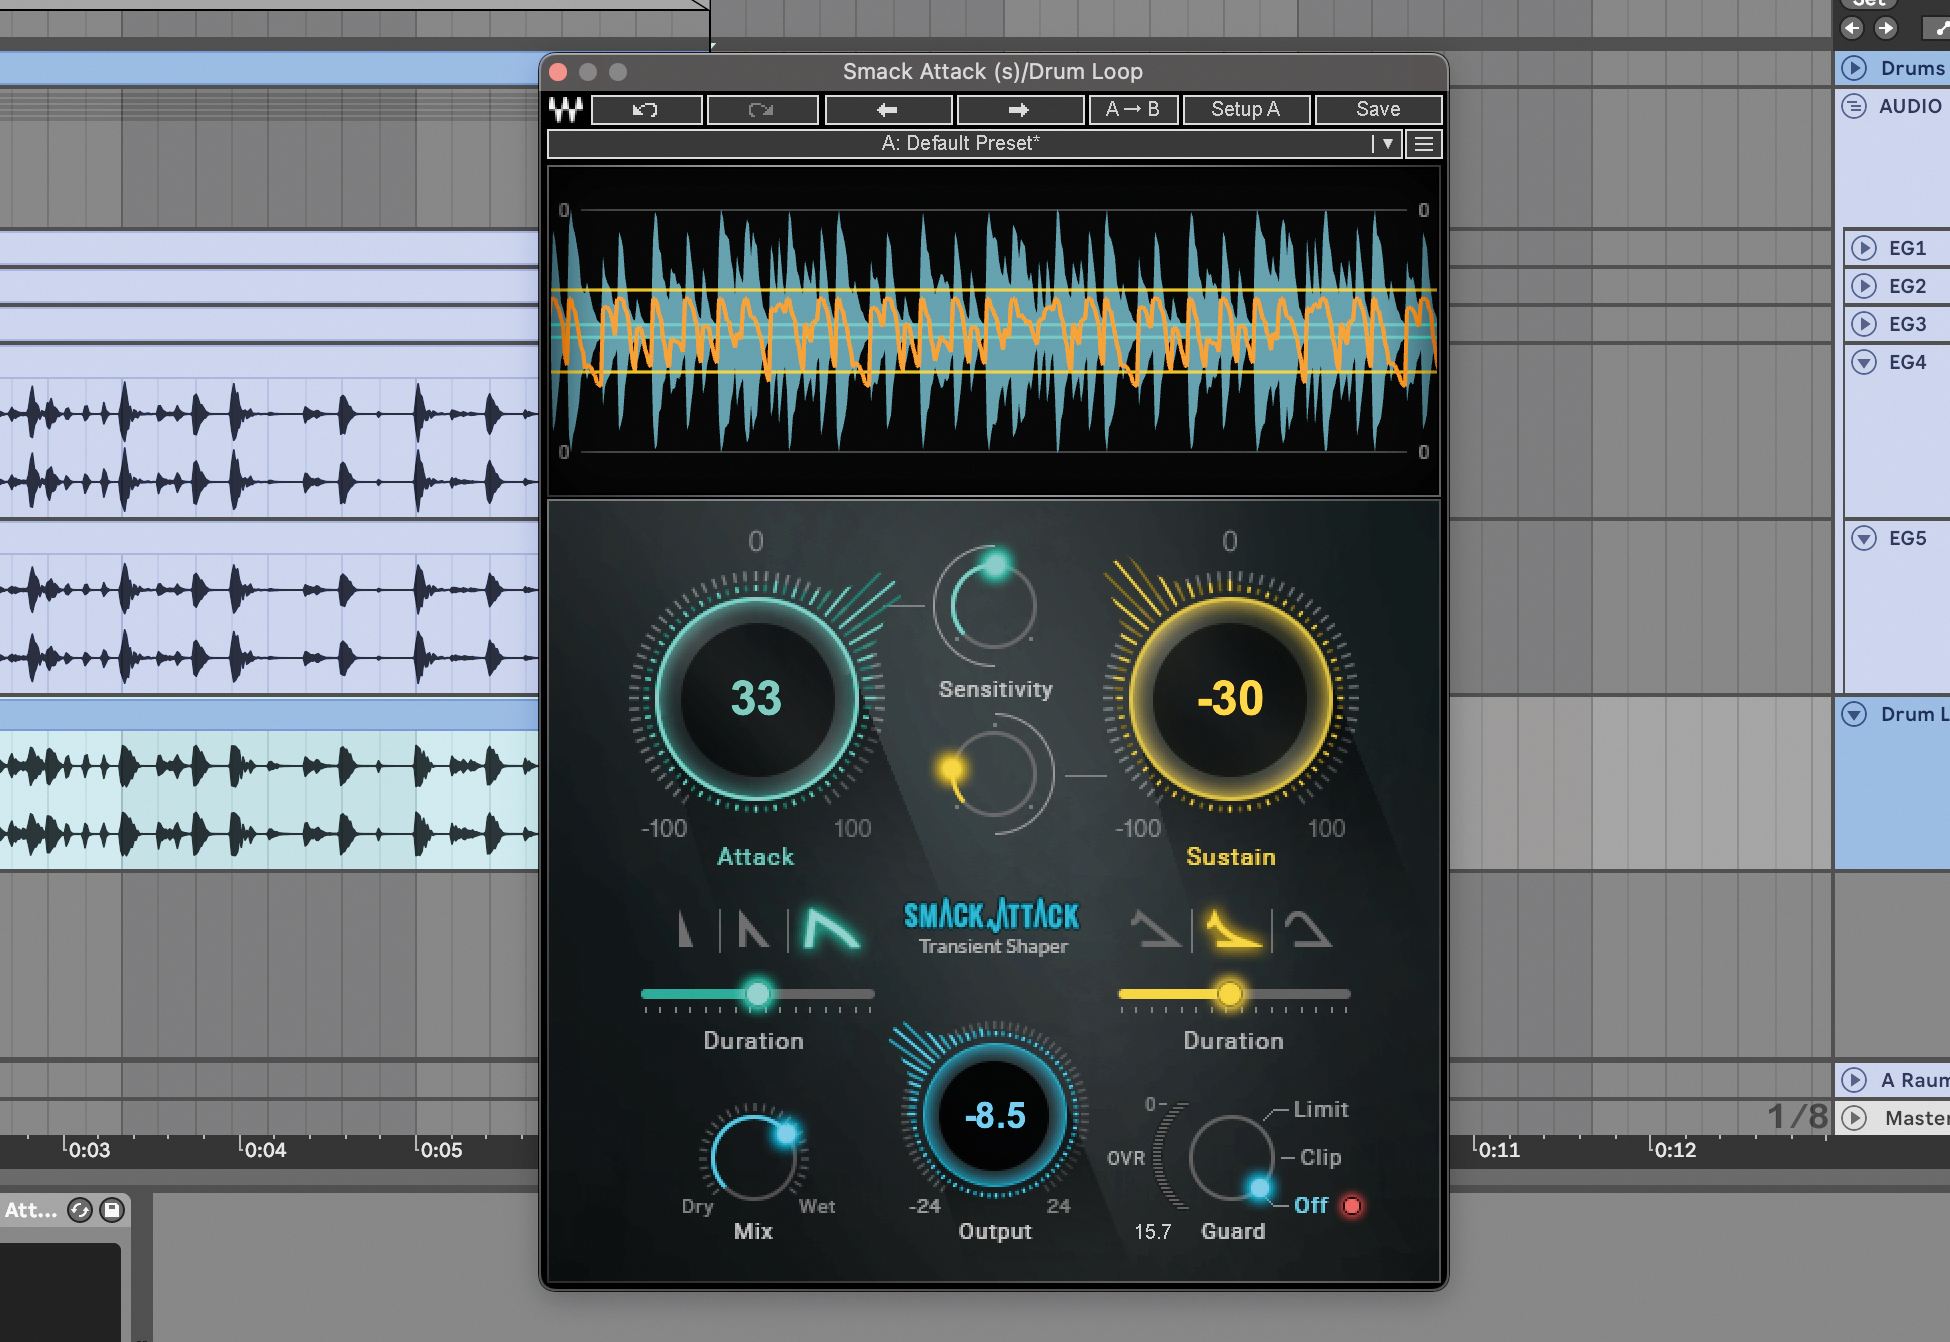
For even more control over the contour of your transients, the Attack and Sustain dials each have three Duration modes. Choose between soft, medium or hard slopes to perfect your sound. There’s also a mix control for dialling back the processing and reintroducing some of the dry sound.
Three of the best drum processors
1. FabFilter Pro-MB
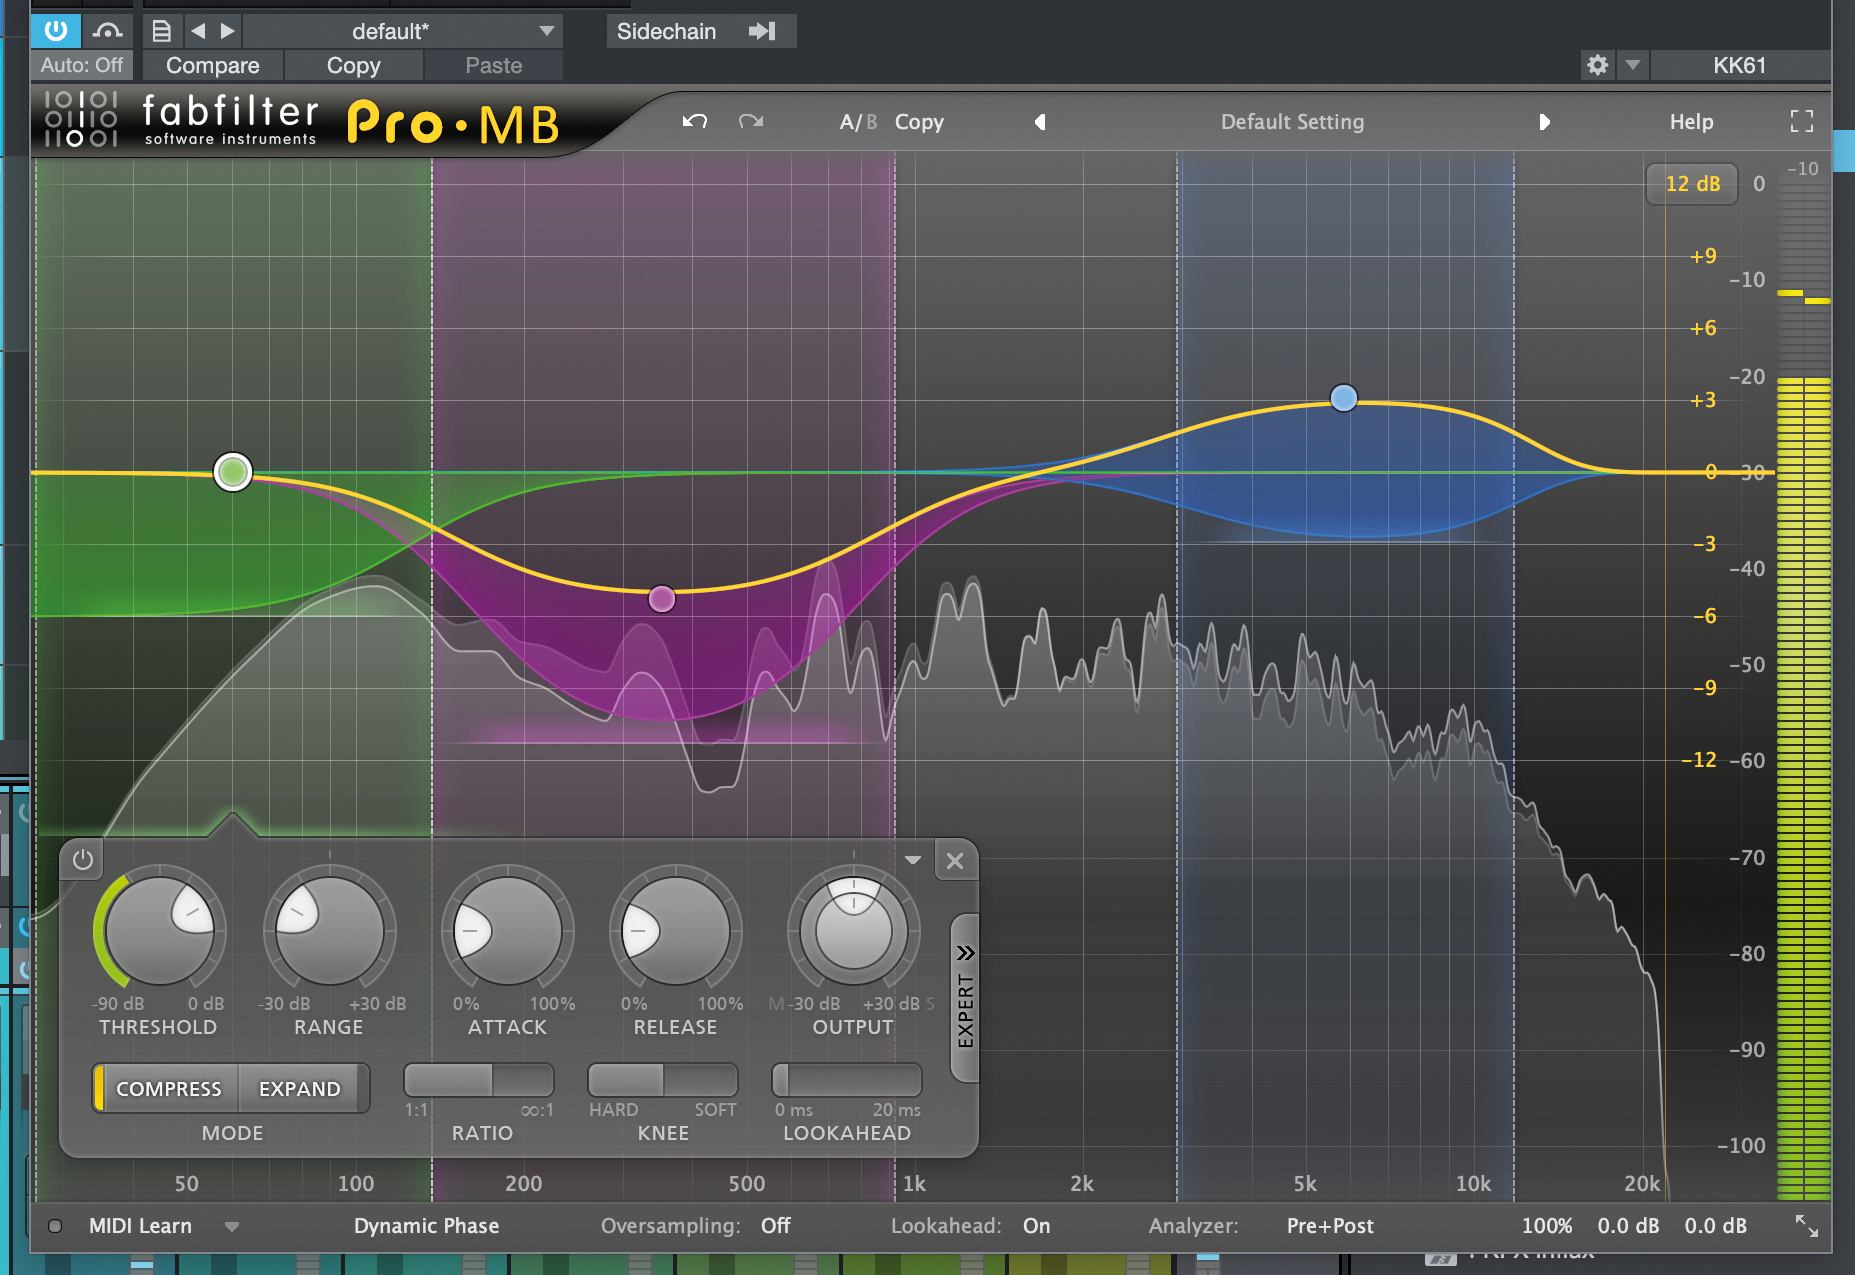
A multiband dynamics device with a difference, FabFilter Pro-MB is a refreshing take on working with the frequency spectrum, allowing any combination of upward and downward compression or expanding, with a good number of bands to create custom setups.
2. iZotope Neutron 4
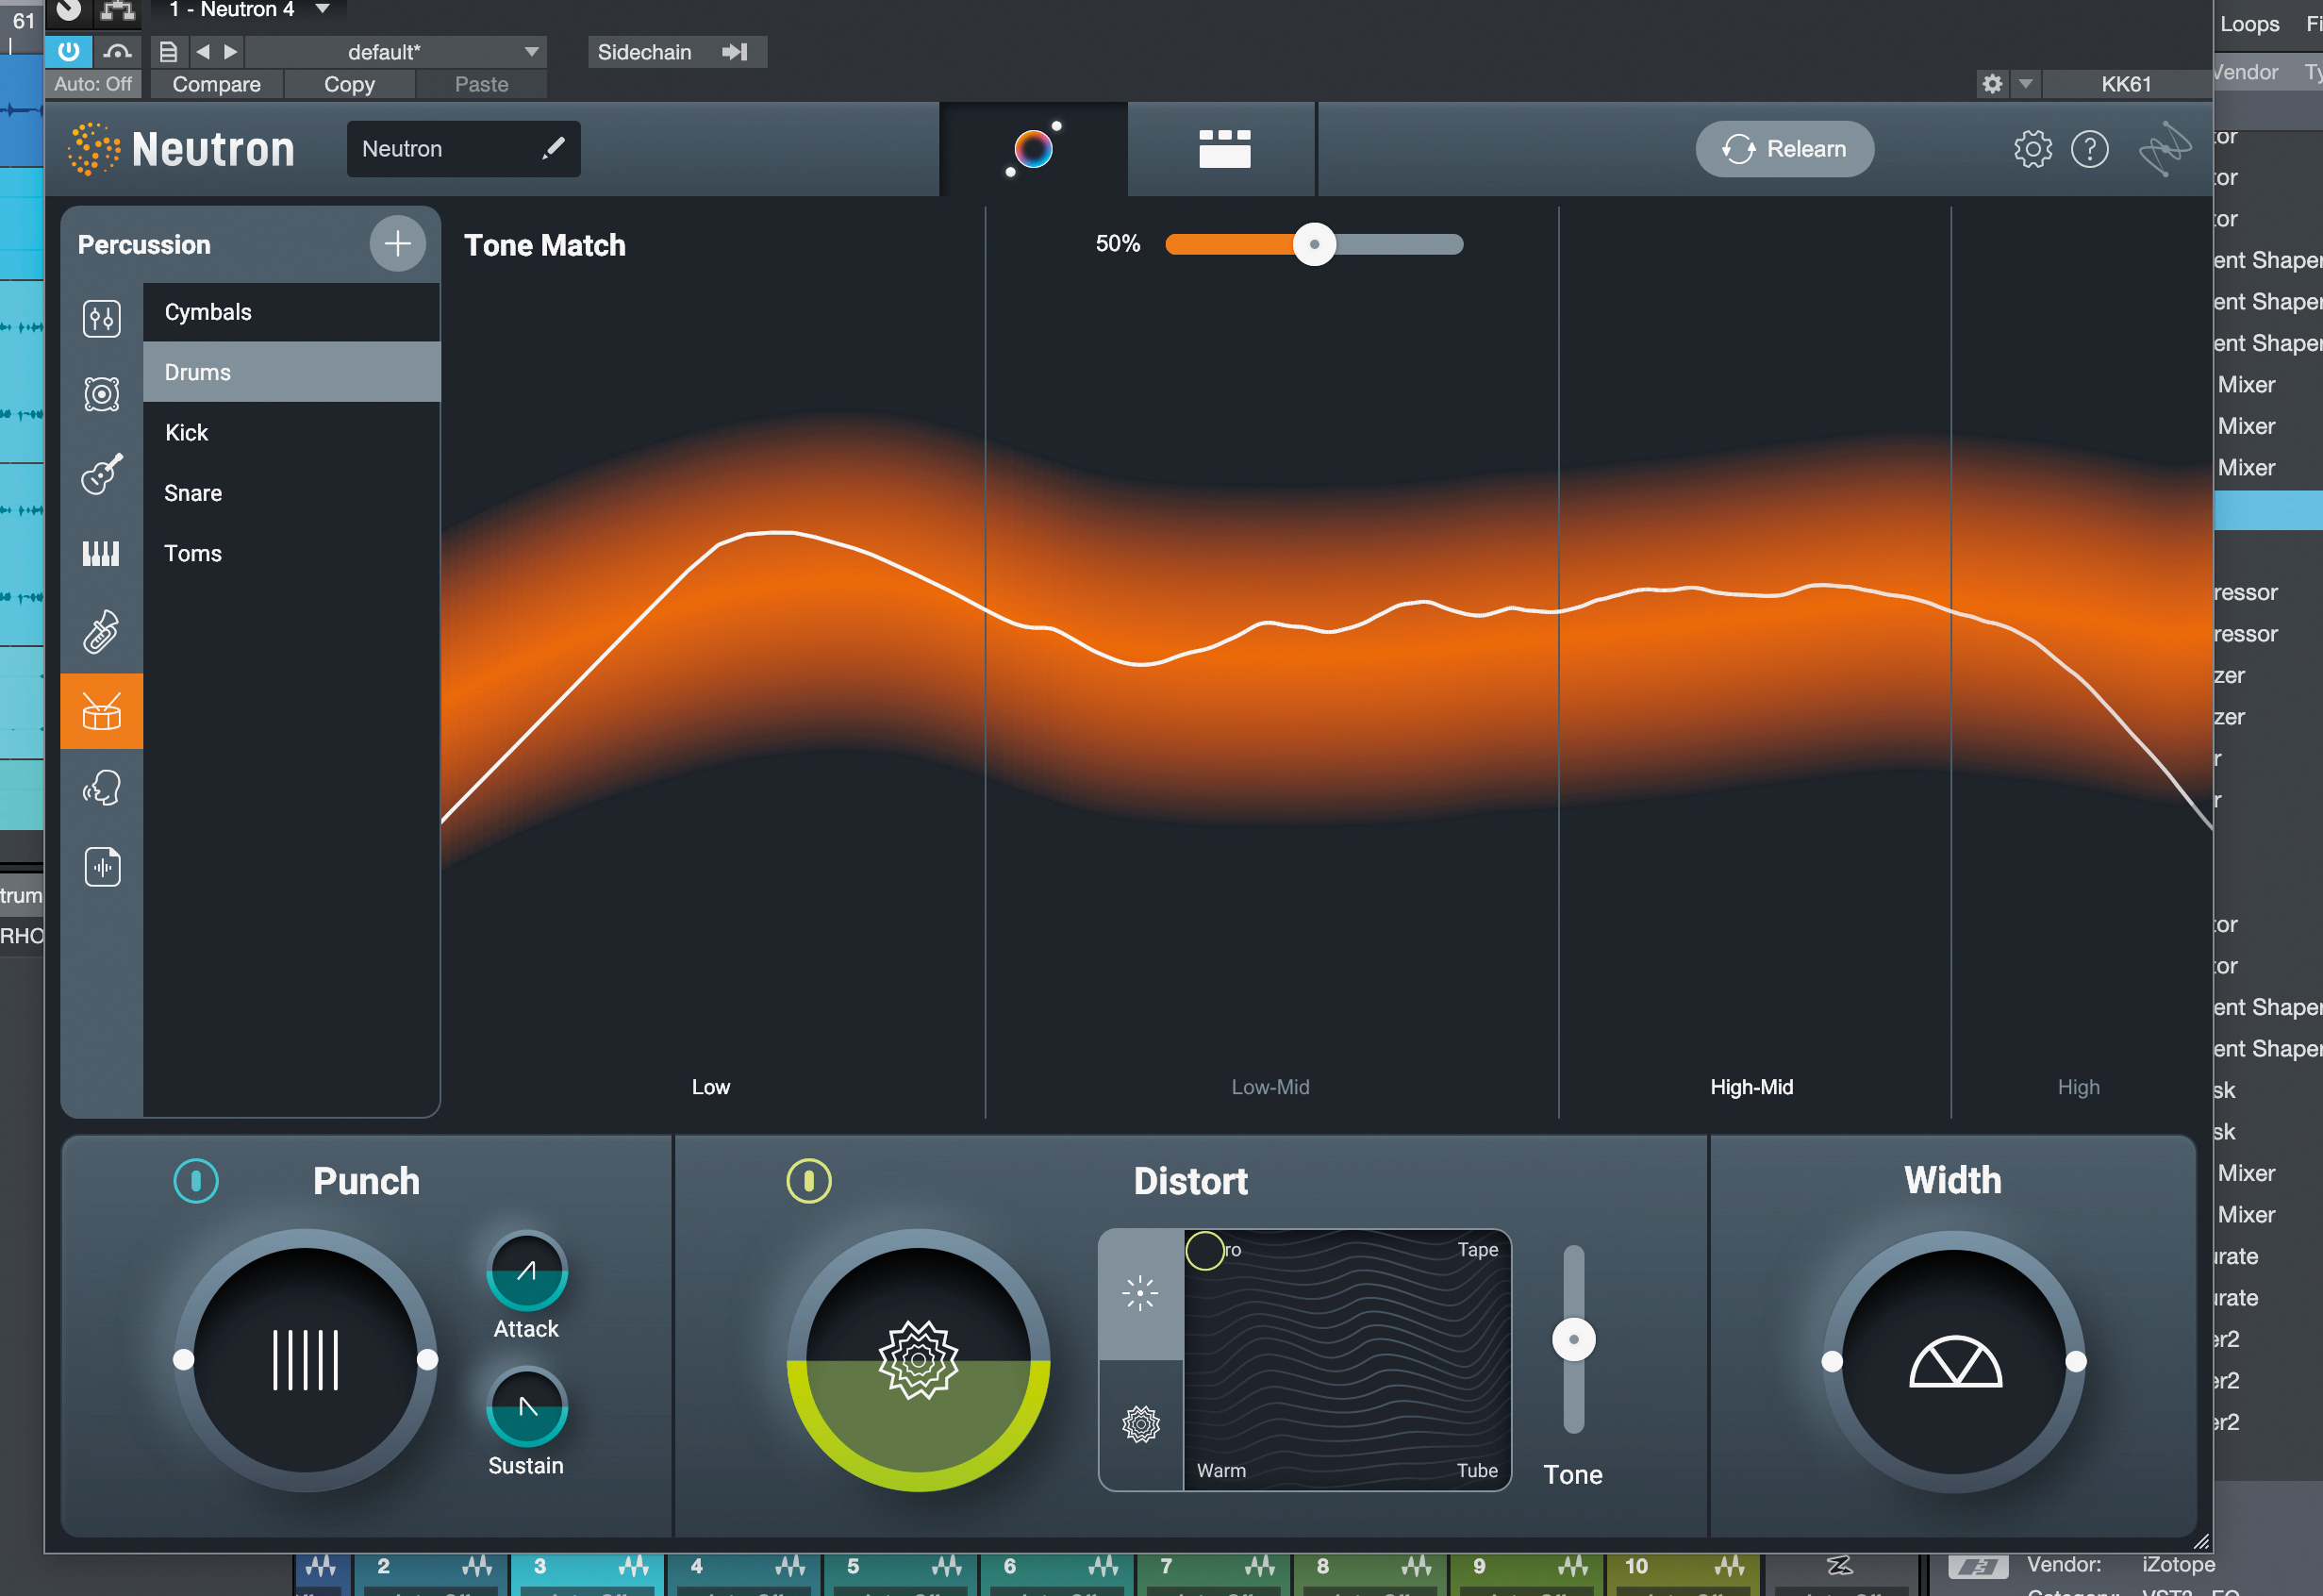
The complete mixing toolkit has in-built AI technology and extra tools to help measure and compare your entire mix. Recently, Neutron 4 has been enhanced with extra distortion options, plus its new Punch compressor. It’ll make short work of most drum mixing tasks, and can even identify what’s most needed in your audio and set initial parameters for you.
3. Native Instruments Raum
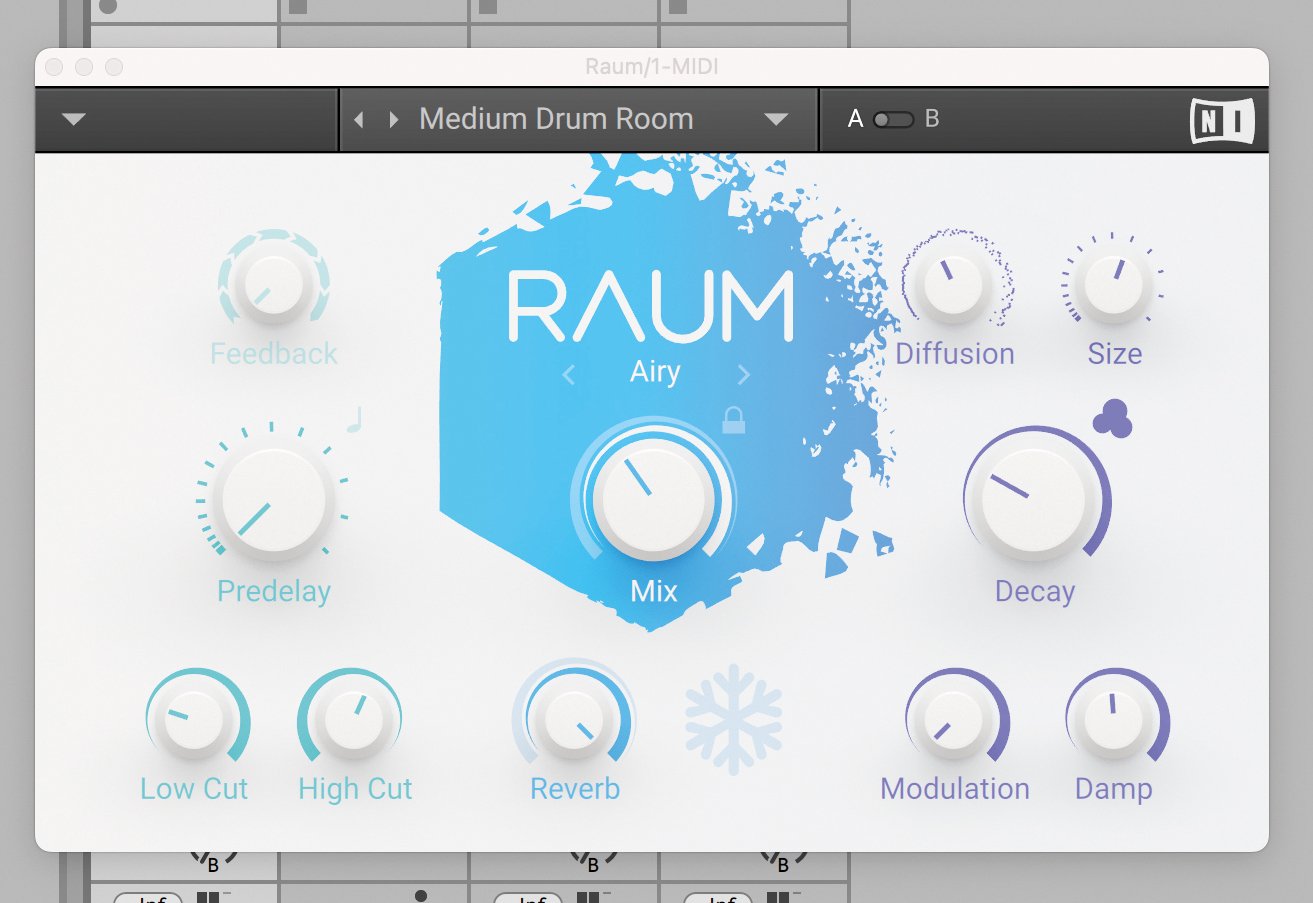
A modern yet timeless reverb, Raum gives you a panoply of styles as well as a bunch of options to make each virtual space your own. This is a very solid reverb that can easily become your ultimate go-to option.

A former Production Editor of Computer Music and FutureMusic magazines, James has gone on to be a freelance writer and reviewer of music software since 2018, and has also written for many of the biggest brands in music software. His specialties include mixing techniques, DAWs, acoustics and audio analysis, as well as an overall knowledge of the music software industry.
You must confirm your public display name before commenting
Please logout and then login again, you will then be prompted to enter your display name.