Vocal acapella masterclass
Top tips to whip those vocal samples into shape
Want all the hottest music and gear news, reviews, deals, features and more, direct to your inbox? Sign up here.
You are now subscribed
Your newsletter sign-up was successful
How to warp acapellas in Ableton Live
Making a re-edit of a choon that varies in tempo can be a frustrating task, and there are many reasons why a track might have fluctuating timing: it might not be sequenced or played to a click track, or it may be recorded via equipment that hasn't maintained a perfectly stable rate of recording.
If the audio has been ripped from vinyl, this is another point at which timing fluctuations can appear. On the plus side, spending time warping a loose track means that when you come to play it in a set, its corrected timing will make it easier to mix.
Generally, tempo detection algorithms are pretty bad at coping with tempo drift, and the most effective thing to do is fix everything manually. This can be especially tricky when working with acapellas, which don't have such obvious percussive clues, so here's a tip…

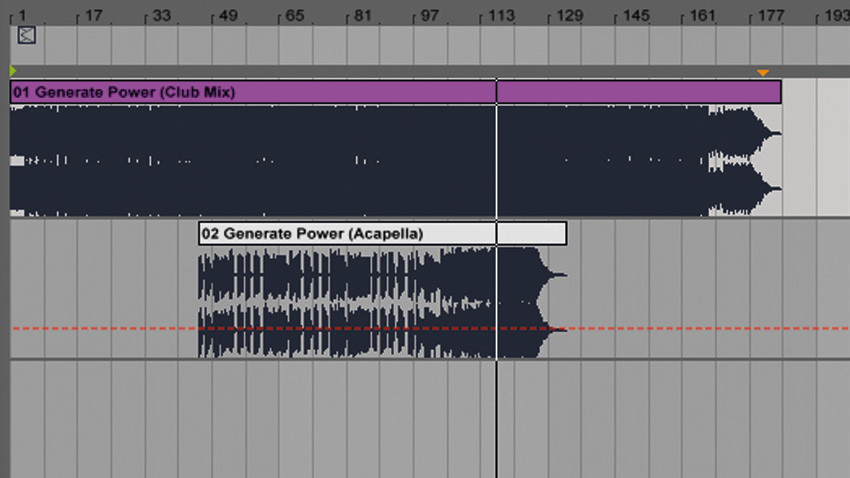
Step 1: For this, we'll need both the acapella and full vocal mix of the track. Drag each audio file onto its own audio track in Live, and make sure both clips' warp modes are turned off. Now, warp the vocal version of the track as normal so that it plays in time with Live's metronome.

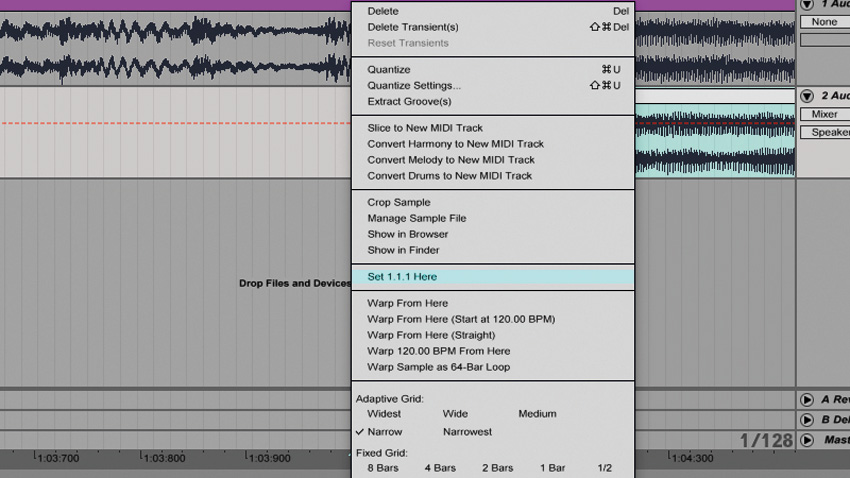
Step 2: Align the part of the vocal in the acapella with where it occurs in the vocal version by adjusting the Start Marker in the acapella's Clip View. Activate the acapella clip's Warp button, right-click the Start Marker and select Set 1.1.1 Here.

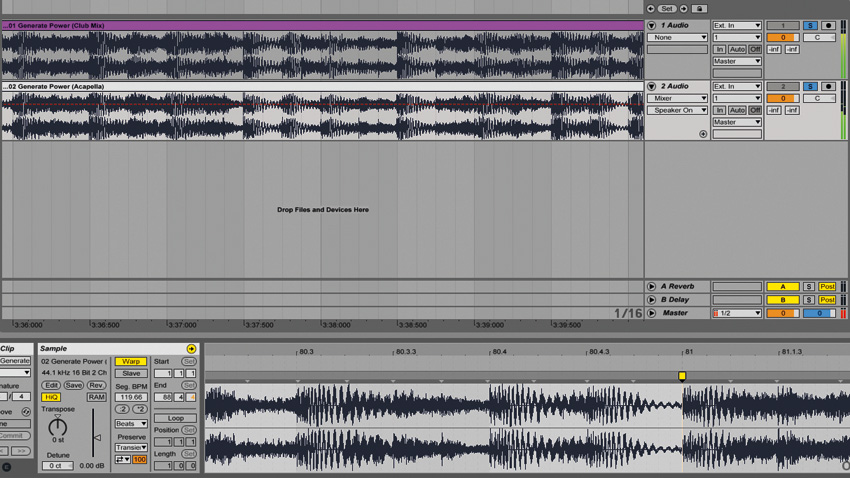
Step 3: Locate the last part of the acapella, add a warp marker and align it with the last part of the vocal. Assuming the timing of the acapella files doesn't drift too badly, it should stick to the project tempo. If not, go through and align the vocal at a finer scale until it's tight.
Want all the hottest music and gear news, reviews, deals, features and more, direct to your inbox? Sign up here.
Current page: How to warp acapellas in Ableton Live
Prev Page 8 essential vocal acapella production tricks Next Page How to create DIY acapellas in Ableton Live