Physical modelling makes use of mathematical models that describe the behaviour of the physical materials and cavities that make up an instrument, as well as those objects used to excite them into action. For instance, a model of a simple skin-covered drum would emulate the material from which the striker - hand, stick, mallet - is made. Is it soft or stiff? How hard is the impact, and how big is it?
Additionally, the material of the struck surface must be modelled - is the membrane skin or metal? Soft or hard? How tightly stretched is it? What's the diameter? Then there's the behaviour of the drum’s body. What’s it made of? What size and shape, and how large is the cavity inside (if there is one)?
We’re simplifying, of course. If all of the potential behaviours of the various forces and materials involved are properly represented, the results can be astonishingly authentic. However, there is a catch: physical models of real instruments usually require a lot of practice to sound good. Indeed, in today’s world of push-button and mouse-click composition, physical modelling can require too much effort on the part of the user. Still, for the recreation of metallic objects, there's nothing else quite like it!
Learn more about metallic sound design with the February 2018 edition of Computer Music.

Step 1: Unfortunately for us, most physical modelling plugins are dedicated to plucked strings. Luckily, Ableton have a hum-dinger in Live. Designed by modelling maestros Applied Acoustics Systems, Collision has everything we need to make cool, metallic sounds. Right out of the gate, it sounds convincing, like a mallet striking a metal beam.

Step 2: If we take a closer look at the Collision GUI, we can see that the left side is occupied by the Exciter parameters. The Exciter can be seen as the thing that sets the sound into motion - like a stick or mallet - just as is indicated here. The Stiffness knob does just what it suggests, it adjusts how stiff the virtual mallet is. Try increasing it.
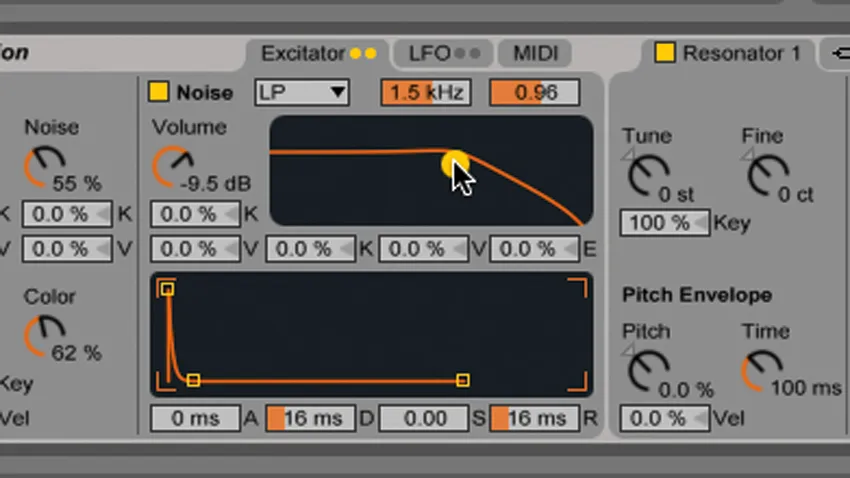
Step 3: Noise is an important part of all sounds. Even the most harmonious sounds have an element of noise - usually during the initial attack. Collision gives us control over that noise. Activate the Noise and turn the volume up a little. Try moving the ball in the filter display to increase the frequency and resonance.

Step 4: Let’s move over to the Resonators. These are the parts of the instrument that the Exciter sets into motion. In this case, only one Resonator is in play, and it’s modelling a Beam. Grab the little ball in the Decay/Material display and move it around. The Material determines what the Resonator is made of. Set the Decay to 12.4s and the Material to 100.

Step 5: Our sound is now richer in higher frequencies. Higher Material values make the sound more metallic. There are a lot of Resonator parameters to play with. Let’s try decreasing the Brightness and Inharmonics to hear their effect on our patch. It’s starting to sound very much like the sorts of instruments heard in Indonesian music.

Step 6: Finally, activate Resonator 2. This simulates the body the previous Resonator is attached to. Lower its volume considerably and select Plate from the dropdown menu of resonator types. We’ll adjust the parameters of this one so that it has more harmonics and decays for 9.44 seconds. We can also increase the Ratio. It sounds fantastic!
