How to program mixed-resolution, trap-style hi-hat patterns
As well as their sub-heavy 808 kicks, the drums in trap are known for those crazy skittering hi-hats. Let’s take a look…
Want all the hottest music and gear news, reviews, deals, features and more, direct to your inbox? Sign up here.
You are now subscribed
Your newsletter sign-up was successful
Second only to the sustained 808 kick drum among trap’s defining percussive features are its unusually intricate hi-hats, shifting between slow and fast, straight and triplet, often several times within the space of a bar.
In this walkthrough, we'll show you how to create a quintessential trap hi-hat pattern in Logic Pro - although any DAW will do, of course. For more on programming unique beats, get the August edition of Computer Music.
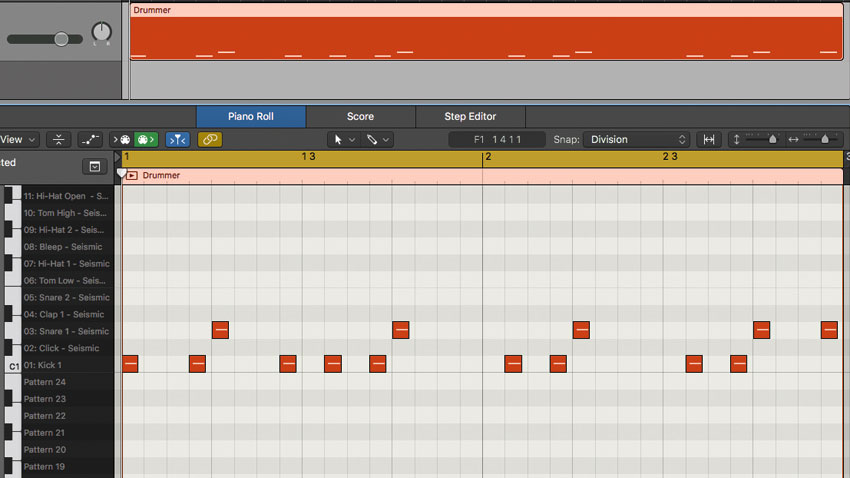
Step 1: Here in Logic Pro X, we have a simple, two-bar kick and snare-based beat in 4/4 at 70bpm, to which we’re going to add a tricky, mixed-meter hi-hat part. Setting a slow tempo helps when programming parts like this, making it easier to add fast, double-time notes.
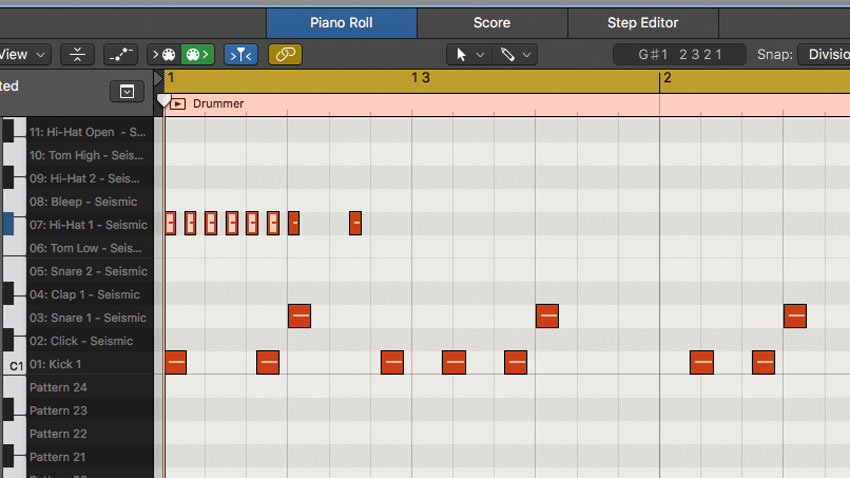
Step 2: We start simply by adding some eighth-note hi-hat beats to the first half of bar 1, as shown. Then we switch the grid resolution to 1/16T (/24 in Logic parlance) and fill the gaps to create six notes spanning the first two beats.
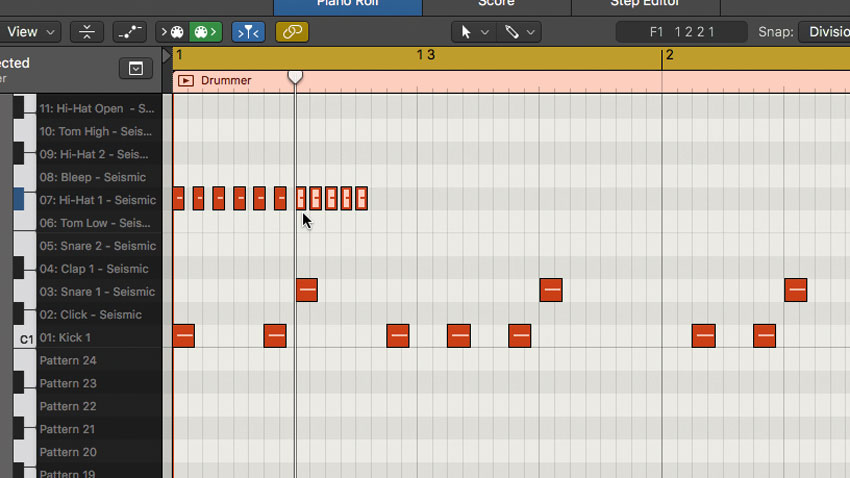
Step 3: On the next beat, we’re going to have a group of five 32nd-notes, so we switch the grid resolution back to /32. We can either use the Pencil Tool to pencil in the notes, or just copy and paste some of the existing ones by holding down the Alt key and dragging them into position.
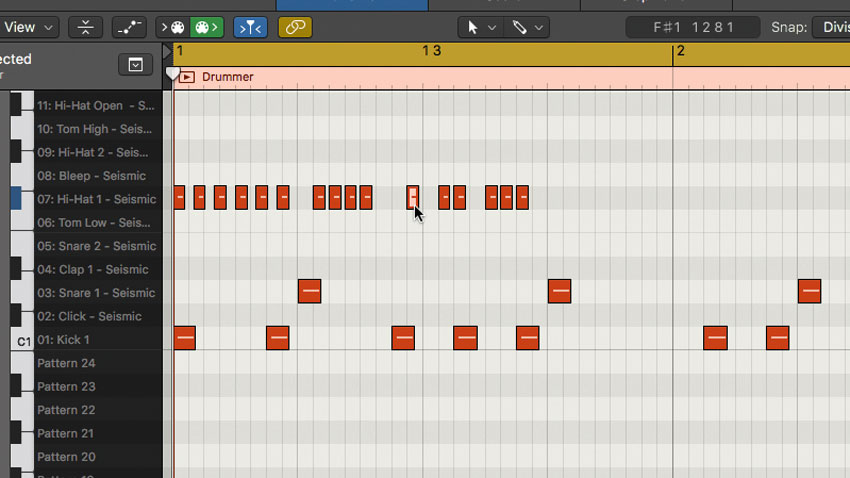
Step 4: Starting on beat 1.3, we continue at our current /32 note resolution, but this time place two groups of three notes in the first seven slots, leaving a one-note gap in the middle. Then we take the first note of the first group and drag it earlier by a 32nd-note, so that it hits before the beat.
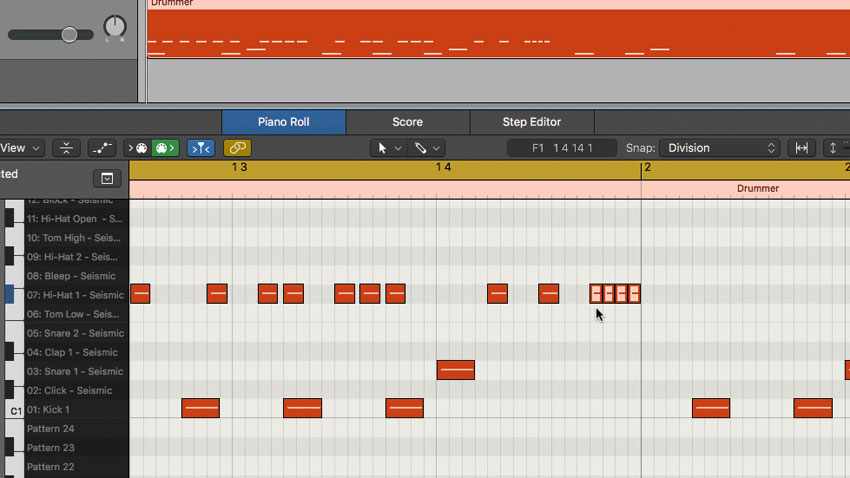
Step 5: In the next half-bar, we start off minimal by inserting hi-hat notes on the second and third 16th-notes. On the fourth one, however, we switch resolution to /64 and go all out with a rapid-fire cluster of four 64th-notes - that’s four notes in a single 16th - to round off the bar.
Want all the hottest music and gear news, reviews, deals, features and more, direct to your inbox? Sign up here.
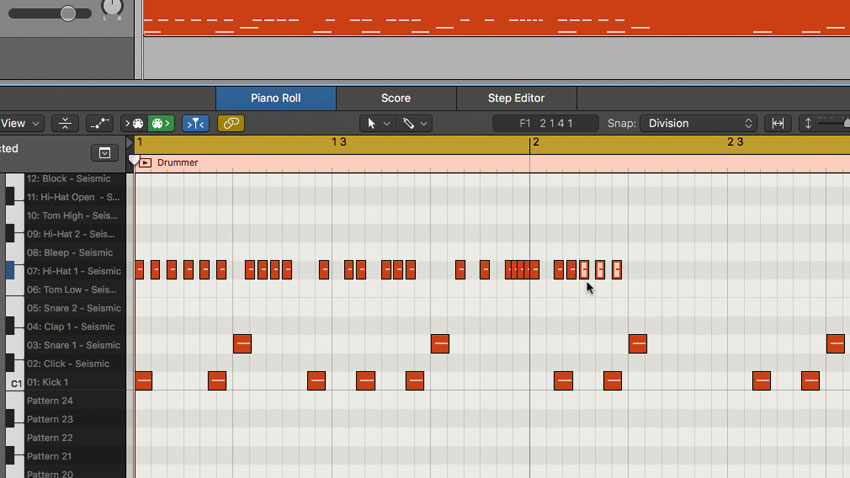
Step 6: We kick off the second half of our two-bar rhythm with a group of four 32nd-notes, switching back to /32 resolution to pencil them in. We follow this on beat 2.1.3 with another triplet, which needs to be entered at /24 resolution. To finish, we get rid of the second of the four 32nd-notes.
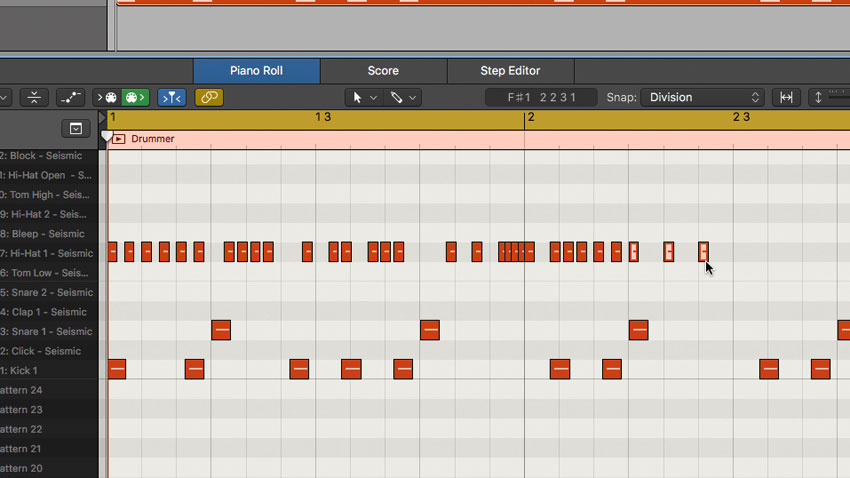
Step 7: A set of three eighth-note triplets is the order of the day for the next part, so another resolution change is needed - this time to /12 (meaning that each whole bar is divided into 12 segments, three per quarter note). We stick a hi-hat note on each one, ending up with three notes that drag across the beat.
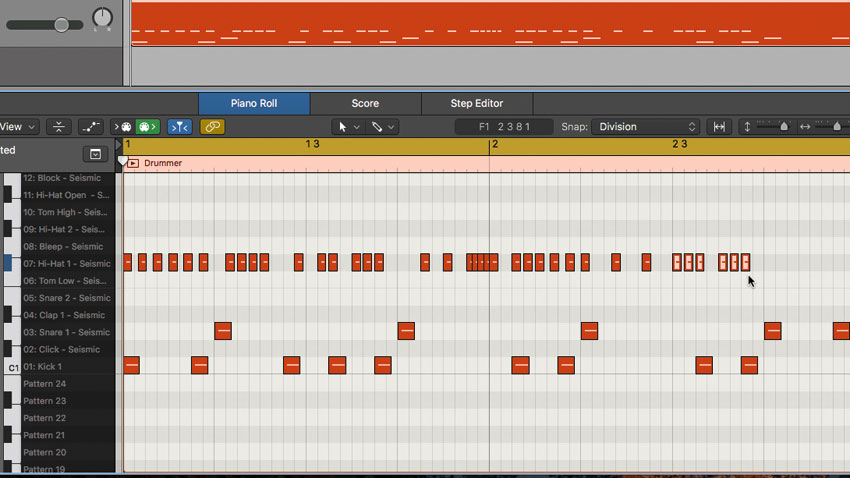
Step 8: It’s back to /32 resolution for the start of the final half-bar, as we pencil in a string of eight 32nd-notes starting from beat 2.3. However, with these in place, we then remove the fourth and eighth notes, giving us two groups of three. We’re almost done!
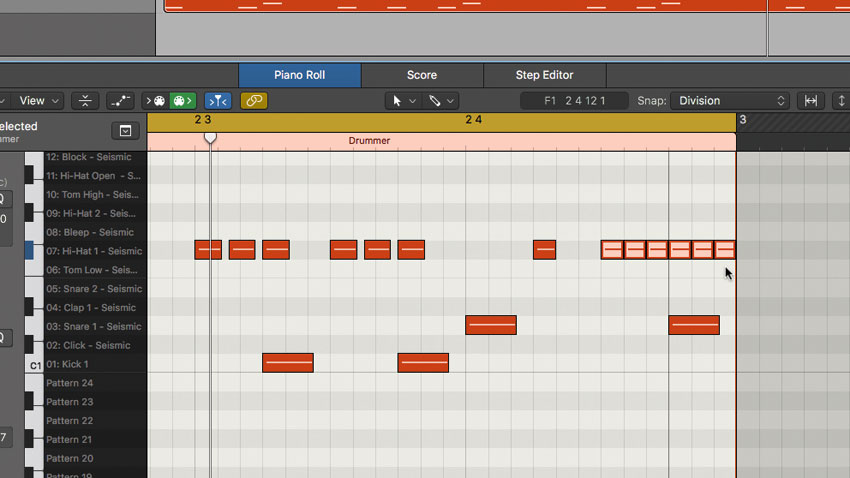
Step 9: For a final flourish, we switch to /48 resolution to enter a lavish 32nd-note triplet fill. With the grid at this setting, we plonk hi-hat notes on the fourth beat, and a string of six notes in the last six segments of the bar. When looped, this rolls nicely back to the beginning of our groove.
Computer Music magazine is the world’s best selling publication dedicated solely to making great music with your Mac or PC computer. Each issue it brings its lucky readers the best in cutting-edge tutorials, need-to-know, expert software reviews and even all the tools you actually need to make great music today, courtesy of our legendary CM Plugin Suite.
