How to get started with Synapse Audio Dune 3's Wavetable Editor
Get to grips with the new wavetable editor on Synapse Audio's epic hybrid analogue/FM/wavetable softsynth
Want all the hottest music and gear news, reviews, deals, features and more, direct to your inbox? Sign up here.
You are now subscribed
Your newsletter sign-up was successful
Building on the its magnificent predecessor the Dune 2, the Dune 3 now offers a comprehensive wavetable editor which can import and export wavetables up to 256 waveforms in length.
The two Import WAV To Wavetable options differ in how they spread the WAV across the waveform slots. Selecting Import WAV (Fit To Wavetable) divides the WAV up into exactly the number of waveforms in the current wavetable, regardless of length. Opting instead for Import WAV (Adjust Wavetable) creates a new waveform every 2048 samples, resizing the wavetable. Pick this if the WAV you’re importing has been created for use as a wavetable and thus adheres to the standard table size of 2048 samples.
A powerful sound design tool, the wavetable editor allows great flexibility when it comes to achieving the perfect sound. But, if you're new to wavetables, or just new to the Dune 3's interface, fear not, we've got you covered.
Read on for a step-by-step guide to the Dune 3's wavetable editor.
Get more from your VST plugin synths with issue 269 of Computer Music magazine
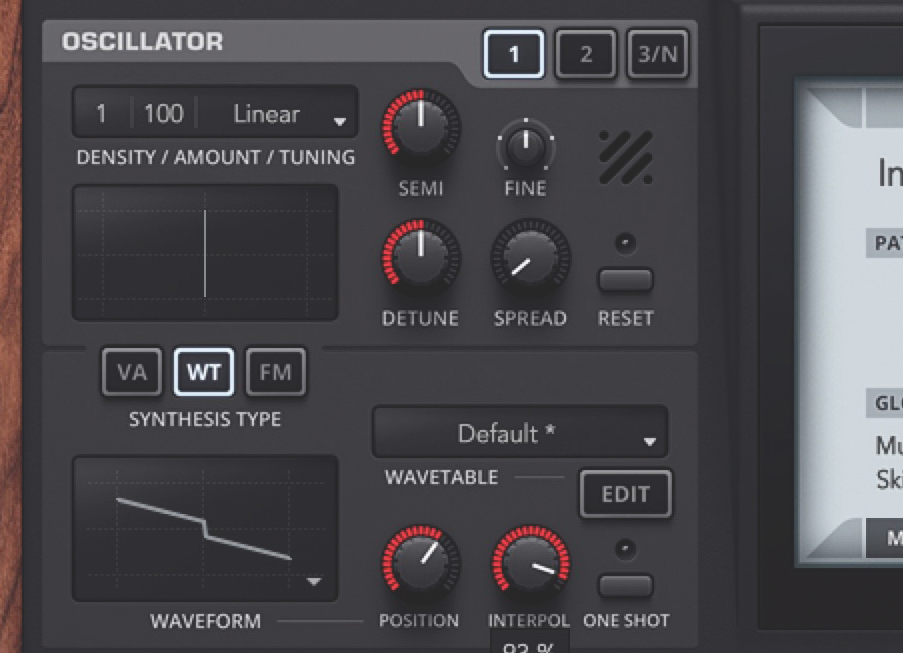
Step 1: Select Initialize Patch from the Patch menu, then switch the one active osc from VA to Wavetable (WT) mode. The default three-waveform table is loaded – sweep through it with the Position knob, and adjust interpolation smoothness with the Interpol knob.
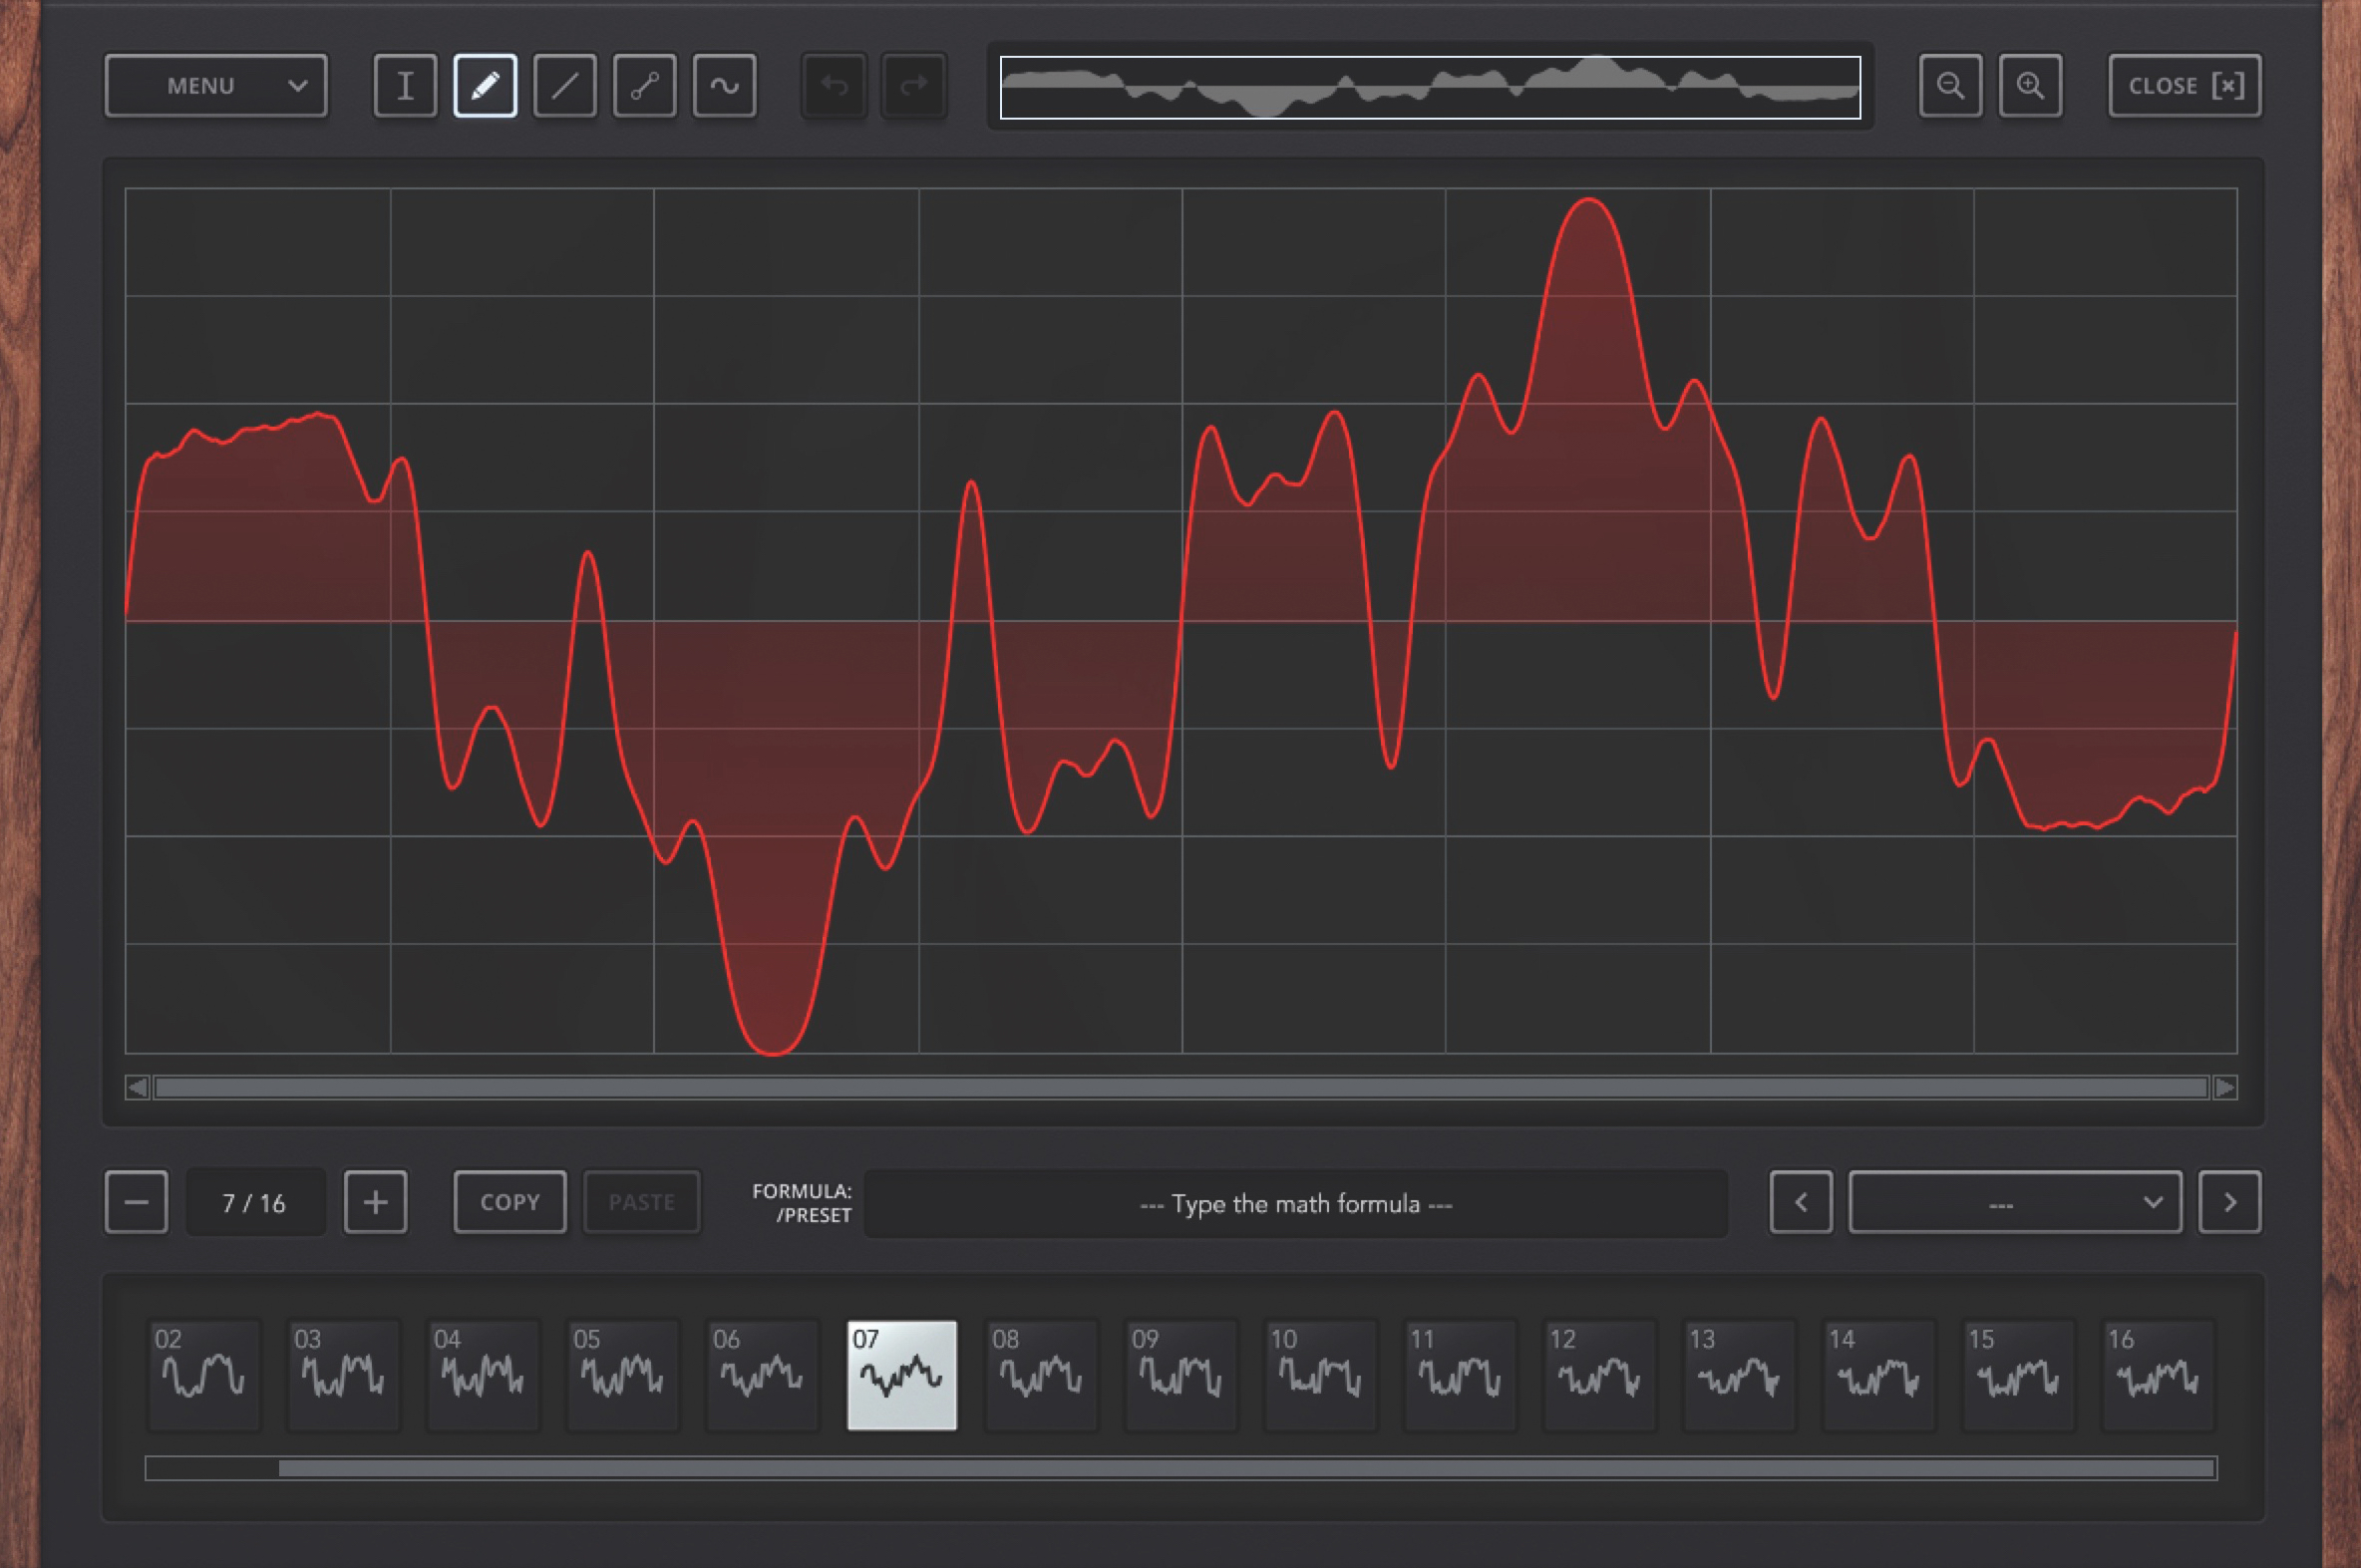
Step 2: There are 47 wavetables onboard. Load MH Phase Dist 3 from the Wavetable menu, and then click the Edit button to open the Wavetable Editor. Here, you will see the 16 waveforms of the wavetable arranged in a row at the bottom, and the currently selected waveform in the main window above.
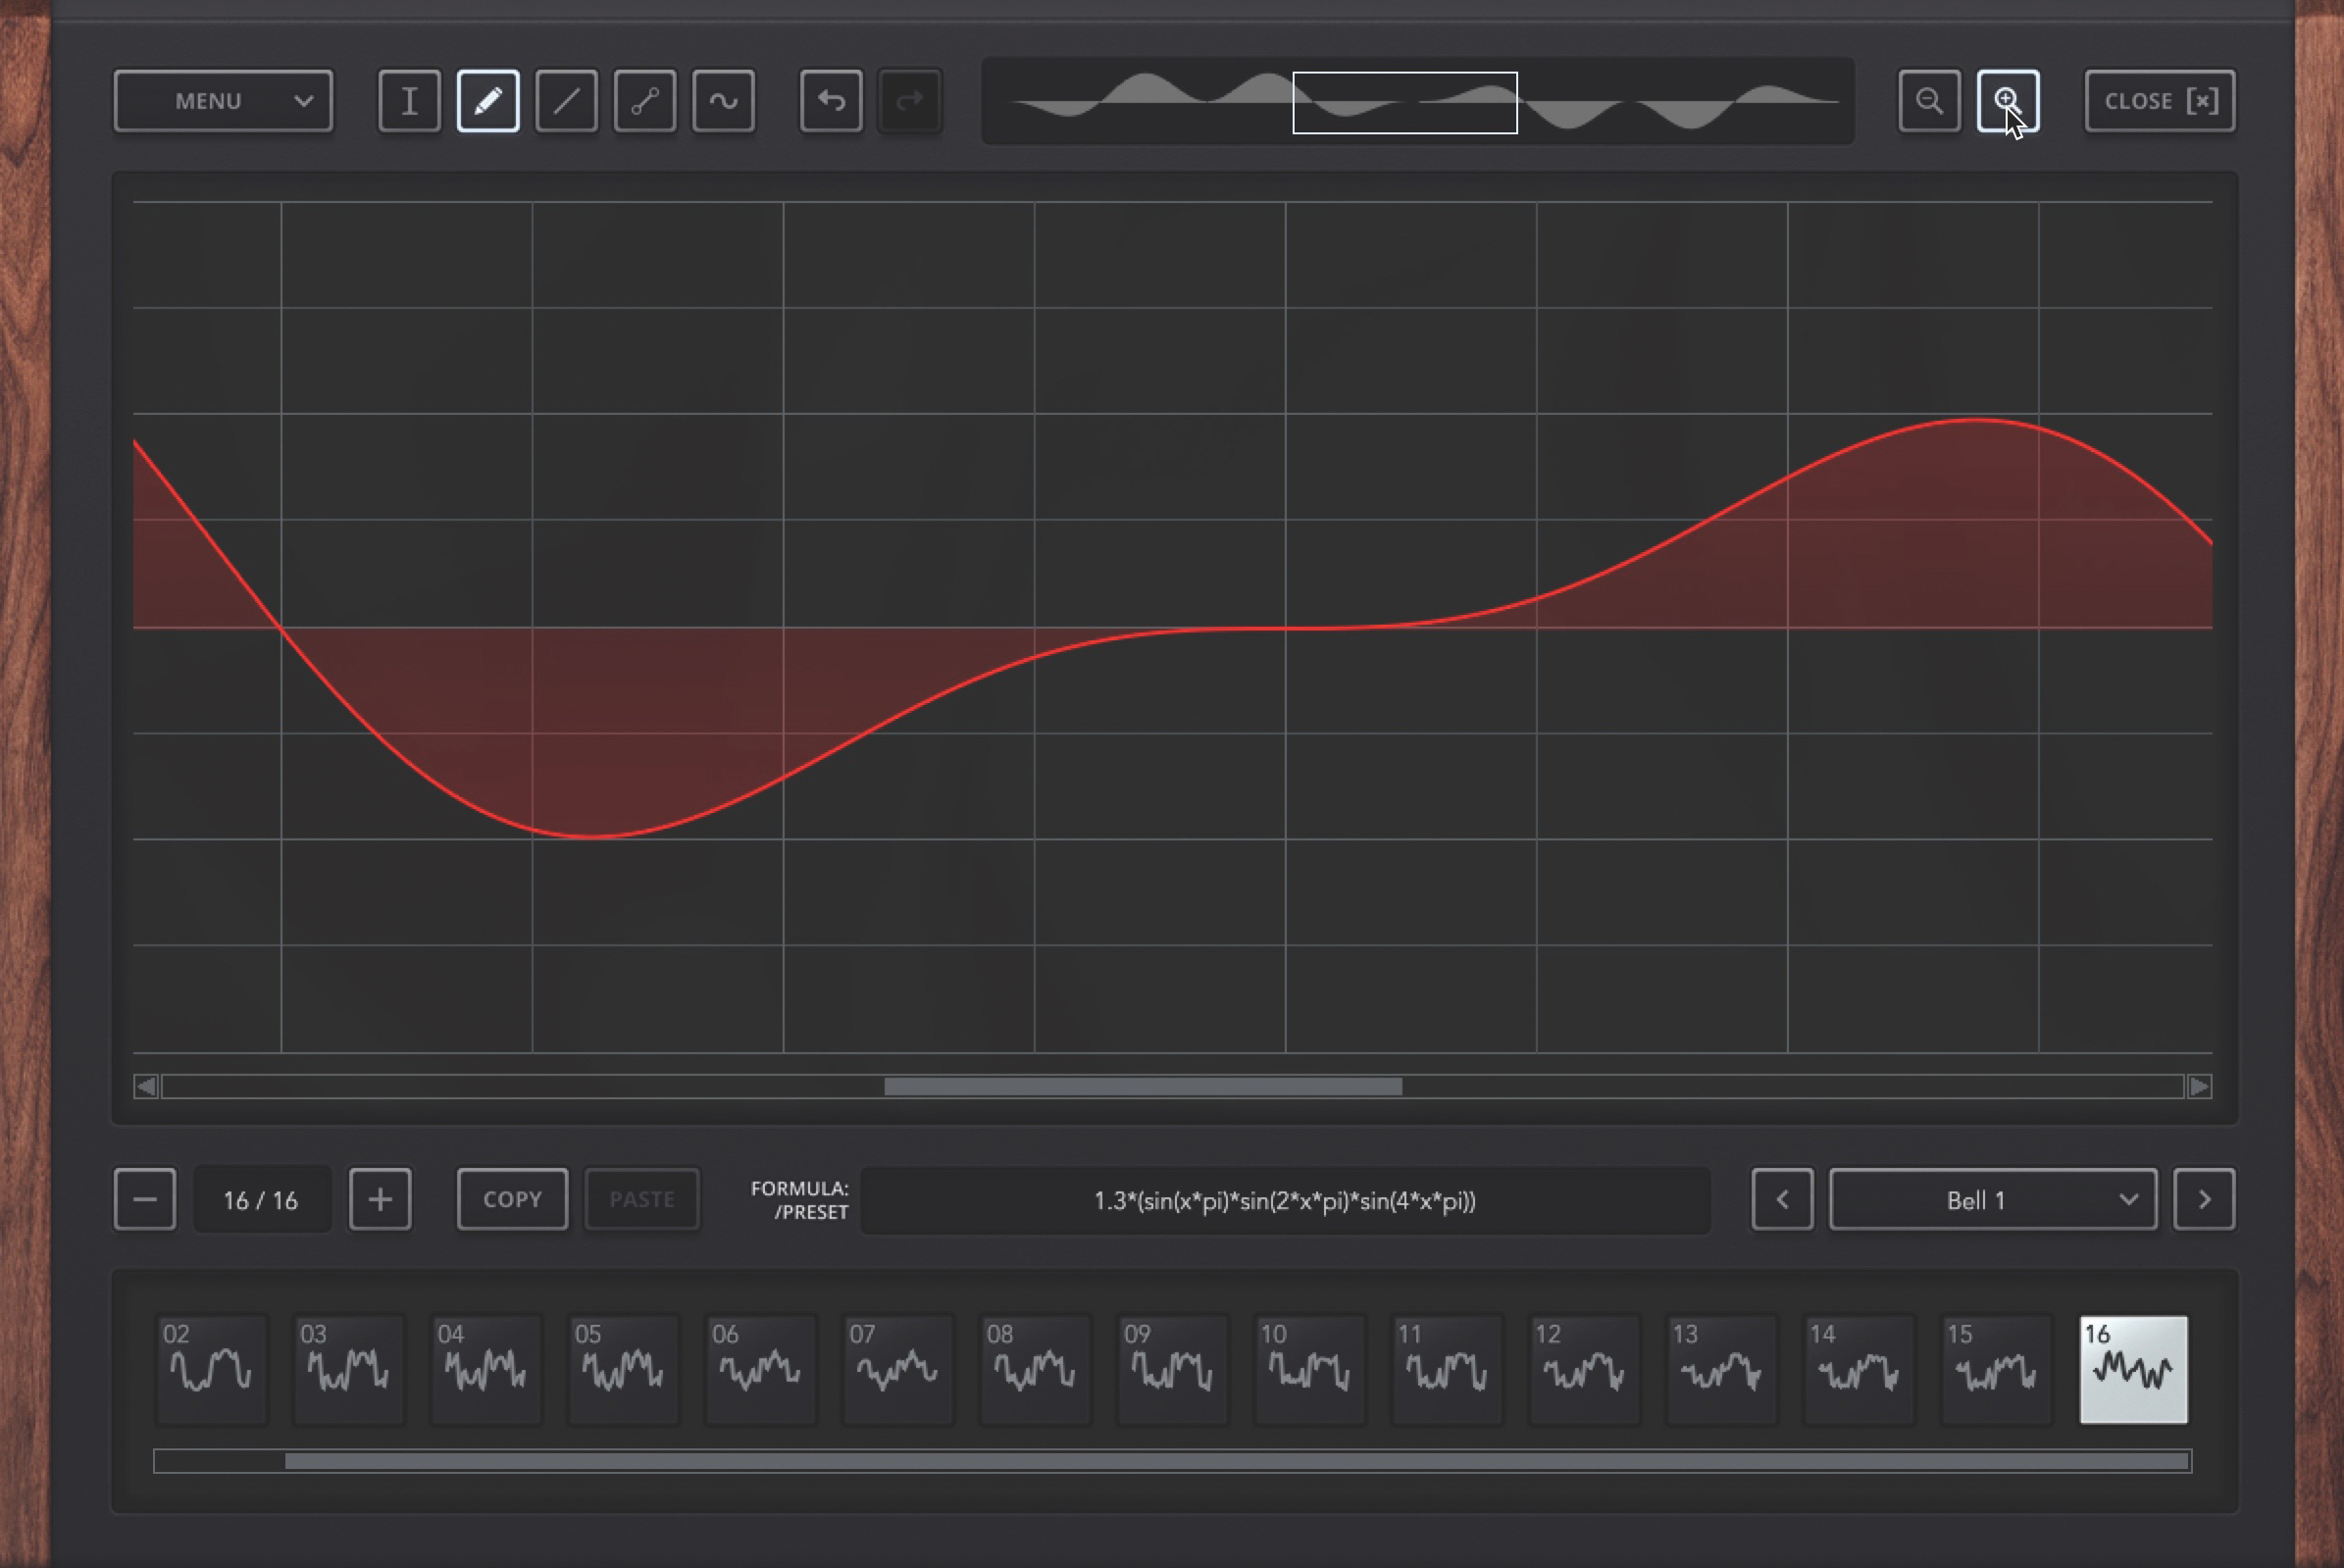
Step 3: Let’s start by editing one of the existing waveforms. Select waveform 16, then click the blank menu at the bottom right. This holds a variety of preset waveshapes generated using the Formula Editor – select Bell 1 to load that wave. Now we can edit it using the middle three of the five tools at the top left, zooming in and out if required.
Want all the hottest music and gear news, reviews, deals, features and more, direct to your inbox? Sign up here.
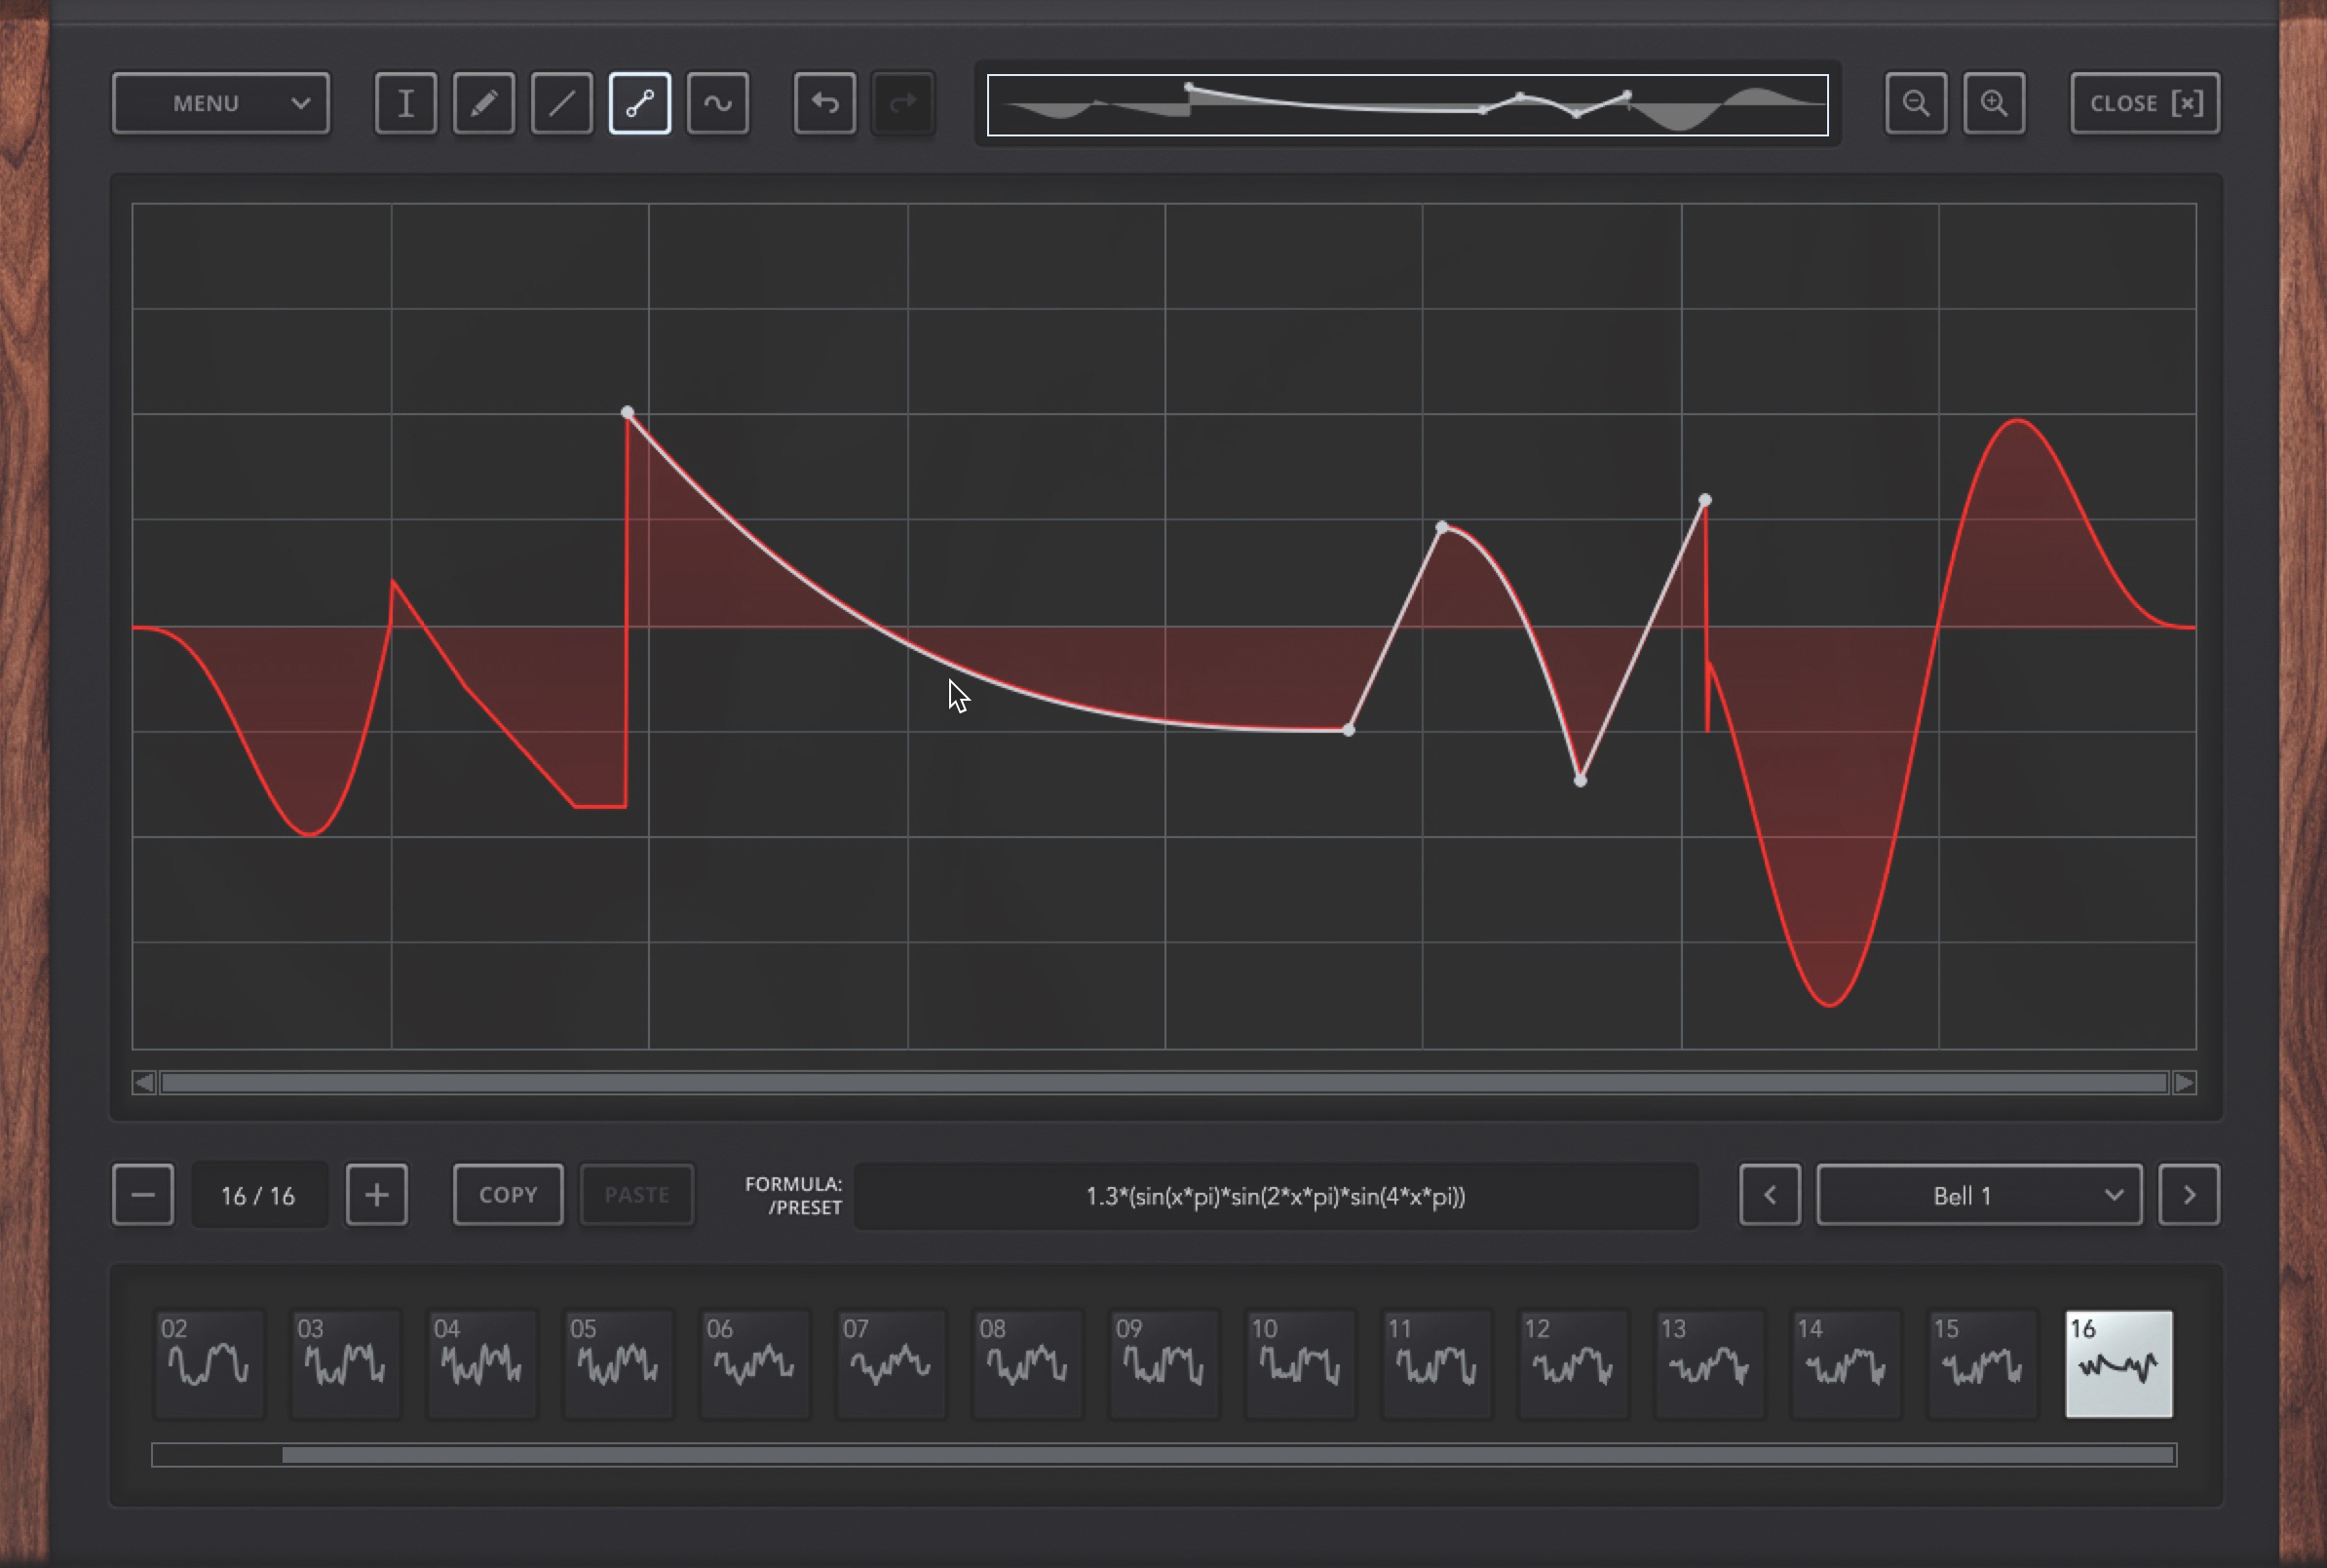
Step 4: The Pen tool is used to edit the waveshape directly – simply drag in the main display to shape the curve. The Line tool creates a straight line from the start to the end of each drag. And the Segment tool lets you create a series of contiguous lines by clicking nodes in and dragging them around, then turn them into curves by dragging on them.
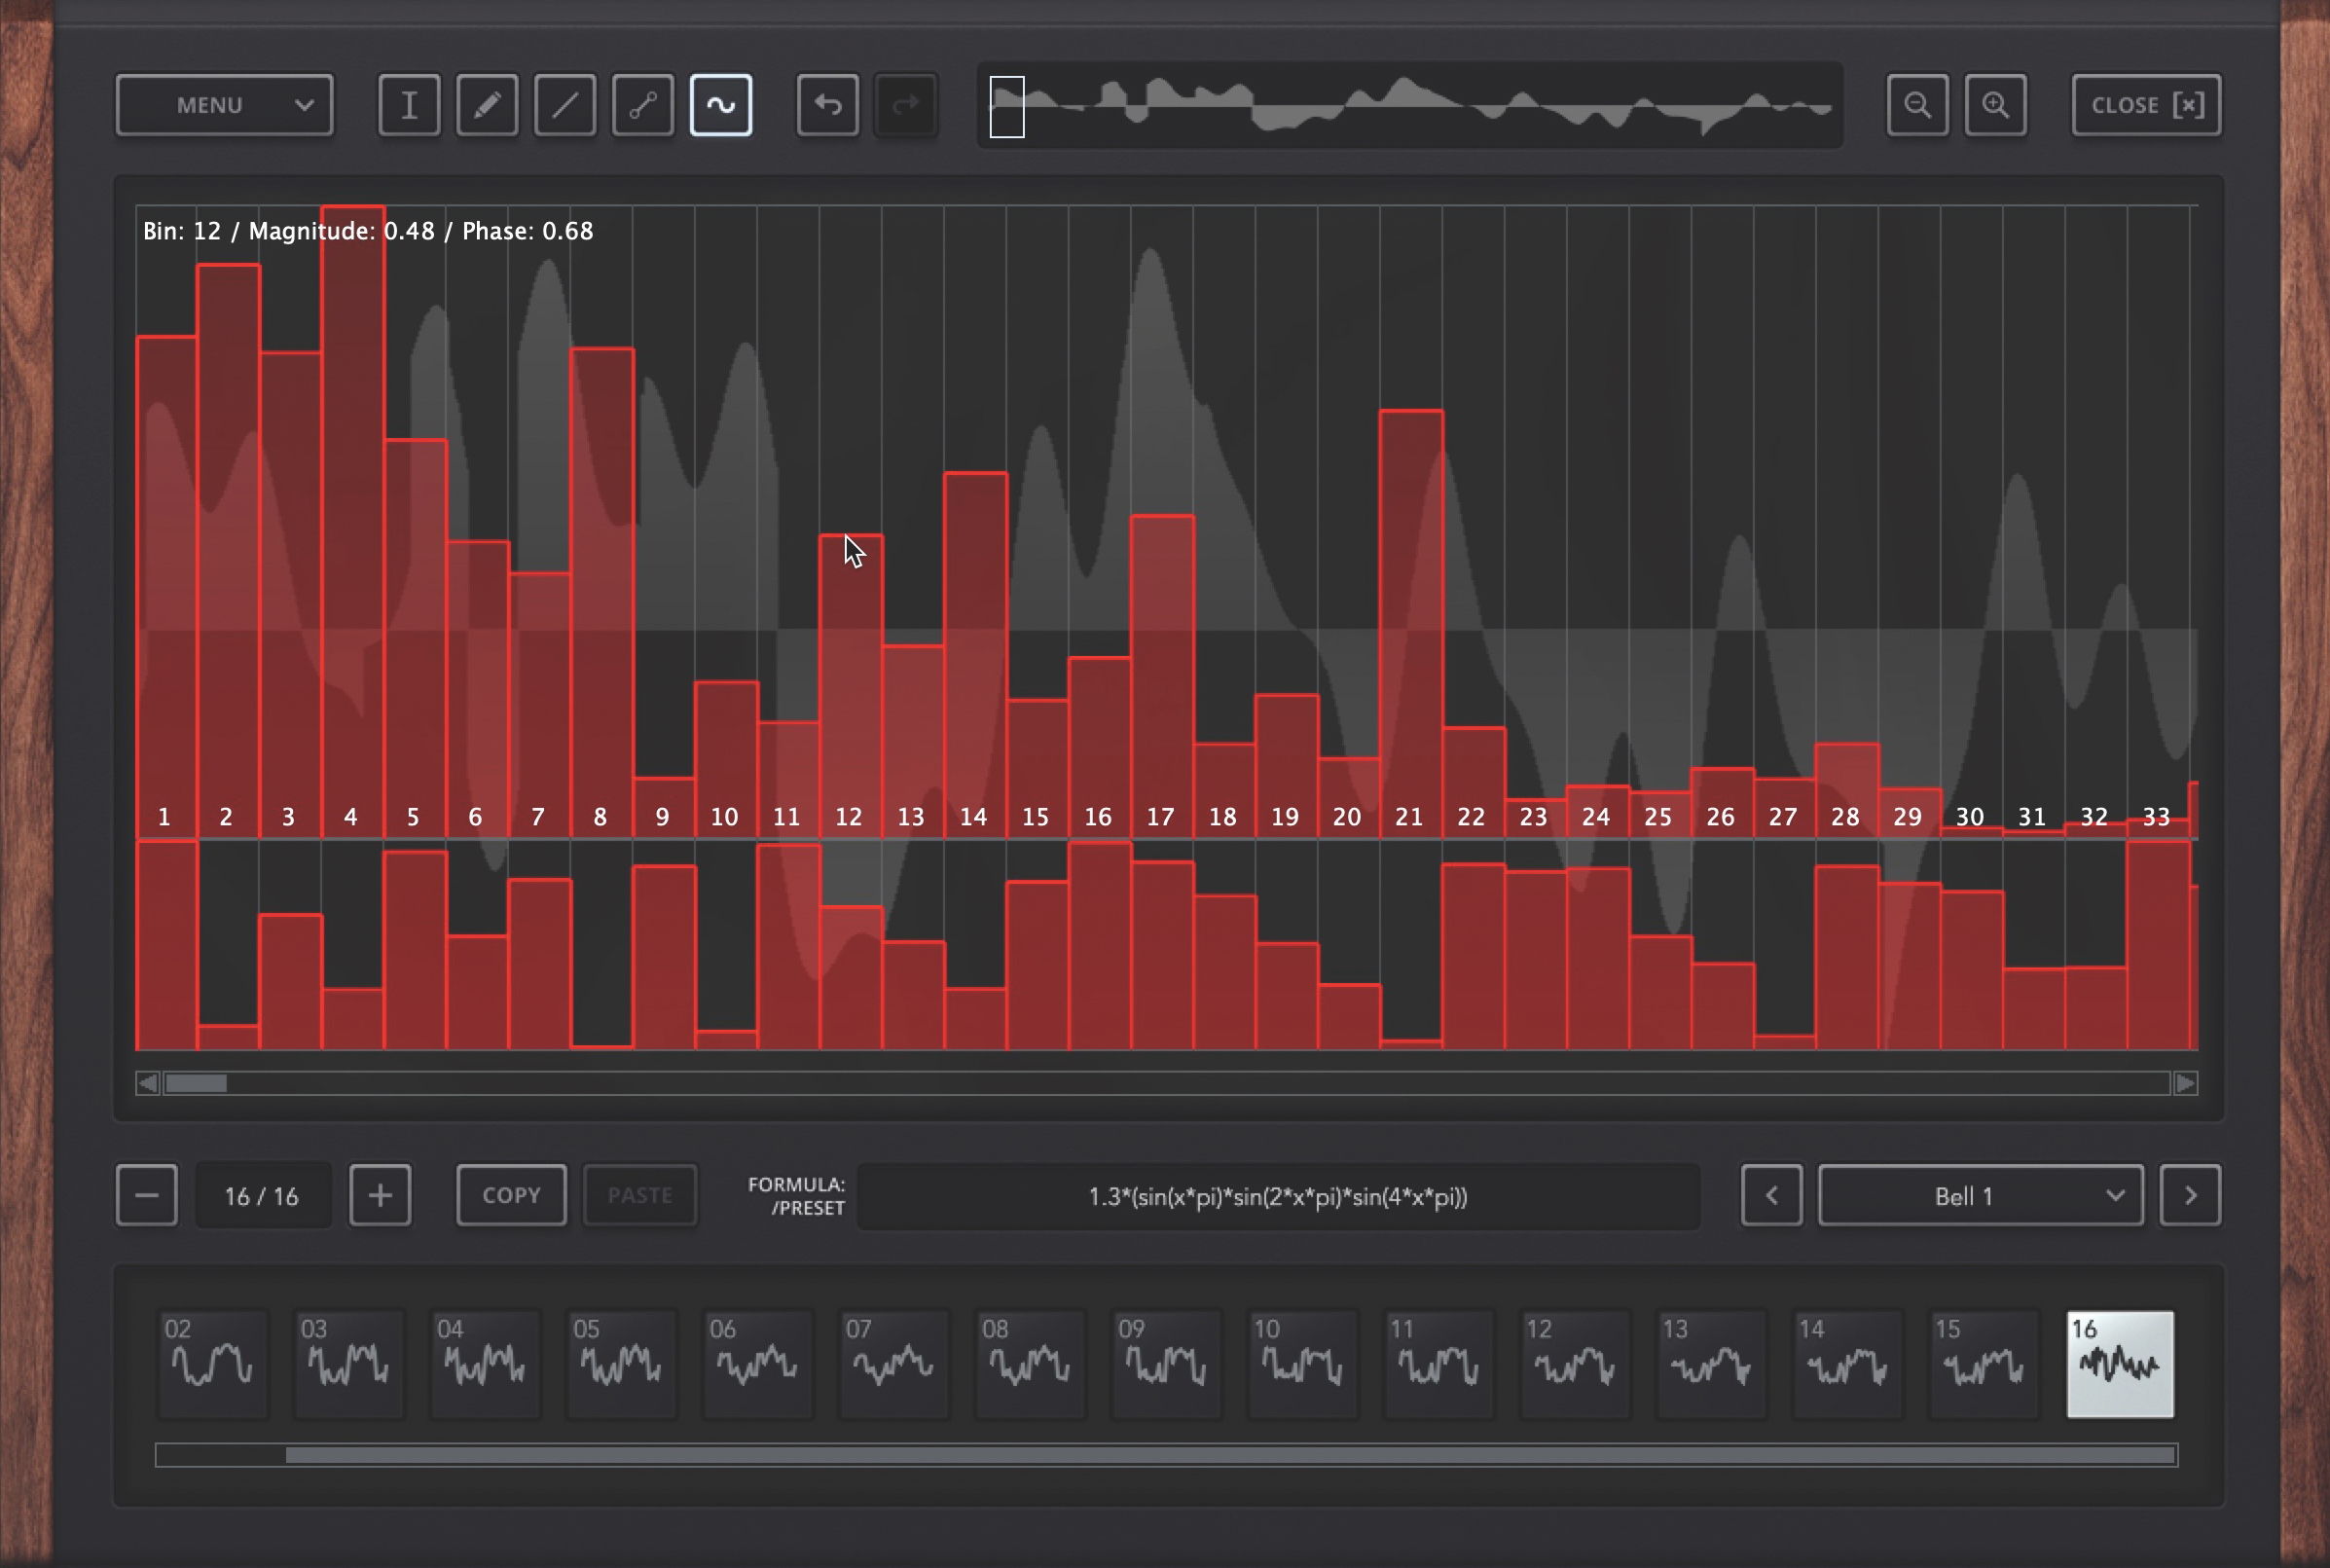
Step 5: Clicking the right-most tool button opens the Additive Editor, where the individual partials making up the waveform can be tweaked – handy for making organ-type sounds. The top series of vertical bars control the amplitude of each partial, while the bottom bars adjust the phase. Select any other tool to exit the Additive Editor.
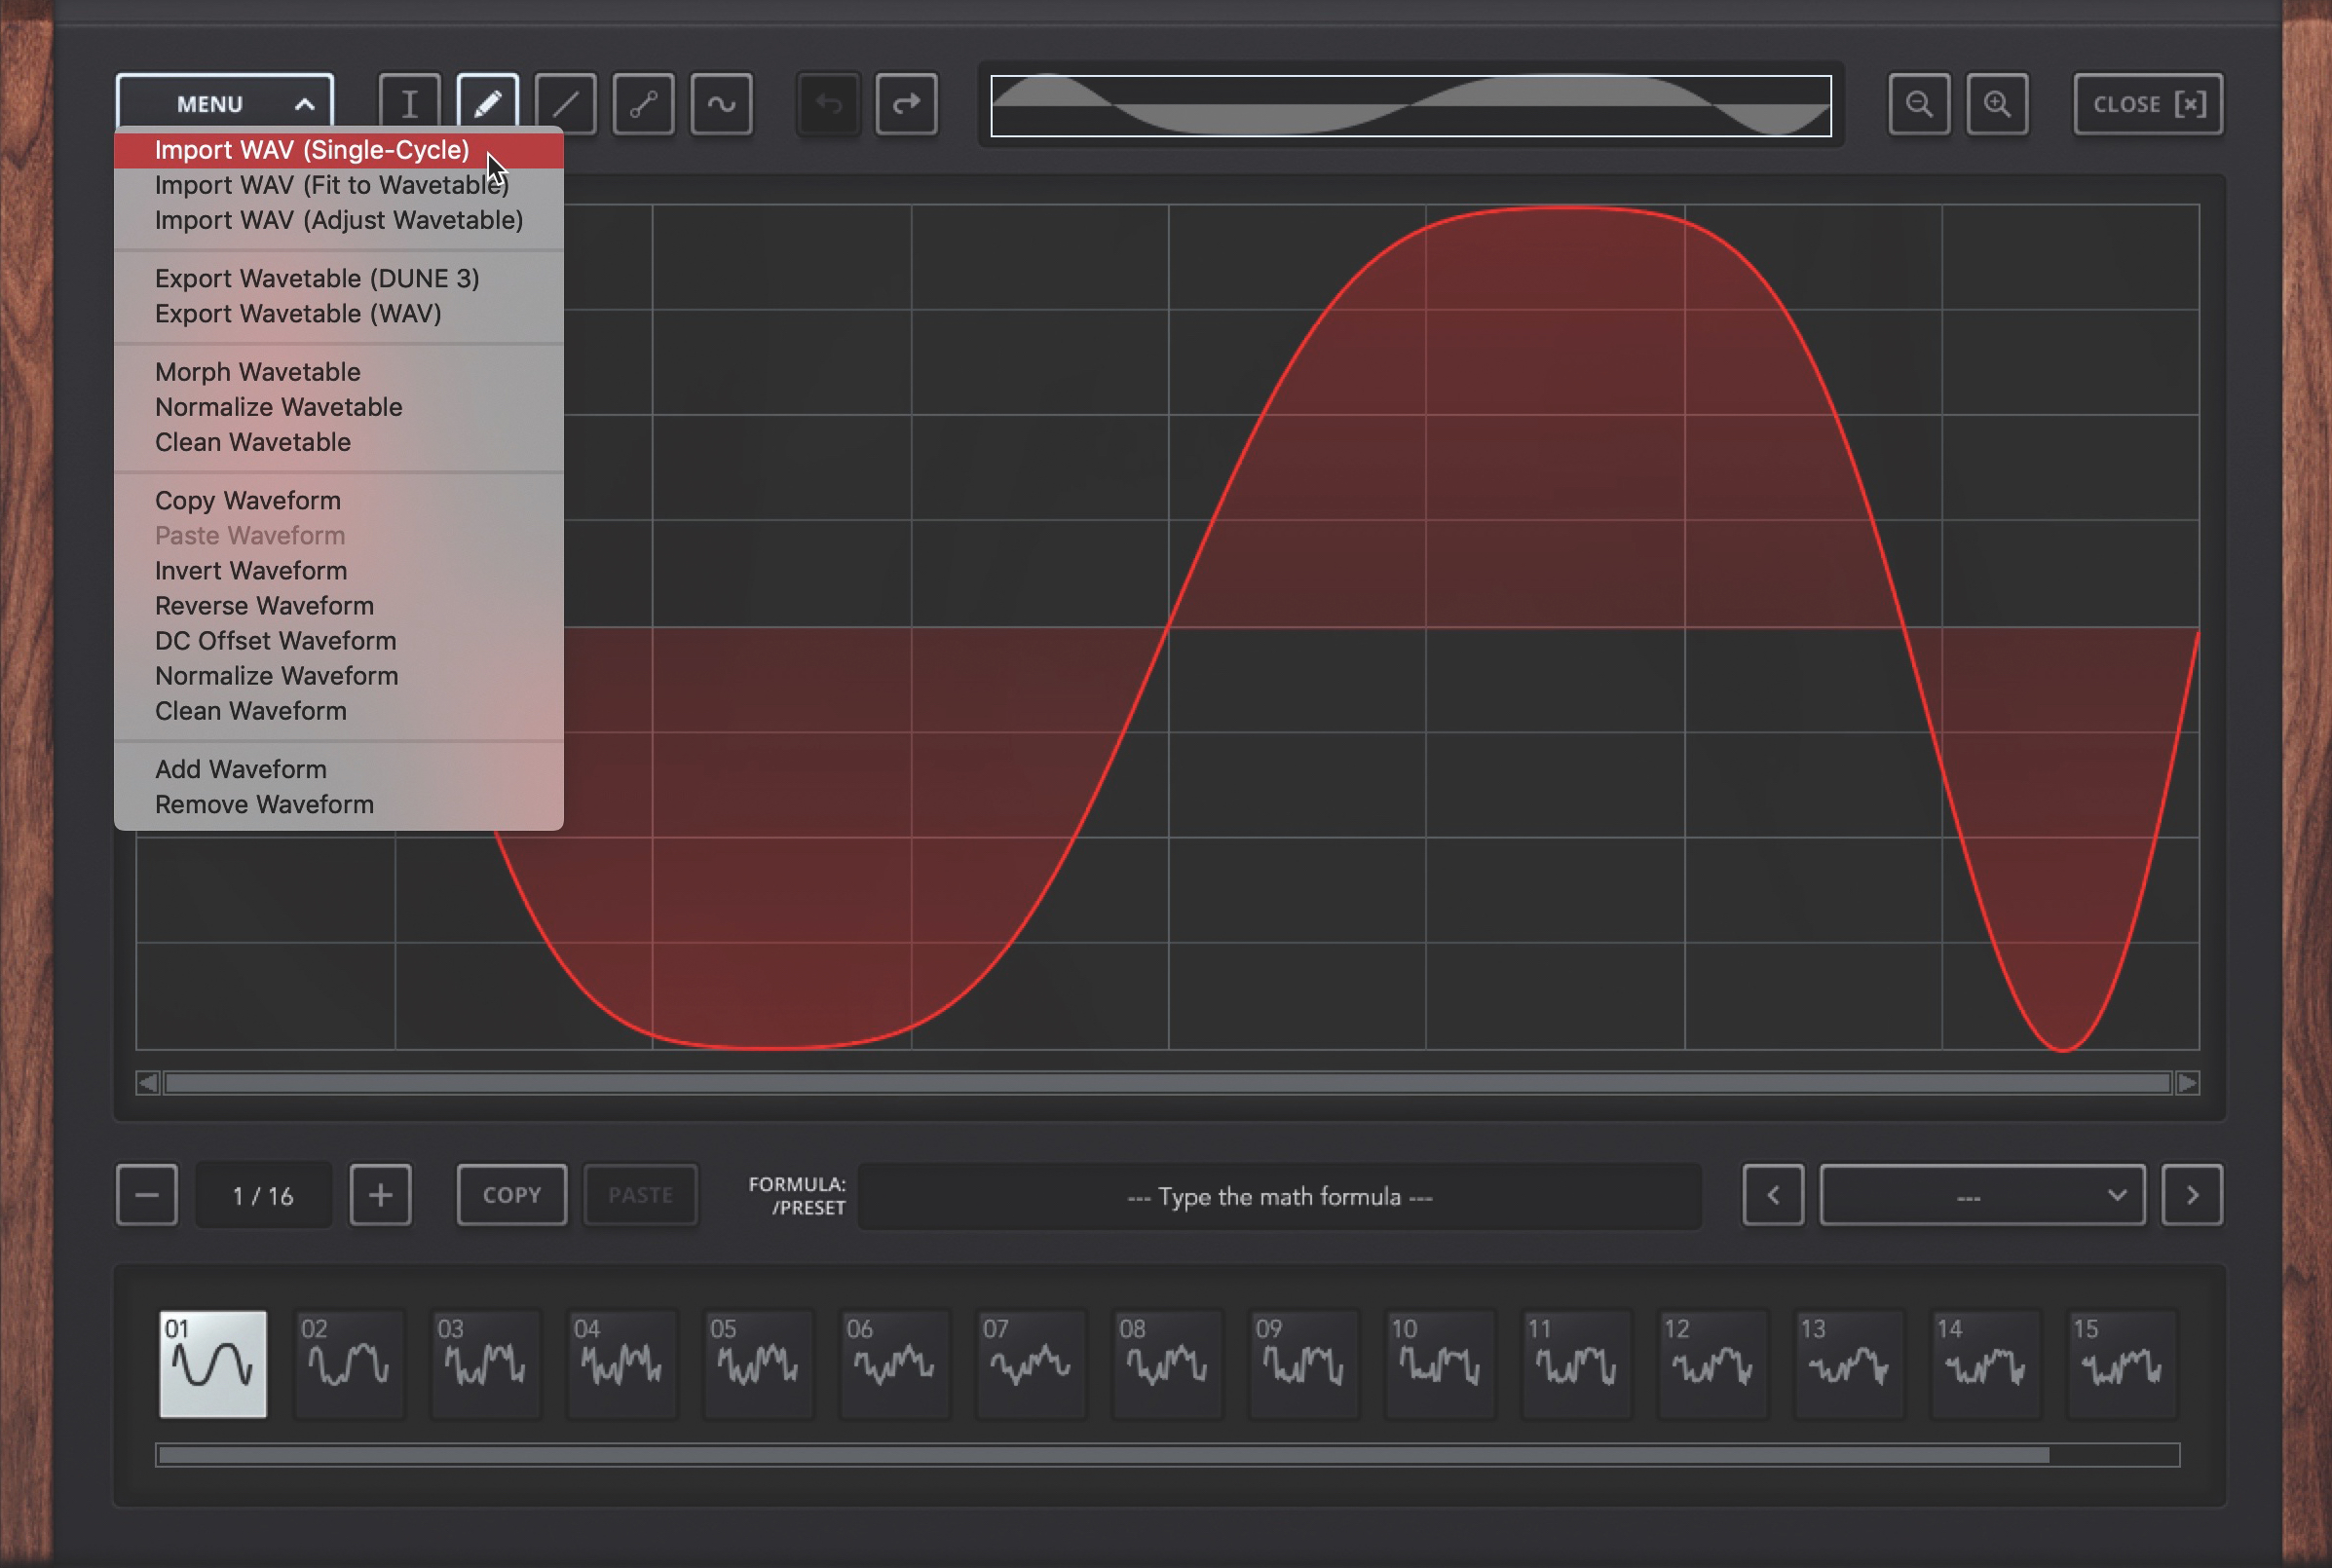
Step 6: The top left Menu houses a range of waveform-transforming operations including Invert, Reverse and Normalize. Here, you can also import WAV files, as single waveforms or complete wavetables – let’s try the former. Select Wavetable 1 in the bottom row, then Import WAV (Single-Cycle) from the Menu, and load in a short sample of your choice.
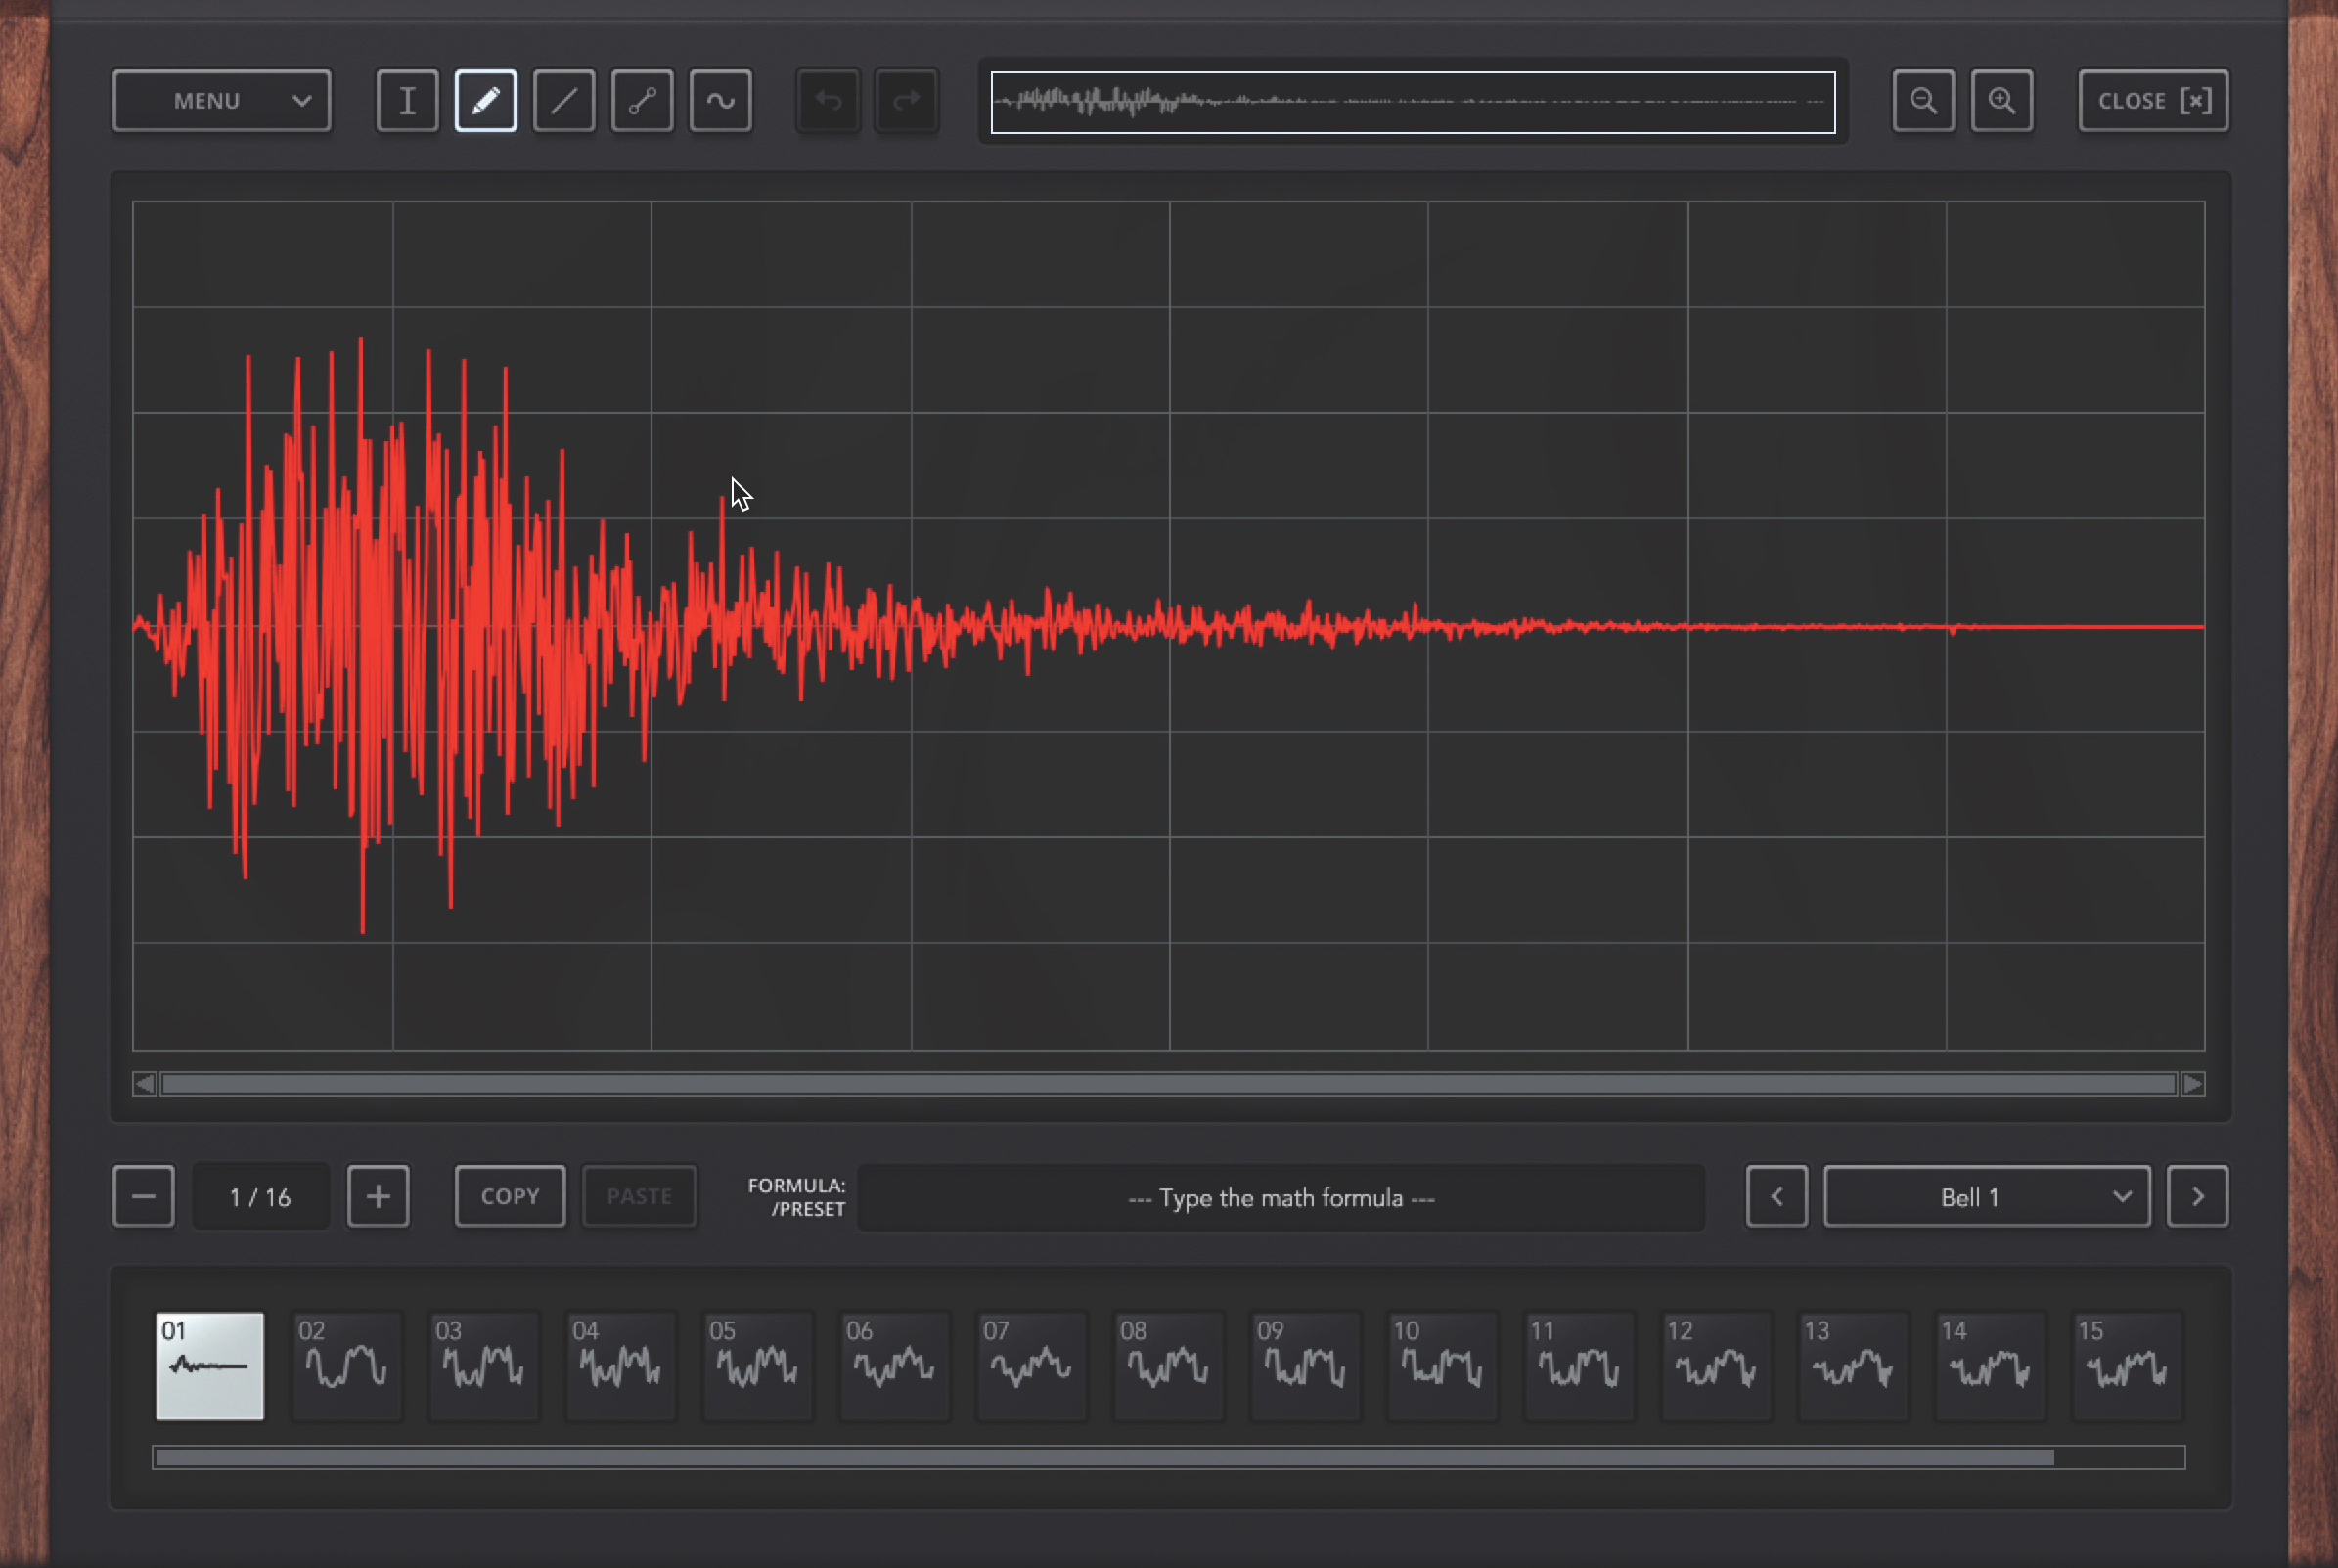
Step 7: The sample is squeezed down to a tiny 2048 samples in length and added to the wavetable. Now we have our edited waveform at the end of the ’table and our imported wave at the start. Wouldn’t it be great if we could automatically fill all the slots in between with a smooth transition from slot 1 to slot 16?
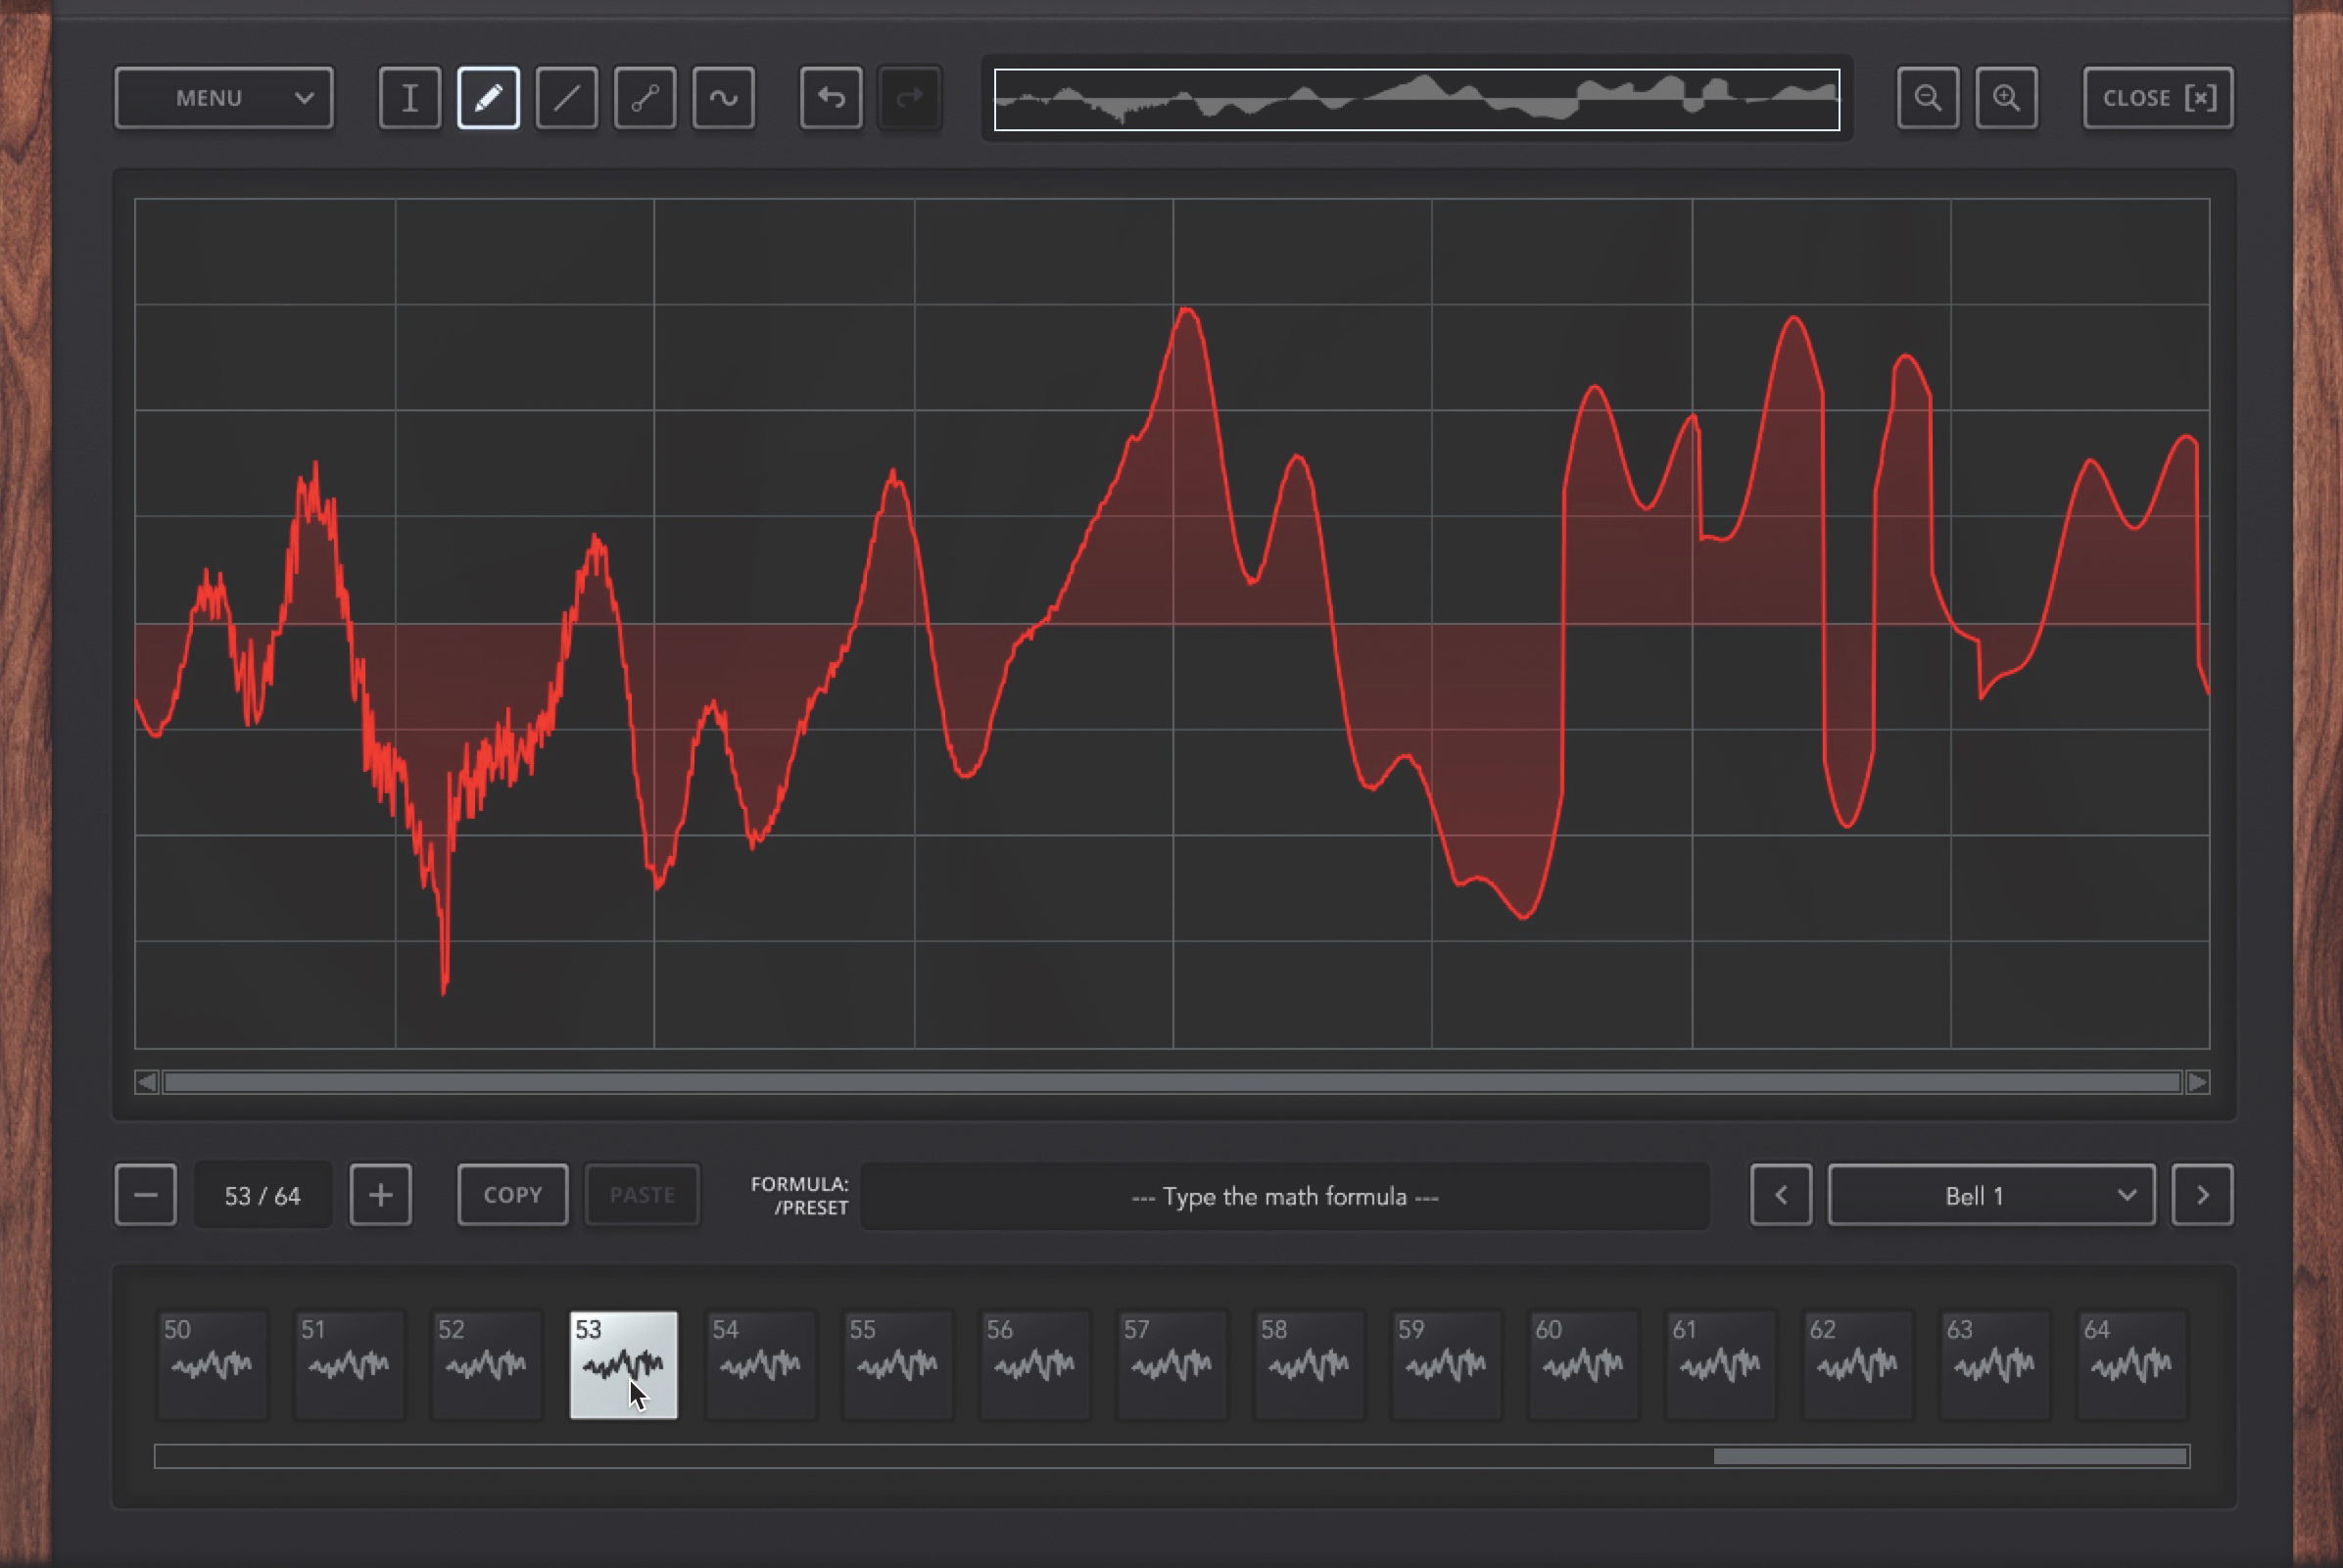
Step 8: Select Morph Wavetable from the menu to do exactly that. The result is a 16-slot wavetable that interpolates nicely from our imported WAV to the edited shape we made earlier. To make the transition even more detailed, increase the number of slots (up to a maximum of 256), drag the last waveform slot to the end of the row and Morph again.
Computer Music magazine is the world’s best selling publication dedicated solely to making great music with your Mac or PC computer. Each issue it brings its lucky readers the best in cutting-edge tutorials, need-to-know, expert software reviews and even all the tools you actually need to make great music today, courtesy of our legendary CM Plugin Suite.
