How to edit audio in Audacity
The world’s most popular audio editor is simple but effective - here’s a quick guide to the basics
From cratedigging sample hunters and mix-recording DJs to enthusiastic podcast creators, Audacity is used by thousands of hobbyists the world over. For many, it’s been the first port of call when dipping a toe into the murky waters of computer-based audio production, sound editing and more.
Audacity has a very simple remit: it’s an audio editor and recorder. Import or record audio into one of many possible tracks, then chop and splice the results. You can also perform basic editing tasks like muting and soloing.
Beyond the basics, there are also loads of ways to generate basic sounds and analyse your audio. What’s more, Audacity offers a huge suite of built-in effects, including the Noise Reduction algorithms that are the reason for many a recommendation of this software package.
Audacity is free and open-source, with source code and binaries available for download from FossHub via audacityteam.org. The program also hasn’t changed much; functionally - and quite noticeably, cosmetically - it’s remained very much the same for the last decade or more. But it’s certainly not broke, so we see no huge need to fix it.
Let's find out how to edit audio in Audacity.
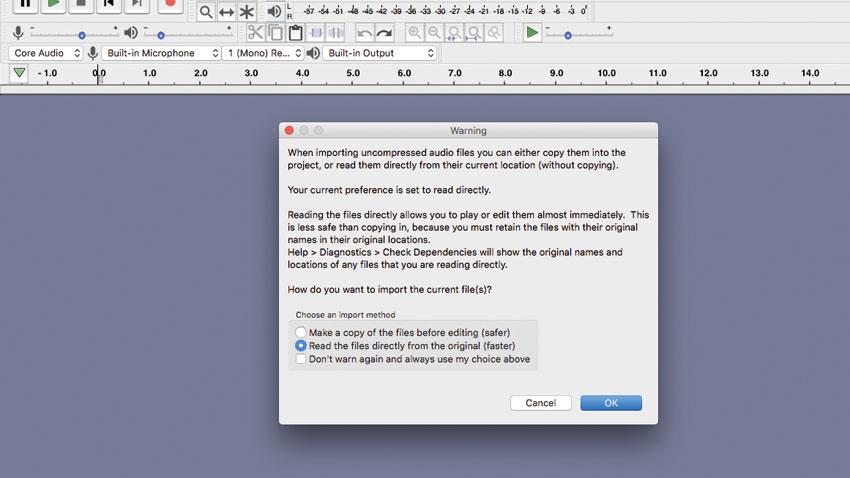
Step 1: Let’s get up and running with Audacity. Load the program and drag GatedVerb.wav (click to download) into the big, blank grey area. Audacity prompts us to decide whether to copy the file into the project or to just read it from its current location. Choose the latter for now.
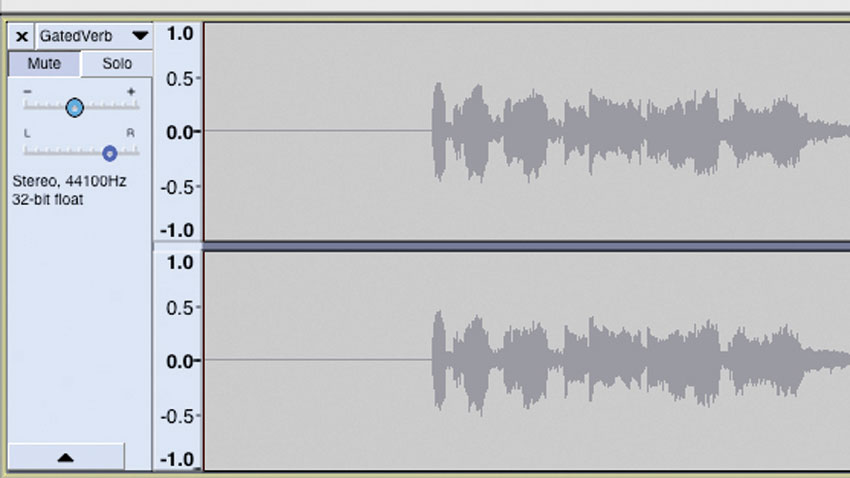
Step 2: Audacity can also load AIFF files and MP3s. The file is loaded in the timeline as a stereo track. As in any DAW or editor, on the left are channel settings such as Mute, Solo, gain (– +) and panning (L, R). Select a section of audio by clicking and dragging on the waveform.
Want all the hottest music and gear news, reviews, deals, features and more, direct to your inbox? Sign up here.
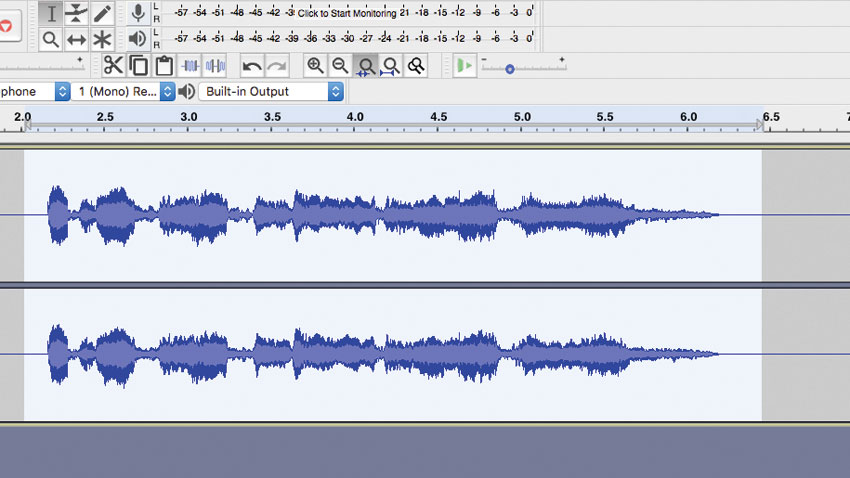
Step 3: Zoom in and out using the magnifying glass buttons (or Ctrl/Cmd+1 to zoom in and Ctrl/Cmd+3 to zoom out). There are also options for zooming to the project width (Ctrl/Cmd+F) or the current selection (Ctrl/Cmd+E), and you can scroll and pinch your trackpad to zoom and navigate (or Ctrl/Cmd+mousewheel).
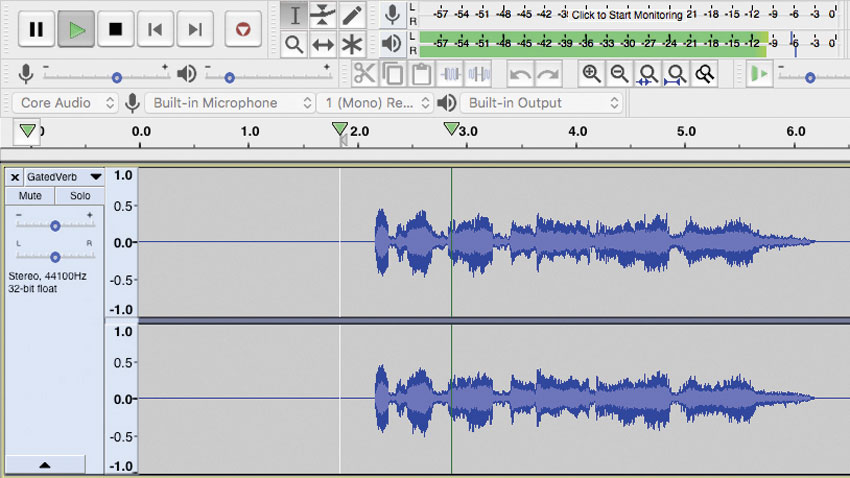
Step 4: Hit the Spacebar to start playback. Before doing so, you can click within the waveform display to set the playhead to a different location, or click the timeline to start playback at the exact point of your choosing.
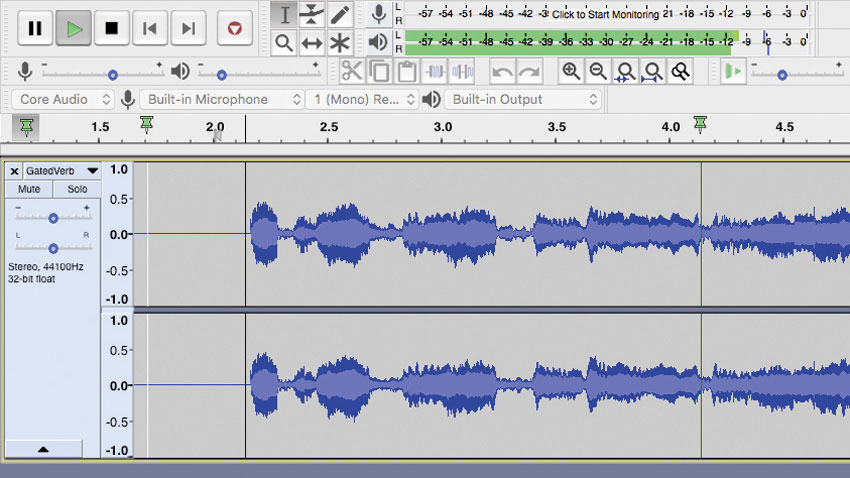
Step 5: There’s output metering available for Audacity’s output at the top of the screen. Make sure it’s peaking below 0 by tweaking the channel’s level. At the top-left of the timeline, click to change the playhead to a pin - the waveform will now scroll during playback, while the playhead stays static.
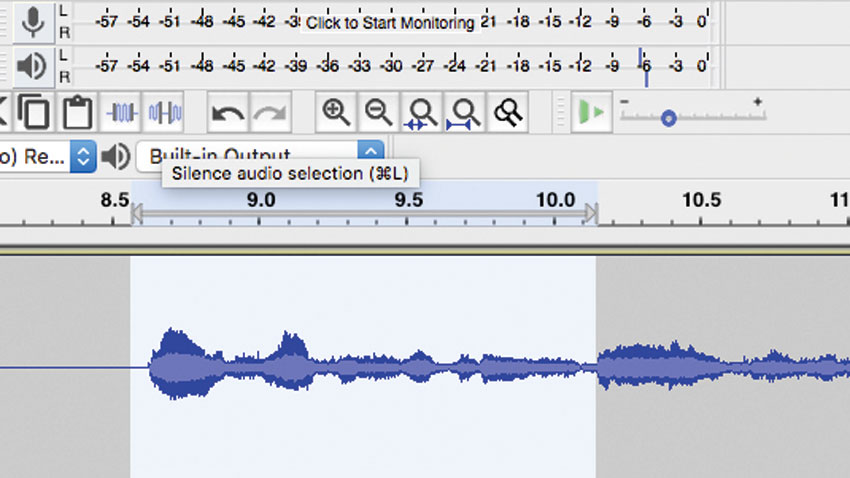
Step 6: Select a region of the waveform, then hit Delete to remove it. But wait - this will bring whatever’s on the right of the selected region earlier in time. To keep everything after the selection in the same place, you need to click the Silence Audio Selection button or use the Ctrl/Cmd+L key command.
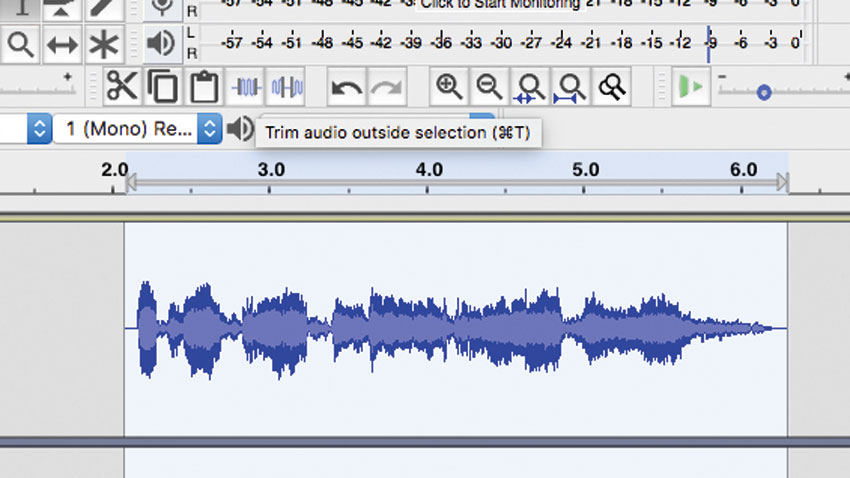
Step 7: Conversely, the button to the left of that (the blue squiggle between two black bars) trims the waveform, removing everything on either side of the selected region, which is left where it is. That’s Trim Audio Outside Selection, or Ctrl/Cmd+T.
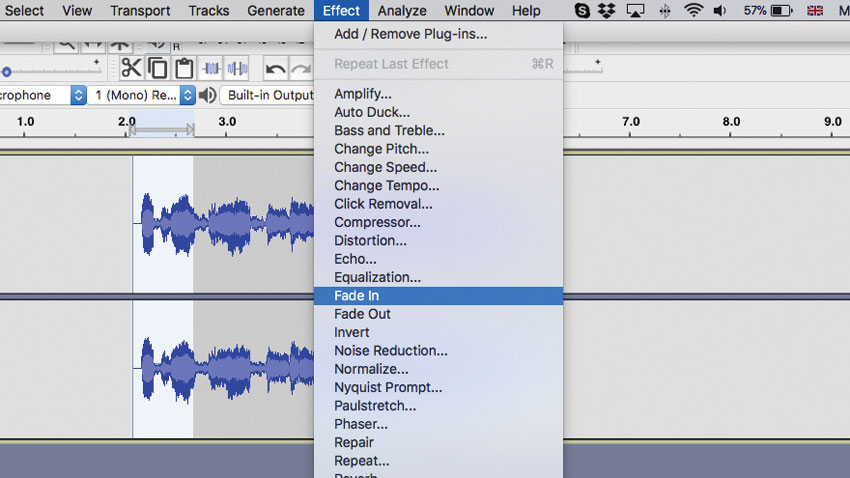
Step 8: There’s more than one way to apply a fade in Audacity. One way is to select the audio region you want to fade (you can ‘spill’ your selection earlier or later if you want to, don’t worry), then head to the Effect menu and choose Fade In. This non-destructive process doesn’t affect the original WAV file on your hard drive.
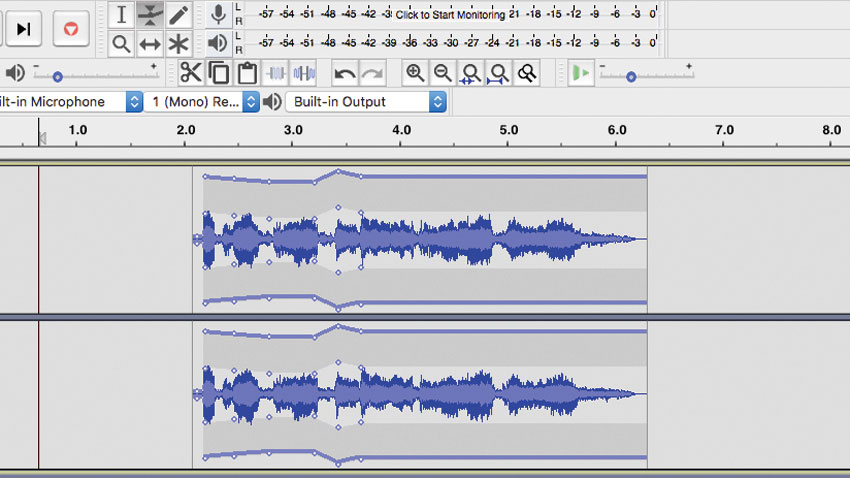
Step 9: You can also apply fades using the Envelope Tool. Click the top button that looks like two triangles with a horizontal line running between them, then click a point in the waveform and drag to raise or lower the volume at that point. Now click at another time in the waveform, and the first and second points will be connected as a ramp.
Computer Music magazine is the world’s best selling publication dedicated solely to making great music with your Mac or PC computer. Each issue it brings its lucky readers the best in cutting-edge tutorials, need-to-know, expert software reviews and even all the tools you actually need to make great music today, courtesy of our legendary CM Plugin Suite.
