As reverb is ‘triggered’ by the sounds we choose to send its way, we often fall into the habit of accepting that its dynamic contours are controlled by those sounds and instruments in a way that is beyond further refinement. However, of course, this isn’t true; there are a number of ways in which reverb can be ‘handled’ to give us greater control over it, many of which can hugely enhance productions where we’re playing close attention to the notion of ‘space’.
The following ideas are particularly pertinent for treating vocals, although they can also, of course, apply to other sounds just as easily.
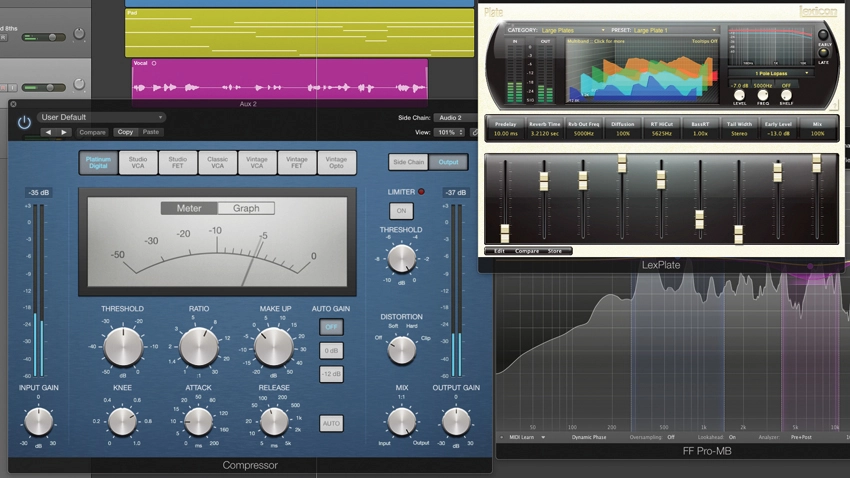
The first option is to place further effects after a reverb for further enhancement. If you want dynamic control over reverb - so that its loudest and softest moments aren’t as broad as they are in their untreated form - place a compressor afterwards to rein in unwanted peaks. This ‘disconnect’ between the source sound feeding the vocal and the reverb itself can work just as well at quieter moments as louder ones; more extreme reverb settings with low threshold and high ratio allied to some make-up gain will make the reverb seem louder during quiet vocal passages and quieter during loud ones, with this ‘inverse treatment’ often producing interesting results.
Another approach is to set up a reverb with a long decay time, then use the source vocal track as a sidechain input signal to the compressor placed after it. This will duck the compressor (and therefore the vocal reverb level) while the singer is performing, before letting it rise to full volume in the gaps between phrases, making the vocal almost pad-like in its warmth if the decay time is generous.
Pay it forward
Sending vocal reverb on to further effects can work well too; a reverb triggering a wide stereo delay creates washy echoes which, rather beautifully, lack the definition of more percussive source sounds. Filter treatments, meanwhile, are effective at reducing or varying the tonal impact of the reverb, either blunting them by rolling off the top-end (with a low-pass filter), or making airier sounds via a high-pass filter treatment. It’s also worth experimenting with setting up an LFO to modulate the filter’s cutoff point, so that reverbs ‘wash in and out’ of the mix as the filter rises and falls.
It’s often the case that vocal reverb can produce problems with sibilance, with ‘ess’ sounds triggering aggressive high-frequency blasts that sound like white noise. Just as de-essing is an effective technique for correcting sibilance on dry vocals, so it can work after reverb plug-ins, too; try a multiband compressor.
Treating different frequency groups to varying amounts of reverb can be a great way to craft space in its own right, as well as dealing with more surgical issues, such as over-sibilant reverb.
Remember, these tricks can work on any sound, not just vocals.
Get hold of the April edition of Future Music to read their full Ambience & Atmosphere cover feature.
