After our tutorial on programming a gnarly acid house lead with the SH-101 emulation, we're now covering how to create a classic sustaining bass patch that combines power and movement for a number of production scenarios: from commercial and pop, to cinematic and soundtrack…

Step 1: Just like our previous patch we need to begin from a point of initialisation, and the simplest method for this is to select an unused patch location from Roland’s patch browser. Once selected, we will have a single square wave activated.

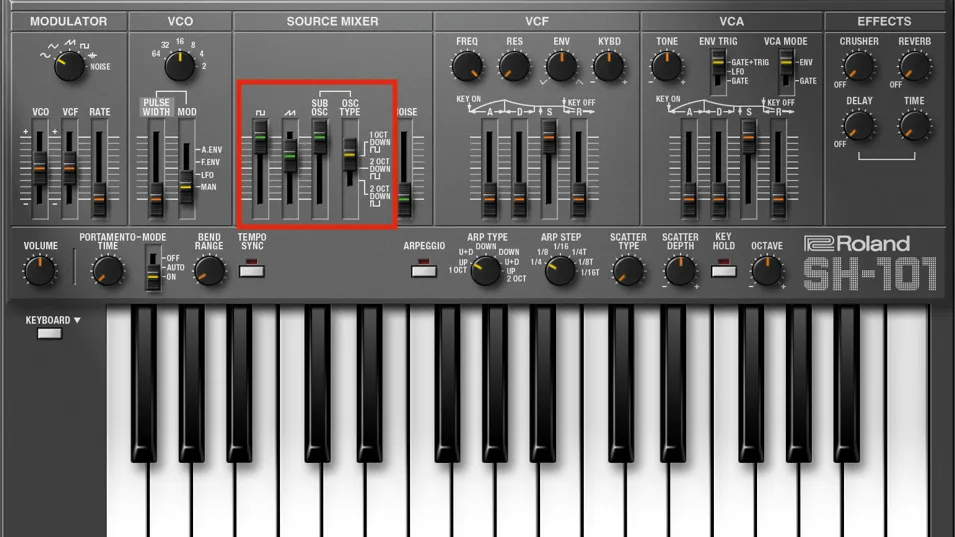
Step 2: We are going to employ all the 101’s tonal sources. In the Source Mixer we blend the square wave and saw together. Notice that the square and sub are very dominant, increased to their max. Ensure that the sub osc mode is set to 1 octave down. The saw is set to around 70%.

Step 3: We’re going to need some extra timbral colour for this patch, so staying within the Source Mixer, increase the noise Level to around 30%. This will provide a helpful background noise to the movement of the PWM in the bass sound itself.

Step 4: As we intend this sound to be exploited for bass duties, we’ll need to place it at a lower pitch. To help in this regard, drop the VCO register pot to 32’ which will allow for plenty of play at the bottom of the keyboard, without running out of keys or requiring transposition.

Step 5: Below the VCO register pot are controls for Pulse Width Modulation (PWM). Set the Pulse Width fader to around the 80% mark, while the Mod switch to the right of the fader, should be set to LFO. This means that the speed of the LFO will modulate the PWM.

Step 6: The LFO rate is slow so adjust the Rate fader. This is informed by the track you want to compose; slow for moody and cinematic, and more commercial styles will likely be quick. The LFO can be sync’d to your DAW, for cool tempo based PWM effects, using the Tempo Sync button.

Step 7: Now that we have some movement in our patch, we want to change the tone somewhat, so with a quick trip to the VCF Filter section, we can add a small degree of resonance, while losing some of the overtly bright top end. If you audition our sound now, it’s clearly starting to gain a slightly enigmatic quality.

Step 8: Let’s try creating a little bit of ‘waw’ at the beginning of each note. First, move the VCF Attack phase to the 30-40% mark. We now have to indicate how much of that signal will modulate the filter cutoff via the Env pot. Try setting this to 2 o’clock and you should immediately hear the sound we want.

Step 9: Now for compression, which we cannot do from within the plugin. Try adding a FET based emulation, which will be effective in lower frequencies. Also note that we have left the VCA envelope settings untouched in order to achieve a clipped and harsh effect. This can be altered for a softer performance.
