Want all the hottest music and gear news, reviews, deals, features and more, direct to your inbox? Sign up here.
You are now subscribed
Your newsletter sign-up was successful
Let’s face it, synthesisers were made for pad sounds (except for the ones that were also made for bass, lead or any other sound) – the march of the synth pad is pretty undeniable, and relatively unstoppable.
As early synthesisers developed, it didn’t take very long for programmers to notice that you could create pretty cool effects by detuning a second oscillator, to play in harmony against the first oscillator.
There are many examples of this in music which exploit early synth technology, but in 1991, a track from the first album by Seal, seemed to bring this concept into a digital age.
We say digital, because the wholly identifiable sound used on the track Violet, which brings Seal’s first album to a close, emanates from the patch called Soundtrack, found on the Roland D-50. Apart from the slightly glistening nature of the sound, which was de rigueur in the late ’80s and early ’90s, it’s the playing of a single note that produced an open chord, known as a perfect fifth.
Anyone who explored this sound discovered that the mere input of a triad resulted in the instant gratification of a much larger chord, known in musical circles as a major ninth. It’s a trick that’s firmly in play with contemporary artists, so here we build our own version of this patch, exploiting the perfect fifth for perfect results.
In this tutorial, we're going to be using ZebraCM, a free and limited version of u-he's excellent Zebra synth. ZebraCM is part of the Computer Music Plugin Suite, a collection of free plugins that we give away with each issue of Computer Music Magazine. If you don't have ZebraCM, you'll be able to build a similar sound using the same method with many other conventional synth plugins.
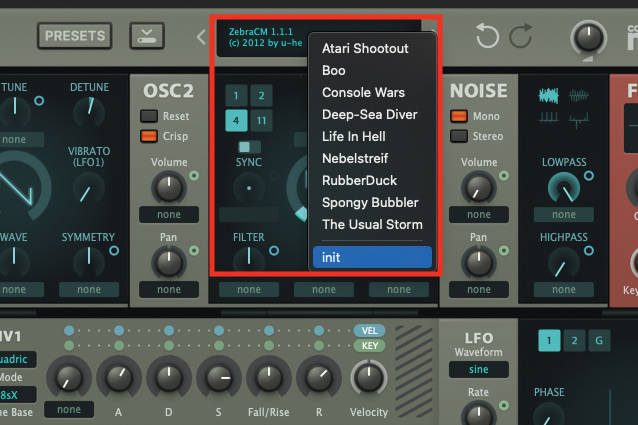
We’ll start by initialising a patch on the ZebraCM. Open up your DAW and load up the ZebraCM plugin. Once the plugin window is open, move to the central display at the top of the window, click to reveal the drop-down menu, and select ‘init’ from the bottom. This will initialise the patch.
Want all the hottest music and gear news, reviews, deals, features and more, direct to your inbox? Sign up here.
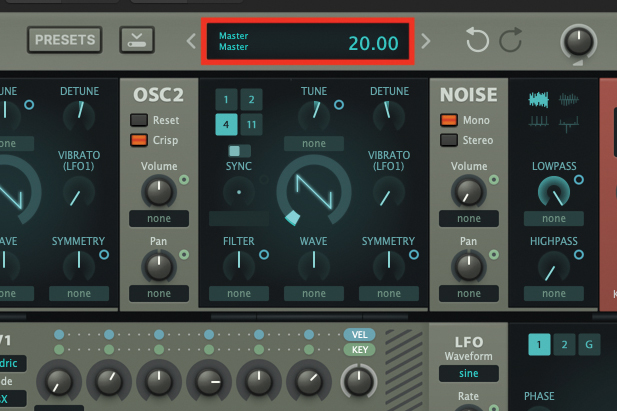
As our patch is going to be relatively loud, it’s a good idea to reduce the master volume to a level of 20. Just as a reminder, every time you tweak a pot or setting on the plugin, you will see an accurate value/numeric in the upper display. We’ll be referring to these throughout the tutorial.

We start creating our patch with Osc1; leave the Volume set to 100, and the waveform selected as the default Sawtooth. We will, however, change the number of aliased waveforms being produced by the oscillator, by clicking on the number 4, displayed in turquoise, in the upper part of the Osc1 display.
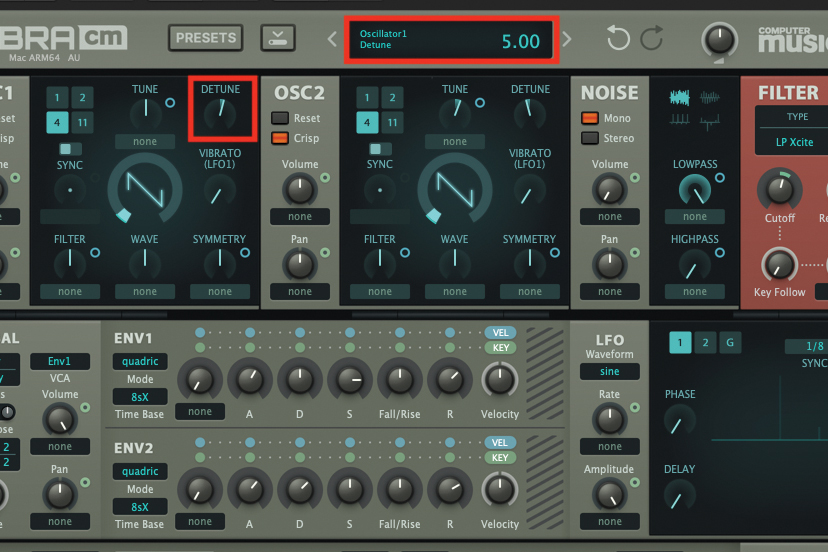
At the moment, Osc1 will be producing a phasing effect, as the four wave forms are piled on top of each other, in the same phase. We thicken the texture considerably by adjusting the Detune control, which we are going to set to a value of 5.
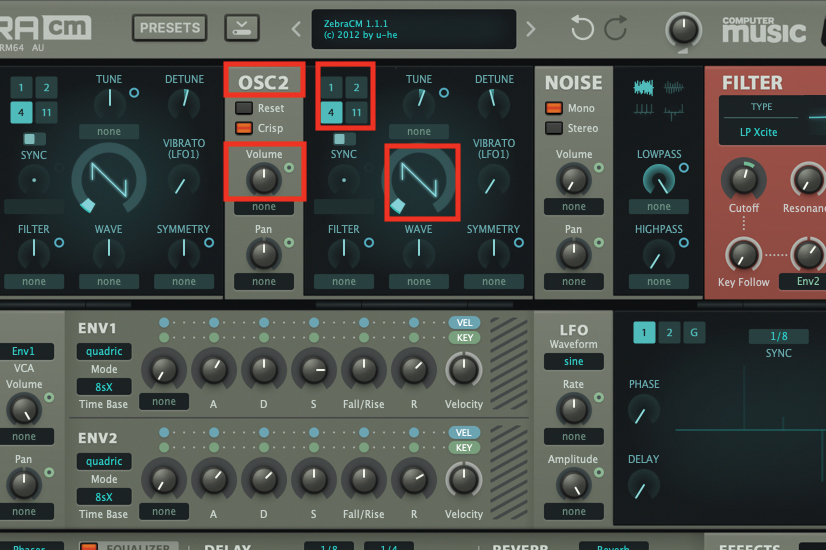
Now we move over to Osc2; we’ll use the exact same settings here, so increase the Volume pot to a value of 100, leaving the default waveform set to a Sawtooth. Once again, click on the number 4, to increase the number of aliased waveforms being produced.
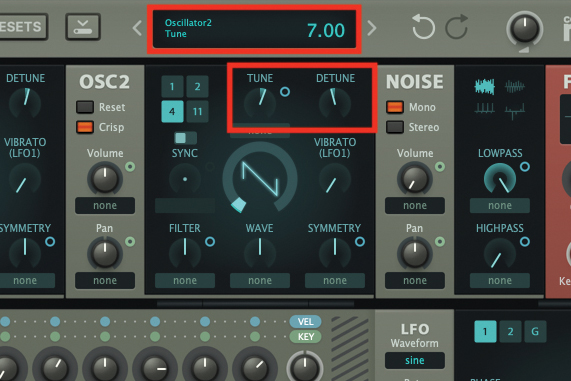
To counteract the detuning of Osc1, adjust the Detuning pot of Osc2 to a value of -5. We also want to change the pitch of this oscillator, increasing the Tune pot to a value of 7. This relates to the number of semitones, which should result in Osc2 playing a perfect fifth higher than Osc1.
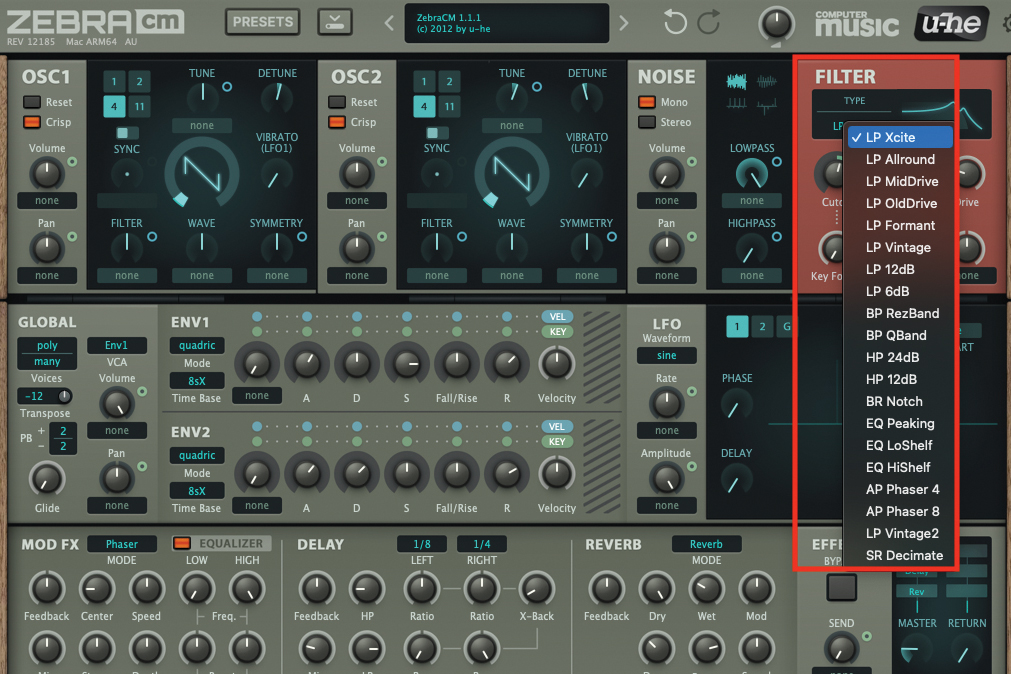
Next, we move over to the filter section; while it is possible to use the vast majority of the filters that the ZebraCM offers, the low-pass filter named LP Xcite is an ideal choice for this patch. Select this filter type from the drop-down menu, within the filter section.
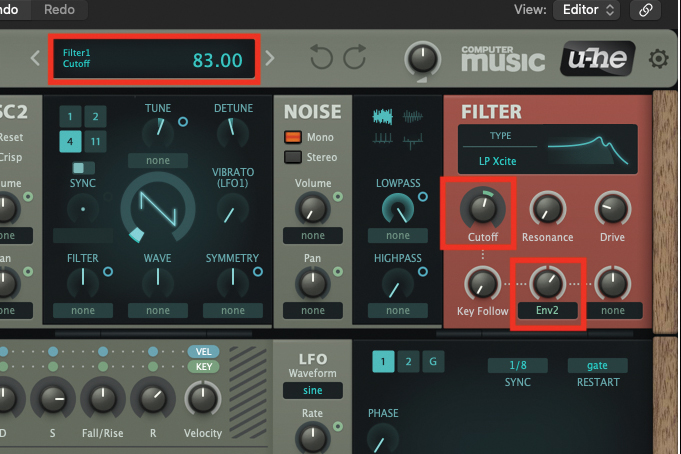
Keeping within the filter section, we need to make two pot adjustments. Firstly, change the Cutoff value to 83, then move to the user-assignable pot, which is currently set to respond to Env2. We will leave this routing intact, but adjust the pot level to a value of 37.
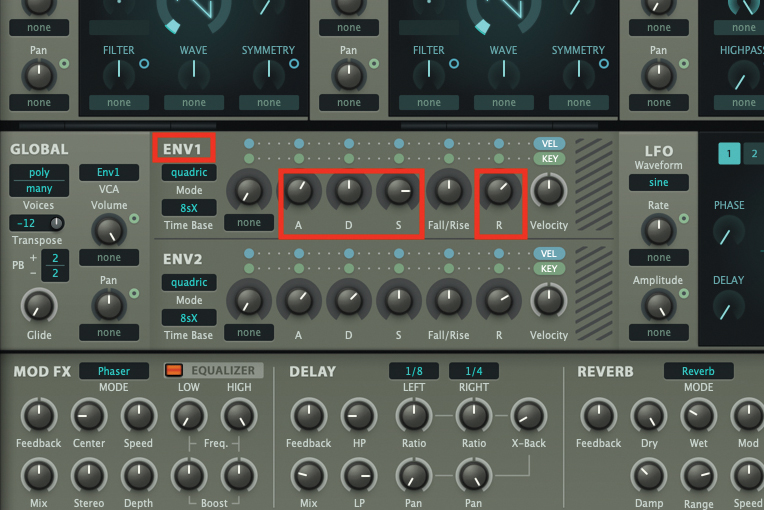
Having dealt with the main components of our patch, it’s now time to turn to the envelope section. Beginning with Env1, which controls the amplitude or volume of our patch, set the Attack pot to a value of 60, Decay pot to a value of 50, Sustain to 80, and finally the Release pot to 65.

Env2 is controlling the Cutoff control within the Filter section, but we need to enhance the settings to suit the style of the sound we want. Set the Attack pot to a value of 63, Decay pot to a value of 65, Sustain to 50, and finally the Release pot to 70.

That concludes the creation of our actual synth patch, but we can enhance it considerably with the addition of effects. Try adding a stereo or ping-pong delay to the track, with a relatively generous feedback amount. This value will vary from plugin to plugin, but even DAW-included delays should provide something very usable.
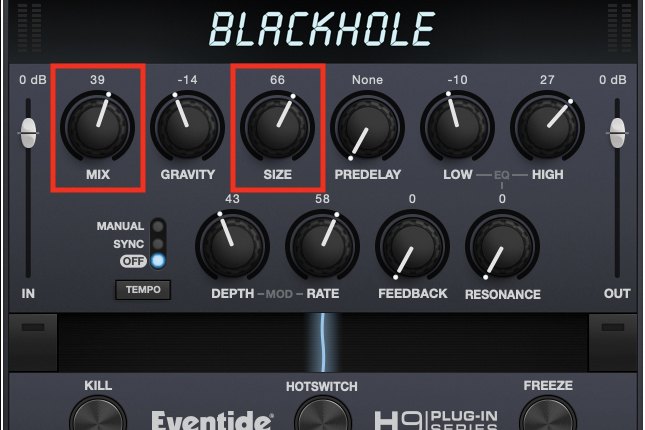
Finally, try adding a relatively generous reverb. You can use any reverb plugin which may be included with your DAW, but adjust the Mix control to provide a greater amount of reverberation. Also, increase the reverb time to a few seconds, which will enhance the sound of our fifths pad.
Pro tip
Undoubtedly, one of the most identifiable aspects of this synth patch is its ability to sound huge and lush, with a relatively minimal amount of musical effort. That’s what happens when you create a chord-based synth sound, and just play a single note.

However, the real magic of this patch comes into play as you explore the tonality of what the patch can really offer. If you need some help with musical direction, consider exploring the basics first. Play a single note, and you will hear two notes play at the same time. Play a triad of C major, using the notes C, E and G, and the resulting chord sounds exceptionally lush, as we also hear the notes G, B and D being played by Osc2. This is known as a major ninth.
But if you want to go for a slightly darker sense of tone, change the note E to an Eb, which will switch the chord to a minor chord, or minor ninth, to be musically correct. You can pad things out even further, by adding the root note, which in this case is C, an octave below your triad. Then, you can try moving the same chord shape around the keyboard.
Recommended listening
1. Jon Hopkins & Kelly Lee Owens & Sultan + Shepard & Jerro - To Feel Again / Trois
One of the most groundbreaking of the contemporary crowd, Hopkins’ recent collaborative track exploits pads against his signature felt piano sound.
2. Seal - Violet
A track that arguably inspired the perfect fifth sound, Seal’s first album is now regarded as a seminal classic, both in performance and production terms.