How to create unique pads using Ableton Live's Spectral Time device
Create unique pads and drones to use in your songs
Want all the hottest music and gear news, reviews, deals, features and more, direct to your inbox? Sign up here.
You are now subscribed
Your newsletter sign-up was successful
Sound design is one of the trickiest stages of music production and creating unique sounds can be a challenge. Using Ableton Live 11’s new Spectral Time device, we can create unique and interesting drone and pad sounds to use in our productions.
Spectral Time seems like a complex effect at first glance, but it’s relatively simple once you get the hang of it. The effect works by capturing short snippets of the spectral (frequency) content of the input signal and transforming them in interesting ways.
We’ll make use of Spectral Time’s Freezer section to ‘freeze’ moments of the input signal, extending them into ghostly, spectral pads and drones that we can resample.
Article continues belowWe’ll start by configuring the basic settings needed for this technique before experimenting with some of the controls to create a diversity of sounds.
This technique tends to work the best on harmonic and melodic inputs, but can also produce interesting results with non-tuned sounds as the source. Explore using the output as is (as a pad layer), or try dropping it into a sampler to build a unique pad instrument.
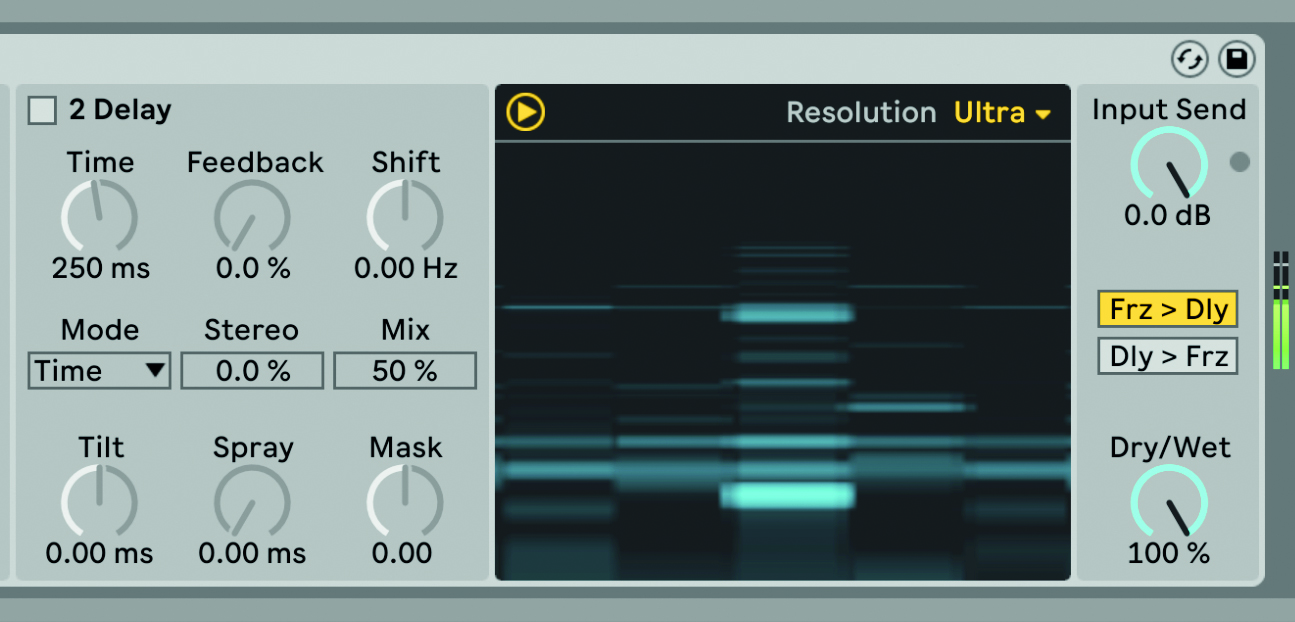
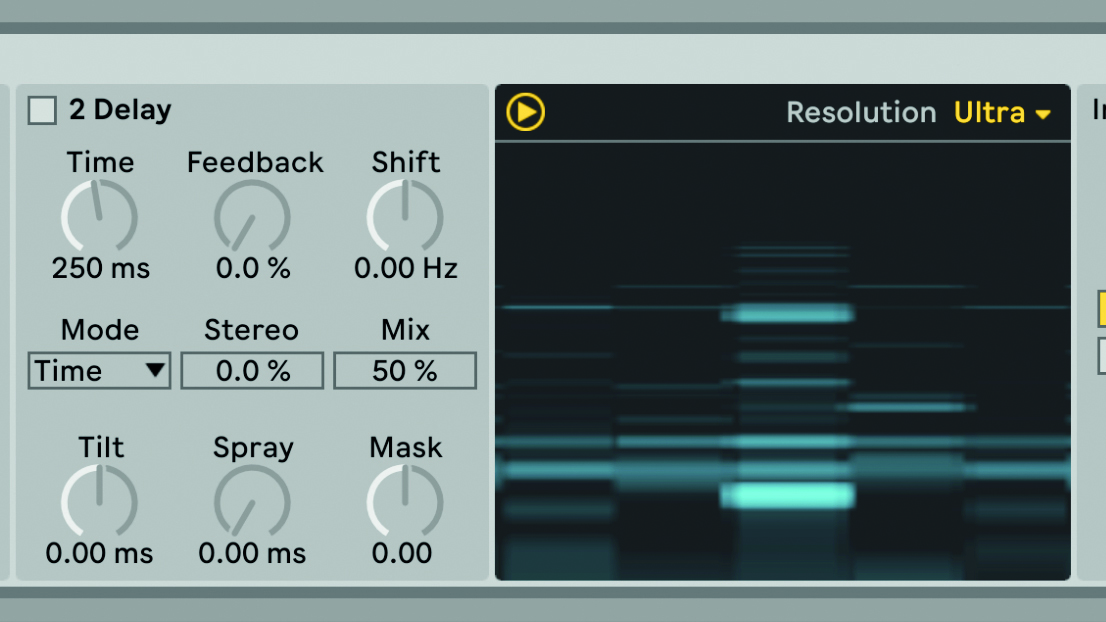
Step 1: Load Spectral Time onto the track you want to affect. This technique works best with some kind of harmonic sound. Set the Dry/Wet to 100%, the Resolution to Ultra and disable the Delay. You can experiment with the Delay section once the basic effect is configured.
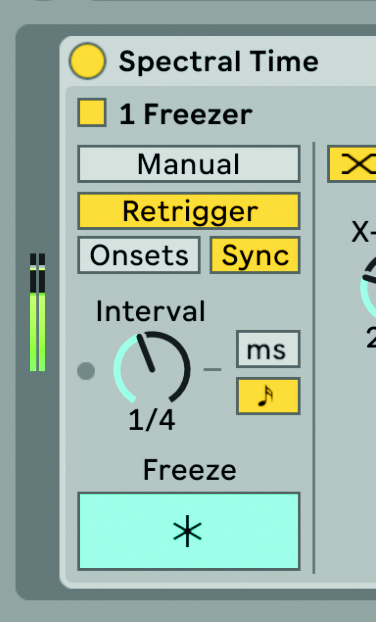
Step 3: Spectral Time’s Freezer section is the most important part of this technique. Enable Freeze (the * button), set the mode to Retrigger and Sync. You should already be getting a rhythmic, blurred version of the input signal. At this point, all that’s left is to experiment.
Want all the hottest music and gear news, reviews, deals, features and more, direct to your inbox? Sign up here.
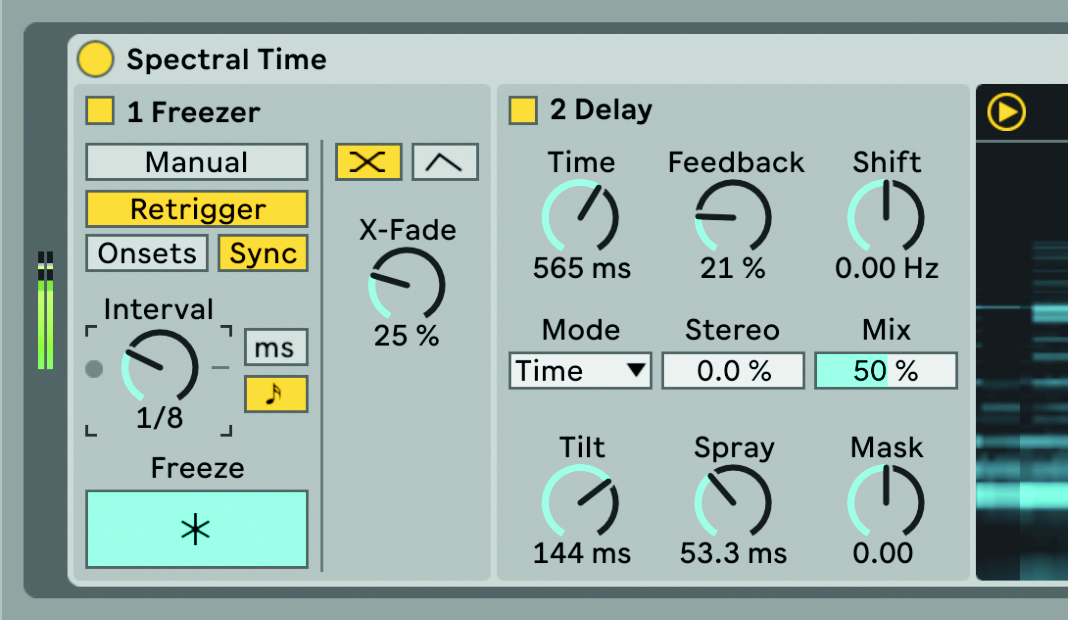
Step 3: The Interval and X-Fade controls will have the biggest impact on the output sound. Use X-Fade to smooth the rhythmic feel of the output. You can also now re-enable the Delay section and experiment here too in order to further transform the sound.
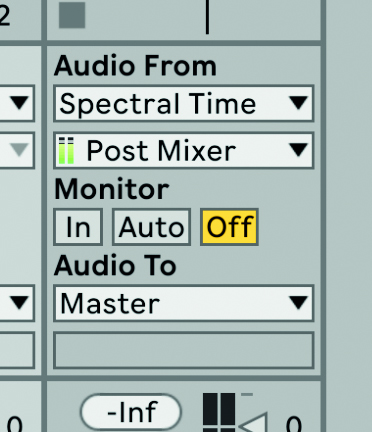
Step 4: The final step is to resample the output. Due to the way Spectral Time works, a delay can be introduced, so resampling will give you more control over how to use the output. Experiment with adjusting controls as you resample. Try dropping the resampled sound into a Simpler or Sampler.
Future Music is the number one magazine for today's producers. Packed with technique and technology we'll help you make great new music. All-access artist interviews, in-depth gear reviews, essential production tutorials and much more. Every marvellous monthly edition features reliable reviews of the latest and greatest hardware and software technology and techniques, unparalleled advice, in-depth interviews, sensational free samples and so much more to improve the experience and outcome of your music-making.
