20 bite-size Bitwig Studio power tips
Improve your skills with the newest DAW on the block

Want all the hottest music and gear news, reviews, deals, features and more, direct to your inbox? Sign up here.
You are now subscribed
Your newsletter sign-up was successful
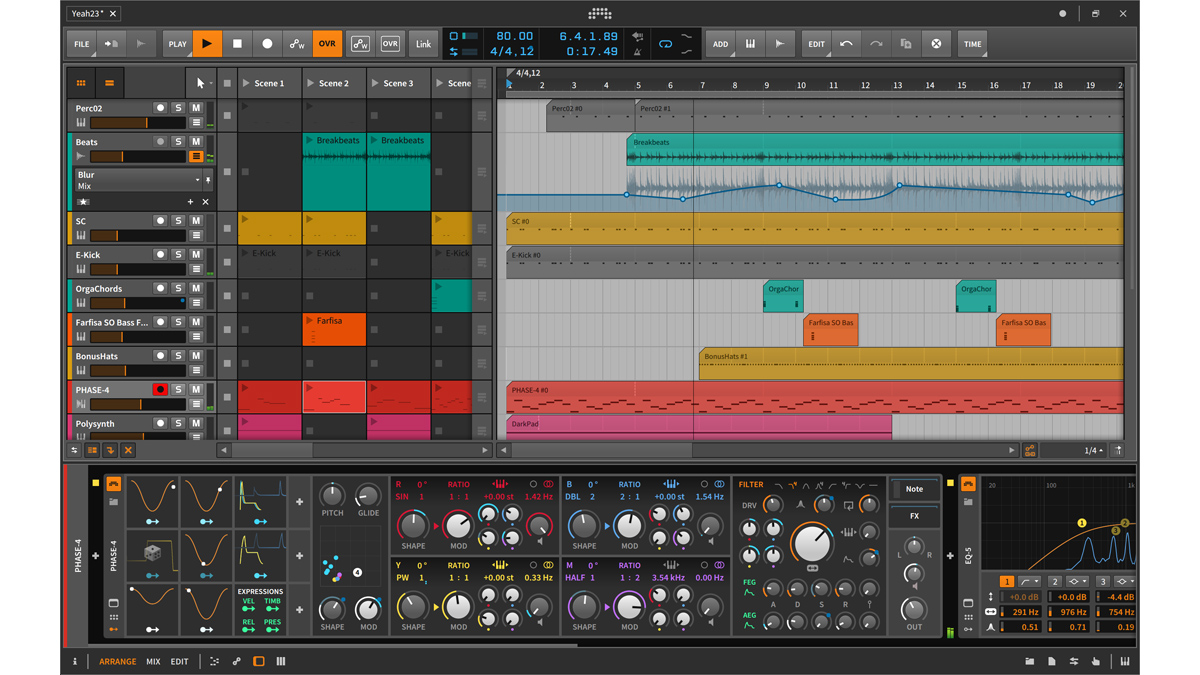
Bitwig Studio has come a long way in a relatively short space of time. Released four years ago, it already feels like a mature and highly capable DAW, and is capable of doing some things that are beyond its more established rivals.
If you want to beef-up your Bitwig knowledge, read on...
1. Custom browser filters
Bitwig’s Pop-up Browser (opened by clicking any + icon) makes auditioning and selecting devices, presets, plugins and samples fast and intuitive. It’s context-sensitive, too, with content filters related to the place it’s launched from, and you can further customise the filters for each context: after setting it up the way you want, just right-click anywhere in the Pop-up Browser and select Remember selected filters when…
Article continues below2. Sibling rivalry
When setting up a drum kit in Bitwig’s Drum Machine, you may often find yourself using the same device in multiple slots - most often Samplers, especially when you’ve sliced an audio clip into Drum Machine automatically. If this is the case in your project, right-click a parameter to copy its value to all ‘sibling’ instruments in the setup, making working with multiple devices much quicker and easier. This works for any type of device in the chain, including nested devices and even modulator settings.

3. Choked out
On a real drum kit, an open hi-hat is choked when the hi-hats are closed, but these are usually separate samples in an electronic kit. Choke groups help emulate the effects of certain samples cutting each other off - in Drum Machine, you can set each drum pad to be choked by any other drum pads. Right-click a pad to set its Choke Targets or what it’s Choked By.
4. Off the ’chain
Some Bitwig devices can accept sidechain audio signals from anywhere in your project. For infinitely more creative sidechaining, though, take a look at the Audio Sidechain Modulator, which has additional settings to adjust and filter the incoming sidechain signal to your requirements. It turns the amplitude of the incoming signal into a modulation source, ready to be assigned to any parameter. Use it as an advanced mixdown tool within an EQ, to make an external signal duck a specific frequency range; or as a crazy sound design tool, modulating parameters of your Polysynth with the amplitude of a drum loop, for example.
5. Special blend
Polysynth’s Oscillator Blend modes might seem complicated and unfathomable to the uninitiated, but they provide flexible options for combining the waveforms of two oscillators into a more complex signal. The amount of distortion introduced by the blending is dependent on the shape of the two oscillators’ source waveforms, and each of the Blend modes can sound very different depending on the oscillator signals. Octave and Pitch are also influential on the results of oscillator blending.
Want all the hottest music and gear news, reviews, deals, features and more, direct to your inbox? Sign up here.
With so much variation down to tiny changes in just a few parameters, the Oscillator Blend modes are ripe for creative experimentation.
6. Share and share alike
Getting stuff from one Bitwig Studio project to another can be a slow process, and usually involves saving device presets, rendering stems and hating the clipboard for losing content on the way. But the Project tabs at the top of the Bitwig window allow you to drag and drop any item between Projects, be it a drum kit, a specific device chain, a little melody clip, or a complete vocal group. Just drag your content to a Project tab, hover there for a second to switch the focus to that project, then drop your selection in. There’s also the option to drop items between or behind the present Project tabs, creating a new Project containing only that content.
7. Number cruncher
To enter any parameter value numerically, Cmd+click the parameter in question. As well as Hertz, you can enter note names (C1, F#2, A4, etc). Especially useful places to take advantage of this are the E-Kick and E-Tom’s Tuning knobs, any filter Cutoff frequency, and the frequency bands within Bitwig’s EQs.
8. Multitrack MIDI routing
Multi-out plugins can receive note information from multiple MIDI channels. To get this working in Bitwig Studio, start by creating as many instrument tracks as required. Then, to send their note information to the multi-out instrument, select Track Output > Plug-ins, and choose the instrument as the output. With this done, a number will appear next to the instrument channel’s name, letting you set the MIDI channel (1-16) for it to output to.
9. Comping circumstance
A full comping feature is still to be implemented in Bitwig Studio, but there’s already a convenient way to record multiple takes of a clip in one go. Head to the Play menu, set Post Recording Action to Record into next free Slot, and choose the length of the clip you’d like to record. Now, when you record into a launcher clip, the recording will automatically continue into the next launcher clip on the same track after the time you’ve specified.
10. Start here
If you have a preferred initial state for a device, set the patch up, right-click the device’s header and Save as Default Preset. It could be an EQ with a low-cut filter already in place, or a specific type of ‘init’ sound in a synth that’s your preferred starting point for creating new patches.
11. On the Scene
When jamming in the Clip Launcher, there’s a quick way to create a new Launcher Scene from all the clips that are currently playing. From the Add menu, select Add Scene from Playing Clips to capture an improvisational moment of brilliance and recall it at any time.
12. Drag distribution
When you drag multiple clips or samples from the Browser into a project, they’re automatically distributed between individual tracks. While this may be helpful in most cases, you can hold the Alt key down before dropping the content to line up all the clips on a single track.
13. The power of Modulators
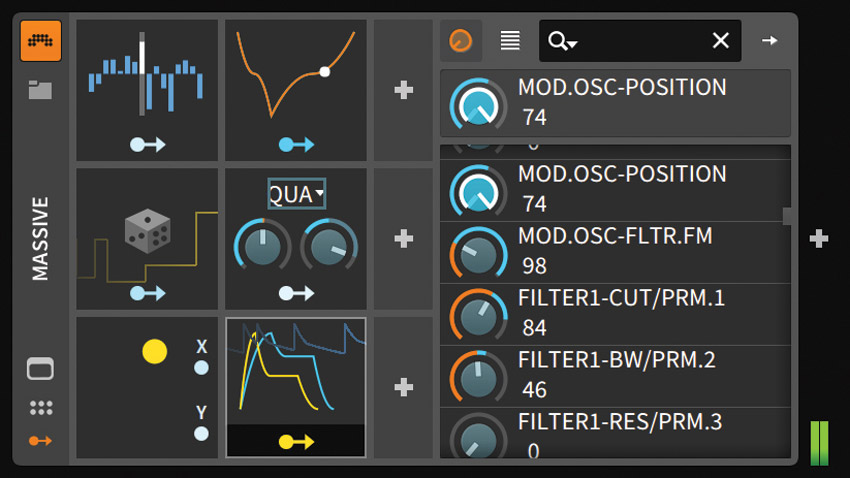
All devices in Bitwig Studio are equipped with the Modulators panel, which lets you add any number of LFOs, envelopes, sequencers or randomisers to them. For plugins, Bitwig shows a list of available parameters, which any parameter you touch in the GUI will jump to the top of, making it easy to find what you’re looking for. It’s not just software that can use Modulators, though - with the MIDI CC and CV Out devices, you can get your hardware synths and even Eurorack setups involved too!
14. Modulation mayhem
The Modulators panel brings enhancement and creative power to any device in Bitwig Studio, but you can also modulate the parameters of other Modulators, giving any modular setup a life of its own! Odd LFO shapes, randomised envelope release times and step-sequenced math are always just a few clicks away in the Modulators panel.
15. Clear the view
When working with multiple track automation lanes, your Project view can quickly start to get cluttered. Shift+click any of the tracks’ automation lane buttons to hide all of them. Shift+click the button again to bring them all back.
16. Tap tempo
It’s not prominently displayed, but Bitwig Studio does feature a tap tempo function! Just hold Ctrl+Alt and tap the spacebar.
17. High-res control
When dragging parameters or automation nodes, the movement can be too coarse for some situations. Hold the Shift key while dragging to edit at much finer resolution.
18. Secret society
When setting up a Group track, the default clip launcher view shows dedicated Scene Launch buttons for that Group… but there’s another view available. Right-click the Group track and select Show Group Master Track Content. This reveals that the Group track itself is also capable of holding audio or instrument clips.
19. Group therapy
To feed note information from multiple tracks into the same Instrument, use Group Tracks. Select several Instrument tracks and hit Cmd+G to group them. By default, grouped tracks’ outputs are routed to the Group Master track, but check out the other options: Notes to Tracks (indicated by a little keyboard symbol) lets you use Groups to send note information rather than audio. You can insert an Instrument device on the Group Master track, to receive and play all notes sent to it.

20. Stretch goals
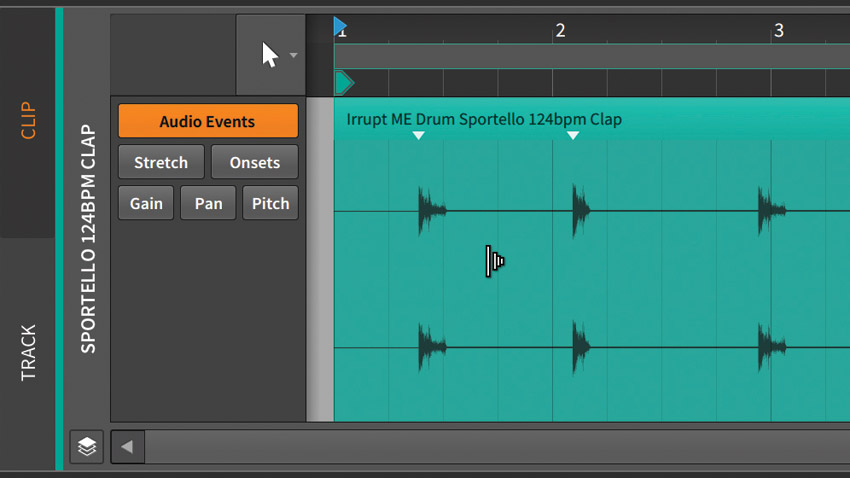
Stretching audio manually to match the grid and thus the project tempo requires a bit of practice. Bitwig Studio’s Audio Editor can be set to either Audio Events or Stretch view. If you Cmd/Ctrl+Alt+drag the waveform, the whole clip will be stretched in relation to the dragging distance, while the Shift key temporarily bypasses the grid for finer adjustment.
Computer Music magazine is the world’s best selling publication dedicated solely to making great music with your Mac or PC computer. Each issue it brings its lucky readers the best in cutting-edge tutorials, need-to-know, expert software reviews and even all the tools you actually need to make great music today, courtesy of our legendary CM Plugin Suite.
