10 Renoise power tips
Work faster and smarter with the supercharged tracker
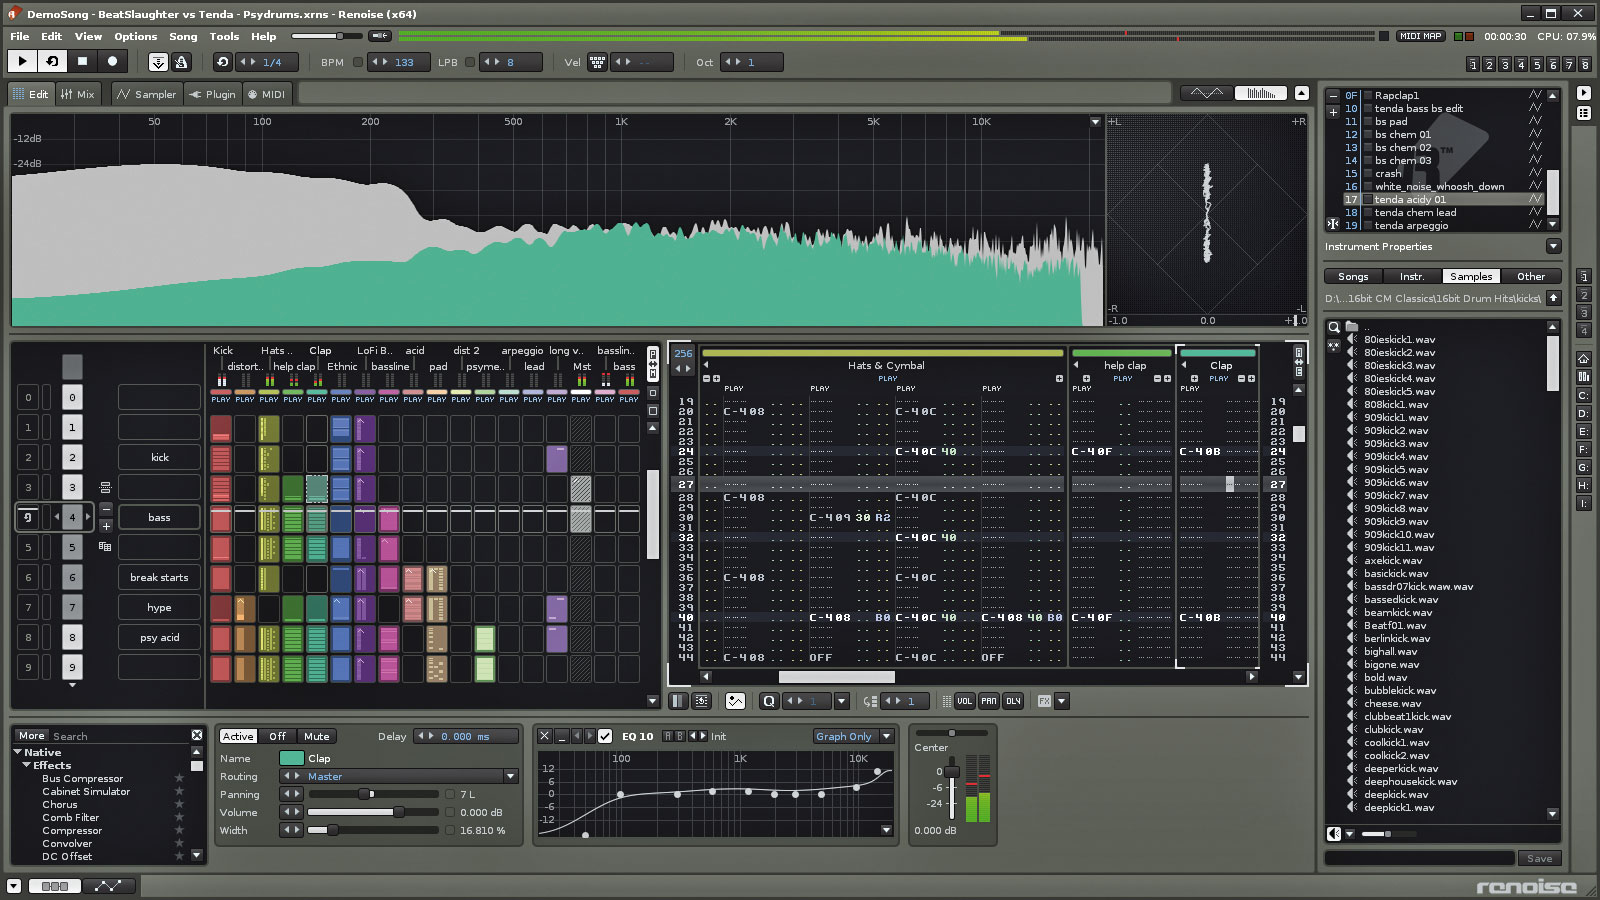
If you've ever worked with an old-school tracker, Renoise will look instantly familiar. Music is made in grid-based patterns, and these patterns can be arranged to create songs. It might look and sound like quite a techy workflow, but for a lot of people, it works.
If you want to refine your Renoise skills, our tips will sort you out.
1. Seek and ye shall find
Traditionally in trackers, samples that were triggered before the pattern you were currently editing wouldn’t play unless you returned to the pattern they were triggered on and listened all the way through it again. To mitigate this, Renoise has the Autoseek button, which can be found in the Sample Properties.
2. Definitely MaYbe
Unleash your inner Brian Eno and introduce an element of randomness to your music with the MaYbe command. Using the Y Effects Command, you can set the probability of whether any particular note will play. Using the command with the probability set to 00 works across multiple lines to force only one of a number of pre-defined notes to play.
3. Under the knife
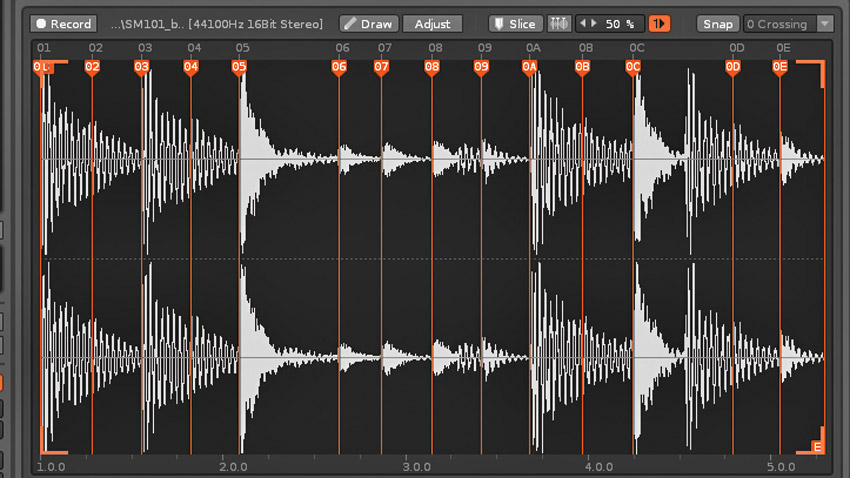
Inside the Sampler tab, you can uncover Renoise’s built-in Slice tool. One common use for this is to chop a drum loop into individual drum hits. Hit the Slice button and place your markers, or use the Auto-slice button for beat or transient detection. Renoise automatically assigns the slices to Keyzones.
4. Phrase action
One of the most revolutionary features in Renoise is the Phrase Editor, found in the Sampler tab. Here, you can create anything from a single hit, chord or arpeggio, to a breakbeat or complex harmony. These pitch- and volume-independent Phrases are then triggered like any other instrument in the main Pattern Editor.
5. Mod squad
In the Modulation section of the Sampler tab, you can create complex modulation for basic sample parameters such as volume, pitch, frequency cutoff, resonance and drive. Each modulation device is placed in sequence and affects the next device by the type of operand selected between them. Time spent here can reap significant sonic rewards.
Want all the hottest music and gear news, reviews, deals, features and more, direct to your inbox? Sign up here.
6. Command and conquer
Effects Commands separate trackers from other DAWs, so knowing them is essential to unlocking the power of Renoise. Commands perform all sorts of tasks, from manipulating sample audio (triggering sample offsets or portamento glides) to automating track effects and even controlling song playback. Click Help > List Pattern Effect Commands to see them all.
7. Flying the nest
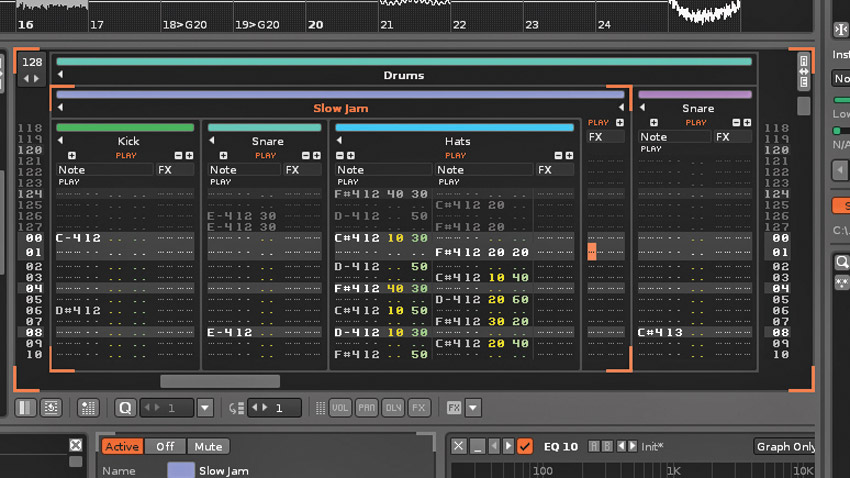
Renoise features nested track grouping, which is not only good for organising tracks, but also processing them, as effects placed at the group level affect all tracks below it. Crucially, you can nest multiple groups inside another group, and continue doing that up to six layers deep, opening up a world of possibilities.
8. Macro scope
Gain quick and easy access to your favourite modulation and FX parameters by assigning them to one of eight Macro knobs. Multiple parameters can be assigned to each one, so you can, for example, simultaneously shorten the length of a sample while increasing its reverb. The results can then be recorded into the pattern as automation.
9. Doof if needed
With the multitude of native effects, meta and routing devices on offer (and their associated parameters), it can be hard to keep track of your favourite combinations. When you find something you like, pack it into a single Doofer (other DAWs call them racks) and save it as a preset. There’s the added bonus that Doofers also come with their own Macro controls.
10. Automation proclamation
Automation is essential for adding motion and interest to your music, and Renoise offers a few different ways to handle it. Here we’ll show you how to program changes throughout a track.
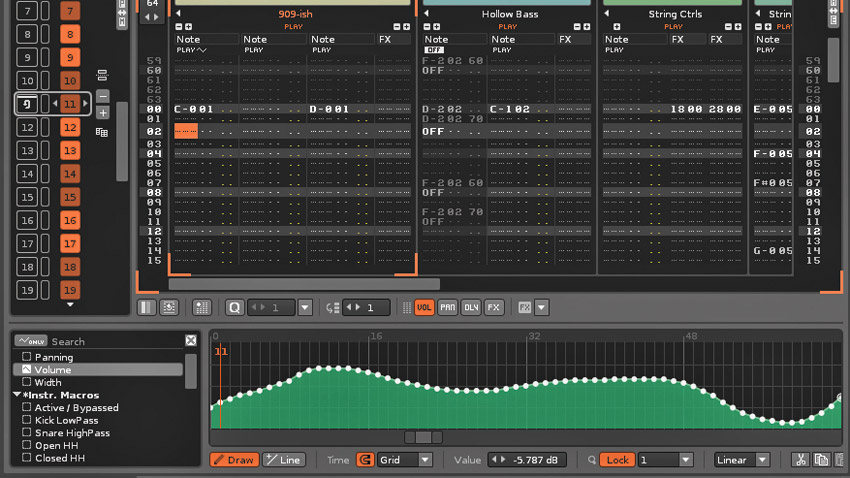
Step 1: Open the Automation pane by clicking the zig-zag icon at the bottom left of Renoise. This shows a list of parameters for the track mixer and any effects or meta devices present on your track. Select the parameter you want to automate, then draw your automation path.
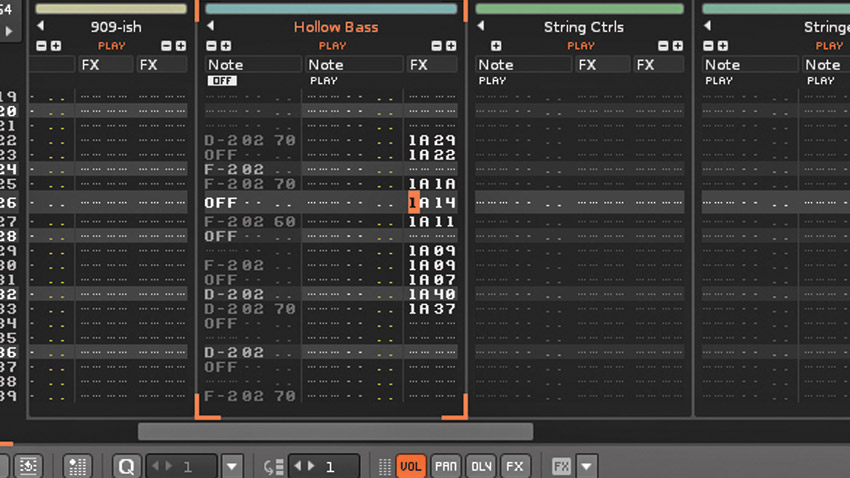
Step 2: Directly set the level for any effects parameter by right-clicking the relevant knob, slider or checkbox. Renoise then enters this information directly into the Pattern view. To make more than one parameter change at a time, you can add up to eight FX columns per track.
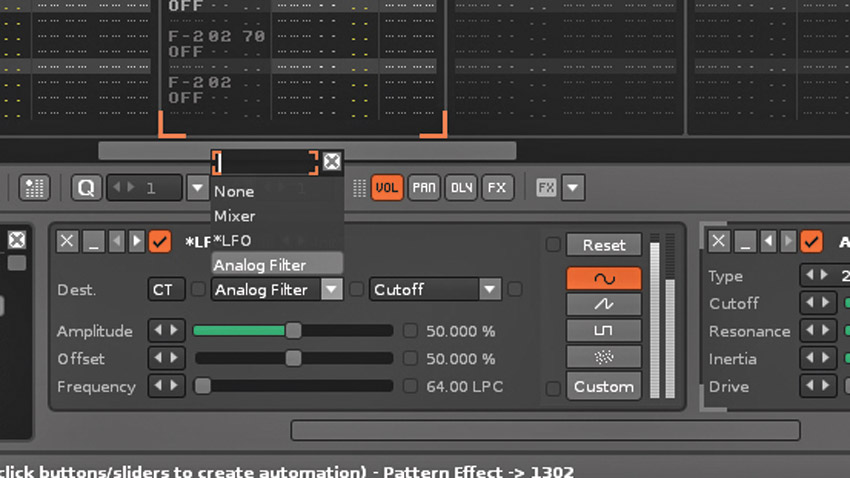
Step 3: Meta devices are a quick and powerful automation tool. Choose the destination for the device (this could be an effect or meta device on the same or a different track), and the automation information is linked to it.
Computer Music magazine is the world’s best selling publication dedicated solely to making great music with your Mac or PC computer. Each issue it brings its lucky readers the best in cutting-edge tutorials, need-to-know, expert software reviews and even all the tools you actually need to make great music today, courtesy of our legendary CM Plugin Suite.

