10 mighty Maschine power tips
Make your best beats ever with Native Instruments’ hardware-connected DAW
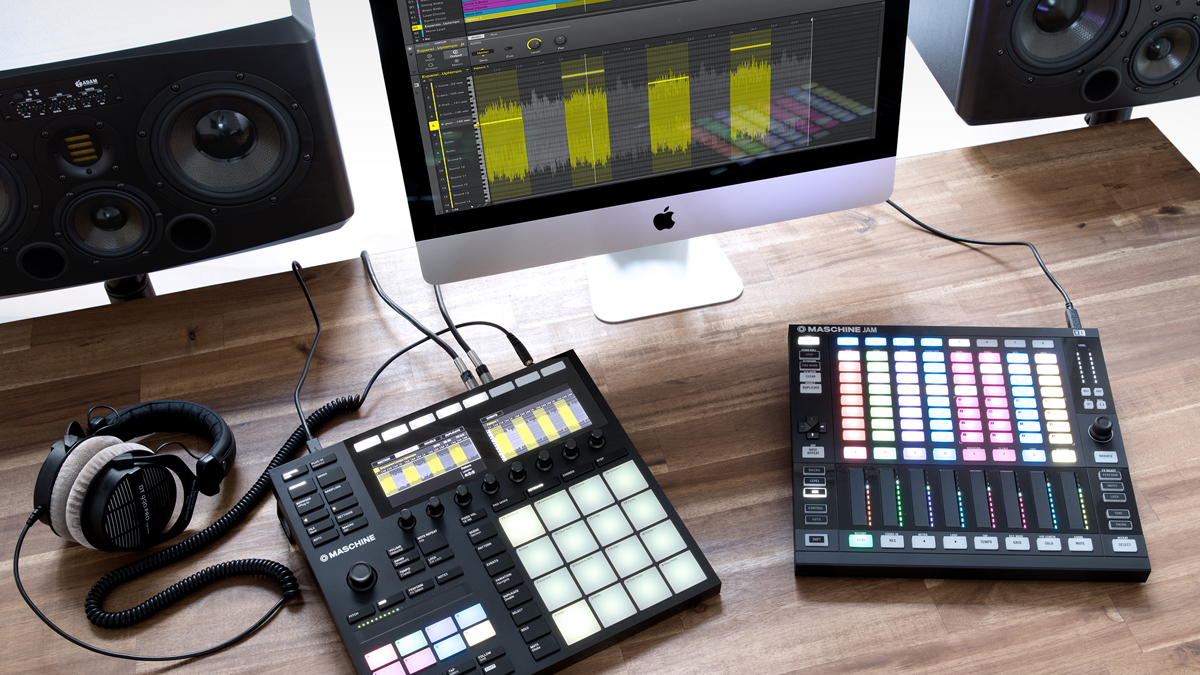
Whichever version of it you go for, Native Instruments' Maschine gives you a fast and furious music creation solution, and with more features being added all the time, it's fast become an end-to-end production platform.
If you want to give your Maschine skills a tune-up, read on.
1. Bass intentions
Maschine 2.7 introduced Bass Synth, a quick and easy monosynth with a beefy, squelchy 303-esque sound. Like its stablemates Drum Synth and Sampler, Bass Synth has been designed with hands-on tweakability in mind, the main page offering control over oscillator waveform (morphing from sine to square via saw and triangle), filter (including envelope modulation) and distortion, and Glide on/off slipping into page 2. It also comes with a decent list of presets (in the browser’s Sounds section), complete with effects chains. The tip here, then, is: don’t overlook Bass Synth! It may not be a particularly flexible or versatile instrument, but when you need a cone-rattling b-line in a hurry, it’s a fantastic option. And if you’re sequencing Bass Synth with Maschine Jam, you can use the top row of buttons in the step sequencer to turn Glide on and off for each step, aciiiid-style!
2. Isomorphic keyboard mode
Also new in Maschine 2.7, the Isomorphic keyboard mode for Maschine Jam takes inspiration from Ableton Push’s In Key mode, mapping only the notes of the chosen scale to the grid buttons, making it impossible to play out of key and easy to construct chords and riffs. In 3rds mode, for example, triads are laid out across sets of adjacent buttons, horizontally or vertically.
3. Hard options
You’re probably already aware of the Export Options dialog (File > Export > Options), with which you can normalise your arrangement renders, choose WAV or AIFF file format, and set the sample rate and bit depth. But did you know that these settings are also applied to patterns exported via drag and drop? You can set them once, safe in the knowledge that all your audio exports - no matter how they’re made - will come correct.
4. Snapped at source
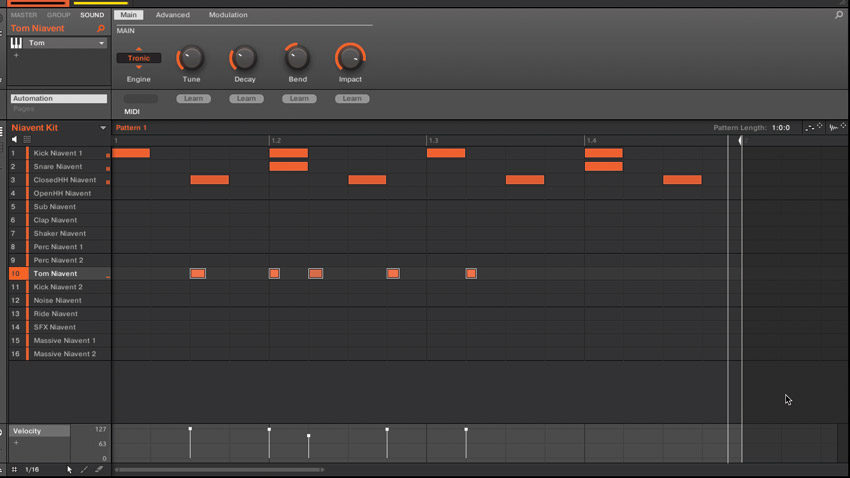
If your Maschine workflow involves recording parts played on the pads then immediately hitting Quantize to snap them to the grid, you might be glad to hear that you can actually quantise your playing on the way in. Input Quantize can be activated for recording only or recording and playing in the General page of the Maschine software’s Preferences dialog, or on the Maschine Mk3 hardware from the Settings button.
5. Stacking pads
Maschine lets you stack pads up so that playing any one of them triggers the whole group - a great tool for layering sounds. Here’s how it’s done…
Want all the hottest music and gear news, reviews, deals, features and more, direct to your inbox? Sign up here.
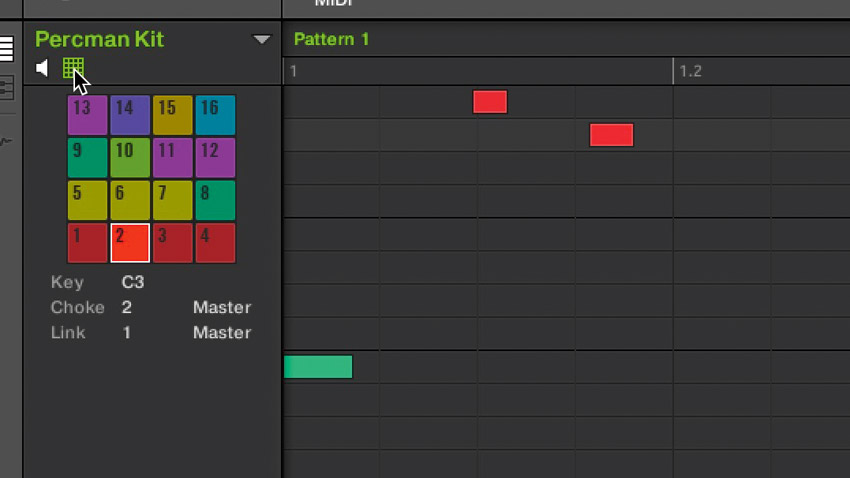
Step 1: With a Group loaded, switch to Pad mode (the Pad Mode button on your Maschine controller or the Pad View button above the Sound List in the software). On the hardware, the right screen shows your 16 pad assignments, while the left houses the contextual controls for them.
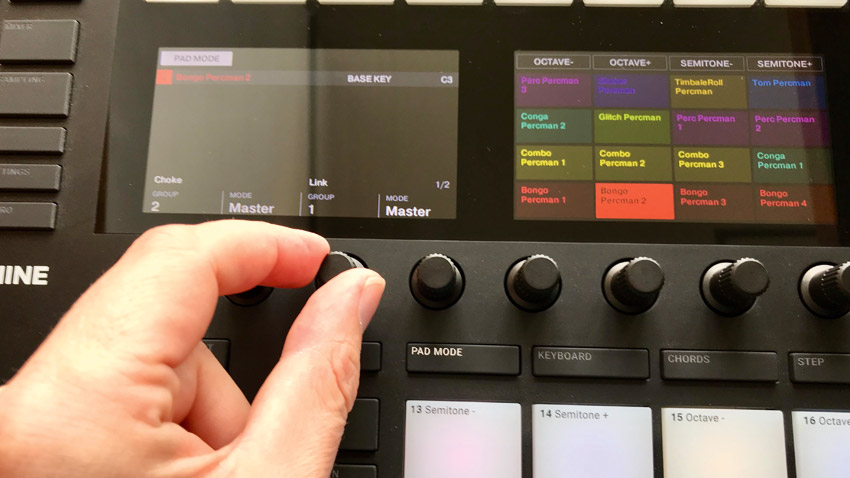
Step 2: To stack two or more pads in a group, first select any one of them, then either turn the Link knob on your controller or click the Link menu in the software and assign it to one of the eight available Groups.
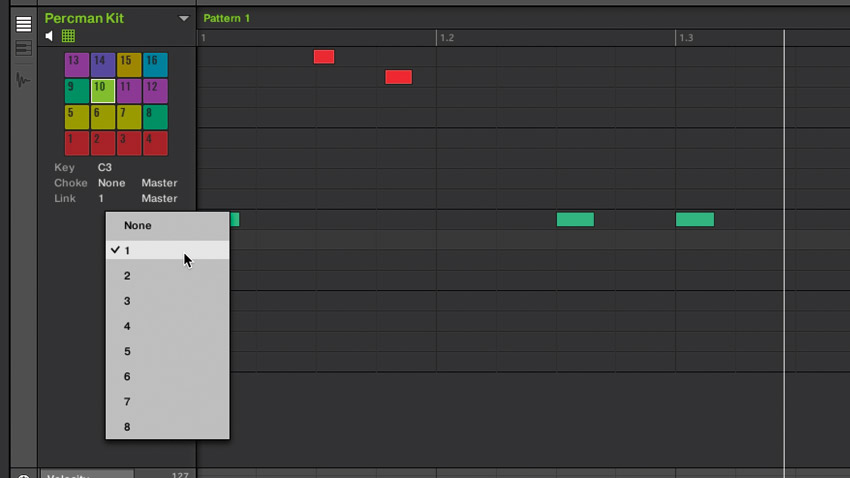
Step 3: Do the same for the next pad in the stack, assigning it to the same Link Group as the first, then repeat for as many more pads as you like. Now, playing any of the pads in the Link Group will trigger them all - ideal for quick layering of snare drums, percussion, etc.
6. Shortcuts to success
The Maschine Mk3 and Studio controllers make accessing their glorious onscreen mixer easy thanks to the big, obvious Mixer buttons. If you’re using Maschine Mk1, Mk2 or Mikro, you do have similar functionality (albeit minus the flashy graphics), but how to get to it isn’t at all obvious: press the Shift and Sampling buttons. Even less obvious is the button combo required to switch the top section of the Maschine software from the Arranger/Ideas view to the Mixer View: Shift and Navigate. This is actually quicker than on Mk3/Studio, where you have to enter Software Navigation mode. However, this mode does also let you hide and reveal the Browser and Control Lane section, switch between Arranger and Ideas views, and zoom and scroll the Arranger timeline and Pattern Editor.
7. Recording options
Given the seemingly simple on/off nature of your Maschine controller’s Record button, you could be forgiven for missing the option to set the Pattern Length prior to recording by holding it down and turning Knob 4 or pressing Buttons 5-8. And here’s another top recording tip: rather than constantly hold down the Auto button to record parameter modulation into the Control Lane, press Shift and Auto instead to toggle modulation recording on until Auto is pressed again to turn it off.
8. Jam factory
As well as presenting a very different way of interacting with the Maschine software to that of the 4x4 controllers, Maschine Jam also makes a fantastic partner for any of them. Obviously, the 8x8 button grid works brilliantly in conjunction with the 4x4 pads, bringing live performance and step sequencing together; but the ability to operate two sets of mixing and/or sound shaping parameters at once - the Mixer Level faders with Maschine Mk3’s knobs, say, at the same time as the Aux sends or plugin controls with Maschine Jam’s touchstrips - is equally empowering.
9. Group shift
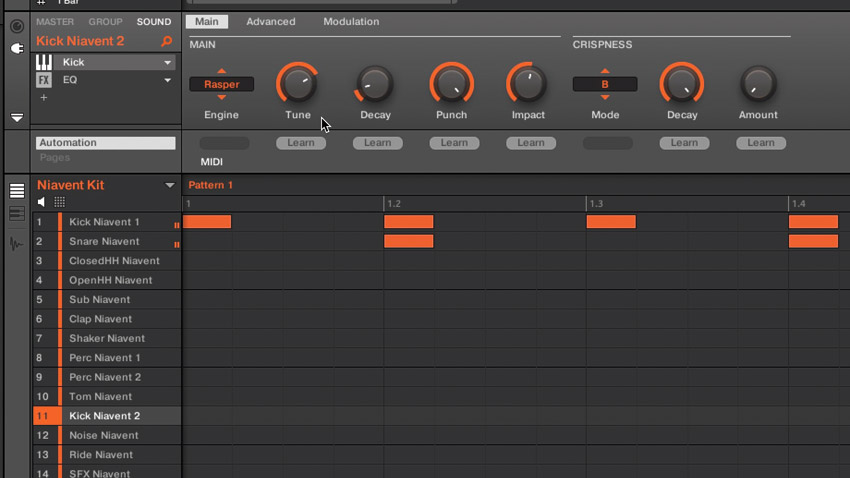
Here’s a handy technique for fixing out-of-tune drum kits and melodic sample Groups. Press the Group and Tempo buttons together, and turn the Control Encoder or 4D Push Encoder, depending on your hardware, to raise or lower the Tune settings of every Sampler and Drum Synth in the Group. Hold the Shift button as well for higher resolution fine tuning.
10. Digging those Scenes
‘Conventional’ Arrangement workflow is creating Patterns then arranging them into Scenes, but you can also do both at once…
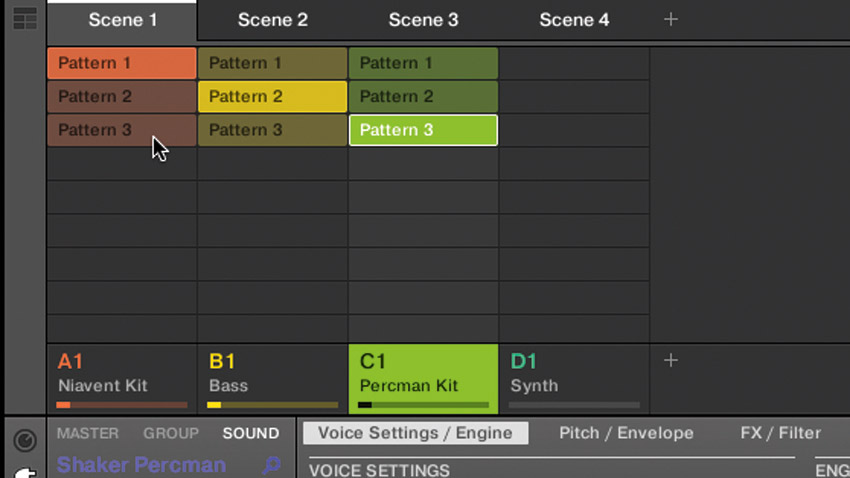
Step 1: The standard way of piecing together a Maschine track is to record, edit and jam around with Patterns in the Ideas view, then arrange everything into a proper structure in the Arranger view. You can also, of course, record directly into the current Scene in the Arranger view.
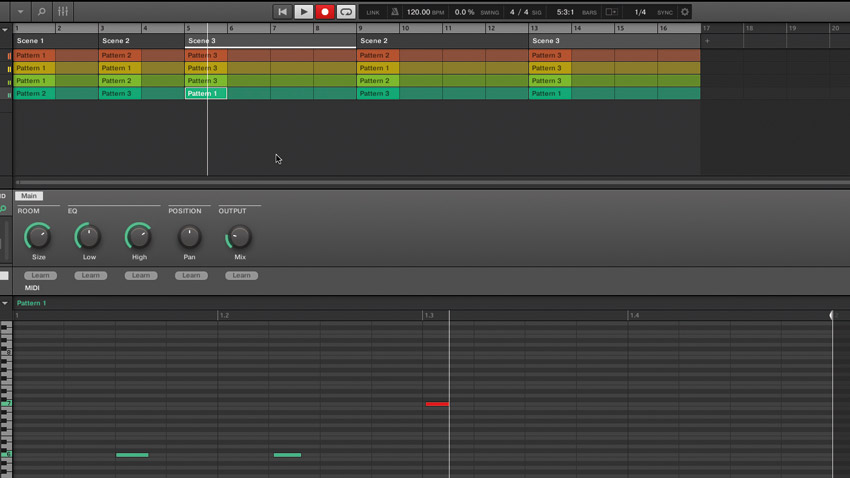
Step 2: What you might not know, however, is that you can also record notes and modulation data into multiple Scenes, simply by setting the Arranger view loop range to cover a series of Scene sections. Set your loop, select a group, hit Record and do your thing.
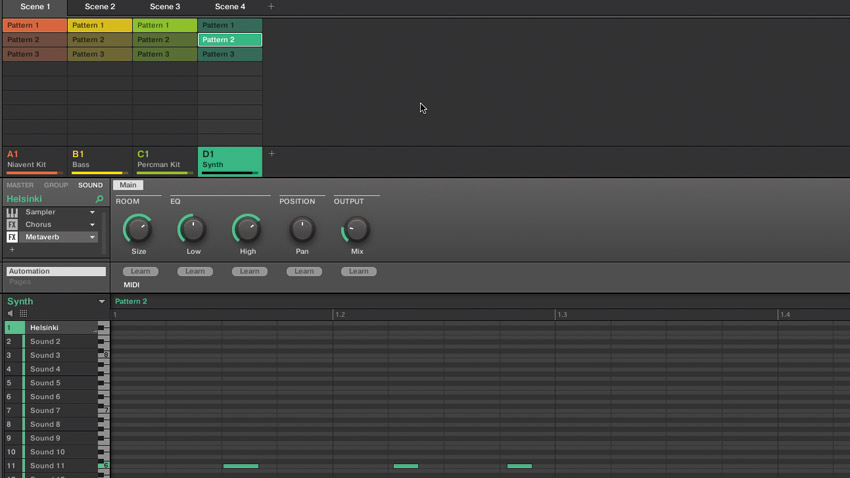
Step 3: As the playhead reaches each new Scene on the timeline, a new Pattern is created for that Group within that Scene, containing the notes played and any modulation data generated. Your newly recorded patterns also appear in the Ideas view.
Computer Music magazine is the world’s best selling publication dedicated solely to making great music with your Mac or PC computer. Each issue it brings its lucky readers the best in cutting-edge tutorials, need-to-know, expert software reviews and even all the tools you actually need to make great music today, courtesy of our legendary CM Plugin Suite.

