Get real, edgy, biting grit into your drum sound with a little touch of deliberate distortion. We show you how to get creative, while avoiding overload...
Not so long ago the words 'distortion' and 'electric guitar' were inseparable. Now, while it's true that guitarists still rely on a range of distortion treatments to form many popular sounds, the rest of us have caught on too. Put simply, you don't have to be an axe-wielder to place distortion centrally in your production process.
Here we'll look at how effectively distortion treatments can be added to drum parts to make them bite with real power...

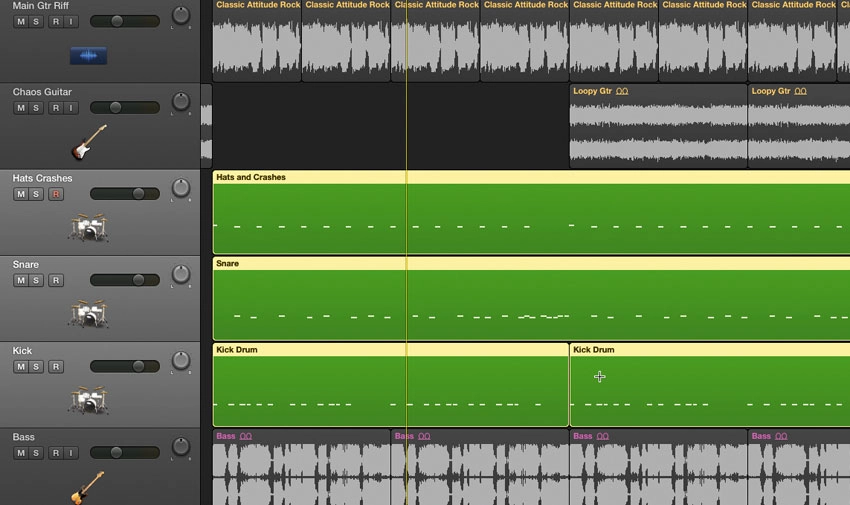
Step 1: Our basic Rock arrangement currently features a heavy distorted guitar loop, which is preceded by a loopy, eerie guitar part to which we've added a Tremolo effect for a gentle auto-pan treatment. There's a two-bar bass loop at the bottom too, whilst the drums are being provided by Logic X's Drummer instrument. The basic feel of this kit is good, but the sound is a little too dry compared to the more biting, distorted sounds around it.

Step 2: To add extra power, we're going to set up a Drum Trash Buss. This is an auxiliary effect channel which will be blended with the main drum part to fill it out, give it width and power and reinforce the role of the drums in the mix. We set this up on the first available auxiliary buss - Buss 3 - and insert FXpansion's Maul plug-in to provide distortion. We use Amb3 Saturator as a starting point. With the drums soloed you can hear how powerful the result is.

Step 3: This certainly provides more bite, but the top end of the treatment is too splashy and overwhelming; the ear is simply drawn to the treble end of the drum mix which, rather than providing the power and drive we want, is making everything very 'toppy'. As Maul splits distortion into three frequency bands, however, it's very easy to pare this back and we do so simply by turning the Drive amount down in the upper frequencies to 25%.

Step 4: This shows how signals as frequency-rich as drum kits respond differently when they hit distortion. For true control over a drum Trash mix, we need to split the drum part into a multi-track arrangement, so we can mix in appropriate treatments for hi-hats and cymbals at the top end, snare and mid-toms in the mid-range and the kick and floor tom at the bottom. So we convert the drums to MIDI and split these drum 'voices' onto separate tracks.

Step 5: Once the parts are separated, their Trash channels can be considered separately too. We retain the existing distortion treatment for the hats but turn down the volume of the Aux return here a little. Then we send the snare part to Auxiliary 4, using a single-band Maul treatment through the 'Tri' algorithm to give a punchier, weightier snare sound. We prioritise the Body rather than the Bite of the sound too.

Step 6: We apply the same rules to the Kick drum, configuring a distortion treatment for this part alone. This gives us three 'dry' drum channels and three distortion treatments which can be blended independently, providing lots of control.
