Parallel - or 'New York style' - compression is excellent for adding density to a sound while retaining transient response in a way that normal compression doesn't. The technique involves using a (usually, but not always) hyper-compressed version of the signal mixed with the original dry feed, allowing average volume to be increased without compromising the transient snap of the original sound. It can be done by using any compressor on a send/return channel, or a compressor equipped with a wet/dry control directly on the sound's channel itself.
Typically, the compressor should be set to the fastest attack time and slow release, with around 10dB of gain reduction showing at the dry signal's loudest points. Adjusting attack/release times and the ratio can change the feel of the compression, as can using different compressor models - the average bundled DAW compressor will likely give clean, straightforward results, whereas something like a UREI 1176 emulation can add more 'bite' and drive.
Additional processing can be used on a parallel compression send to shape the sound; examples include rolling off high frequencies with a low-pass filter to add bass weight, and using distortion to give the whole sound more aggression. You can even set up multiple channels of parallel compression, each designed to contribute a different quality (eg, snap, body, low-end oomph) to the sound, and blend them as needed.

Step 1: Let's check out parallel compression techniques. In your DAW, import BreaksLoop.wav. You can apply parallel compression using either a compressor with wet/dry controls directly on the channel, or any compressor on an effects send. We're using a send for its superior flexibility.

Step 2: In the mixer, add a new return channel, turn it down to -15dB, and insert Computer Music's SunRuys CM plugin. Send the BreaksLoop channel to the return at 0dB. We're using Logic for this, and send/return channels may work differently in your DAW, so consult your manual if you're not sure how to do it.

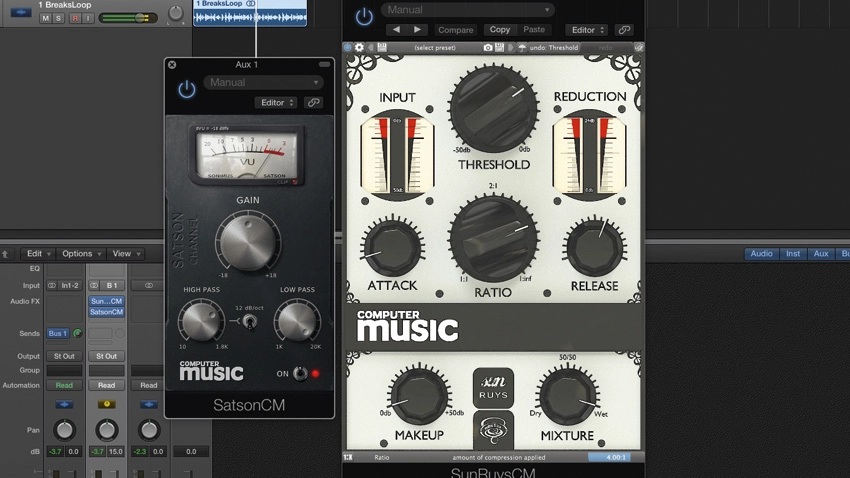
Step 3: Set SunRuys CM's Attack to its fastest setting, Release to around 60% and Ratio to 4:1. Then adjust the Threshold to around -15dB until the compressor shows around 10dB of gain reduction. The parallel signal is now heavily compressed - the transient has been squashed, and the sound of the original audio has been thickened.

Step 4: The original audio lacks some density in the high frequencies - we can filter the parallel send to fix this. Add Computer Music's Satson CM after the compressor and set its High Pass knob to around 2 o'clock. The high frequencies are now filled in without bloating the lows. Also, try turning the saturation on/off with the bottom-right switch - great for adding character.
Get schooled in a universe of compression - over 14 pages and in 17 videos - with issue 222 of Computer Music. Includes FREE VST/AU effects rack plugin, FX TimeTrip sample pack and more!
