Although delay might not immediately spring to mind as a music production tool of particular relevance to drums, by eliciting controlled echoes from individual parts of the kit (the snare or hi-hats, for example), a wide range of sonic improvements and effects can be cooked up, from pseudo-reverbs to rhythmic spot FX and more.
In this tutorial, we'll take a very simple drum part and turn it into something rather more exciting through the application of a variety of delay treatments. We'll be using Native Instruments' Battery 4 as a sound source, and by way of preparation, we've already bussed each element of the kit to its own audio channel in Ableton Live, for discrete delay processing.
As you can hear in the audio example Raw drums.wav, the drum part we're starting from couldn't be more minimal - it's just alternating kicks and snares on the beat, doubled up with hi-hat hits. So, using nothing but delay plugins, we're going to put flesh on the bones of this percussive skeleton by enhancing the kick, snare and hi-hat patterns, and turning a tom-tom fill into a feedback-drenched soundscape.

Step 1: The kick is the drum least applicable to being treated with delay, as too much of it can easily overwhelm the bottom end of any mix. Nonetheless, here we're feeding my quarter-note kick into Battery's own delay module to give it a bit of swing and dynamics. Note the feedback is kept low - we don't want those low frequencies building up.
Raw drums
Kick delay

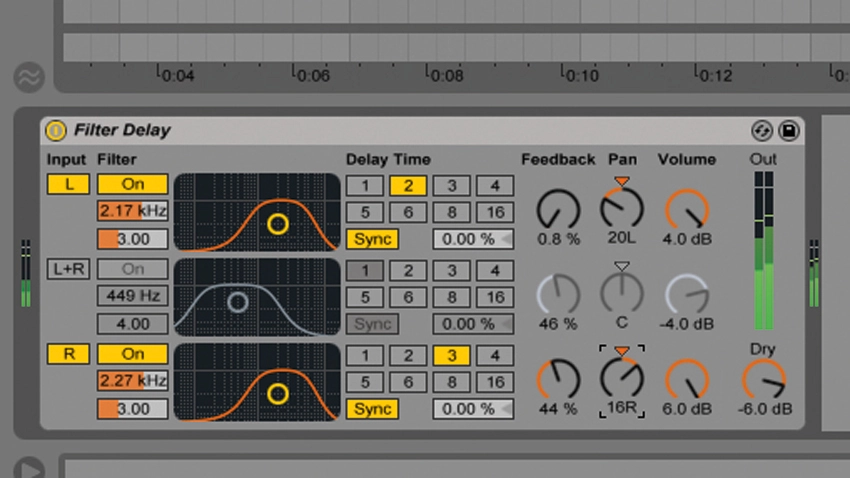
Step 2: The hi-hats currently land on every beat. By inserting Live's Filter Delay, knocking out one of its three taps, setting the remaining two to 2 and 3 16th-note delay times, filtering them into focus, raising the Feedback on the '3' side to fill in the 'missing' hit, and panning them a touch, a dynamically variable 16th-note pattern emerges.
Hi-hat delay

Step 3: The snare, with its abundant mid and high frequencies, is probably the most viable drum element for delay processing. Let's use a single tap set to a very short delay time to fake a short room reverb. We're using one channel of Live's Filter Delay again, this time set to around 100ms, with a hint of Feedback. Lowering the band-pass filter frequency darkens the sound.
Slapback snare

Step 4: Next, the classic spin delay effect. We set up PSP stompDelay on an auxiliary bus, 100% wet with the Delay Time set by ear rather than synced to tempo for an organic vibe, and the Feedback raised. By automating a quick rise in send level from the snare channel to the bus at punctuative points, a dubby delay tail is generated.
Snare spin delay

Step 5: Speaking of dub, to conjure washes of sound out of a drum track, all you have to do is 'grab' some hits (I've gone for a tom fill) with a spin into a very high-feedback delay line, then play around with the filters, Delay Time and Feedback. Don't forget to insert a limiter, as things can easily get out of hand!
Toms feedback delay

Step 6: Here's a handy trick for generating snare drum ghost notes: feed your snare channel into a multitap delay and set each tap to a delay time that makes rhythmic sense when triggered by the snare. By raising and lowering the levels of individual taps, you'll get a range of funky rhythms.
Snare groove delay
