How to program an '80s electro funk drum machine beat using plug-ins
Build a classic 606-style soul rhythm in your DAW
Want all the hottest music and gear news, reviews, deals, features and more, direct to your inbox? Sign up here.
You are now subscribed
Your newsletter sign-up was successful
In the late '70s and early '80s, funk, soul and r&b artists like Prince, Marvin Gaye and George Clinton began to use synths and drum machines in a more emotive, humanised way than ever before, and the genre known as electro funk was born.
In the video above and step-by-step below we demonstrate how to program a simple early-'80s electro funk drum machine rhythm.
For more on replicating the sounds of electro funk with plug-ins check out the January issue of Computer Music (186).
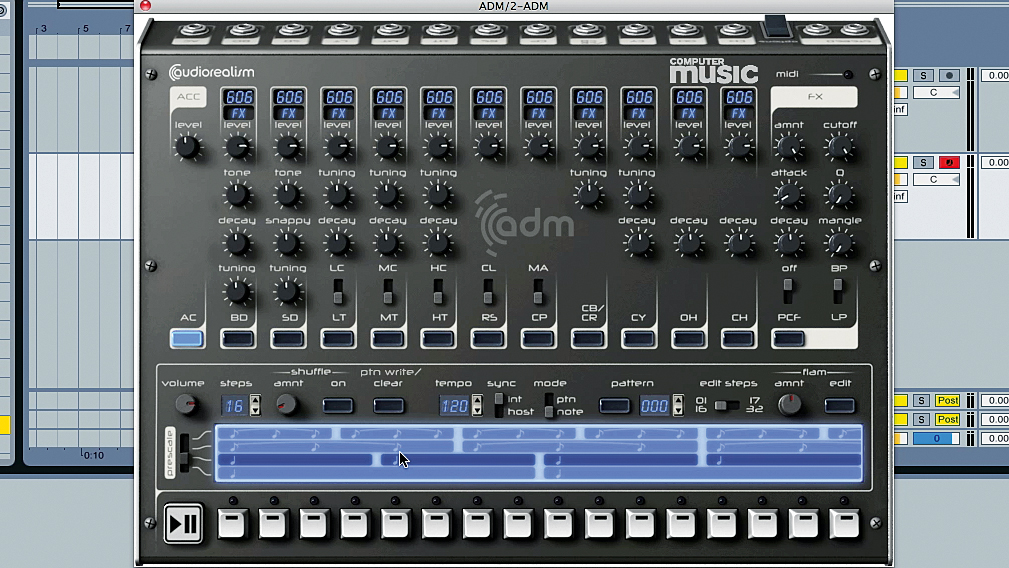
Step 1: We're using AudioRealism ADM CM, which is included with every issue of Computer Music (or a demo version of ADM can be downloaded from the AudioRealism official site.) It's a great tool for making early '80s-style drum machine beats, thanks to its ability to emulate the Roland TR-606. Load the instrument onto a track in your DAW, and start by changing the Mode toggle from Ptn to Note. This enables us to trigger the instrument from a MIDI track, rather than having to use the internal sequencer.
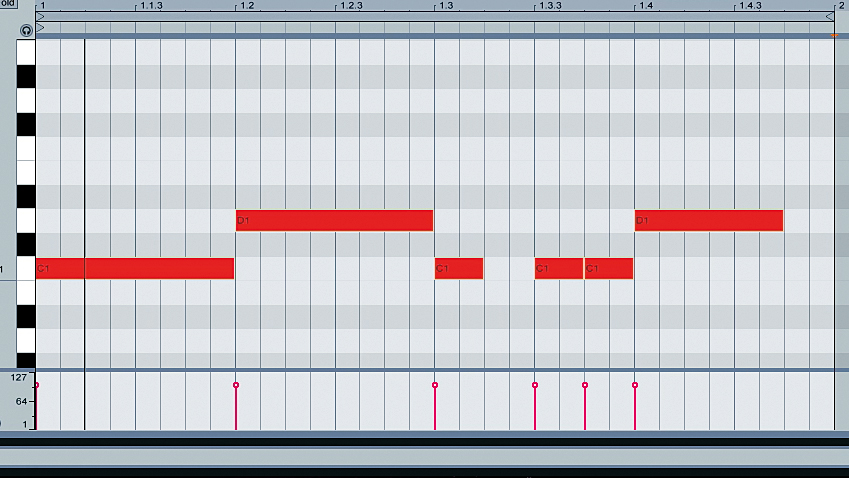
Step 2: In your DAW, set your project tempo to 100bpm. Let's start out with a simple kick and snare pattern like the one above. In ADM CM, each drum sound has its own set of parameters, with Level at the top. Set the BD (bass drum) Level to 100%, and SD (snare drum) to 78%.
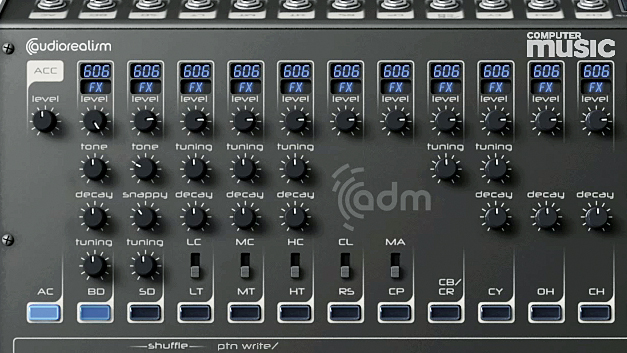
Step 3: We're making the kick louder than the snare because we're going to layer the snare with a clap, which will make it seem louder anyway. While you're at it, set the Tone of the snare drum to 29%, and its Snappy parameter to 39%. This gives us a tighter, sexier snare sound.
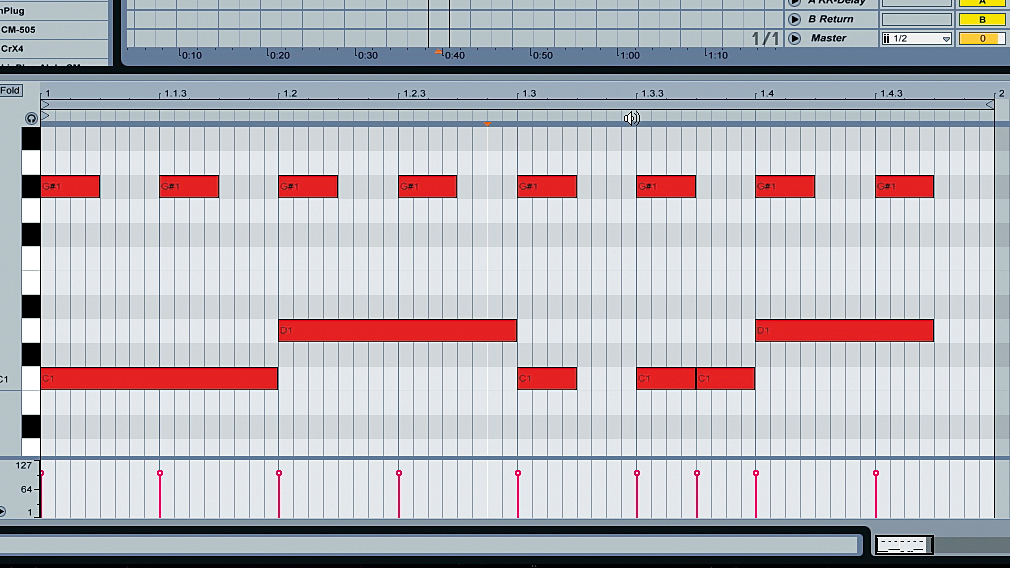
Step 4: Next, let's add some hi-hats. Copy the eighth-note hi-hat pattern above. In ADM CM, locate the CH (closed hat) section. Set the Level to 68.5% and turn the Decay down to 413.5ms. This gives the hats the restrained, tight feel that we're after.
Want all the hottest music and gear news, reviews, deals, features and more, direct to your inbox? Sign up here.
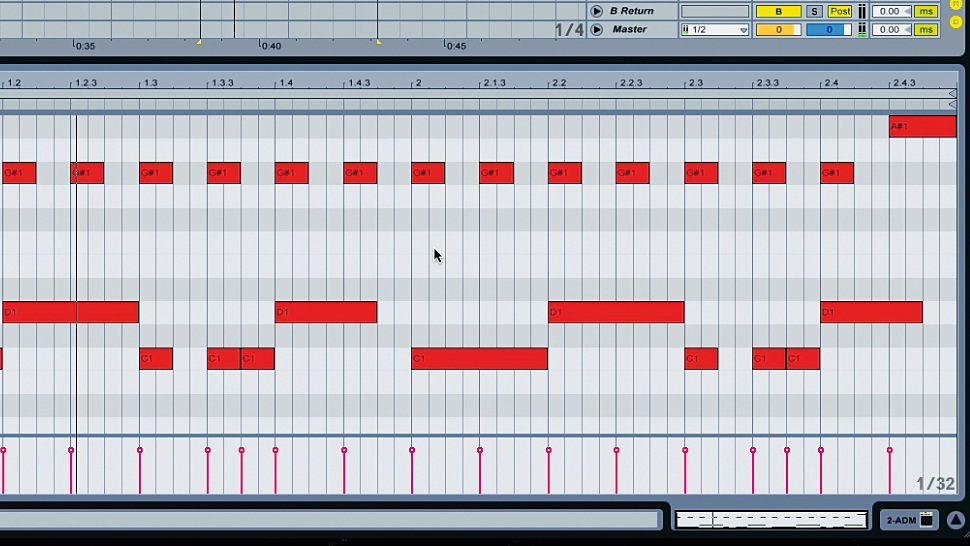
Step 5: We've now got a one-bar pattern that grooves along nicely, and we can turn it into a two-bar pattern with a simple edit. Duplicate the first bar and replace the final closed hat with an open one in the copied bar, as shown. This small touch gives the second bar a quite different feel. Now we have a basic two-bar groove to riff off.
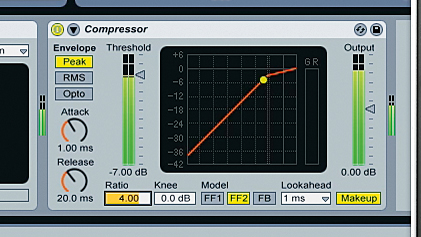
Step 6: We have the basic foundation of our beat, but there's a bit of a problem: it's really quiet! Turn the Volume knob at the bottom left hand corner of the interface up to 100%, then insert a compressor (your DAW's built-in one will do just fine) into the ADM CM mixer channel. Set the Threshold to -7dB and the Ratio to 4:1.
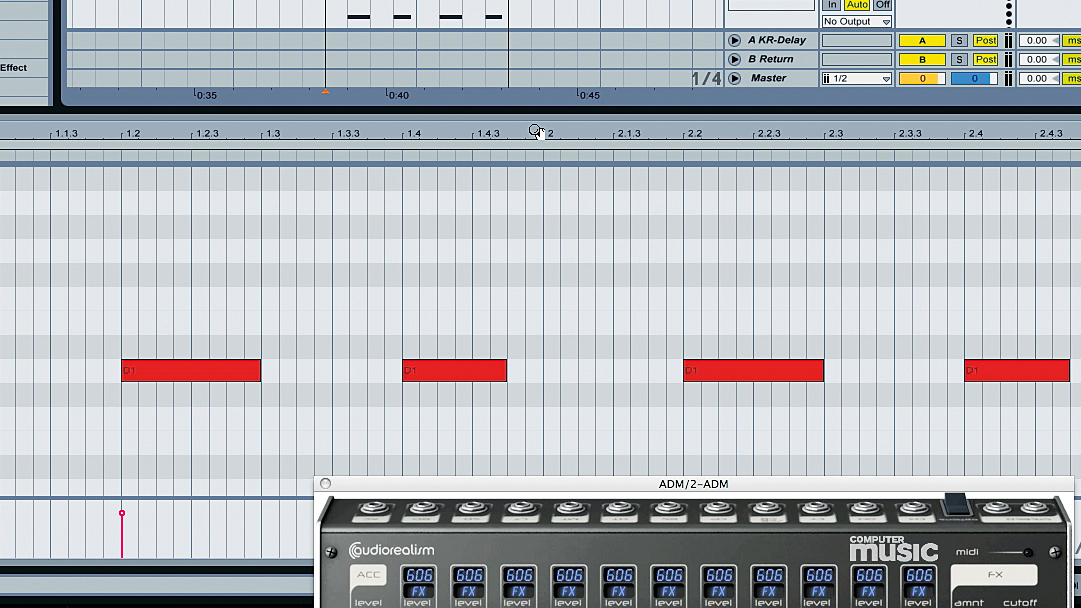
Step 7: We're using Ableton Live's Compressor, and its automatic makeup gain ramps up the volume level quite a bit, so we add a limiter after the compressor to prevent the channel from clipping. Next we need to add that clap. Create another MIDI channel in your DAW, put another ADM CM on it, and again set the Mode to Note. Copy the MIDI part above, which simply doubles the snare.
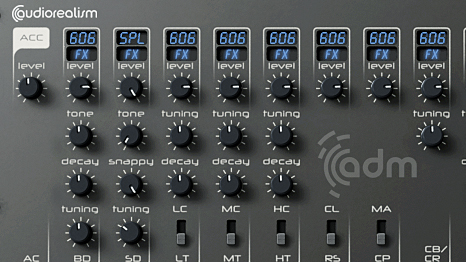
Step 8: Bring up the new ADM CM's interface, and click and hold where it says 606 at the top of the SD section. Select Clap»09_Clap.wav from the list of samples. Set the Level to 100%, and turn the Tuning down to A-3 (-4sm).
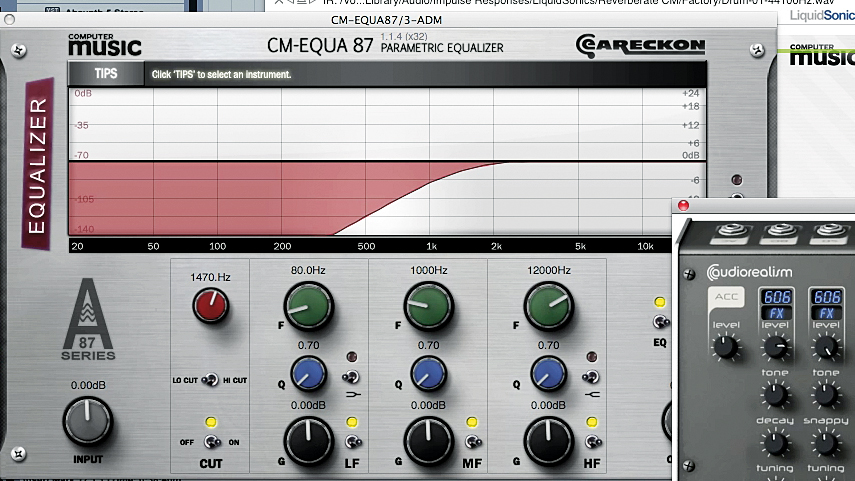
Step 9: Add ReverberateCM (another CM studio plugin) to the clap channel, select the Simple Drum preset from the menu in the bottom left hand corner, and turn the Sustain knob down to -8.6dB. Add CM EQUA 87, and bring the red Filter knob up to 1470Hz. Now use your DAW's track delay setting to bring the track forwards by 10ms (or just move the MIDI notes forward in time a bit), so that the clap sits better with the snare.
Computer Music magazine is the world’s best selling publication dedicated solely to making great music with your Mac or PC computer. Each issue it brings its lucky readers the best in cutting-edge tutorials, need-to-know, expert software reviews and even all the tools you actually need to make great music today, courtesy of our legendary CM Plugin Suite.
