How to make your music loud
Getting started
You’re probably well aware of the infamous ‘loudness war’ that has been raging in music production over the past 20 years. Producers and mastering engineers have seemingly been on a mission to achieve higher levels, leading to a steady increase in the volume of recorded music.
Although there are some notable downsides to this battle - most significantly, a loss of dynamic range and mixes that are fatiguing on the ears - it’s still one that many of us would like to engage in. Here, then, is a guide to making your music loud, complete with audio examples so that you can hear the effects of our tweaks.
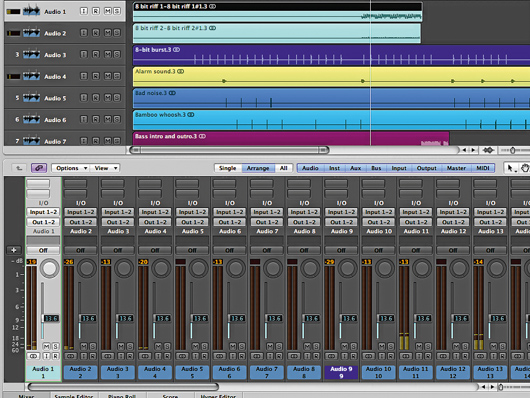
Step 1: To get started, drag all of the AIF files from the make-it-loud folder (click here to download the 241MB zip file) into a new arrangement set to 140bpm. The stereo bus will overload, so drop all the faders to -13.6dB to provide some headroom. The track should sound like this:
Compressing the beat
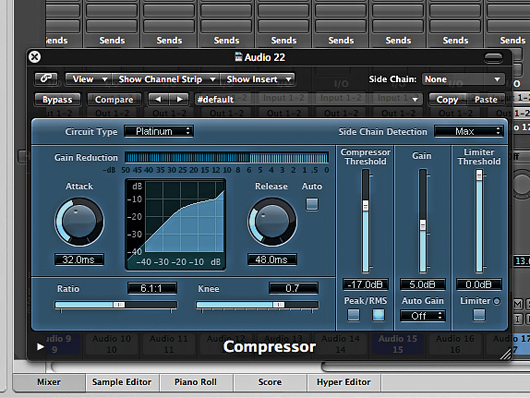
Step 2: We need to focus on the bottom end of the track, as it’s the bass parts that will drive our output processors (such as multiband compression and bus limiting). Start with the Barnet Beat part. Compress the track using a Ratio of 6:1, and a low enough Threshold to produce 6dB of gain reduction and an output gain increase of 5dB.
EQ and gating
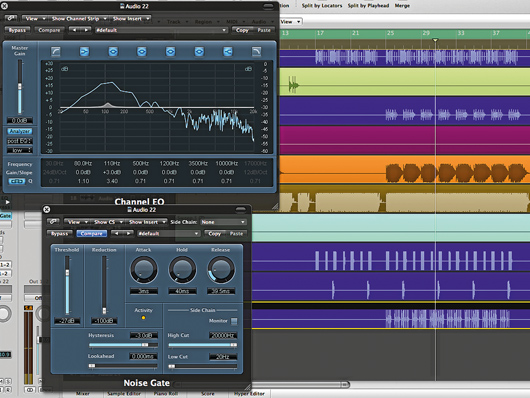
Step 3: That’s producing a fuller sound, but the inherent reverb is proving a bit of a problem, as the compressor is pulling up the level of this as well as the dry sound. Gate the part to cut off the reverb tails - we’re using a Threshold of -27dB and a Release time of 40ms. We’re also adding a 3dB boost at 110Hz to give the kick extra weight.
Filter and EQ
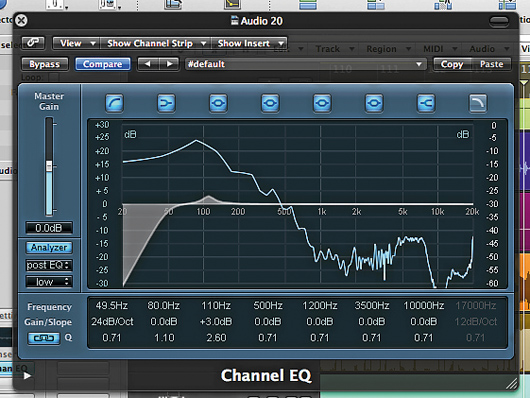
Step 4: The Tom Kick part comes next. Our Logic Channel EQ Analyzer function reveals that there’s a lot of energy in this sound below even 20Hz! Use a high-pass filter set at 50Hz to tighten the sound and boost 110Hz by 3dB again, to help glue this sound to the Barnet Beat part. Listen carefully to how they sound together.
Bass compression and EQ
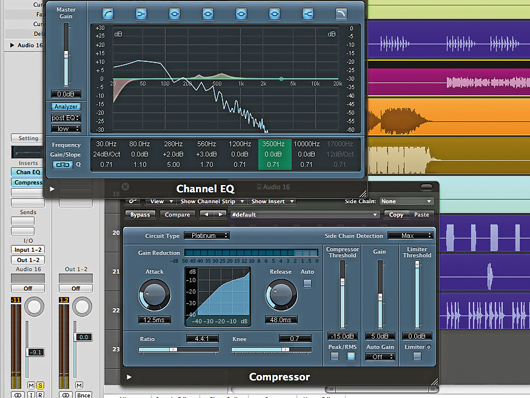
Step 5: Next up, we’ll EQ and compress the main bass part to make it really full. Acting on information from our EQ Analyzer, we push frequencies at 280Hz and 560Hz by 2dB and 3dB respectively. Set your compressor to provide some fairly gentle gain reduction with a Ratio of 4.4:1 and a Gain increase of 5dB.
Bass distortion
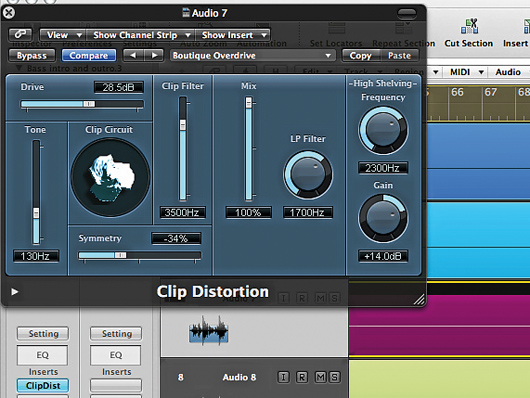
Step 6: The other bass element we want to adjust is the Bass Intro and Outro, which occurs just before the Sitar part returns in bar 86. It’s distorted, but not aggressive enough. Fire up your favourite distortion plug-in - we’re using Logic’s Clip Distortion, setting Tone at 130Hz and adding 28.5dB of Drive, with output Gain of 14dB.
Power for the pad
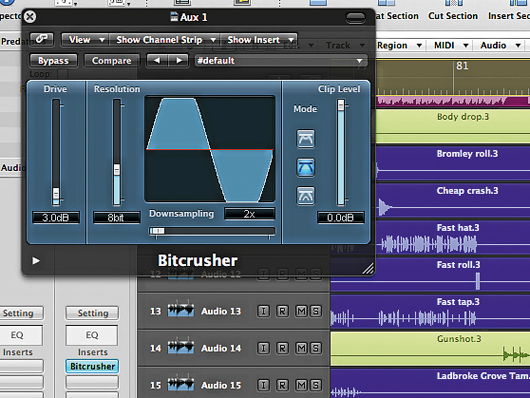
Step 7: The Predator pad plays the important role of saturating the mix whenever it occurs, filling in the upper mids and low treble. We want to give this part extra power. Send it to an auxiliary upon which you’ve set up a bitcrusher at 8-bit resolution. This produces a very crunchy, distorted effect that fills the sound out nicely.
Tweaking the fills
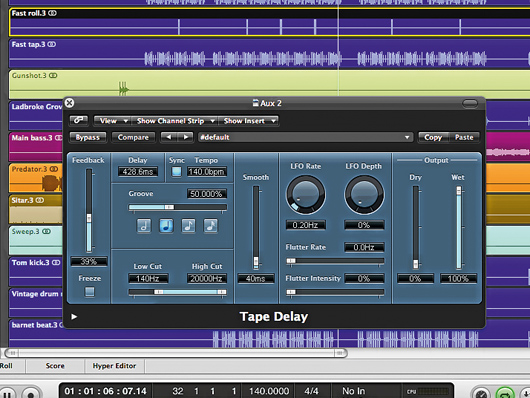
Step 8: This track is dependent on a number of fill elements to maintain its momentum, and many of these need volume now. Let’s adjust the Bromley Roll and Fast Roll parts first. Turn them both up 4dB, with the Bromley Roll panned halfway left and the Fast Roll halfway right. Add a quarter-note delay to the Fast Roll via another auxiliary.
Adjusting effects
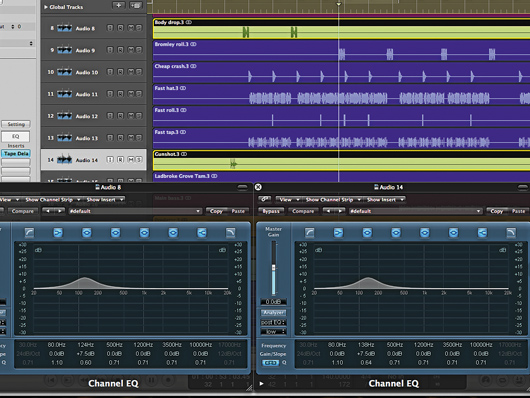
Step 9: Let’s give some more weight to the sound effects by adding extra bass to the Gunshot and Body Drop parts, as well as turning these up. Both sounds benefit from 7.5dB of extra volume between 120 and 150Hz. Send them both to your auxiliary delay too, to keep them present in the mix for longer.
Mix tweaks
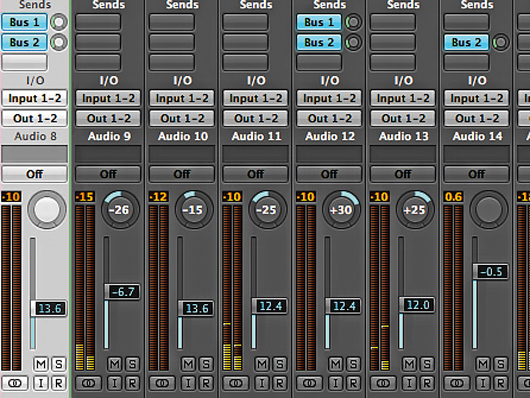
Step 10: The mix sounds solid now, but due to the extra bass, our top end is lacking a little volume. Let’s turn up a few elements, starting with the Fast Hat and Fast Tap parts. Pan these mid-left and mid-right respectively while you’re at it, then turn up the two 8-Bit parts to keep these appropriately balanced.
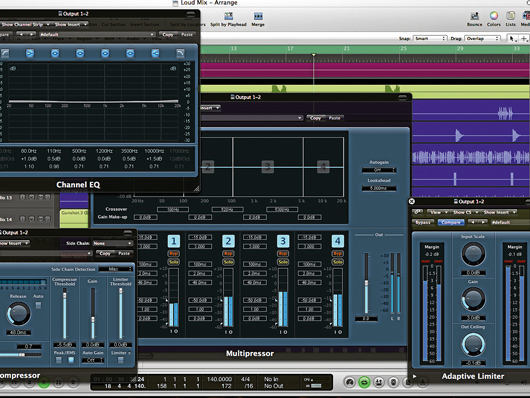
Output channel processors
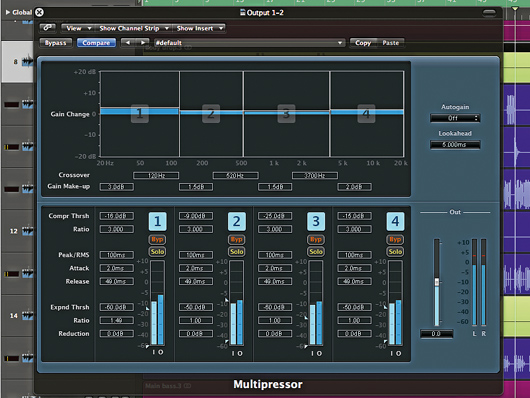
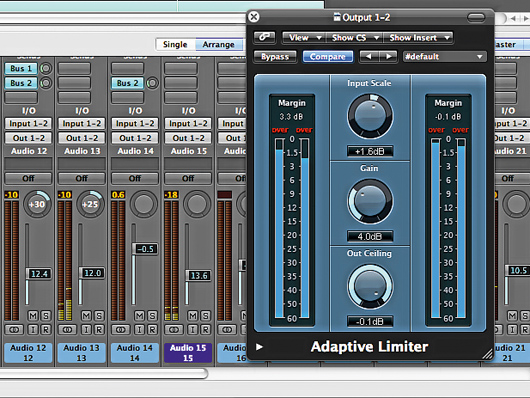
Step 11: Now it’s time to organise the output channel processors so that we can start dialling in the volume we need to make the overall mix loud. You’ll need a channel EQ, a compressor, a multiband compressor and a limiter, in that order. Insert these now. We’re using Logic’s Multipressor and Adaptive Bus Limiter to cover the latter two duties.
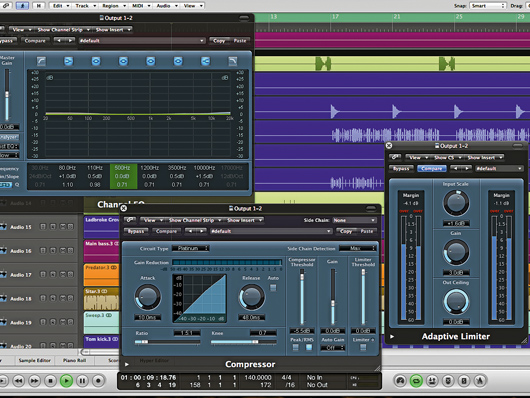
More EQ and compression
Step 12: Set the EQ to produce boosts of 1dB at 80Hz, 0.5dB at 110Hz, 0.5dB at 3.5kHz and 1.5dB at 10kHz. The compressor is just there to rein in any peaks, so set the Threshold to -5.5dB, with a Ratio of just 1.5:1. Set your limiter to produce 3dB of extra Gain and set its output ceiling at 0dB. Bypass your multiband compressor for now.
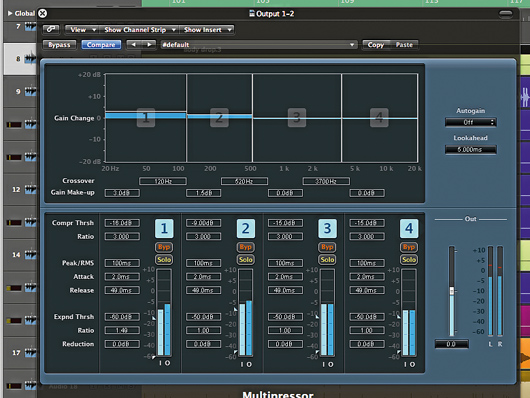
Multiband compression
Step 13: Now let’s un-bypass the multiband compressor and focus on the bass and low mids. Set these to 0Hz–120Hz and 120Hz–520Hz respectively, with a Threshold of -16dB and a Ratio of 3:1 for the bass, and a Threshold of -9dB and a Ratio of 3:1 for the low mids. Turn the bass up by 4dB and the low mids up by 2.5dB.
