How to create wider and deeper basslines with synth layering
Make the most of your bass parts by adding extra sounds
Want all the hottest music and gear news, reviews, deals, features and more, direct to your inbox? Sign up here.
You are now subscribed
Your newsletter sign-up was successful
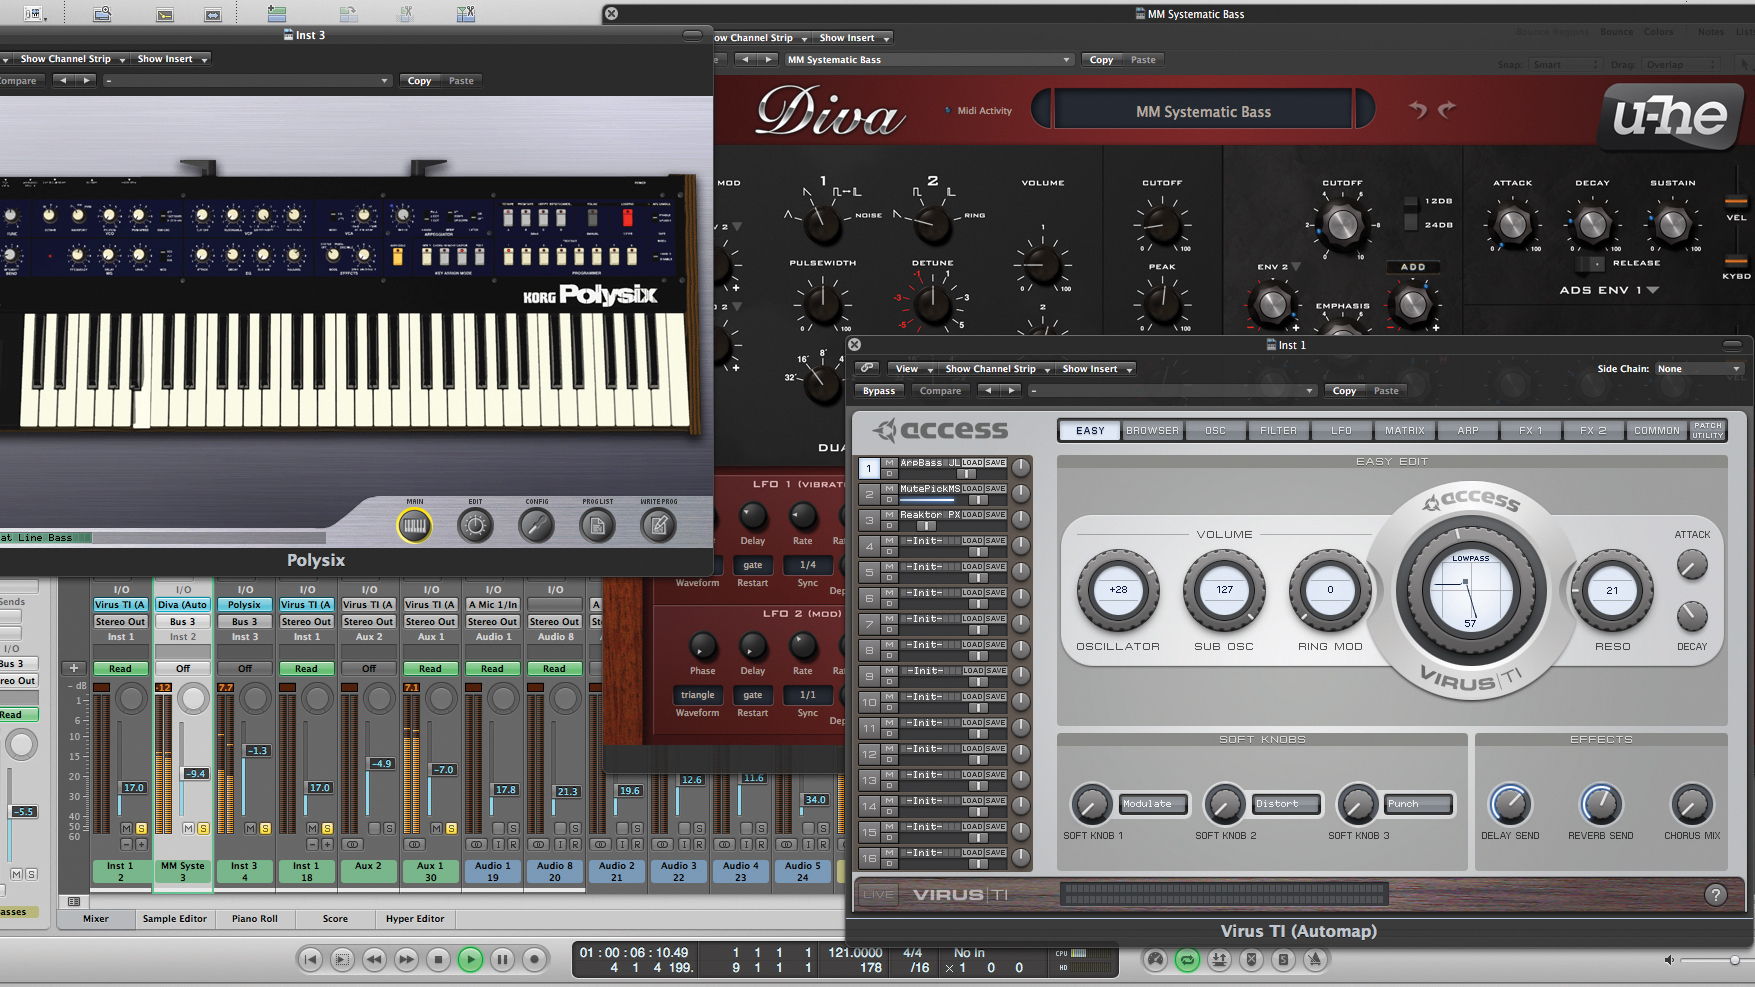
Sometimes when you program a bassline or synth sequence you'll be happy with the performance but the sound might be lacking. Often the mistake people make is to add extra instrumental parts to bulk up the mix. Although this approach can work it can sometimes lead to a confused overall picture with parts fighting for space.
An alternative is to squeeze the most out of your current parts and layer up. Here we show you how to go about this and maximise the potential of what you've already recorded.
Choosing the correct sounds to complement your existing synths is most of the battle here. Selecting patches that contain qualities the others don't is key. For example mixing sounds heavy in low frequencies with others that contain more high end will help you to build up a more complete sonic spectrum.
Even with the ideal sounds selected it's likely that some treatment will be needed. In this example some equalisation and dynamics processing are applied to ensure the separate layers make up a single cohesive sound.
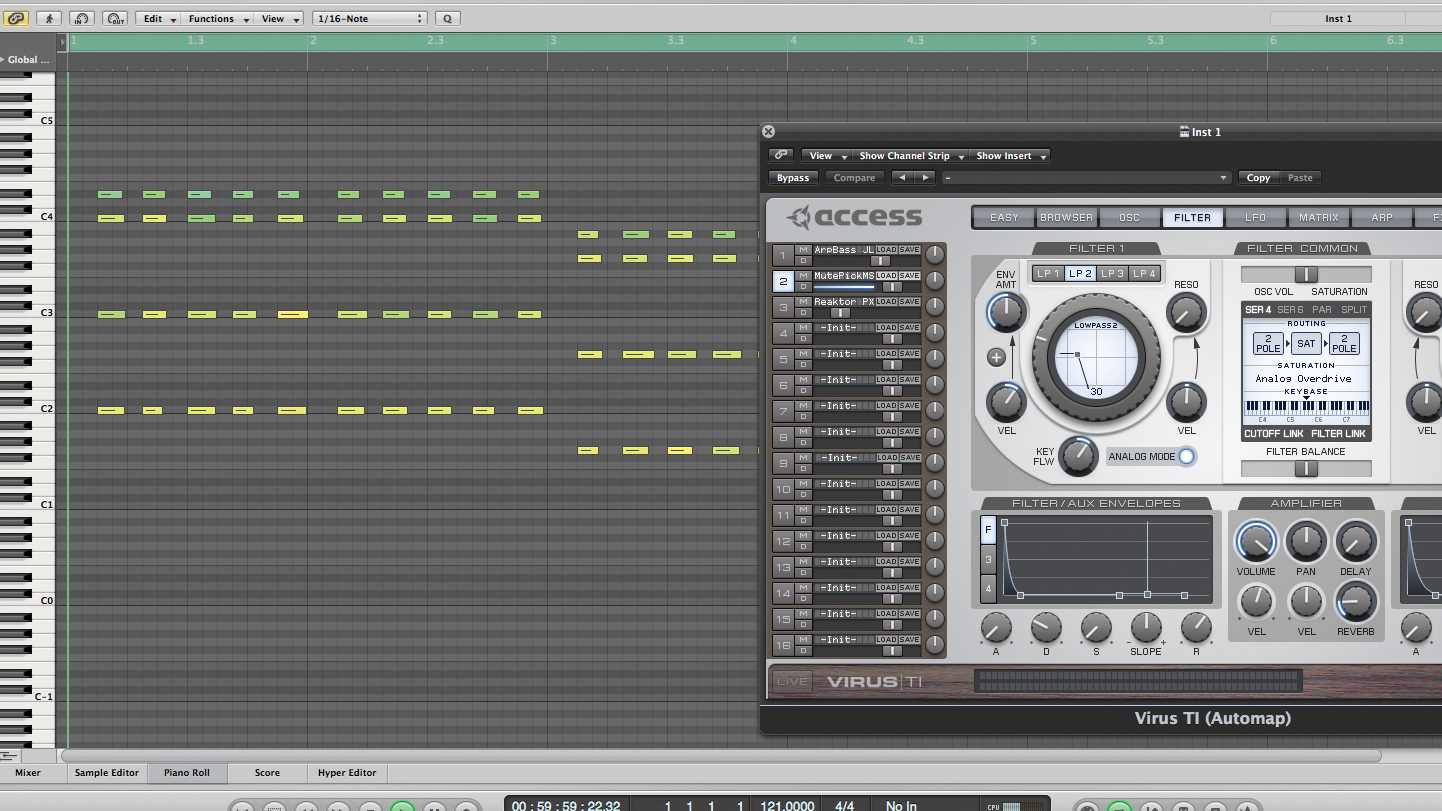
Step 1: Your starting point will be a basic synth bassline, or in this case chord progression. We'll use this as an 'anchor' for the rest of the parts and duplicate all or part of this MIDI to produce the duplicate layers. Combined with some processing we can produce a more interesting sound.
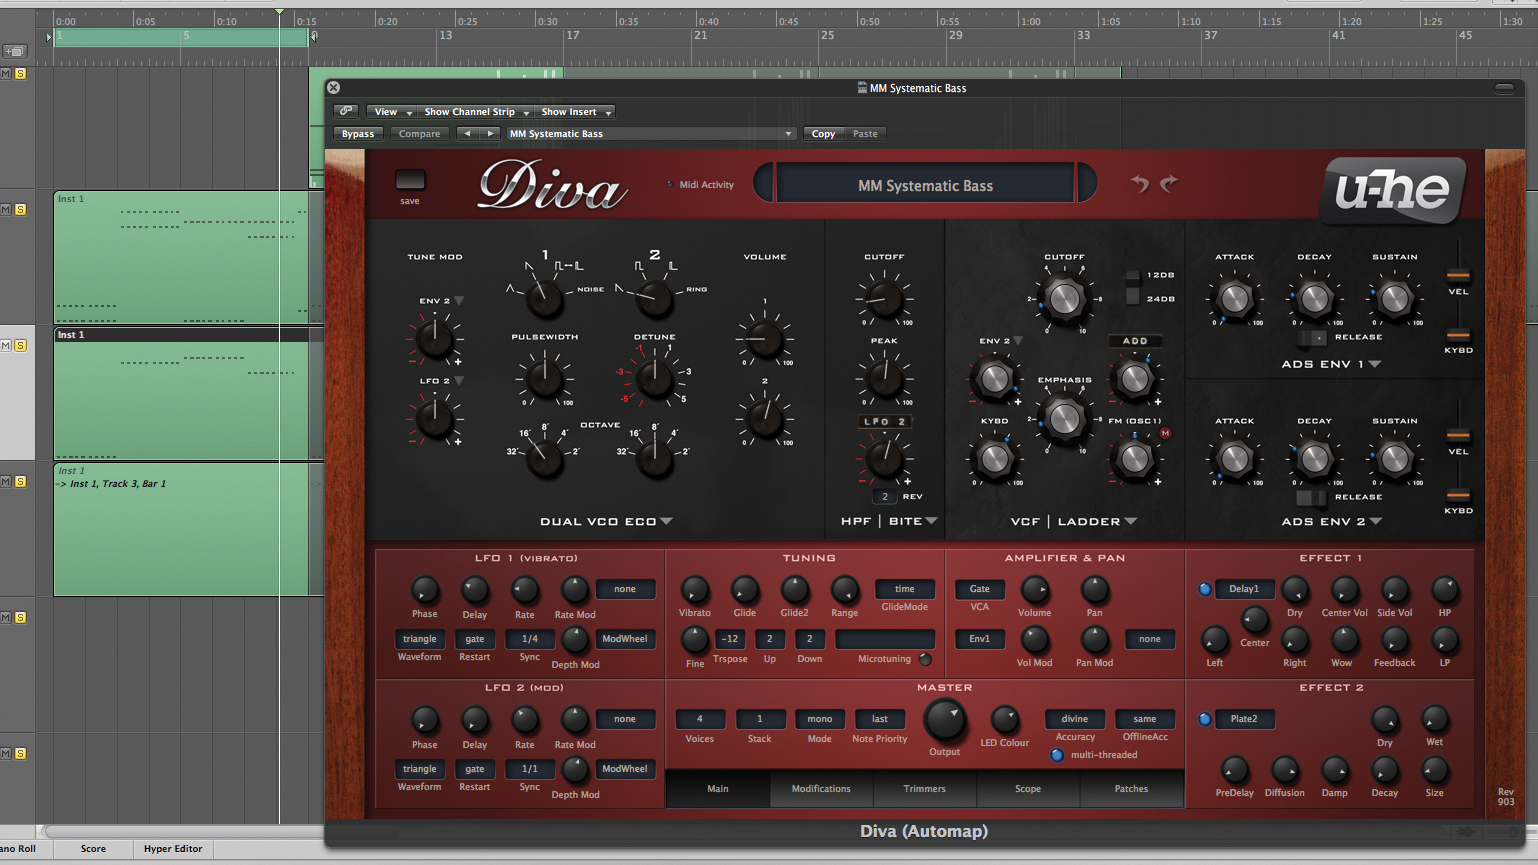
Step 2: As the initial sound was a chord sequence the root note is used to create a duplicate part. The original sound contained a fair few upper mids so this layer is going to extend the low end. A simple synth bass part from Diva adds some low frequencies and gives some mono punch.
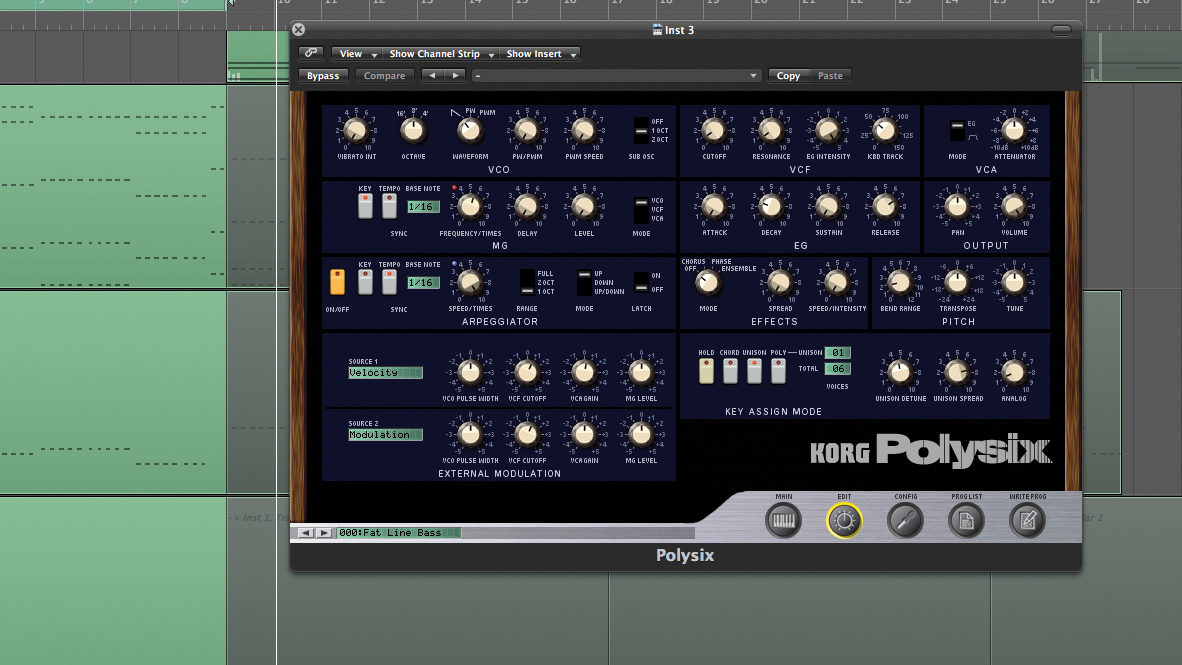
Step 3: With our high mids and low end covered we can think about the low mid frequencies. A third synth is added and as we have already added a mono patch something with a wider stereo image can work here. The Korg Polysix provides some great low mid impact and wide unison.
Want all the hottest music and gear news, reviews, deals, features and more, direct to your inbox? Sign up here.
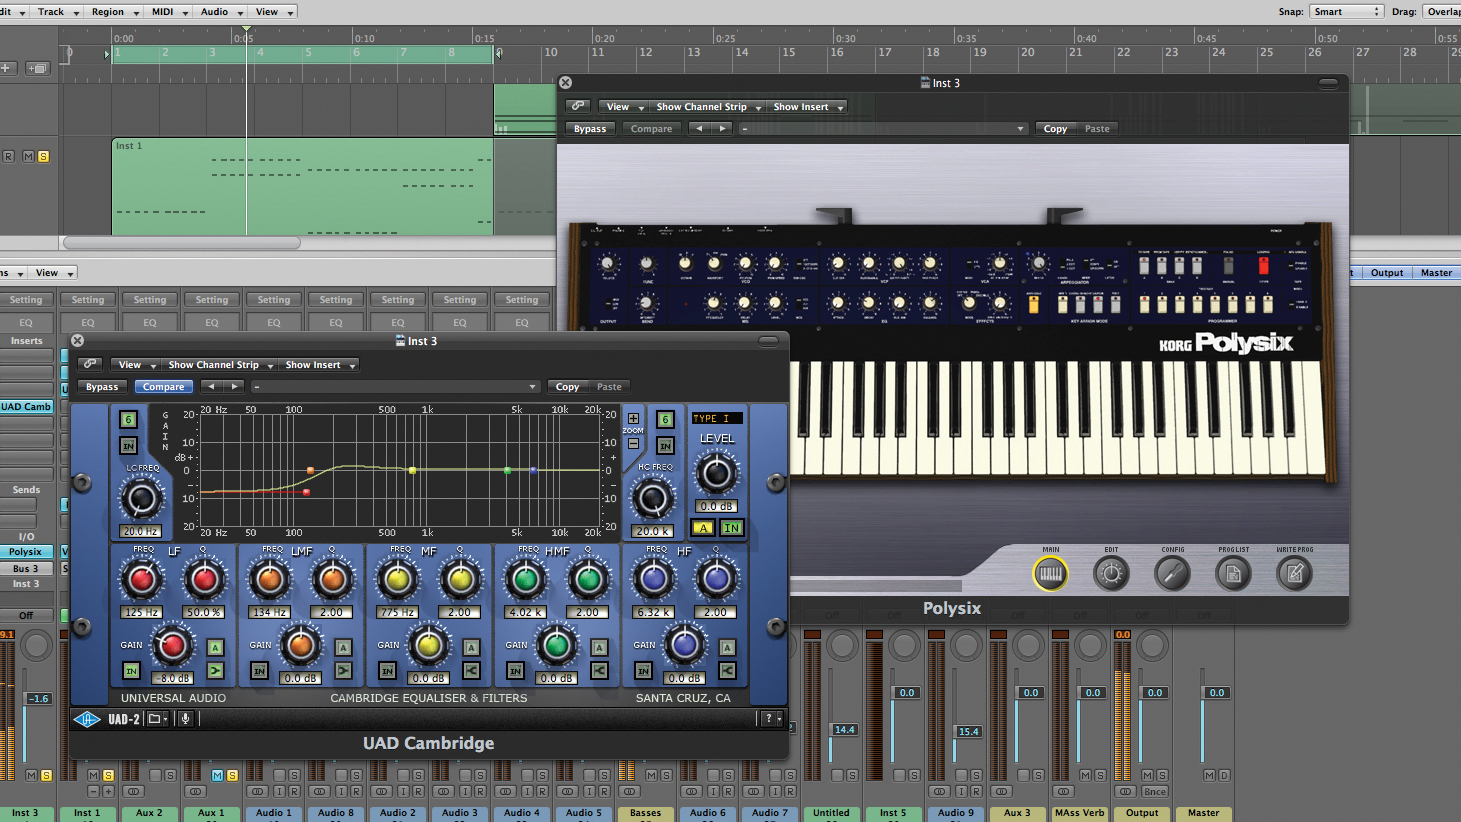
Step 4: Now it's time to start shaping the layers with EQ or filters. In this case the sounds were selected pretty carefully so there isn't a huge amount of work to do. A shelving filter is used to remove some low end from the Polysix. This allows the Diva patch to breathe.

Step 5: Now try playing the new sounds back with the original layer. Everything should play together well, but some final adjustments may be needed. Much of the final work will probably involve tweaking of levels to strike the perfect balance. Then you can introduce your new sound into the mix.
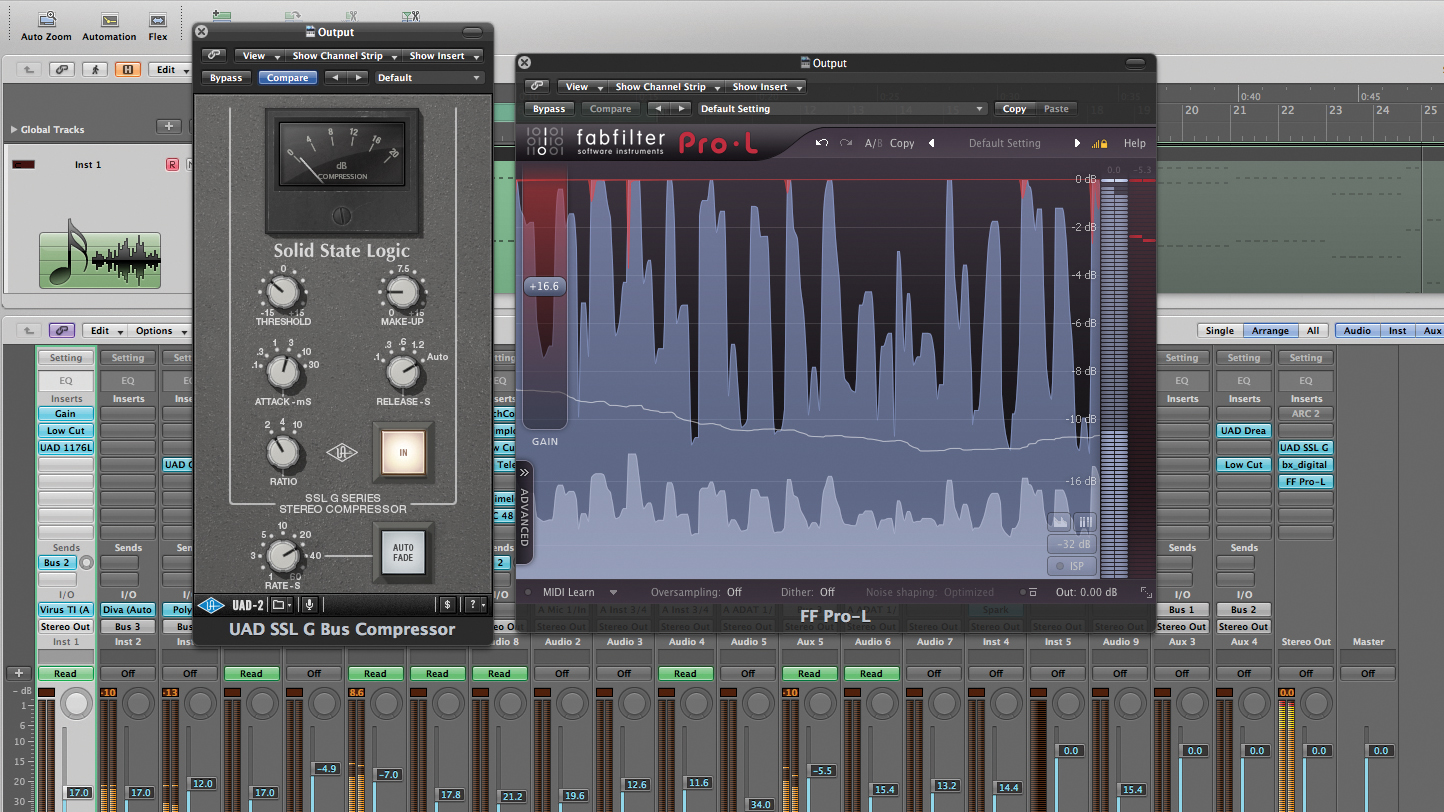
Step 6: With your three sounds working well they can be grouped for some buss processing. In this case a compressor and limiter are used to tame the dynamics and ensure there are no wayward transients popping out of the mix. The final result is then mixed with the rest of the project.
Future Music is the number one magazine for today's producers. Packed with technique and technology we'll help you make great new music. All-access artist interviews, in-depth gear reviews, essential production tutorials and much more. Every marvellous monthly edition features reliable reviews of the latest and greatest hardware and software technology and techniques, unparalleled advice, in-depth interviews, sensational free samples and so much more to improve the experience and outcome of your music-making.
