When you find yourself in need of a special effect or riser sound while in the middle of a determined studio session, you're unlikely to stop your creative flow just to spend ten minutes twisting up a clap sound in a sampler. There are likely thousands of ready-made FX sounds in your sample library, and a synth with a noise generator is only ever a few clicks away.
However, consider those shorter sound design sessions, when your goal is the cooking up of new sample fodder. By loading basic sounds into a sampler and creatively manipulating them, you can turn out a broad range of FX tones and drones while developing your lateral thinking and sampling/synthesis skills. These sounds can then be rendered and reimported into the sampler for further processing, spawning further generations of the same sound.

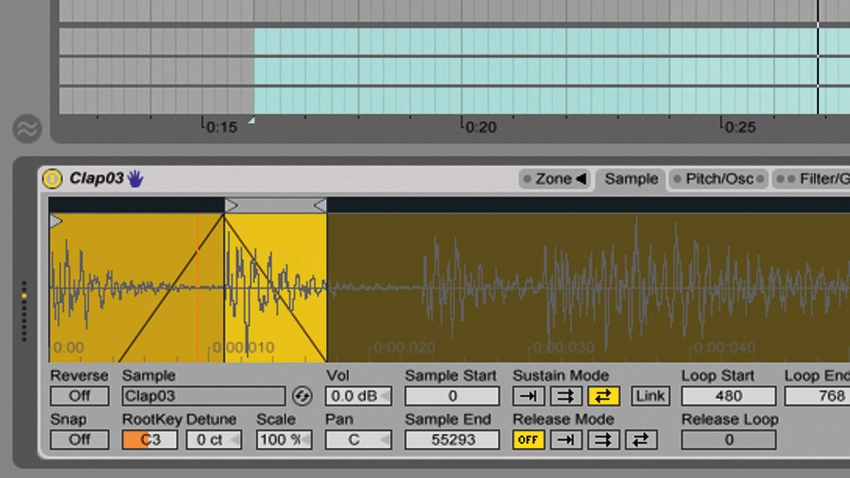
Step 1: Begin by loading a simple percussion sound into your sampler of choice - we've dropped a pitched-down drum machine clap into Ableton Live 9's Sampler. Set up a long reverb and a ping-pong delay on separate return tracks, and send the clap signal to both of them.

Step 2: By switching Sampler's Sustain loop mode to loop back and forth, then setting up loop points around a short portion of the clap's waveform, a short buzzing tone is created. Increasing the Crossfade amount removes clicking.

Step 3: Turn on Sampler's Pitch Envelope, then increase the modulation amount to +48 semitones. Set a slow Attack of around 3.5s and maximum Decay of 60 seconds, then turn the pitch envelope's Loop Mode to Sync. This transforms the tone into an endless rise.

Step 4: Now modulate the pitch in the opposite direction: activate LFO 2 in the Modulation page, assign destination slot A to the Pitch Envelope's amount, then increase this slot's modulation depth to 100. Set the waveshape to a downwards sawtooth, and move the LFO's rate for a sci-fi zap effect.
