How to create a custom effects chain using Ableton Live's Racks
Reusable racks and effects chains for rapid productions
Want all the hottest music and gear news, reviews, deals, features and more, direct to your inbox? Sign up here.
You are now subscribed
Your newsletter sign-up was successful
Hands up those of you who have countless unfinished tracks lurking on your hard drives waiting to be finished one day. Thought so, a fair old few of you. Well we're not adverse to spot of procrastination and track-hopping ourselves, we're only human after all. Which is why we're always on the hunt for new ways to get those solid-gold hits signed off and finished for good.
The Ableton users amongst you will be glad to hear that there are a veritable shed-ton of ways you can speed up your workflow, and shortcut some of those creative processes in Live.
Here we are going to save time by creating ready-made preset chains of your favourite combos to use again and again.
Article continues below• For many more Ableton Live guides go to our massive learning hub: Learn Ableton Live and Ableton Push: music production tips and tutorials
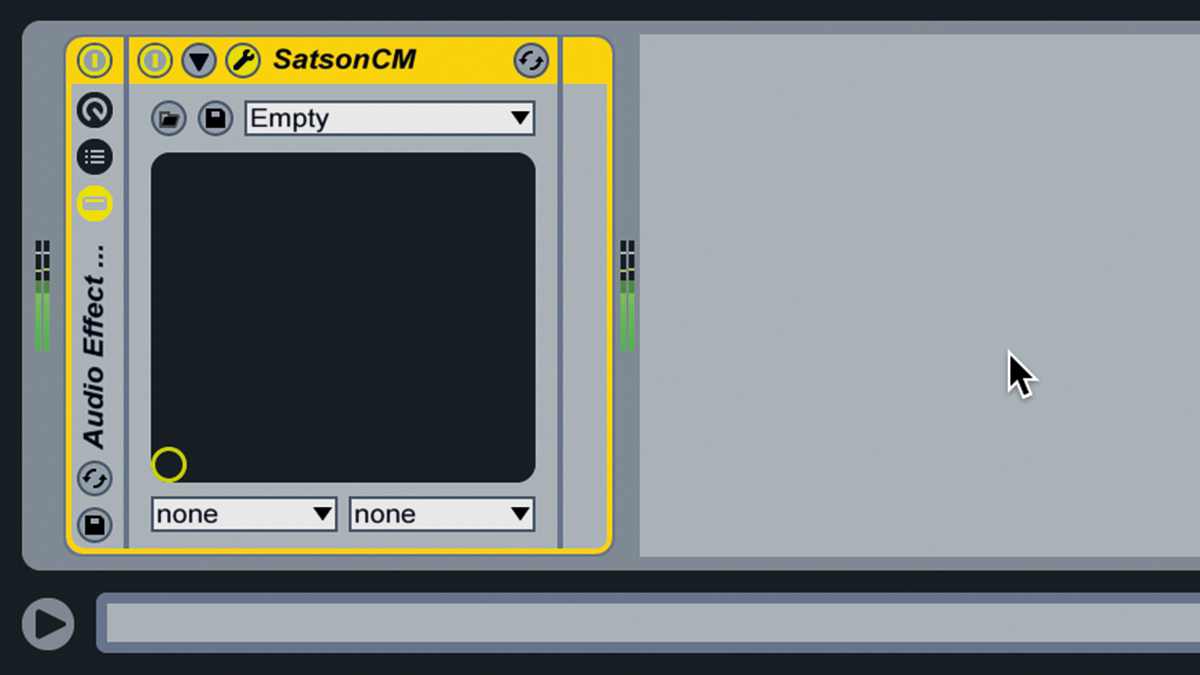
Step 1: We'll use Ableton Live's Racks to make a bread-and- butter channel strip. Download the accompanying files and load Drums.wav on a new audio track in a 90bpm project. Add Satson CM to the track, then right- click its header and select Group (or press Ctrl/Cmd-G) to encapsulate it in a Rack.
Dry
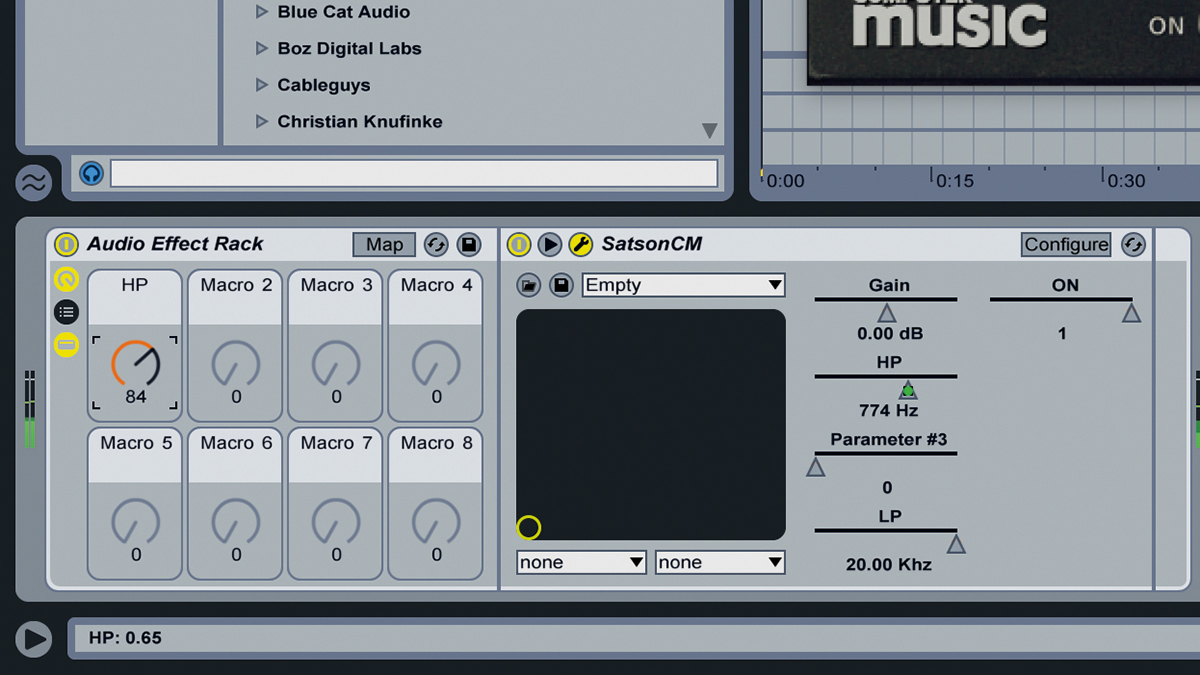
Step 2: Click the Macro icon (below the device's power switch) to reveal eight macro knobs. Now click the arrow on the Satson CM device to show the plugin's parameters - any of these can be mapped to a macro knob. Right-click the HP parameter and select Map to Macro 1. Wiggle the Macro 1 knob - it's now controlling Satson CM's high-pass filter.
HP at 50%
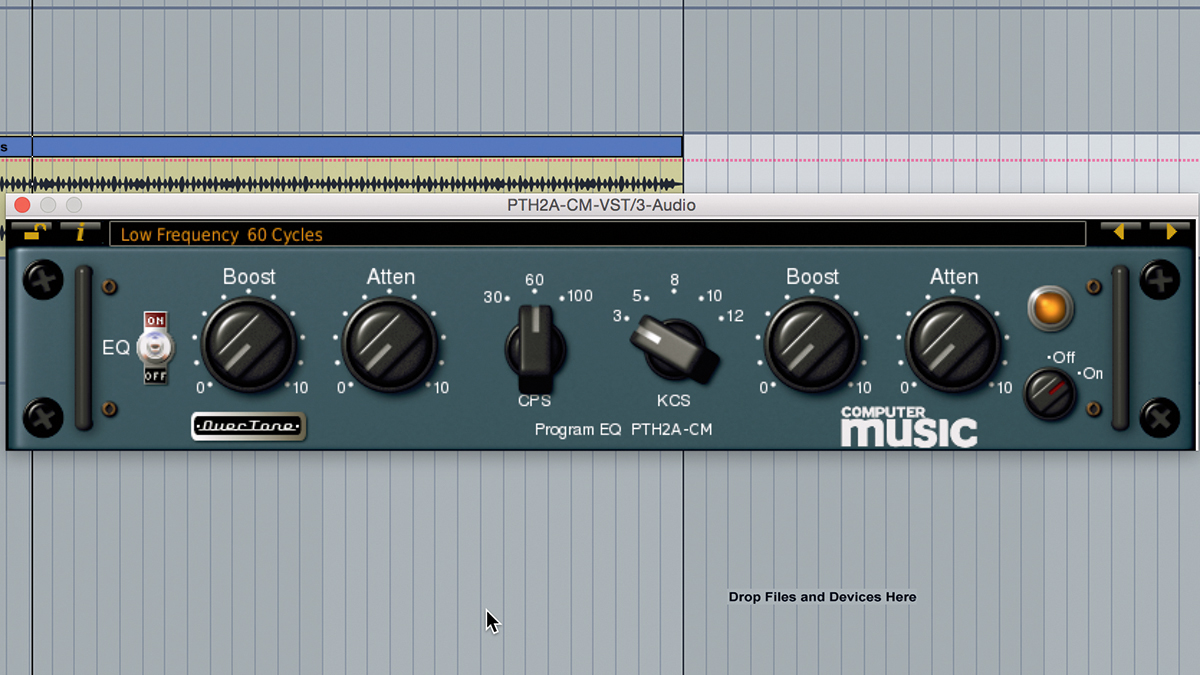
Step 3: Next, assign Satson CM's low-pass filter (LP) to Macro 2. It defaults to 0, so push the knob up to 127. Now for EQ - load Overtone DSP's Program EQ CM right after Satson CM. Turn the EQ On with the far-right switch, and set CPS (ie, bass boost frequency) to 60. As we don't need to change this value, we won't bother mapping it to a macro.
Want all the hottest music and gear news, reviews, deals, features and more, direct to your inbox? Sign up here.
Bass at 25%
Bass at 50%
Bass at 75%
LP at 50%
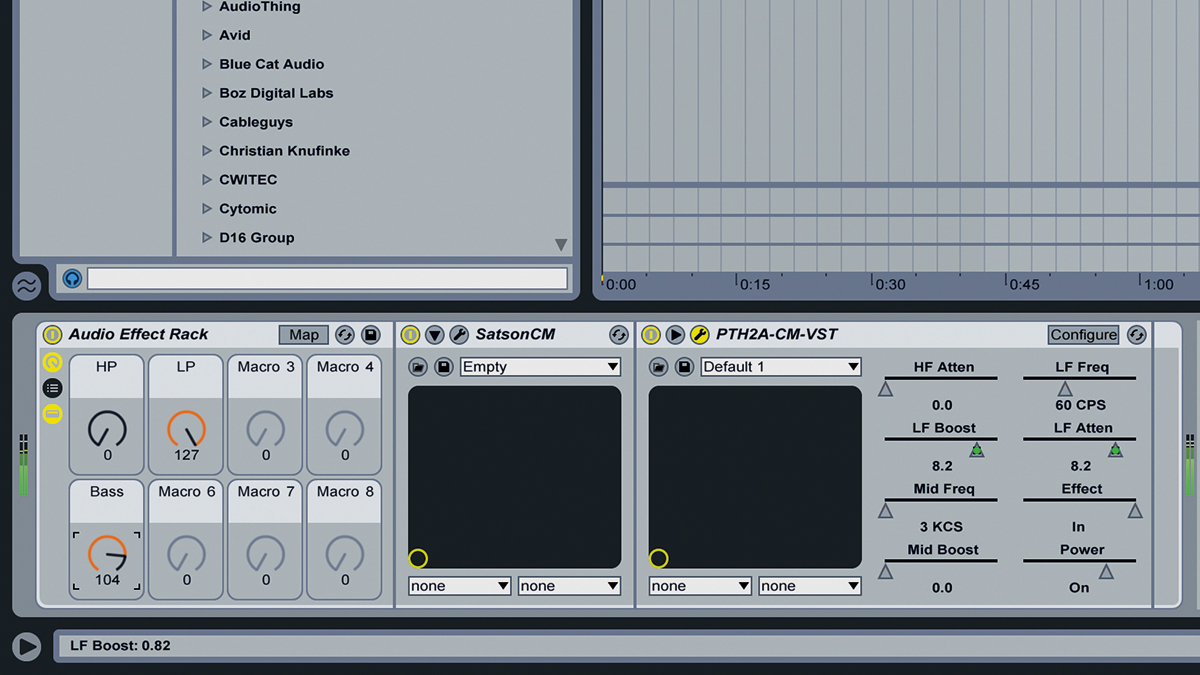
Step 4: Map LF Boost to Macro 5, then click the macro knob and press Cmd/Ctrl-R to rename it - call it Bass. Map LF Atten to the same macro. With both low shelf knobs mapped to one macro, increasing the Bass control achieves the classic Pultec EQ trick of simultaneously cutting and boosting shelves. Next, set KCS to 10, then map Mid Boost and HF Atten to Macro 6, naming it Treble.
Treble at 100% - HF Atten max at 0.40
Treble at 100% - HF Atten max at 1.00
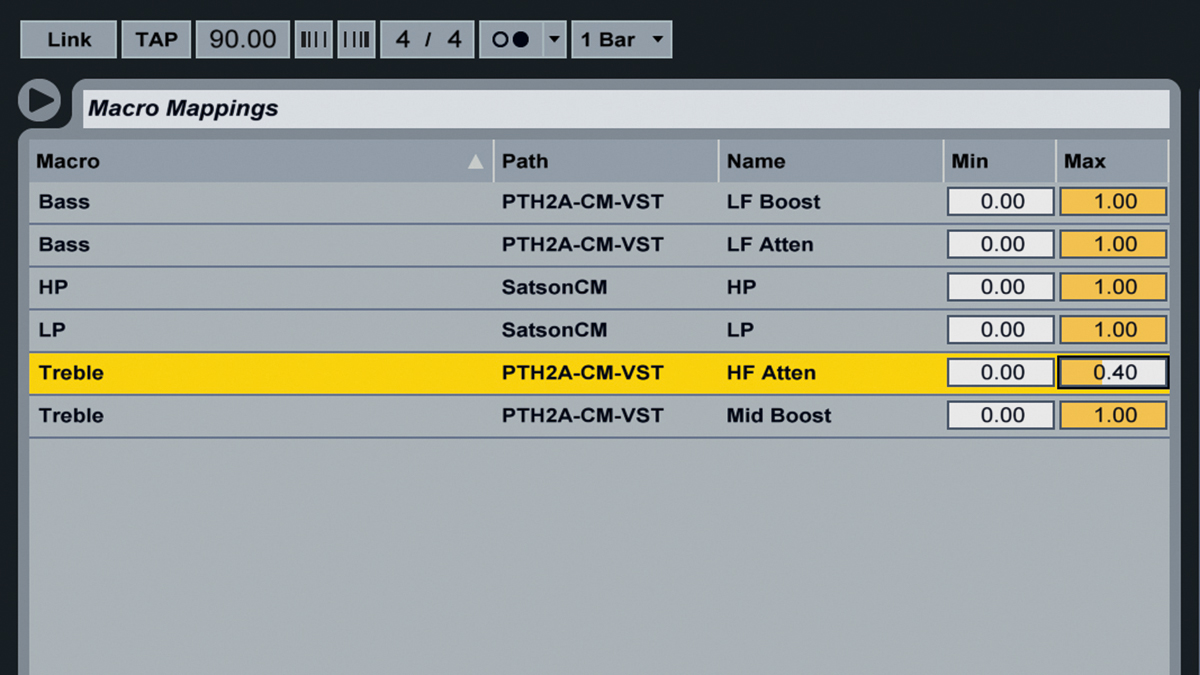
Step 5: This gives a combined 10kHz bell boost and shelving cut, focusing the treble without it getting too bright. Even so, we'd like more of an obvious boosting effect, so let's make the shelf cut weaker. Click Map to open the Macro Mappings panel, then set HF Atten's Max to 0.4. Now the Mid Boost knob covers its full range, but HF Atten stops before halfway. Click Map to exit mapping mode.
Drive at 75%

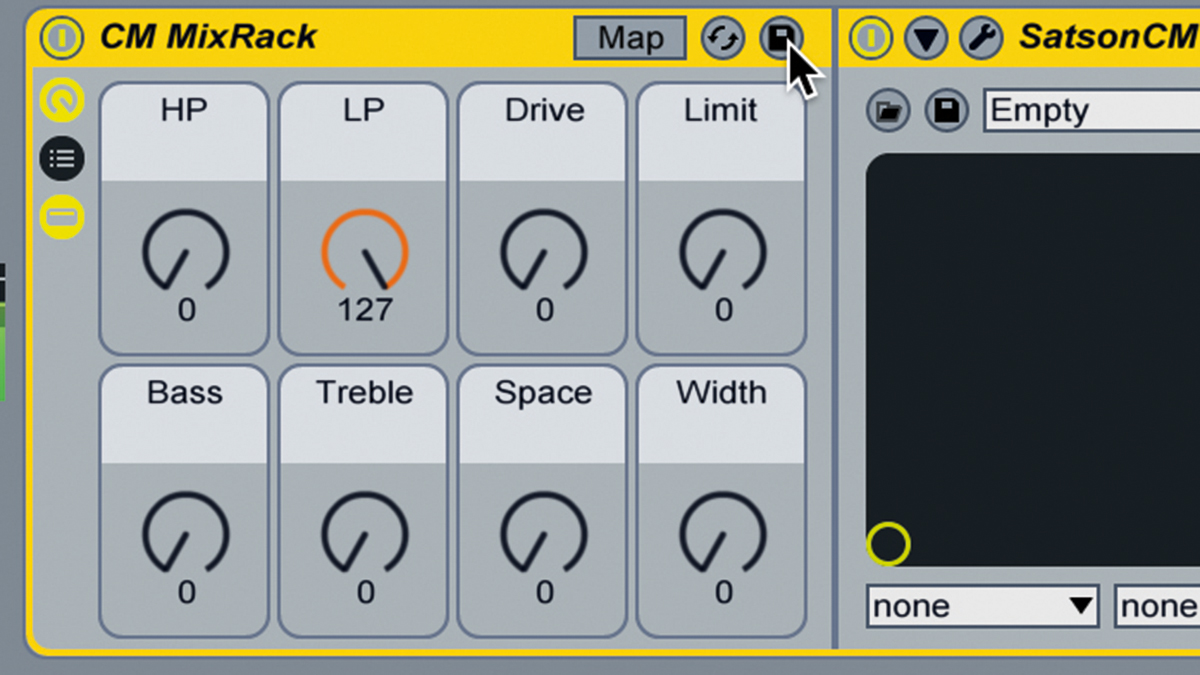
Step 6: Next in the chain, saturation. Add 6X-500 CM, turn its EQ Off, and map Input Gain and Output Level to Macro 3, naming it Drive. Use Map Mode to invert Output Level's action, so its Min is 1.00 and Max is 0.00 - the gain increase is now compensated. We finish with reverb, stereo widening, and limiting. Finally, click the Rack's header and press Cmd/Ctrl-R to rename it. Hit the disk icon to save it.
Space at 75%
Space at 100%
Width at 25%
Width at 50%
Limit at 75%
Limit at 100%
Fully processed loop
Like this? Then don't miss...
How creating custom sample collections can speed up your workflow
How to find plugins and samples faster in your DAW
13 things to do with your 'found sounds' when you get them home
Computer Music magazine is the world’s best selling publication dedicated solely to making great music with your Mac or PC computer. Each issue it brings its lucky readers the best in cutting-edge tutorials, need-to-know, expert software reviews and even all the tools you actually need to make great music today, courtesy of our legendary CM Plugin Suite.
