25 pro tips for better home recordings
Get a studio-quality sound in your bedroom

Want all the hottest music and gear news, reviews, deals, features and more, direct to your inbox? Sign up here.
You are now subscribed
Your newsletter sign-up was successful
Turning your house into a recording studio doesn't have to be too difficult, but the same old problems always seem to pop up.
So, MusicRadar has collated 25 home recording tips from the pros. Take their advice, and the quality of your bedroom productions could improve dramatically.
If you want to know more about getting the best out of your project studio, check out Computer Music Specials (Volume 31): Recording Essentials which is on sale in selected UK newsagents now and can also be purchased online.
Oh, and when you've finished here, be sure to go and look at MusicRadar's 25 more pro tips for better home recordings.
1. Mic positioning
Optimum mic placement will depend on the sound of the instrument and the sound of the space it's in. As a general rule of thumb, start by listening to how and where the instrument makes its sound, and what the room contributes to that sound. Position your mic to achieve the right balance between the two.
2. Drum miking
Recording drums could easily involve ten or more mics, but this won't necessarily make them sound better - it just gives you more balancing flexibility later. A four-mic solution can be just as effective: put one in front of the kick drum, one on the snare and a stereo pair over the top.
3. Beats first
You've got to start somewhere, and most tracks are built on rhythmic foundations. So if you're recording a track bit by bit, get some proper beats down first. This gives the musicians something real to play to (rather than just a click) and will help shape the feel of the track.
Want all the hottest music and gear news, reviews, deals, features and more, direct to your inbox? Sign up here.
4. Dry vs wet
For most instruments, you'll be looking to add and adjust effects levels (reverb, delay and so on) when you mix, so recording these with your original sound can be a mistake. However, there are exceptions - for example, electric guitar parts, where the effects are an integral part of the sound and performance.
5. Mic and DI
For guitars and bass, try recording separate DI and mic signals. This gives you a clean DI sound and a character-rich amp sound, and balancing them on playback gives you the best of both worlds. If you later decide the original amp sound isn't right, simply put an amp sim plug-in to work on your DI signal.
"Recording drums could easily involve ten or more mics, but this won't necessarily make them sound better."
6. Headphone mixes
Serving up a perfectly mixed headphone feed may make the performer feel good, but it can be deceptive. Keep it simple: concentrate on providing a solid pitch reference, a solid timing reference and foldback of what's being played (with added effects if required). This should give the musician all they need to deliver a good performance.
7. Record at 24-bit
A higher bit depth enables you to have a greater dynamic range and to capture more subtle detail in your recordings. On the downside, a 24-bit file is 1.5 times the size of a 16-bit file. Even so, the benefit outweighs the cost, because the extra dynamic range means you can allow yourself more headroom when you're recording.
8. Sample rates
With new interfaces delivering 96kHz and even 192kHz audio, the pressure is on to record at higher sample rates. However, the norm remains 44.1kHz or 48kHz. Part of the reason for this is file sizes, with 24-bit/96kHz recordings requiring over three times the space of CD-quality audio. This being the case, it may be prohibitive for massive multitracked sessions, but it's worth trying higher sample rates for simpler sessions. Just keep an eye on your hard drive space.
9. Headphone bleed
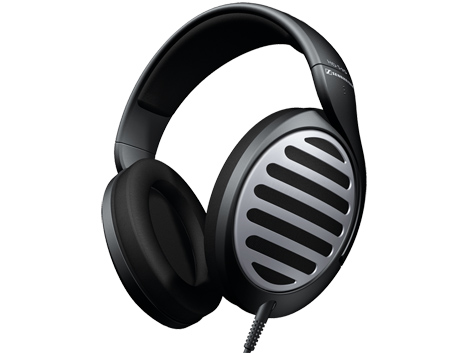
Always bear in mind that your mic could be recording unwanted extras. Combat this by picking a pair of headphones that are fully enclosed. Then set your headphone level to avoid loud volume when you're recording quiet tracks.

10. Low latency monitoring
Many audio interfaces now offer basic hardware monitoring. Even a simple analogue desk can provide you with the same options and more besides, including auxiliary sends for effects and a dedicated headphone send. The whole idea may seem like a bit of a step backwards, but if you do a lot of recording, it can prove productive.
11. Gain structure
Getting a clean signal into your computer requires a basic understanding of the way signal levels work. Mic preamps always have an initial gain control, but they may have other level controls later in the chain. For best signal performance, set these to zero or unity, and use the initial amp gain to adjust the level to your needs.
12. Dropping in
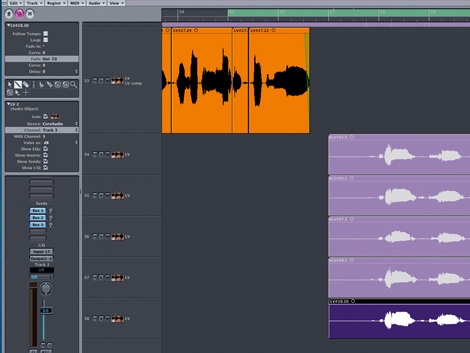
On a tape machine, dropping in to record overdubs is a pretty straightforward process. This isn't the case with all audio sequencers, but on the upside, you'll likely have more tracks to play with. Simply set up a 'monitor' track and drag takes onto it for playback while you continue to record to new tracks.

13. Compression
With 24-bit recordings you shouldn't run out of dynamic range, so the technical need to compress when recording is less than in days of old. However, you may want to do so purely for convenience. Avoiding fast release times should make any unexpectedly heavy compression less obvious.
14. EQ while recording
If you're confident in your monitoring, EQing when recording is a good plan. Even so, if you find you're boosting certain frequencies by more than 6dB, beware. One cautious rule of thumb is to split the difference between zero and your preferred amount of boost.
15. Computer studio
If you record in the same room as your computer, noise can be an issue. Position a directional mic so that its rejection node points at the noise source. Alternatively, if possible, manually reduce the computer's fan speed. Just don't try to hide, cover or screen off your PC, as it will just get hotter and noisier.
16. Separate rooms
A simple 'flying' lead can connect you (and some mics) with other rooms in your house. Bedrooms often make good dead spaces, thanks to the abundance of soft furnishings they contain (and they also tend to be in quieter parts of the house). Using a separate recording space enables you to listen objectively while recording.
17. Polar pattern advantage
Directional mics can be surprisingly good at keeping out unwanted room noise. In a small space, try a cardioid with good rejection and a tight pickup pattern. Alternatively, try capturing a singer/guitarist using a figure-8.
18. Return to the source
A posh microphone won't make a poor instrument or bad performance sound any better. Look for weaknesses in your playing and instruments and address them first, then you can reward your efforts by splashing out on a new mic.
19. Software setup
Amid the flurry of preparing for a recording session, you might forget to get your software straight. If you're planning to record regularly, it's a good idea to set up a song template or two for different situations, with inputs and outputs all suitably routed.
"If you record in the same room as your computer, noise can be an issue. Position a directional mic so that its rejection node points at the noise source."
20. Lock multiple tracks
These days, most decent audio software enables you to group tracks together easily. This is now an essential process when recording and editing multitrack sessions, because with concurrent tracks locked together and fully in sync, you can edit them quickly and simply as one unit.
21. Use your ears
Before recording in an unfamiliar space, take a walk around, talking, shouting and clapping your hands in different places. This will give you a good impression of how various parts of the room respond to different volumes and sounds, so you can set up appropriately or make changes if necessary.
22. Use the room
Achieving a good room/direct sound balance using a single microphone can be difficult. If you do want to capture some natural ambience, set up a separate microphone for the purpose. The ideal position will depend on the room's size and character - there's no substitute for a little experimentation.
23. Tuning
Multitracking and overdubbing will lay bare any tuning issues you have. Stay on top of tuning at the recording stage and you'll find finishing the track much simpler. Check your instrument tuning between each and every take. If in doubt, listen back with the musician or singer, pinpointing the problem areas - then fix them.

24. Mic choice
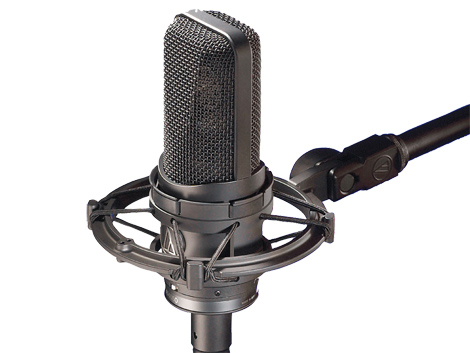
Ruggedness, sensitivity and sound are all major considerations when it comes to choosing a mic. For handheld use, a typical condenser will be too vulnerable to contact noise, so use a dynamic. For quiet sources, on the other hand, you'll need something quite sensitive, so use a condenser mounted on an appropriate stand.
25. Remain objective
It's all too easy for your ears to become accustomed to poor playing or bad tuning while you're concentrating on the technical side of the recording process. To counter this, try to retain an overall sense of perspective (also known as 'punter's ears') and address problems at the source rather than planning to fix them later.