MusicRadar Verdict
Cubase 11 not only adds some great new features but also evens up its three versions, delivering a professional option to suit most wallets.
Pros
- +
Good balance of features on each of the three versions of Cubase 11.
- +
Excellent new dynamic EQ on reworked Frequency 2 plugin.
- +
SpectraLayers One with an ‘unmix vocals’ option.
- +
Sampler Track a lot more useful with the new Splice option.
- +
Scale Assistant option can speed things up.
Cons
- -
Unless you’re within the recent purchase grace period, this is a paid-for upgrade.
MusicRadar's got your back
What is it?
Steinberg has spearheaded music software development for over 30 years, and through Cubase, which started as a MIDI sequencer, introduced a whole generation to the block-based arrange screen now used in the majority of today’s DAWs.
Along the way, they invented virtual studio technology, developed a class-leading audio editor (Wavelab) and survived the dark days of software piracy.
However, in the last few years the music software landscape has changed beyond recognition and their flagship DAW, once one of only two or three serious contenders, now finds itself competing in a sea of seriously powerful and yet surprisingly similar apps, many of which of course owe their modus operandi to Cubase. So, how does this market-leading DAW keep things fresh?
Existing users already know the answer, and that is the regular annual updates. These are typically paid-for updates, which is somewhat annoying. However, there are usually some good new features to tempt us and Cubase 11 will hopefully be no exception.
Cubic
Computer Music provided an extensive breakdown of the new features, in issue 290, which include new plugins, SpectraLayers integration, MIDI Key Editor improvements, improved stem exporting, enhanced sampler track options and better score editing, and here we’re going to pick up on that and see how they perform. But first, let’s have a recap of what exactly you’re buying into.
If you’re new to Cubase, there are three paid-for versions, so if you’re not ready to commit to the full Pro version there is some merit in starting at a lower level. Remember, all versions are capable of professional results and you won’t lose out financially by upgrading from one level to the next.
Features-wise, Cubase is a cross-platform DAW and has, over many years, developed a formidable and somewhat daunting feature set.
Want all the hottest music and gear news, reviews, deals, features and more, direct to your inbox? Sign up here.
There are a multitude of processing plugins, including MIDI-specific ones. There is also a multifaceted and rather excellent integrated channel strip with six different processors and an EQ focus panel
It incorporates audio recording, MIDI sequencing (check our explainer opposite for version-based track limits), track automation and real-time and offline audio processing.
There is a multitude of processing plugins, including MIDI-specific ones. There is also a multifaceted and rather excellent integrated channel strip with six different processors and an EQ focus panel. Mixing is handled via the MixConsole which can be accessed in the bottom panel.
Although to reveal its full analogue-inspired glory it can be undocked, which is great if you’re using a second monitor. If you need a helping hand with audio processing there are also a multitude of categorised track processor presets that load chains of preconfigured plugins.
The amount of content you get depends on which version you buy, but even Elements gets a sizable chunk of sample sets
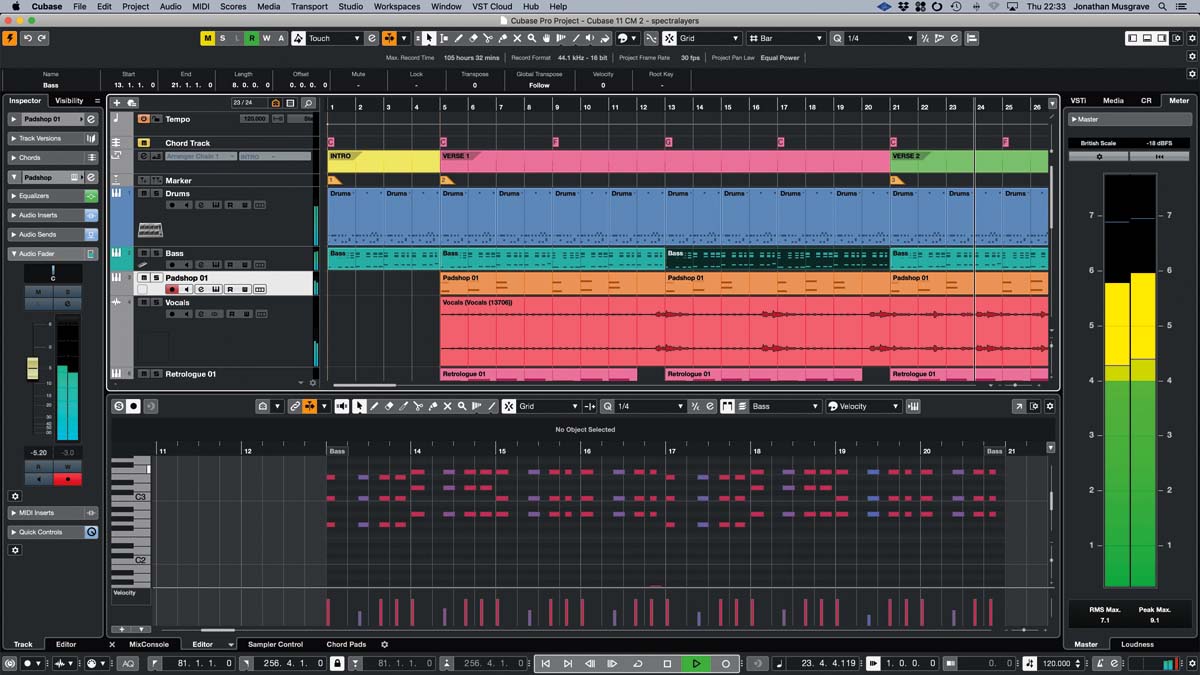
From a workflow perspective, Cubase combines a core project window with various additional zones and windows, some of which can be undocked and floated.
The main project window incorporates an arrangement timeline in the middle with various editing-related panels below. This is flanked by the VST instrument rack and MediaBay browser in the right zone and track or editor Inspector in the left zone.
Some editing including automation, clip settings and even MIDI via the In-Place Editor can be done in the main timeline section, but detailed editing is usually done in the specific panels which include the MIDI Key Editor, Score Editor, Drum Editor, List Editor and audio Sample Editor.
Finally, the layout of various windows can be saved as a Workspace. Thankfully, this very established workflow remains in Cubase 11.
Finding your way
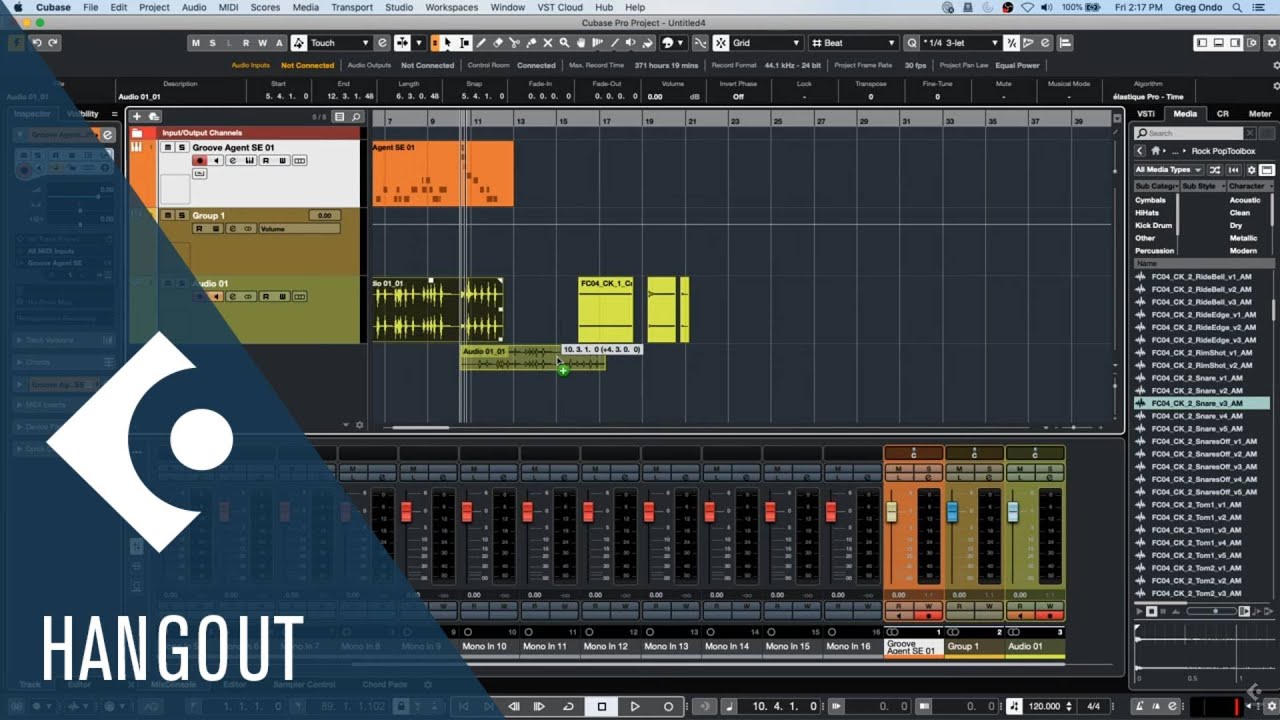
On the creative front, there are eight bundled software instruments including the sample-based workstation HALion Sonic SE 3, virtual analogue Retrologue 2, the granular and spectral synthesis Padshop 2, and the beatbox-inspired Groove Agent SE 5. These dovetail with a plethora of categorised instrument presets.
Meanwhile, should you want more sounds, full versions of the included SE instruments as well as Steinberg’s flagship HALion 6 instrument can be purchased via various add-on bundles. In addition to the instrument-based content, Cubase includes as standard an extensive and varied sample, construction kit and loop library.
The amount of content you get depends on which version you buy, but even Elements gets a sizable chunk of sample sets. Packs include their own blend of individual hits, loops and MIDI loops. By using the two support apps – Download Assistant and Library Manager – you can choose which packs to install and where to stick them.
One further creative feature is the Sampler Track, an update of which is discussed below. This innovative, sample-specific track provides a quick pathway from audio file to keyboard triggered sample playback and with drag-and-drop simplicity, even from a MIDI instrument track, it’s incredibly easy to use.
Whether you’re dealing with MIDI or audio, the editing options in Cubase are impressive. Features include multiple take comping, audio warping with quantise, MIDI and audio part in place rendering, group editing, timestretch, monophonic pitch correction (VariAudio 3) and audio alignment.
There’s also comprehensive musical notation and score editing. Cubase supports Audio Random Access (ARA), so certain software such as Melodyne and SpectraLayers can be used without leaving the Cubase project window.
Further handy options include the Control Room, which provides a software-based system for monitoring, cue mixes, talkback and so on. There’s also track import from both Cubase and Nuendo sessions.
SpectraLayers One
SpectraLayers is an extremely powerful cross-platform tool that lets you edit frequency via a spectrogram display with time-domain on the horizontal axis and frequency on the vertical axis.
This makes it useful for both fixing audio problems like unwanted noises, and also a great sound design tool for the creatively inclined. v7 is available from Steinberg as a standalone application in two levels, Pro (£257) and Elements (£68). They’ve wisely now added SpectraLayers support into Cubase Pro and Artist versions, so you can use it without launching it separately.
But they’ve also included a specific version, SpectraLayers One. This is quite thinned down, even compared to the Elements edition, and you won’t find many of the editing and selection tools or processes. You also won’t find the latest automatic unmix stems option, that deconstructs a stereo mix into component parts.
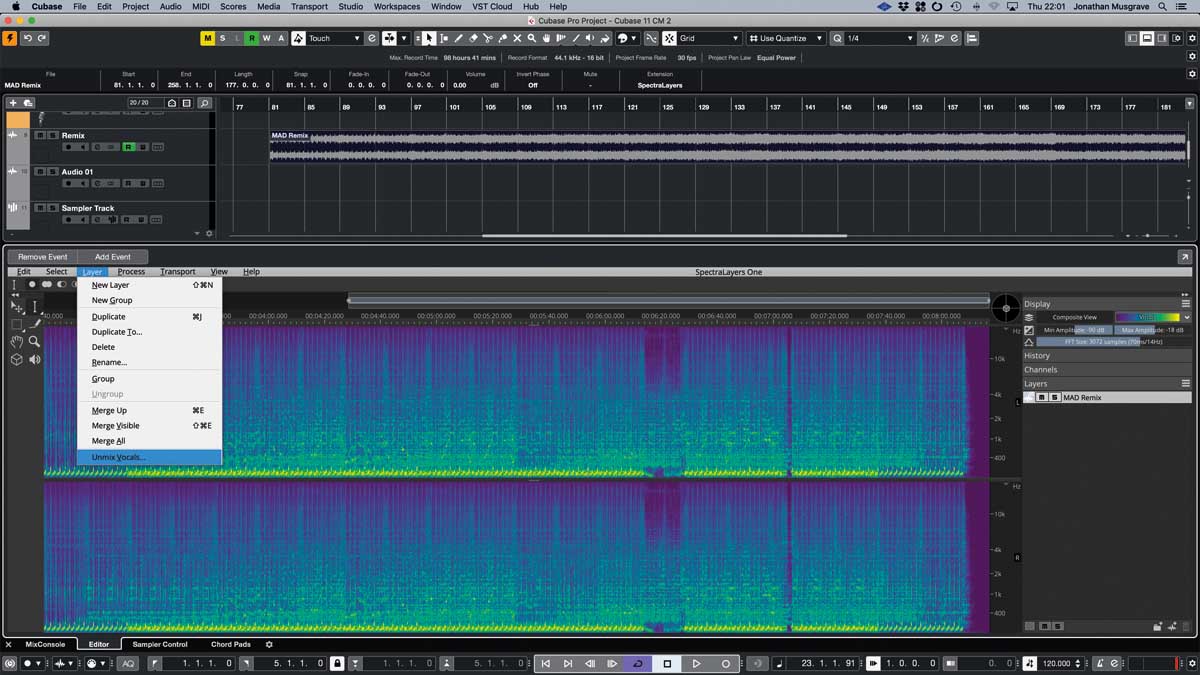
What you do get is a simpler unmix vocals option, and this is awesome. Simply load a stereo mix into a track and then, from the Audio menu and Extensions folder, select SpectraLayers.
With the track visible in the SpectraLayers panel at the bottom, select the Layer menu and Unmix Vocals option. It then does some number crunching and presents two new layers in the Layers menu – Vocals and track (Piano, Drums, Bass and Other). The two layers are dragged back into the project screen and detached from SpectraLayers.
So how does it sound? Surprisingly good and although some artefacts do bleed through, it’s one of the best we’ve tried and great for anyone who needs to separate an existing stereo mix into vocals and music track.
Performance and verdict
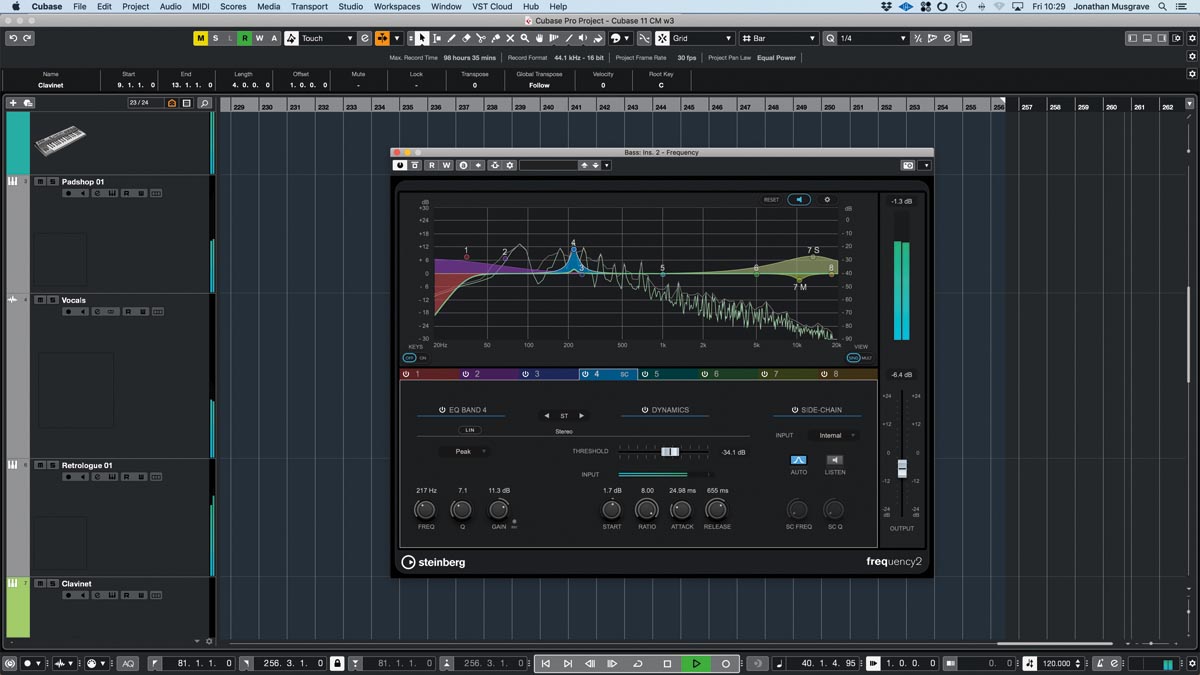
Let’s have a look at what’s new. Cubase 11 includes both new and updated plugins. Frequency 2 is an upgrade of an EQ introduced in version 9.
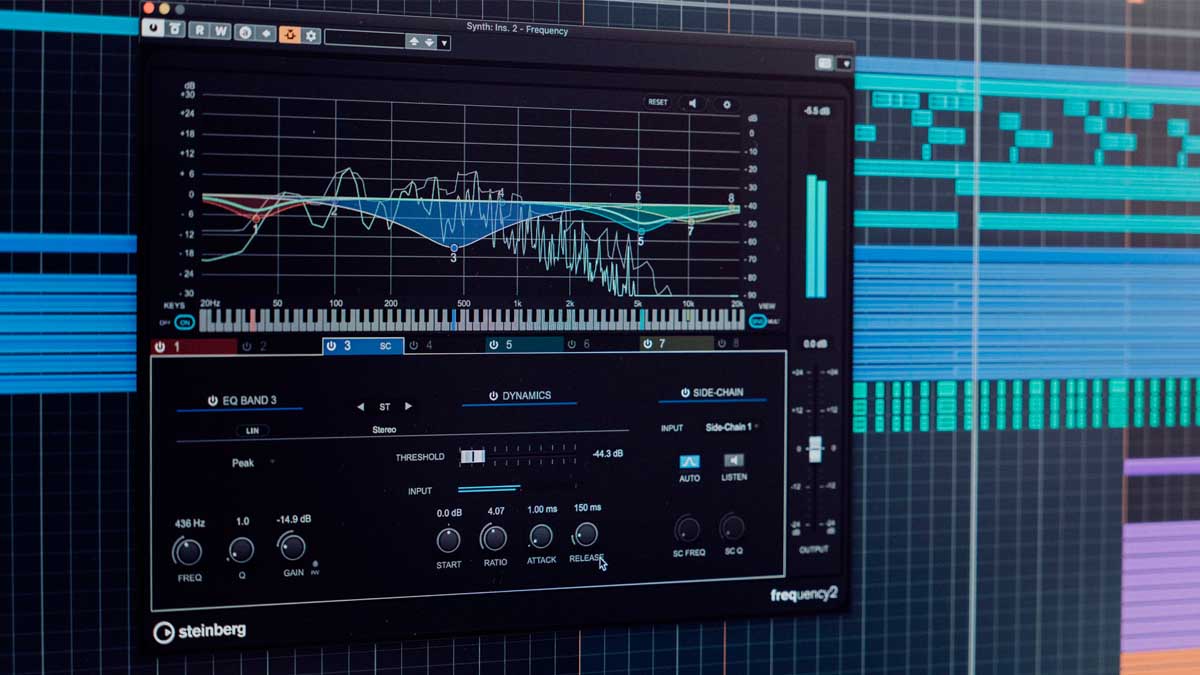
This eight-band design was already good, with band-specific stereo, mid/side and left/right options, easy-to-use node editing, band auto listen, band-specific linear phase mode and keyboard scale. In Frequency 2, Cubase Pro users now get dynamic EQ with individual external side chain on all eight bands.
This mode is available for peak and shelving filter shapes, and selecting the dynamic option simply switches the existing curve you have to dynamic mode. You then open the single band view to adjust the controls.
These include threshold, ratio, attack and release. You also get a gain offset (Start) and between this and the main filter gain you can define quite accurate dynamic filtering behaviour. Frequency 2 does a great job of cutting unwanted frequencies momentarily, and this would be a typical use.
• Presonus Studio One 5
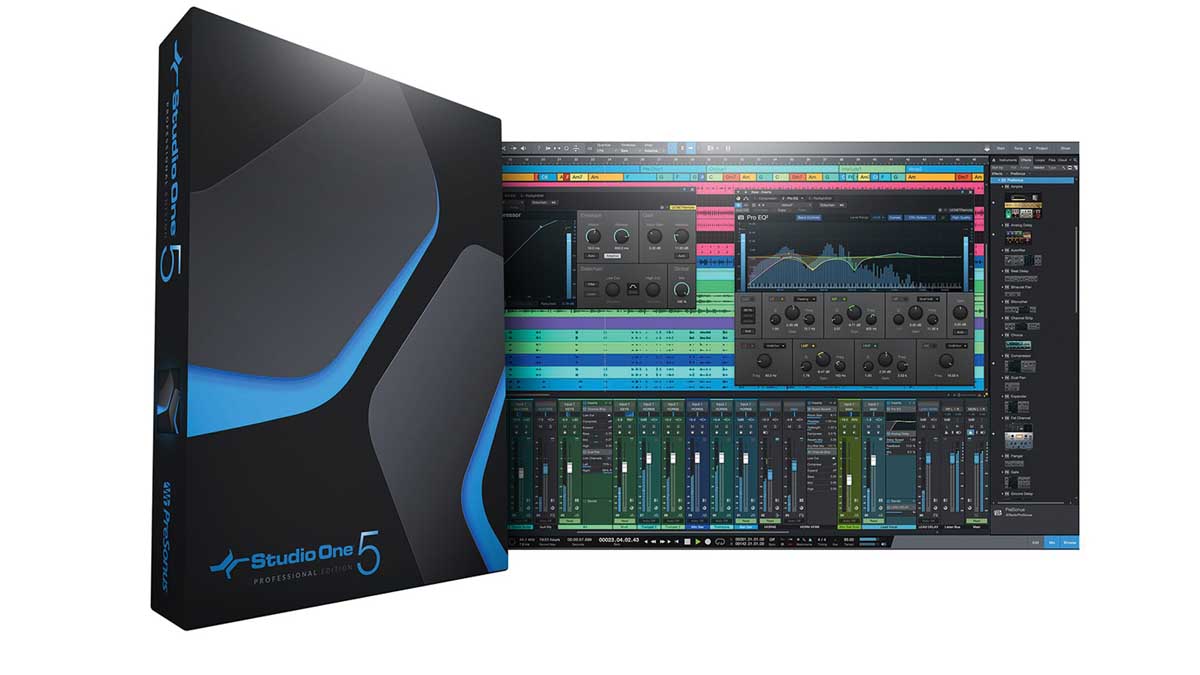
It’s quite incredible how far Studio One has come in the decade since its launch, and version 5 is mature, stable and an awesome update to an already superb DAW.
• Logic Pro X
In its unstated aim of achieving functional parity with rival DAWs, Logic Pro X 10.5 adds a wealth of empowering features and systems, including grid-based clip launching and an embarrassment of sampling riches.
But you can boost as well, and we found this could create pretty creative results, particularly with longer attack and release settings. Squasher is a new 3-band multi-band compressor for all Cubase 11 versions.
It incorporates band-specific downwards and upwards compression, drive, gating and mix blend. There’s also both adjustable internal sidechaining and external side chain again on a band-specific basis.
The main panel incorporates a rather nifty twin threshold slider, and further parameters are on two drop-down panels. At the top, a foldaway panel provides one of two editable displays – frequency or compressor. Squasher is great for spicing up loops, tailoring submixes and of course side chain compression effects.
We found the combination of compression types coupled with the razor-sharp attack and release created some amazing effects on just one band. Multiply that by three and you can get really creative. Squasher is pretty easy to get to grips with but if you’re looking for inspiration there are a bunch of presets that showcase what it can do.
New for both Pro and Artist are Supervision and Imager, Supervision being a configurable analysis plugin. You can include up to nine modules from a choice of 18 across six categories (signal level, spectral domain, phase, spatial domain, waveform and time).
The window is freely resizable, so you could if desired fill the whole screen with signal analysis modules, and there are many module-specific settings so you can finesse what you see.
Typical modules are included (level, loudness, spectrum analysis, phasescope and so on), but we think it’s great to see some less common examples such as multifrequency phase panorama, multifrequency correlation and something called Wavecircle, which has a rotating waveform display.
Further useful features include the option to pause any module’s display, plus double-clicking a module zooms it to fill the whole window. You can, of course, stick this plugin anywhere in the signal chain and analyse specific tracks or mixes.
Finally, Imager is probably the simplest of the new plugins. This is a multi-band stereo image plugin with up to four bands. Level and band crossovers are adjusted in the top graphic panel, meanwhile stereo width, panning and level can be adjusted below.
Bands can be bypassed, which results in the dry signal passing through. They can also be solo’d, and this is our favourite feature as it allows us to zone in and accurately tweak settings for each band.
Start chopping
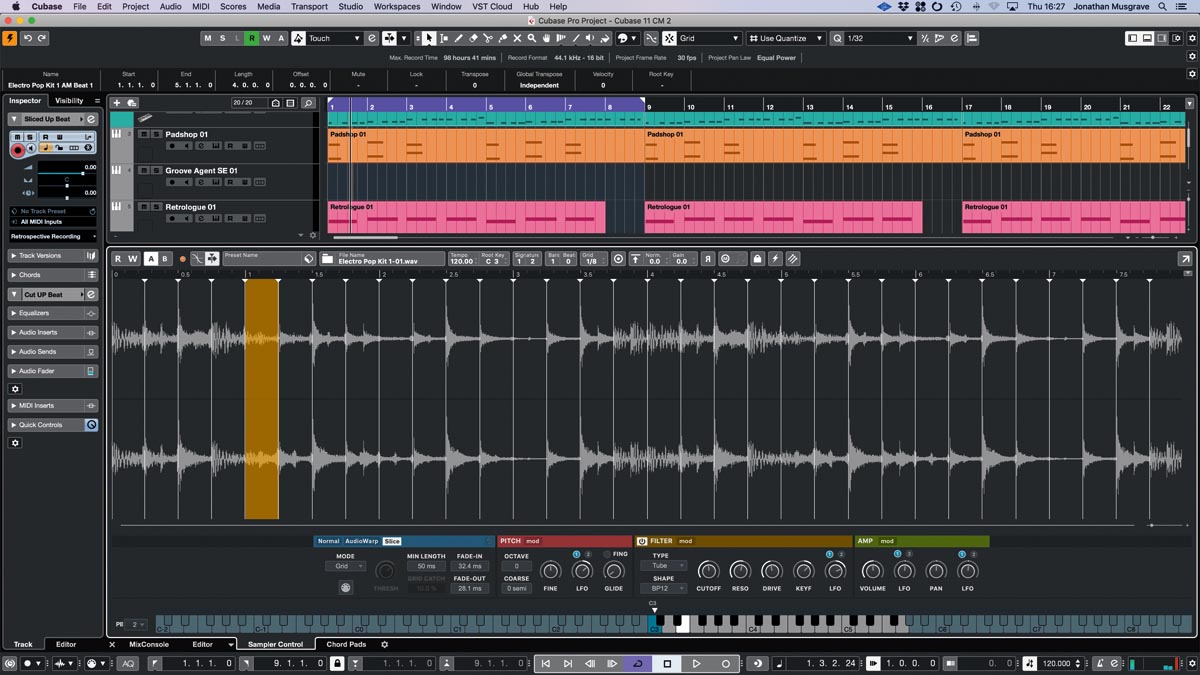
Cubase version 9 introduced an excellent feature called Sampler Track and this gets a big boost in v11. The existing AudioWarp timestretching option is now joined by an alternative mode called Slice. This chops up the sample and maps it across the keyboard.
You get to choose one of four modes for how it does this – Transient, Grid, Transient+Grid and Manual – and you finetune the outcome using the pertinent settings. So, in Transient mode, parameters are threshold, fade-in and fade-out. The slice points are also visible on the waveform display so it’s pretty easy to see what’s happening.
Whether you’re editing a loop, grabbing snatches of vocal, or simply want to get that old skool keymapped sampler vibe going it’s quick, easy and flexible. But there’s more. Sampler now has two integrated syncable LFOs with modifiable shapes. These can be assigned to the filter, pitch, amplitude and panning, and can also be routed via the mod wheel.
Finally, the overall sample engine now includes five playback quality modes. We particularly like the final one, Vintage, as this provides various bit rate and sample rate settings for that vintage sampler vibe. We already liked the original Sampler track, but the Slice option makes it so much better.
The Scale Assistant is a new feature for all versions and can be found in the Key Editor Inspector. It’s designed to help you work in a particular musical key, and is mighty handy if you’re either not too sure of your theory or simply in a bit of a rush.
It will suggest scales based on the notes you’ve already recorded, and can then snap to those notes when you’re editing or even when you’re recording. The selected scale can be highlighted in the editor grid, and you can also select individual or multiple notes and quantise their pitch to the scale. It’s easy to use and really works.
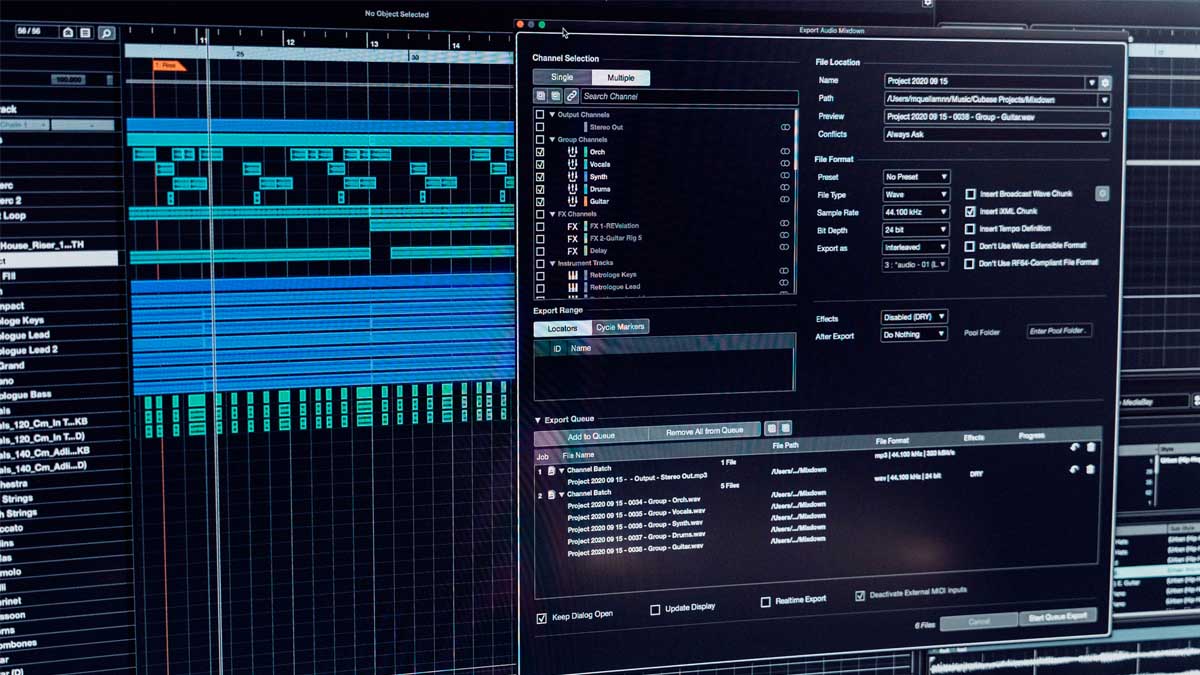
Cubase Pro users gain improved stem export features and these use a new job queue management in the Export Audio Mixdown dialogue. The beauty here is you can define the formats you want for specific tracks, including mono downmix or split stereo files, and then add them to the queue. You can even add the tracks you have selected in the project window.
The Scale Assistant is a new feature for all versions and can be found in the Key Editor Inspector. It’s mighty handy if you’re either not too sure of your theory or simply in a bit of a rush
Once you’ve put everything you want in the list, you start the export, and a bit like a batch process, come back when it’s finished. Anyone sharing productions across platforms, getting tracks mixed remotely, or preparing final mixes and stems will love this, and so do we.
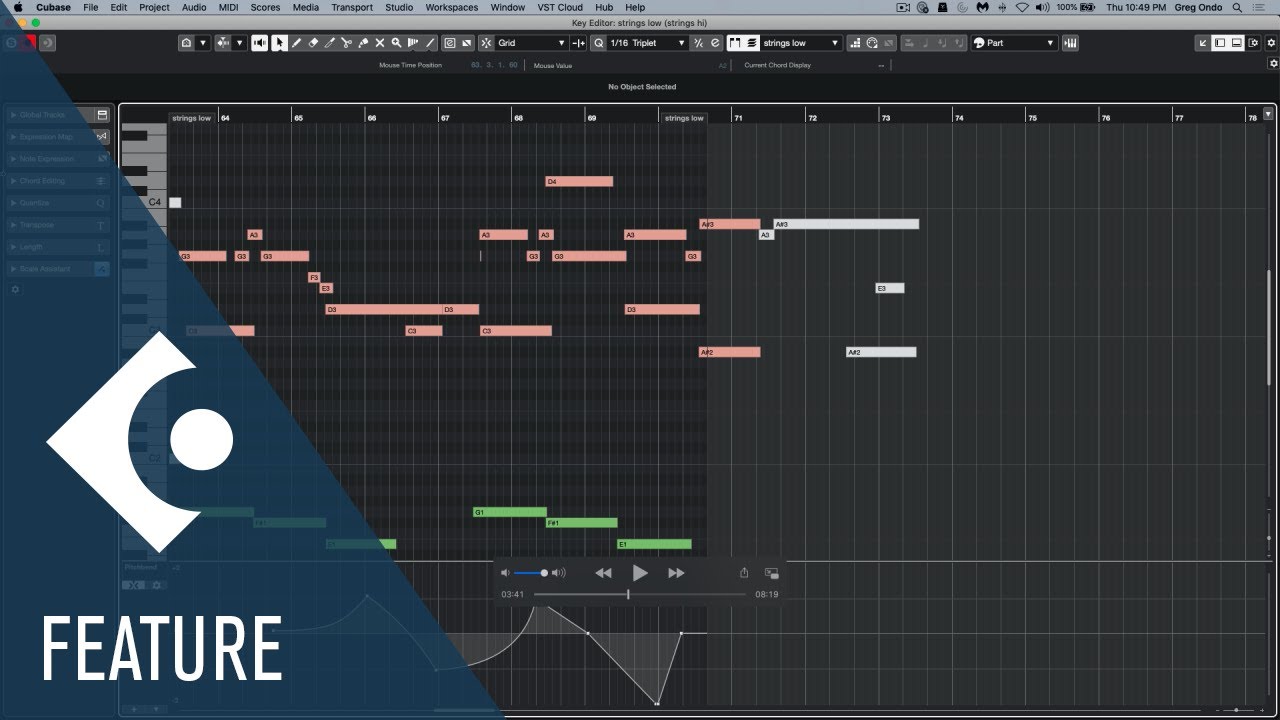
There are a few further new additions we should mention. When you have the full Key Editor window open you can now add in the Global tracks on a track-specific basis.
This makes navigation much easier when you’re doing deep MIDI editing and it’s a much more elegant solution than either rescaling the lower zone of the project window or trying to float the Key Editor with the project window Global tracks visible.

Sticking with the Key Editor, you can also now draw curved lines for MIDI data. This is pretty easy as you just grab a new node in the middle of the data line and drag it as required. A simple addition, but still very welcome.
Finally, there are additions to score editing, including new fonts and a new properties tab. Our favourite is the Note Editing Overlay which, as suggested, overlays the MIDI notes above or below the staff so you can edit length/velocity.
The new sounds
Although Cubase 11 doesn’t get any new synths, all versions get six new sound sets totalling just under 6GB of content, courtesy of Black Octopus Sound, Beat Butcha and Robert Dudzic. A couple of these (Dancefloor Tech House and Hard Knocks) are straight-up beats packages bringing you fully up to date club and hip hop sounds.
Dancefloor Tech House combines one-shots and loops at 125bpm with the latter including synth bass, drums, drum fills, percussion and synths. There are also some effect hits thrown in for good measure. Sonically the pack delivers the tougher end of house sounds but still has plenty of swing.
Meanwhile, Hard Knocks from Beat Butcha is quite an eclectic hip hop, R&B and trap pack. There are some nice, crisp single-hit drums, but it’s the many and varied melodic loops that shine. Plenty of material to get you started. LoFi Dreams from Black Octopus Sound is a mood-heavy pack of one-shots and loops.
Tempos vary from 70 to 160bpm and the cross-genre synth, beat, pad, bass, guitar and processed vocal loops will work in any number of musical styles. Next up, Night Calls Synthwave delivers a top selection of 80s-inspired loops and beats across a focused tempo range of 85 to 115bpm. The sounds are great and deliver the fat beats that epitomise the 80s sound.
For a more laidback vibe, there’s Noir from Robert Dudzic, which is a pack of free tempo ambiences, soundscapes and effects. There are some impacts, booms, risers, transition hits and drops which are ideal for soundtrack producers, and the overall tone of these is very consistent. But it’s the themed atmospheres that we like most.
Finally, Bloom is a set of solo female vocal samples courtesy of Amy Kirkpatrick. The general timbre is quite ethereal, laidback and pure. Tempos range from 83 to 140 and there are various lyric phrases and ad-libs. It’s always tough for an established DAW to feel groundbreaking whatever features they add.
Nevertheless, Cubase 11 is a solid update that expands its offering on a number of key fronts. For new purchasers the many excellent plugins, extensive sound library and massive functionality make the £499 asking price fair.
Existing users will welcome the new additions, feature enhancements and operational improvements but nevertheless have to weigh up whether they need them and pay for the upgrade. Either way, Cubase 11 remains a truly impressive DAW that’s powerful and fun to use, whichever version you opt for.
MusicRadar verdict: Cubase 11 not only adds some great new features but also evens up its three versions, delivering a professional option to suit most wallets.
Hands-on demos
Cubase
Specifications
- KEY FEATURES: 64 bit audio engine, 192 kHz audio resolution, unlimited audio, VST instrument and MIDI tracks, 8 VST Instruments, more than 3000 instrument sounds, 79 VST audio effect plugins, 18 VST MIDI effect plug-ins, and more
- SYSTEM REQUIREMENTS: 64-bit Windows 10 Version 1909 / 64-bit Windows 10 Version 2004; macOS Mojave / macOS Catalina / macOS Big Sur, 4GB minimum required memory 8GB RAM or more recommended 35GB free storage space
- CONTACT: Steinberg
- NOTE ON VERSIONS: No review of a major league DAW is complete without a mention of the lite option. However, in the case of Cubase, that doesn’t really exist as, wisely in our opinion, Cubase 11 comes in three-tiered versions – Pro, Artist and Elements.
This provides three nicely spaced price points with corresponding feature sets, and upgrading from one to the next is essentially the price difference, so you’re not out of pocket.
All three offer the same high-res 64-bit audio engine at up to 192kHz. Beyond this there are tiered feature sets, so Elements has track limits (64 MIDI, 48 audio, and 24 VST instrument) whereas Artist and Pro have unlimited tracks. Similarly, the internal routing and grouping, and addressable inputs and outputs also vary.
As an example, Pro can handle 256 physical inputs and outputs, and Elements can handle 24. In terms of content, Pro delivers an awesome package with eight VST instruments (and over 3000 sounds), 79 effects plugins and 18 MIDI plugins.
Artist still includes eight VST instruments, but with fewer sounds (over 2600) and fewer audio plugins (60). Meanwhile, Elements only includes three instruments with over 1000 sounds and seven plugins.
Cubase 11 adds some nice extras for Elements including the Squasher plugin, curved MIDI data, Scale Assistant, Sampler Track slicing and all the new sound packs included. The more refined features like dynamic EQ, expanded stem exporting and the new scoring features are Pro only.
Computer Music magazine is the world’s best selling publication dedicated solely to making great music with your Mac or PC computer. Each issue it brings its lucky readers the best in cutting-edge tutorials, need-to-know, expert software reviews and even all the tools you actually need to make great music today, courtesy of our legendary CM Plugin Suite.
