The ultimate guide to sub bass: tips and tricks for a high-class low-end
When it comes to music designed for a powerful sound system, nailing your sub can be what makes or breaks your track
Want all the hottest music and gear news, reviews, deals, features and more, direct to your inbox? Sign up here.
You are now subscribed
Your newsletter sign-up was successful
Splitting sub bass into separate bands for precise mixing
A lot of electronic music styles are based around ‘bass’ sounds that don’t just occupy the low end of the mix – they may include everything from the sub bass frequencies up to the highest of highs!
These basses can sound massive but can be tricky to mix. Splitting these kinds of parts into two or more bands allows us to process the sub bass separately from the rest of the signal.
There are dedicated plugins for this task and some DAWs even feature multiband split utilities. But let’s look at a DIY approach to multiband mixing.
Article continues below 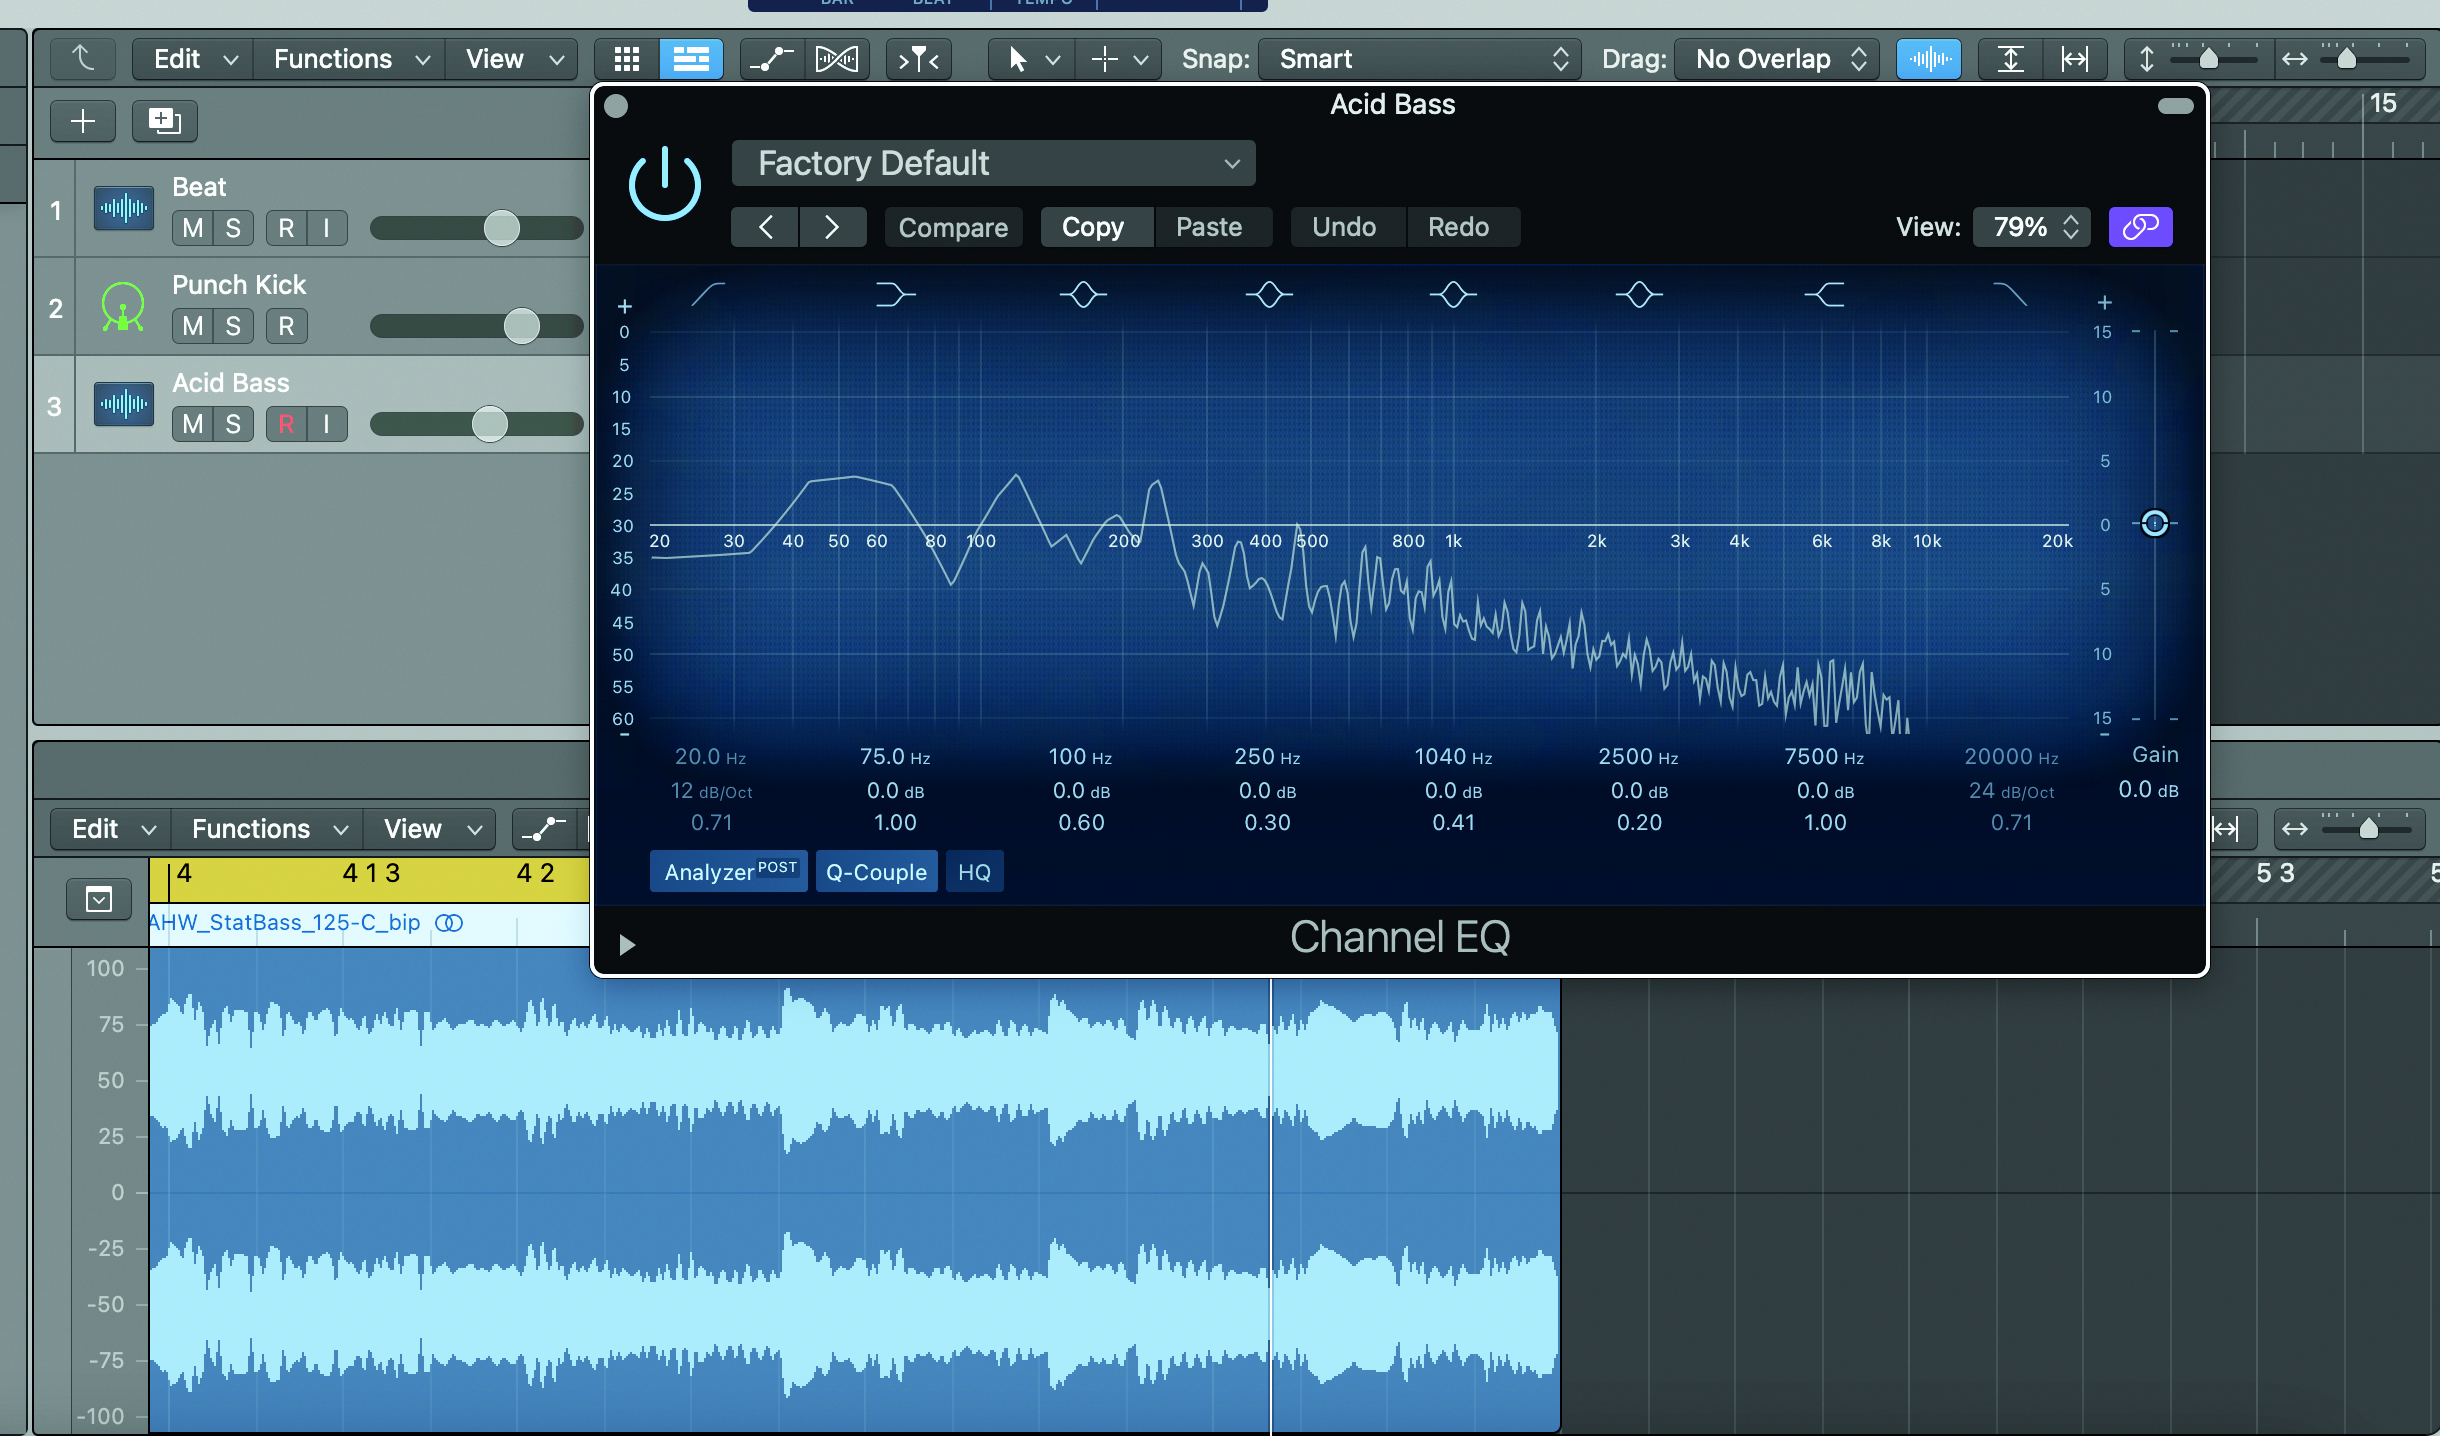
A lot of electronic music styles are based around ‘bass’ sounds that don’t just occupy the low end of the mix – they may include everything from the sub bass frequencies up to the highest of highs!
These basses can sound massive but can be tricky to mix. Splitting these kinds of parts into two or more bands allows us to process the sub bass separately from the rest of the signal.
There are dedicated plugins for this task and some DAWs even feature multiband split utilities. But let’s look at a DIY approach to multiband mixing.

Step 1: In Logic we have a basic drum groove accompanied by a big, squelchy Acid Bass riff. By loading Channel EQ as an insert on our bass channel, we can see the bass has a lot going on in both the mid frequencies and the sub range, which could make it tough to process and mix. Let’s split the sound into lower and higher parts.
Want all the hottest music and gear news, reviews, deals, features and more, direct to your inbox? Sign up here.
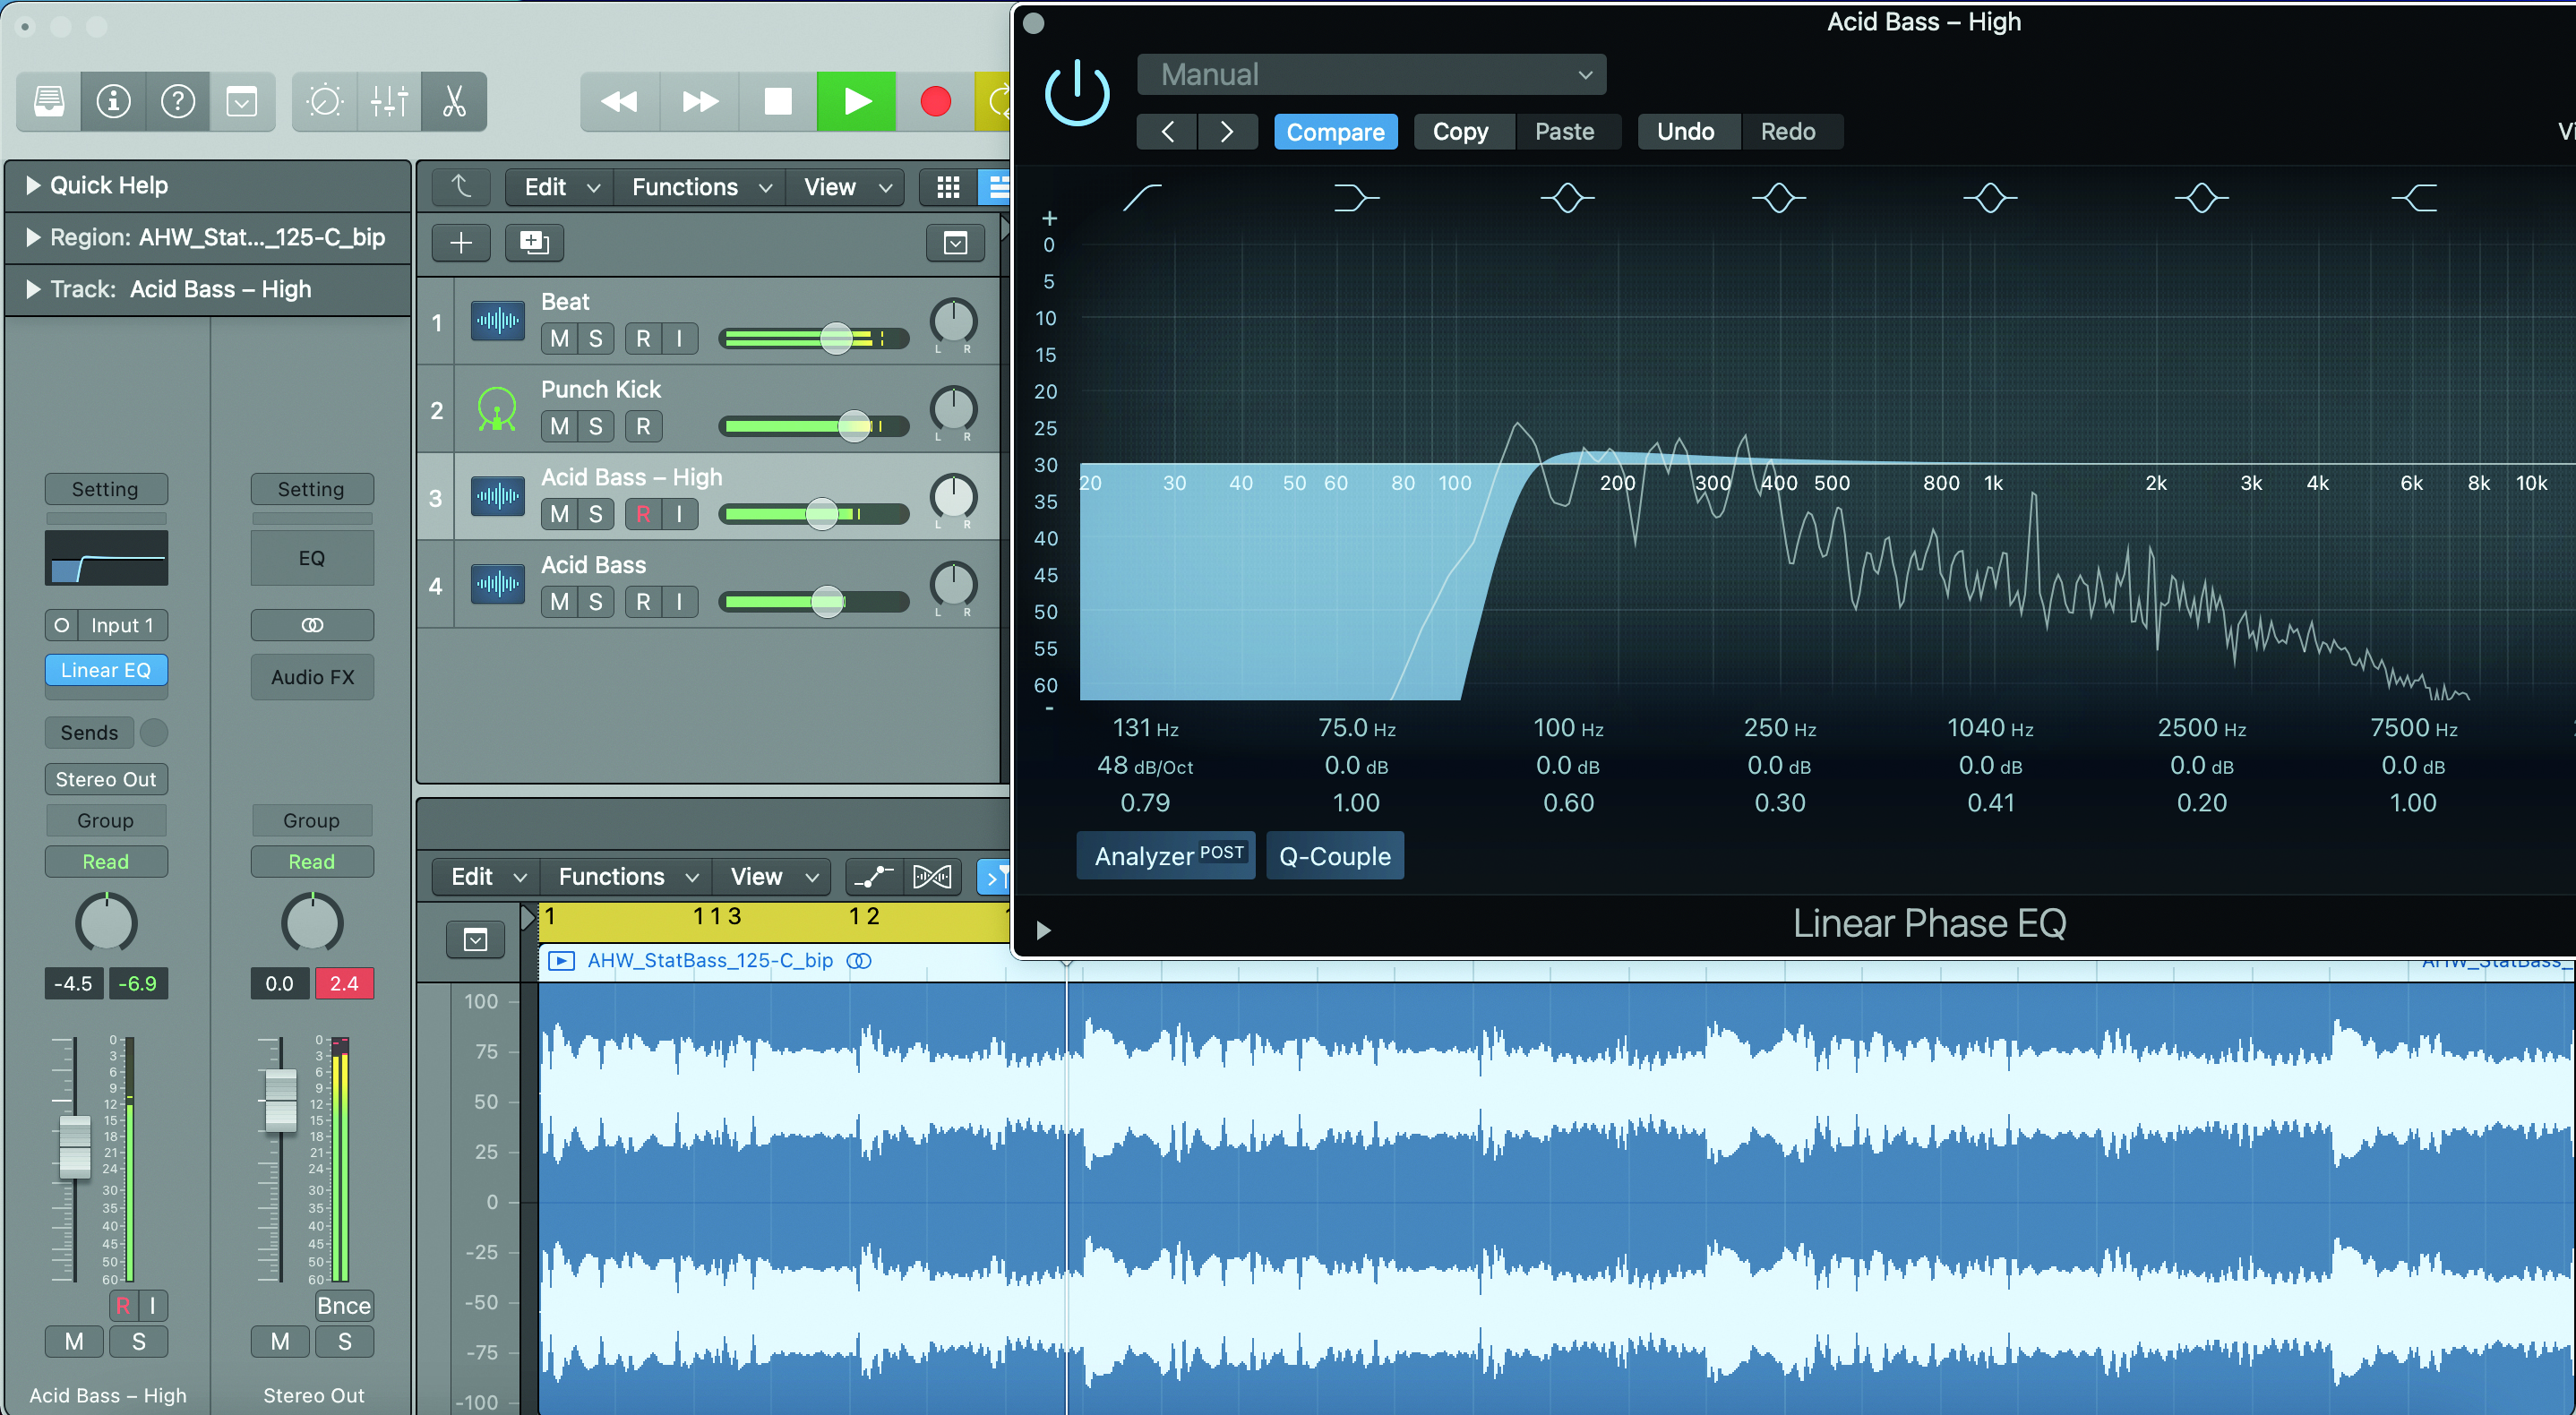
Step 2: First we duplicate the bass part and rename this Acid Bass – High. Next we swap Channel EQ for Logic’s Linear Phase EQ. Since linear phase EQs preserve the phase of the audio signal, they’re better for these applications. We engage a high-pass band with an extreme -48dB slope at 130Hz, to remove the sub.
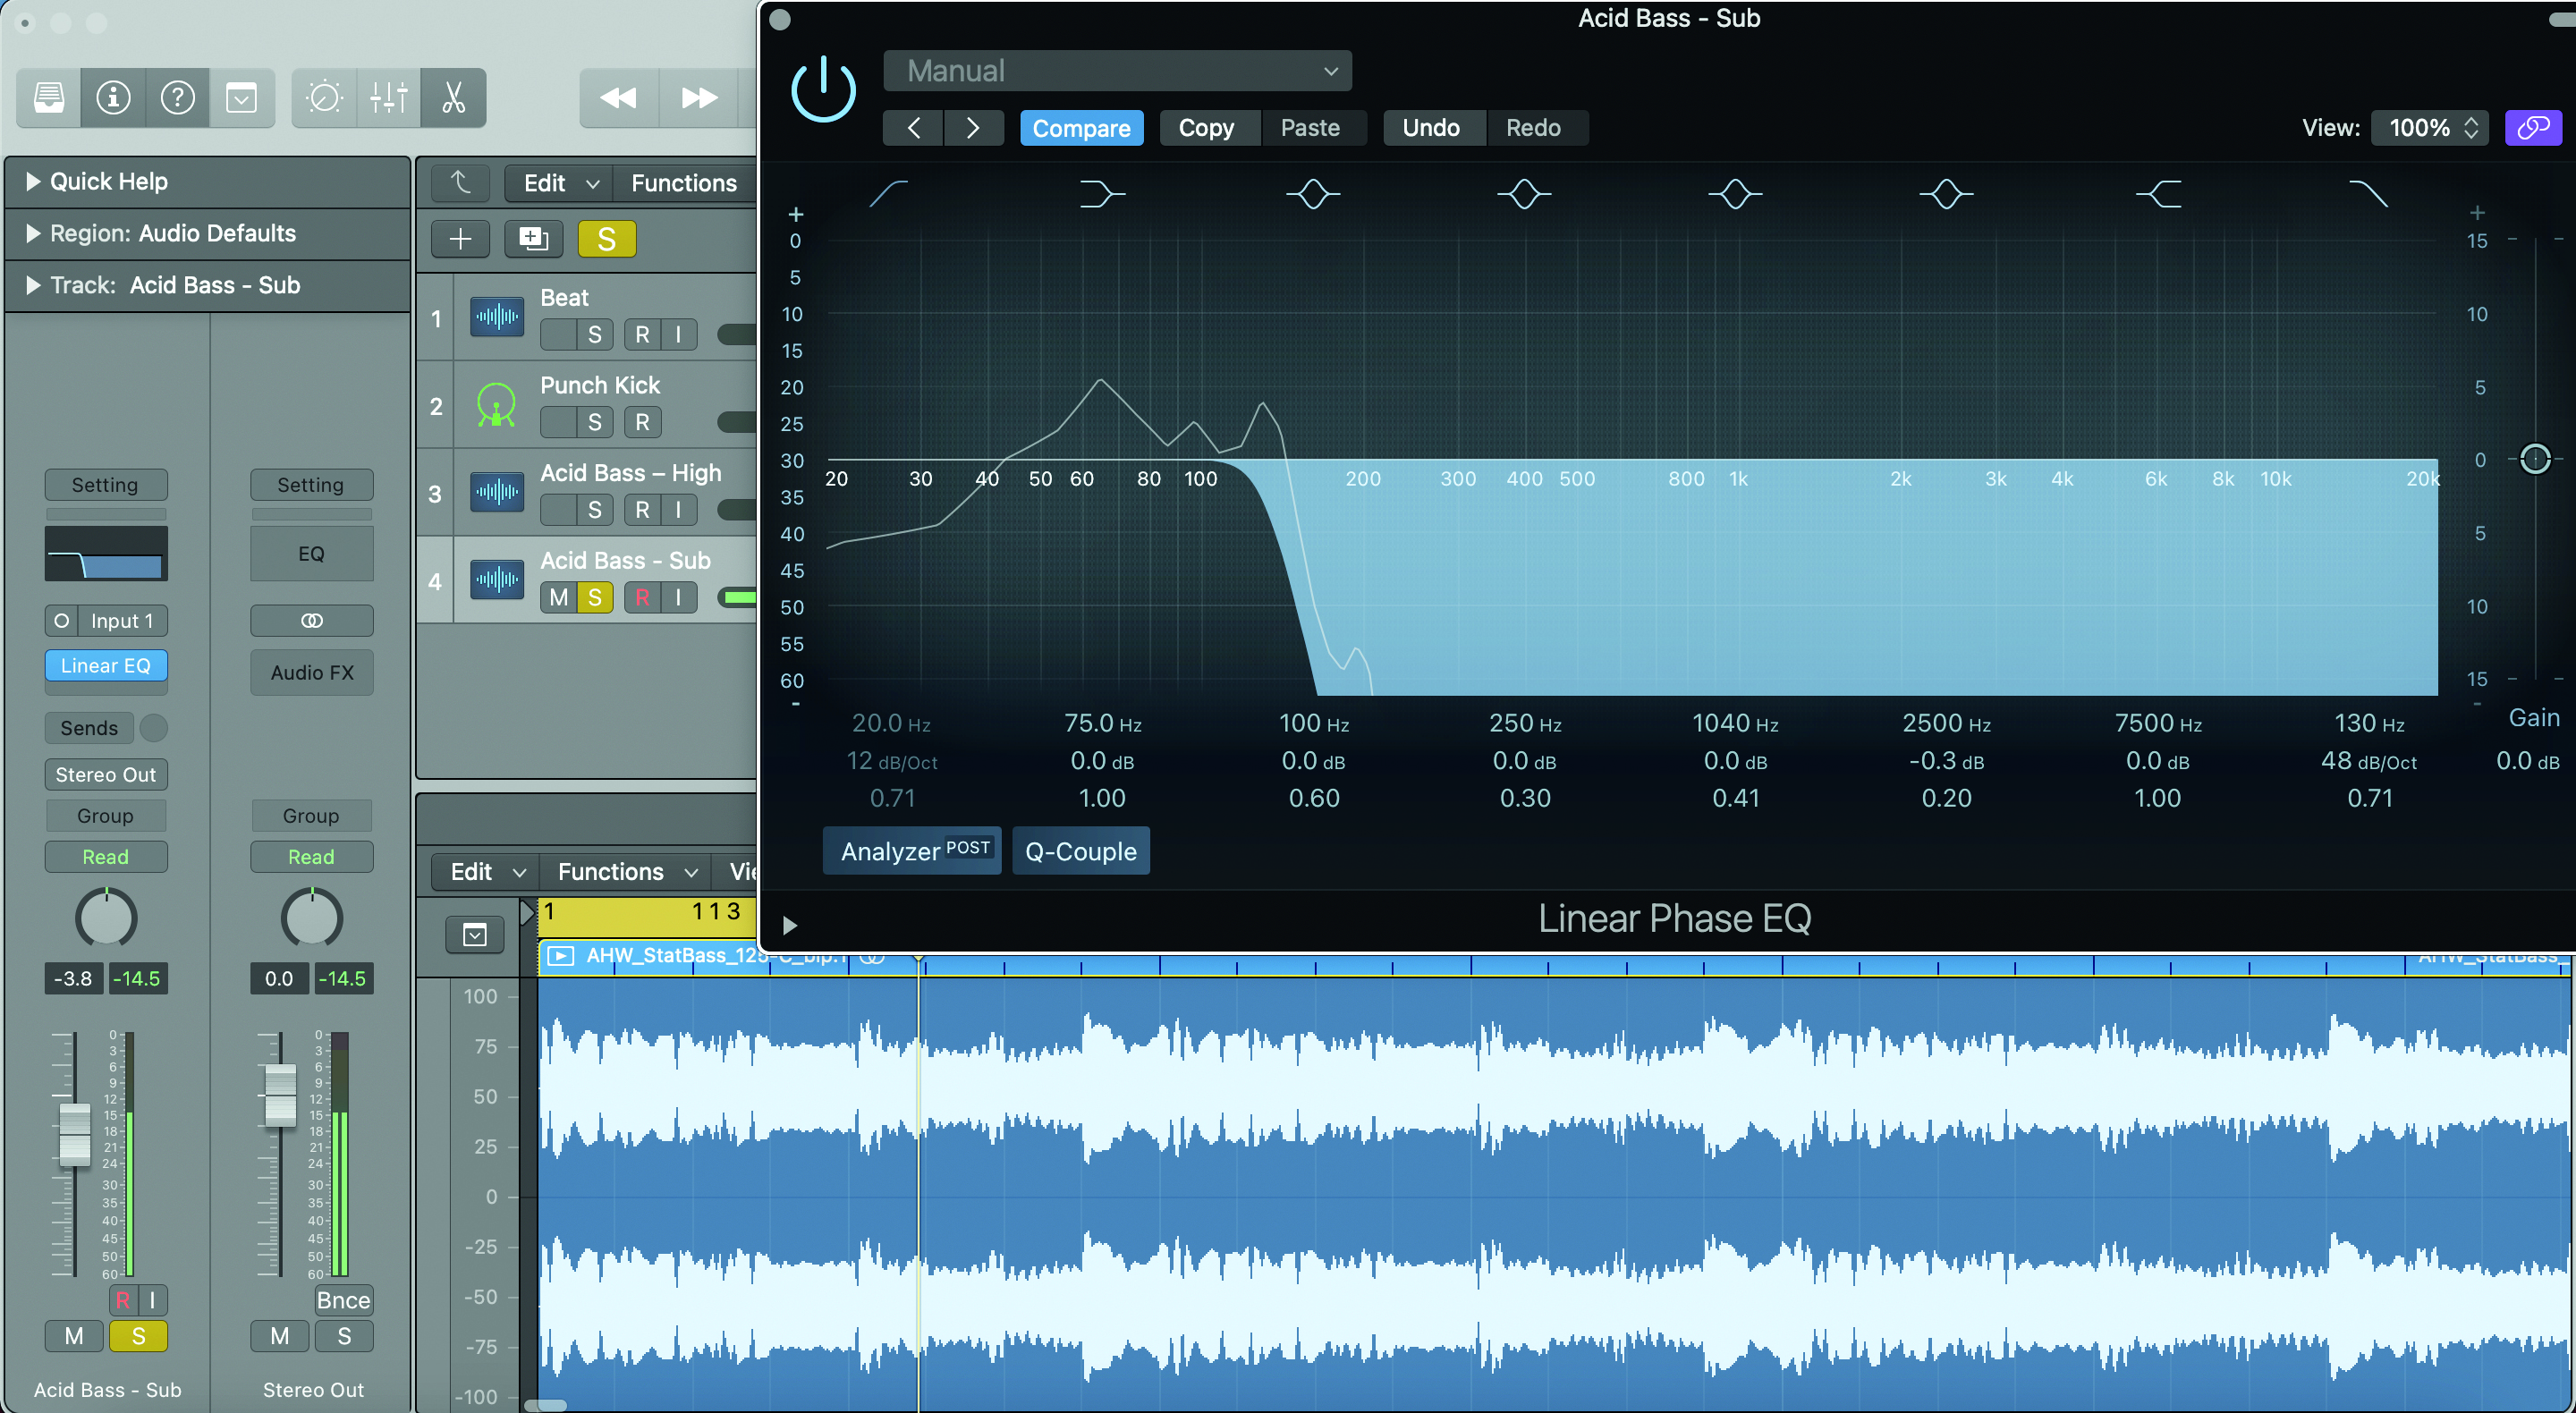
Step 3: We rename the original bass part Acid Bass – Sub. We can remove the high frequencies using the method as in step 2, in reverse. We add a Linear Phase EQ and apply a low-pass filter, again set at -48dB at 130Hz. You can adjust the cutoff point where you separate low and high bass parts depending on the sound.
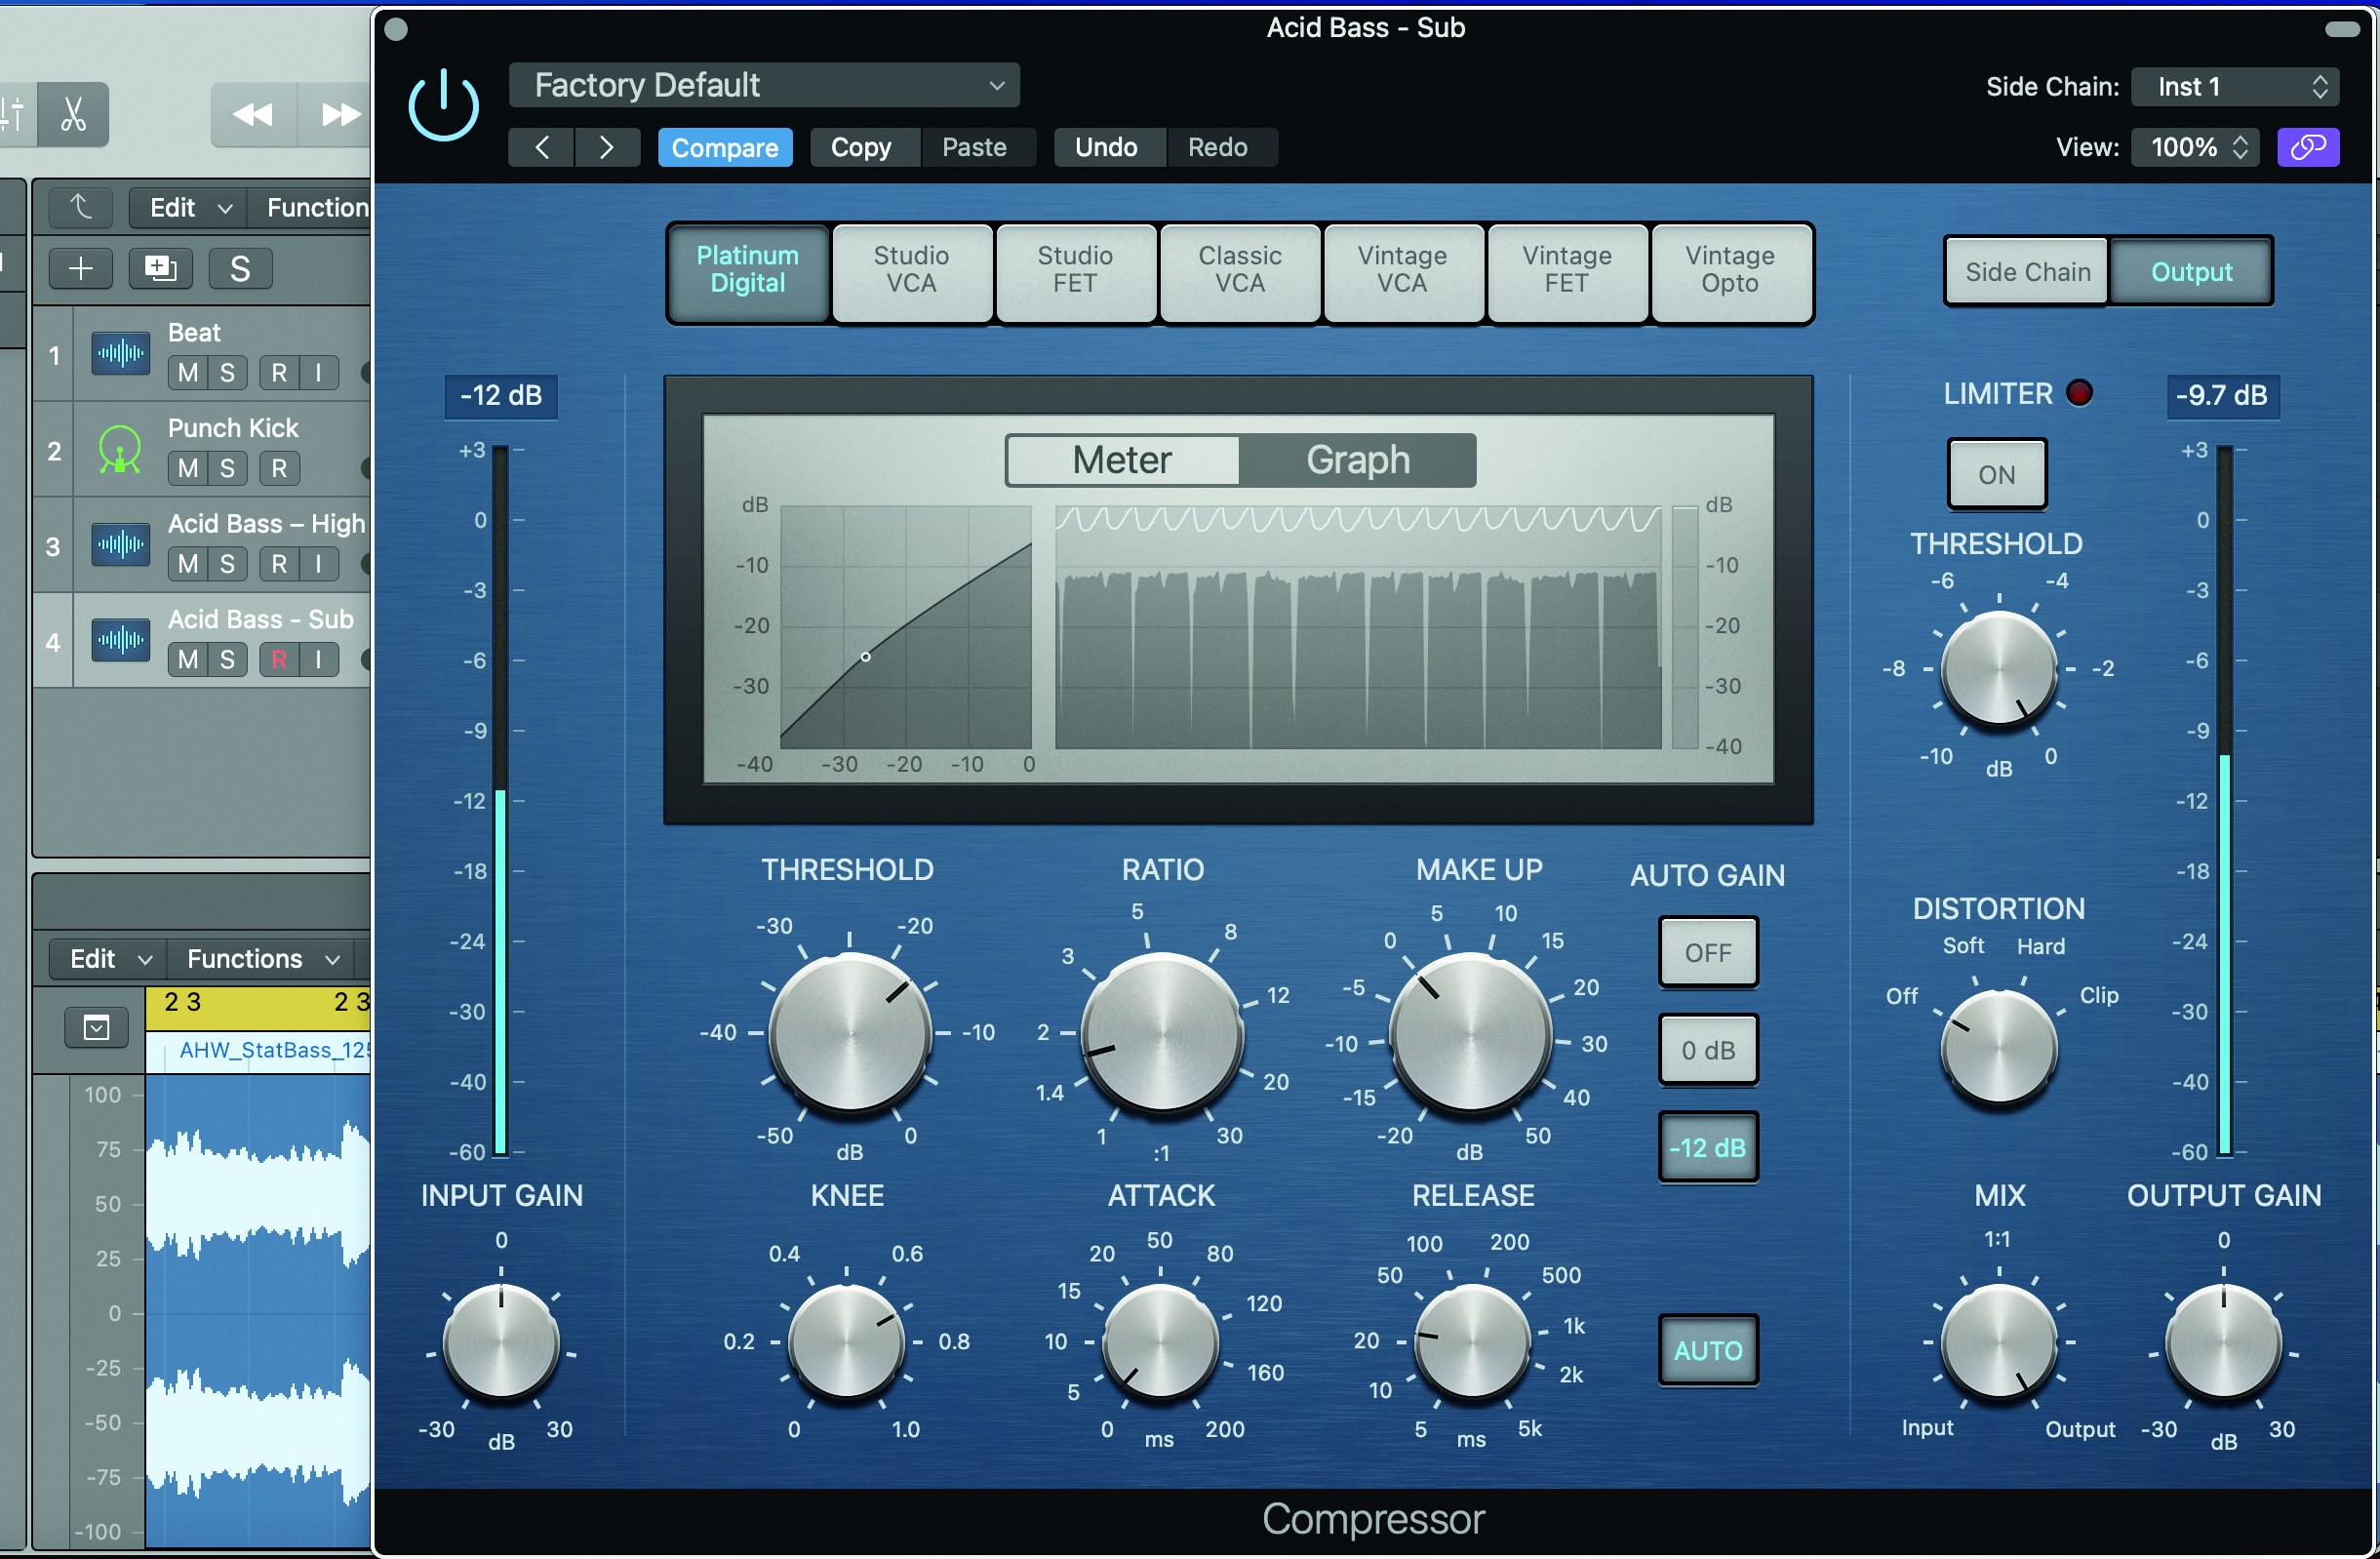
Step 4: Let’s treat our sub first. Here we apply sidechain compression triggered by our kick drum, this helps those low frequencies keep out of each other’s way without creating an audible pumping in the midrange bass. The sub doesn’t really need much else, although if your bass part is in stereo it’s worth putting these low frequencies into mono to help with compatibility.
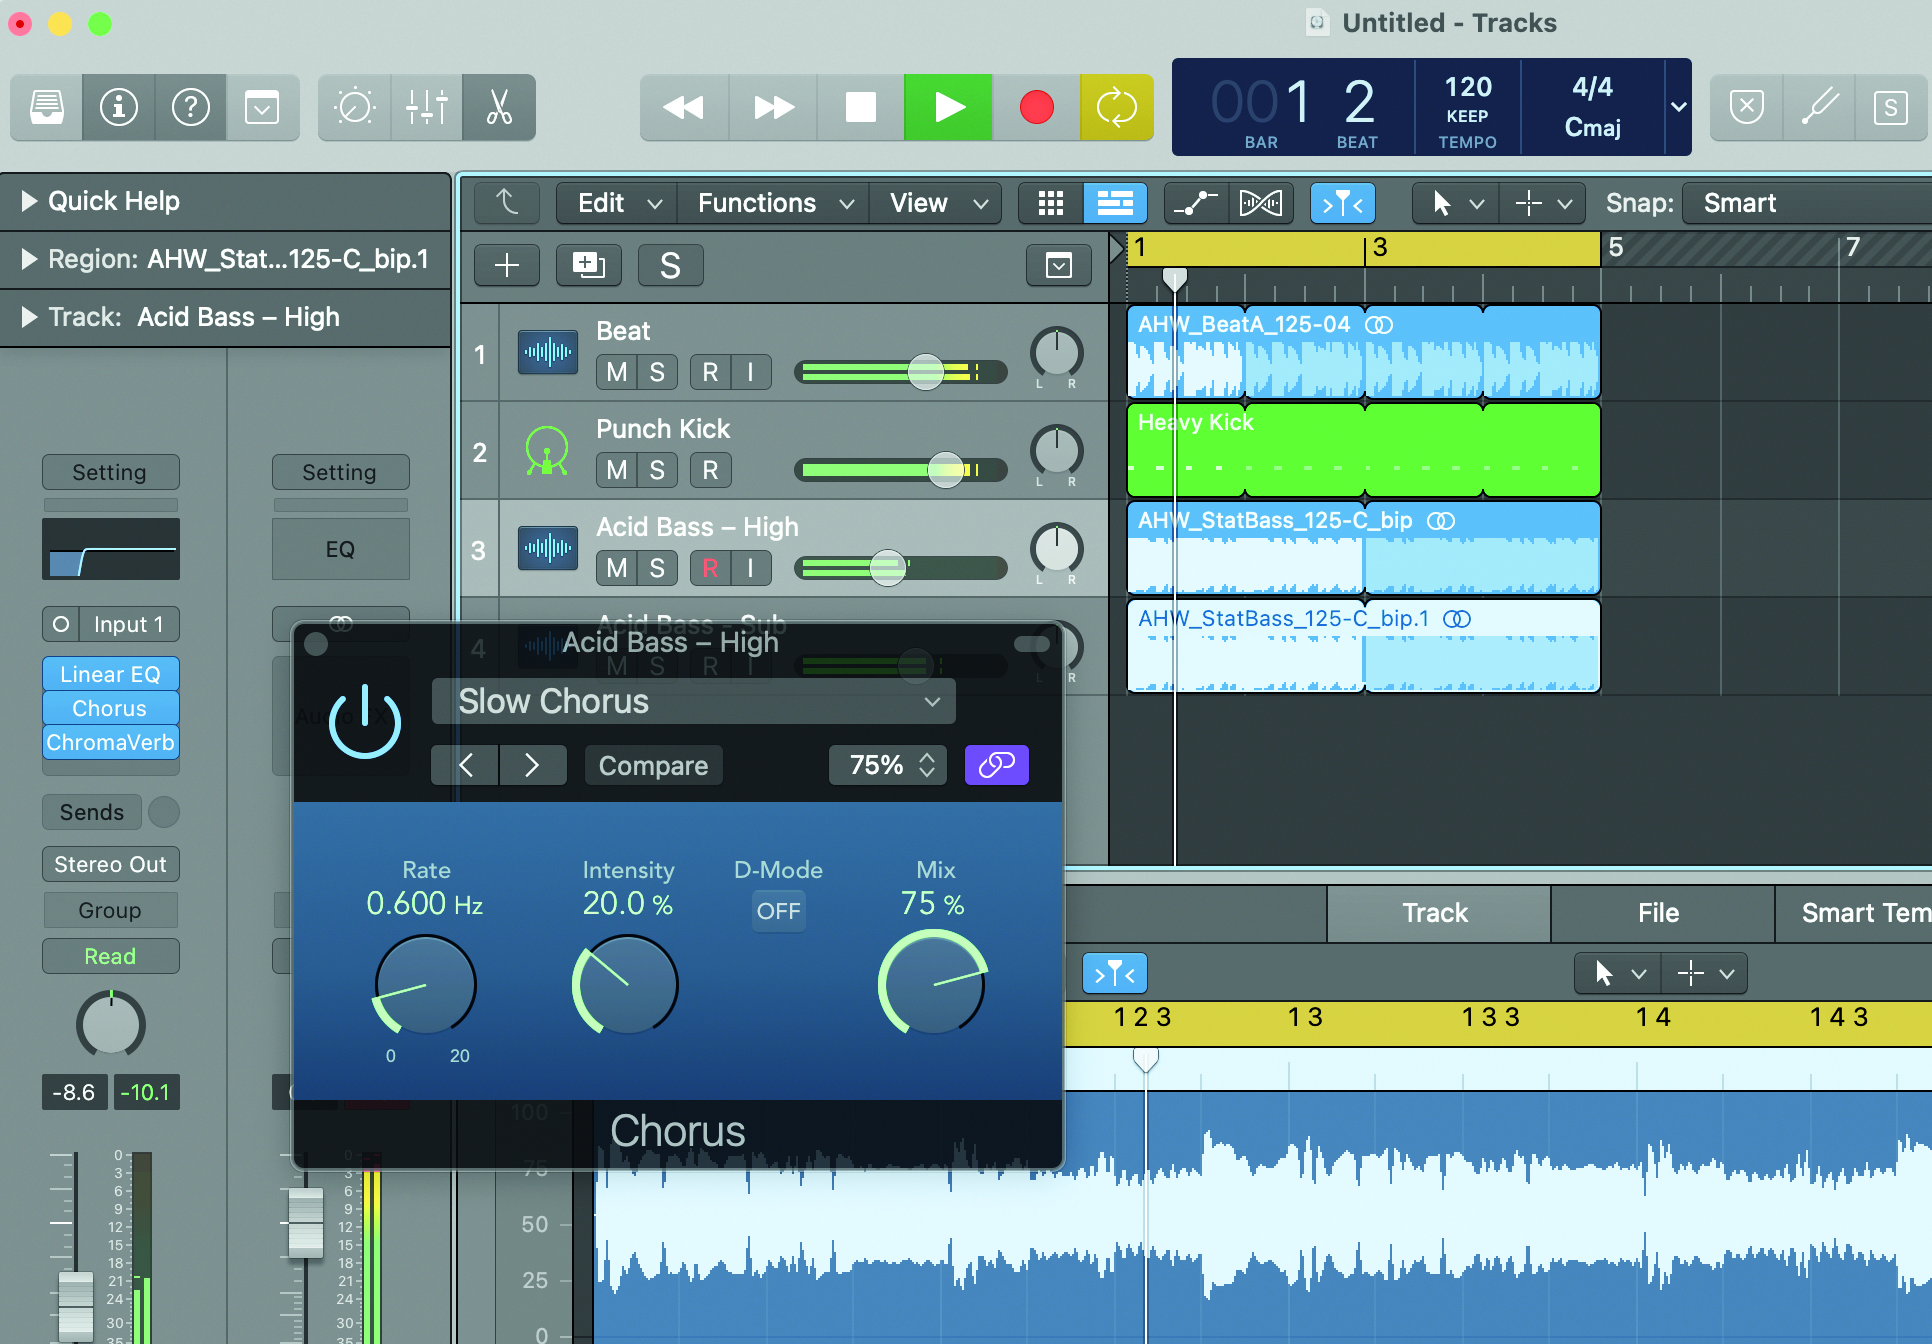
Step 5: With our low frequencies separated out, we can apply some more ear-catching effects to the higher parts of the bass. We start with a stereo chorus effect to widen the sound. A touch of room reverb adds extra space and presence.
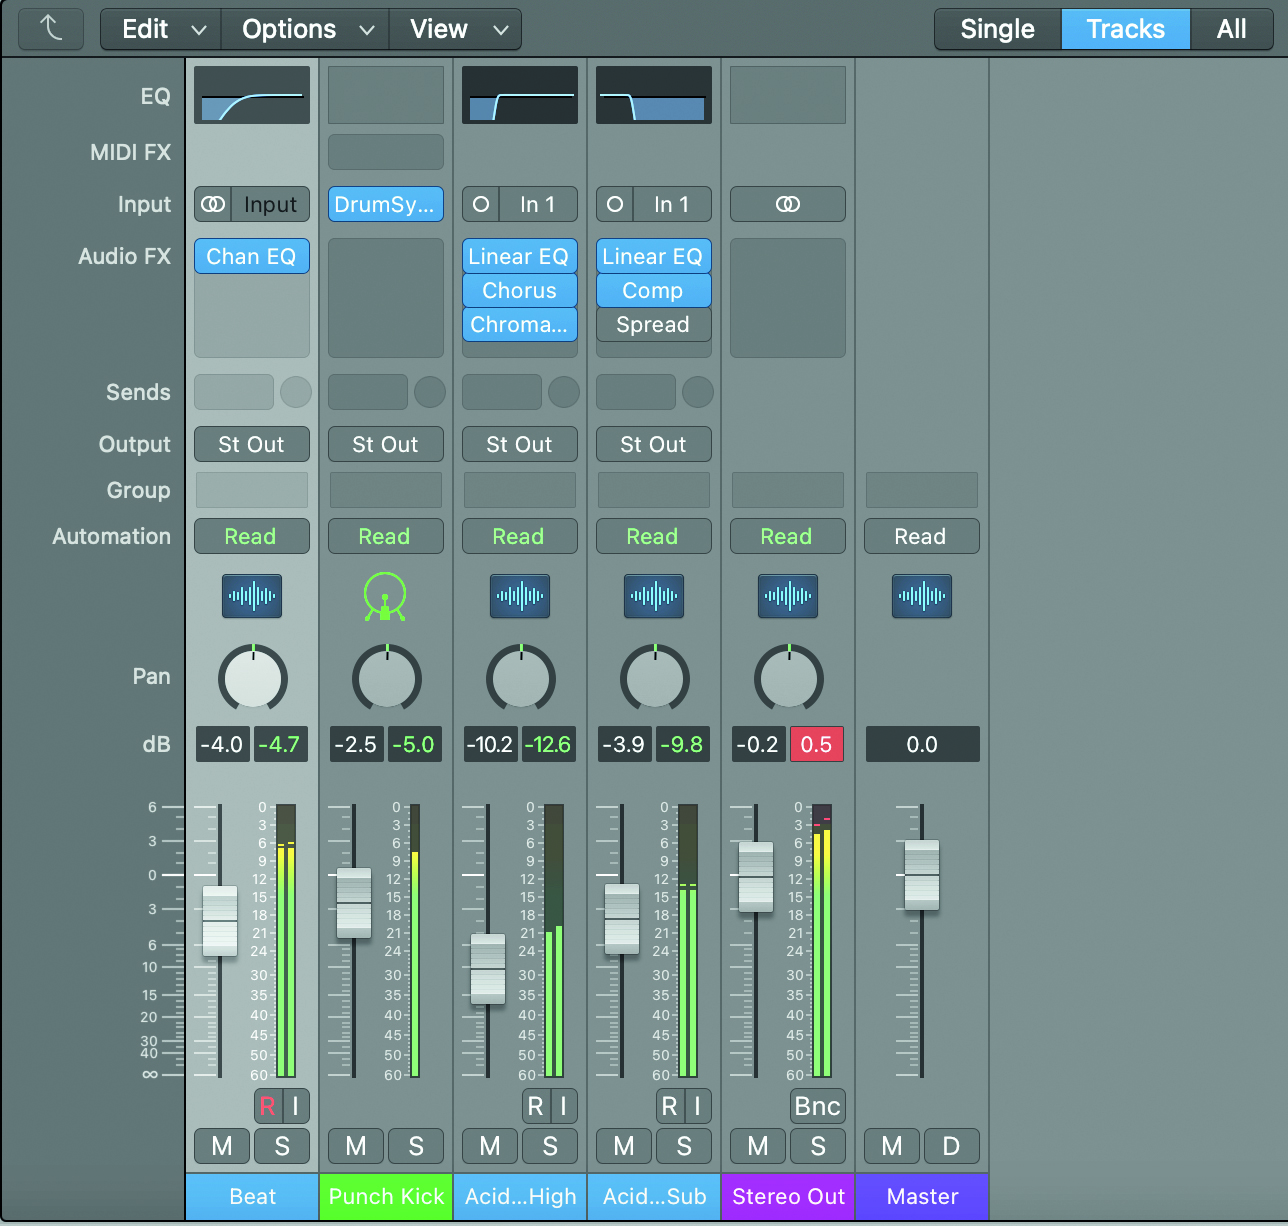
Step 6: Having the two elements separated out also makes it easier to balance the high and low parts. We reduce the volume of the High channel a little so our bass no longer dominates the mix but doesn’t lose any low-end weight.
Current page: Mixing sub bass
Prev Page Monitoring sub bass Next Page 12 of the best sub bass pluginsFuture Music is the number one magazine for today's producers. Packed with technique and technology we'll help you make great new music. All-access artist interviews, in-depth gear reviews, essential production tutorials and much more. Every marvellous monthly edition features reliable reviews of the latest and greatest hardware and software technology and techniques, unparalleled advice, in-depth interviews, sensational free samples and so much more to improve the experience and outcome of your music-making.
