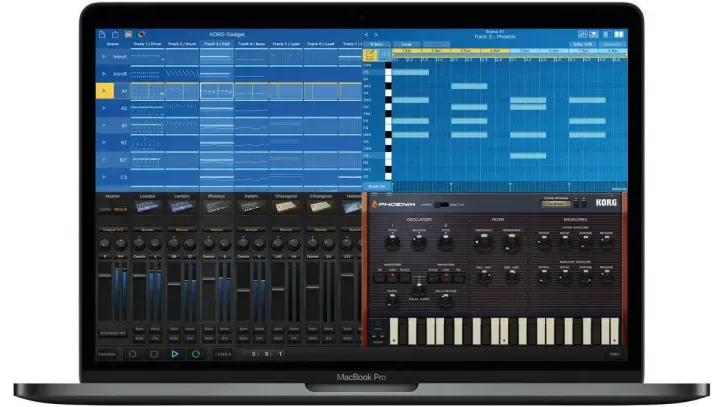
Since its introduction on iOS in 2014, Korg’s award-winning Gadget has arguably become the top integrated synthesis and sequencing app for iPads, regularly topping the iTunes App Store music production chart. It’s no surprise, either, as Gadget powerfully blends ease of use with comprehensive synthesis tools and the ability to export your Gadget projects to Ableton Live.
In 2017, Korg expanded Gadget’s range by introducing an identical version for Mac OS, bringing its intuitive approach to the desktop. The full install of Gadget for Mac is bundled with more than 30 plugins, including the recording gadgets Zurich and Rosario, as well as a virtualized collection of their most iconic hardware synths.
Though many of Gadget’s synths are so immediately approachable that there’s no real need for tutorials, others can look a bit cryptic to new users. Even if you’re an experienced synthesist, there are nuances in each of the instruments that go beyond the obvious functionality. So, for this master class, we’ll dig deeper into the more sophisticated gadgets, exposing possibilities that may not be immediately apparent.
• The best VST plugins 2020: the finest synth, drum machine, sampler and effect plugins you can buy right now
• The 18 best synthesizers 2020: keyboards, modules and semi-modular synths
Berlin sync synth

This synth’s engine is configured as a pair of hard-synced analogue oscillators, with an Attack/Decay envelope (EG1) serving double-duty for the pitch of the synced oscillator and the filter cutoff, with independently variable amounts. As a result, it excels at the vintage Prophet-5 squawks made popular by George Clinton and The Cars.
Although Berlin’s parameter set is straightforward, here are two design tricks that may not be apparent at first glance.
Pseudo flanging. For an effect that’s reminiscent of a flanger, but less metallic and slightly grittier, set the oscillator (sync) modulation source to LFO, the mod amount to 115, and the LFO speed to 0.80. Then, experiment with the oscillator tone parameter. The result will be a very slow flanging effect that sounds fantastic in conjunction with the synth’s delay and works well for subtly shifting drones.
Tone shaping. Because Berlin is a monophonic synth that works equally well for bass and leads, skip the sync modulation controls entirely and focus on the tone and waveform parameters. Then, use EG1 to modulate the filter cutoff in a traditional manner. This is a fantastic resource for plucked effects and synthwave basses.
Brussels anthem synth

This monosynth has a razor-thin focus: Supersaw leads for EDM and trance music. That said, Brussels’ parameter names are a little bit obtuse if you’re used to standard synthesis terminology, so here’s a cheat sheet for translating them.
Pump: Amplitude modulation optimized to emulate sidechain compression on a quarter-note kick drum.
Repeat: Sixteenth-note sawtooth amplifier modulation for rhythmic pulsing.
Glide: Portamento/Glide, always-on, no legato behaviour.
Bottom: Blends a duplicate set of oscillators, one octave lower.
Twist: Pitch envelope with variable depth, both positive and negative.
Diffuse: Unison detuning amount.
Filter: Cutoff frequency for a slightly resonant lowpass filter.
Chiang Mai VPM synth

Despite the terminology, phase modulation is a term some purists use to describe Yamaha’s implementation of FM synthesis, Chiang Mai is a remarkably powerful FM synth that is capable of both classic FM textures and complex modern tones. As a result, it’s worthwhile for Gadget for Mac users to consider using the AU/VST version in conjunction with other DAWs they may own. It’s that powerful.
To fully grasp its capabilities, it’s important to understand the underlying architecture. Each of the two oscillators is a discrete FM modulator/carrier pair, with the level, waveform, and pitch parameters governing the carrier, and the associated VPM parameters controlling a modulator that can be tuned to any of 24 harmonics, in addition to the sub-harmonic octave (0.5 setting). These modulators also include VPM (FM) depth and an envelope modulation-depth parameter that is tied to the filter envelope. Both modulators use the same envelope, but that’s not a huge deal-breaker sonically.
Here are some tips for programming Chiang Mai, both as an FM synth and as a source of more familiar subtractive textures.
Yamaha-style FM. Setting both of the oscillators to sine waves with all other parameters at their default and filter cutoff at maximum will give you a classic starting point for traditional FM synthesis. Start by setting oscillator 1’s VPM depth to 50, then click through each harmonic, noting the similarities to iconic DX7 presets. For example, a harmonic setting of 3 is close to the DX “jazz guitar” preset, while a harmonic setting of 5 delivers its “marimba” sound. From there, tinker with the VPM envelope depth and the filter envelope settings.
House fans take note: by setting the VPM harmonic to 2, depth to 10, and VPM envelope depth to 40, you’ll have the perfect starting point for the “future house” bass sound.
Classic subtractive. By leaving the VPM settings at zero for both oscillators, you’ll create a standard virtual analogue signal path, with individual waveforms and pitch for each oscillator and the bonus of an integrated chorus and delay.
Hybrid approaches. Starting with the classic subtractive approach described above, you can create thick, evolving textures by selecting triangle waves for both oscillators (the carriers), which will deliver a brighter FM result when you tinker with the VPM depth and envelope amounts. By using slow filter envelope settings with long attack, decay, and release settings, its sound becomes extremely complex. The “First Evolution” preset in the Factory 2 bank is a great example of this technique.
Chicago tube bass

This synth is optimized for TB-303 emulations, with an integrated arpeggiator that speeds up the process of making acid bass lines. Though the majority of its parameters need little explanation, here are some details that may not be immediately apparent.
Saw/Square. The oscillator waveform is continuously variable between sawtooth and square, which are actually two discrete oscillators that are slightly detuned. Accordingly, settings between -20 and +20 exhibit a slight phasing which can be cool for keeping a repeating pattern subliminally interesting.
Gate/Env. While the panel diagram appears to correlate the envelope/gate parameter to the filter, it actually switches the amplifier between gated (no envelope, full sustain) and the shared ADSR.
Bite and Gnaw. These filter parameters apply distortion to the filter, with Bite serving as a classic 303 overdrive and Gnaw behaving like a Minimoog-style feedback loop.
Effects. All of Chicago’s effects are clearly labelled, with the exception of Decimator which is actually a bit-crusher.
Dublin analogue semi-modular

Envoking Korg’s classic MS-20, the Dublin monophonic synth is a fantastic way to dip a toe into the waters of modular synthesis, since its modulation routings must be done with virtual patch cables. That said, it’s got some quirky limitations that a modular approach resolves—a bit like a puzzle for synth nerds. Here are a few tricks to get you started.
Interval tunings. Because VCO 2’s tuning knob is strictly for detuning, you can’t access intervals directly. Workaround? Patch the modular envelope generator to VCO 2 pitch, set everything except sustain to zero with maximum modulation amount, then use the sustain level parameter to dial in your interval.
Self-oscillation. Dublin’s filter resonance will self-oscillate at maximum, even with no oscillator or noise signals present. Setting filter keyboard amount to maximum allows it to track the keyboard chromatically (with cutoff as tuning control). While this technique is great for emphasizing oscillator harmonics, it’s also an impressive solo resource in conjunction with the integrated overdrive and tone controls.
Rhythms. Dublin’s dual LFOs can be tempo-synced, making them extremely useful for rhythmic effects. Experiment by patching these to the inputs for VCO 1 waveshape, the various mixer volumes, and/or the cutoff frequency.
Helsinki ambient

While Helsinki’s stated purpose is “ambient synthesis,” thanks in part to its huge reverb effect, it is handy for creating other types of sounds, too. Just keep in mind that all of the oscillators have a minute amount of very slow pitch LFO applied to them. With lower cutoffs and extreme reverb settings, this adds a semi-chorused motion to the sound. Dry, the effect sounds a bit like a decaying vintage synth. Additionally, the multimode filter eschews keyboard tracking, so adding resonance is useful for colour, but doesn’t follow the pitch. This is worth noting when creating noise-based patches.
That said, here are two non-ambient textures you can create with Helsinki. For both of these patches, select the LPF12 filter mode, set the cutoff to maximum and the envelope to sustain only, with attack, decay, and release at zero
Transistor organ. You can re-create the ’60s Farfisa/Vox sound by selecting the sawtooth waveform then adjusting the oscillator octaves (low, high, higher) like drawbars for classic rock and new wave organs.
Chiptune/GameBoy. For 8-bit video game sounds, use the above organ technique, but with square waves selected for the oscillators. For bonus points, add a touch of noise and experiment with the Lo-Fi effect, which is actually a bit-crusher.
Kiev spatial synthesizer

Another powerful gadget, Kiev, combines vector synthesis (which traditionally uses single-cycle waveforms) with sampled instruments, allowing you to tune and blend up to four of them on an X/Y axis. The sampled options, such as “EtherBel,” are a bonus, as many of them include attack transients for added impact.
Once you’ve selected and tuned each of your oscillator elements, there are two independent sine/triangle LFOs for modulating the overall mix. The end result is optimized for spacious, morphing pads and evolving leads.
While Kiev’s range of options is exhaustive, the best way to quickly understand its tonal possibilities is to set the A/B and C/D LFO depths to zero, and then select four timbrally distinct oscillator samples. From there, set each to a different octave, so their tones are easily distinguished. Finally, use the glowing yellow icon in the X/Y grid to mix between the four tones. This will let you hear what’s actually going on in the synth.
Once you have a feel for that aspect of its architecture, start experimenting with the dual LFO's depth and rates before moving to the more traditional multimode filter and envelopes.
Also worth noting is Kiev’s comprehensive array of effect options. While most are aptly named, here are translations for three more exotically named processors:
Decimator: Bit-crusher
Grain shift: Stuttering effect
Talk Mod: Formant Filter
Phoenix analogue

Loosely based on vintage Oberheim polysynths and, thus, straightforward to program if you understand subtractive analog synthesis, Phoenix still has a few tricks up its virtual sleeve that give it an edge for exotic textures. Here are a few areas for exploration.
Filter tracking. Like Dublin, Phoenix’s filter includes keyboard tracking and resonance that approaches self-oscillation. Setting the keyboard tracking to maximum (100%) and increasing the resonance allows you to use it as a third oscillator to emphasize any harmonics present in the main oscillators, but unlike Dublin, it’s polyphonic.
Amplitude modulation. Because the Phoenix LFO rate extends into the lower audio regions, it’s possible to create ring-mod effects by applying modulation to the amp destination. Additionally, adding a touch of S&H audio-rate modulation to the filter or pulse-width is an excellent tool for adding grunge and analogue-style chaos.
Oscillator thickening. While there’s an excellent Unison mode for supersaws and thickening, this can make your CPU work harder (especially on older iOS devices). As an alternative, set both oscillators to pulse, then add PWM via the LFO with a rate of 2.50 and a depth of ±2.50. From there, set Osc 2’s detuning to around 40 for a more economical approach to thick, warm pads.
Miami wobble

Although the Miami synth is optimized for nasty dubstep basses (which nowadays are a tad dated), if you set the wobble amount to zero, it’s an excellent X-Mod lead synth with glide and stereo width.
To get started with this, select the Init Miami patch and set both Carrier and X-Mod oscillators to triangle waves, X-Mod level to 100, and X-Mod depth to 100. From there, experiment with the following tuning settings (either positive or negative): 0, 1.46, 2.50, 3.96, and 5.00. These will yield the most harmonically rich results with minimal sideband inclusions. From there, tinker with the X-Mod depth and waveforms for both oscillators.
Tokyo analogue percussion
This simple analog drum machine offers familiar tools for kick, snare, and tom. But the real star here is the PCS503 percussion module, which is excellent for cowbells, claves, and awesome analog bongos and congas. Although most of its parameters are self-explanatory, its modulation section is FM-based with key-synced phase.
Because the modulation restarts with every event, slow speeds and lower depths via the sawtooth will result in disco toms. On the other hand, audio rate modulation will result in awesome metallic percussion. Tinkering with depth and other waveforms varies the character greatly.
Wolfsburg hybrid

With two capable oscillators, multimode filtering, two LFOs, integrated effects and a four-way modulation matrix, Wolfsburg is almost worthy of its own master class. Fortunately, everything is laid out beautifully, so if you’re familiar with modern softsynths, navigating its options will be an enjoyable process.
That said, here are three unusual programming tricks that may not be immediately apparent.
Noise modulation. One of the sources in the modulation matrix is a noise generator. Try adding a miniscule amount (±0.10 is a good starting point) to cutoff or oscillator pitch for analog grit. Resonance is another useful destination, but requires more extreme modulation settings to get the full effect.
Rhythmic effects. Like Dublin, Wolfsburg has two LFOs that can be tempo-synced and phaselocked to key events, but it offers a wider range of destinations, making it superb for polyphonic rhythmic patches (“Pulse Rhythm” is a good example of this). Start with a pair of sawtooth LFOs at different tempos, like 1/8 and 3/16, and then assign each to different parameters. Cutoff, output level, resonance, and noise level are all solid options.
Performance customization. With velocity and keyboard tracking as modulation sources, it’s possible to create dynamic performance patches with Wolfsburg. While velocity modulation is an obvious choice for output, cutoff, and envelope times, try applying keyboard tracking to envelope decays for plucks and bells that get longer or shorter in different keyboard ranges.
