Program a sequencer-based drone with this free plugin
Continuing our deep-dive into the standout tools in our CM Plugin Suite, we shed some light on drone-making using BazilleCM’s sequencer section
Want all the hottest music and gear news, reviews, deals, features and more, direct to your inbox? Sign up here.
You are now subscribed
Your newsletter sign-up was successful
Before we get started, let’s just make sure that we are talking about the right kind of drone! We certainly aren’t talking about any form of flying machine or underwater sub, but we could certainly use this month’s patch to provide plenty of sub‑like action.
One of the most powerful features, located at the bottom of BazilleCM’s interface, is the sequencer section. Its primary role is to provide a modulation source, but that modulation can be applied to any parameter that is patchable within the BazilleCM interface.
If it were connected to the tuning input of OSC1, we could use it as a traditional sequencer, to play a series of notes in a prescribed order, in a looped formation. However, we are going to use the sequencer three times, for the purposes of tone modulation. This means that we can create plenty of movement within our patch, which is exactly the sort of thing that makes a drone more interesting.
Article continues belowMoreover, the drone that we are going to create is at the more playable end of drone business. Play it low, and you have an interesting and pulsating bass drone, but it can also be played higher, to provide interest in the middle of a mix. Or you could use it to add interest to a track when played alongside a chord sequence, as we do in our video tutorial demo.
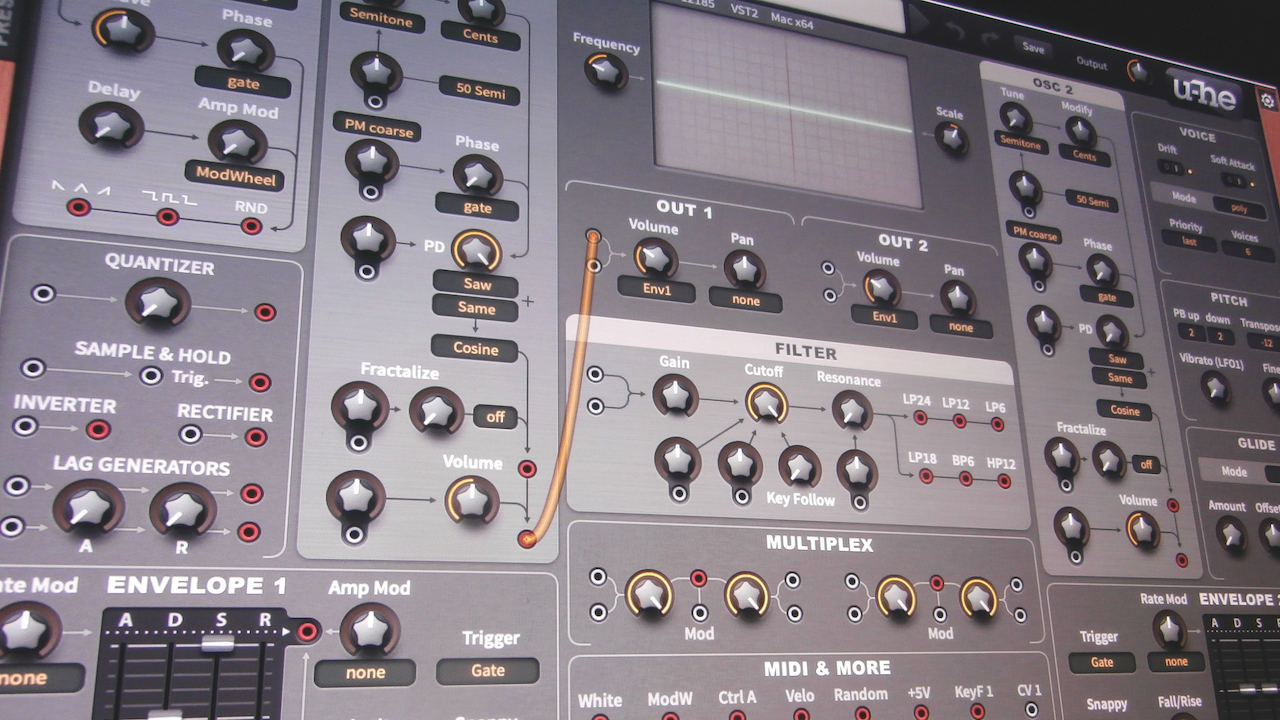
For this tutorial, we're using BazilleCM, a synth plugin that comes free with every issue of Computer Music, along with a bundle of other plugins called the CM Plugin Suite. BazilleCM is our unique version of u-he's patchable modular synthesiser, sequencer and mapping generator Bazille.
Creating a sequencer-based drone with BazilleCM
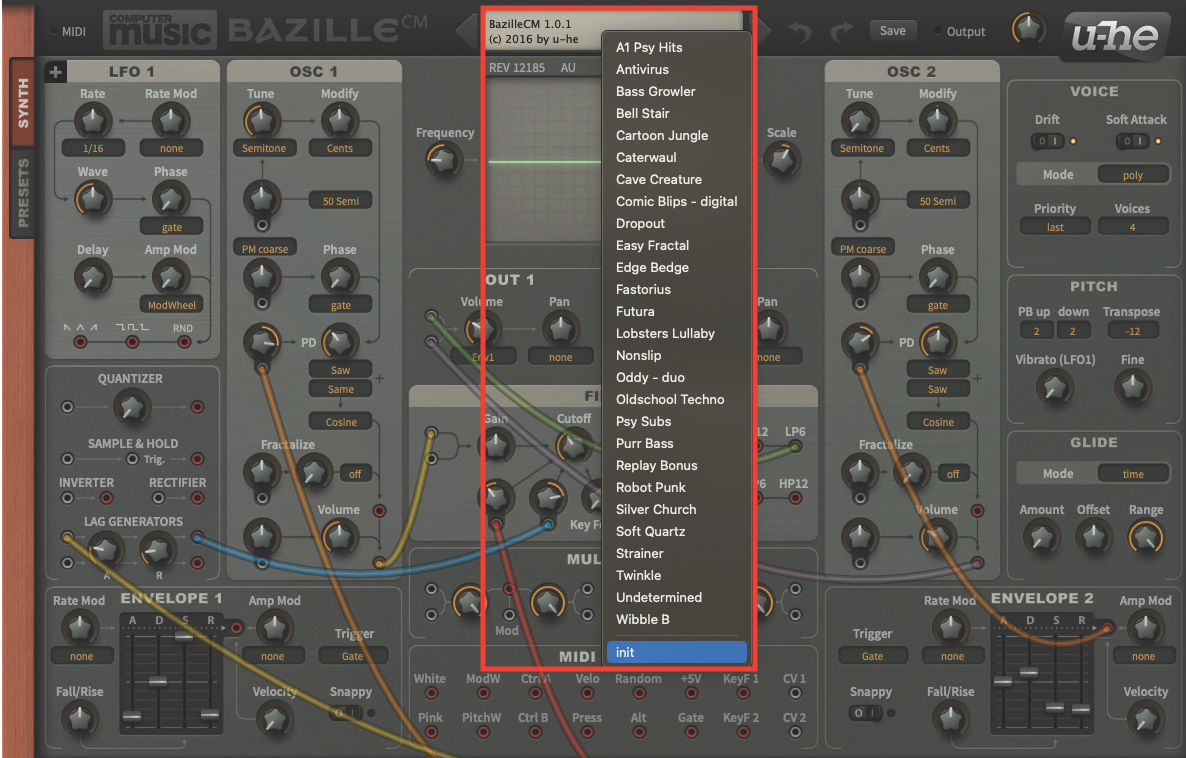
Let’s start things off by initialising a patch on BazilleCM. Open up your DAW and load up the plugin. Once the plugin window is open, move to the central display at the top of the window, click to reveal the drop-down menu, and select ‘init’ from the bottom. This will initialise the patch.
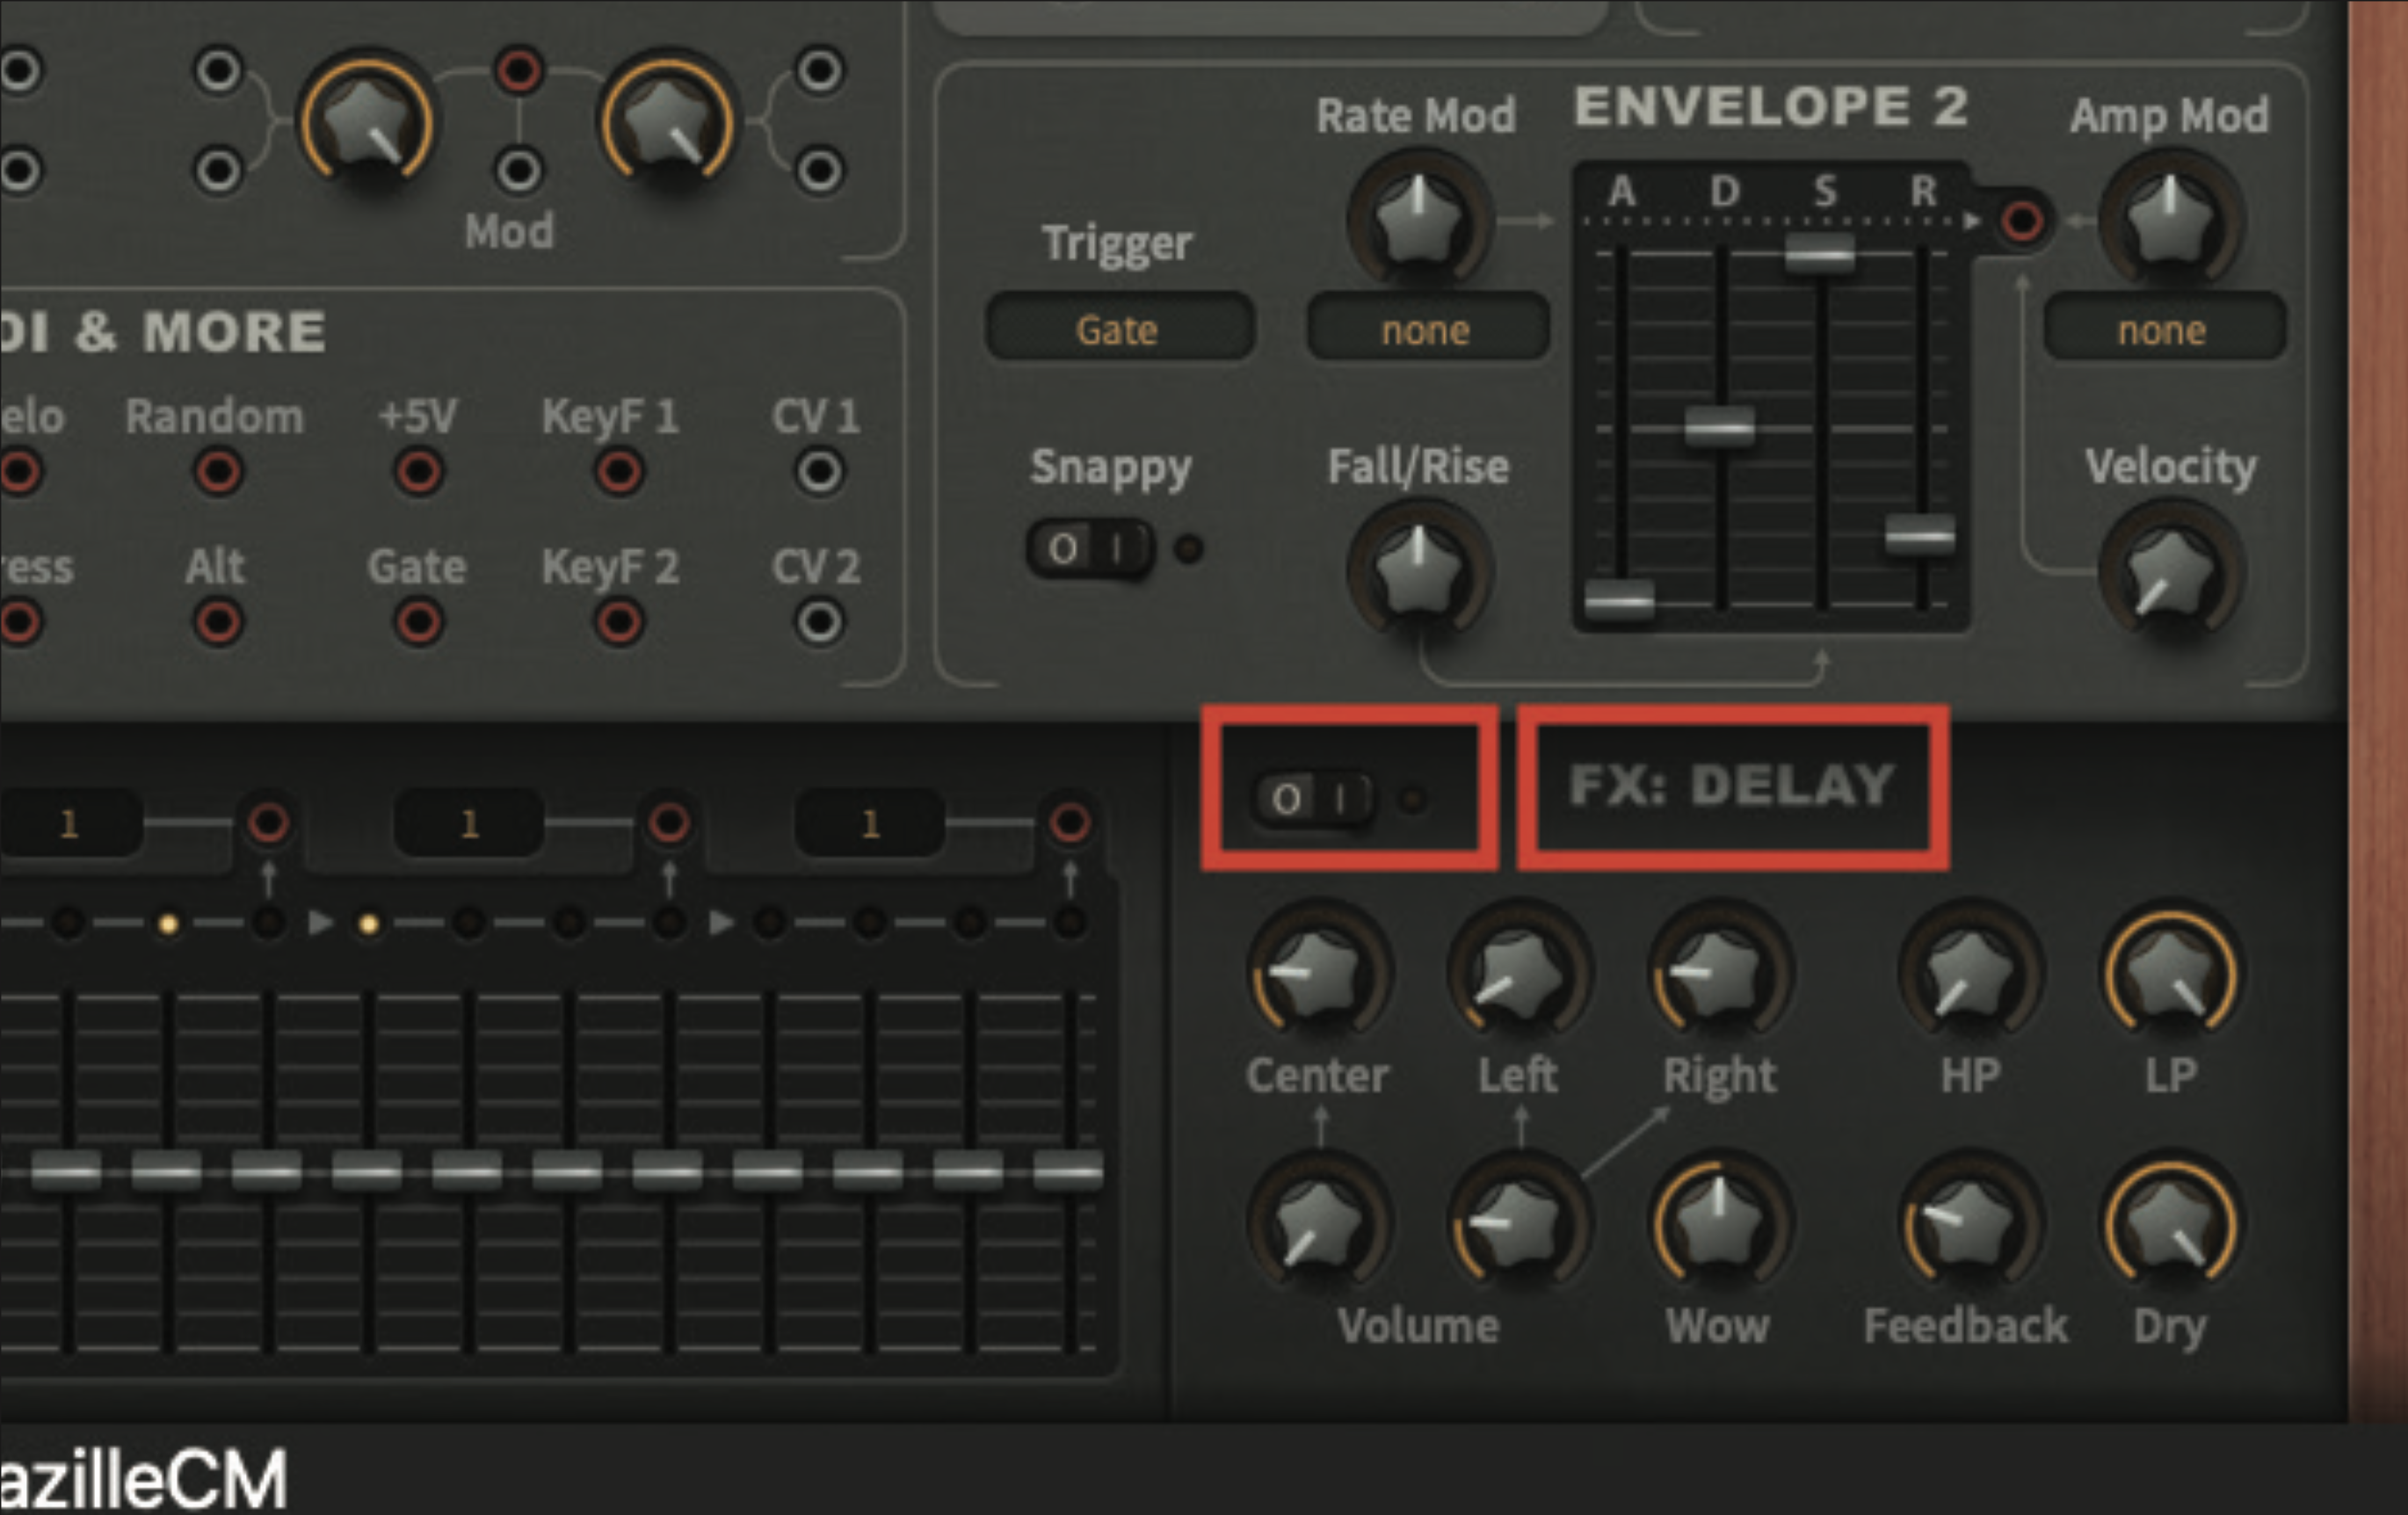
As part of the initialisation, you’ll also hear the FX Delay active in the signal. To make our adjustments clearer at this stage, go to the Delay section (bottom-right) and move the switch to the ‘off’ position. You can always switch it on again later, if so desired.
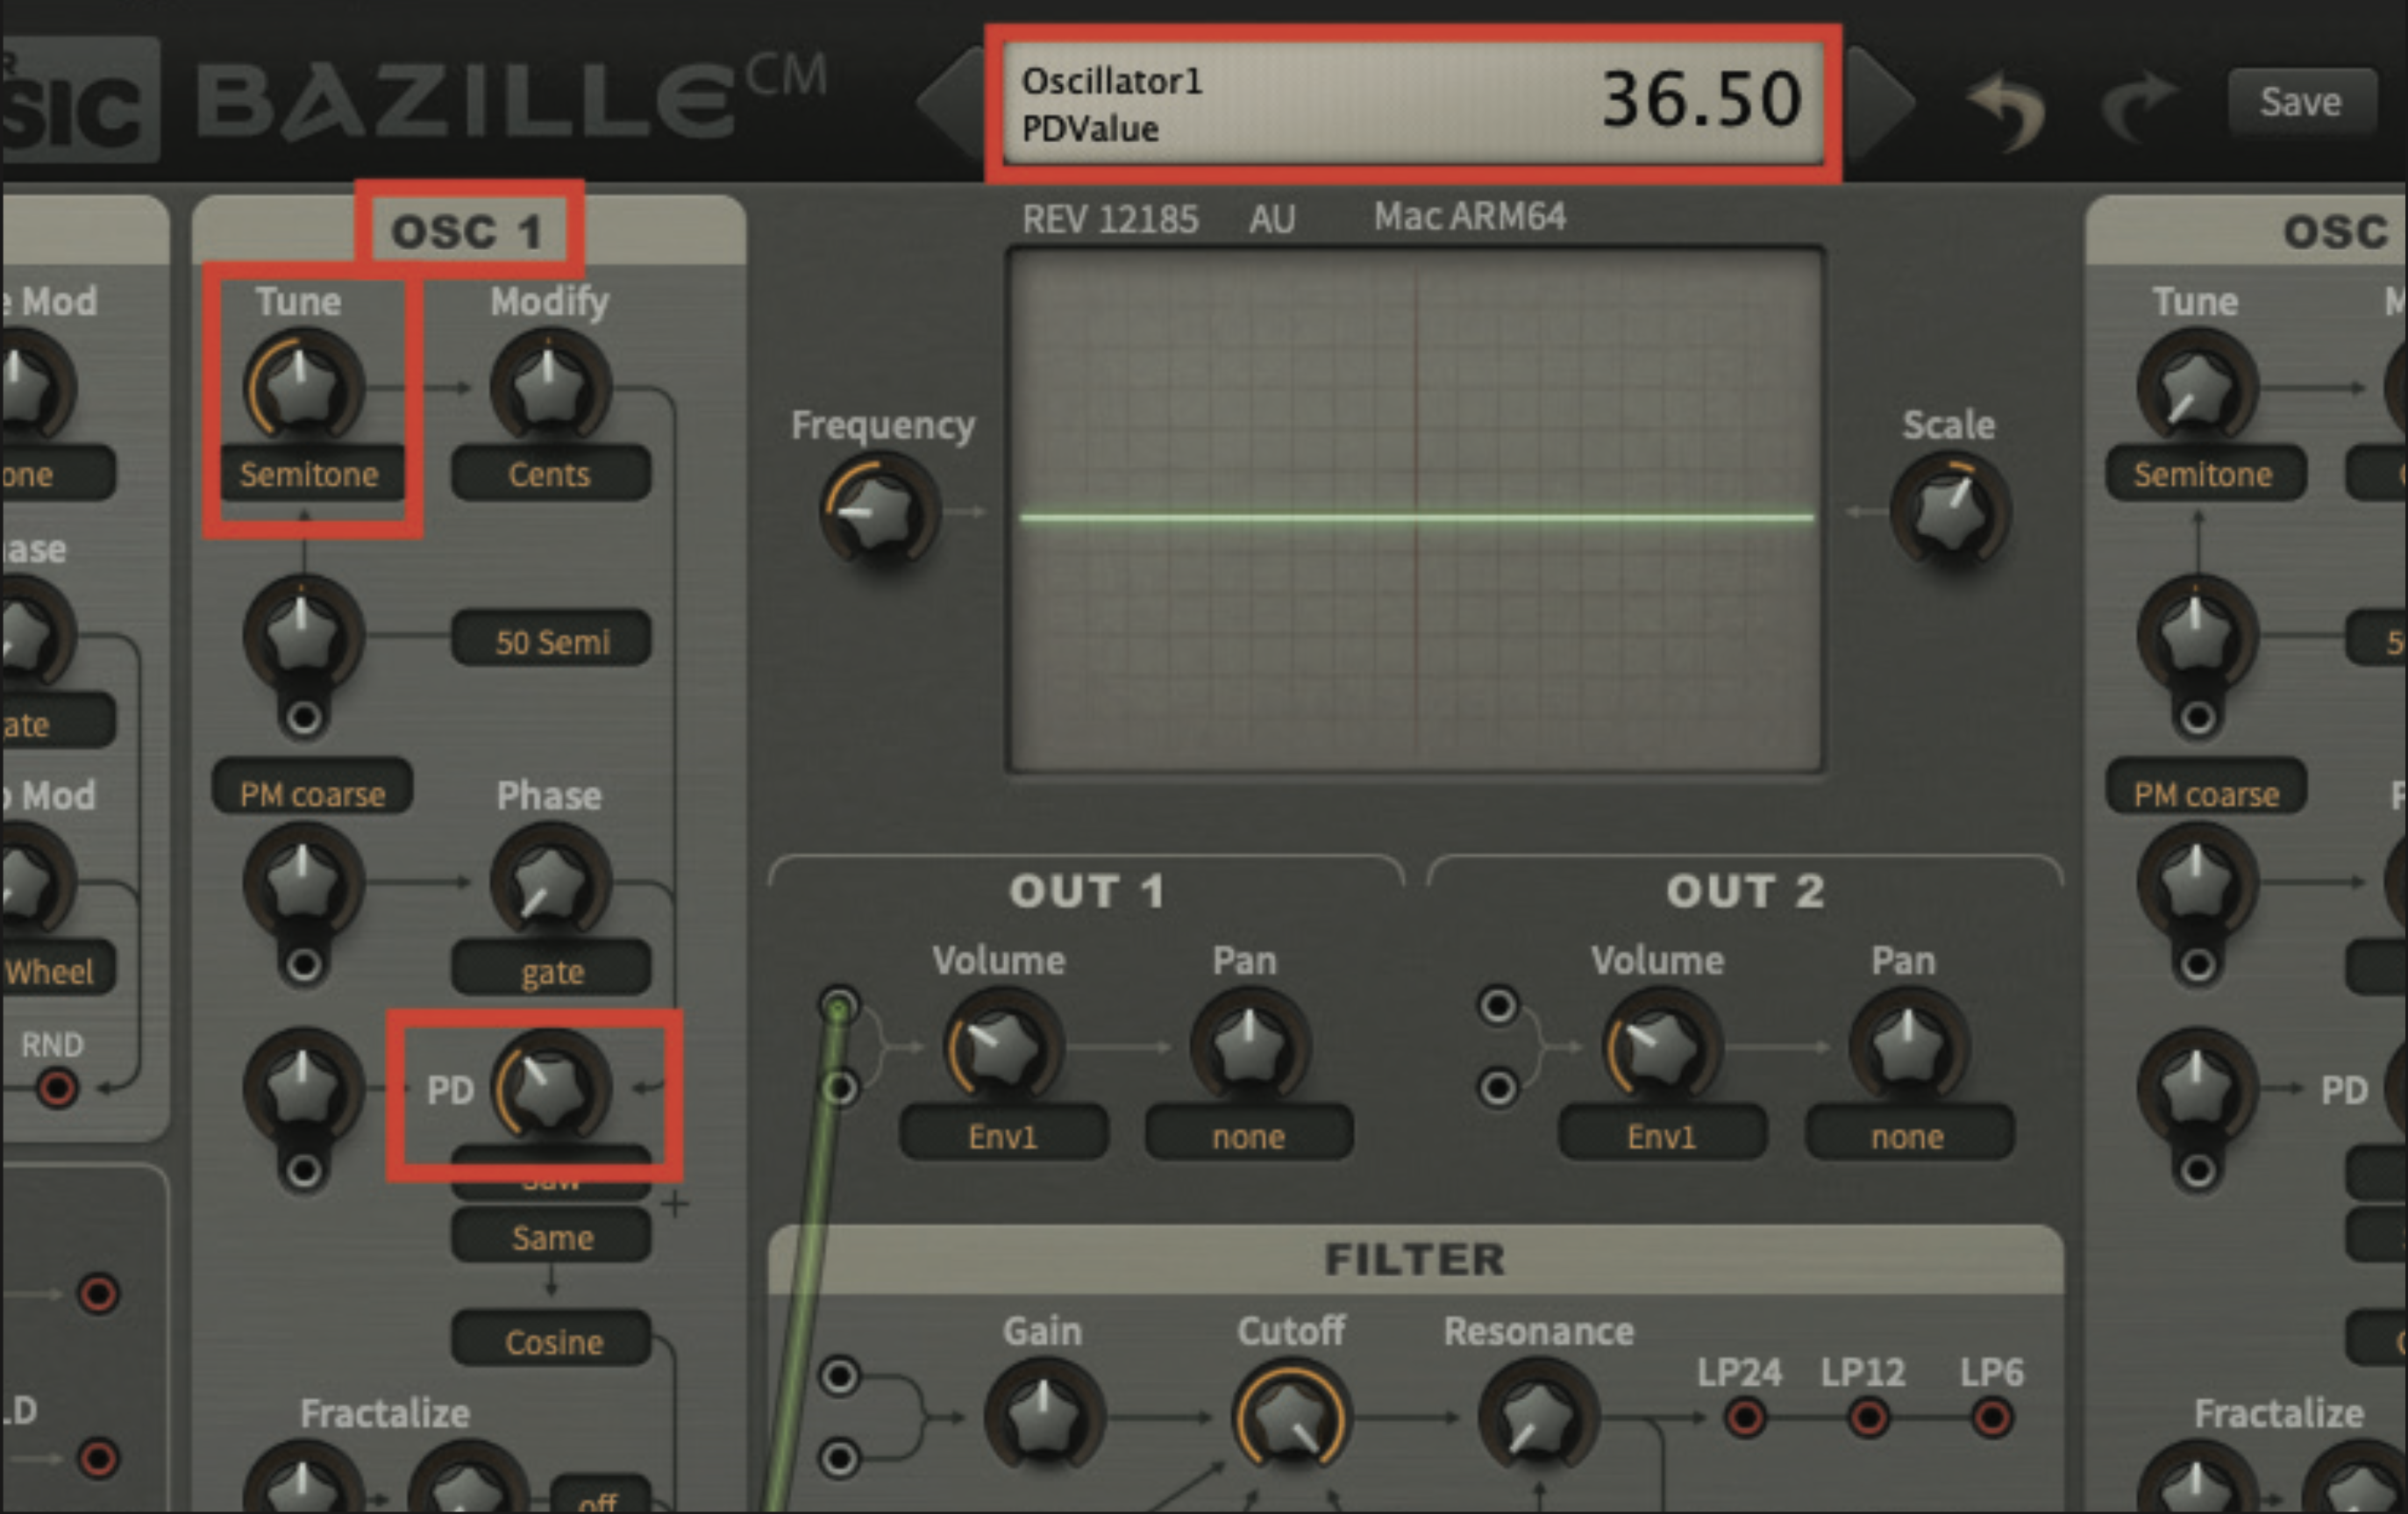
Move to the OSC1 section and adjust the Tune pot to a value of 12. Remember that every time you make a pot adjustment, the value will be displayed in the upper-display. Locate the PD pot, which is located halfway down the OSC1 strip, and set this to a value of 36.50.
Want all the hottest music and gear news, reviews, deals, features and more, direct to your inbox? Sign up here.
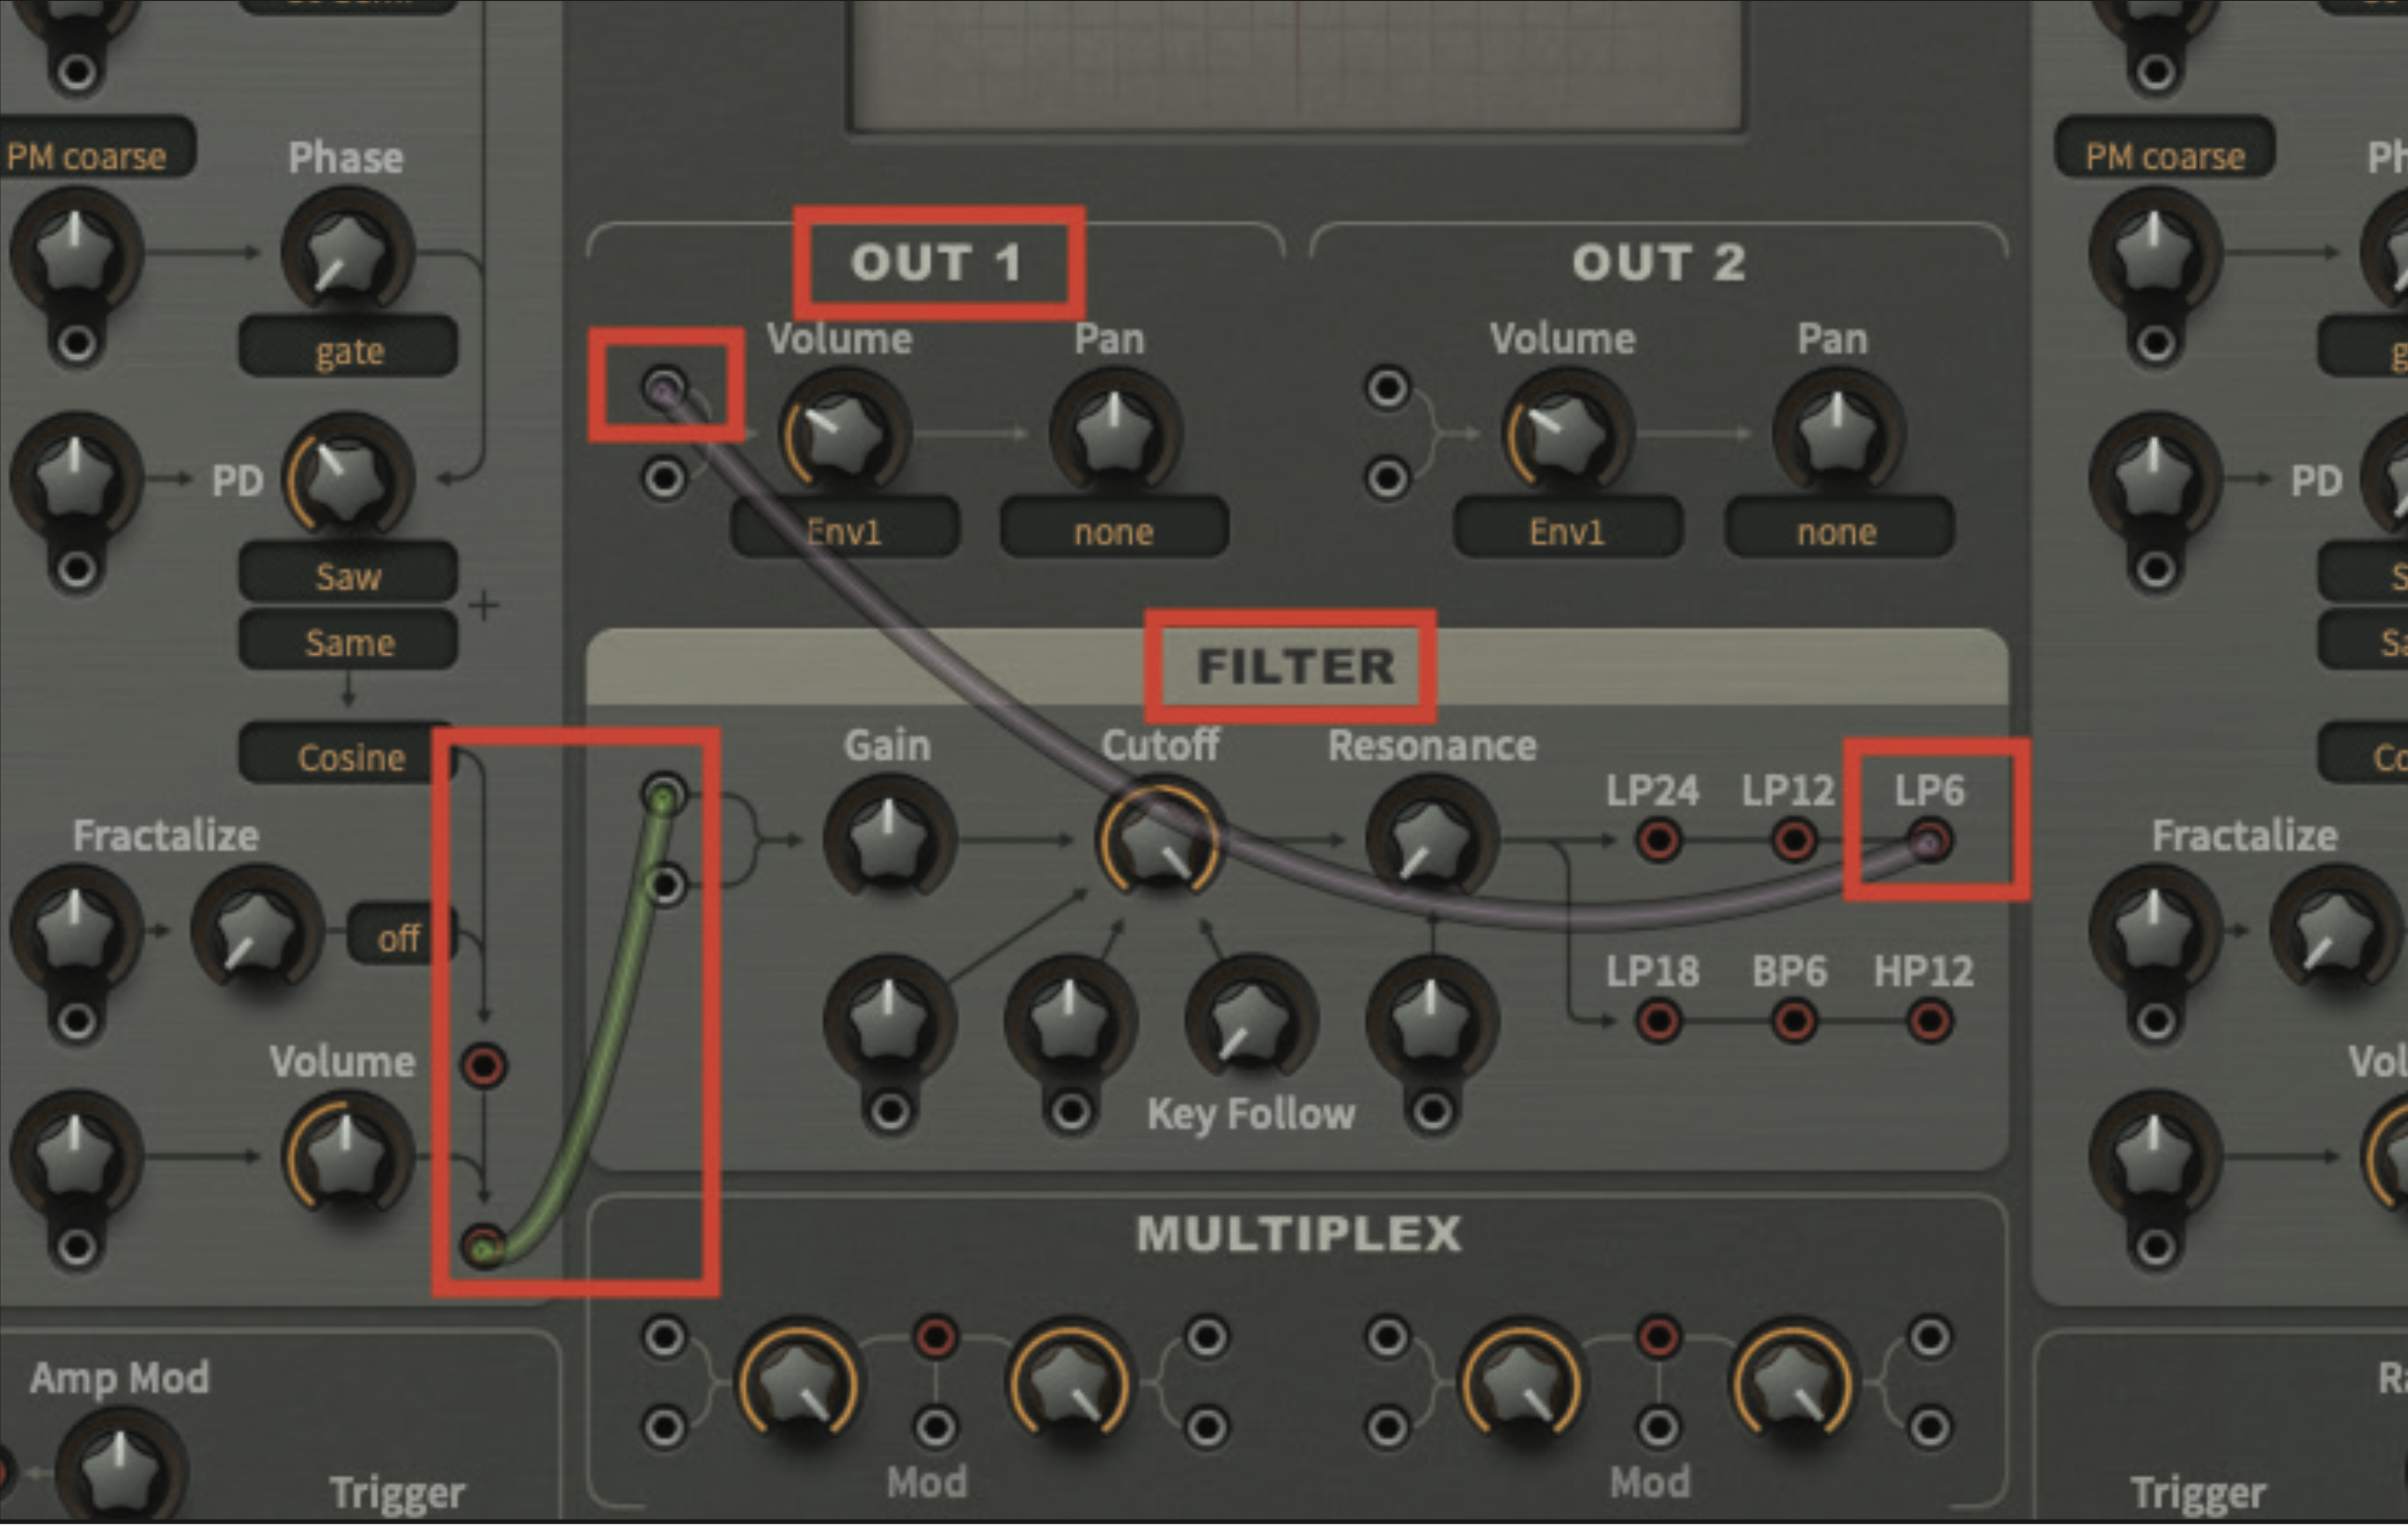
Next, patch OSC1 to the filter section. Disconnect the existing patch cable from OUT1, and reconnect it to the input of the Filter section. You should be able to do this by clicking and holding on the end of the cable. Once connected, create a second patch cable from the filter output LP6, to the input of OUT1.
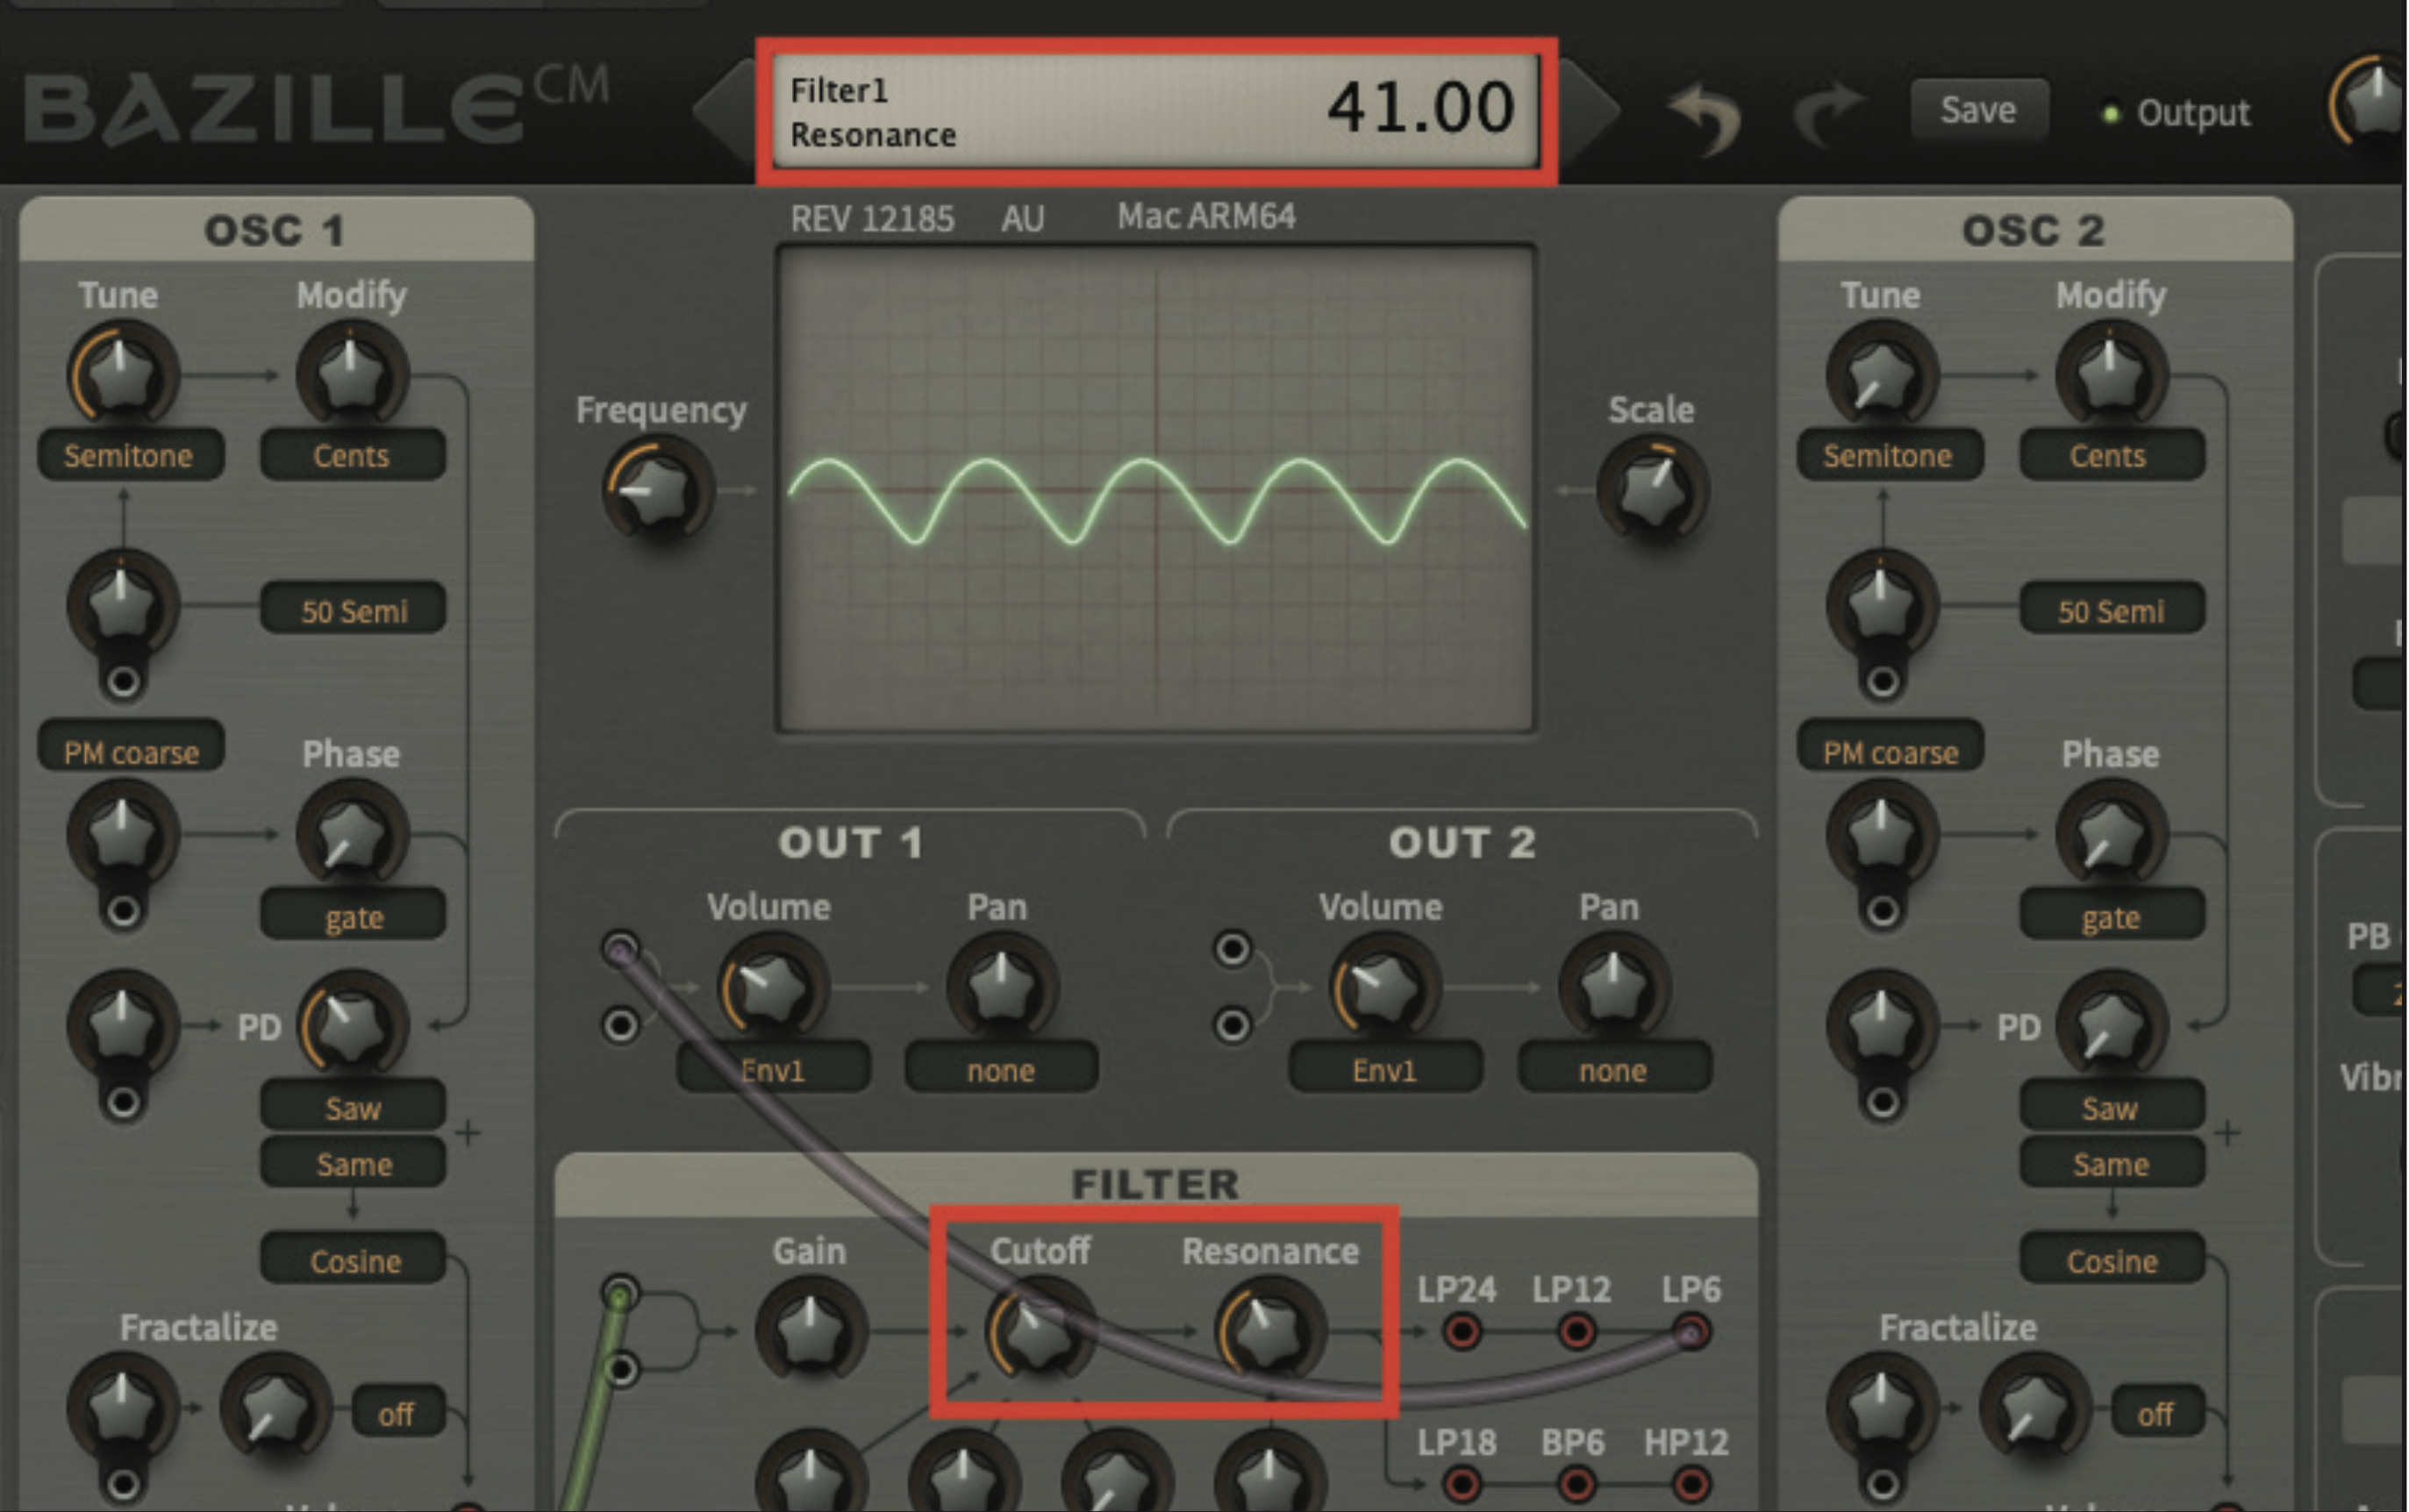
Now that the filter section is connected, we can adjust the associated tone elements. Begin with the Cutoff pot, which we need to set to a value of 58, and then adjust the Resonance pot, to a value of 41. The sound we hear now will be quite dull and intense, but this will change very shortly!
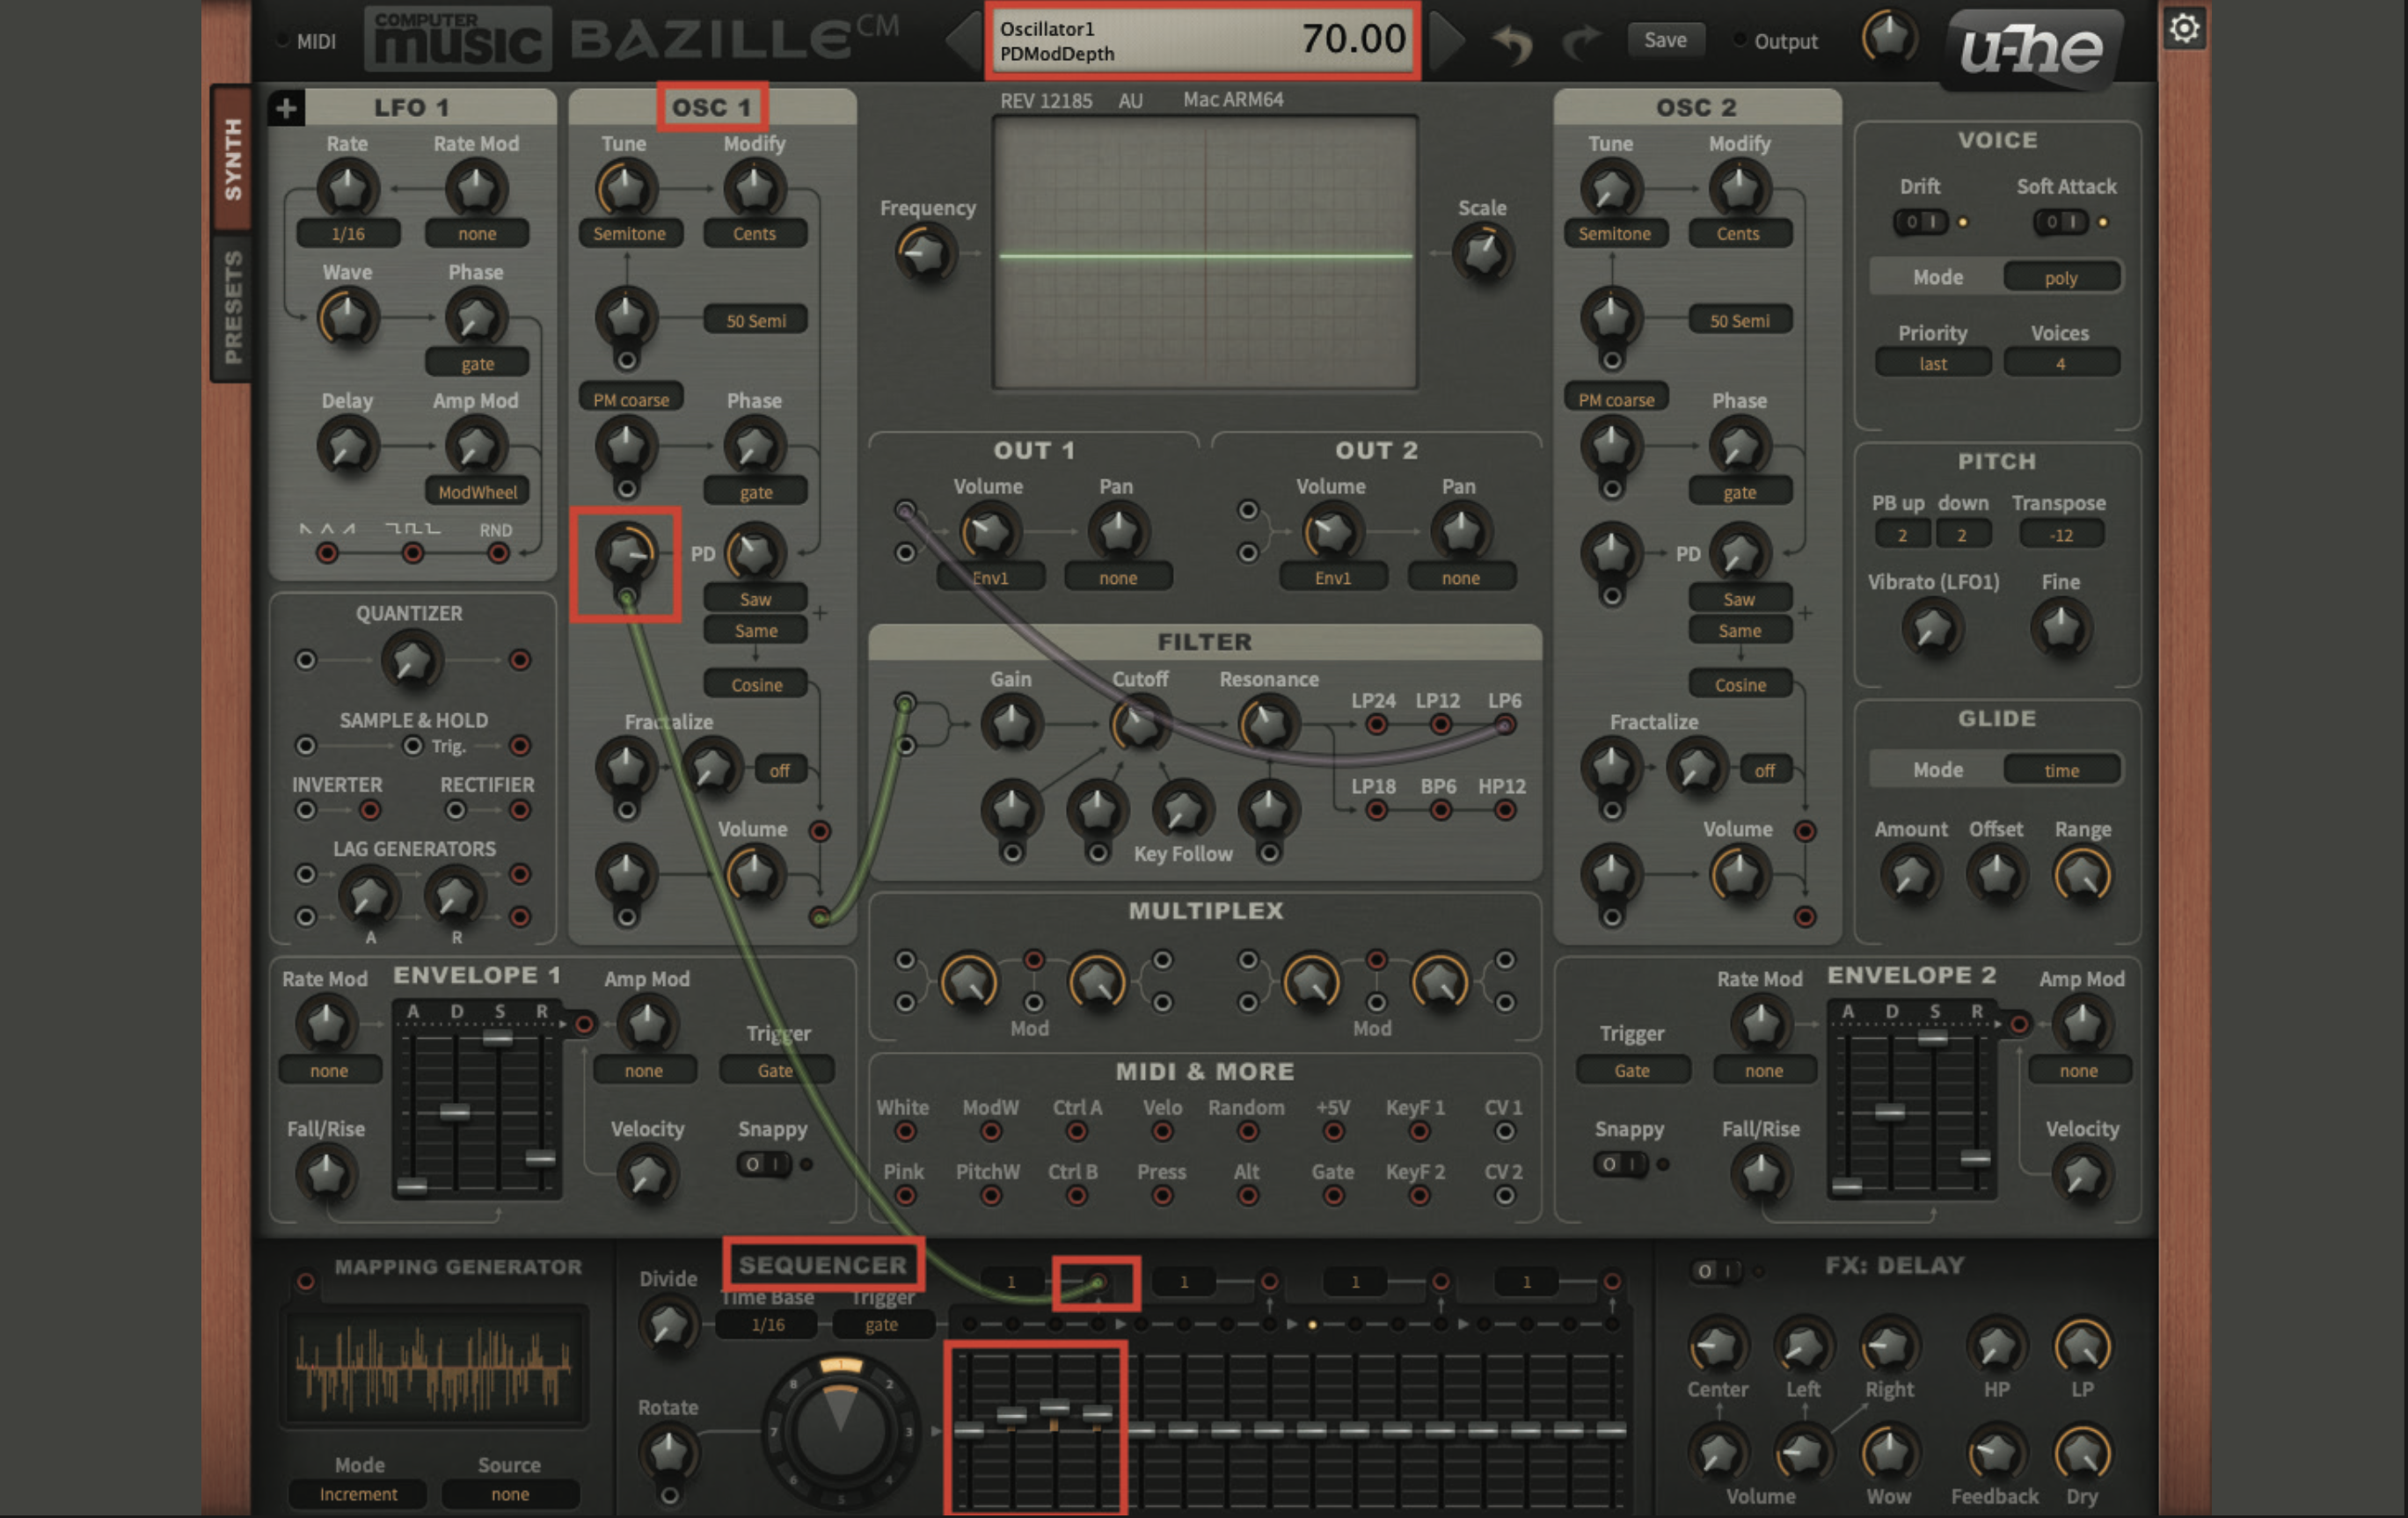
It’s time to patch in the first section of the sequencer. Using the sequencer’s output point which is located on the left, patch a cable to the PD modulation pot, within the OSC1 section. Then set this pot to a value of 70. Adjust the first four sequencer faders to values of 0, 20, 32 and 24.
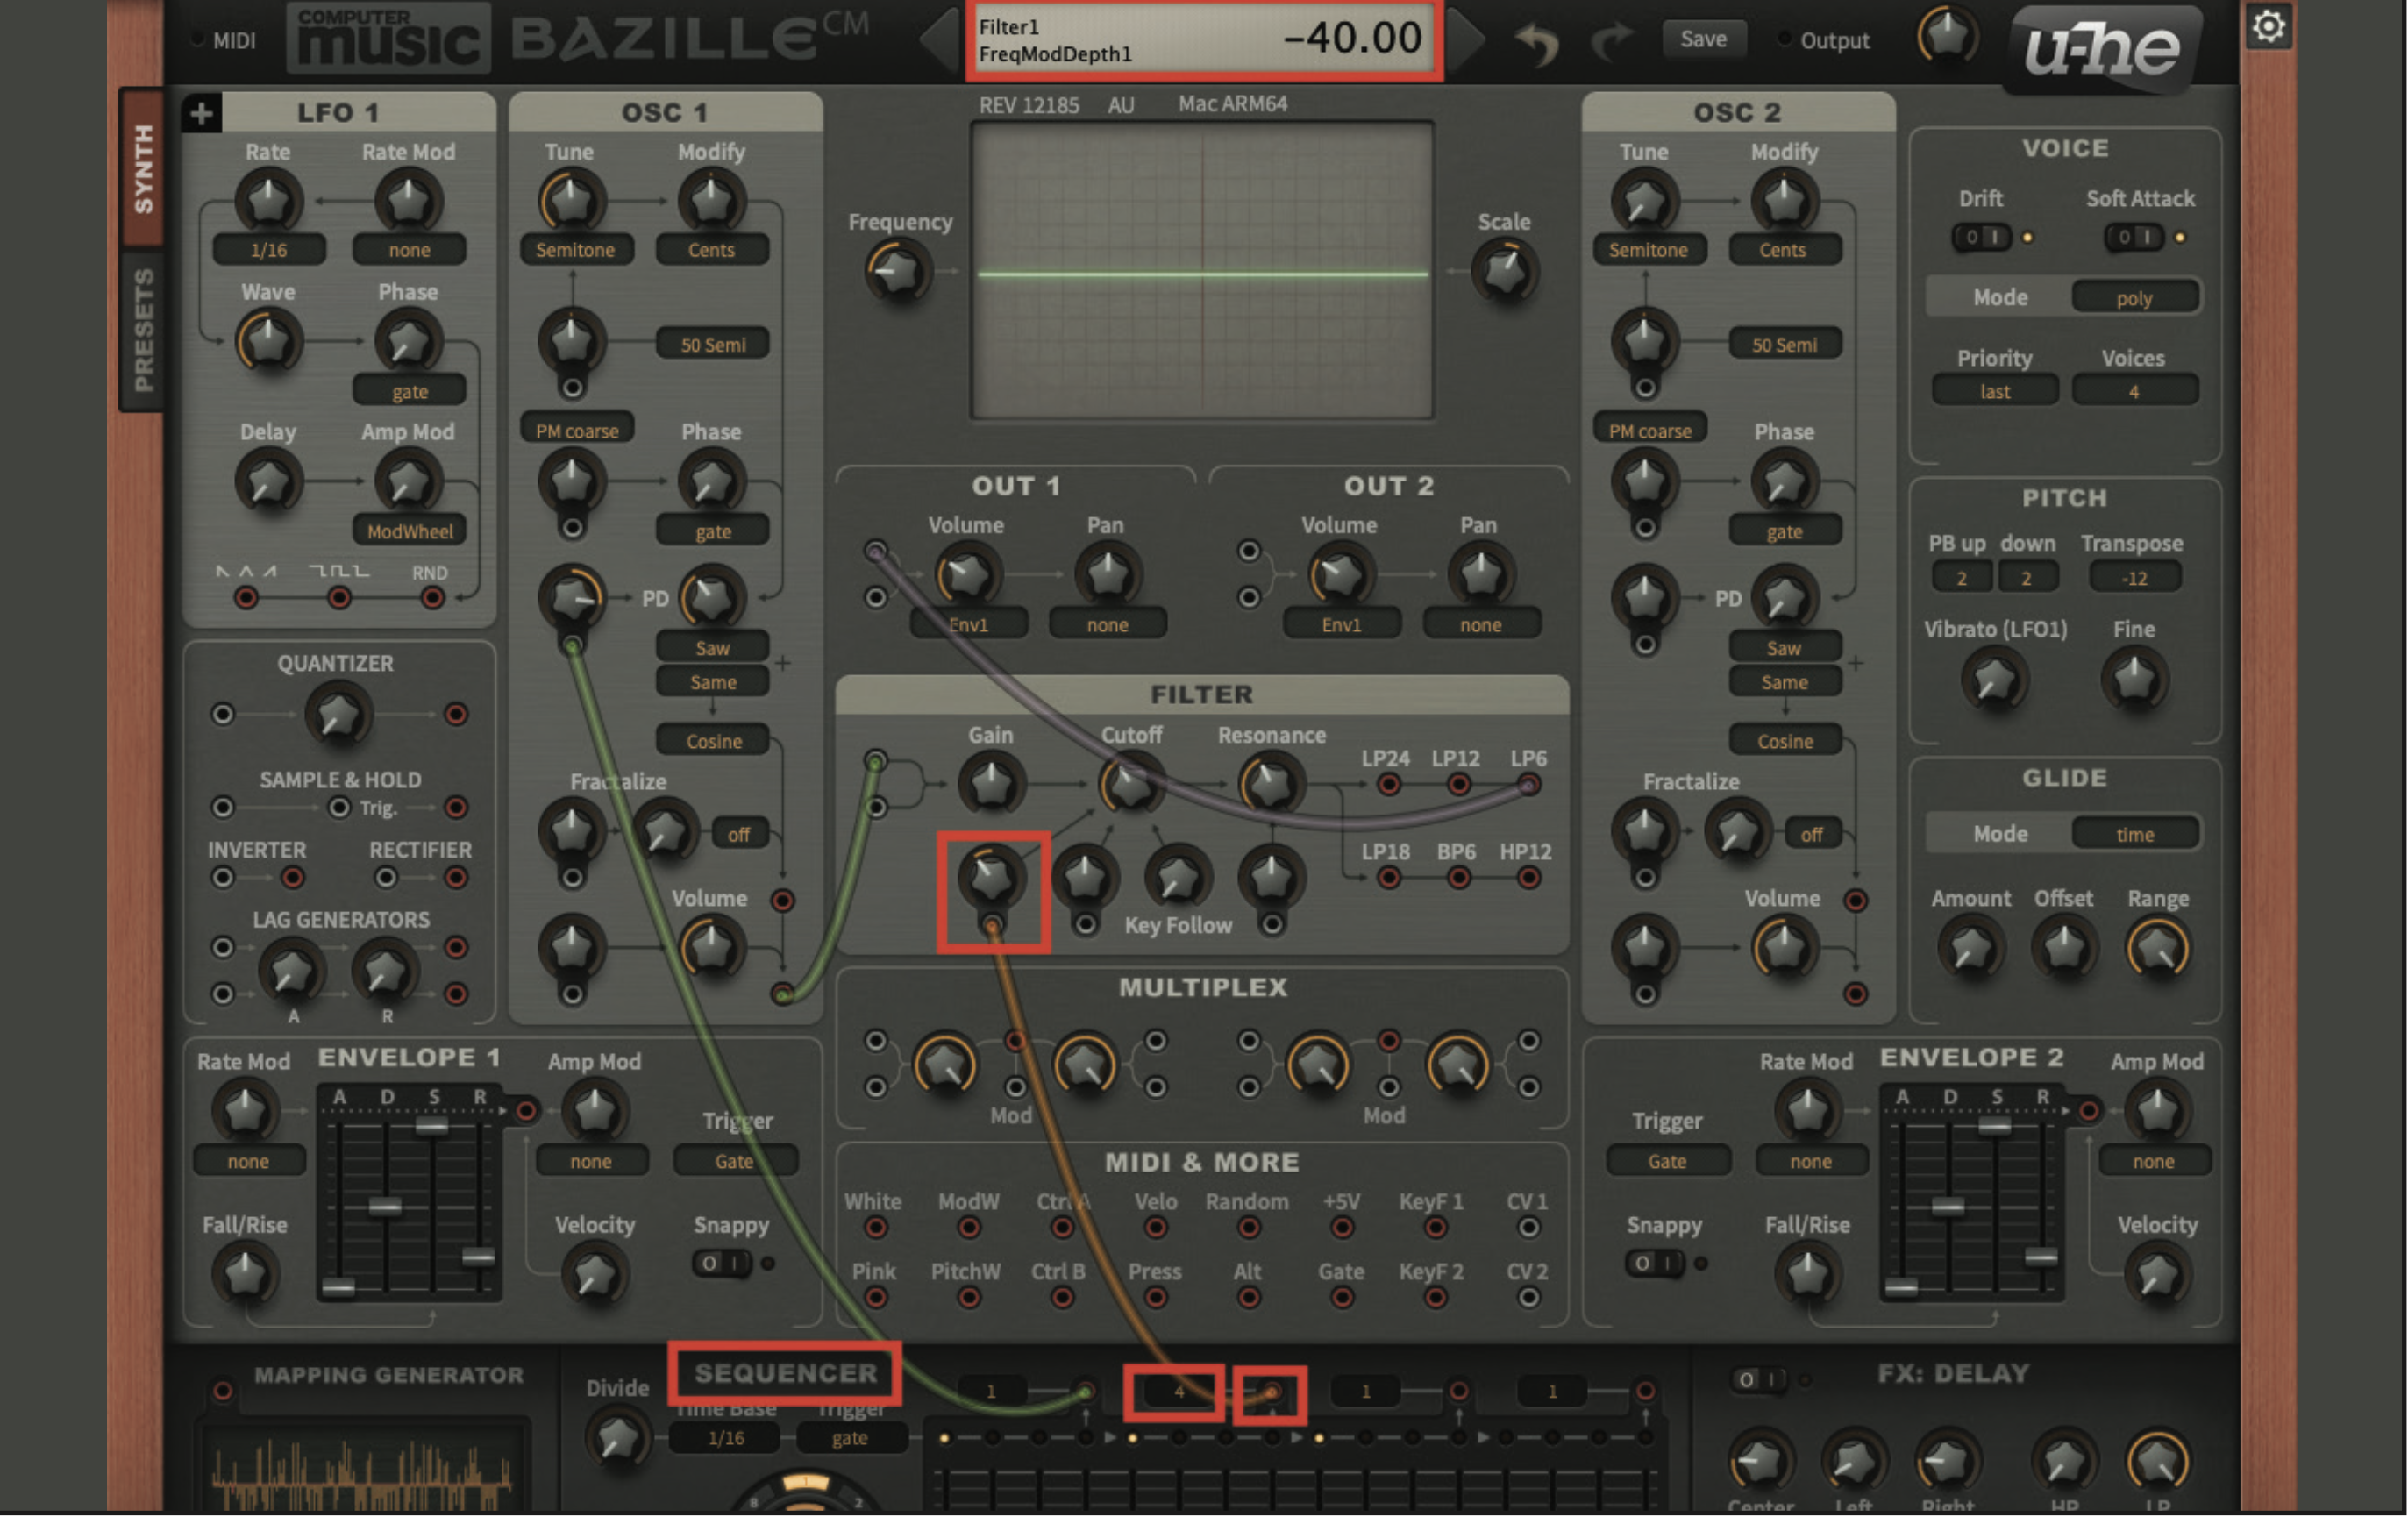
Locate the second sequencer output point. You will see a number associated with this point, which relates to the note value being played by this section of the sequencer. Change this value, from the drop-down menu, to a value of 4. Then patch a cable from this location, to the first filter modulation pot, within the filter section. Once connected, set this pot to a value of -40.
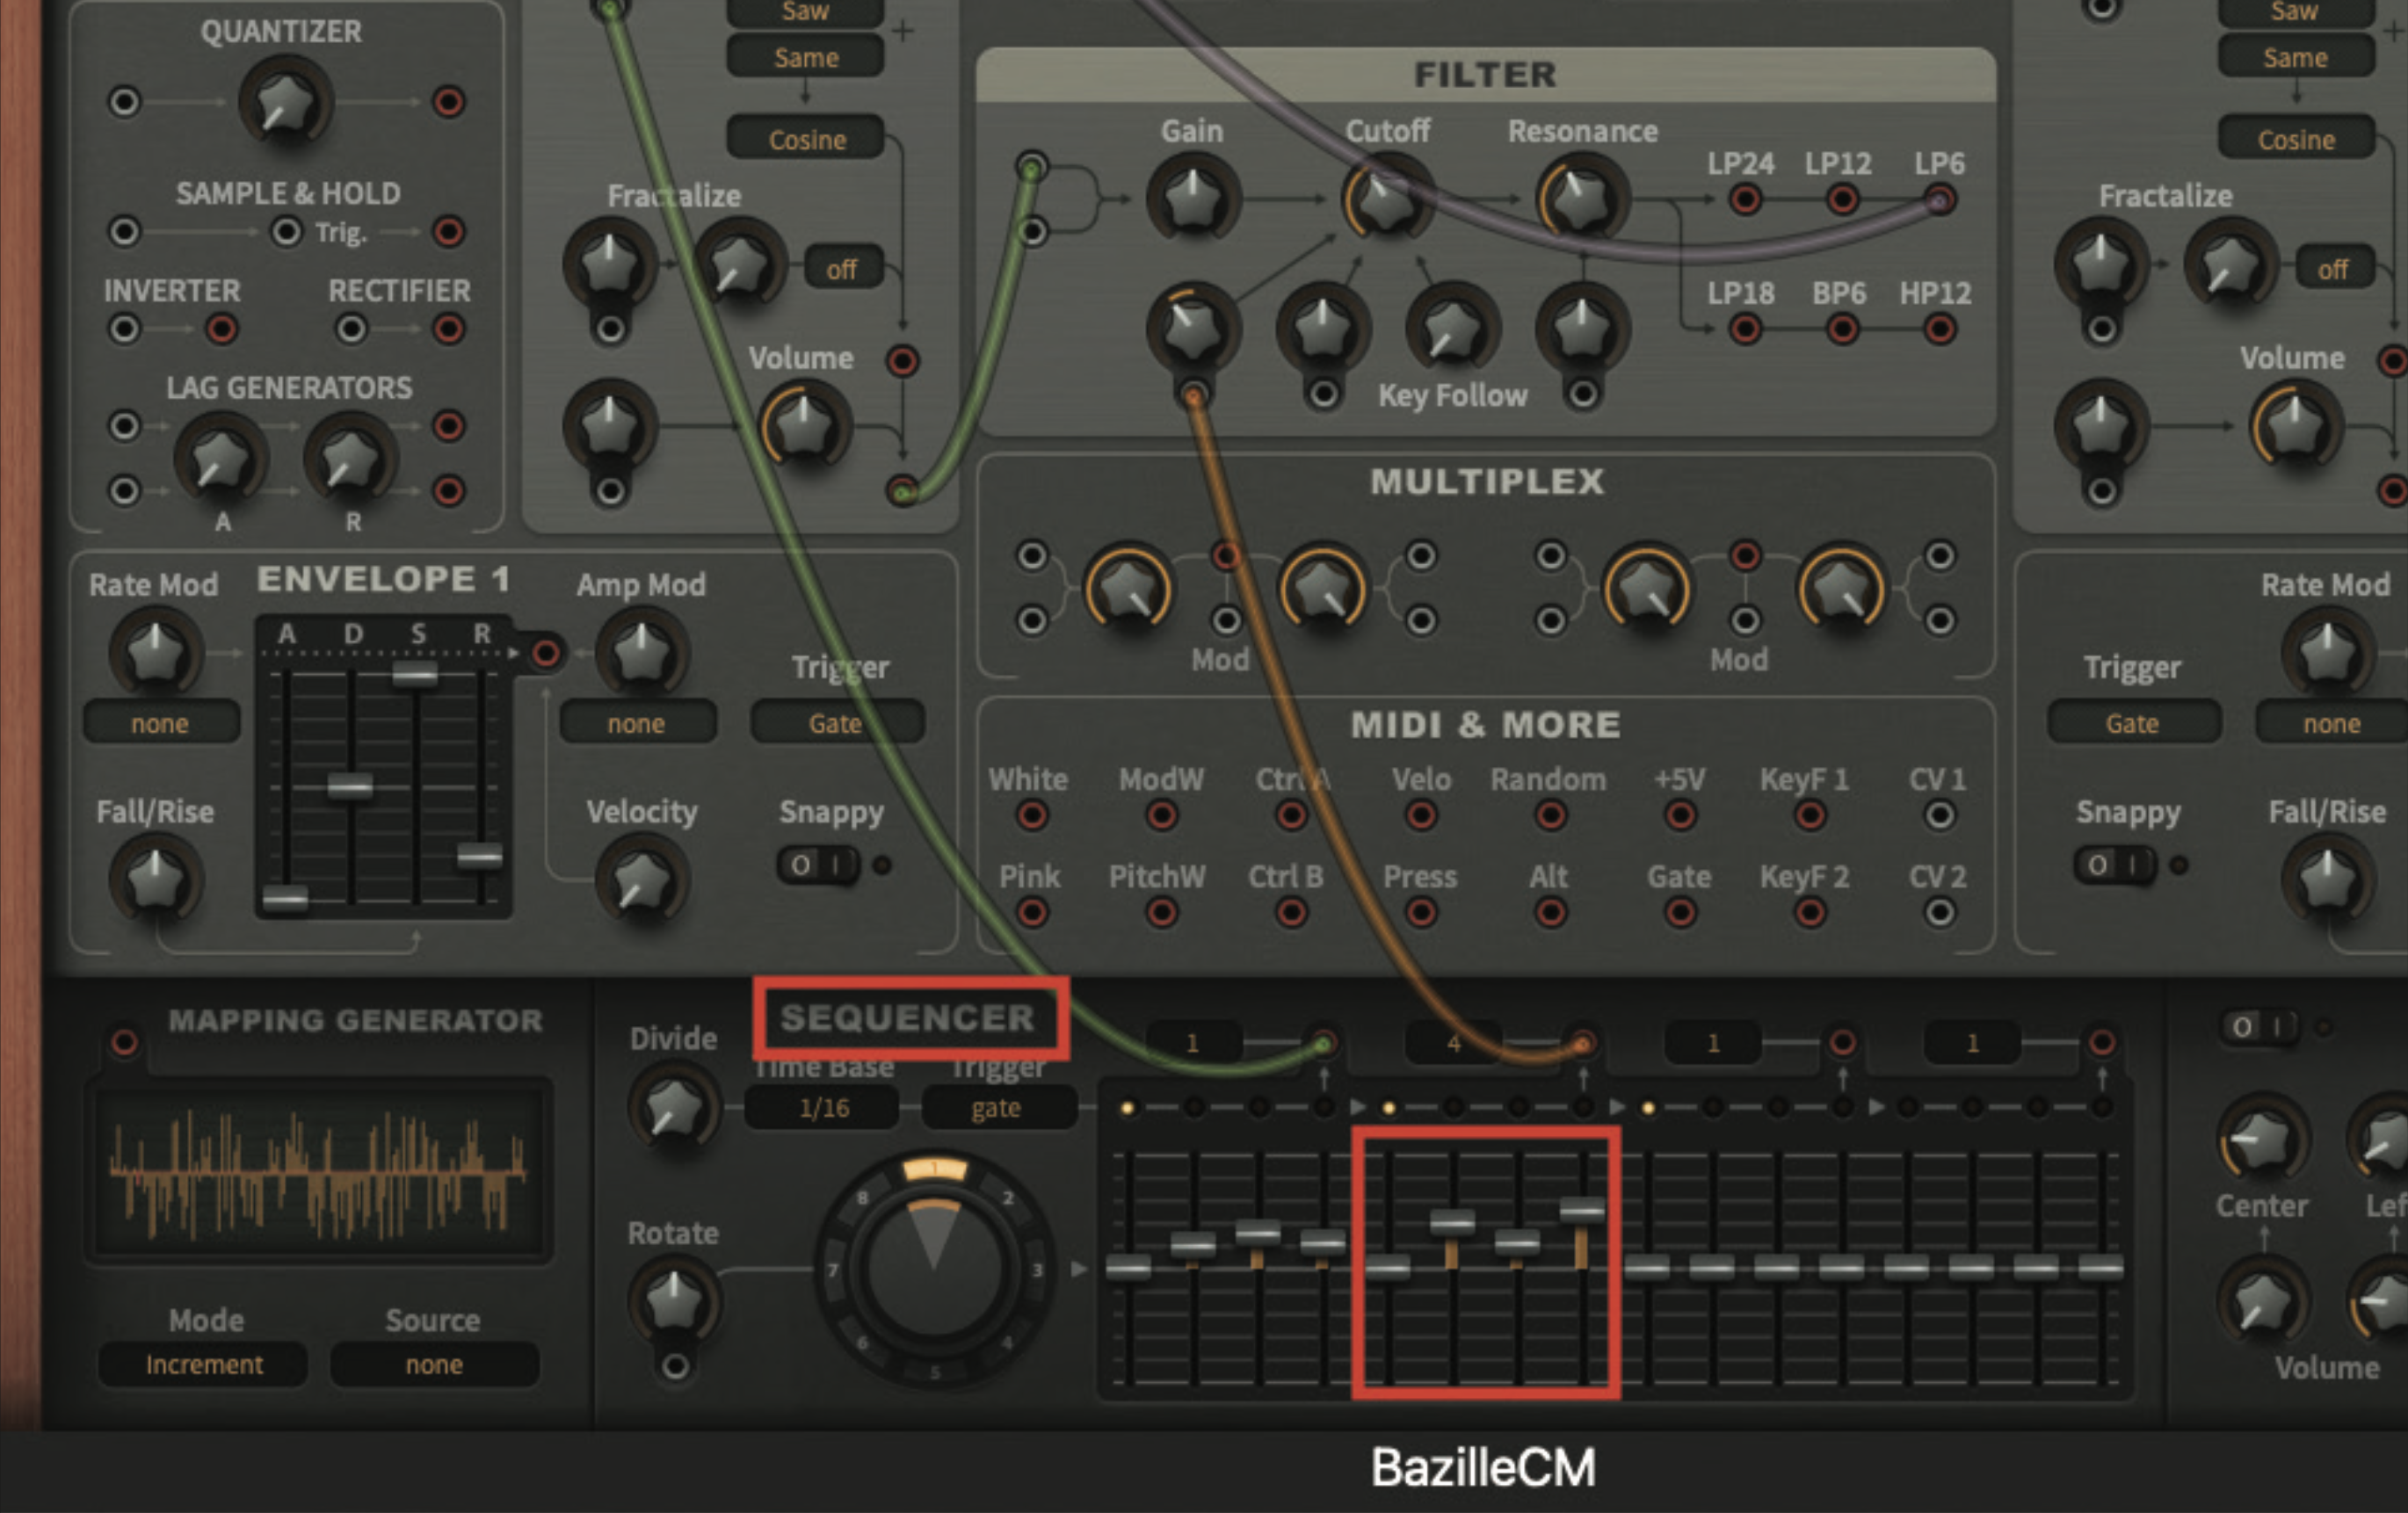
Much like before, we need to assign the next batch of four sequencer faders, to the values 0, 40, 22 and 52. When you play a note, you will see that the sequencer starts to play, but you should also note that this section of the sequencer is running four times slower than the first section.
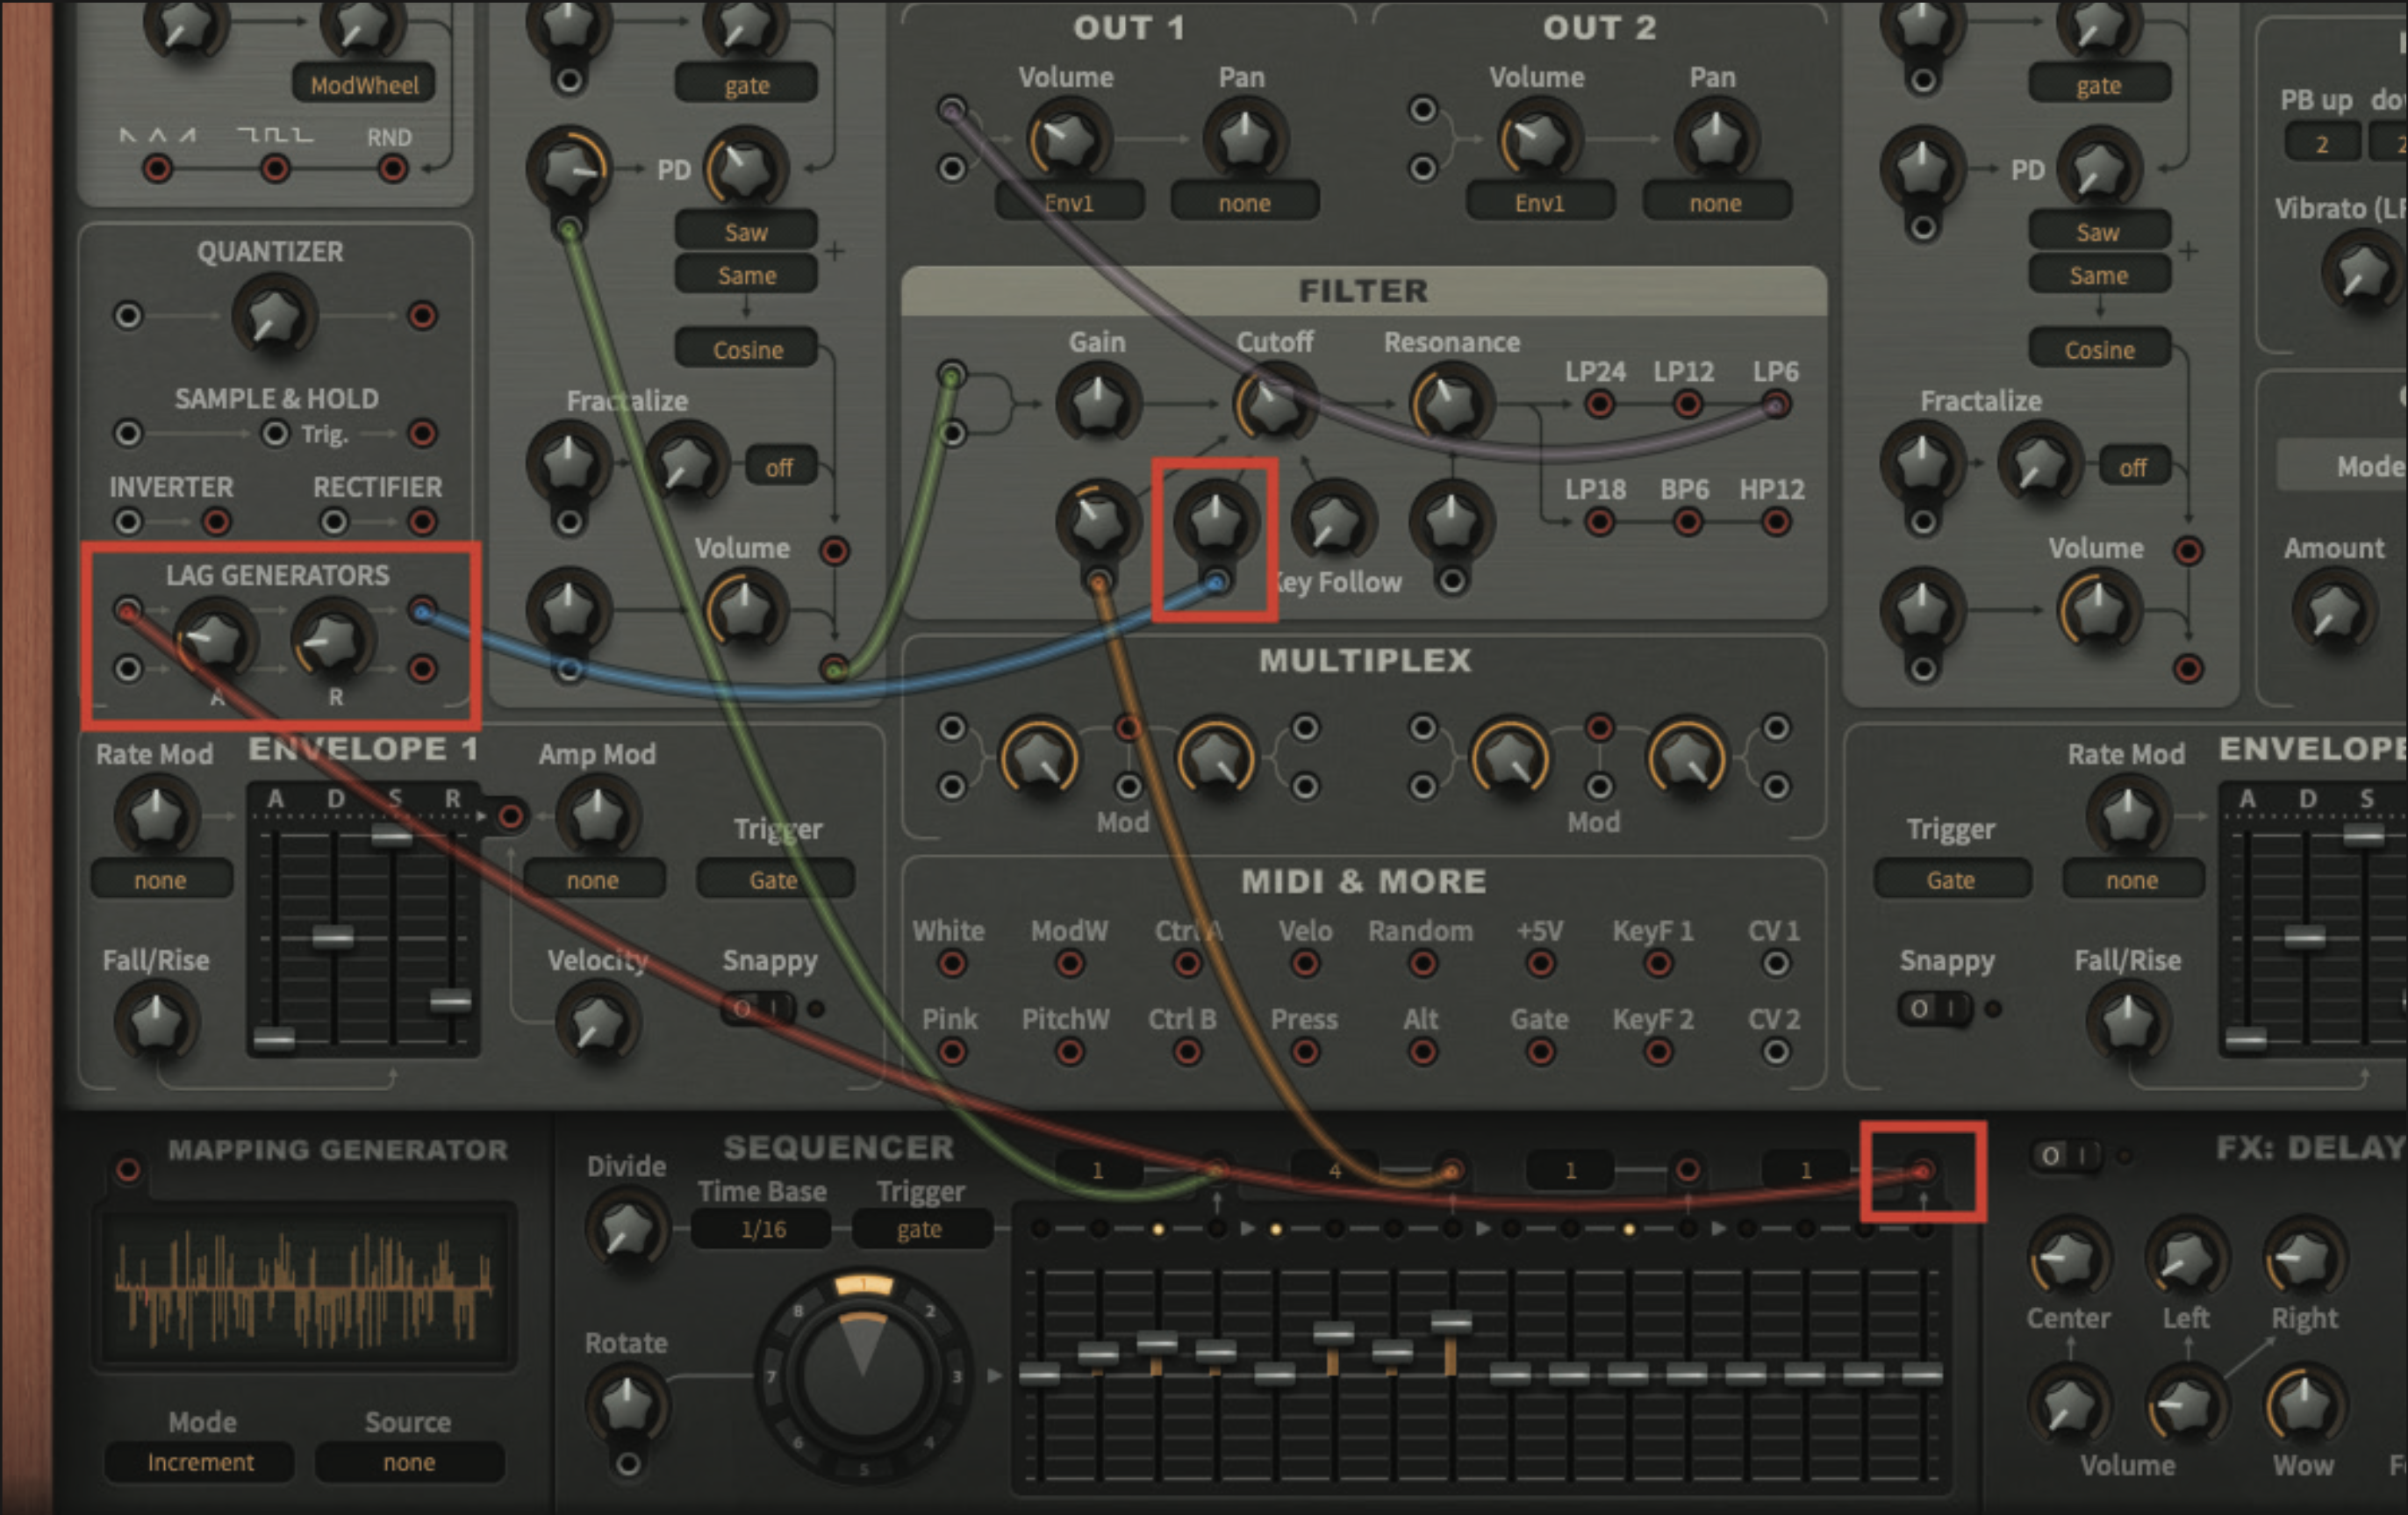
Locate the final patch output point, within the sequencer section, and create a patch cable from this location to the input of the upper Lag Generator. Then patch an output from the Lag Generator to the second filter modulation pot. Moving back to the Lag Generator, set the Attack pot to a value of 2.3, and the Release pot to a value of 1.6.
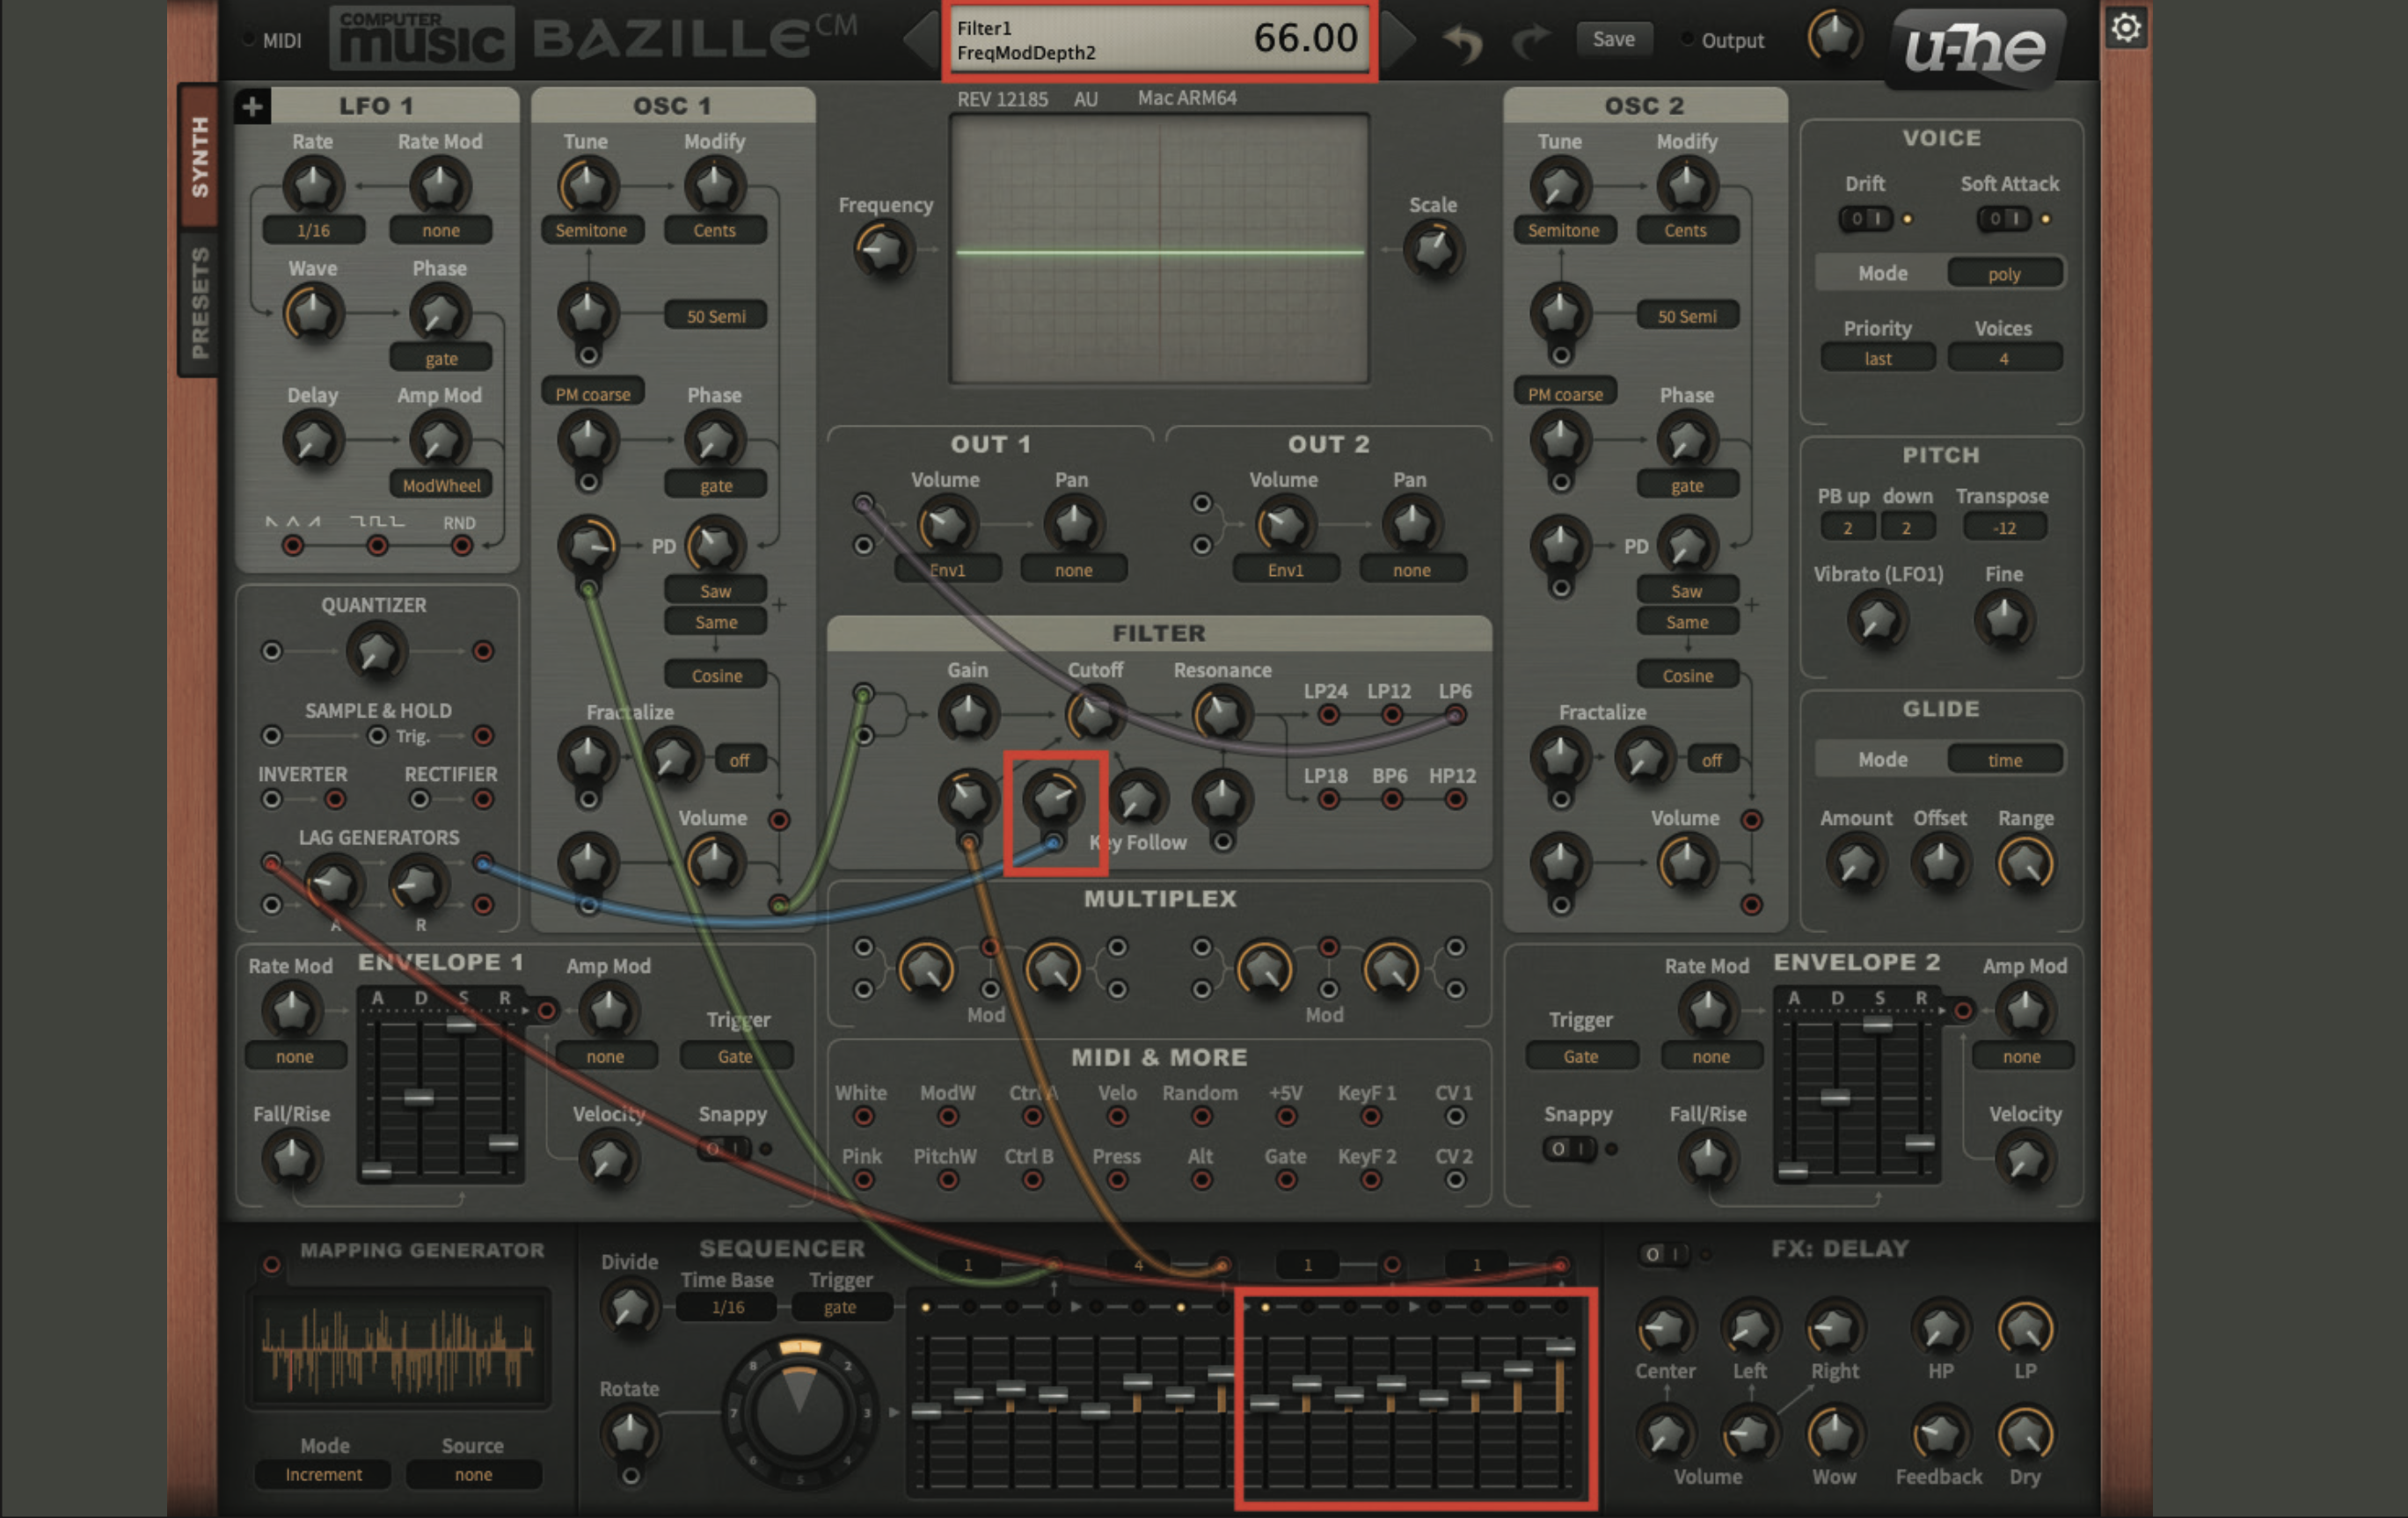
In order to hear this element of the patch, we will need to do two things; firstly, adjust and experiment with the remaining eight faders on the sequencer, which will in turn have an effect on the filter cutoff control. By adjusting the Filter Modulation pot, we can increase or decrease the effect applied by the sequencer. Try setting this pot to a value of 66 as a starting point.

Moving to the OSC2 section, set the PD pot to a value of 50. Then create a patch cable from the output of Envelope 2, to the PD modulation pot. Set this pot to a value of 38. We also need to connect the output of OSC2 to the OUT1 section, and reduce the OSC2 volume pot to 30.
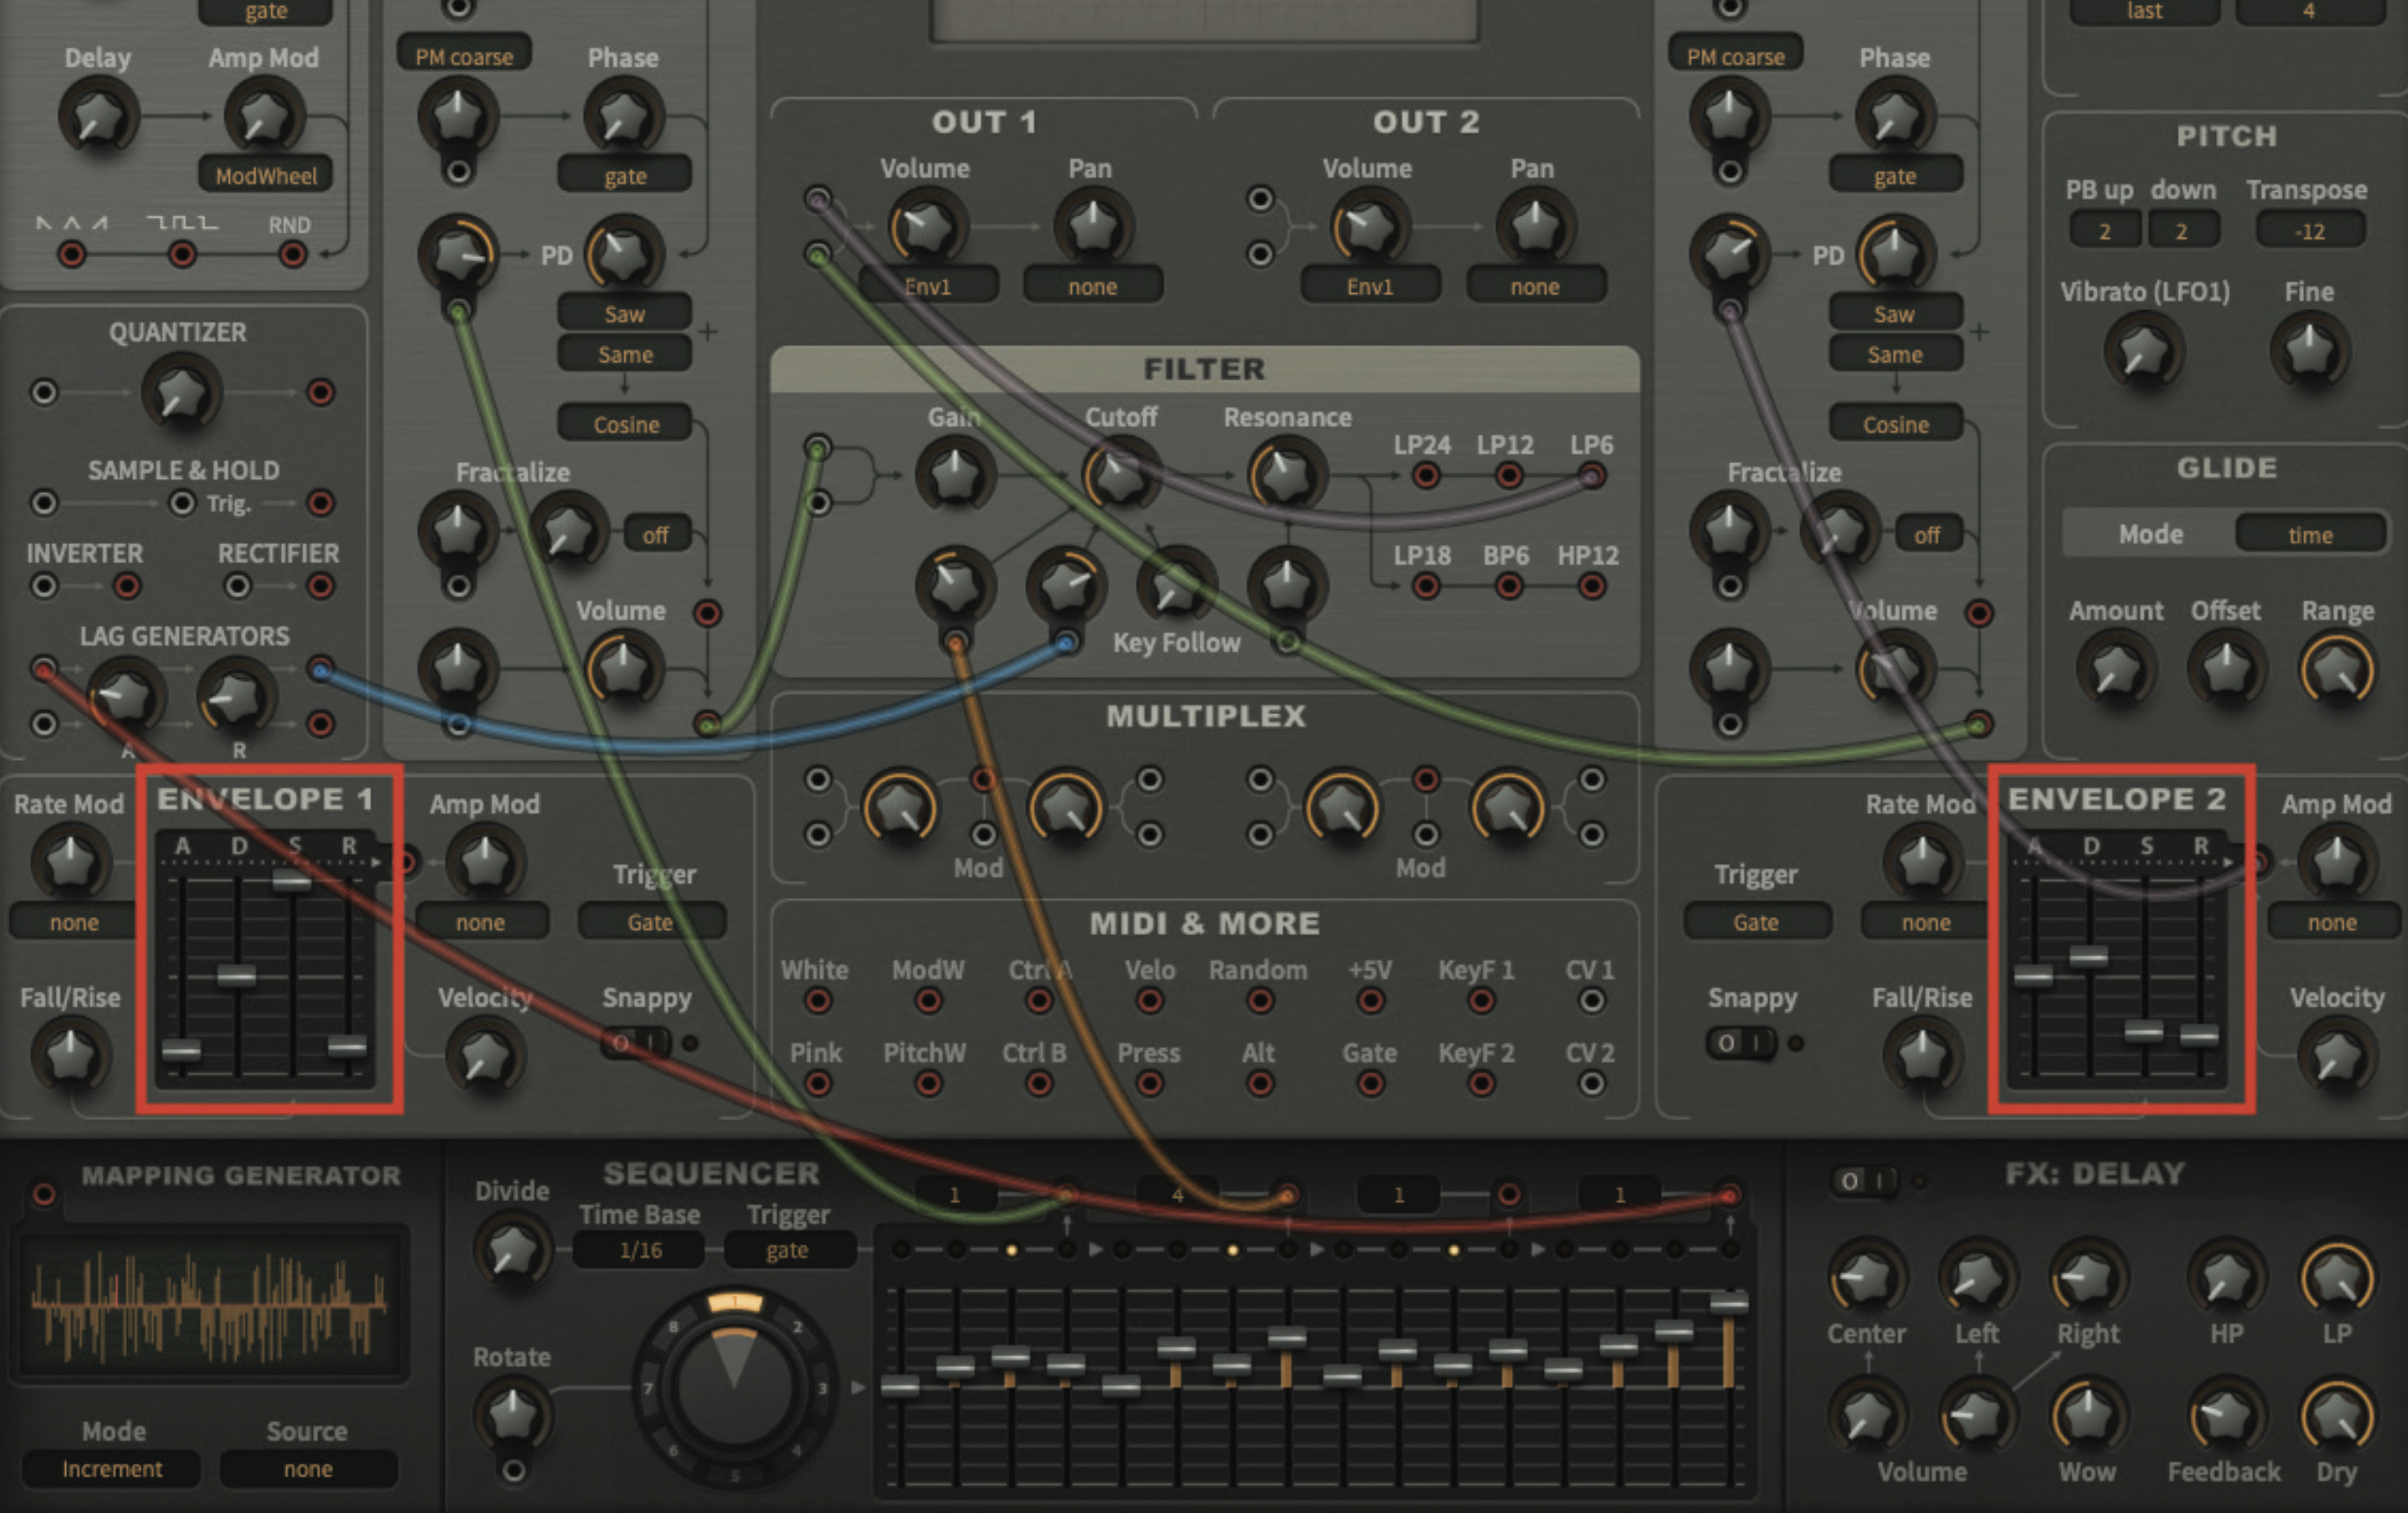
Finally, we need to adjust both of our Envelopes. Set the Envelope 1 faders to Attack 12, Decay 50, Sustain 100 and Release 14. Envelope 2 will modulate the Phase Distortion of OSC2, so adjust these faders to Attack 50, Decay 60, Sustain 22 and Release 20.
Pro tip
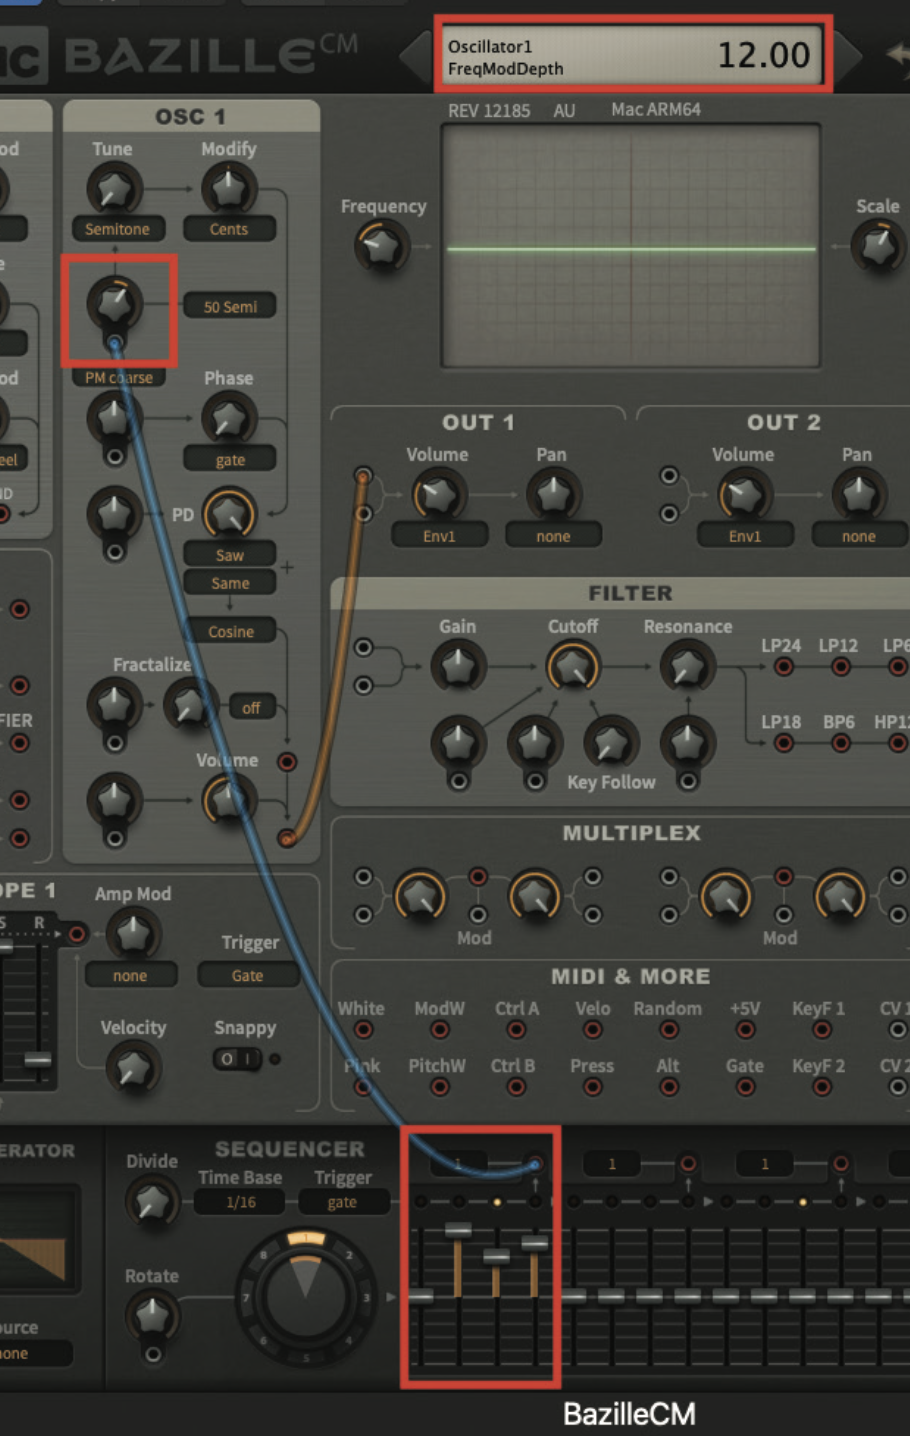
The sequencer section of BazilleCM is undoubtedly one of the most impressive and useful tools in the synthesizer’s armoury. Not only can it be used to modulate a number of different facets within a patch, but it can be used multiple times, thanks to its flexibility.
As we have noted with our patch, we are using the sequencer in three different capacities, to modulate different aspects of our sound. However, the one thing that we have not used the sequencer for, is sequencing notes. This can be achieved in much the same way as the procedure we describe in our tutorial.

Simply take the output from one of the sequencer points, and patch it to the pot, which is immediately below the Tune pot, within the oscillator section. If you adjust this modulation pot to a value of 12, this will allow the control of an octave, either side of the central point on the sequencer’s faders. By adjusting the faders that are in use on the sequencer, you can create patterns or bass lines, which will be triggered every time you play a note, and the pattern will move around, to reflect the note that you are playing.
Recommended listening
1. Daniel Avery – Drone Logic
This perfectly formed techno track by Daniel Avery makes extensive use of a sequencer, modulating the cutoff frequency of the filter.
2. Heaven 17 – Let Me Go
This impressive pop track from the ’80s, uses an analogue sequencer with lag, that runs throughout the entire song length.
Roland Schmidt is a professional programmer, sound designer and producer, who has worked in collaboration with a number of successful production teams over the last 25 years. He can also be found delivering regular and key-note lectures on the use of hardware/software synthesisers and production, at various higher educational institutions throughout the UK


