How to process a stereo drum mix with mid/side compression
This technique splits the signal into its sum and difference components, allowing you to process them independently
More often than not, we'd typically process stereo submixes and master mixes using regular stereo processors. And in the case of a compressor, although the left and right channels could be processed completely independently, our compressor usually has a stereo linking mode that uses a combined left and right channel sidechain so that the stereo image remains stable.
However, you’ll often hear mixing and mastering engineers talk about processing stereo signals using the mid/side technique. This splits the signal into its sum and difference components allowing you to process them independently and then returns them to stereo at the output.
Much like recording in MS, this process only requires two audio channels, which means that it’s reasonably straightforward to design a stereo compressor that can also process in mid/side (the classic Fairchild 670 for one example).
In software form you get various implementations including controls for both mid and side components. Or sometimes the option to process just one, leaving the other aspect unprocessed (this is the case in TDR Labs’ excellent Katelnikov free plugin). Either way, plugins have stereo inputs and outputs so are very straightforward to use.
But why would we choose to compress in mid/side mode? This really boils down to the way contemporary mixes are structured. Often bass-heavy and key punchy elements are in the centre, while the stereo comes from aspects in reverbs, stereo sounds and elements that are panned.
Nevertheless, mid/side allows us to reshape the mid components, and apply more suitable compression or even none at all to the side components, and this leads to a different outcome to straight up stereo compression, where the compression is applied to the whole stereo signal.
Here we’ll run through how to set up and use this technique on a stereo drum mix.
Want all the hottest music and gear news, reviews, deals, features and more, direct to your inbox? Sign up here.
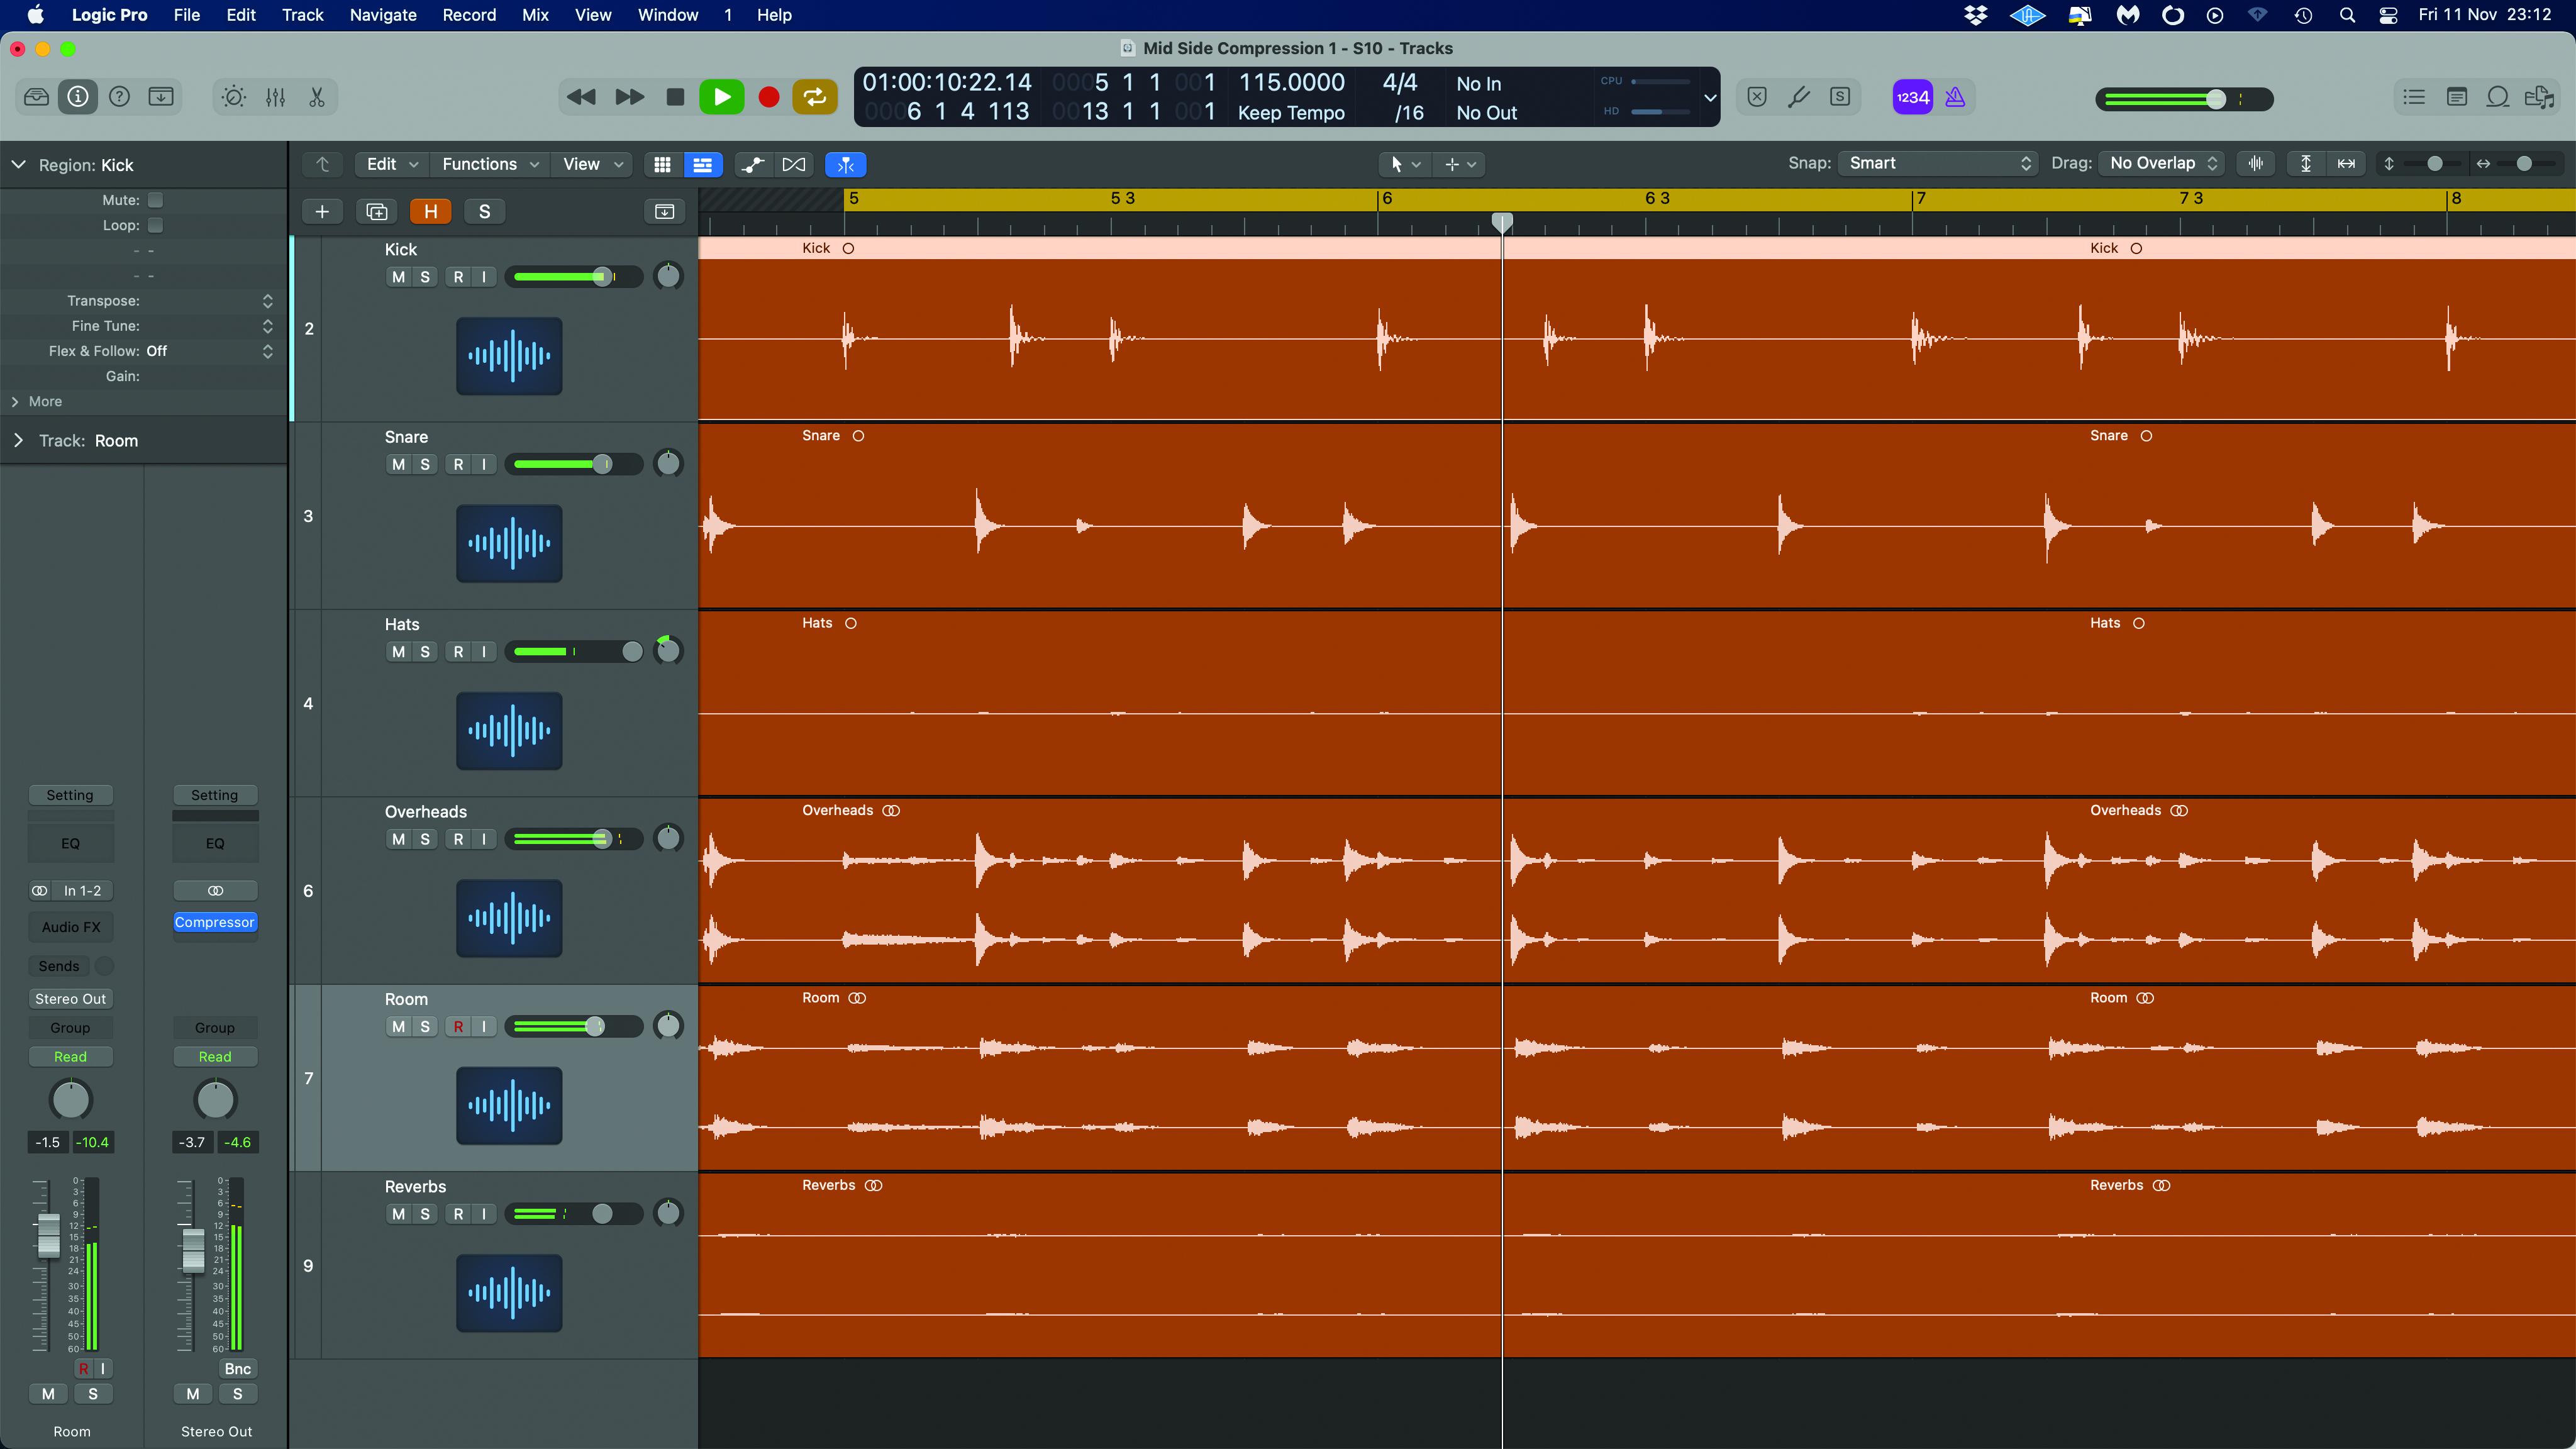
Stereo beats are a great starting point for trying out MS compression, and an ideal candidate is a drum kit as by default it typically includes centred aspects such as kick and snare and stereo components in the overheads, room mics and any reverbs that have been added in the mix.
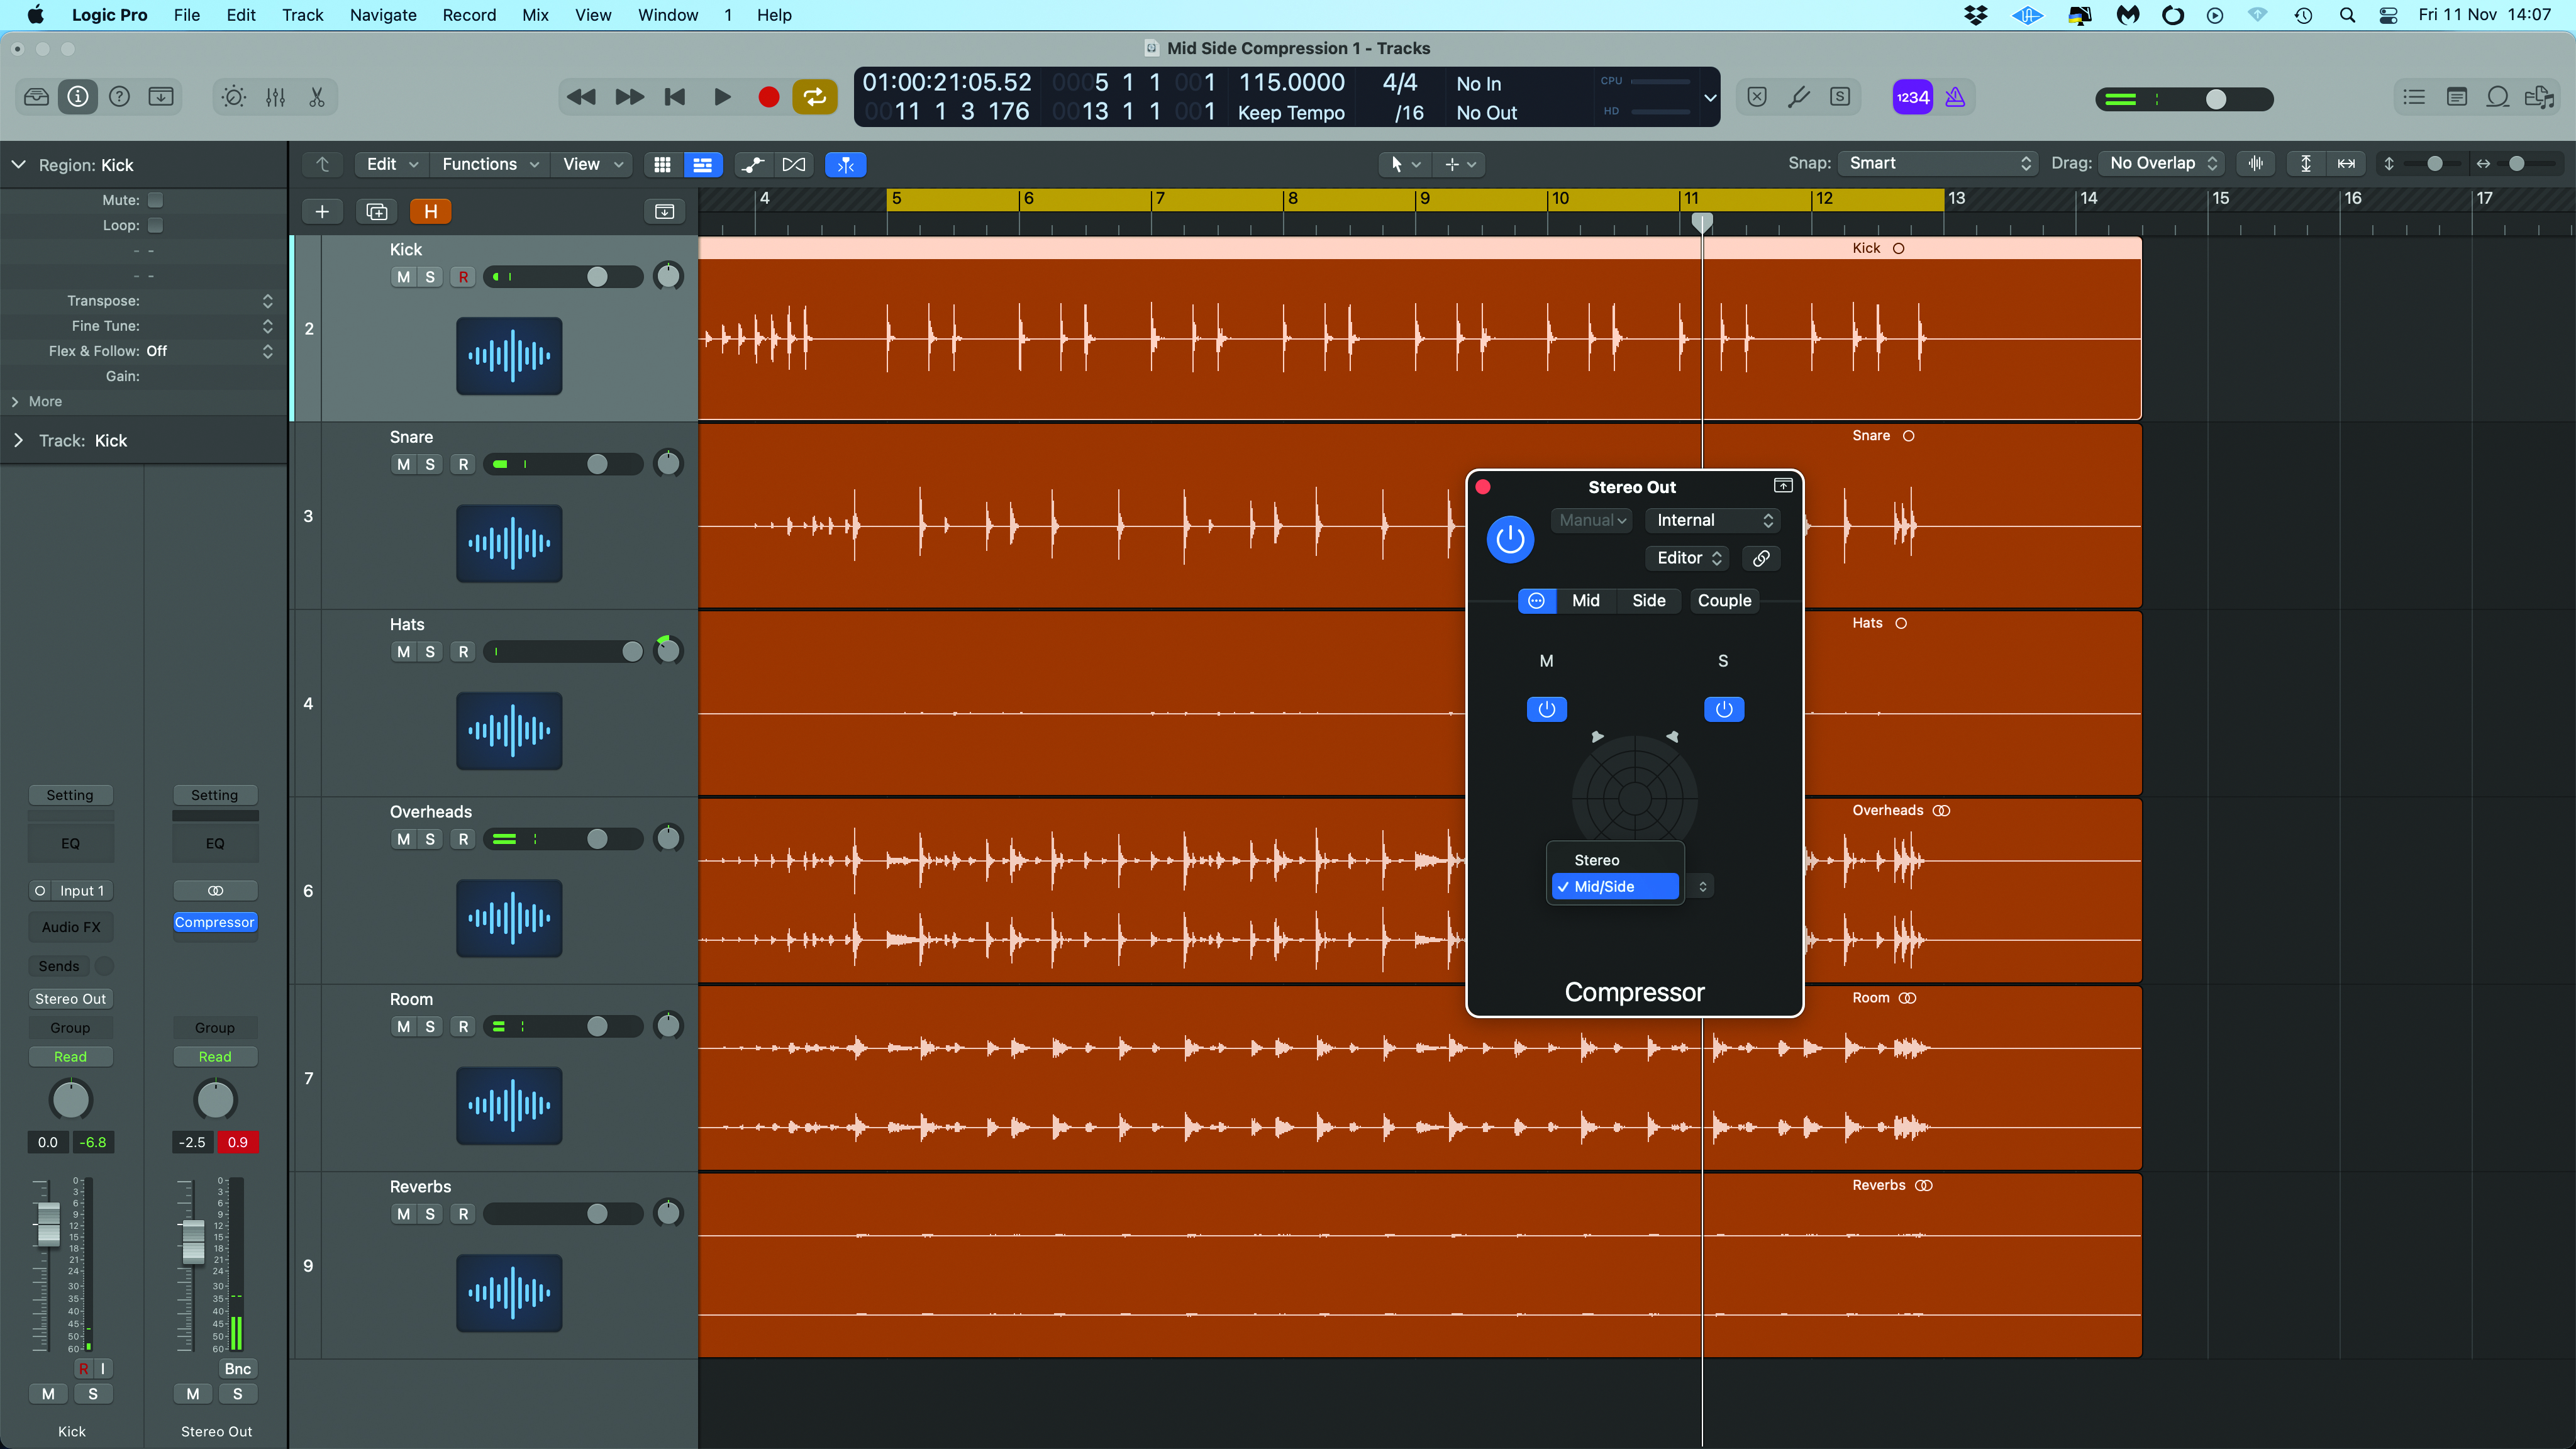
Here we’re starting with a multitracked drum kit that combines mono and stereo elements as discussed. That said, we are still processing the overall stereo blend and in this case at the output. We’ve loaded up a mid/side capable compressor, and on its signal flow page set it to mid/side mode.
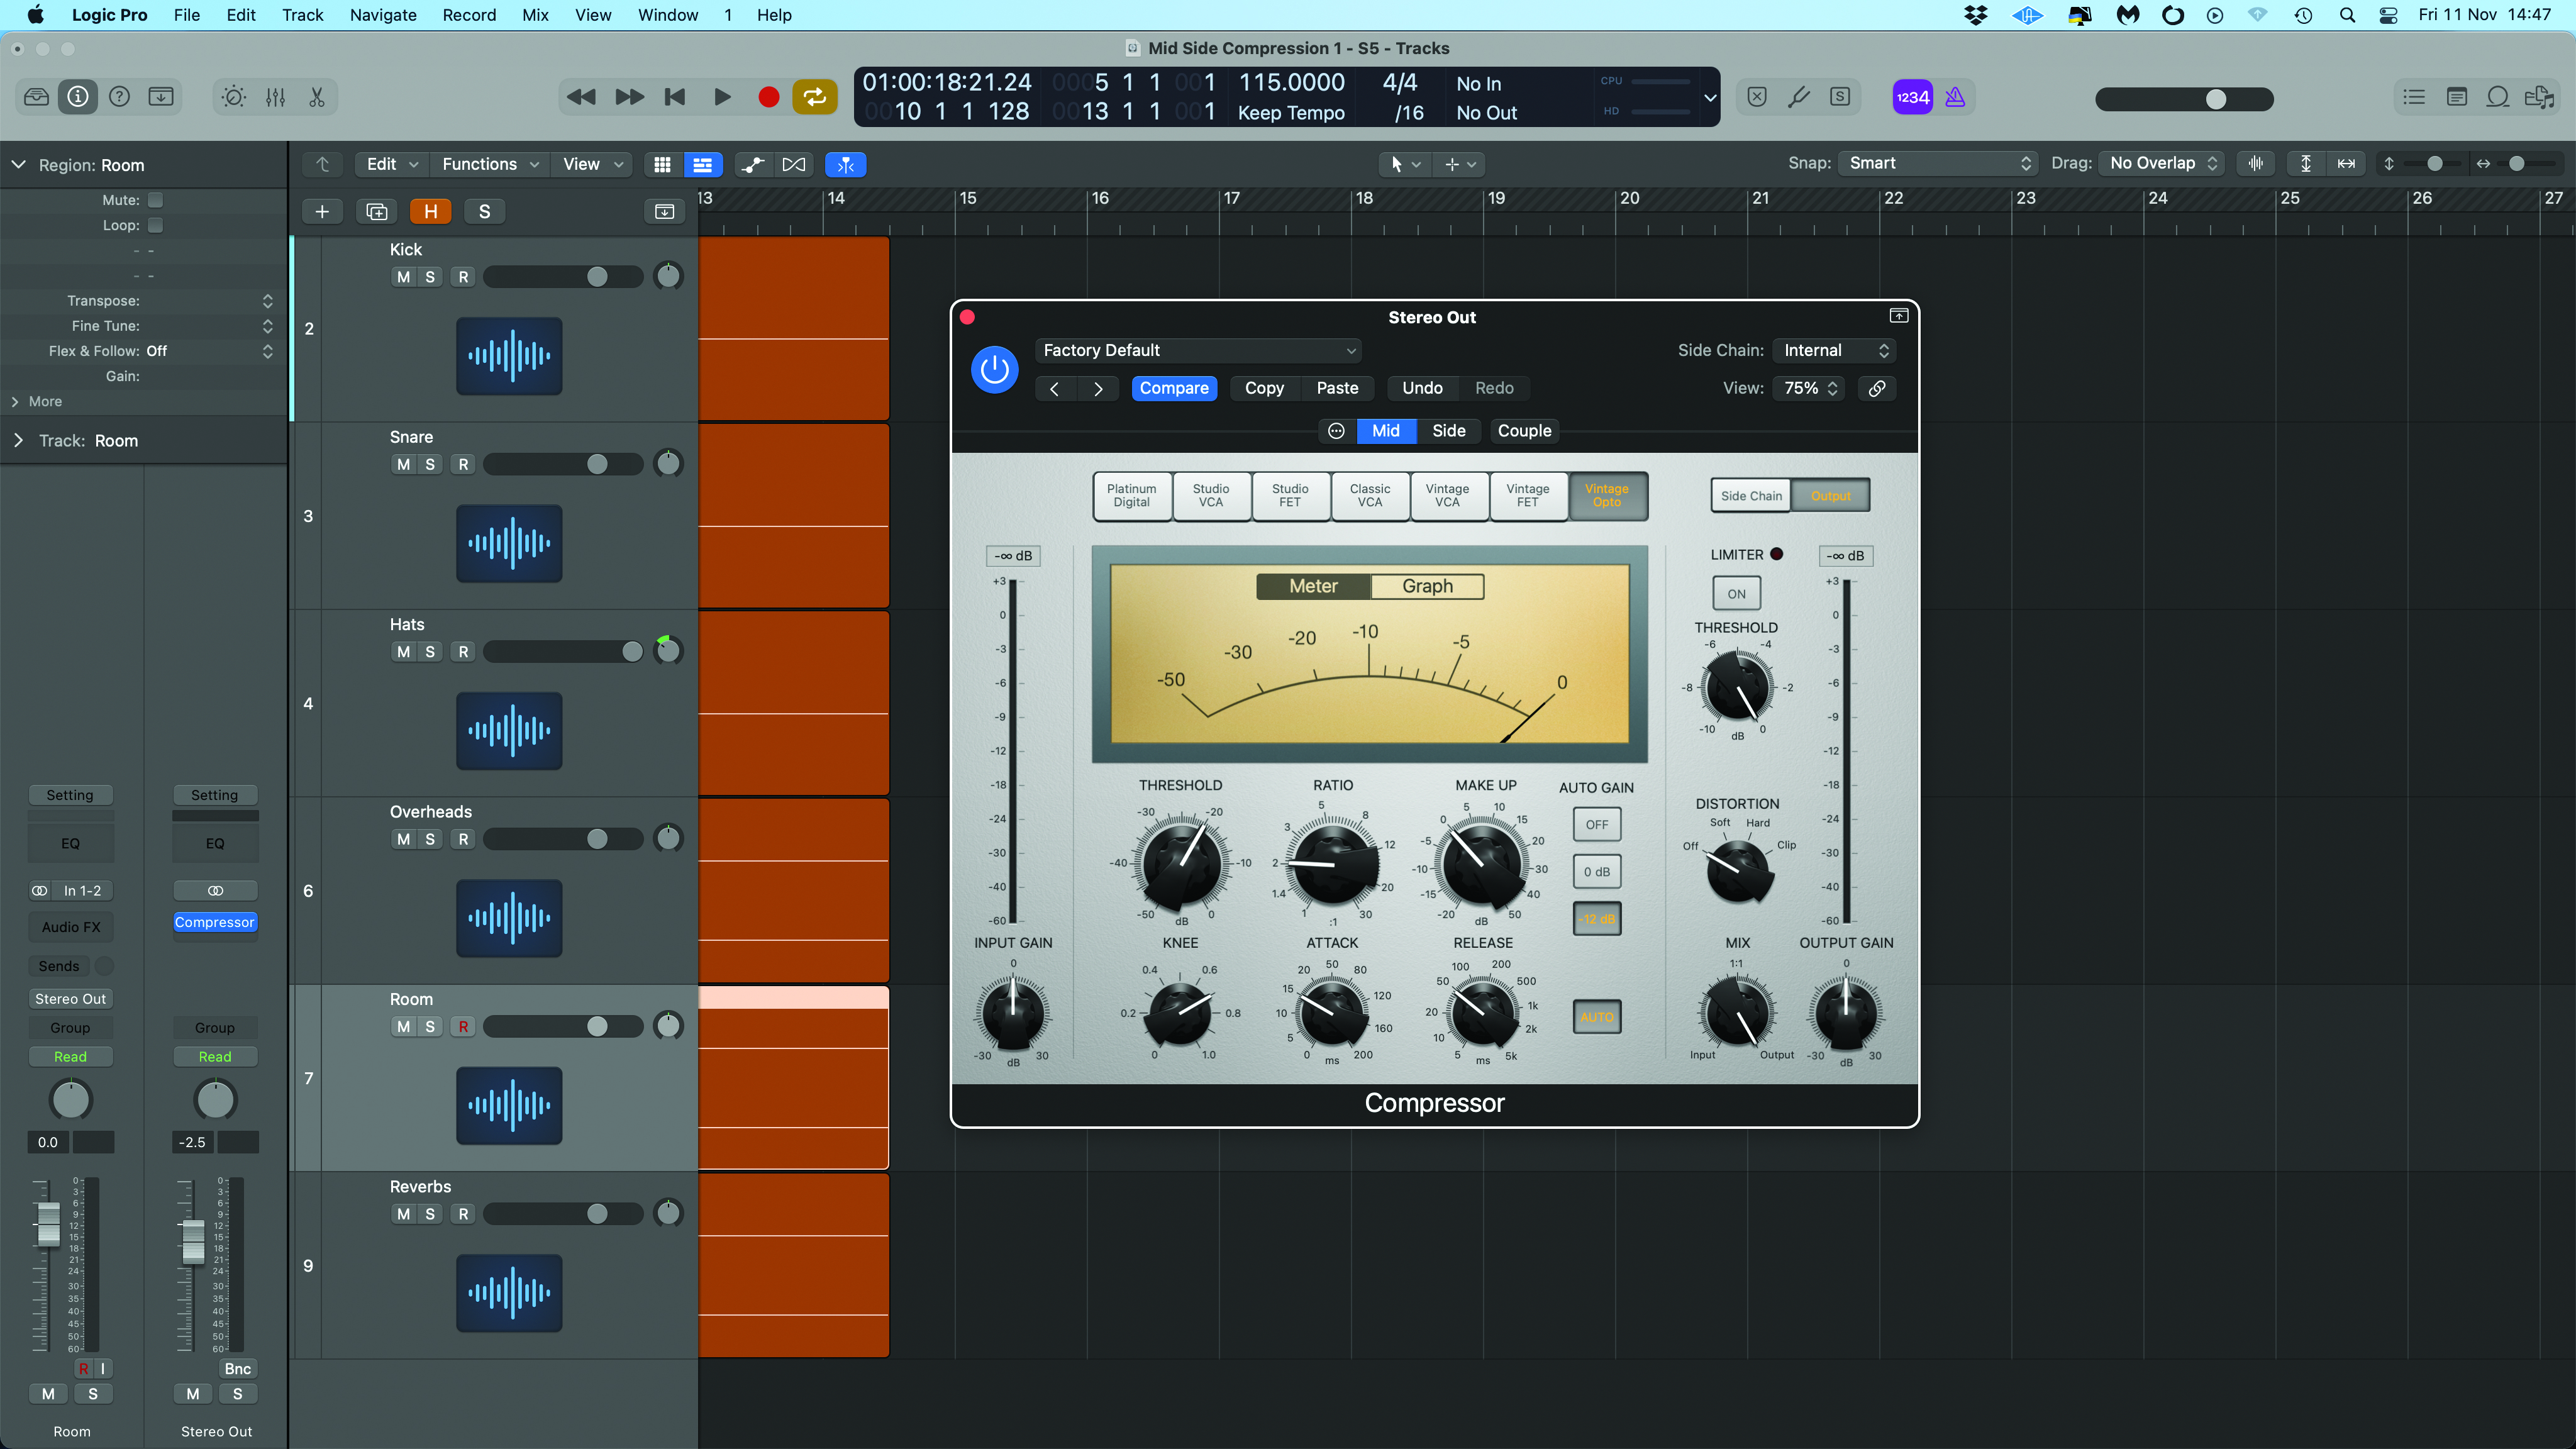
Initially we’re going to focus on just the mid component. Back in the main compressor window we’ve used the tab to select the ‘mid’ parameters and have then selected the opto compressor emulation. The reason we’ve chosen this is because we can achieve an audible compression that demonstrates the technique.
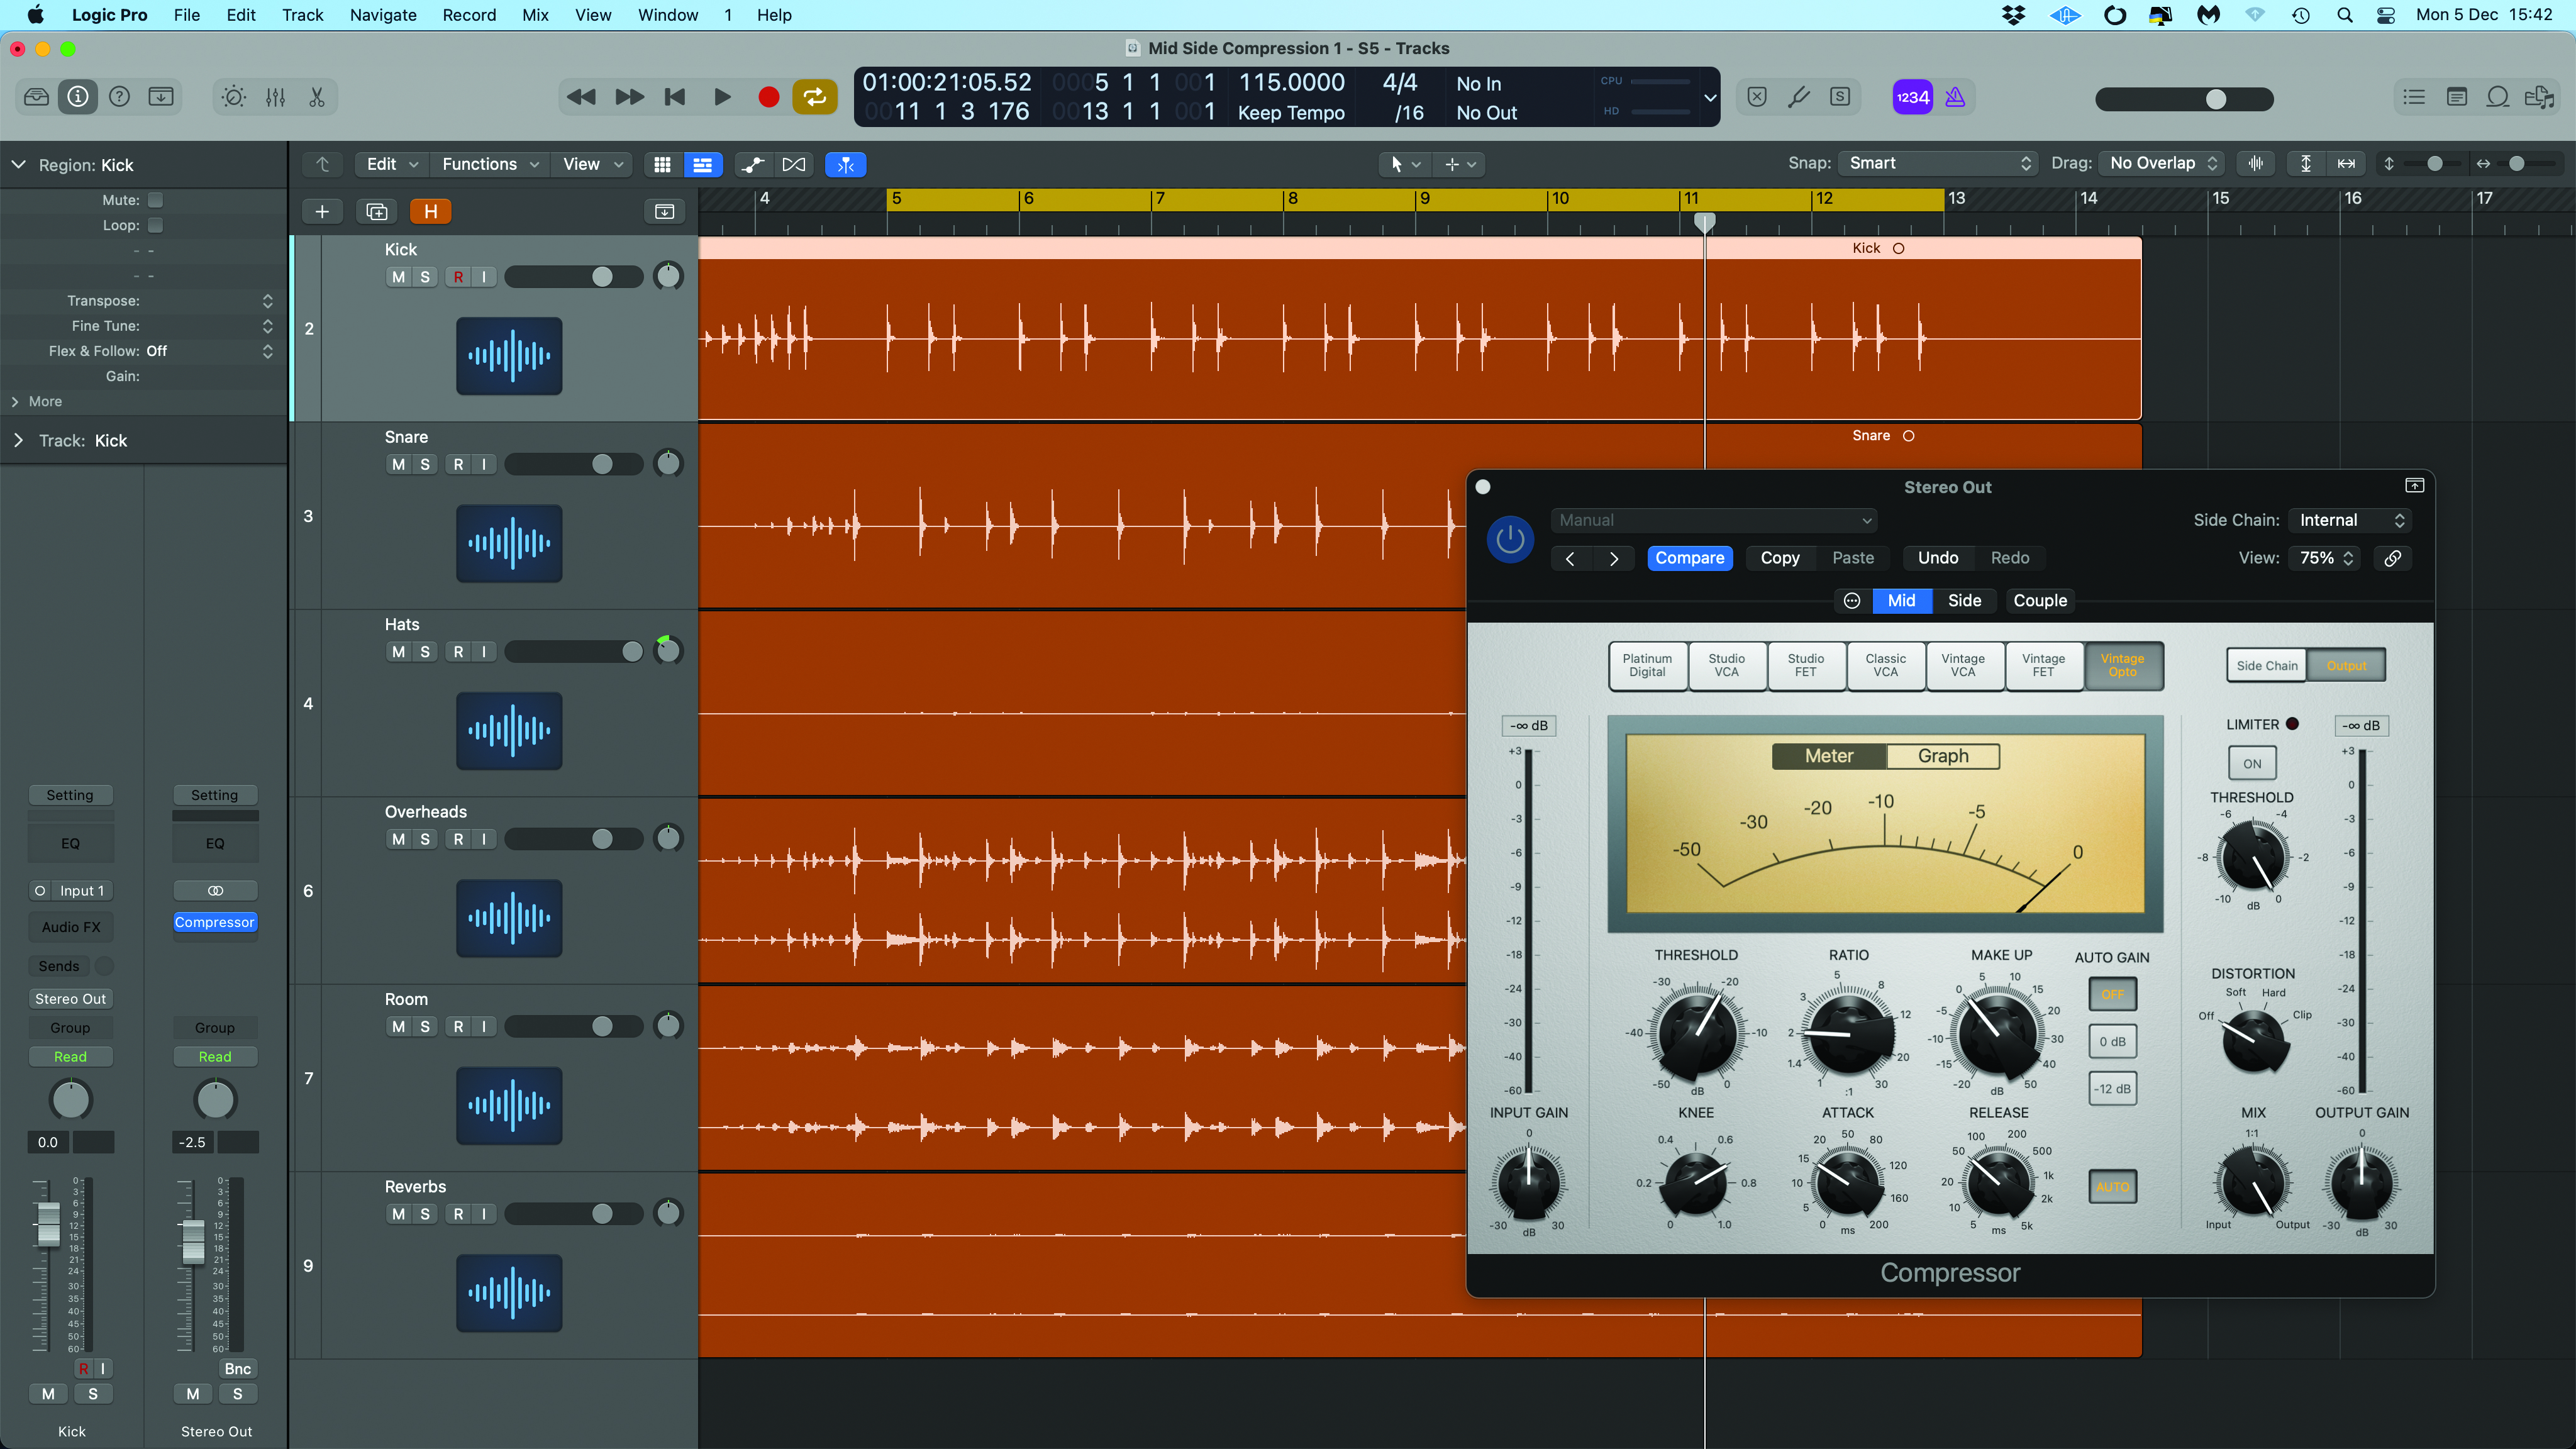
Whenever you’re processing mid and side independently, changes in the balance between these two components influences the width of the stereo image. Compressor automatic gain and make up gain can cause an extra layer of confusion, and we suggest switching this off and using the manual make up gain to manage the balance between mid and side.
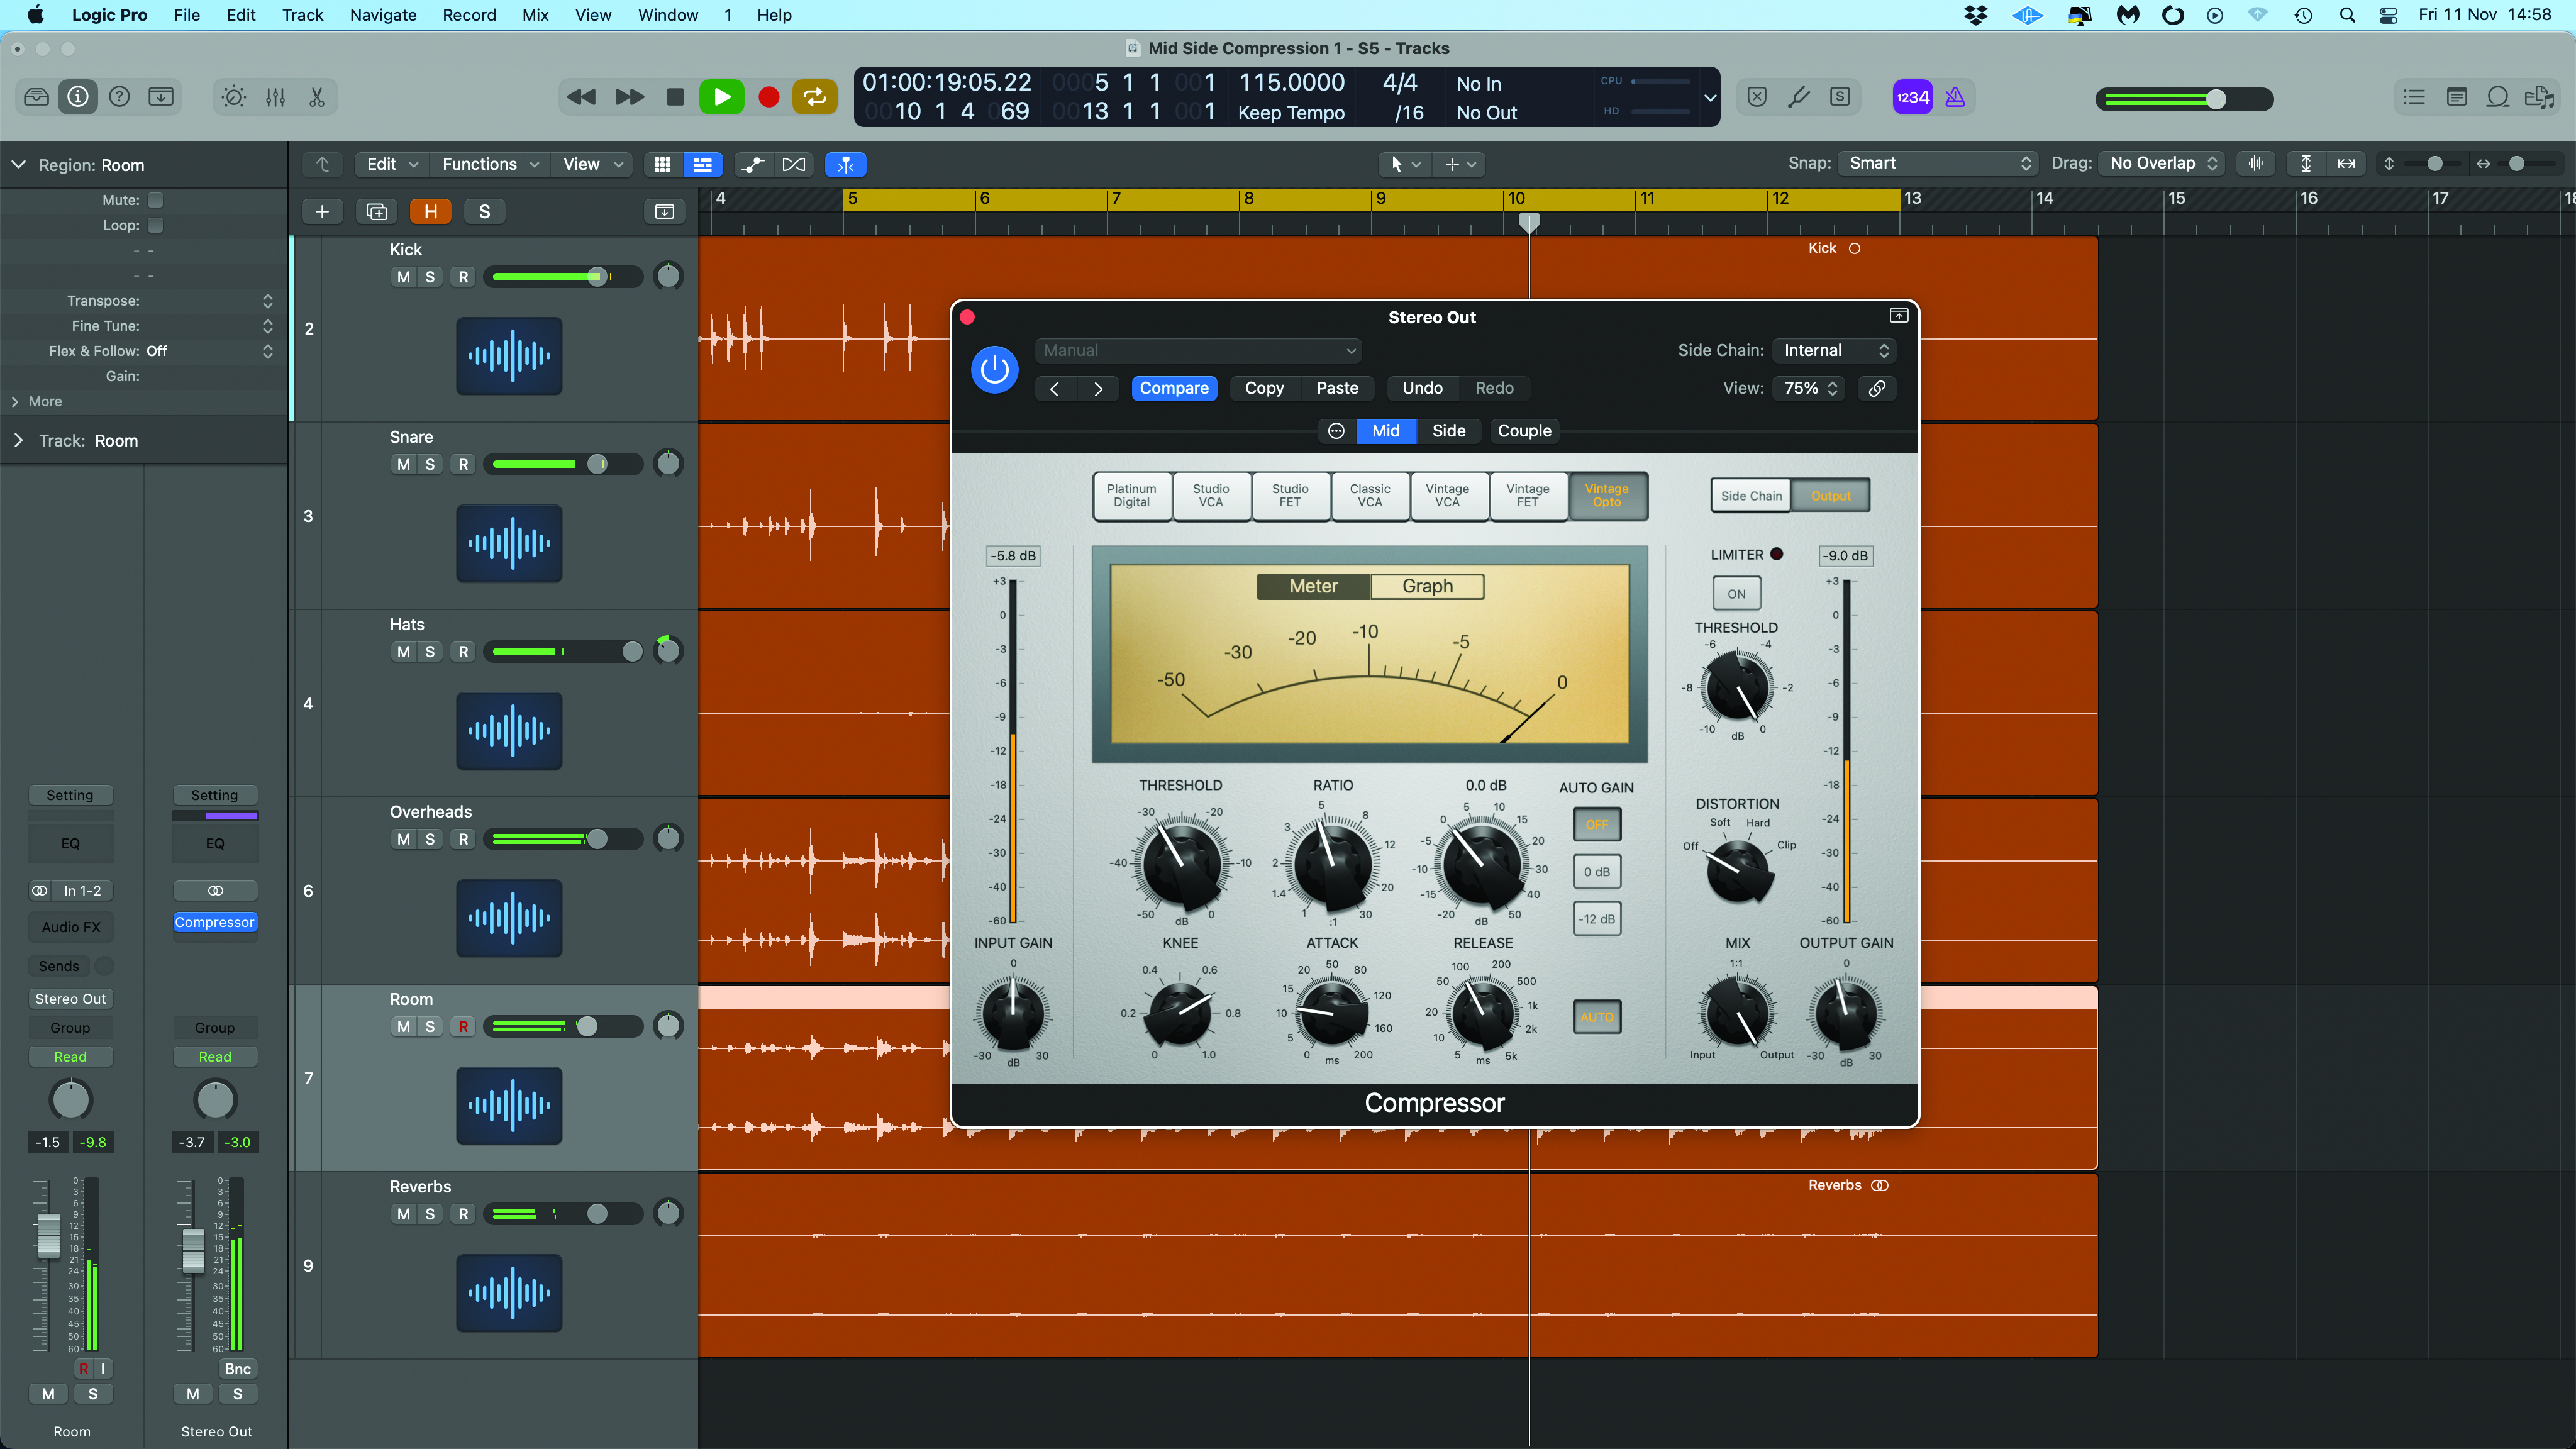
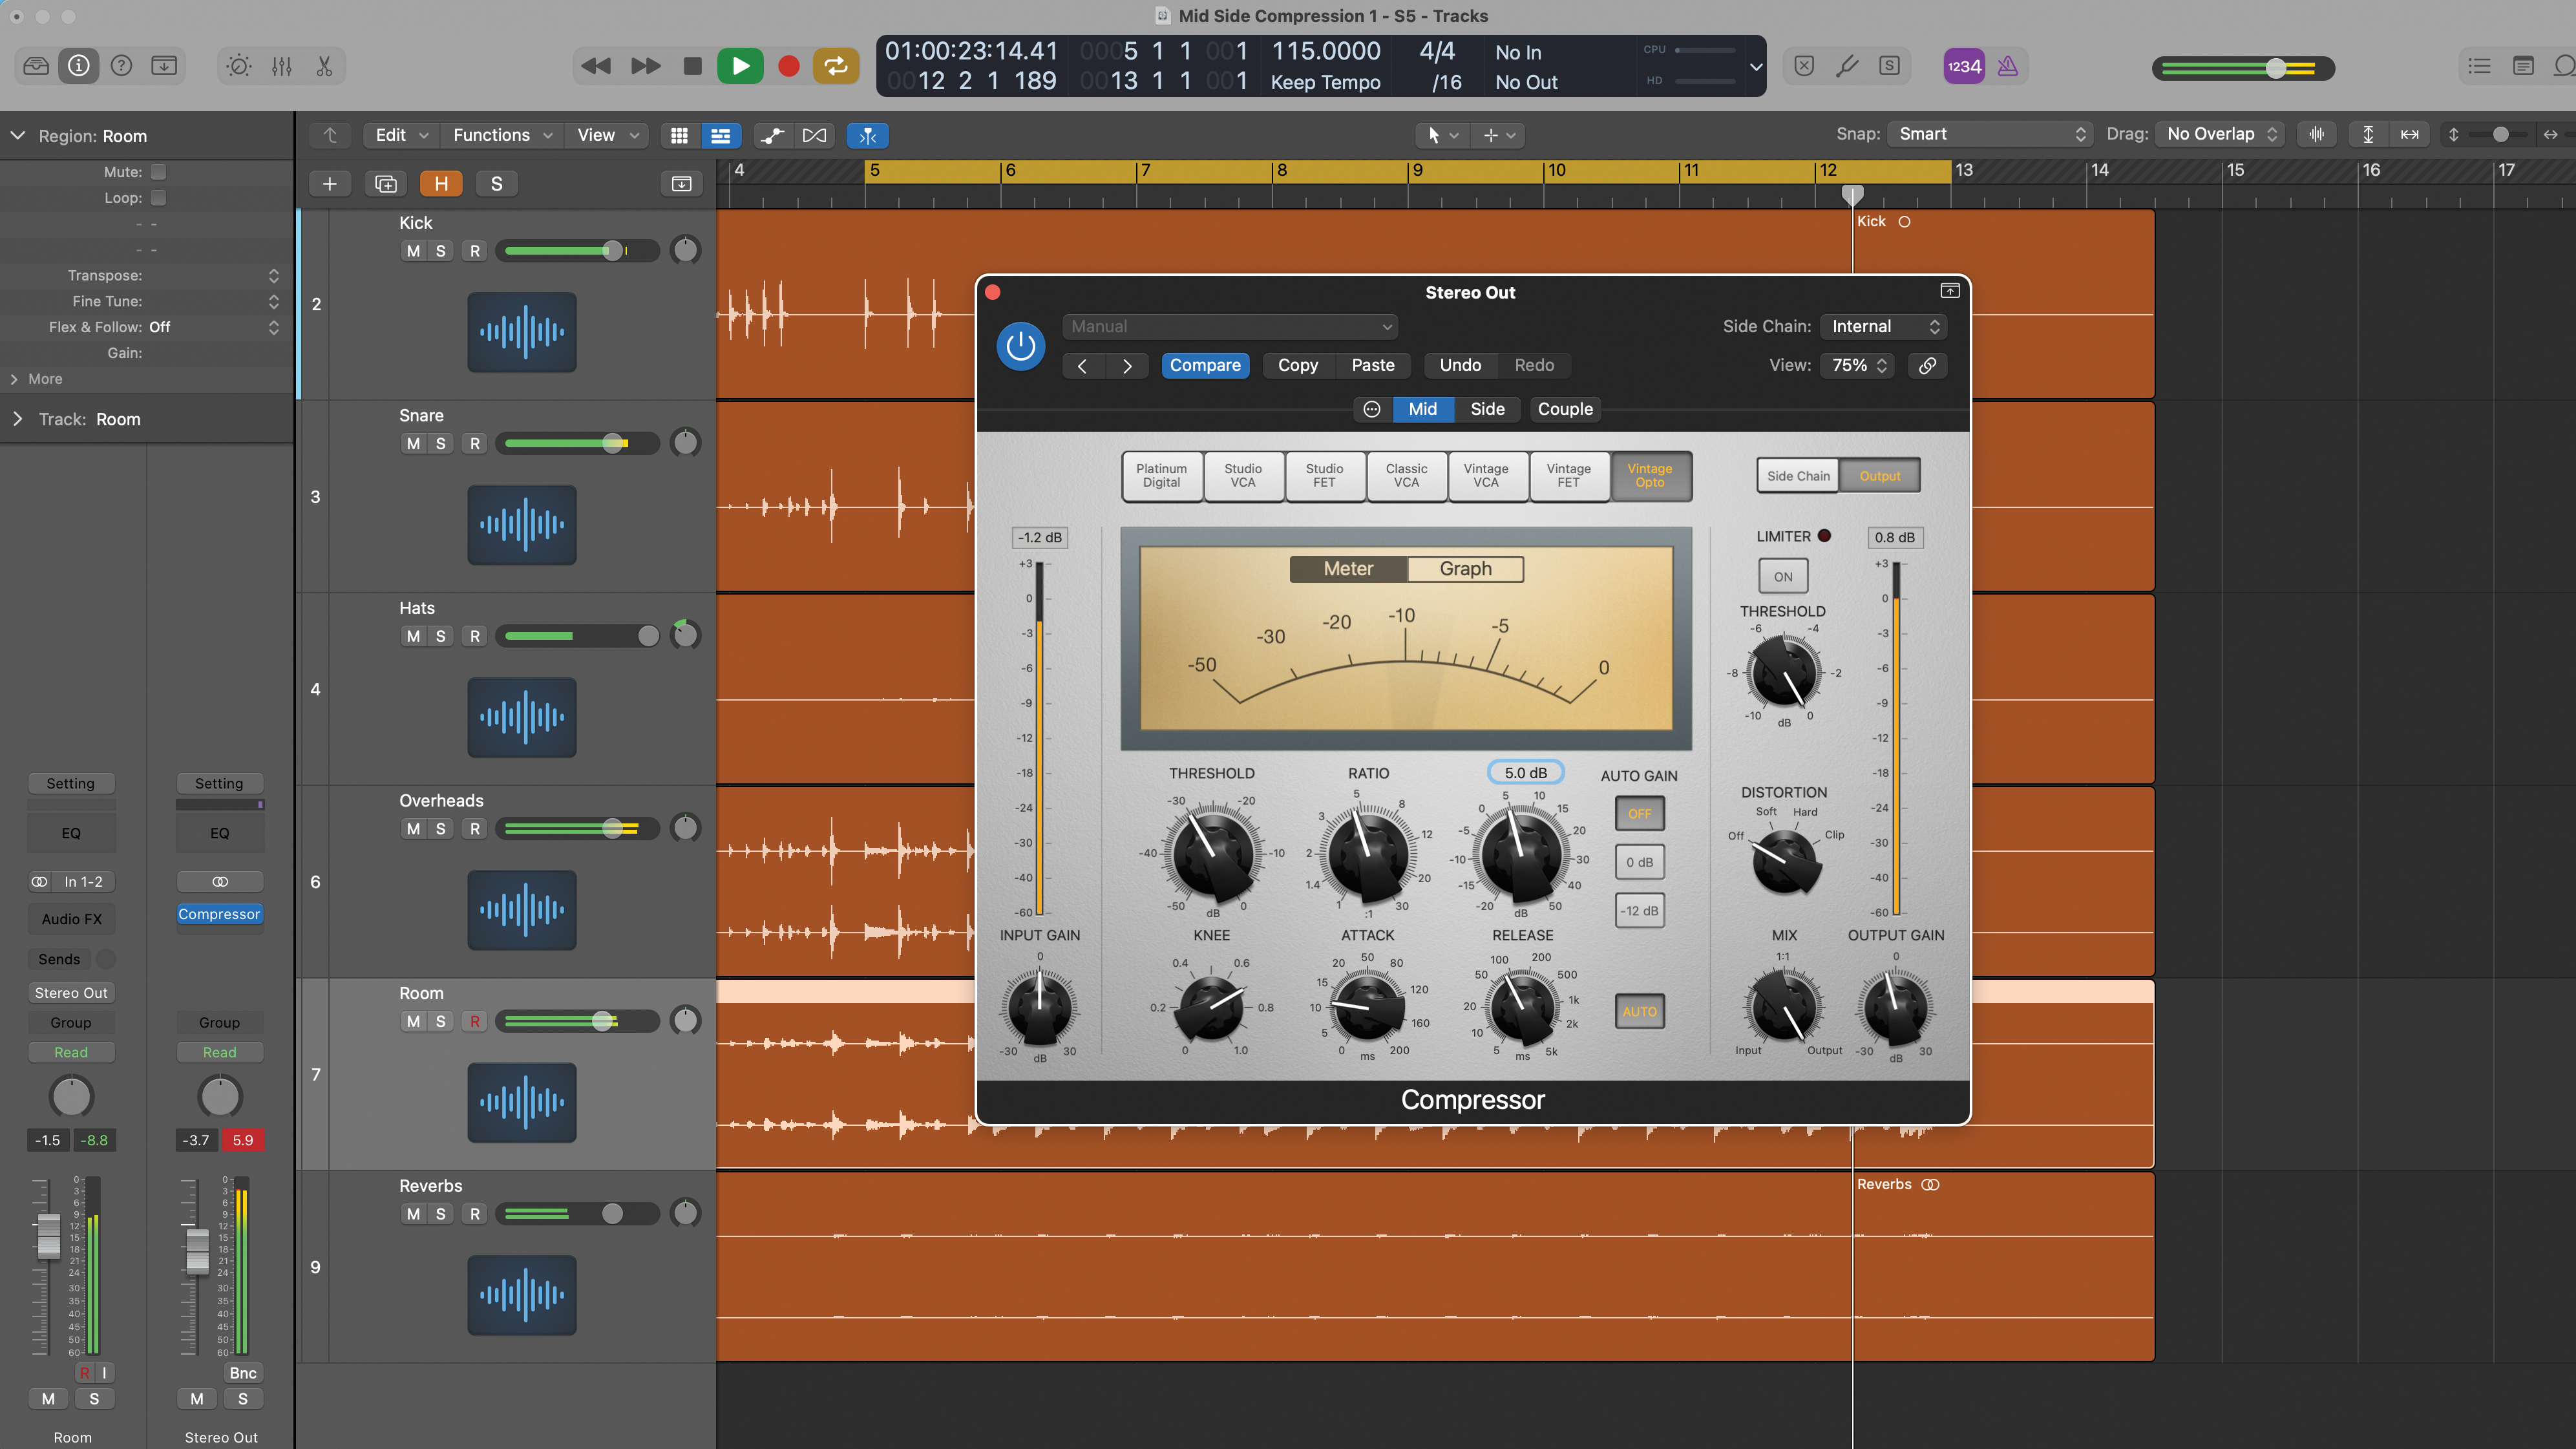
Now let’s set the main compressor parameters. We’ve chosen aggressive settings with a quite fast attack but slow enough not to crush the transients. With automatic release and a ratio of 5:1 we’ve set the threshold so that gain reduction is hitting 10dB on the peaks.
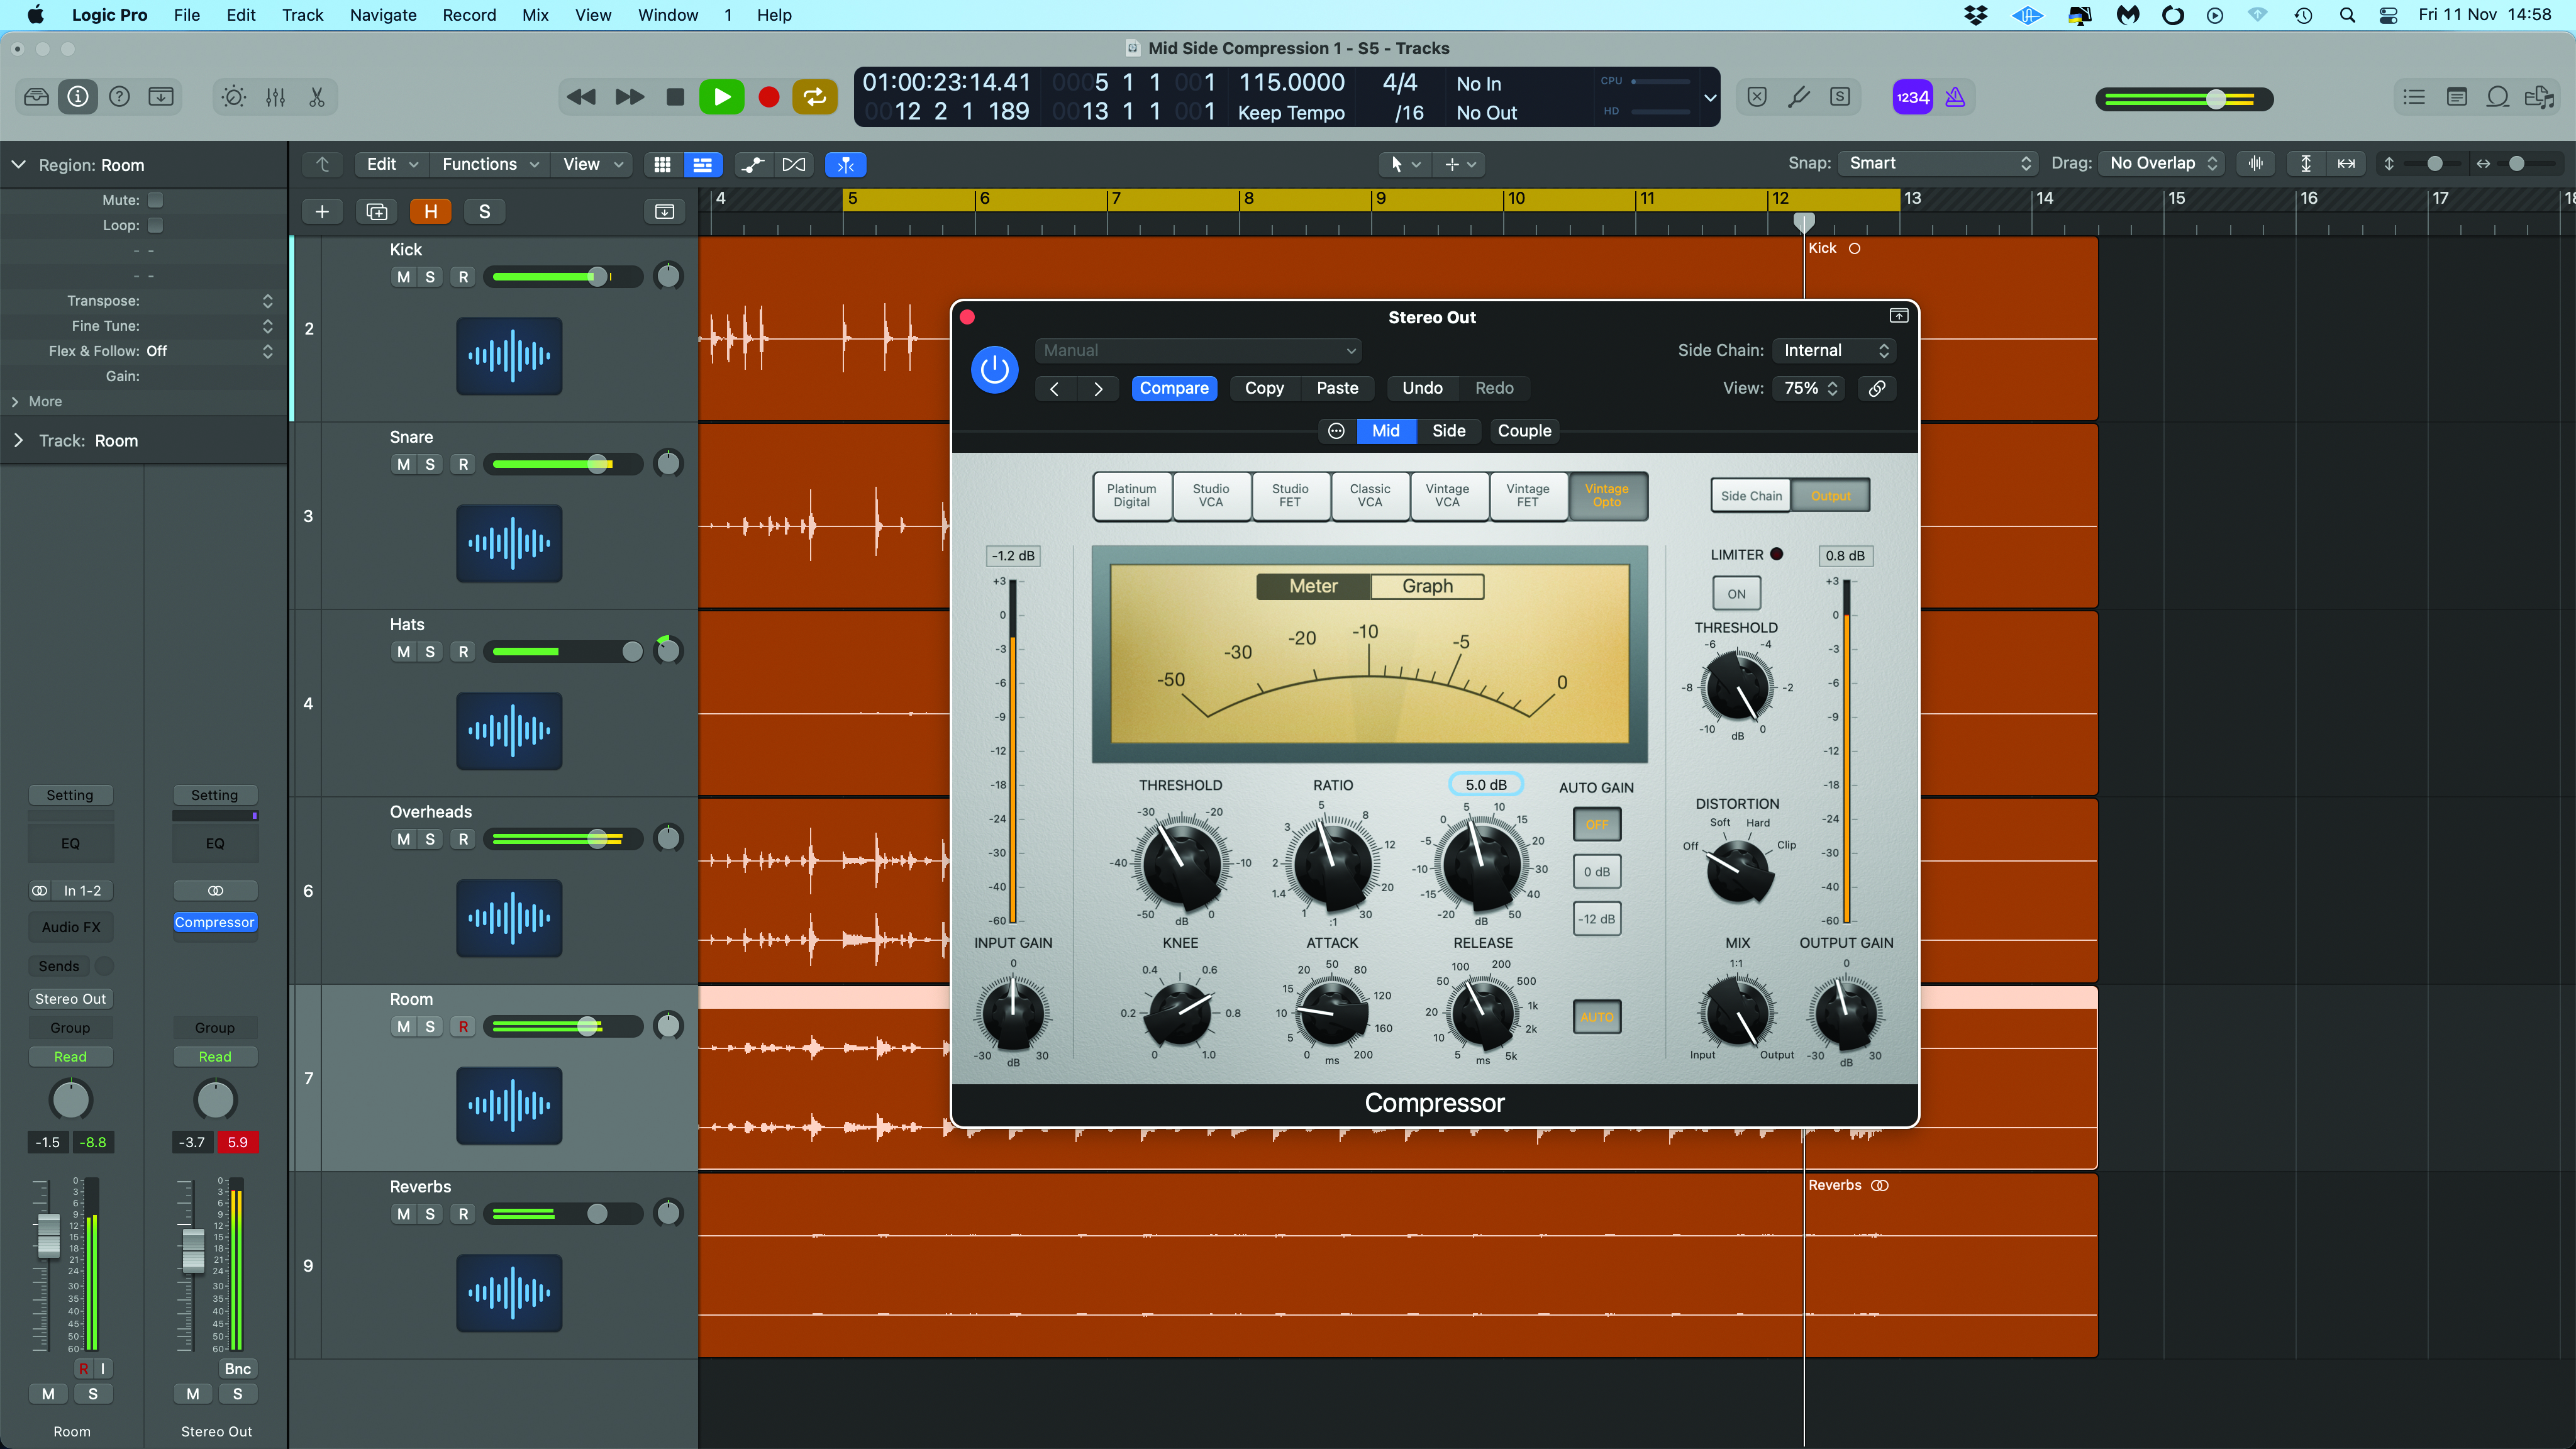
This amount of gain reduction has had a big impact on our stereo image, and with manual gain make up, it’s time to rebalance the output level. You’ll have to do this by ear, as although the meter is telling you -10dB of gain reduction, that’s only the peaks. Here we’ve added about 5dB on the make up control.
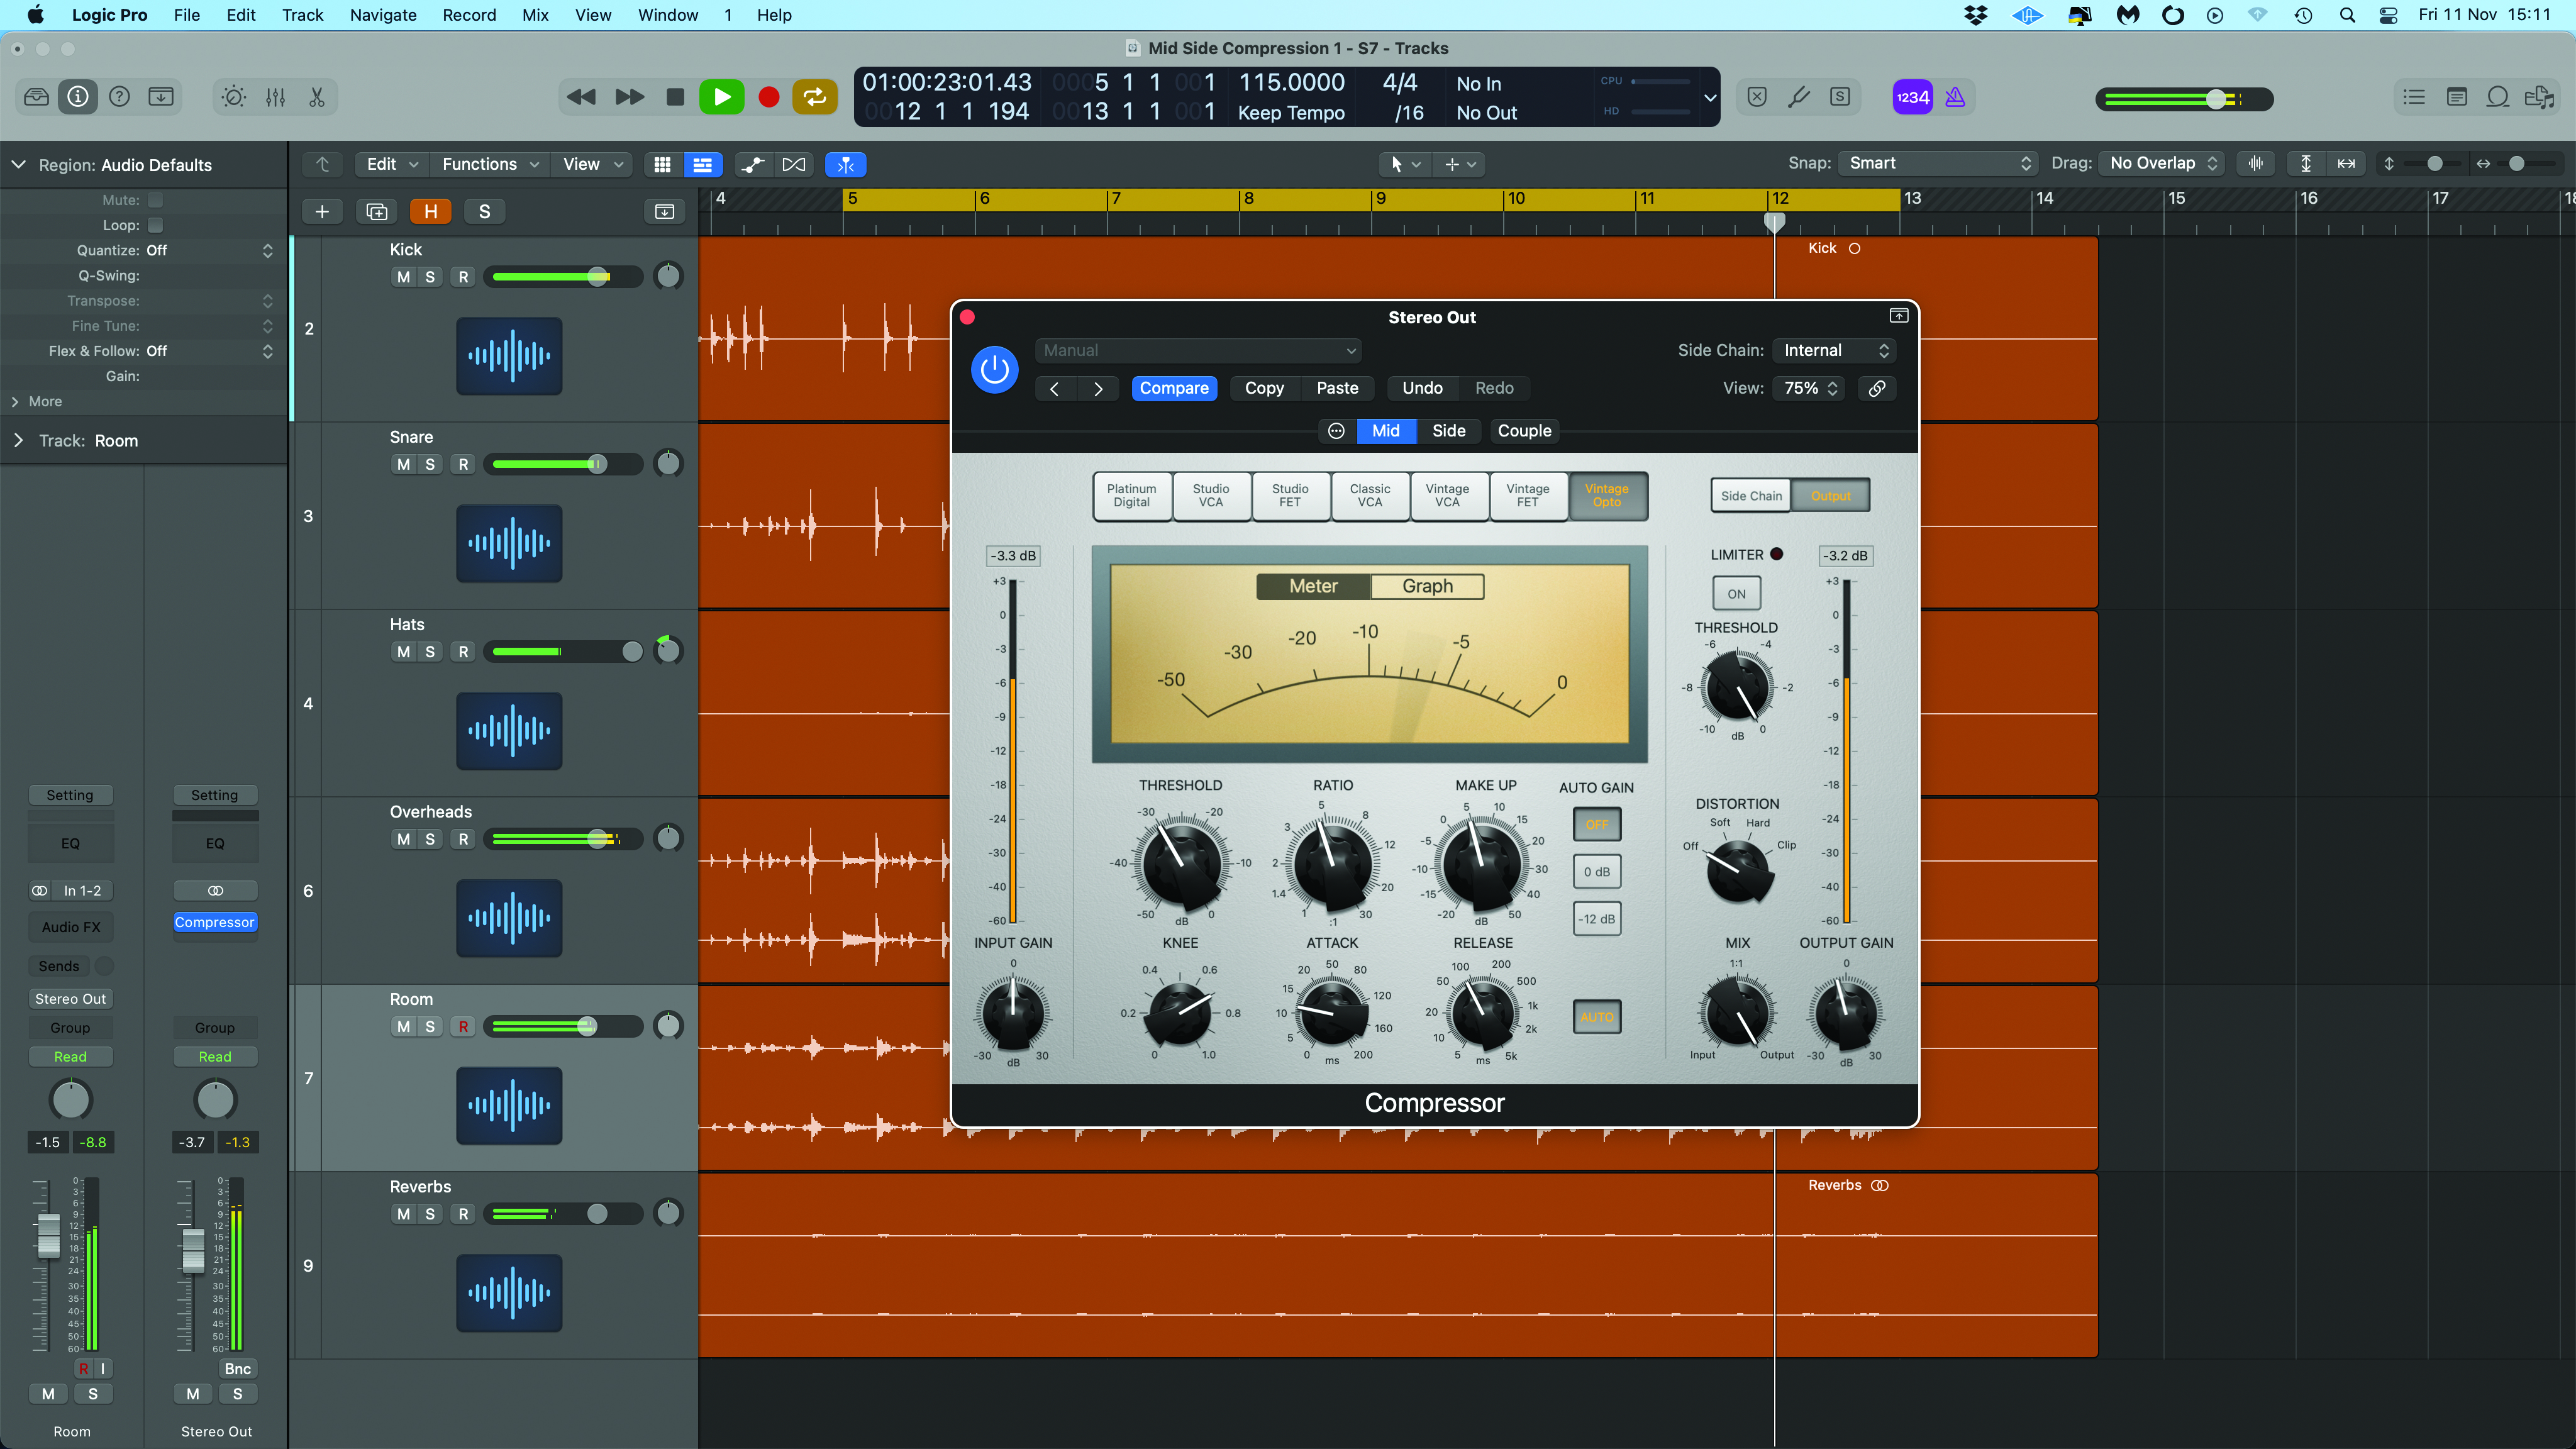
Try A/Bing the result to see the difference. The key things for us are the much more snappy, fatter-sounding snare drum and the more solid central image. Also the wide parts of the stereo image remain quite natural. Finally, there’s fundamentally more energy in the blend but it’s not pumping.
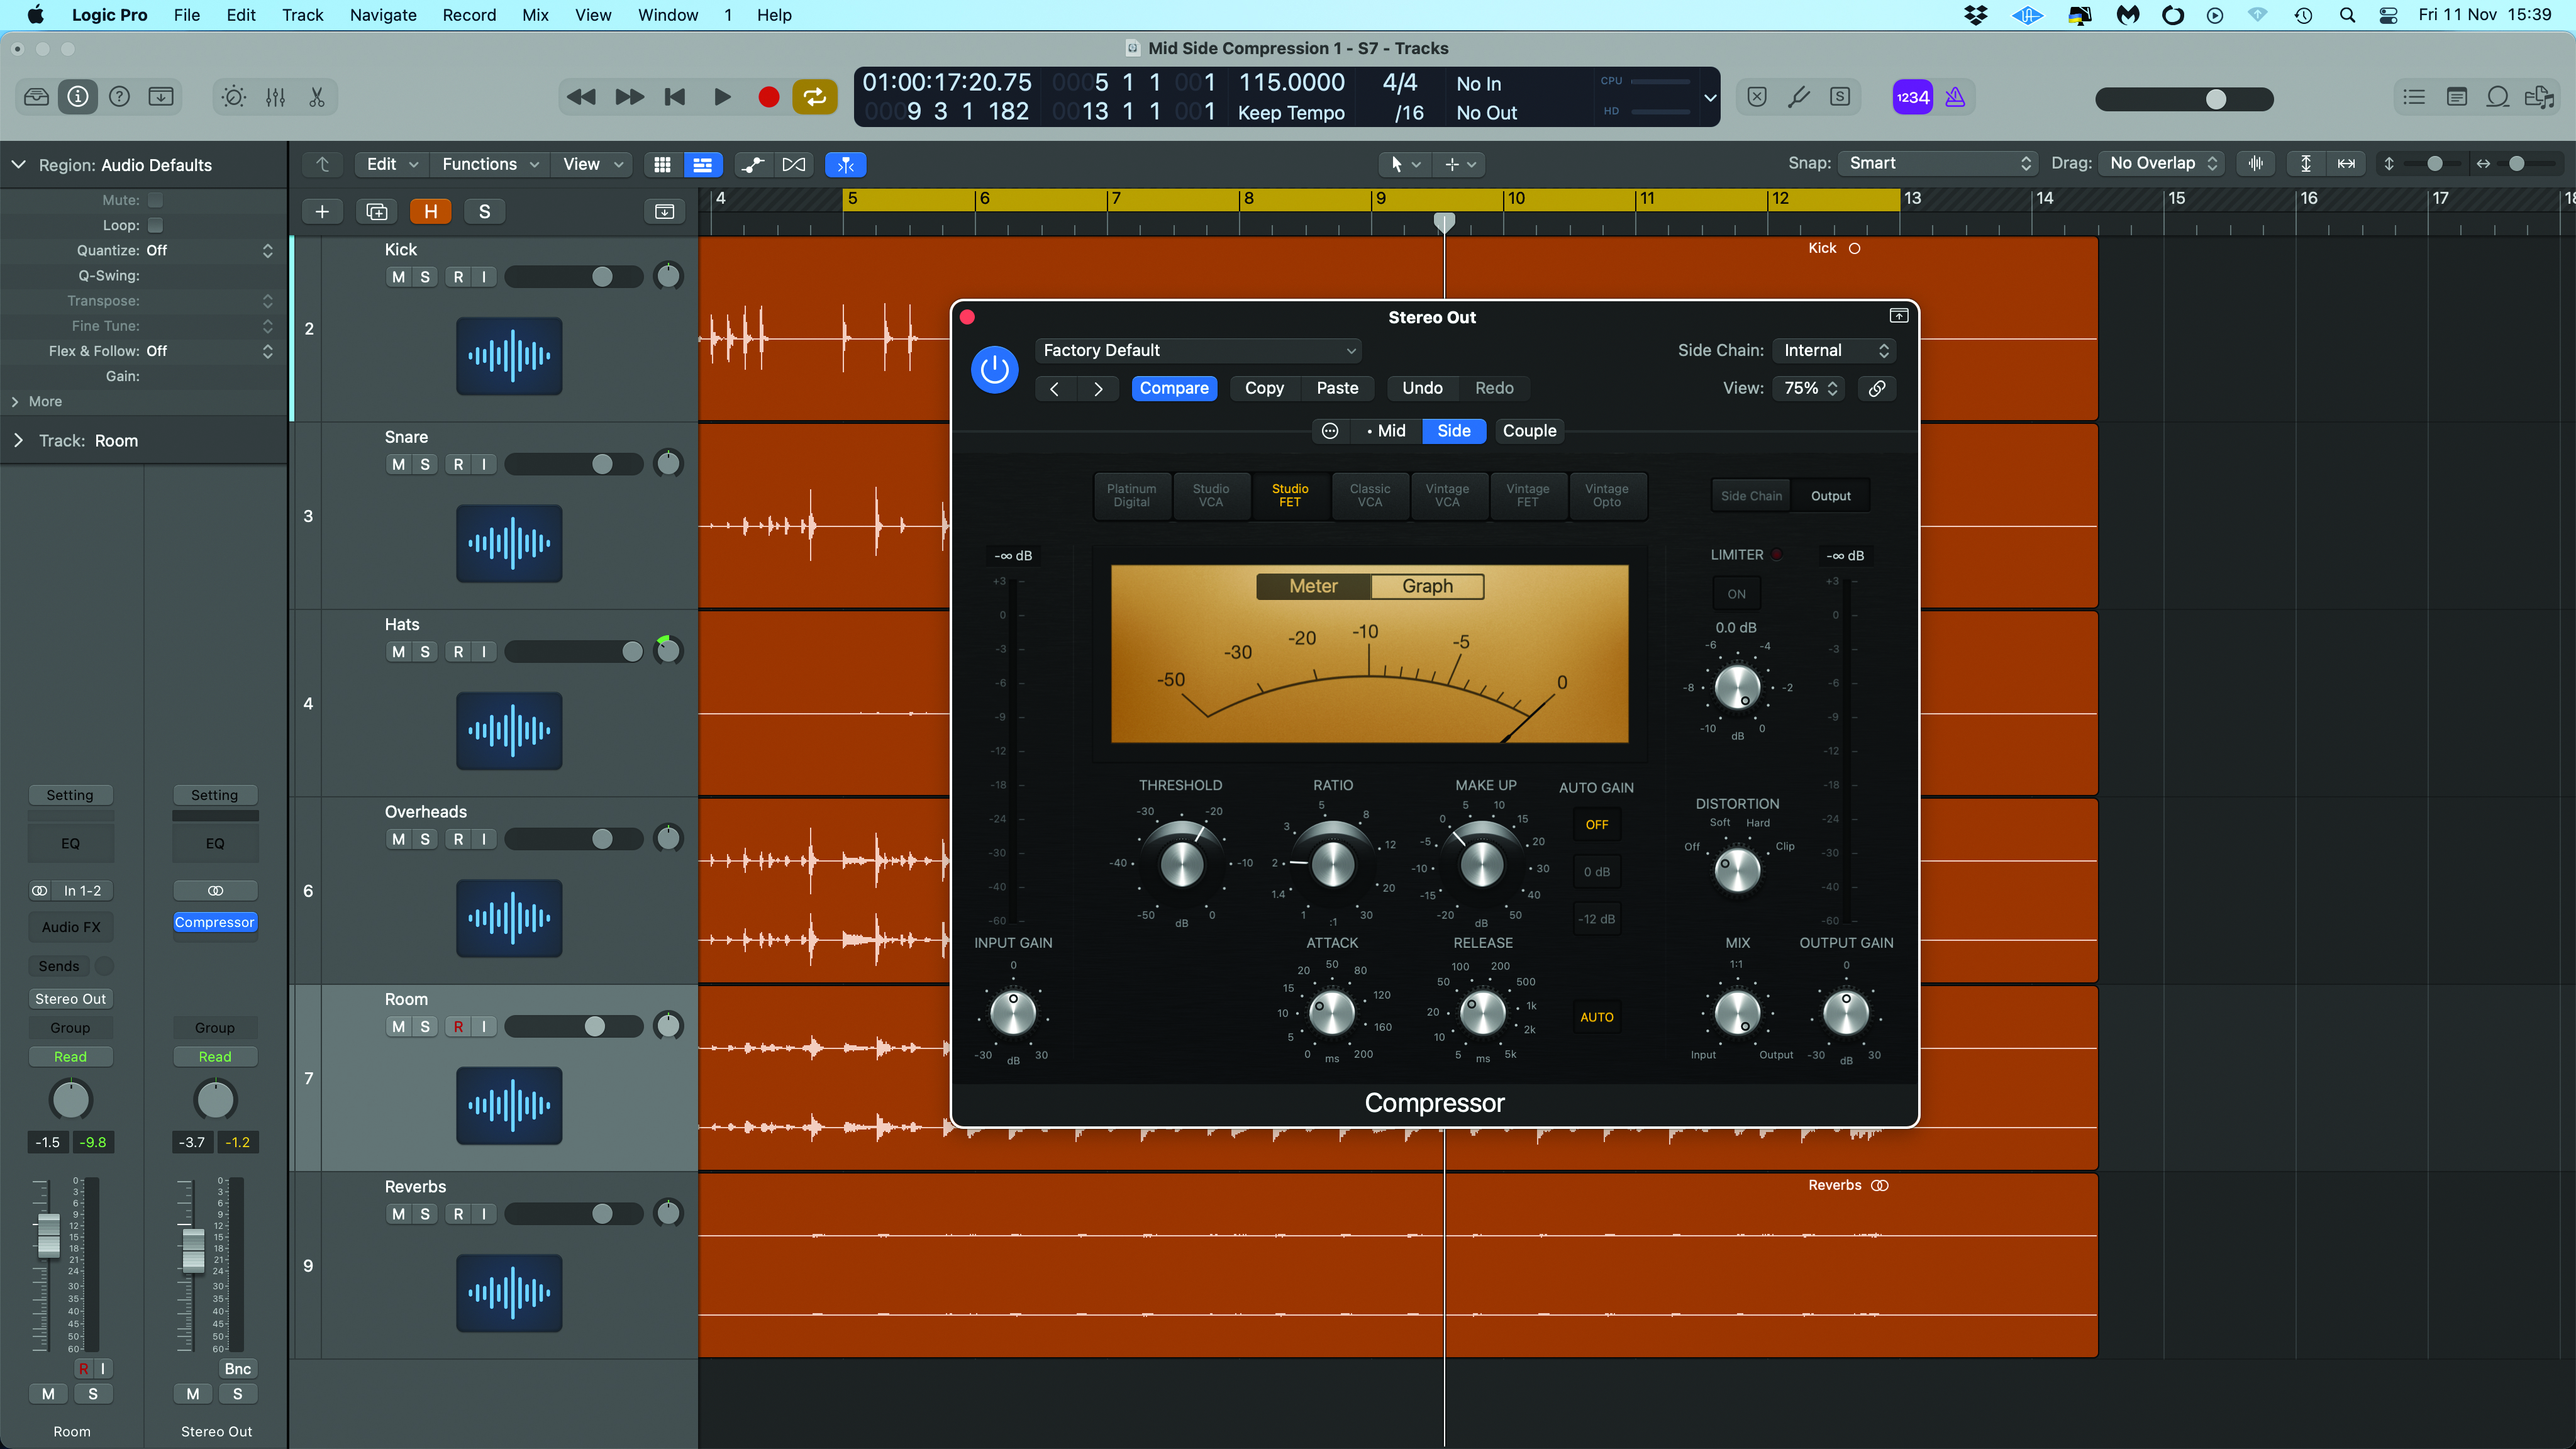
Now let’s try processing just the side component. Here we’ve switched over to our routing matrix and deactivated the mid channel. Then on the main compressor page we’ve selected the Side tab and chosen the super fast Studio FET emulation, once again deactivating the automatic gain make up.
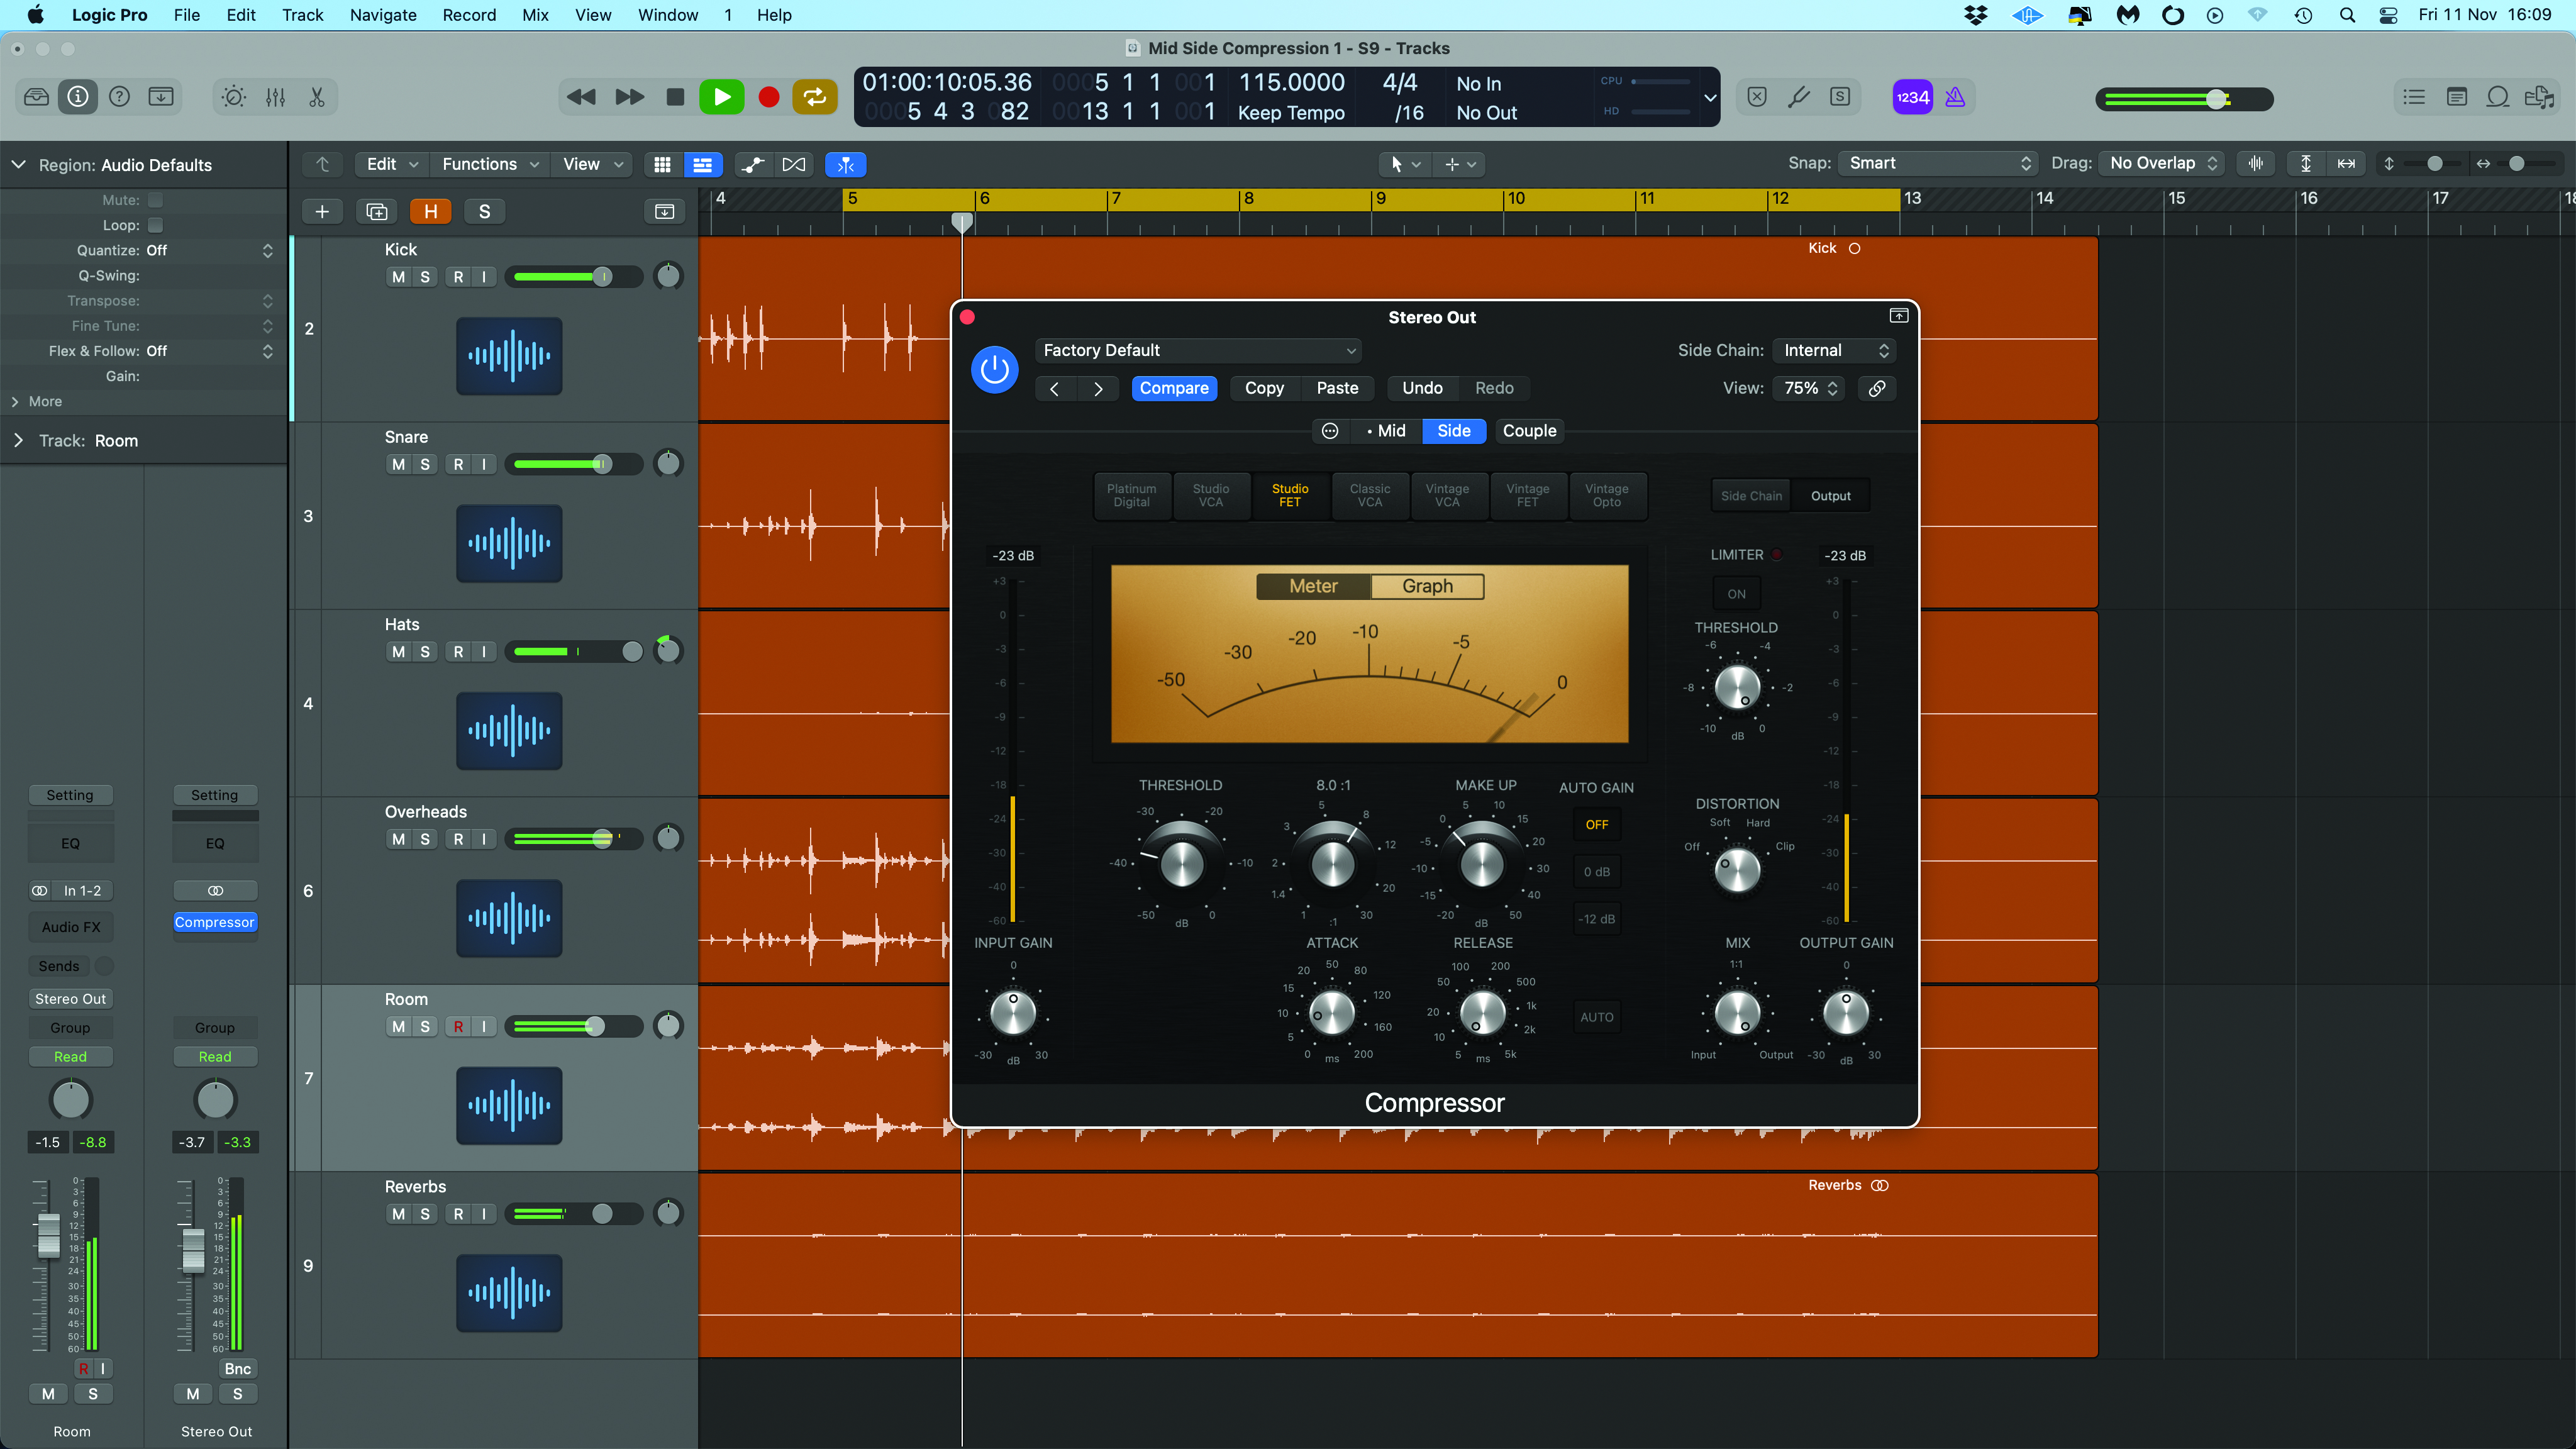
Our aim is to use the compressor to bring up the stereo aspects of the blend and add some shape to the transients. To that end we’ve set the attack reasonably fast and the release at its fastest setting. With the ratio at 8:1 we’ve adjusted the threshold to achieve up to 8dB of gain reduction on the peaks.
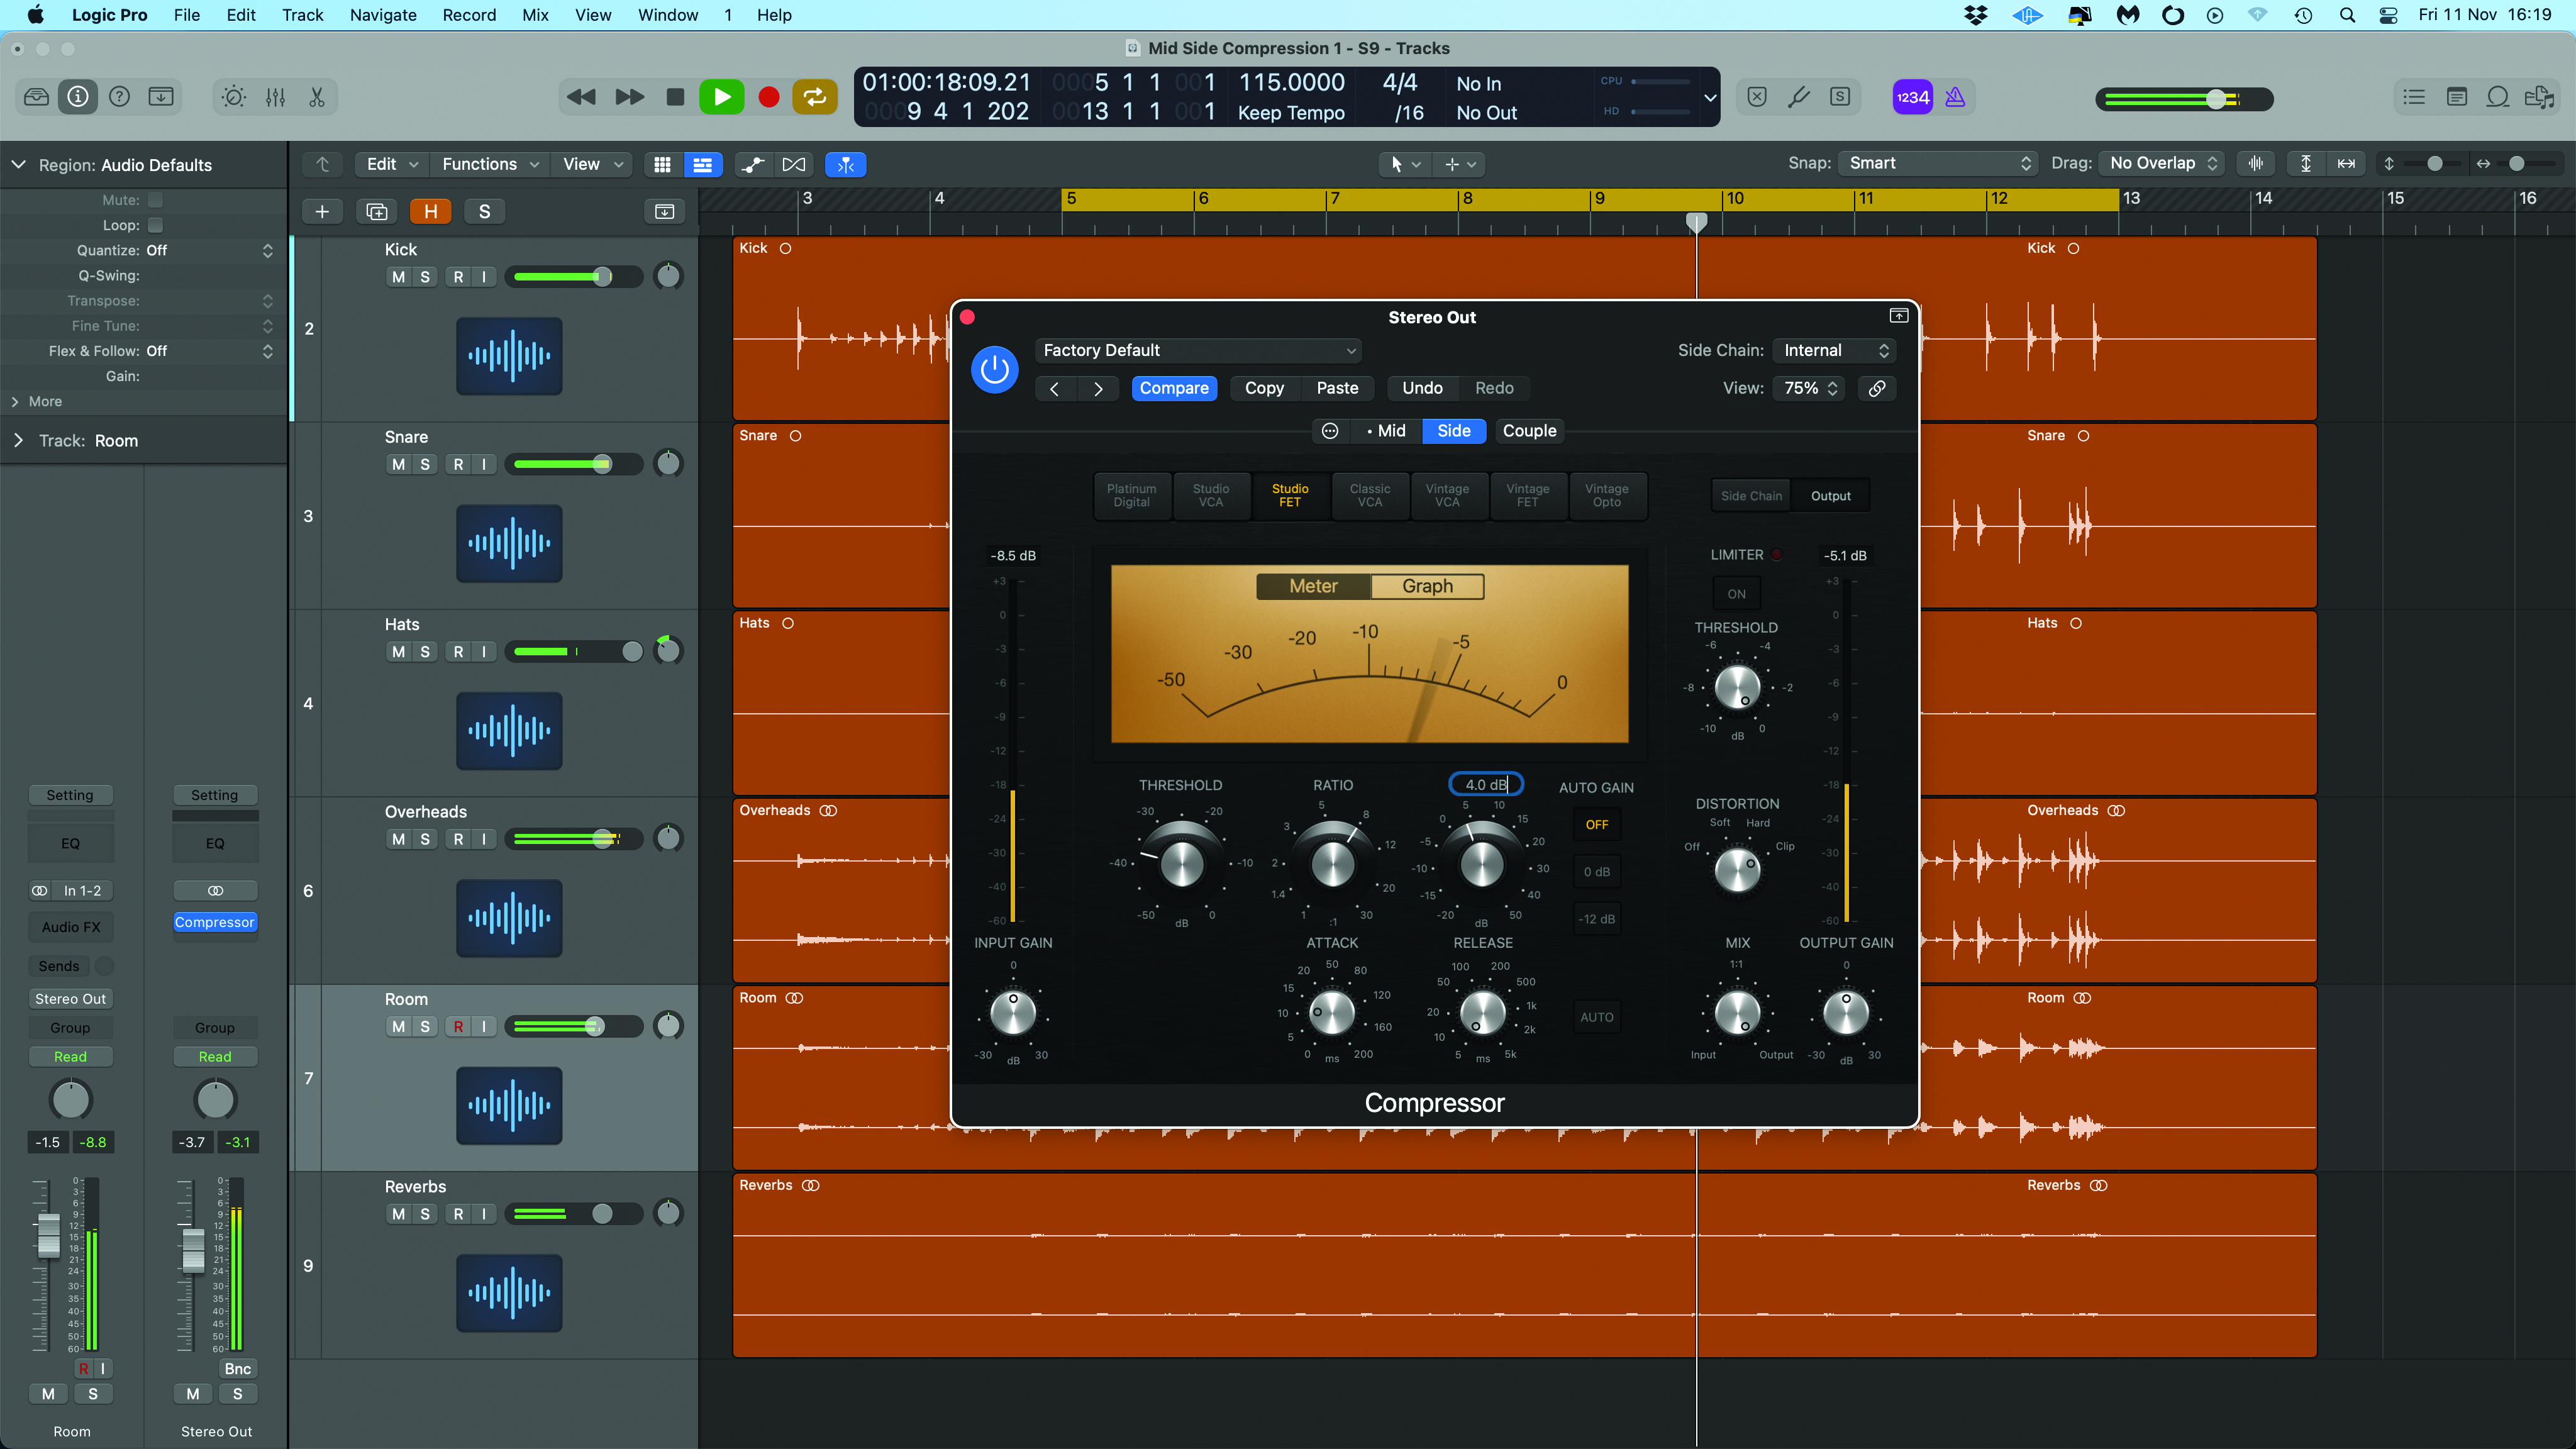
As before we’ve adjusted the make up gain to balance the mid and side (4.0dB for us). Try A/Bing the result. The side component is now more present and has some pump to it. Meanwhile the unprocessed mid component delivers the clean transients. Once again there’s more energy to the sound.
Computer Music magazine is the world’s best selling publication dedicated solely to making great music with your Mac or PC computer. Each issue it brings its lucky readers the best in cutting-edge tutorials, need-to-know, expert software reviews and even all the tools you actually need to make great music today, courtesy of our legendary CM Plugin Suite.
