PreSonus Studio One 3 is not only a top-flight DAW for recording and mixing, but it also contains a powerful mastering section called the Project page.
Once you load your songs into it, you can change their order; add effects and fades; adjust volume, both on individual tracks and globally; and bounce and publish your finished project in a variety of formats.
Here’s how to use it.
Life in the track lane

To get started, choose “Create New Project” from the Start page or “New Project” from the File menu and name your project. Next, you need to import song files. Go to “Project/Import File” to browse for your mixes to import, or simply drag and drop them into the Track Lane area near the bottom of the screen. Each song will show up as an independent WAV file in the Track Lane. In addition, the song names and other metadata will show up in matching order in the editable Track Column area on the left (see Figure 1).

The best DAWs 2020: the best music production software for PC and Mac
You’ll also notice two fields near the top left for Disc (album name) and Artist. I recommend filling those out at the beginning of the project; otherwise, it’s easy to forget. If that happens, the artist and album name won’t appear in the metadata of the final files, whichever format they’re in, and you’ll have to go back, fix it, and re-export the master. If you click the disclosure arrow at the bottom of each track in the Track Column, it opens up additional metadata fields.
The song files in the Track Lane can be edited in several ways. Rearranging their order is accomplished by dragging the songs up or down in the Track Column. When you do, the audio files in the Track Lane move correspondingly.
If you zoom in close on an individual song, you can trim the space at the beginning and end by clicking and dragging the edges of the file. Small fade triangles at the corners of the files can be used to create fade-ins and fade-outs.
Click and drag the songs in the Track Lane to adjust the song-to-song spacing. When you do, all the songs to the right of the one you’re dragging will move along with it, and all those to the left will remain where they were. Be careful that the start and endpoints of the files don’t overlap. Otherwise, when someone plays, say, track four on their music player, they’ll hear a bit of track three’s ending first.
Matchy matchy

One of the keys to mastering an album is to get the levels even between songs so that listeners don’t have to reach for their own volume control to turn a track up or down as the album plays. The Project page gives you easy-to-use controls for making volume adjustments. When a track is selected (either the audio file in the Track Lane or in the Track column), you’ll see its name appear over the Track Device Rack, an area just to the right of the Track Column where you have a volume fader and a field for adding insert effects (see Figure 2).
Use Studio One’s effects or third-party plug-ins to EQ, compress, limit, and otherwise tweak the audio for each song individually. You can save the settings in a Device Rack, making it easy to recall a specific effects treatment to use on a different song.
What's in play
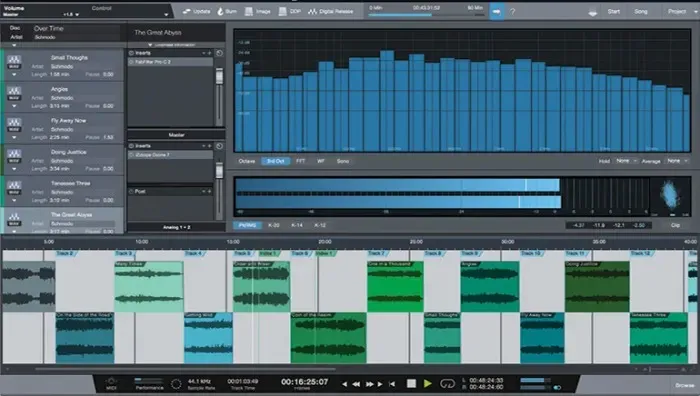
Whenever you start playback, you’ll see the Project page’s impressive metering features spring to life. These include a very large Spectrum meter that shows the frequencies of your audio in several selectable formats. There’s also a Level meter, which can be set for Peak/RMS functionality, with a number of display options, or one of three K-System scales (the K-System was created by mastering engineer Bob Katz).
Play through your songs, listening for volume issues between them, and use the volume slider in the Track Device Rack to make adjustments. Clicking in the timeline that’s just above the Track Lane during playback will make the cursor jump to the spot you clicked, and play from that point. This is a great feature to use for moving back and forth between songs to check relative volumes. It’s also handy for checking the transitions between songs.
Below the Track Device rack is the Master Channel Device Rack, which offers a master fader for the entire project and fields for adding master insert effects and post effects. (Post effects are used mainly for adding dithering plug-ins, in case you don’t want to use the built-in dither features.) In addition to any global EQ and compression/ limiting you need, adding a master effect with a little character can help to add sonic consistency from song to song.
The finish line
Once you’re satisfied with your mastering job, the Project page offers a number of export options. Several of these choices are the creation of physical CDs. You can burn Red Book CDs directly from your computer and make a CD image or DDP image to send to a CD manufacturer for duplication or replication. You can also create a digital release in a wide variety of formats, including WAV AIFF, MP3, Ogg Vorbis, FLAC, or CAF. The digital release creates individual files for each song, including all metadata, and puts them in a single folder. You can even publish directly to a SoundCloud account if you want.
All in all, the Project page provides you with a powerful and user-friendly mastering environment. If you’re interested in doing your own mastering, you should check it out.
