How to use an arpeggiator to creatively sequence drums
Seeking rhythmic inspiration but hindered by your own conventions? Maybe it's time to try something completely unpredictable…
While the arpeggiator is forever linked with melody, harmony and the bridge between them, what happens if you use it to ignite ideas for drum parts? Instead of holding down a major seventh chord, what if you try holding down the notes for kick, snare and hi-hats, and messing with the parameters until you kick out something you’d never have come up with otherwise?
With such sophisticated software arpeggiators available today, experimentation has never been more viable. The digital revolution has left us with no shortage of high-level arpeggiator options, with all the requisite bells and whistles. Add to that the fact that almost every DAW now comes with an arpeggiator, and there’s no excuse to not give them a try and come up with something new and exciting.
For plenty more creativity power-ups, get the June 2018 edition of Computer Music.
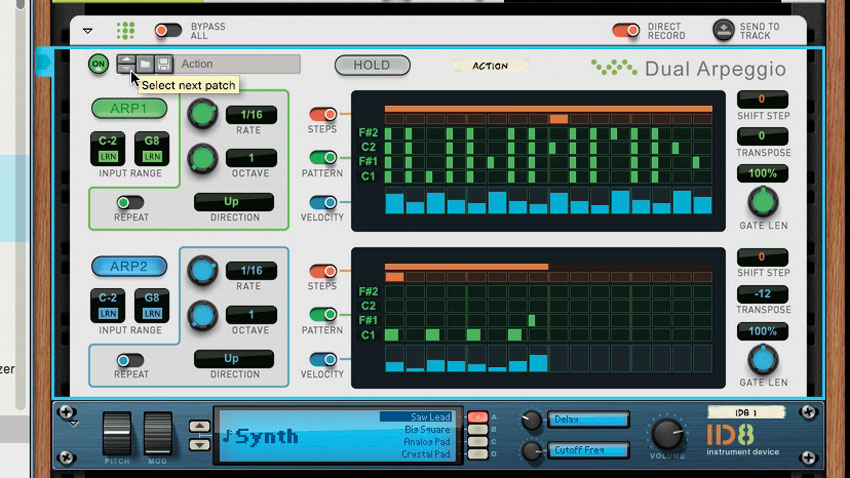
Step 1: Here’s Reason 10’s Dual Arpeggio device. It’s currently powering ID8’s synth instrument, which is a pretty normal way to arp. If we play chords, they’ll come out as sequences of notes, and with this particular arpeggiator, the presets instantly give us a wide variety of riffs. But what if we change the ID8 patch and swap out the synth for a drum kit?
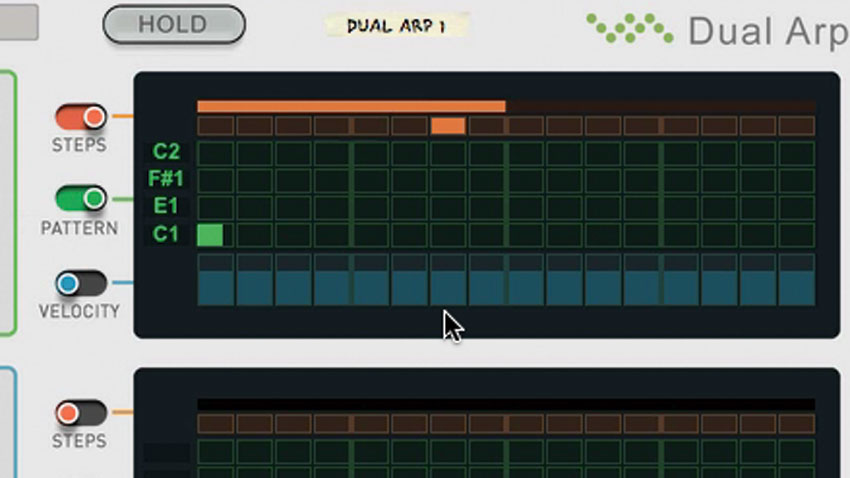
Step 2: In Dual Arpeggio’s default Init patch, if we hold down one note, the drum in question just repeats until we let go. If we hold down notes for a kick (C), snare (E) and hi-hats (F#), we get all three playing in sequence. Different drums can hit at the same time, thanks to the way Dual Arpeggio’s interface and controls are set up.
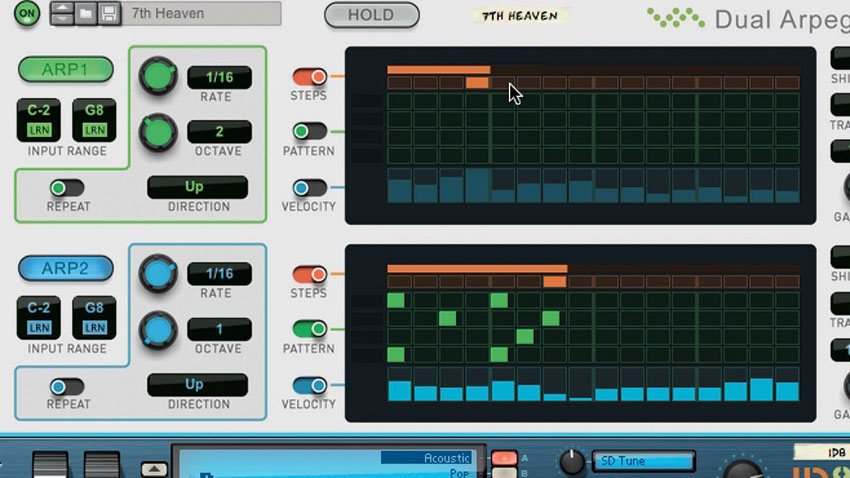
Step 3: So far, we don’t have an immediate ‘beat’, but it’s not far off from sparking a couple of ideas. Audition a few presets. Since these were designed mostly for playing synths and other virtual instruments, some candidates aren’t nearly as appropriate as others.
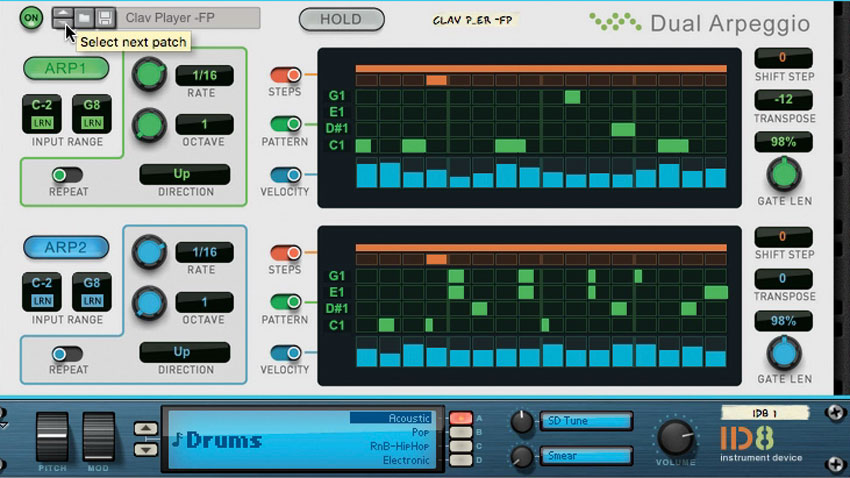
Step 4: With a preset chosen, try adding a fourth note into the mix. Notice how introducing this note or taking it away again radically changes the sound of the beat. We’re not dealing with a MIDI sequencer here - we’re dealing with a very different way of generating patterns. It’s not intuitive, but it can kickstart something completely fresh!
Want all the hottest music and gear news, reviews, deals, features and more, direct to your inbox? Sign up here.
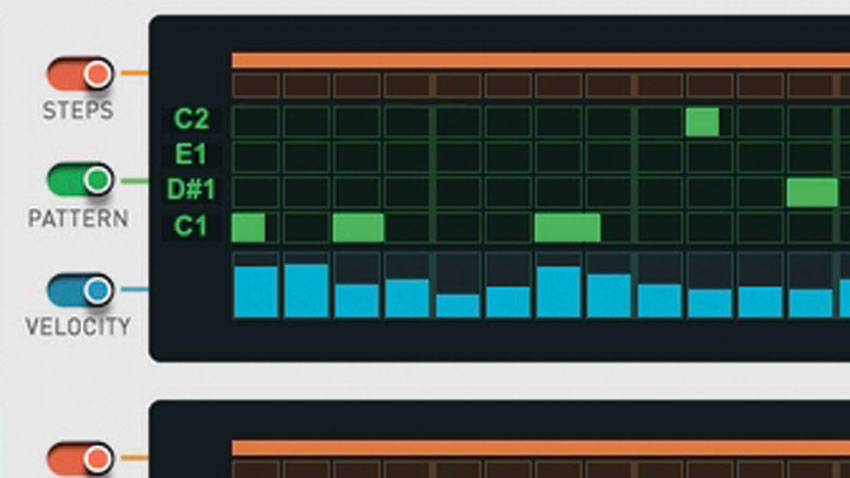
Step 5: This is exactly the way to ‘play’ a drumming arpeggiator. Hold a few initial, staple notes down, but every bar (or few), add a new one and take another away. Every so often, try suddenly swapping every note you’ve got held down for two completely different ones, just for a bar, to create a sort of fill.
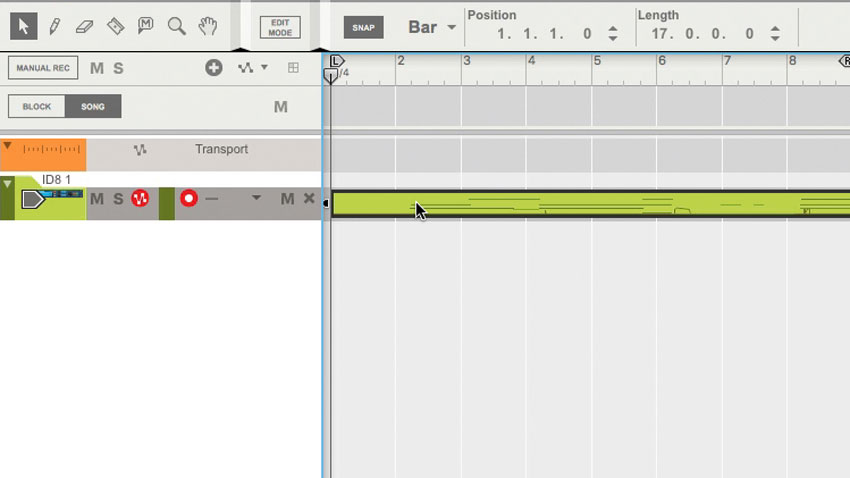
Step 6: Once you feel comfortable performing like this, it’s time to hit record and capture a few ideas. This method is sure to generate some interesting ideas, but they probably won’t be perfect first time - it’s likely you’ll have to pay a visit to your recorded MIDI sequence to edit and ‘rationalise’ it a little.
Computer Music magazine is the world’s best selling publication dedicated solely to making great music with your Mac or PC computer. Each issue it brings its lucky readers the best in cutting-edge tutorials, need-to-know, expert software reviews and even all the tools you actually need to make great music today, courtesy of our legendary CM Plugin Suite.
