"Programming realistic, groovy drum parts is well within any desktop producer’s abilities": How to program MIDI drums that sound like the real thing
You might not be a drummer, but that shouldn't prevent you from programming totally convincing drum tracks that have a live feel
Want all the hottest music and gear news, reviews, deals, features and more, direct to your inbox? Sign up here.
You are now subscribed
Your newsletter sign-up was successful
DRUMS WEEK 2025: Many computer musicians shy away from programming their own acoustic (as opposed to electronic) drum tracks, understandably concerned that since they don’t know how to play a real drum kit, any attempt to create a performance on a virtual one will fall short in terms of technicality and sound.
Others go in the opposite direction, naively and over-confidently penning beats that at best would require five or six limbs to actually play, and at worst come across as mad and unconvincing, even to the untrained ear.
The fact is that programming realistic, groovy drum parts is well within any desktop producer’s abilities. All you need is a MIDI sequencer, a quality sound source and some insight into the rules, limitations and standard practices that real drummers work to and within.
Article continues belowBut is it really worth the effort? Why not just use sampled loops of real drummers playing real drums to create your percussion parts? While this is always a wholly viable option, the results will be qualitatively different to what you’d get from building your own parts.
You would have to choose a loop based on its particular production and rhythmic qualities, and you’d have a very finite level of control over them. Program your own drums, though, and you have total command over every element of the ‘performance’ - from the notes themselves to the sounds of the individual drums and cymbals.
So, if you really want to take full ownership of your beats, building them yourself from the ground up is the way to go.
Same difference
If you’ve programmed electronic beats before, you’ll be glad to hear that the rhythmic paradigm that governs dance music and electronica is equally dominant in pop, rock and most other genres in which you’d find a live drummer. It’s that fabulous 4/4 backbeat, with the kick drum emphasising the first and third beats (either directly or by implication), and the snare on the second and fourth, embellished by incidental grace notes and fills.
Want all the hottest music and gear news, reviews, deals, features and more, direct to your inbox? Sign up here.
The vast majority of modern music adheres to this straightforward structure, which is good news for programmers looking to emulate the real thing.
What’s more, knowing how drummers play their drums isn’t just useful for programming live-sounding parts: even your drum machine patterns will benefit from a true understanding of what the human ear has semi-consciously come to expect from contemporary percussion elements.
With all that in mind, then, it’s time to take a drum lesson…
Drumming 101
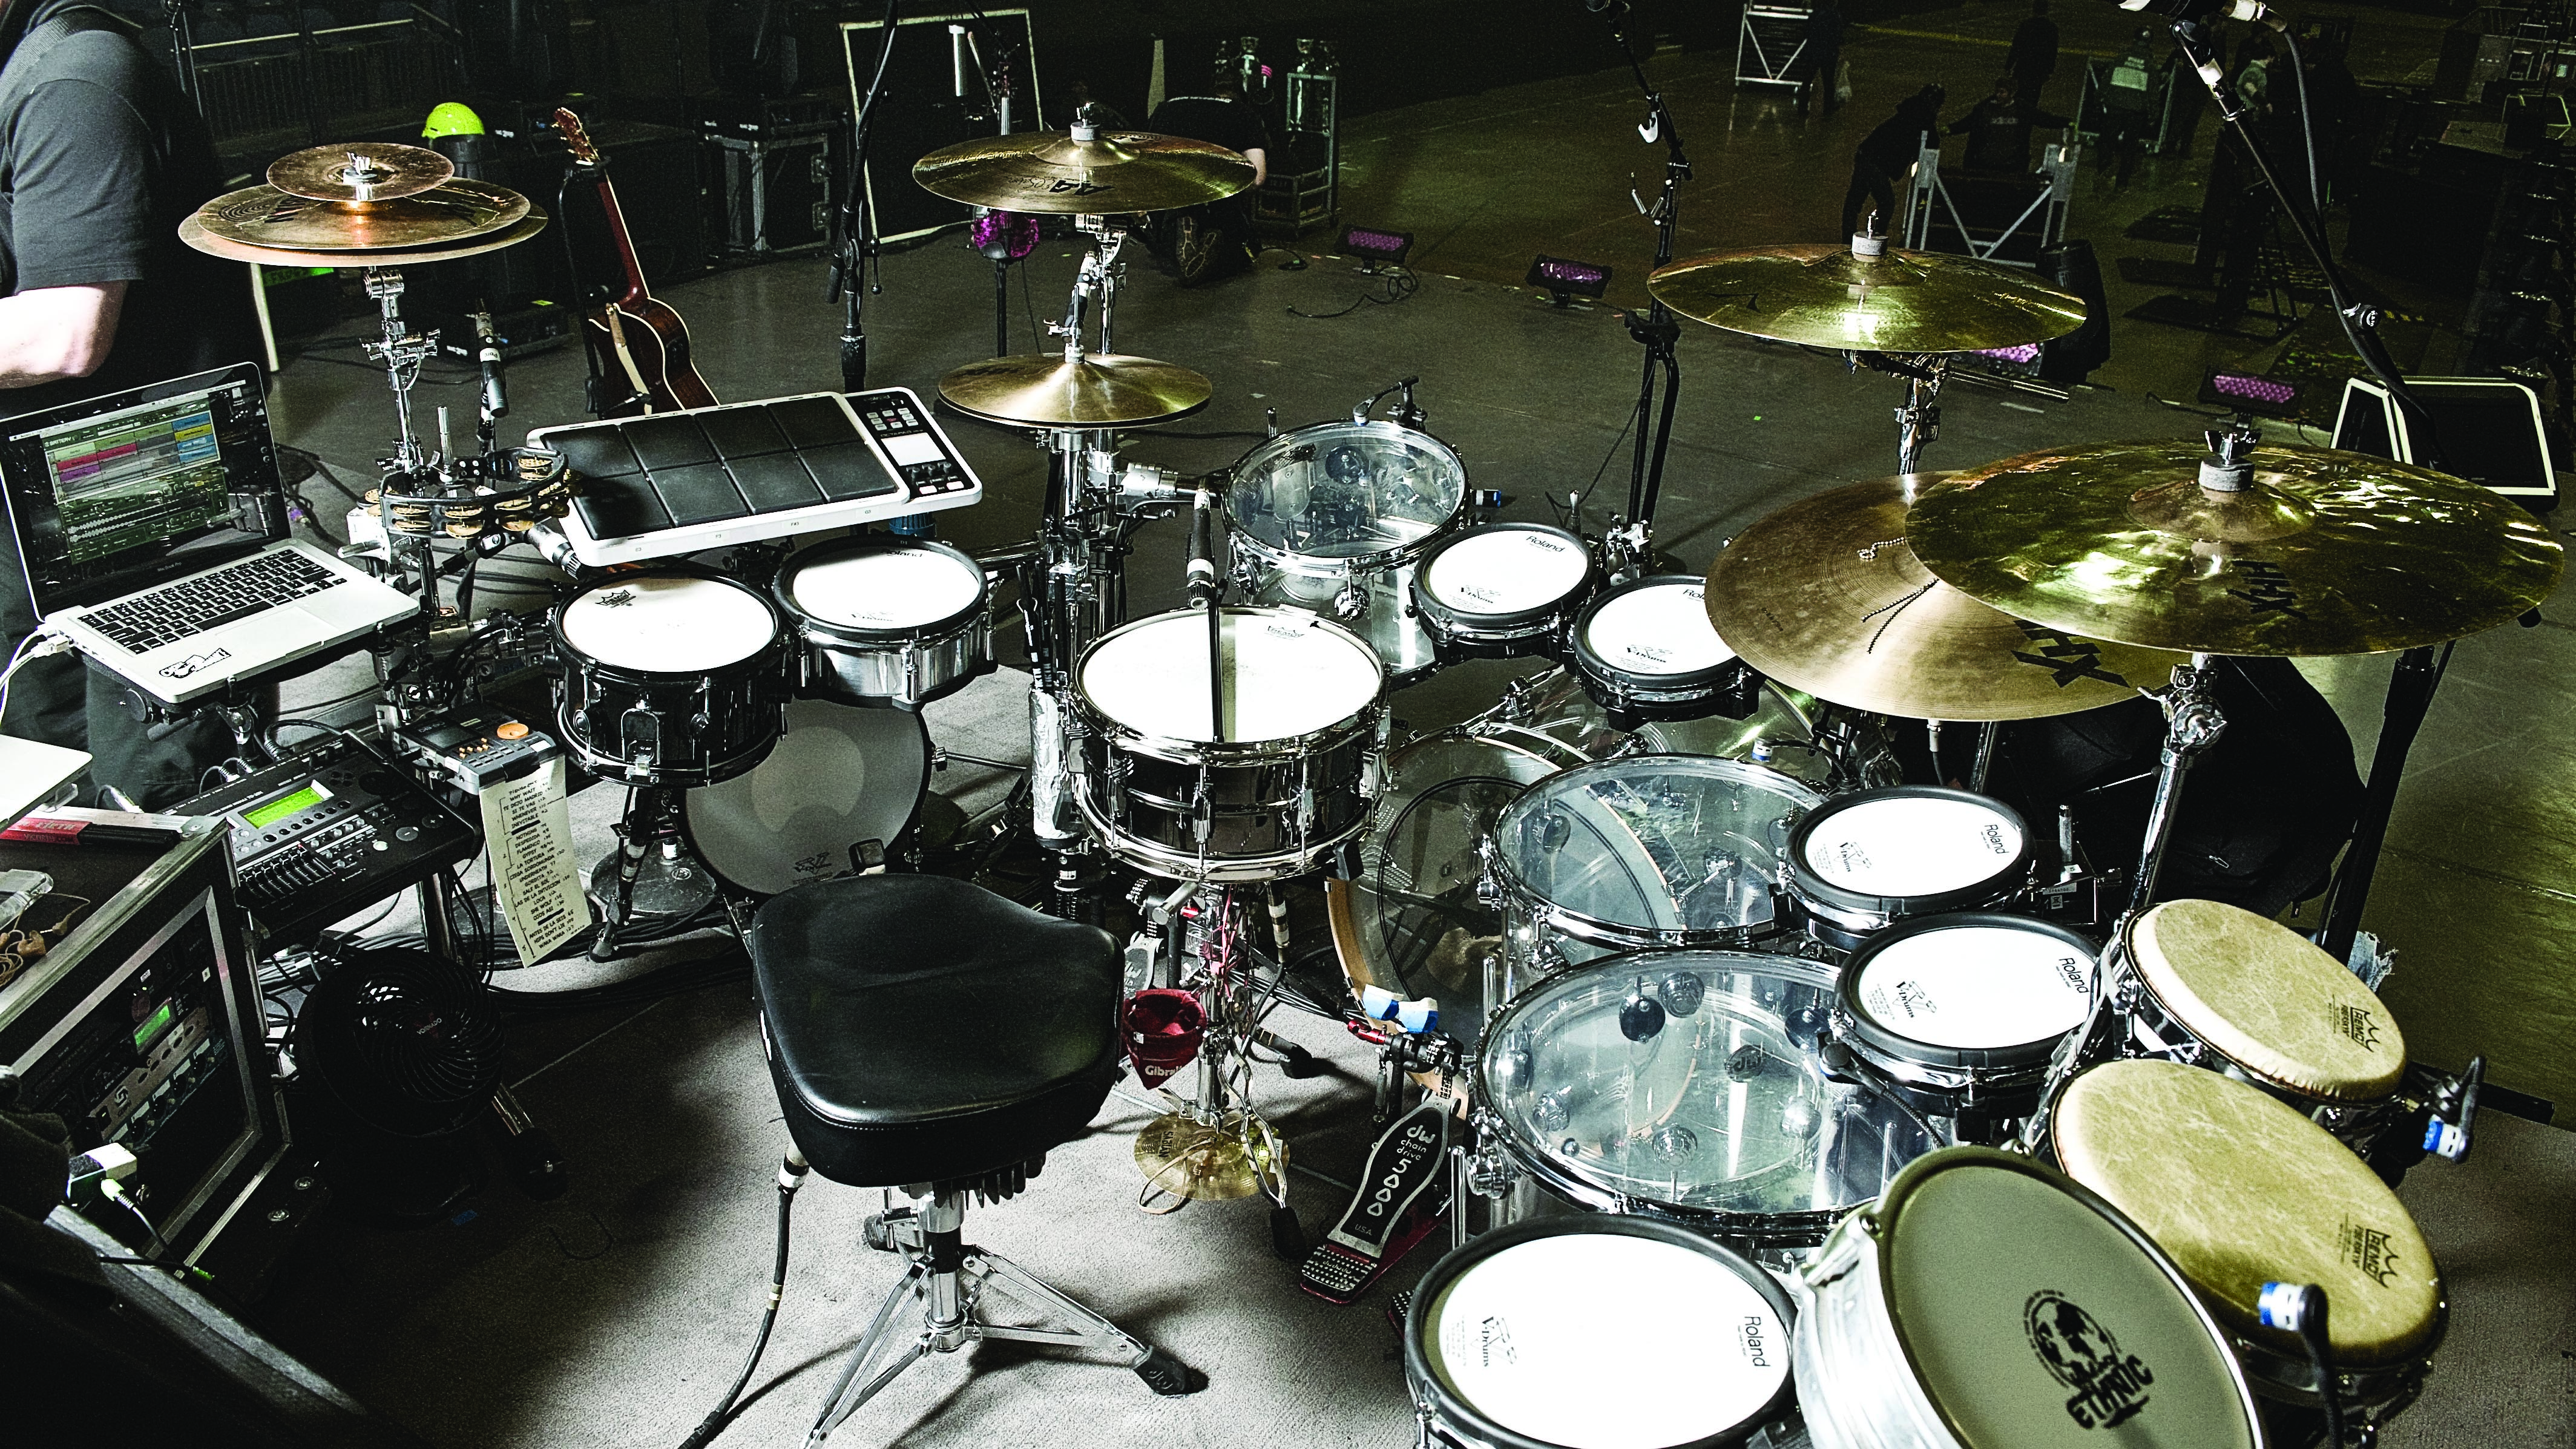
The drum kit comprises a kick drum, a snare drum and a pair of hi-hats, plus a variable number of tom toms and cymbals (usually two or three toms and four or five cymbals, although the only limits are space and reach). Most of the action takes place on the kick, snare and hats, while the toms and cymbals are used for accenting and fills.
Most tracks will see the drummer spend the vast majority of their time playing a groove, which, generally speaking, involves nailing the backbeat on the kick and snare, and tapping out a metronomic eighth-note ‘tick’ on the hi-hats (known as ‘riding’).
Assuming the drummer is right-handed, the right foot plays the kick drum, while the left foot controls the hi-hat. The top hi-hat cymbal is struck with the right hand (crossing over the left), while the left hand hits the snare.
Try it now on a desk or your thighs: tap out eight evenly-spaced hits with your right hand, simultaneously tapping your right foot on hits 1 and 5 and your left hand on hits 3 and 7. Don’t worry about the left foot - just repeat ad nauseam. Congratulations – you’re drumming!
Feeling the groove
Those are the fundamentals, but of course there’s much more to it than that. Rather than consciously calculating the placement of kick, snare and hi-hat notes while playing, the trained drummer ‘feels’ where they should go. He or she places them in the context of the rest of the track, in which - never forget - the drums play an underpinning, supporting role.
This isn’t something you need to master in order to program realistic drums, but you do need to understand the forms that these intuitive patterns might take beyond the elementary ‘kick, snare, kick, snare’.
Generally speaking, the kick drum should work in tandem with the bassline, so try placing kick hits directly on top of your main bass notes. Most of the time the snare will fall on beats 2 and 4, but shifting one forwards or backwards by half a beat can utterly transform a groove - try it.
Other variants are the half-time groove (à la dubstep), with the kick falling on beat 1 and the snare on beat 3. Then there’s the disco-style hi-hat pattern: you play 16th-notes with both of your hands, with the right hand moving to the snare for the backbeat.
Although it should go without saying, we’ll say it anyway: no drummer can hit more than two drums with their sticks at any one time. Just like us, they only have two arms! So, if you’ve programmed a snare, a tom and a hi-hat hit on the same beat, realism has left the building.
Little extras
A couple of drum kit variables worth bearing in mind are the ride cymbal and double-kick drums. The ride cymbal is an alternative to the hi-hats. In pop and rock, it’s traditionally used in choruses and middle eights, where the energy of the track needs to increase. In jazz, it replaces the hats as the primary riding instrument – but jazz drumming is a whole other kettle of fish that we don’t have space to get into here. Another time…
Double-kick drums are found almost exclusively in the realm of metal, where they’re the bedrock for blisteringly fast double-time grooves and fills. Feel free to use them where appropriate, but be aware that they can quickly overpower a track, and that a drummer in the real world can’t easily pedal the hi-hat and play that second kick drum at the same time.
Laying down a basic groove
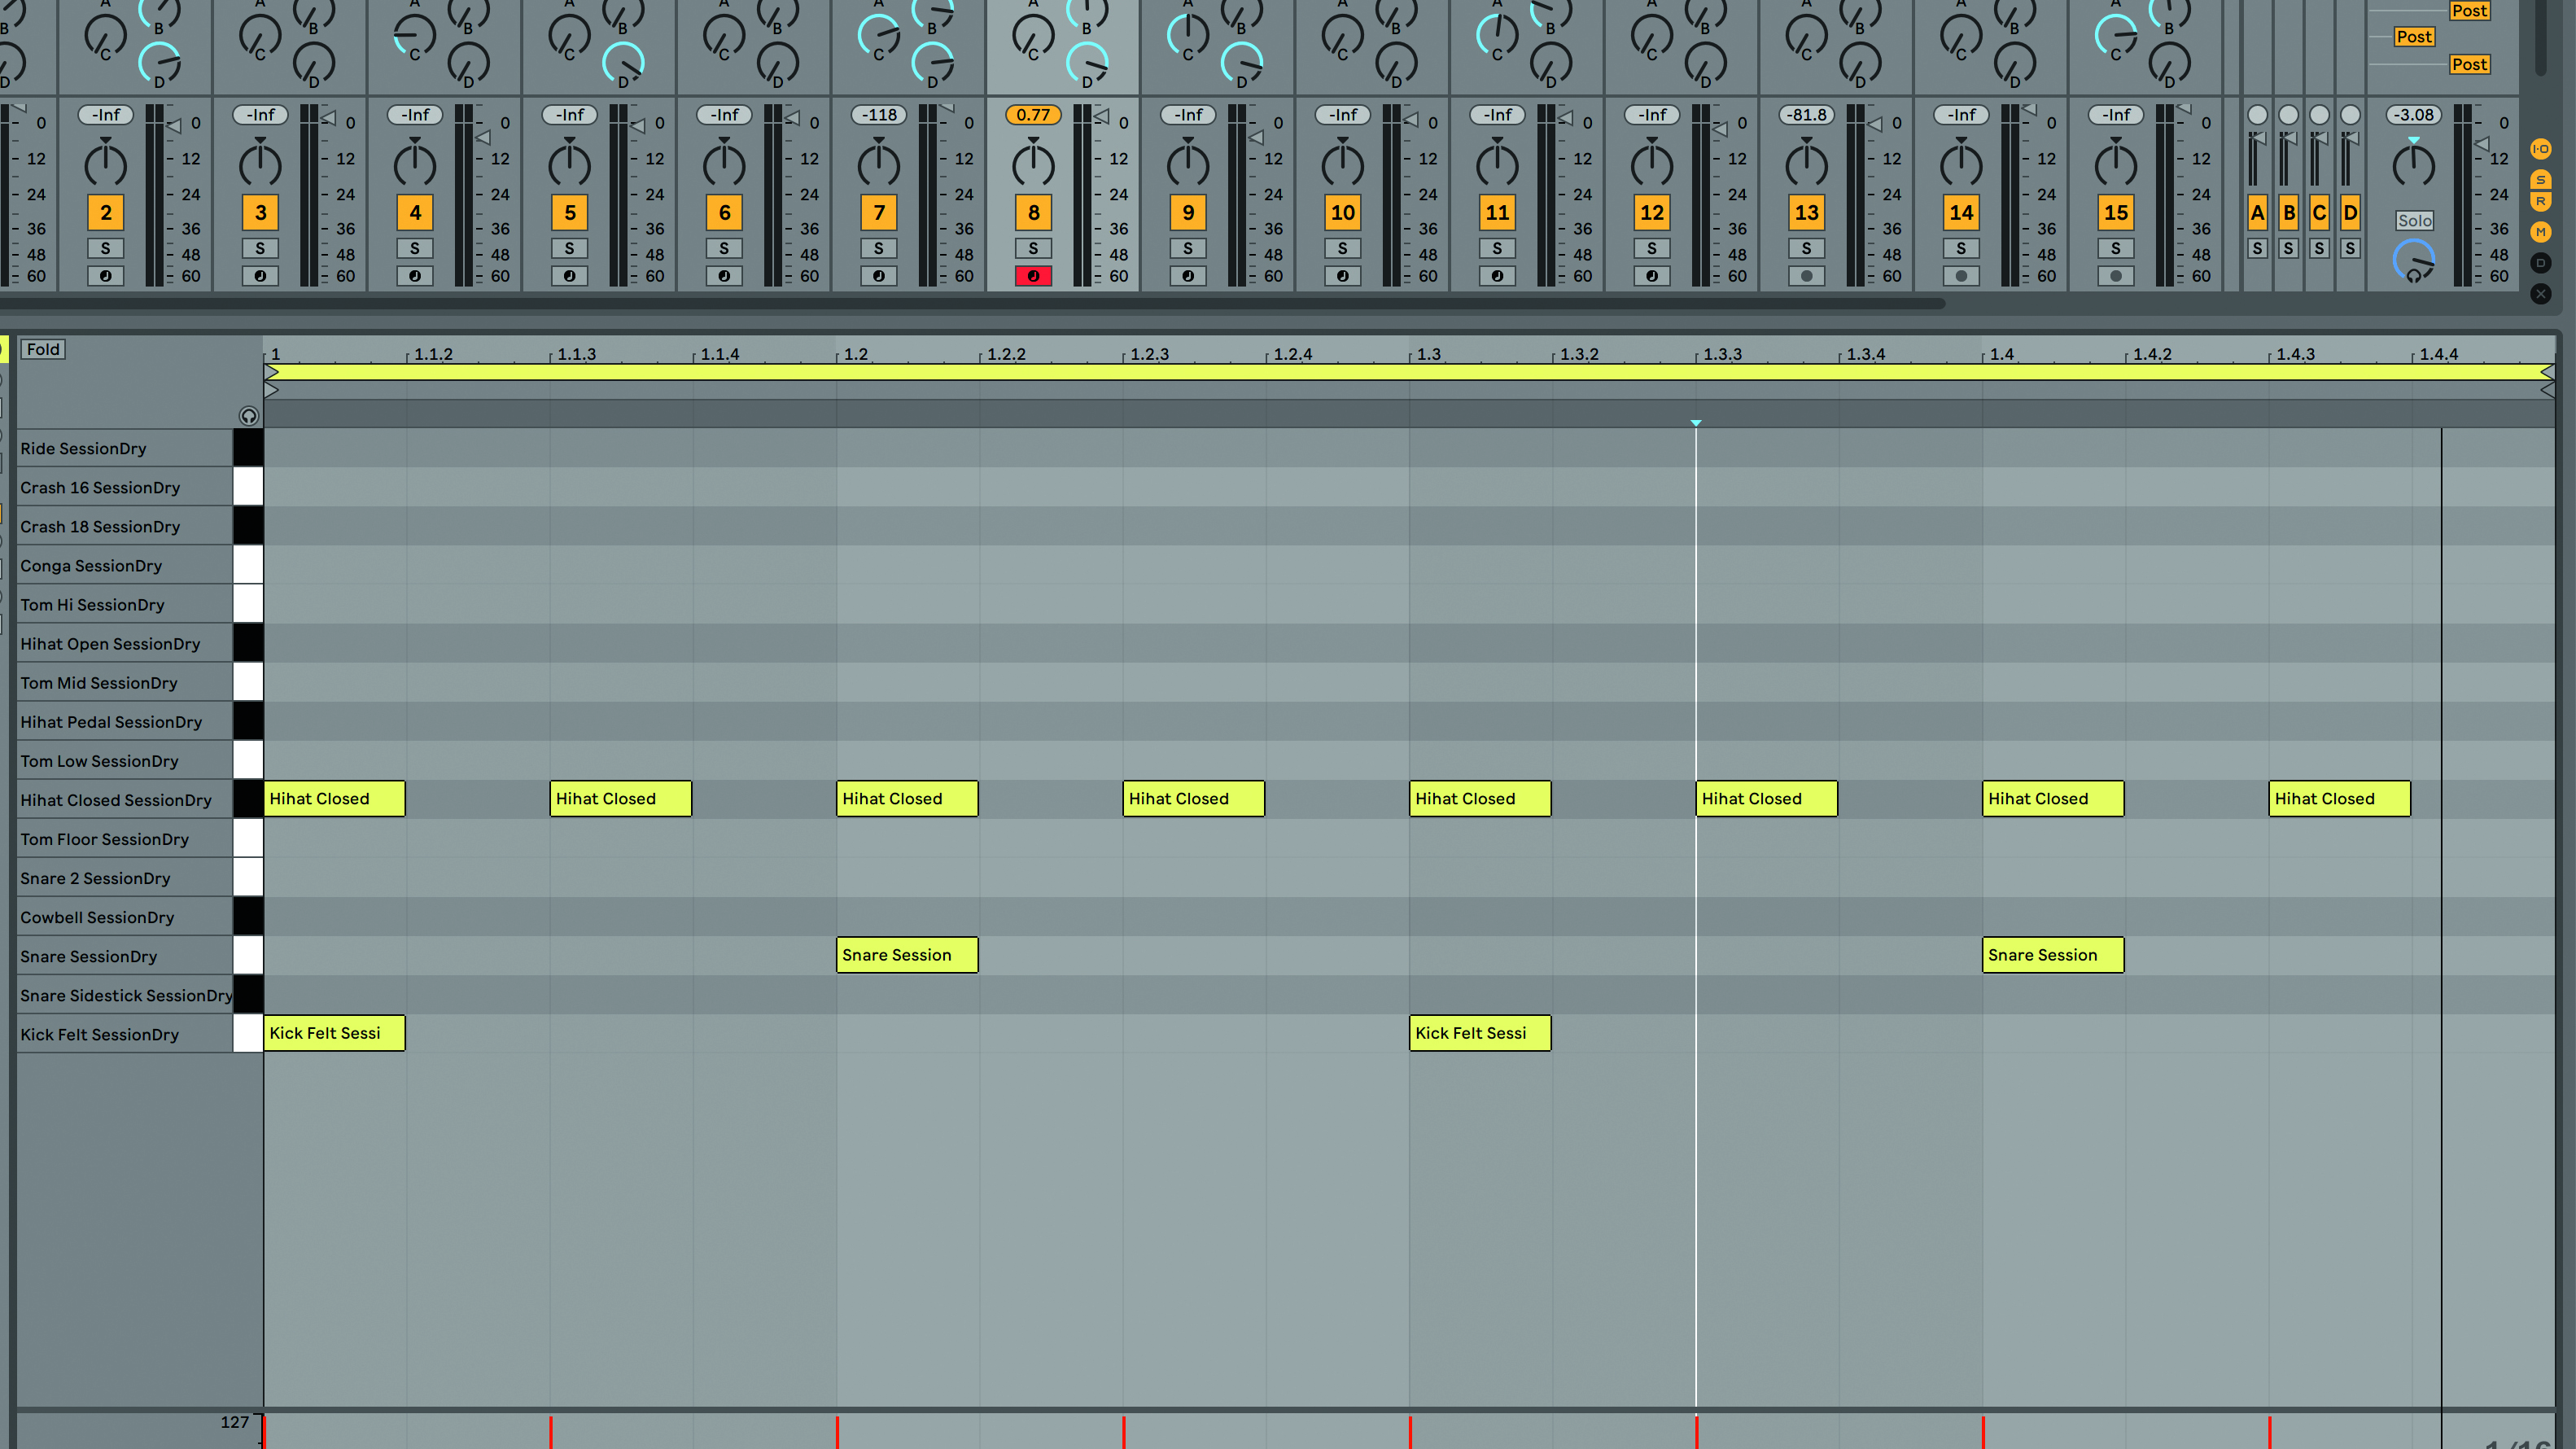
Step 1: This is about as simple as a drum kit part gets: kick on beats 1 and 3, snare on 2 and 4, and hi-hats riding on every eighth-note. If this was the chorus of our track, we might move the hi-hat part to the ride cymbal. We’ve used the Ableton Session Dry kit but most DAWs will come with some decent acoustic kits to experiment with.
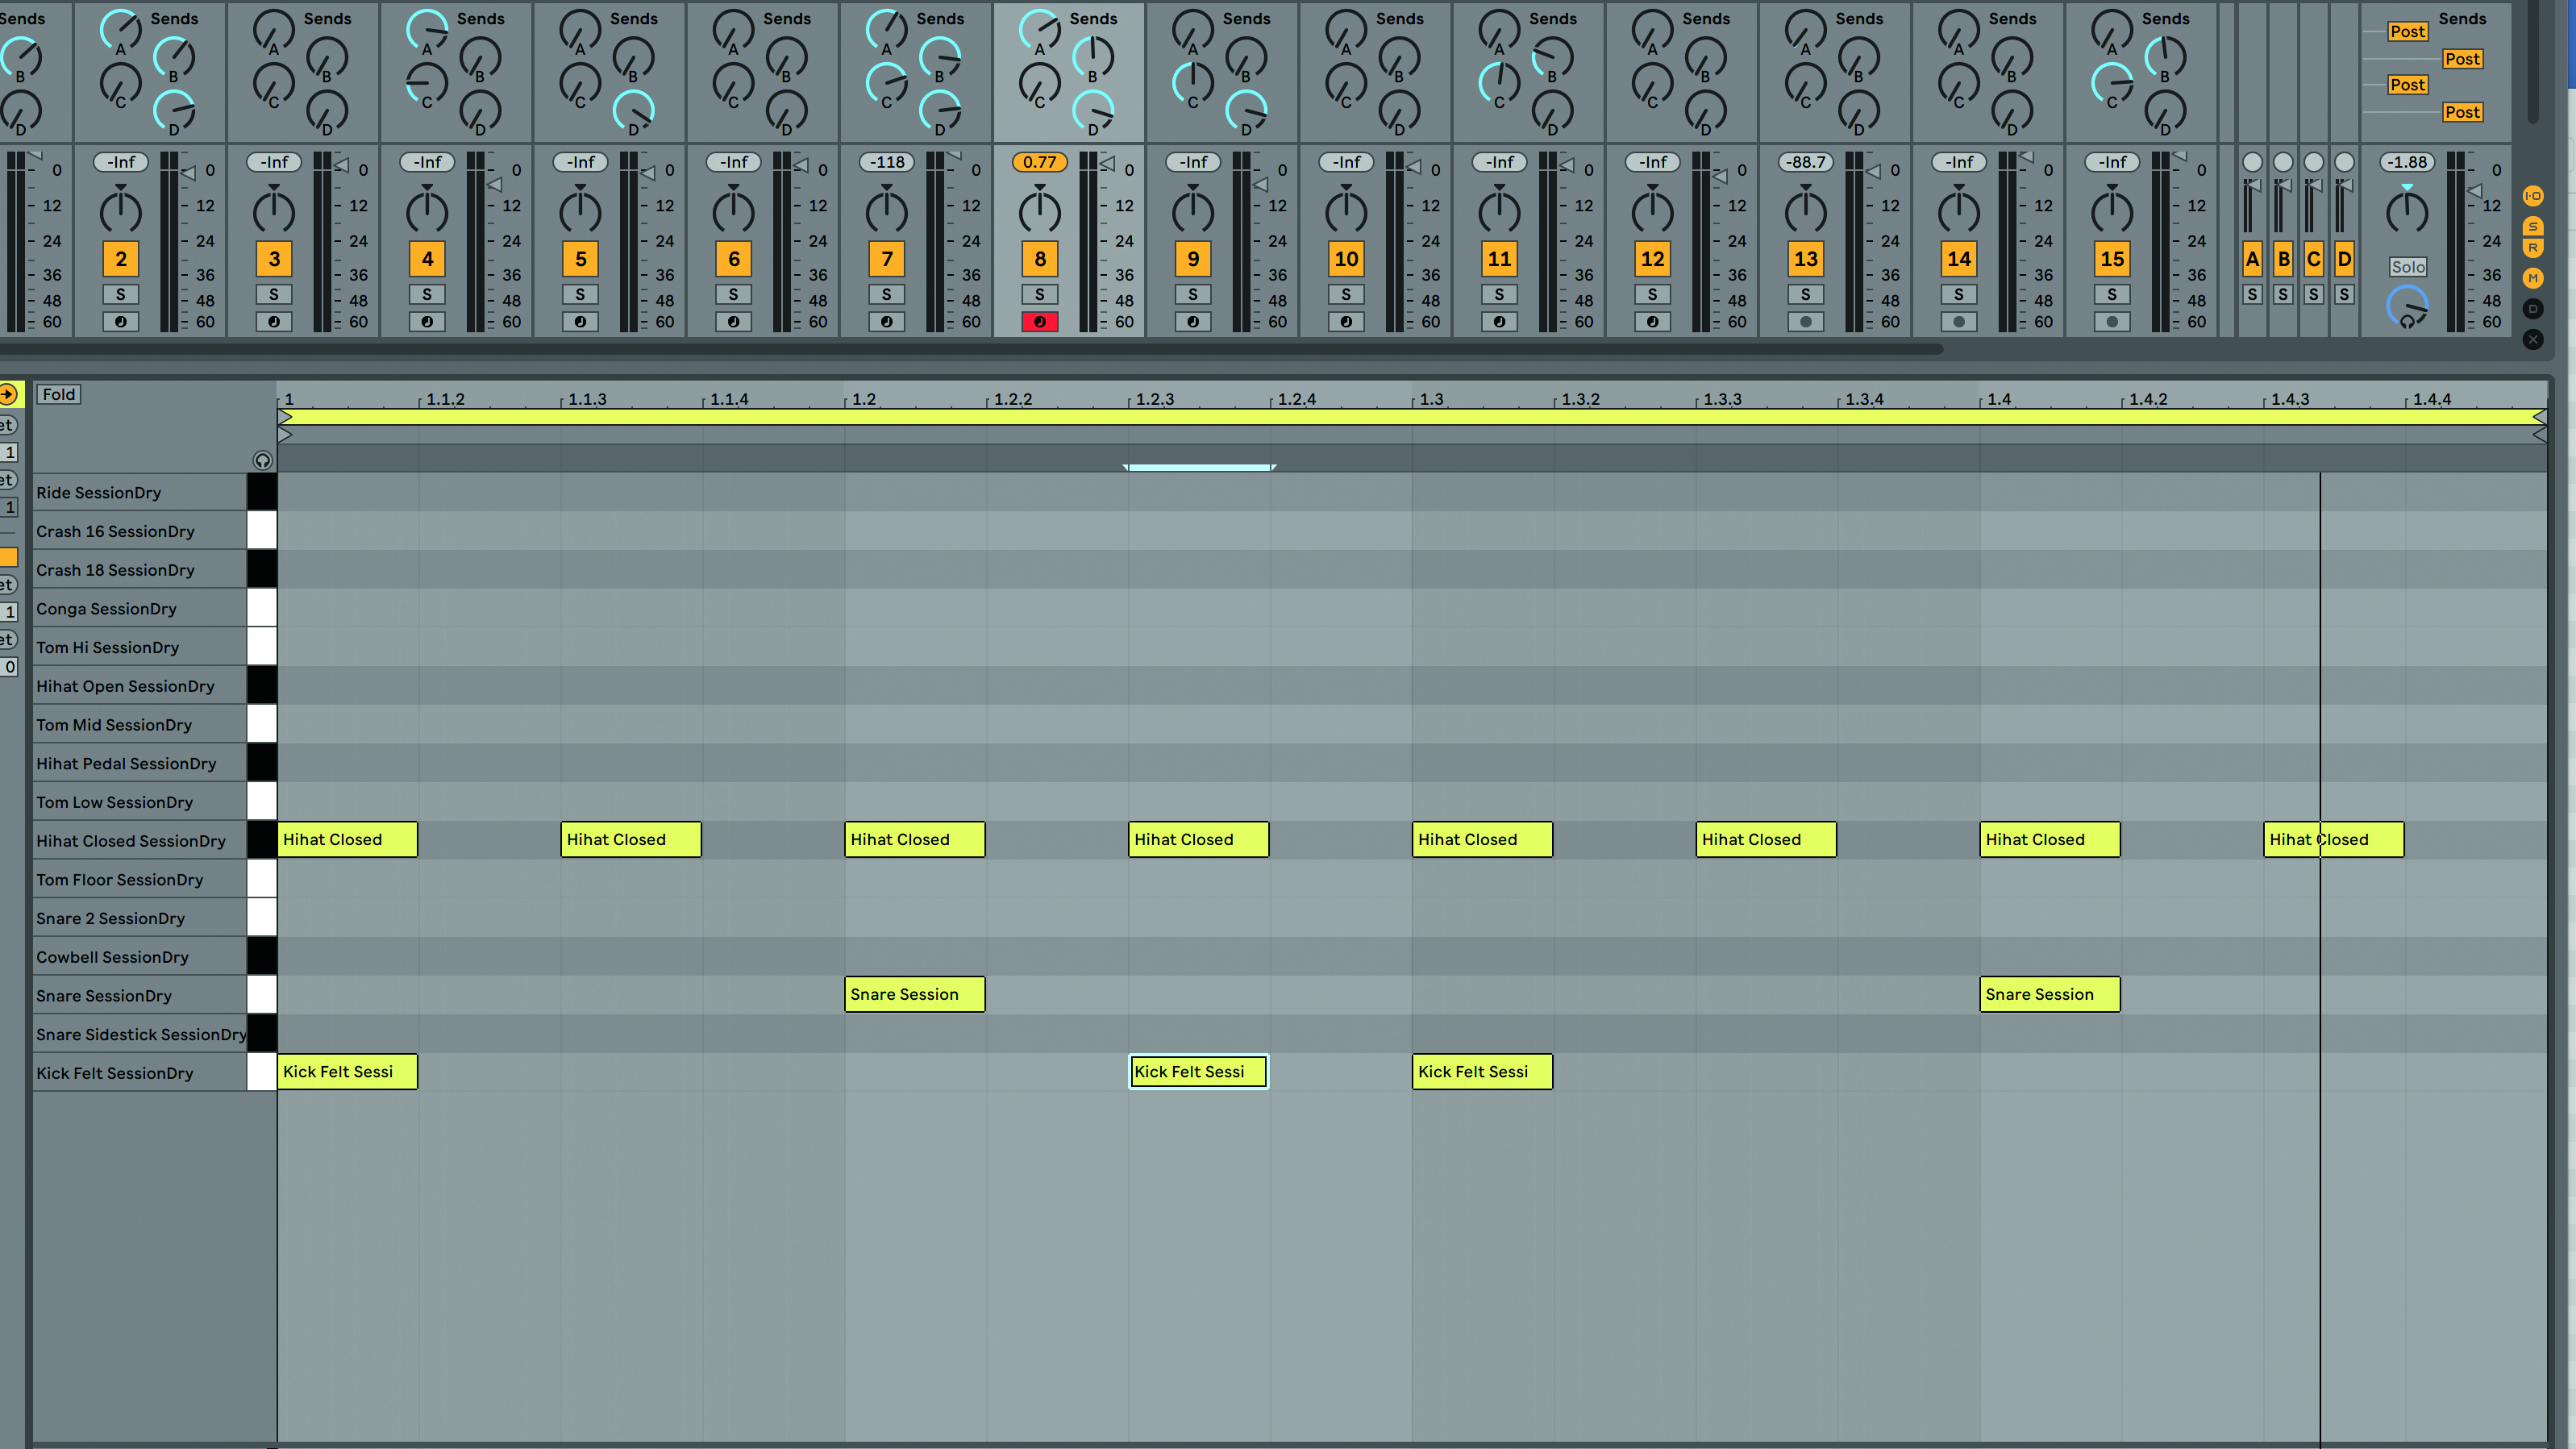
Step 2: Now we are upping the complexity a bit, so we draw in another kick drum note leading into the second half of the bar. You will hear what a big difference this seemingly minor change makes to the groove – although you still wouldn’t call it a complicated pattern.
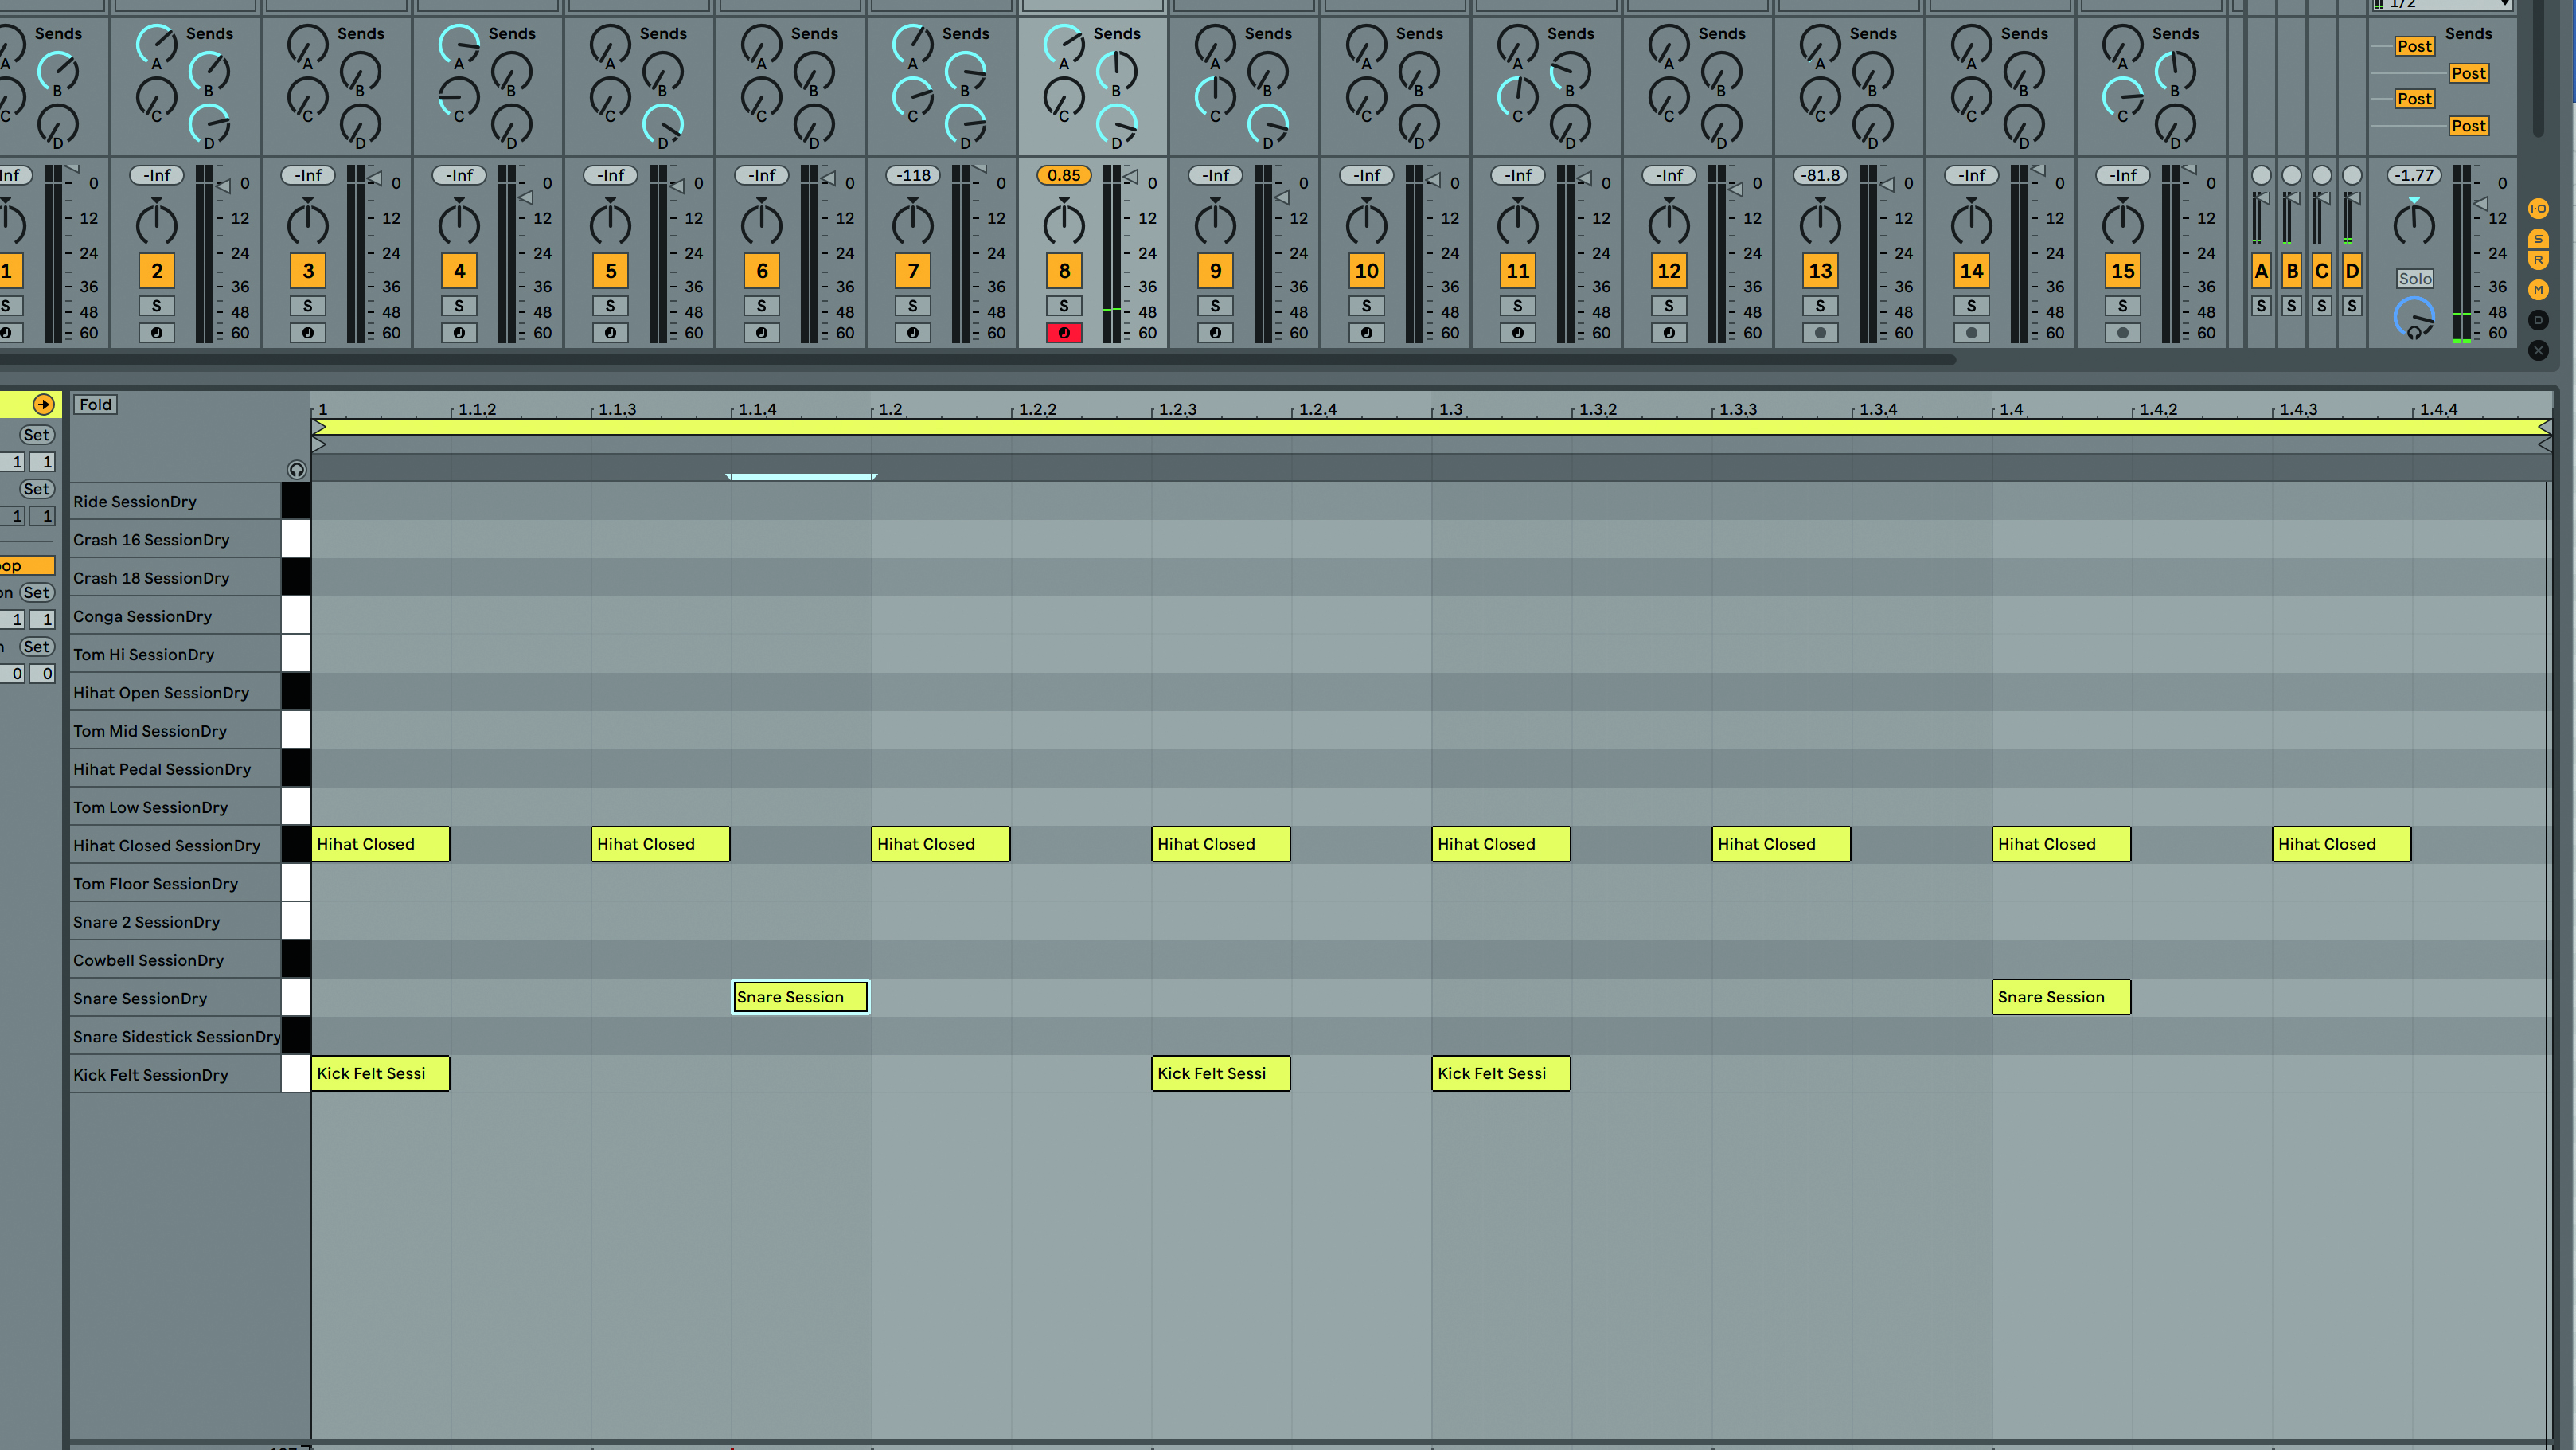
Step 3: Displacing the first snare hit makes the groove become something else altogether. At the moment our drum part is authentic in that it doesn’t make any unreasonable demands on our ‘drummer’, but it’s way too rigid and programmed-sounding to pass for the real thing.
Dynamics and timing
As you’ll have no doubt noticed, our drum part so far, while making sense in terms of playability and pattern, still sounds totally mechanical and unrealistic. This is because we drew all the notes in by hand, snapped perfectly to the grid and at a constant, fixed velocity level.
The best way to remedy this problem is to play the part in live using a MIDI keyboard or drum pads. It does require a modicum of skill and the ability to ‘feel’ the groove rather than just rigidly bash it out, but you don’t have to play the whole thing at once.
Set up a record cycle and play each element in separately as the track loops round – hats, then kick, then snare, for example. The result will be a MIDI part with naturally varying velocities and subtle timing fluctuations from beat to beat (and they do need to be subtle – if anything sounds noticeably out of time, move it closer to the grid).
If you can’t or don’t want to play your part in live, draw the notes in with snap turned off, aiming for the grid lines (and being sure to fall within a few milliseconds of them). When you’re done entering the part, manually tweak your velocity levels or use a MIDI plugin to introduce a touch of randomisation/humanisation.
Keep it believable
Varying velocities and timing is the best way to make your parts sound realistic, then, but don’t go too mad! Keep your velocities within a relatively narrow range – a drummer will strive to be as consistent as possible, so obvious leaps in volume from hit to hit will sound wrong.
For hi-hat and ride cymbal patterns, the drummer will play the notes that fall on the beat harder than those falling in between (or vice-versa, if they’re looking to accent the off-beat).
Of course, it’s not enough to trigger just the one sample per drum at varying velocities – you need a properly multisampled drum kit, so that low-velocity hits trigger samples of drums played gently, while high-velocity hits fire off
full-strength recordings.
Your DAW most likely has a decent multisampled kit built in, and there are several fine third-party solutions: Toontrack’s EZdrummer and Superior Drummer, XLN Audio’s Addictive Drums, FXpansion’s BFD series, NI’s Battery and Studio Drummer are just some of the great titles available.
Finally, an important timing consideration is push/pull: skilled drummers will deliberately play very slightly behind or ahead of the beat to create a driving or laid-back feel. To emulate this, simply apply a bit of channel delay to the whole part, or manually shift selected elements of it after you’ve made all your other edits.
Getting real with timing and dynamics
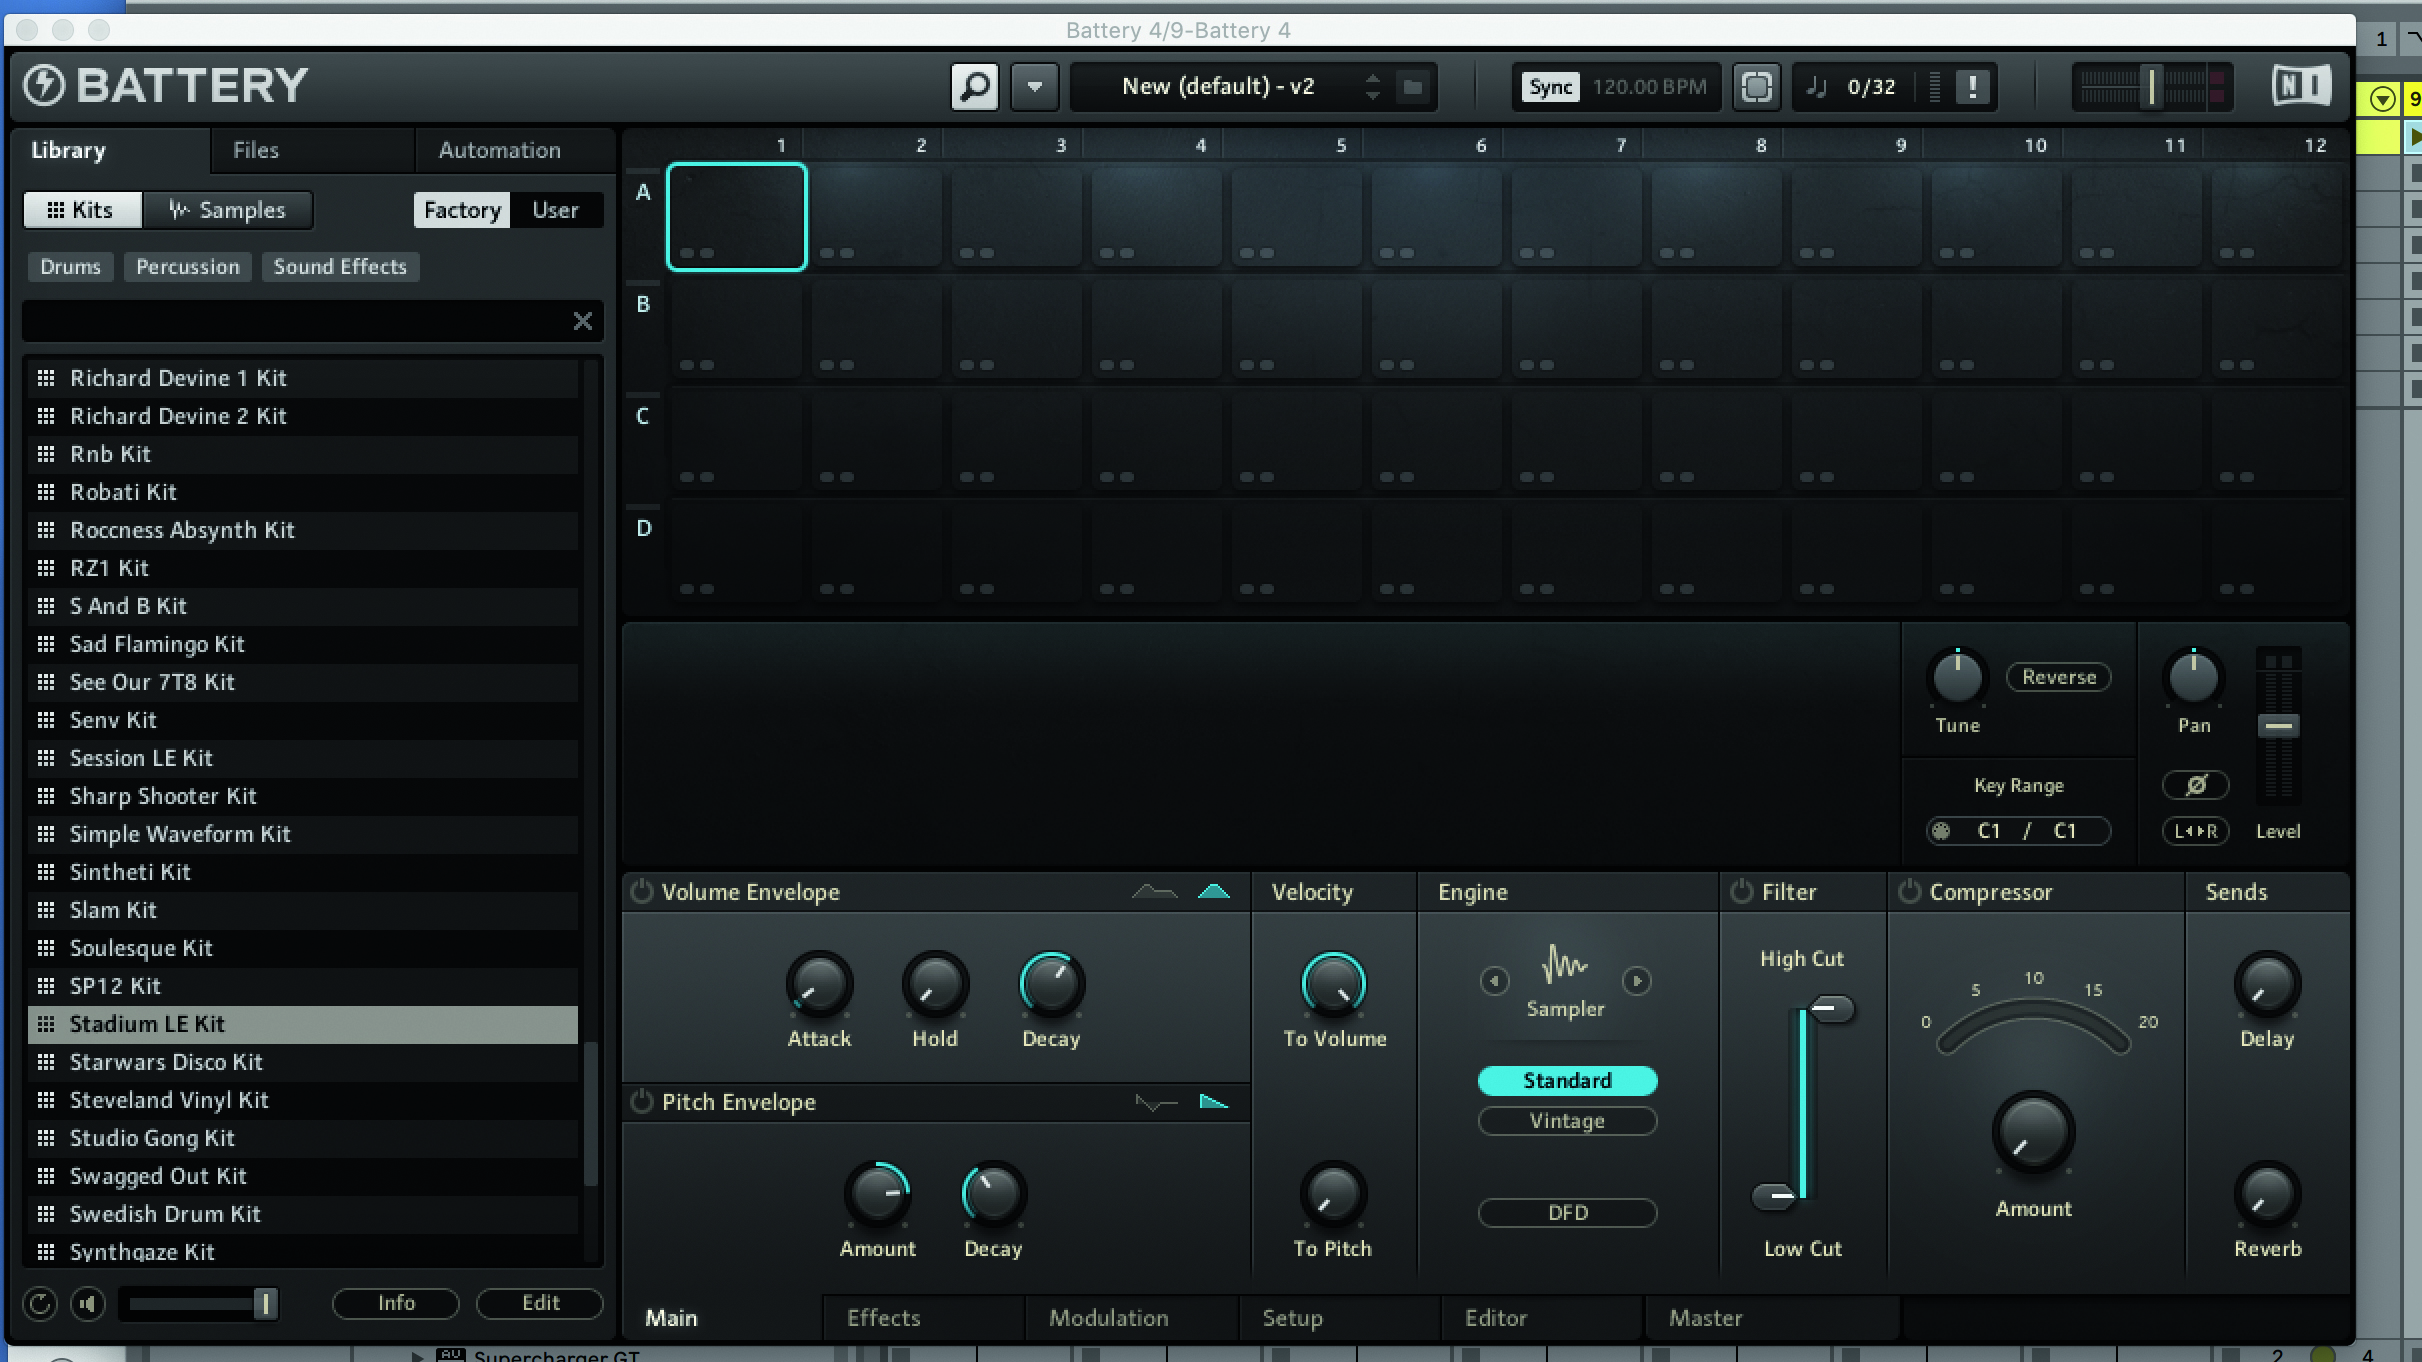
Step 1: Our drum part is currently triggering one of Ableton Live’s bundled drum kits, but you could try any of the third party options we mention in the text above. We experimented with some of the kits in Battery 4 for ours.
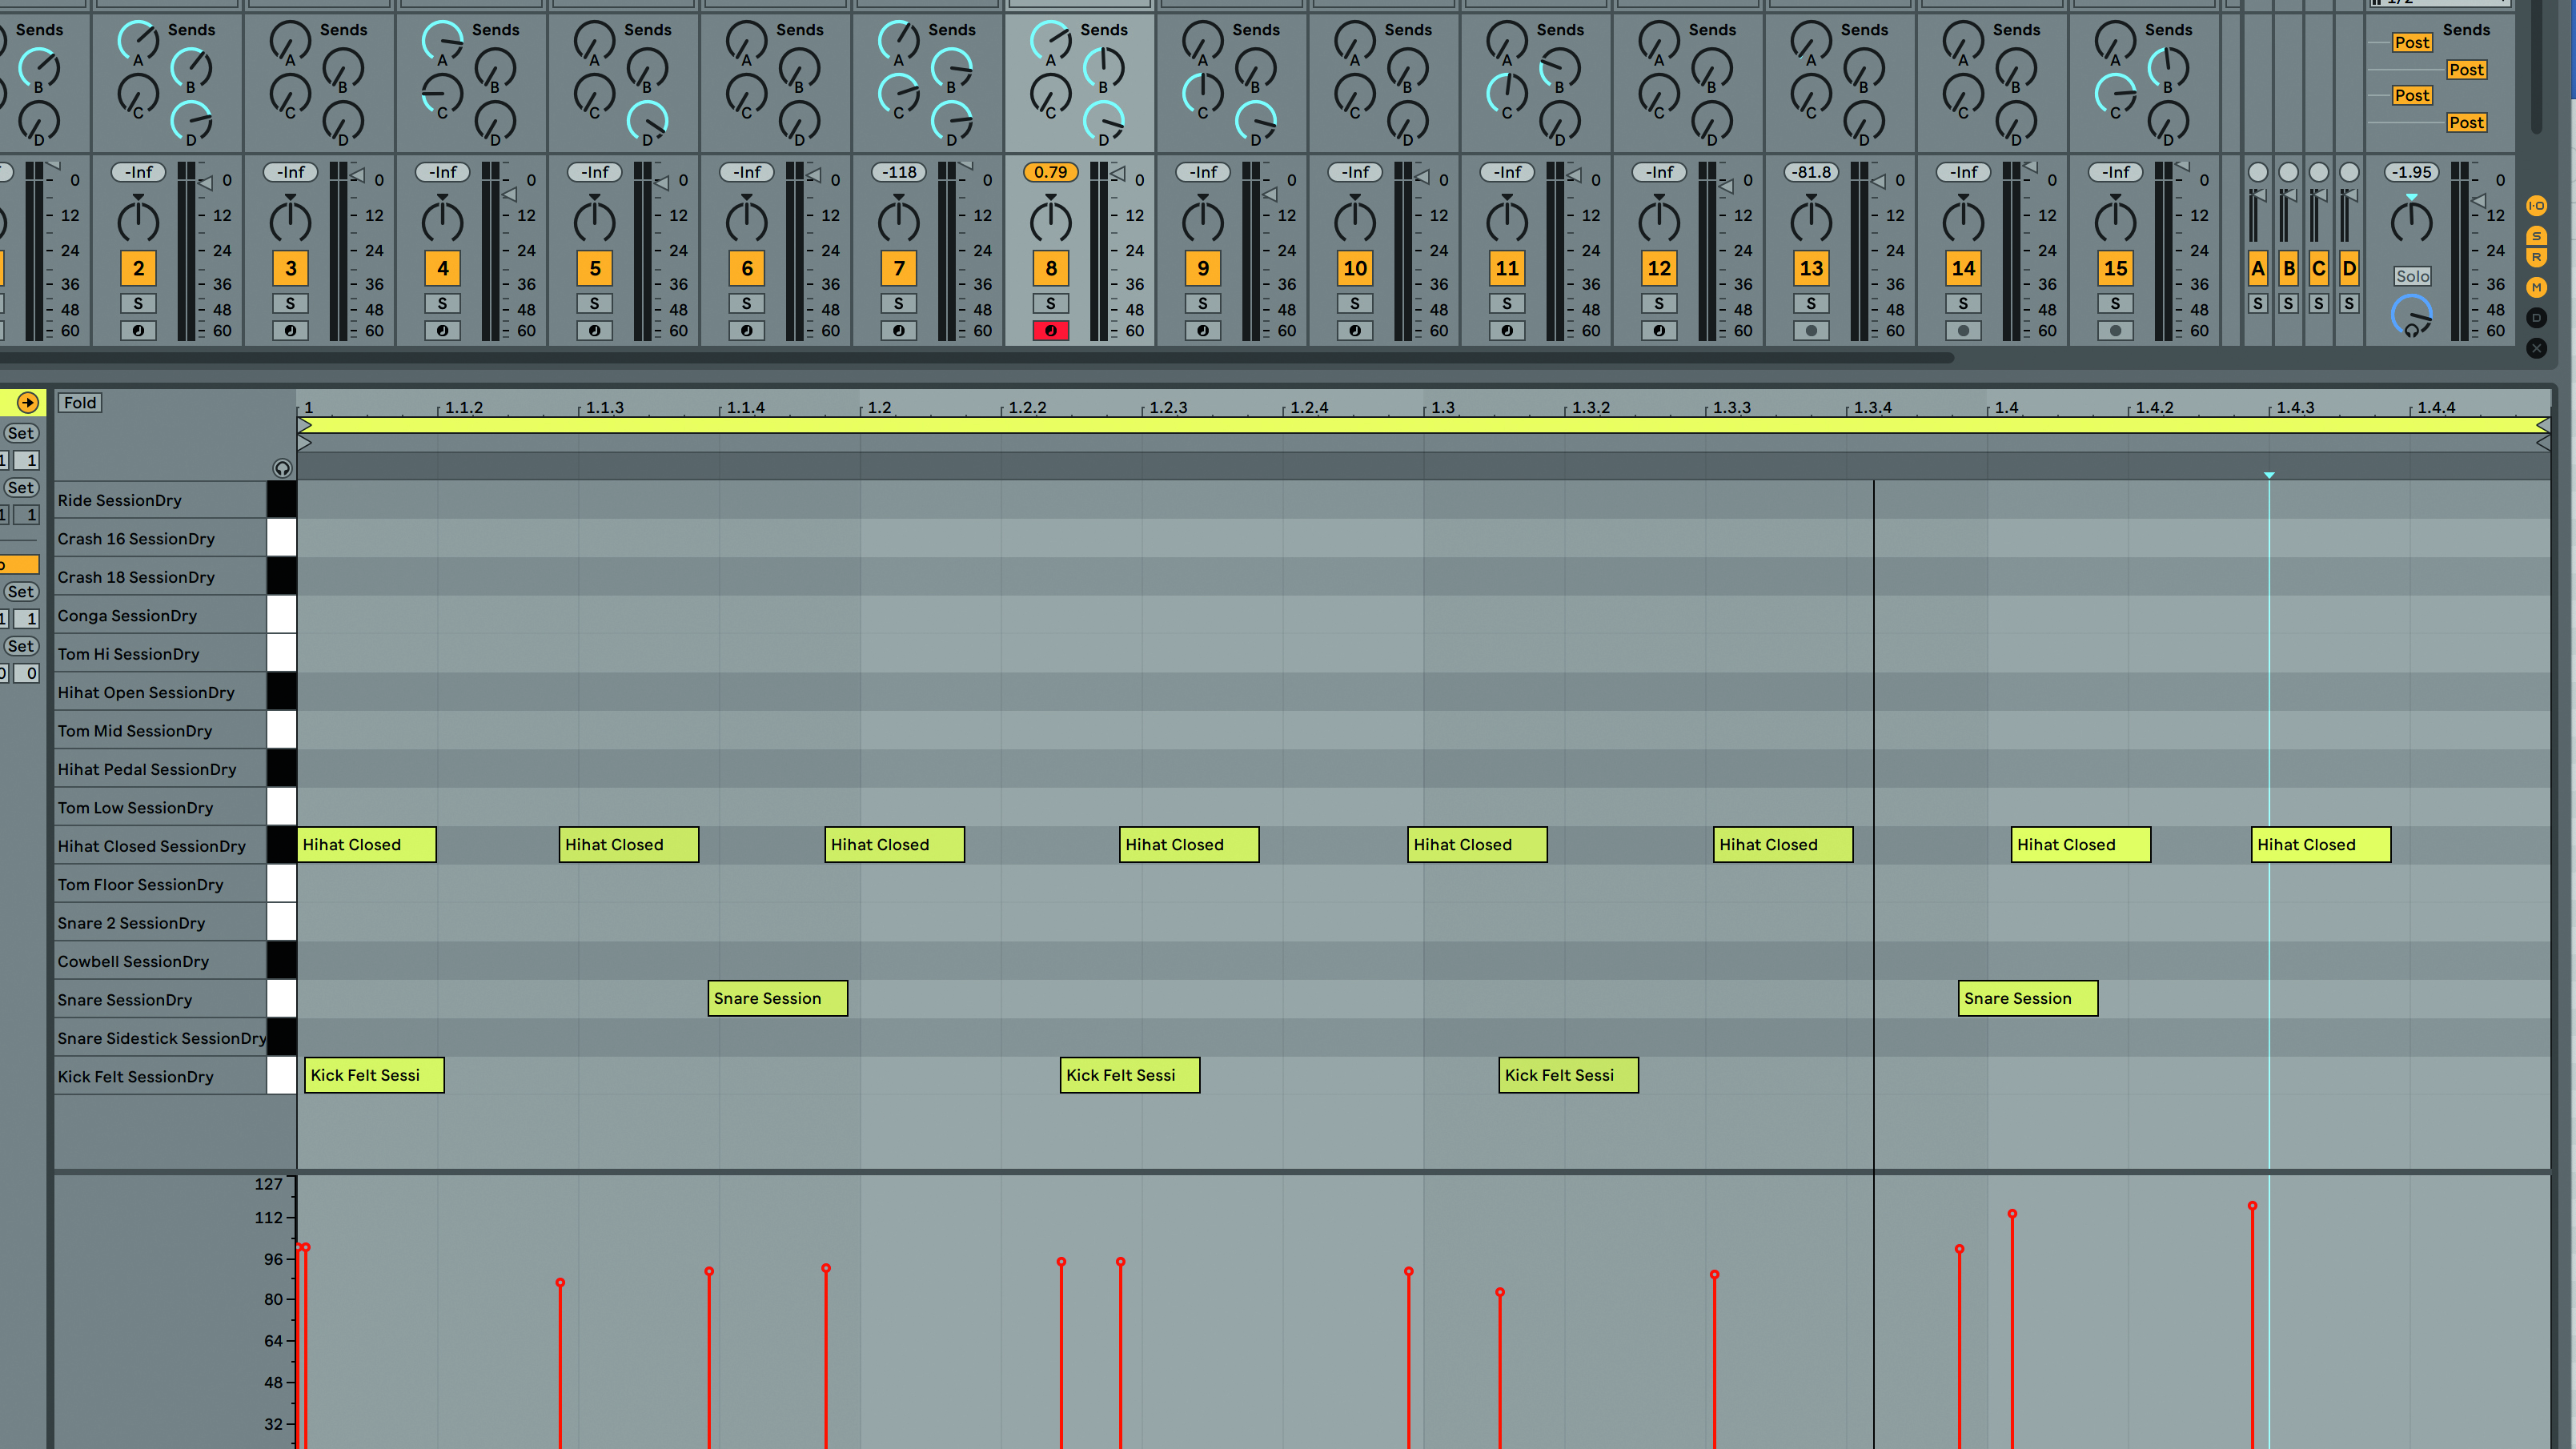
Step 2: We’ll load up our groove from the previous walkthrough in a moment, but first, here is our not so great attempt to play the same part in on a keyboard – one pass and no edits. Note the natural variations in timing and velocity. Well, we were after a more natural sound, but this might not be the ideal route for you…
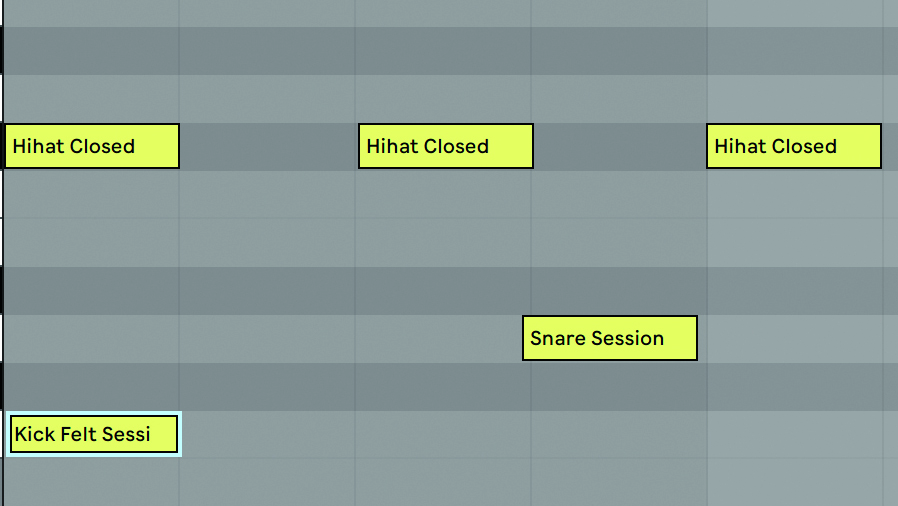
Step 3: Let’s go back to our rigid, manually programmed part. The first thing we need to do is inject some human feel into our groove by deactivating snap and moving the hits slightly ‘off the grid’, emulating the intrinsic subtle variations in timing that you get with a real drummer. These edits need to be very subtle in order to work properly.
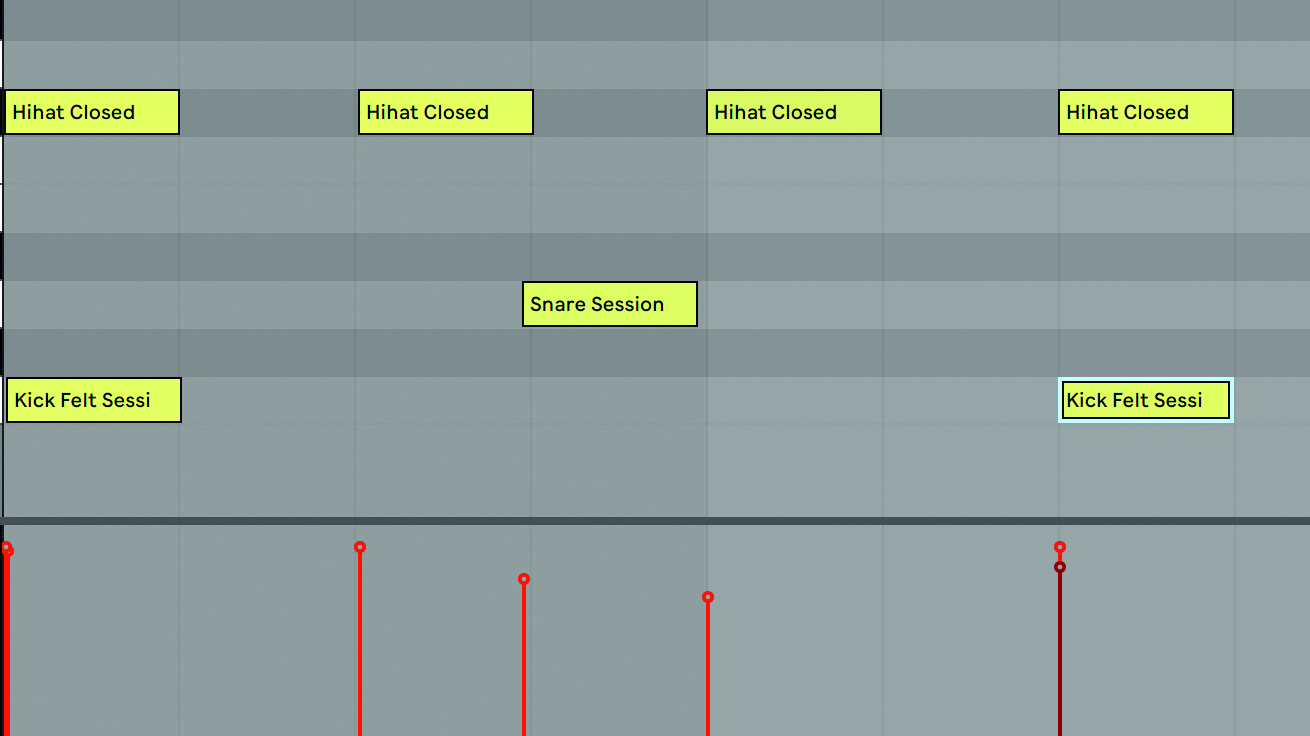
Step 4: Dynamics next, and we repeat Step 3 but for velocity rather than timing. Again, our adjustments are small – we want our snare drum hits, for example, to range from loud to slightly less loud, rather than loud to soft. We also want to make our off-beat hi-hats consistently quieter than the on-beat ones, as per the drumming norm.
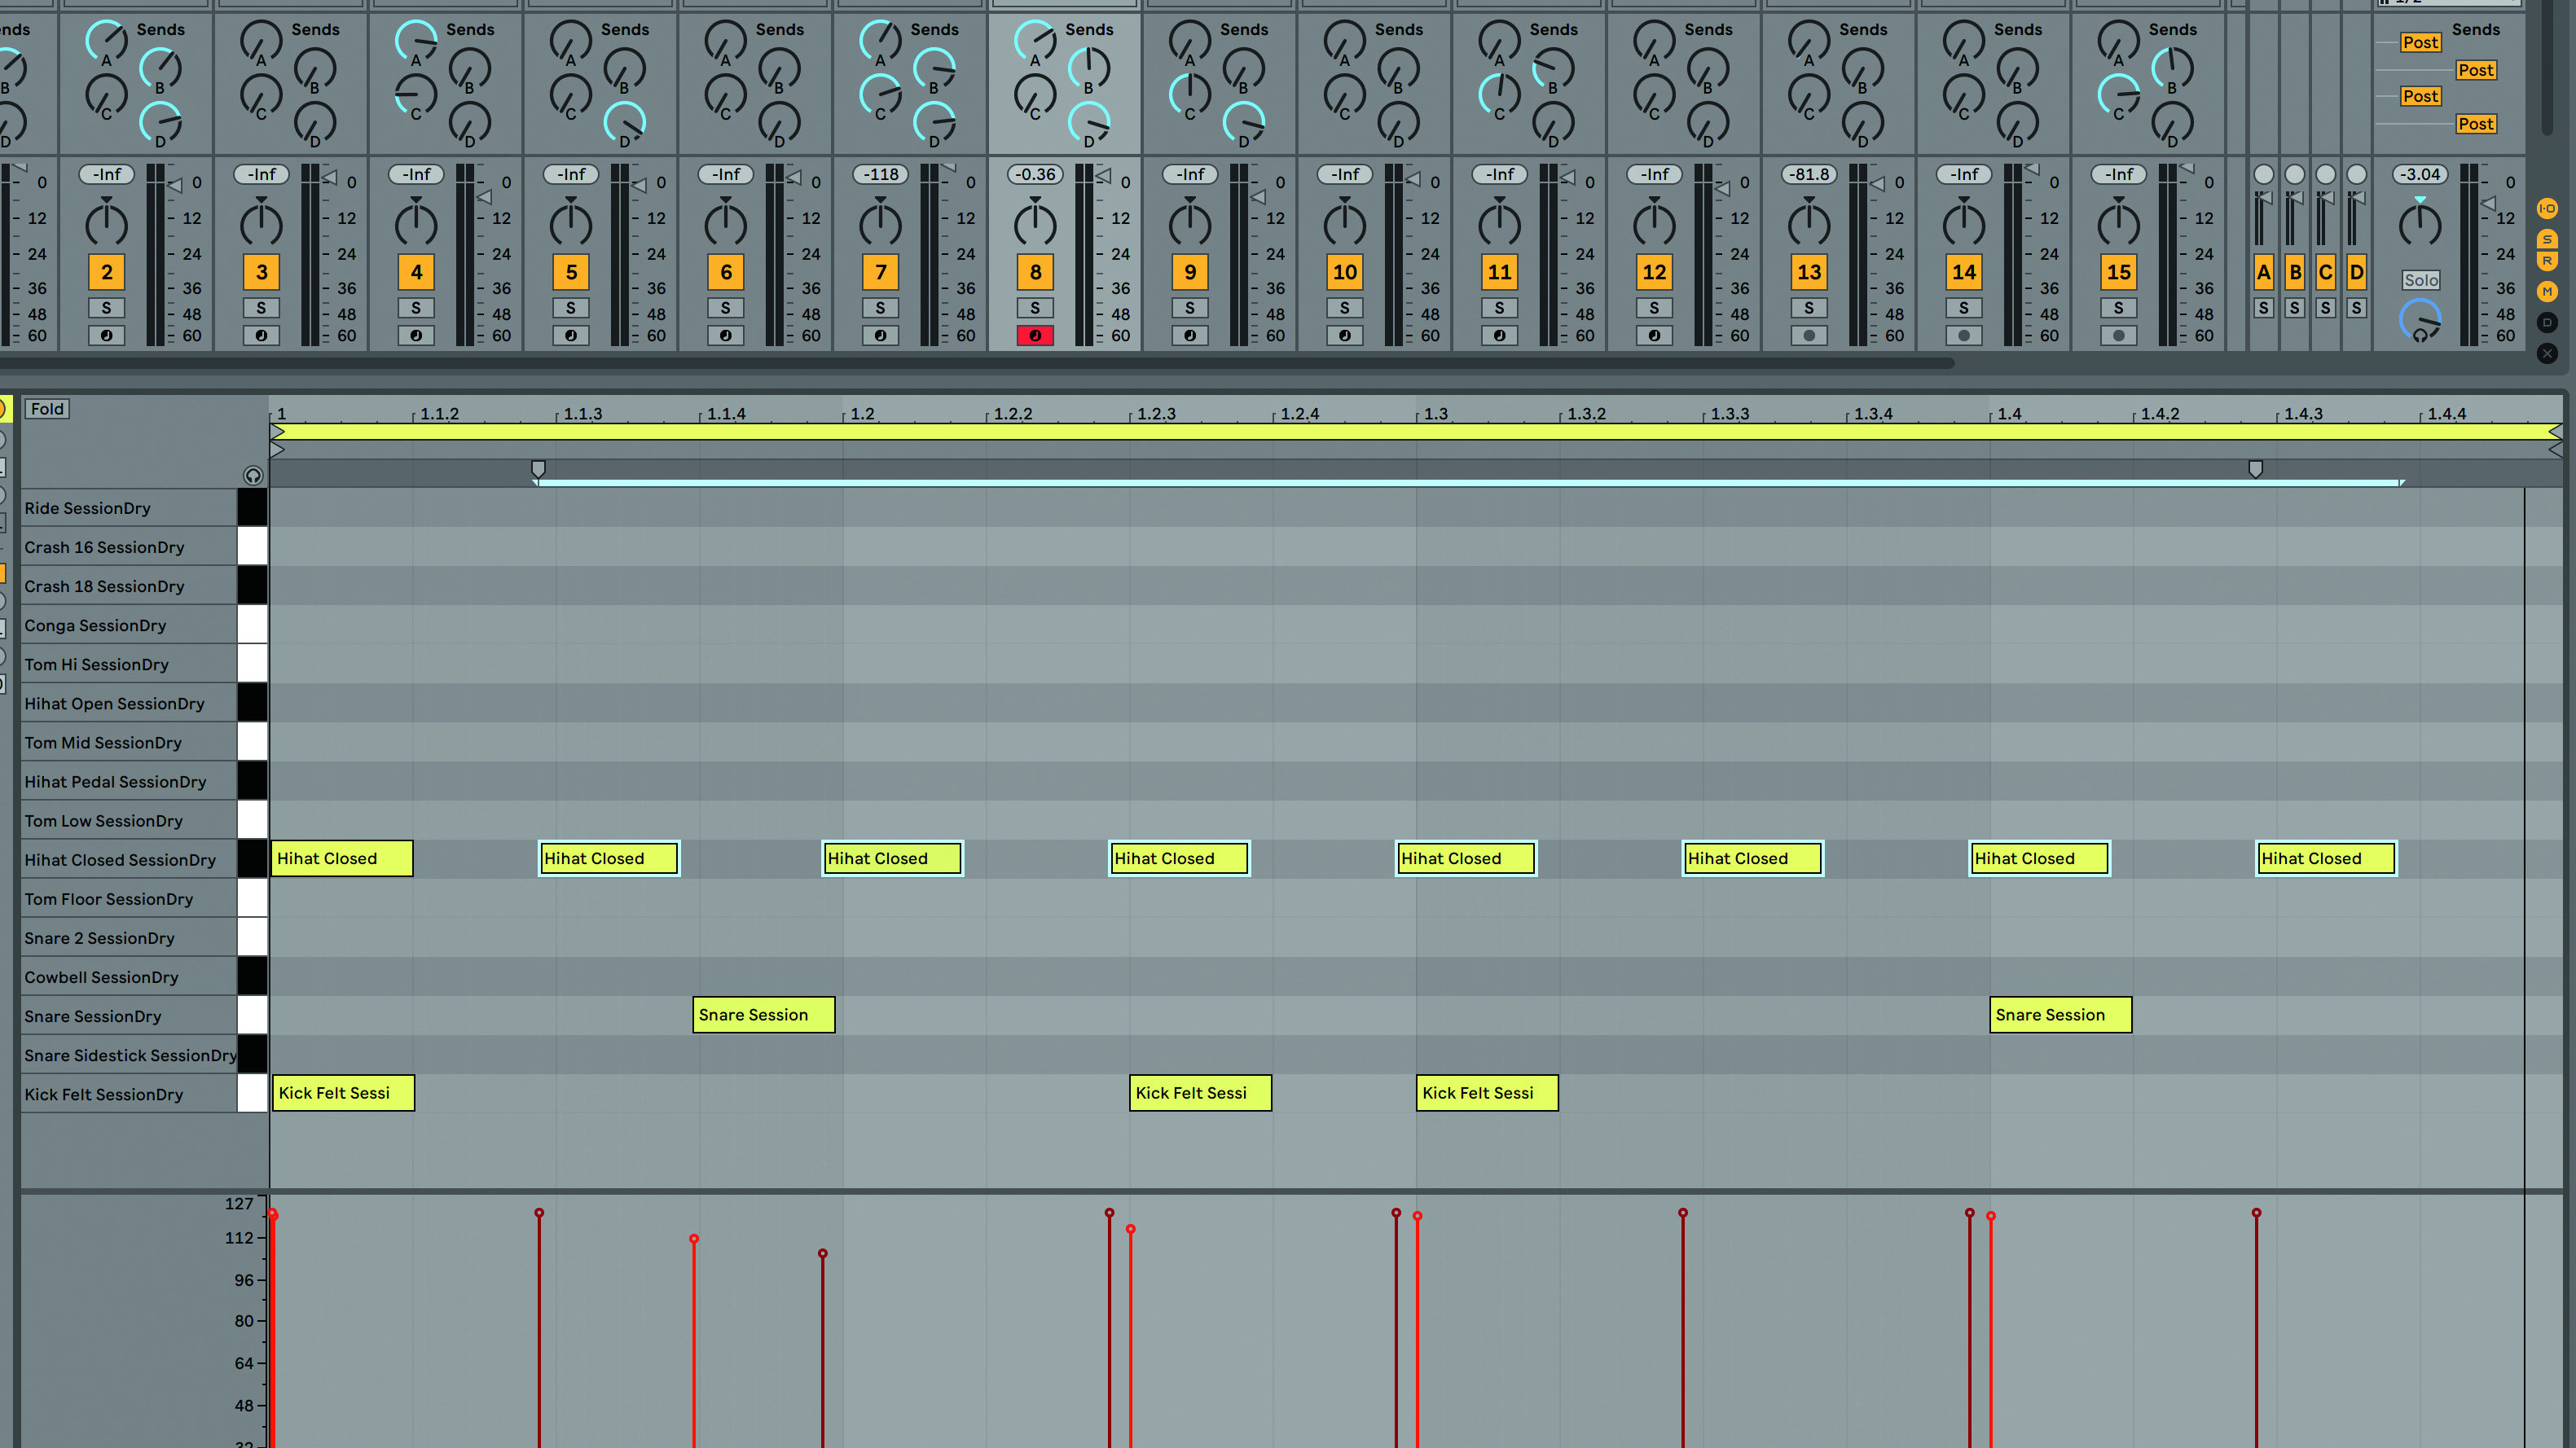
Step 5: Shifting the hits back or forwards on the timeline to emulate the push or pull of a real drummer changes the feel of the whole track. Or you could introduce your own delay – apply 12ms of Track Delay to the drums to pull them slightly behind the beat.
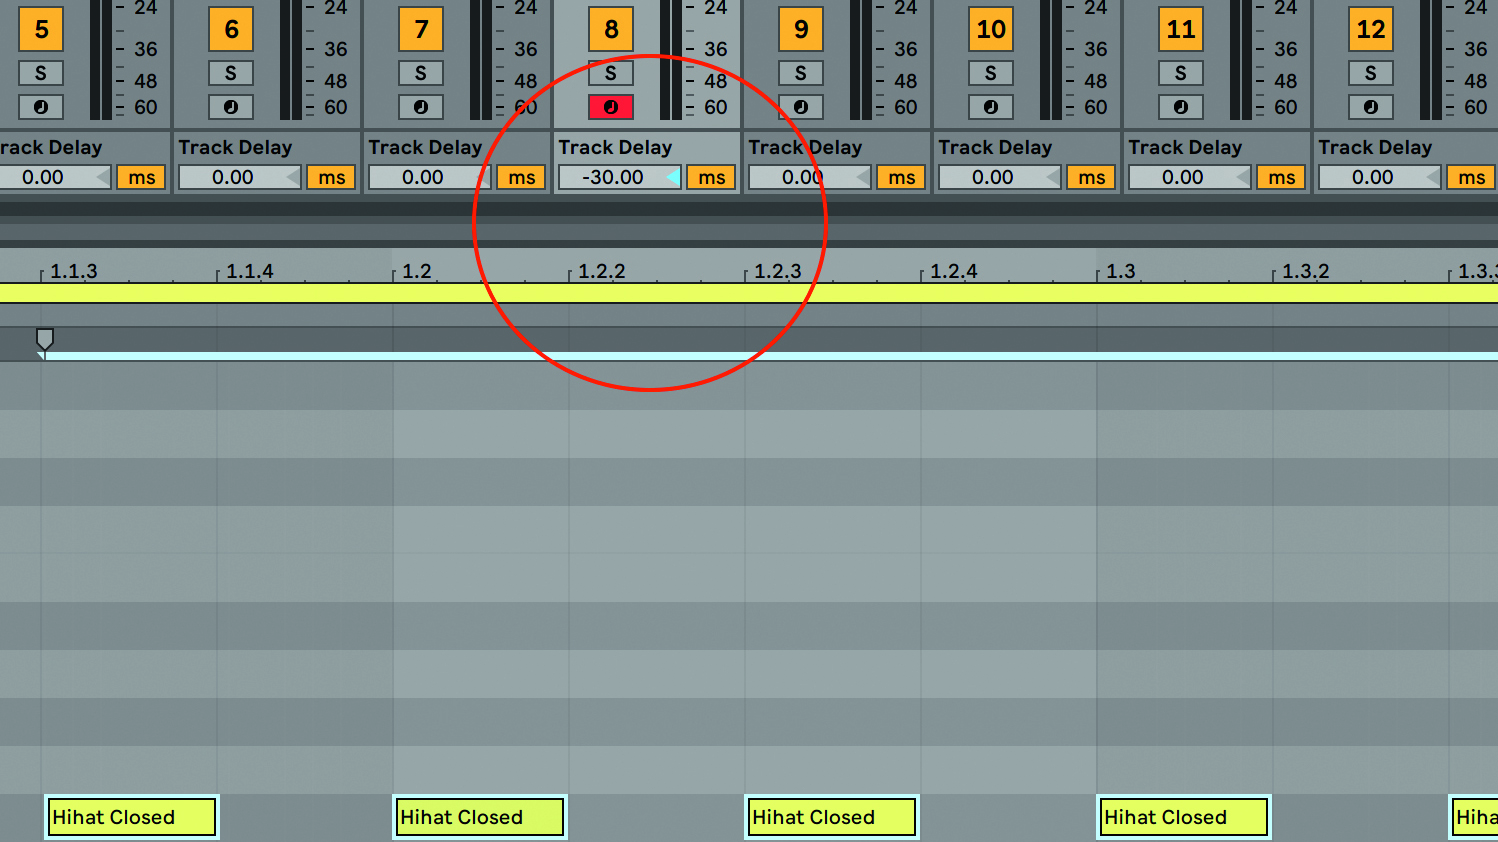
Step 6: Alternatively, we can give our tune a more driving, energetic vibe by pushing the drums ahead of the beat – dialling in -30ms of Track Delay increases the momentum nicely. Generally, you can push your drums further than you can pull them before things just start to sound out of time.
Ghost notes, accents and fills
Our groove sounds pretty authentic and ‘live’ so far, but there’s still more to do if we’re to make our drums sound like they’re being played by a real drummer with a real drummer’s brain.
To bring syncopation and a feeling of forward motion to the groove, we need to employ ghost notes. These are very quiet (often barely audible) incidental snare hits, funkily filling the spaces between hi-hat strokes. They can take the form of single hits or gentle presses, where the stick is pressed into the drumhead to create a very short, fast roll (three or four hits).
Applying ghost notes is an automatic, almost unconscious process for the experienced drummer, who will play them pretty much constantly. For the programmer who takes the time to draw or play them in, the sonic results will always be well worth the effort.
The snare drum is also used for accenting, with strategically placed full-strength hits adding character to the groove and/or emphasising other track elements. The classic example of this is the off-beat hit following the backbeat, or the drummer in a funk band rimshotting the snare in time with the brass section’s horn stabs.
Open hat strokes (whereby the left foot releases the hi-hat pedal, moving the two cymbals apart) serve a similar purpose, being deployed to lead into a bar or phrase, or doubled up with a snare hit to add bite and a burst of splashy sustain.
Fundamental fills
Every eight or 16 bars, the drummer might throw in a fill, bringing the toms and crash cymbals into play. A fill is a roll around the toms, a series of enthusiastic snare hits or any other free-flowing deviation from the groove, usually concluding with a cymbal crash (which is always accompanied by a kick or snare – you’ll hardly ever hit a crash cymbal on its own). It’s designed to lead into the beginning of the following bar, which will serve a purpose in terms of phrasing - introducing a chorus or key change, say.
Fills can be simple but effective or complex and impressive, but all the usual programming rules apply: turn the snap off; vary the velocities, bearing in mind that the first hit in a series of strokes on one drum will naturally be played harder than those that follow; and don’t ever trigger more than two things (plus kick drum and hi-hat pedal) at once. If your sound source offers them, alternating between separate left- and right-hand samples can only boost realism.
Finally, fills don’t have to be full-on. There’s nothing wrong with a simple ‘rat-a-tat-tat’ on the snare - in fact, for many tracks, anything more than that will feel like overkill. Exercise restraint in your fill programming endeavours.
Adding ghost notes, accents and fills
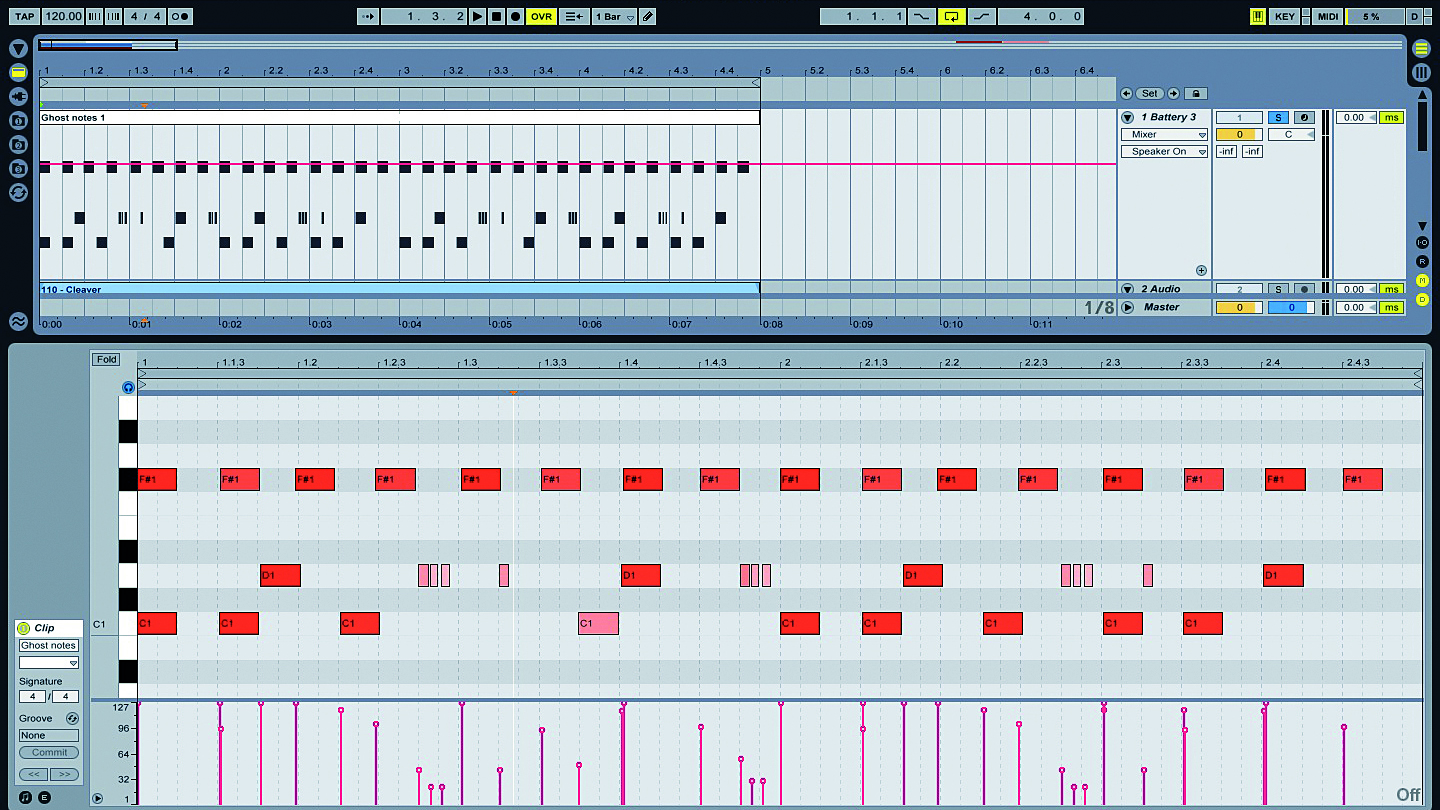
Step 1: Ghost notes add movement and syncopation to any groove. We draw in some very low-velocity snare presses and single hits between certain hi-hat hits. To make the presses sound convincing, the first hit needs to be a bit louder than the following ones.
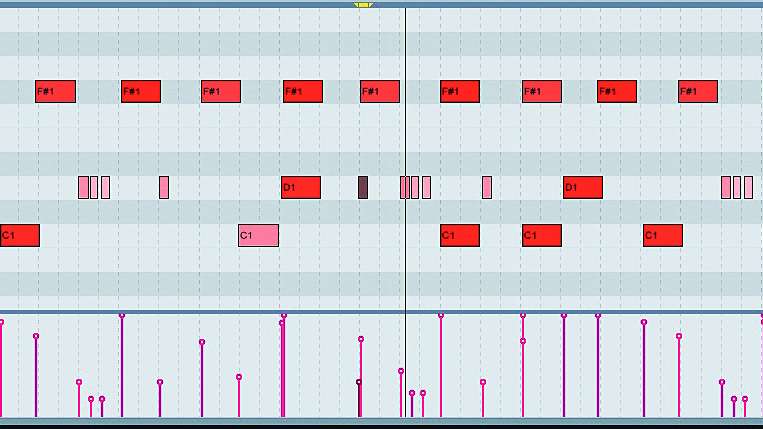
Step 2: Many drummers will play ghost notes between most of their hi-hat hits almost semi-consciously, so we add a few more. These really enhance the groove, and our drum part is now full of movement and sounding pretty funky.
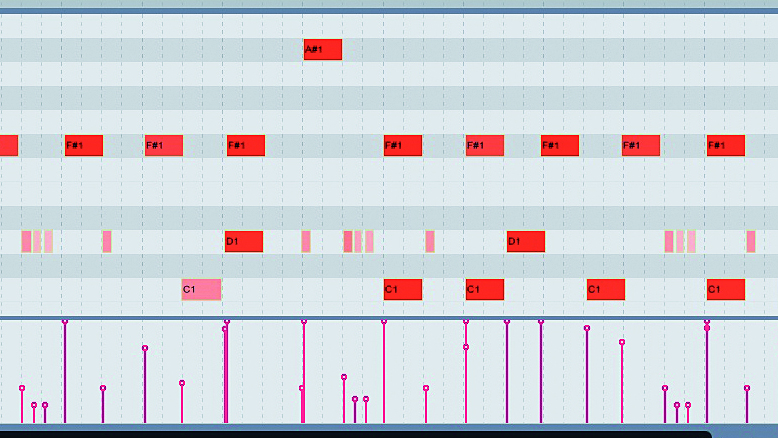
Step 3: The only thing a real drummer would take issue with in our groove now is the lack of hi-hat variation. To remedy this, we place open hi-hats at the end of the first bar of our two-bar phrase and on top of the last snare. These are choked (that is, muted) by the following closed hi-hat hit – most virtual drum kits include this feature.
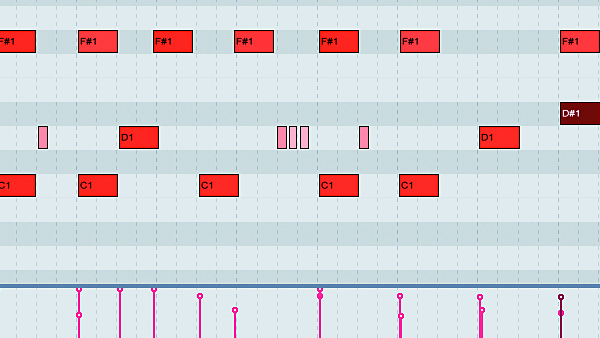
Step 4: For accenting and elaborating on the backbeat, extra full-strength snare hits are called for. These can be placed on or off the beat, depending on whether you’re aiming for syncopation or ‘beat reinforcement’. We go for syncopation most of the way here, with a big on-beat accent at the end of the phrase triggering a rimshot sample.
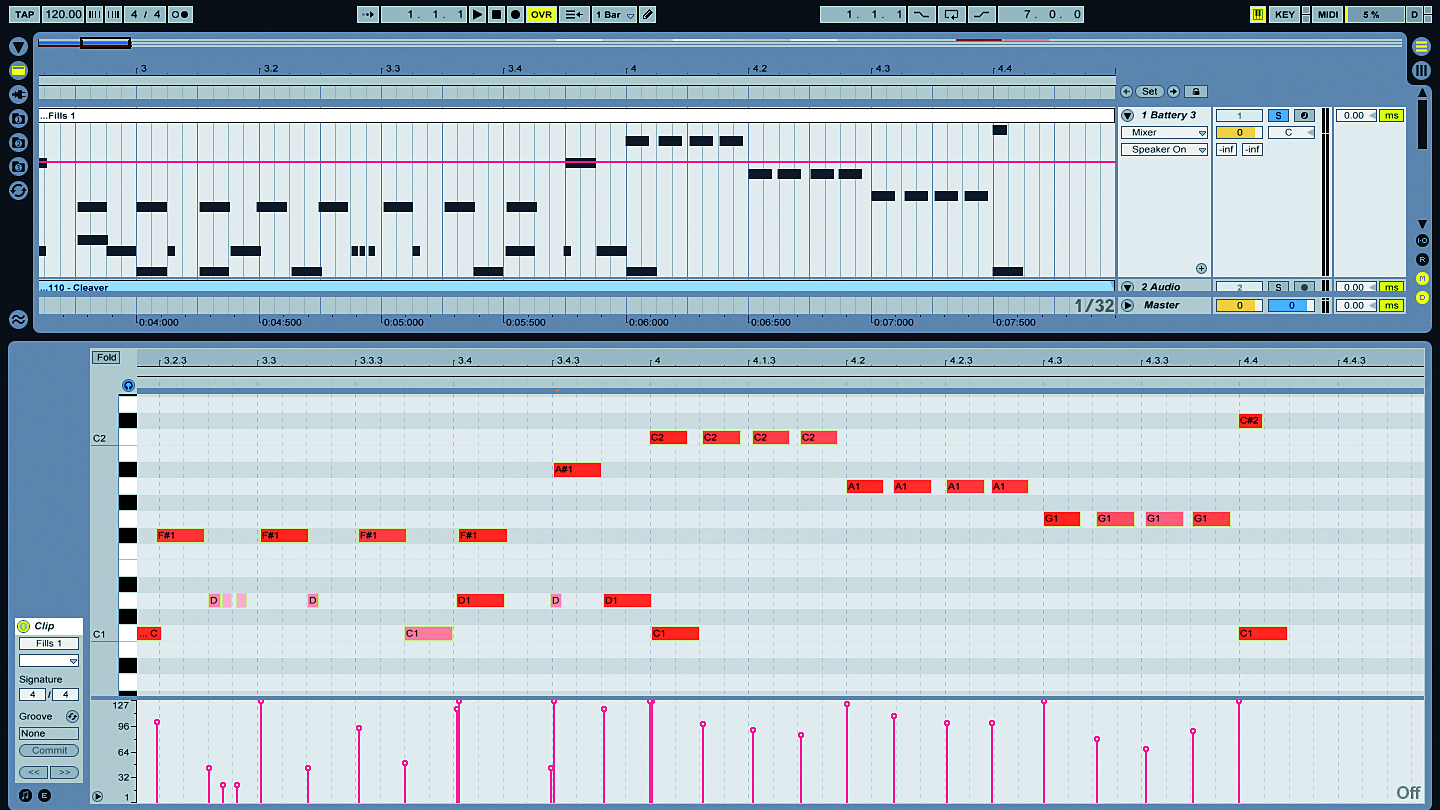
Step 5: Fills are used to mark the ends of phrases and lead into verses, choruses, middle eights, etc. Our first example is incredibly simple – the clichéd 16th-notes round the toms, with a cymbal smash at the end. We show you this for demonstration purposes only – don’t ever use it unless you’re specifically going for a naive, amateurish feel!
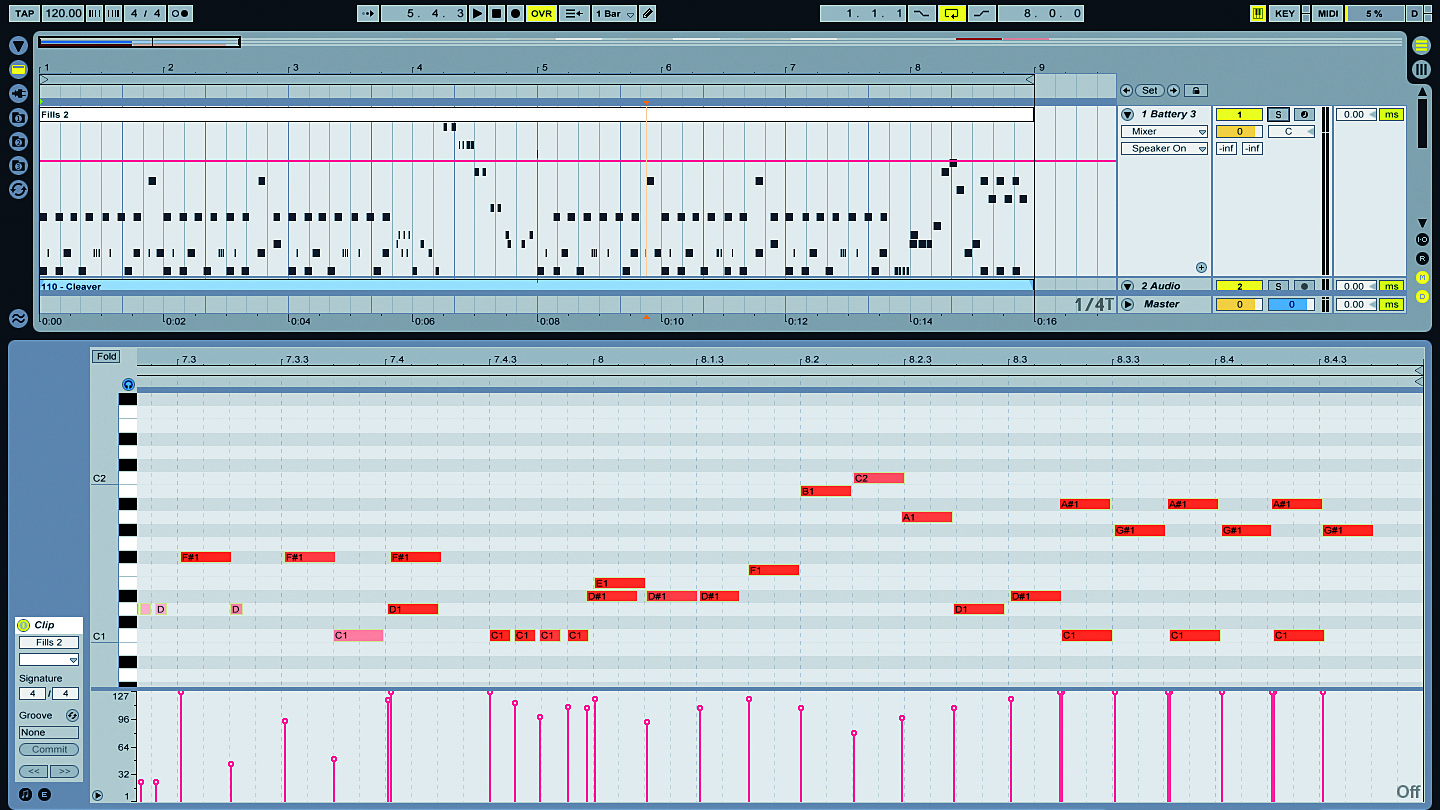
Step 6: This is the sort of thing a skilled drummer would actually play as a fill! We include a variety of snare articulations, different samples for left- and right-hand strokes and a set of Bernard Purdie-style hi-hat kicks (at maximum velocity). We’ve even thrown a tearing double-kick drum rip in there! We’ve drawn everything in by hand, with snap off.
MusicRadar is the number 1 website for music makers of all kinds, be they guitarists, drummers, keyboard players, djs or producers...
GEAR: We help musicians find the best gear with top-ranking gear round-ups and high- quality, authoritative reviews by a wide team of highly experienced experts.
TIPS: We also provide tuition, from bite-sized tips to advanced work-outs and guidance from recognised musicians and stars.
STARS: We talk to musicians and stars about their creative processes, and the nuts and bolts of their gear and technique. We give fans an insight into the actual craft of music making that no other music website can.
You must confirm your public display name before commenting
Please logout and then login again, you will then be prompted to enter your display name.
