How to cut a virtual vinyl record in your DAW
Get in the groove with our guide to emulating vinyl sonics in your music production software
Want all the hottest music and gear news, reviews, deals, features and more, direct to your inbox? Sign up here.
You are now subscribed
Your newsletter sign-up was successful
Vinyl has a ‘rounded’, ‘warm’ sound that’s in part dictated by the physical limitations of the format. As well as having less dynamic range than CD-quality audio, the mechanics of vinyl as a playback medium means that things we take for granted in the digital domain won't necessarily translate well to vinyl.
For example, it’s difficult to cut out-of-phase material such as stereo bass onto vinyl, as the lathe’s cutting head will try and cut the groove both laterally and vertically at the same time, leading to skipping when the record is played back. This is why the common consensus when mixing has always been to keep low-frequency instruments such as kick drum and bass centered in the mix.
It’s also a struggle to press audio with excessive sibilance or high-frequency energy onto vinyl for two reasons. First, excess sibilance can blow up the cutting stylus, so vinyl cutting systems feature in-built high frequency limiting, protecting the stylus by aggressively reducing excessive high-mid and treble energy. Second, treble frequencies on vinyl distort before bass on playback, as the stylus has problems tracking extreme high-frequency content.
Additionally, the further a record is played towards the label, the more the sound quality decreases. This is because the distance around the record is longer for the outside grooves than it is for the inside ones, while the record plays at a fixed speed throughout, meaning the outside grooves offer better resolution and high-frequency reproduction than the inside grooves. Combine these restrictions with the surface noise, pops, crackle and hiss that even a well-looked after piece of wax can exhibit, and you end up with a more lo-fi, characterful overall sound compared to digital formats.
With all that explained, let's emulate the sound of a vinyl in our DAW!
For more virtual vinyl action, pick up the January 2019 edition of Computer Music.
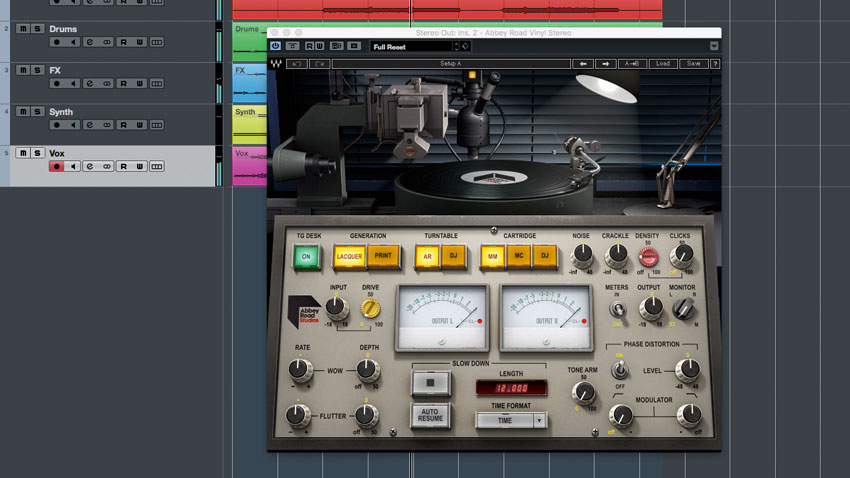
Step 1: We can preview what a track might sound like when transferred to vinyl by auditioning the mix through suitable processing. After dropping our Tutorial Files (click here to download) into a fresh 128bpm project, we load Waves’ Abbey Road Vinyl plugin onto the master output. This plugin emulates the vinyl cutting and playback process. First, we’ll need to process our mix so that it’s ready to ‘cut’…
Want all the hottest music and gear news, reviews, deals, features and more, direct to your inbox? Sign up here.
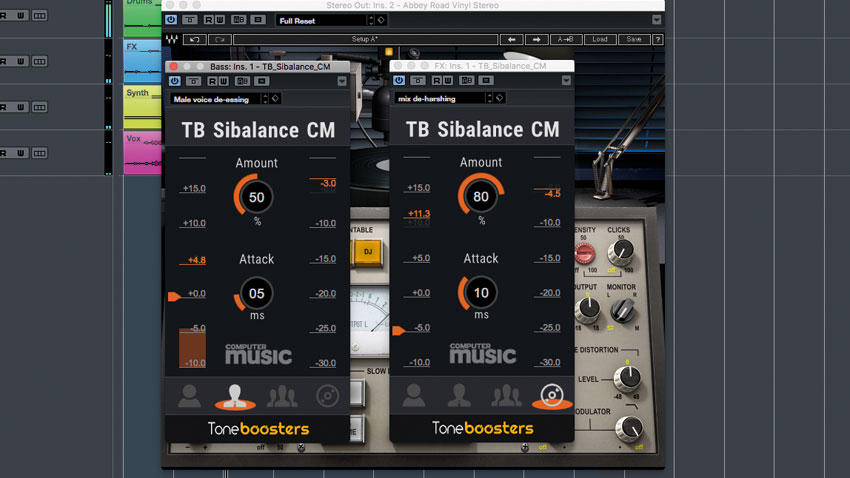
Step 2: Controlling the high frequencies of our mix will give a clearer sound, with noticeably less playback distortion. We use TB Sibilance CM’s Mix De-Harshing preset on the track’s FX channel to soften the high-mid frequencies of our sweeps. After that, we place TB Sibilance CM on the Bass channel, then select the Male Voice De-Essing preset. This smoothens the bass out.
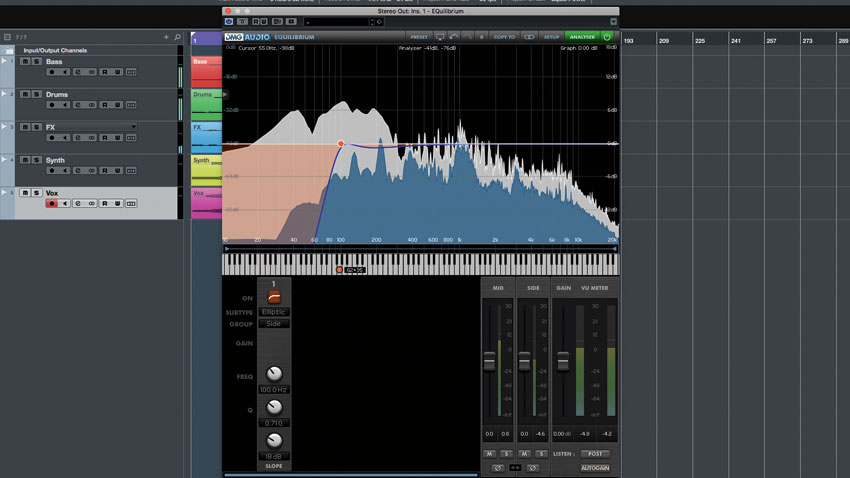
Step 3: Next, we use DMG Audio’s Essence to de-ess our vocal above 4kHz, setting the Ratio to 1.5:1 to take sharpness from the sound without overly dulling the voice. Next, we load DMG’s EQuilibrium on the stereo output (before Abbey Road Vinyl), then apply a 100Hz Elliptical high-pass filter to the Side channel. This removes out-of-phase sub-bass frequencies from the track’s stereo content.
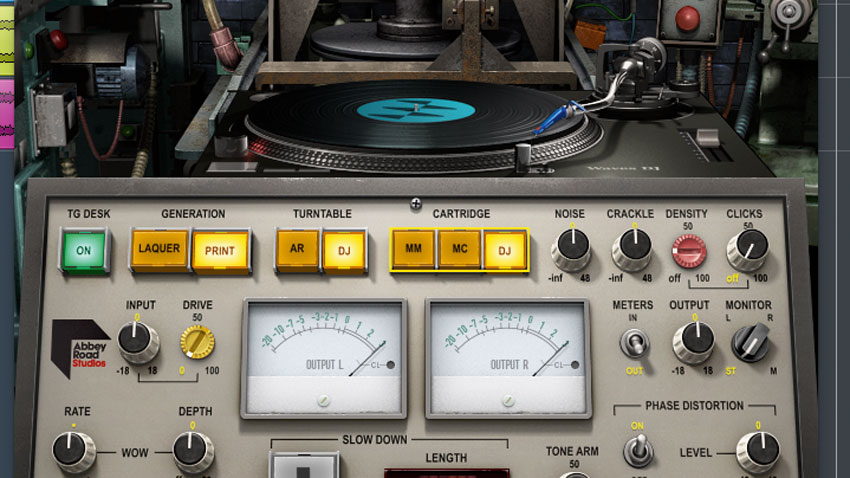
Step 4: We can hear the difference in sound between a lacquer/dubplate and pressed vinyl by tweaking Abbey Road Vinyl’s Generation setting - we choose Print for an authentic vinyl tone. Cycling through the Turntable and Cartridge modes auditions our virtual vinyl using audiophile or DJ-grade equipment. As our track is a dance banger, we choose DJ settings for both.
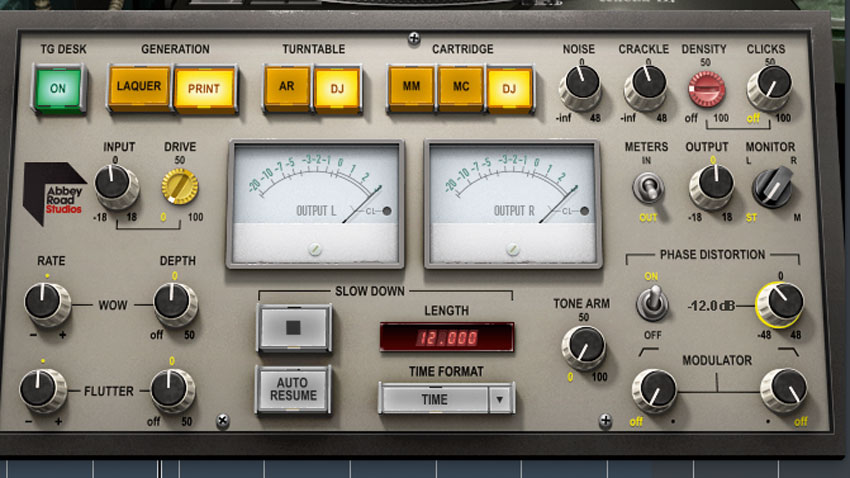
Step 5: Pulling back the Input gain to -1dB reduces drive into the virtual cutting head, giving us a cleaner sound. We clean the sound up even more by turning the Noise and Crackle amounts down to -6dB to make Vinyl’s background noise less obvious. The Phase Distortion control models tone-arm distortion on playback – we set this to -12dB in order to emulate a high-quality turntable.
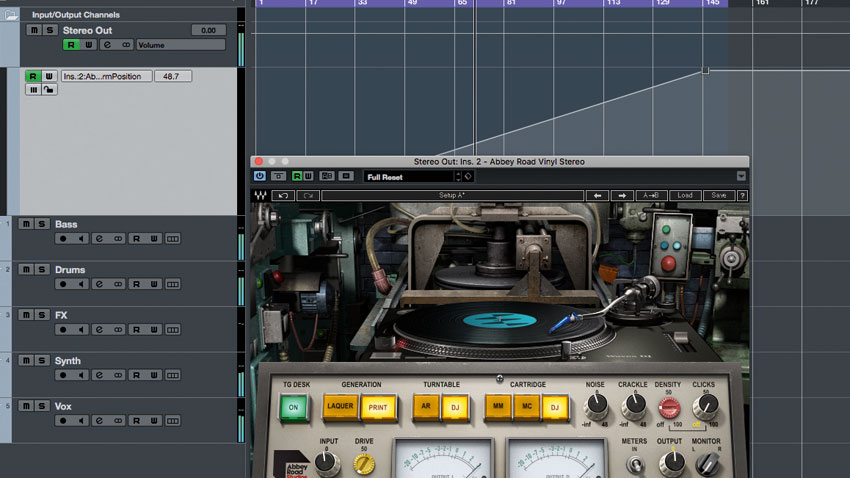
Step 6: To finish things off, we can automate the tone arm’s position, accurately emulating the loss of quality that happens as a record plays from start to finish. Add a new automation lane for the Tone Arm Position to your master output, then draw in a line from 0 at the beginning of the track rising to 100 at the end.
Computer Music magazine is the world’s best selling publication dedicated solely to making great music with your Mac or PC computer. Each issue it brings its lucky readers the best in cutting-edge tutorials, need-to-know, expert software reviews and even all the tools you actually need to make great music today, courtesy of our legendary CM Plugin Suite.
