Massive X has firmly arrived, and although its shortcomings have been widely discussed, it’s still a worthy entrant into today’s roster of ‘powersynths’.
So let’s delve into the synth’s multitude of oscillators by building a handful of presets, ranging from wavetable-based sounds to FM noises and special FX.
Let’s synthesise a distinctive noise ‘riser’ effect that utilises Massive X’s twin noise oscillators.
How to build a basic square wave bass sound in NI's Massive X synth
How to create an FM bassline using Massive X's phase modulation oscillators

Step 1: With a new instance of Massive X loaded on a MIDI track in your DAW, create a new eight-bar-long MIDI clip and draw in a C3 note spanning the entirety of the clip.

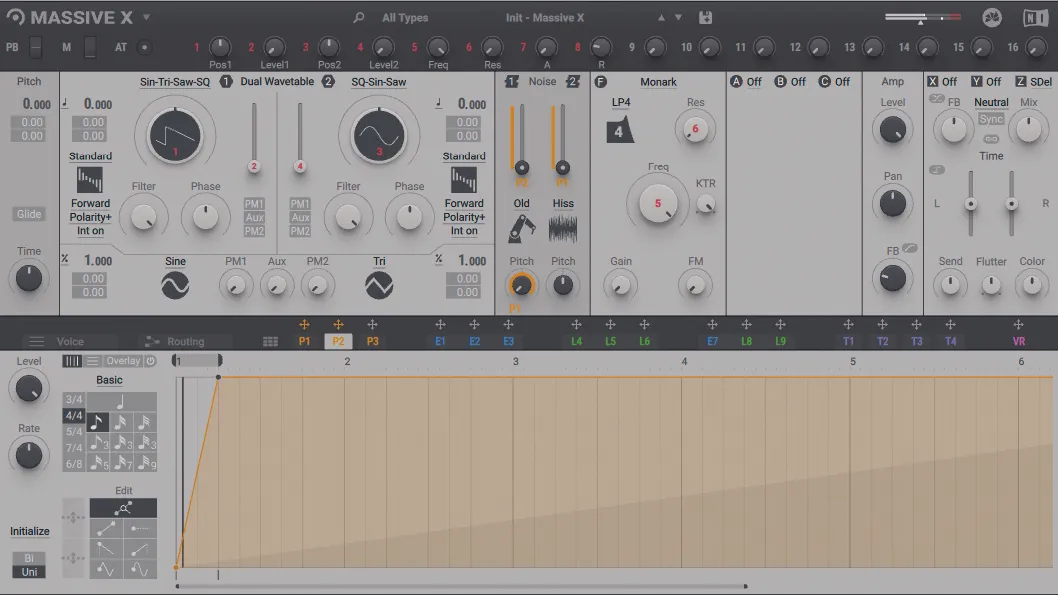
Step 2: Next, starting with the Init – Massive X default patch, head to the first Performer (P1) modulator, which conveniently runs over eight bars by default. Grab the rightmost yellow node and drag it up to the max top right position of the vertical grid (24). We now have a ramping modulation signal that rises over eight bars.

Step 3: Before we design our FX sound, let’s make sure this Performer modulator resets every time a MIDI note is received. Head to the Performer’s Remote page (the icon displaying nine blocks, found to the left of the P1-P3 tabs), then change the Launch mode from Remote to Key.

Step 4: Close the Remote page to open the main editing area again. We don’t want to use the main wavetable oscs, so pull Osc 1’s Level slider down to minimum. The synth’s two Noise oscs can be loaded with looping atonal samples (‘Noisetables’) ranging from static noise through to mechanical, environmental and animalistic timbres. Crank the Noise 1 oscillator’s Level slider up to maximum.

Step 5: Both Noise oscillators feature a Pitch control for transposing the currently loaded sample. After setting Noise Osc 1’s Pitch value to fully anticlockwise, drag the Performer (P1)’s cross target to Noise Osc 1’s Pitch target slot, then click and drag up in the slot to apply max positive modulation. Our eight-bar ramp-up is now gradually transposing the noise sample.

Step 6: The default Static >> White noise sample is pretty vanilla, so click on the header and browse through the more eccentric noisetables on offer. We settle on Machines >> Old. You’ll notice that as the pitch of a noisetable is increased, the sample’s loop length is gradually shortened, creating a cool ‘wind-up’ effect.

Step 7: Before we move on, let’s spice up our riser with effects. Switch the Filter type to Blue Monark, then push up the Amp section’s FB (Feedback) for more grunt. After that, head to the final Stereo FX slot and call up the Stereo Delay, leaving settings at default.

Step 8: We can introduce the second Noise osc for an ever-increasing sense of brightness over the course of eight bars. Grab the first Performer (P1)’s mod cross, drag it over to the Noise Osc 2’s Level mod slot, then drag it up. With the Static >> Hiss noisetable selected, our eight-bar ramp raises this ‘fizz’ layer’s level.
Step 9: Finally, we can introduce a sense of sidechained-style ‘pump’ by looping a one-beat section of Performer 2, creating an upwards ramp, then using this to modulate Noise Osc 1’s level up and down. From here, try loading different noisetables and experimenting with Massive X’s onboard processors to customise your riser.
