How to build generative beats with Ableton Live's MIDI effects
Using arpeggiation, note manipulation and the rules of chance, we can make our drums play themselves
Following on from our one-note bassline tutorial, here’s another way to break out of a creative rut and make something interesting using only MIDI effects.
This time, we're thinking differently about Ableton Live’s in-built MIDI processors, cooking up a variable, generative beat that’ll keep you on your toes while working on the rest of your track.
Get more productivity-inspiring tips and techniques in the June 2018 edition of Computer Music.
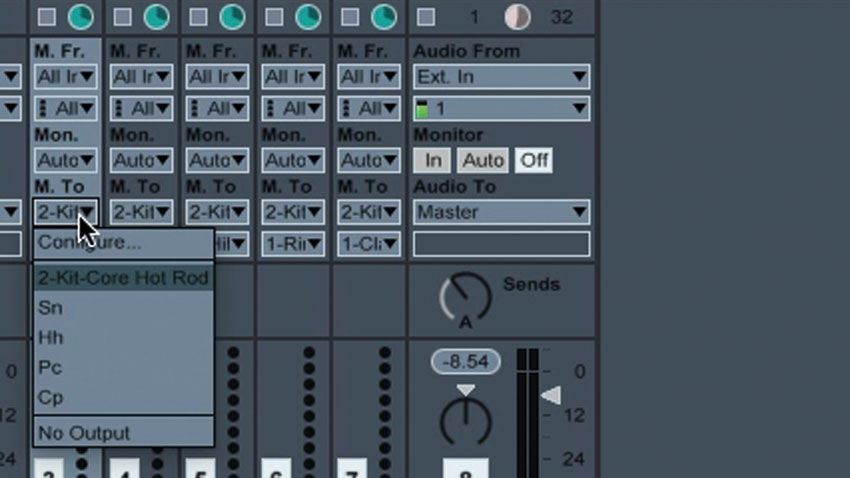
Step 1: Our Ableton Live project includes a backing pad and a Drum Rack that’s being fed by five separate MIDI tracks, selected in the MIDI To menus. The MIDI feeding each one is the same, playing a C3 note that lasts a whole bar.
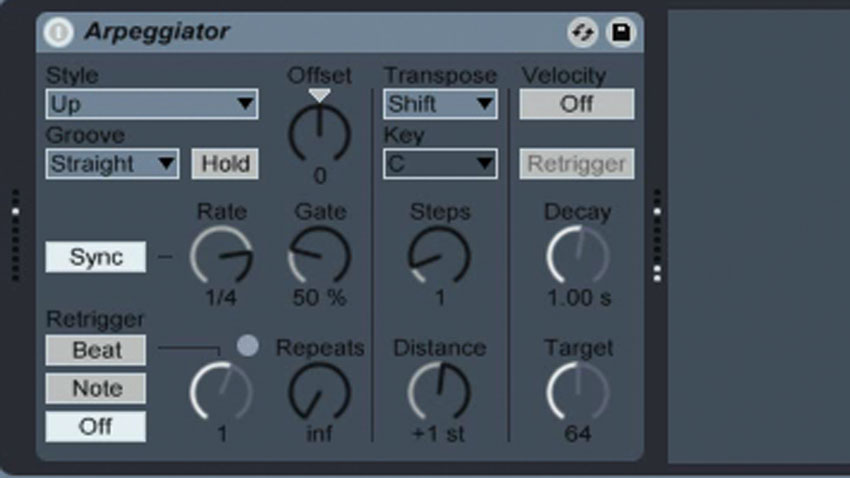
Step 2: Activate the Kick channel. One long C3 note means it’s only playing once per bar. To get ourselves a 4/4 beat, head to MIDI Effects in the browser and drag an Arpeggiator onto the kick channel. Set its Rate to 1/4 and you’ve got a 4/4 kick pattern - simple as that. Now activate the snare channel. Getting this one right is a little more complex…
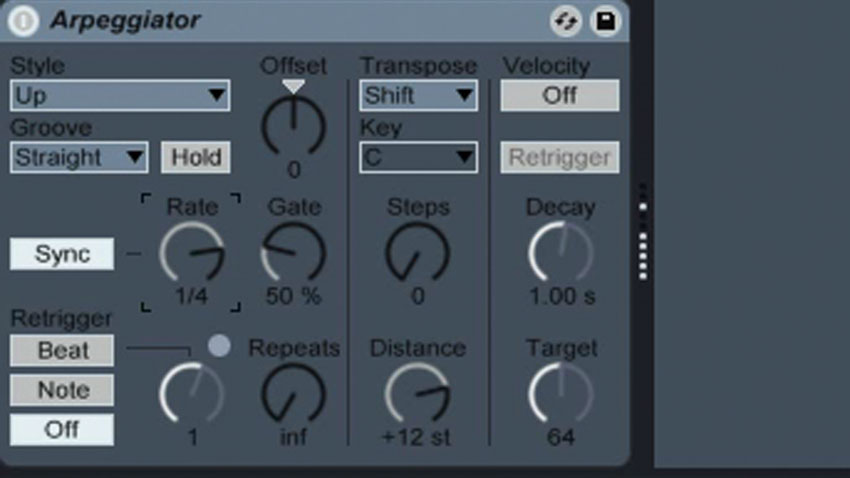
Step 3: Set up another Arpeggiator at 1/4, or copy the same one over from the kick channel. This time also set Steps to 1 and Distance to +1st. This means that every other note output by the Arpeggiator is transposed, giving us the pattern C, C#, C, C# for our bar. But we don’t want a snare for every kick…
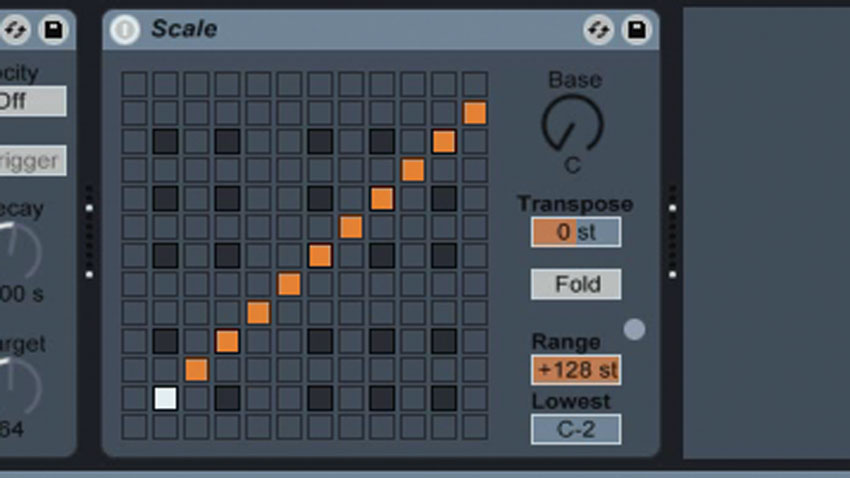
Step 4: Drag a Scale device next in the chain. This helps us repitch or reject certain notes from the MIDI signal. Deselect the lowest left note (C) and hey presto - only the C#s remain, timing our snare on beats 2 and 4. Now for a hi-hat pattern. Copy both the Arpeggiator and Scale devices over to the Hats channel and activate it. Hi-hats are quicker, of course, so set their Arpeggiator’s Rate to 1/16.
Want all the hottest music and gear news, reviews, deals, features and more, direct to your inbox? Sign up here.
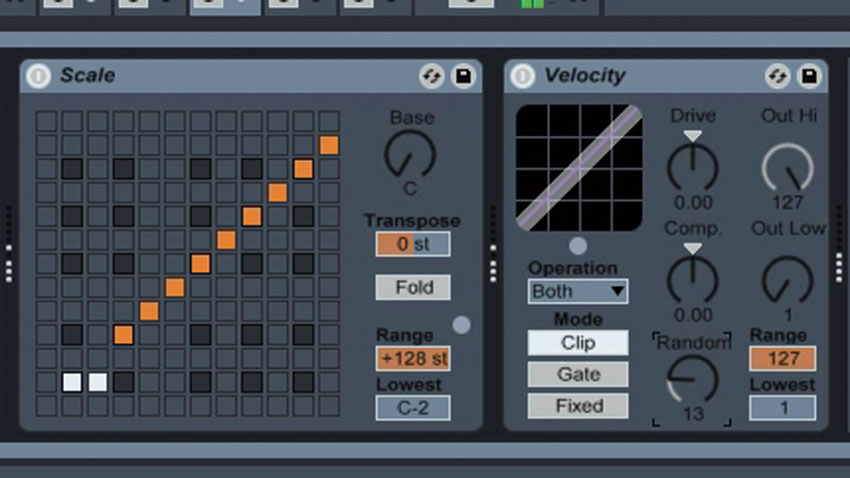
Step 5: This time, set the Steps to 2, so that three notes are output from the Arpeggiator in sequence. Make sure the C note is still inactive, and retune the D to a C# (as above), so that only two notes out of every three get through and play the same note. The beat’s getting a bit mechanical, so add a Velocity device after the Scale, and turn its Random parameter to 13. Do the same for the kick and snare.
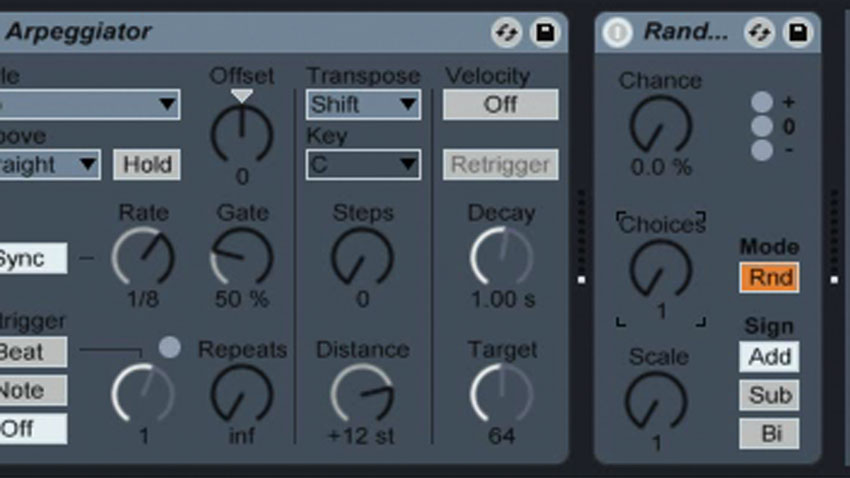
Step 6: For the Percussion channel, we’ll set up a pseudo-random pattern - that is to say, a random timing of notes but with some rules specified. Add an Arpeggiator to the track, with a Rate of 1/8. Now add a Random device after this. Set Choices to 1, and ensure Scale is still at 1. Random changes the notes it received based on rules you set.
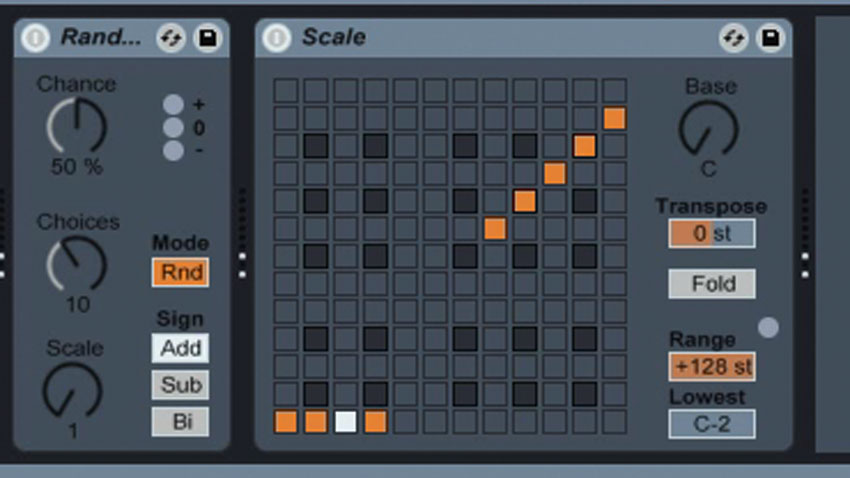
Step 7: With the Chance dial at 0.0%, there’s no chance of the note being changed. If you set it to 100%, the note will certainly be changed. Set it to 50% to give a 50/50 probability. If we add a Scale device and deactivate the changed note, the Chance dial turns into a control for whether the note will be played at all.
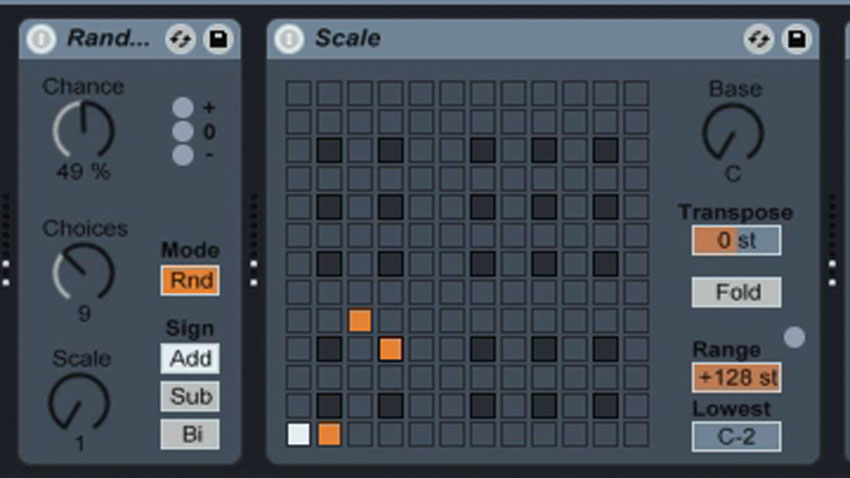
Step 8: Finally, place an Arpeggiator (set to 1/4) on the Clap track, set Chance to 49% and Choices to 9. Deactivate some of the first nine notes in the Scale device, and retune others. The clap has a 49% chance of playing, and after that, a certain chance (depending on the Scale settings) of reinforcing the snare at its original note or another note, or doing nothing at all.
Computer Music magazine is the world’s best selling publication dedicated solely to making great music with your Mac or PC computer. Each issue it brings its lucky readers the best in cutting-edge tutorials, need-to-know, expert software reviews and even all the tools you actually need to make great music today, courtesy of our legendary CM Plugin Suite.
