How to build a basic synth voice with Cherry Audio Voltage Modular
Use Cherry Audio Voltage Modular to create a basic synth voice
Want all the hottest music and gear news, reviews, deals, features and more, direct to your inbox? Sign up here.
You are now subscribed
Your newsletter sign-up was successful
With modular synthesis all the rage in the physical sphere it was only inevitable that they'd find their way into the digital one too.
Cherry Audio’s Voltage Modular, whose Eurorack-styled virtual framework allows users to mix and match a growing catalogue of compatible modules, is one such example. With some modules included with the basic package and others available from Cherry Audio themselves as well as third-party developers, Voltage Modular offers an exciting opportunity for those averse to the world of hardware to start getting modular.
In this guide we'll walk you through the steps required to make a simple synth voice, let's go!
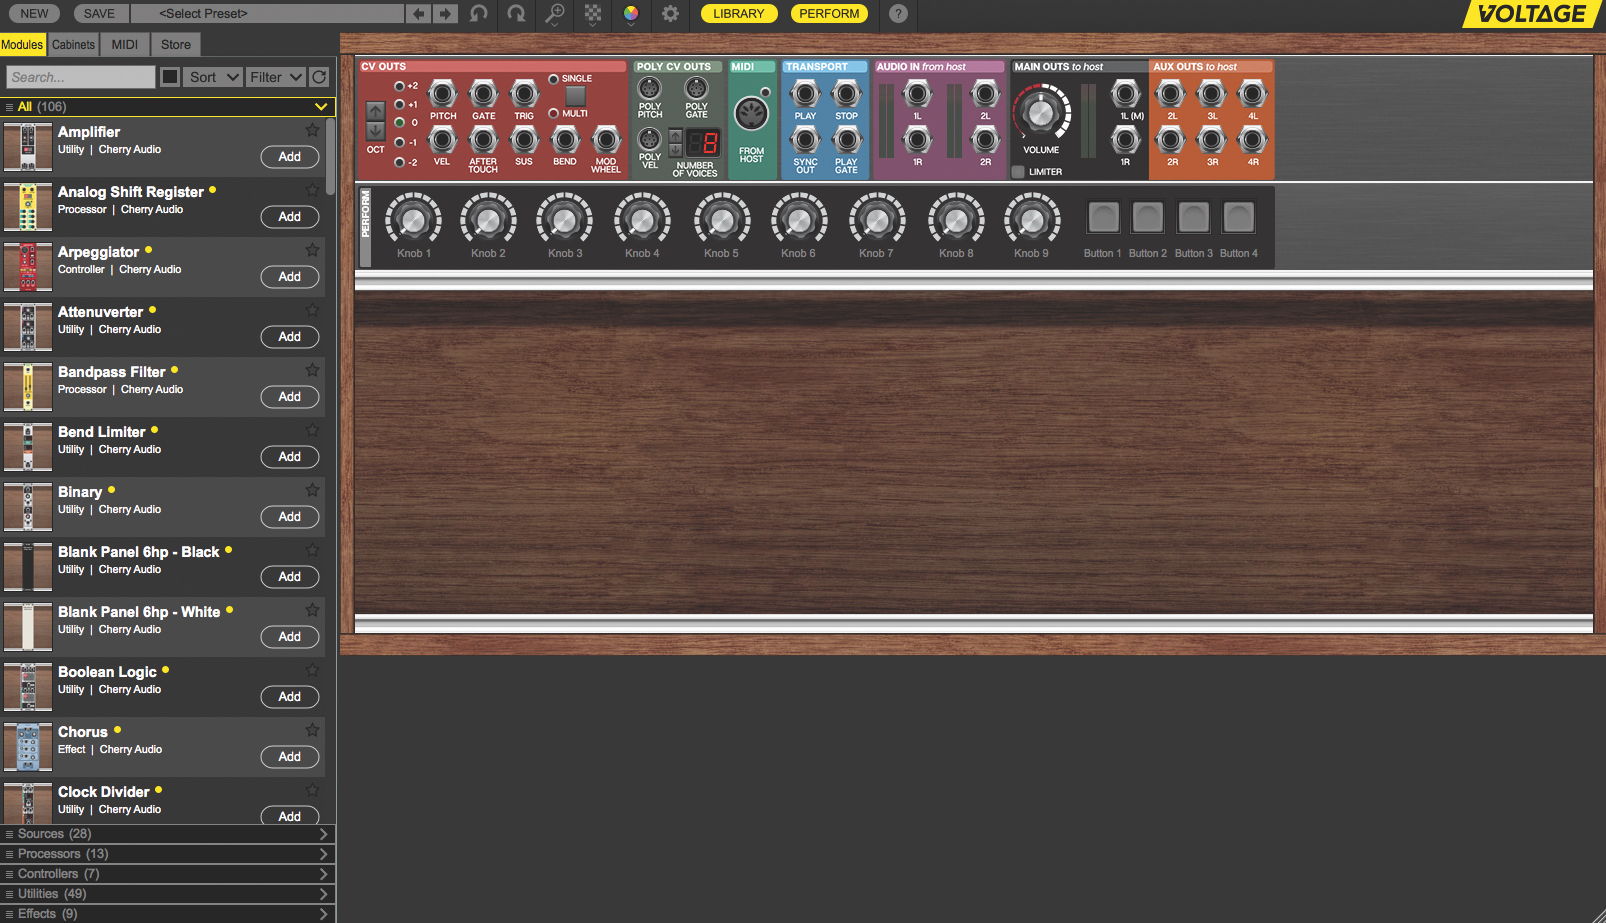
Step 1: The best way to get our heads around this new system is to use it to build something familiar, so let’s start by constructing a simple subtractive synthesiser voice. Here, we’ve opened Voltage Modular in our DAW, but we could just as easily have used the standalone version. As you can see, the bulk of the GUI looks like an empty rack.
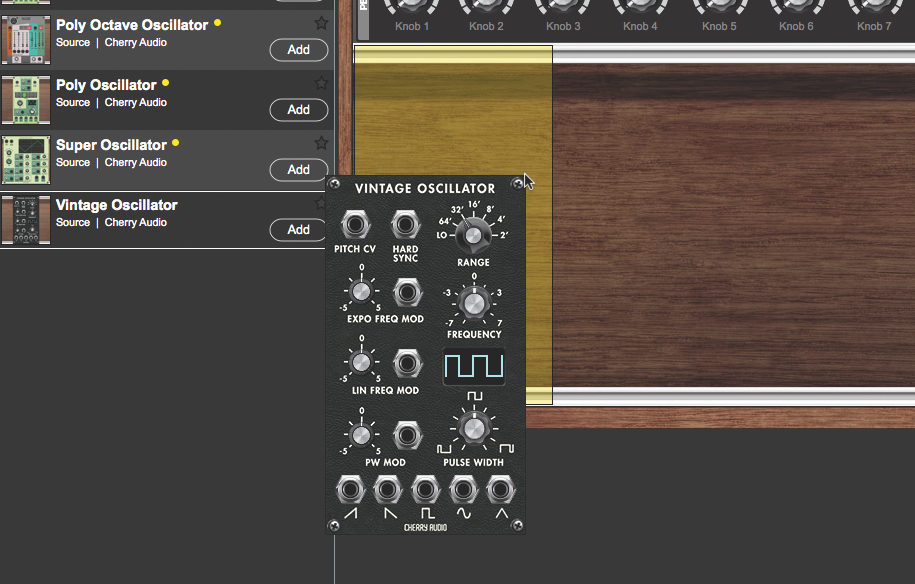
Step 2: One immediately noticeable difference, however, is the inclusion of the module library along the left. This can be hidden to expand the rack space, but we’ll keep it open for now. There’s a module search field in the upper left. We’ll type in ‘Oscillator’. All of the available Oscillators appear. Let’s drag the Vintage Oscillator into our rack.
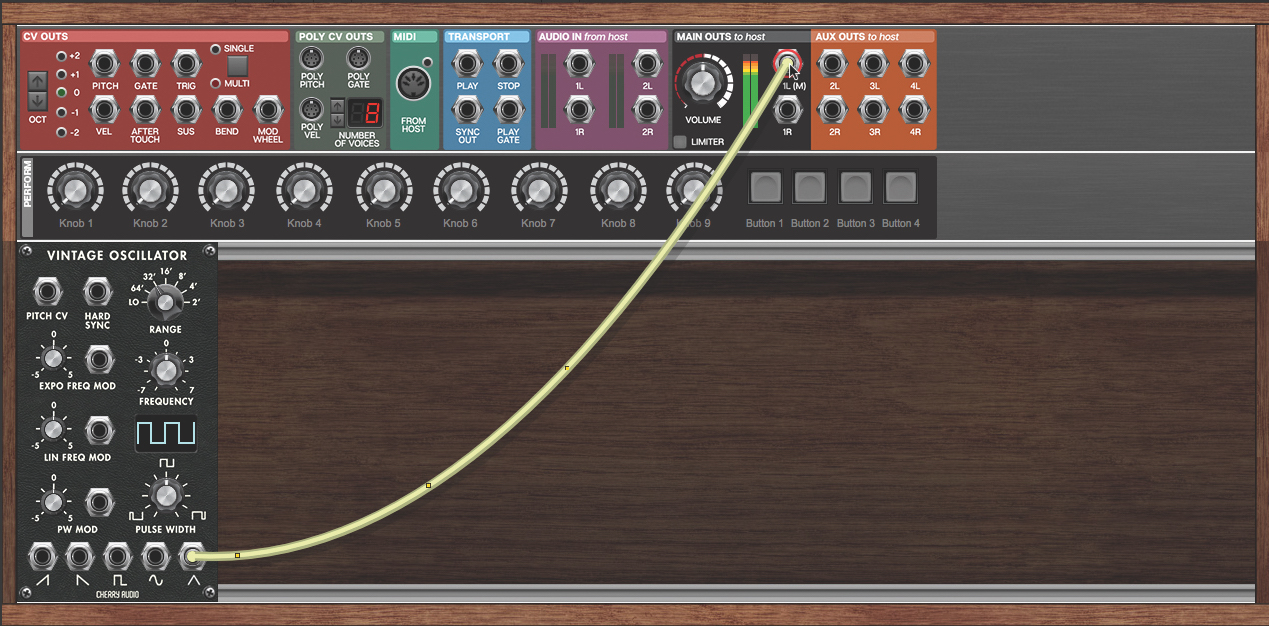
Step 3: We can test out our Vintage Oscillator by patching one of its waveform outputs to the 1L (M) input jack at the top of the rack. This is as easy as clicking one of the jacks and dragging a virtual cable to the other. Animated dots along the cable indicate the signal flow, and the Main Out’s meters show us the output level.
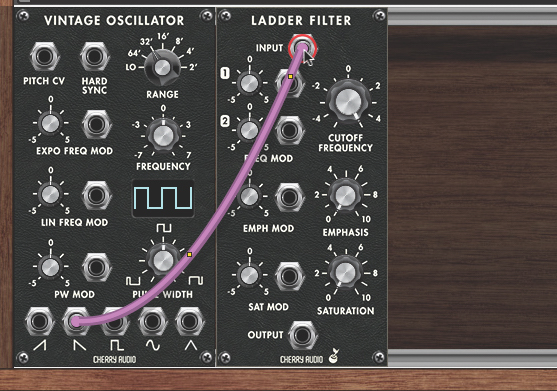
Step 4: This isn’t so exciting, so disconnect the cable by selecting it and right-clicking, or dragging it from the jack. Let’s add another module. Right-click in the rack, choose Add Module and get a Ladder Filter from the Processor category. Route the Oscillator’s sawtooth output to the Filter’s Input jack.
Want all the hottest music and gear news, reviews, deals, features and more, direct to your inbox? Sign up here.
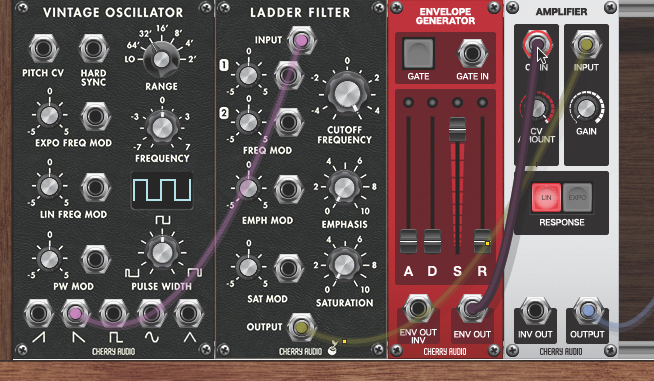
Step 5: Get an Amp from the Utilities modules and patch the Filter’s Output to the Amplifier’s Input. Now, patch the Amplifier’s Output to the Main Out’s 1l(M) jack. Get an envelope generator from the Controller’s subcategory. Patch the Envelope Generator’s Env Out jack to the Amplifier’s CV In.

Step 6: To play our patch, we need to go to the CV Outs module in the top-left, and patch a cable from its Gate jack to our Envelope Generator’s Gate In jack. That lets us trigger the sound from our DAW or any connected MIDI controller. To control the pitch, route the CV Outs’ Pitch jack to the Oscillator’s Pitch CV input.
Computer Music magazine is the world’s best selling publication dedicated solely to making great music with your Mac or PC computer. Each issue it brings its lucky readers the best in cutting-edge tutorials, need-to-know, expert software reviews and even all the tools you actually need to make great music today, courtesy of our legendary CM Plugin Suite.
