How to design a punchy, radio-ready synth bass sound
Recreating the impactful bass sound of pop hits like Jax Jones’ Whistle needn’t be difficult. Let’s learn how…
Want all the hottest music and gear news, reviews, deals, features and more, direct to your inbox? Sign up here.
You are now subscribed
Your newsletter sign-up was successful
Ever since the early days of jazz and rock’n’roll, the musical connection between drums and bass has been core. Tastes, styles and interpretations come and go, but finding the perfect bass sound, that fits against the drums in your mix, is often viewed as something of a holy grail.
Pacifying the multitude of platforms, where your mix has to translate on everything, from earbuds to a full PA system, is no mean feat. Too much bottom end, and it might sound great on lightweight headphones, but the moment you step into the domain of any reasonable hi-fi system, you could have a problem, as those low frequencies swamp your mix.
How then, can you give your mix a fighting chance? Apart from the established practice of scooping out an area of your mix’s low frequency domain, where your bass will reside, there are other things that you can do, at the level of creating your synth bass sound.
That’s our tack here, as we create a degree of attack-based bite upfront, using the filter, with a little help from some envelope modulation. We can also start with a waveform which can cut through the mix, coupled with a sustained low end. Granted, we’re likely to need some compression to help us achieve our goal, but that’s all part of the mix-mill, on the way to achieving that commercial bass sound.
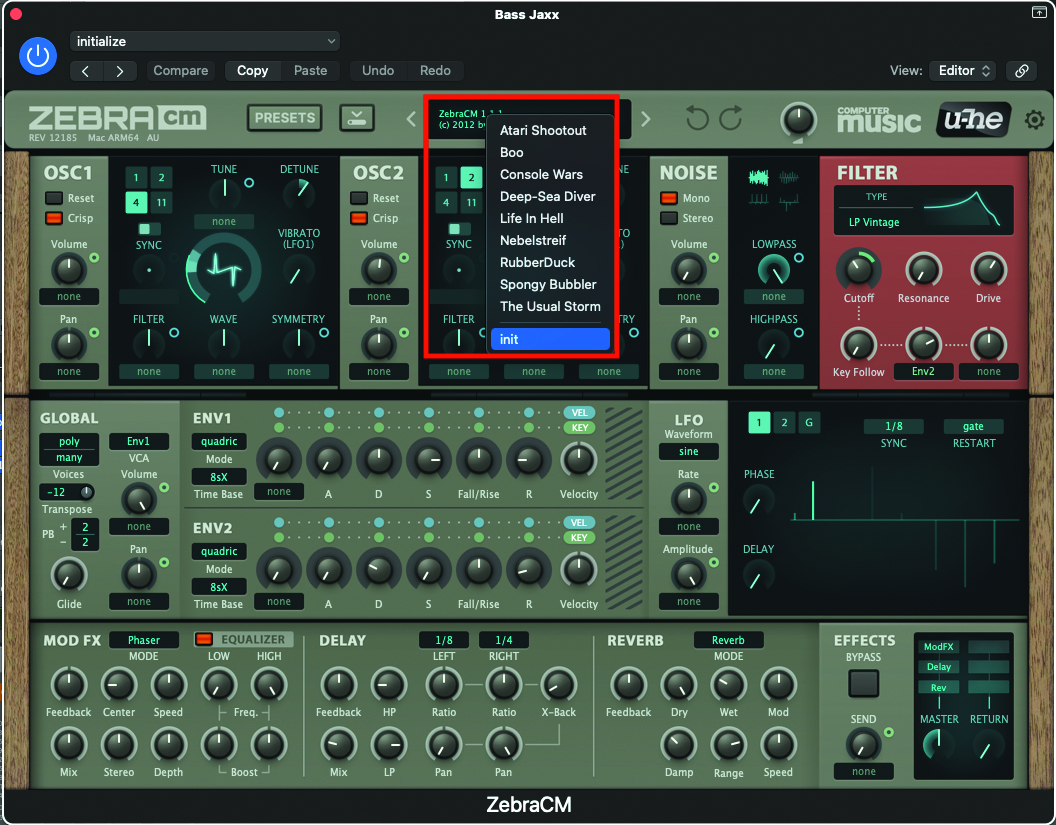
Let’s begin by initialising a patch within ZebraCM. This specialized version of u-he Zebra comes free with every issue of our sister magazine, Computer Music. Open up your DAW and load up the plugin. Once the plugin window is open, move to the central display at the top of the window, click to reveal the drop-down menu, and select ‘init’ from the bottom. This will initialise the patch.
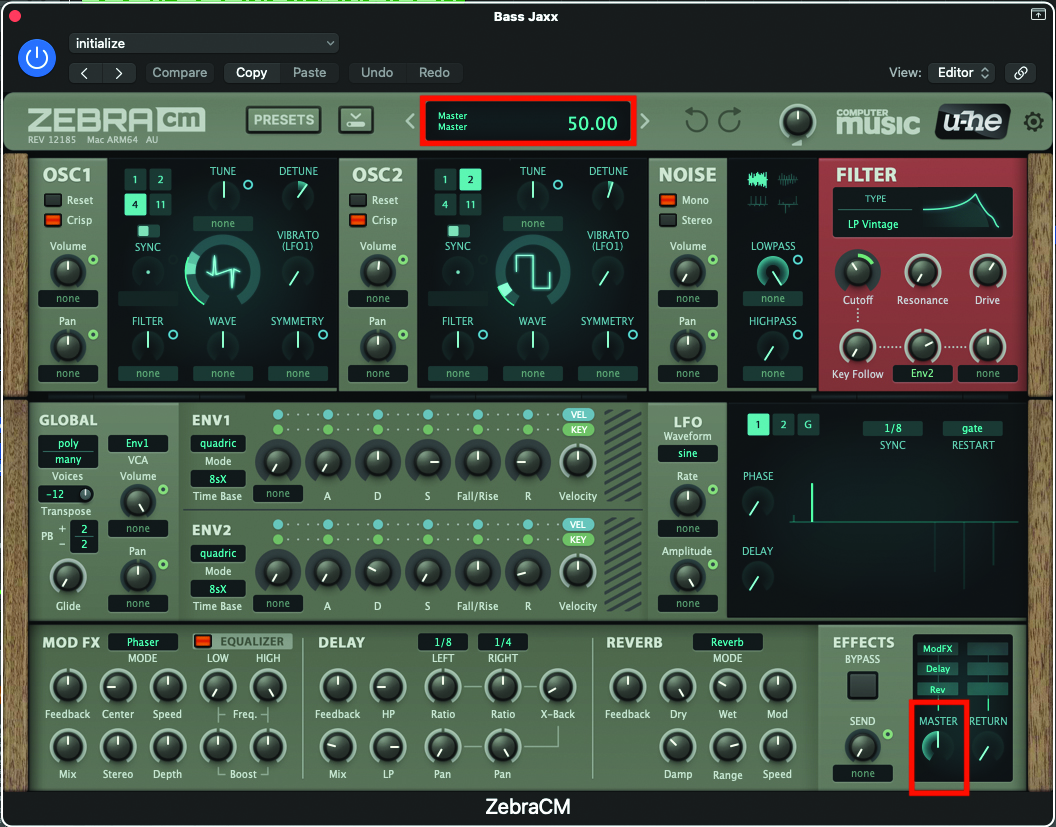
This patch is going to be a relatively loud one, so now would be a great time to reduce your master volume to a level of 50. Just as a reminder, every time you tweak a pot or setting on the plugin, you will see an accurate value/numeric in the upper display.
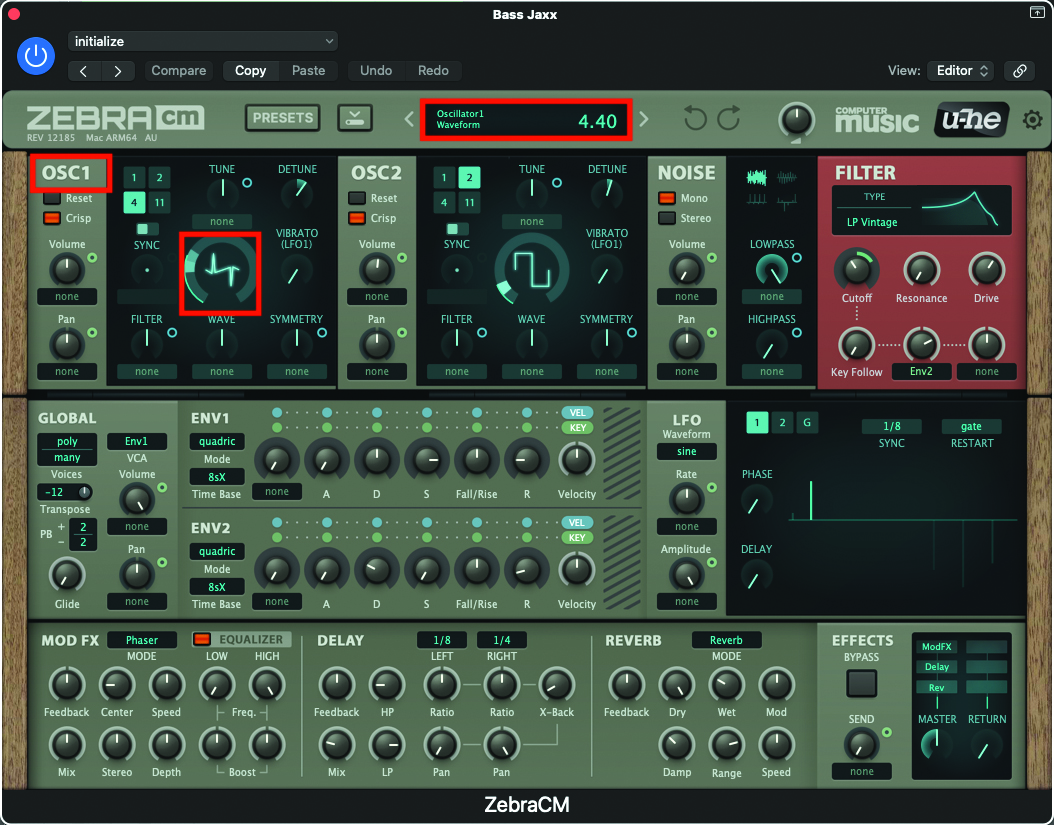
We will begin our sound creation by moving to the OSC1 section; click and hold on the waveform, while dragging the mouse upwards. We’ll use a relatively harsh waveform, which requires a value of 4.40. There shouldn’t be any need to adjust the volume, which should be set to 100, by default.
Want all the hottest music and gear news, reviews, deals, features and more, direct to your inbox? Sign up here.
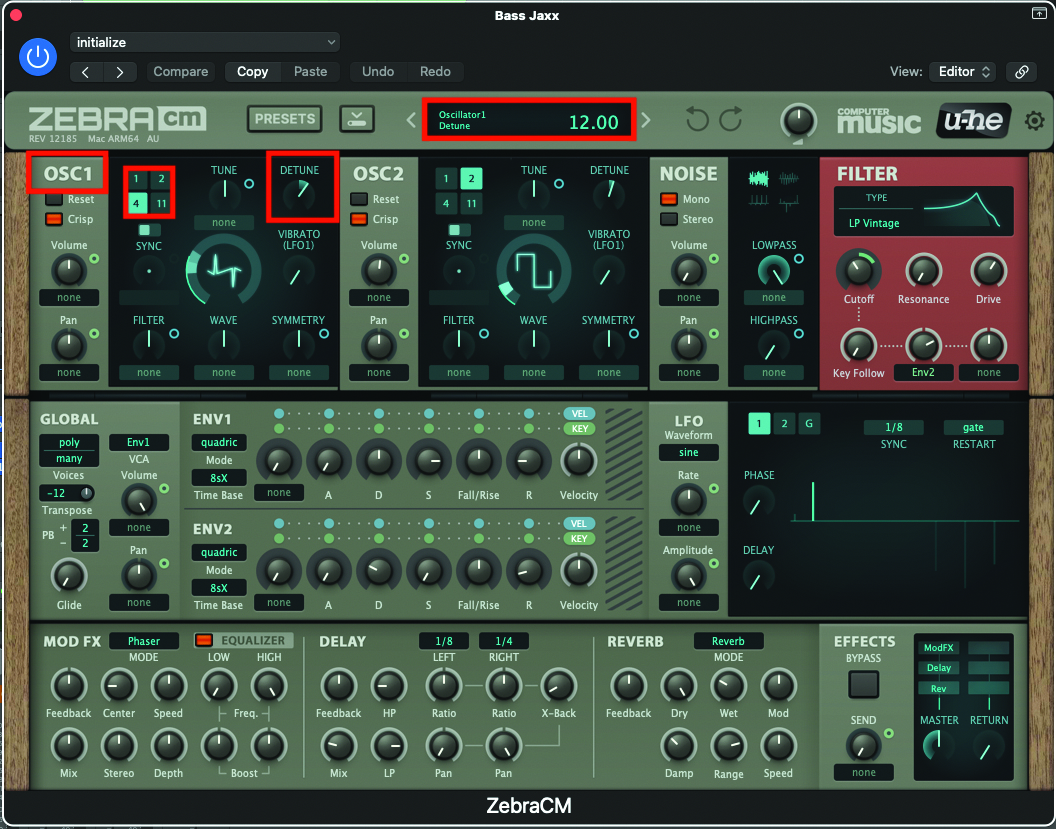
Keeping within the OSC1 section, activate the waveform aliasing to the power of 4. It should become highlighted in turquoise, once selected. This creates four waveforms which will be compiled, one on top of another. It will sound slightly phased, until we detune these waveforms, so adjust the Detune pot to a value of +12.
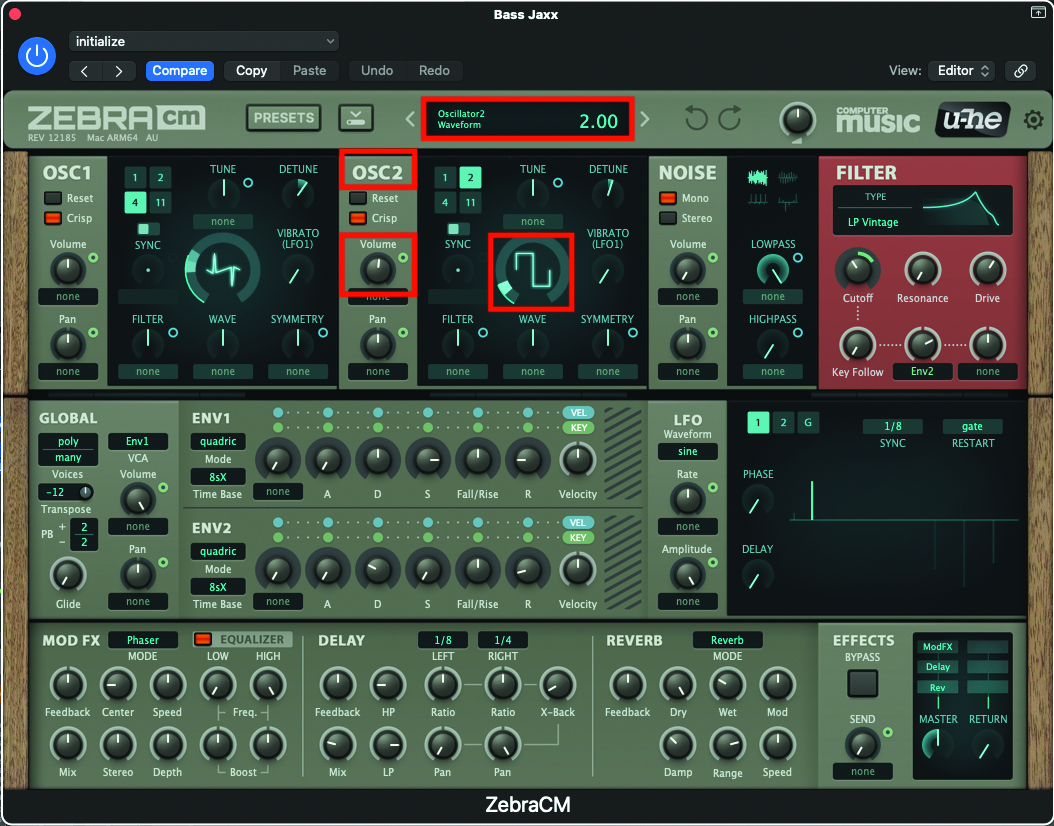
We are now going to turn our attention to OSC2; this will deliver more of the bass element that we require, through the selection of a Square wave. Click and hold on the waveform, dragging upwards until you see a value of 2.00. You will also need to increase the volume to a value of 104, as it is completely reduced to 0, by default.
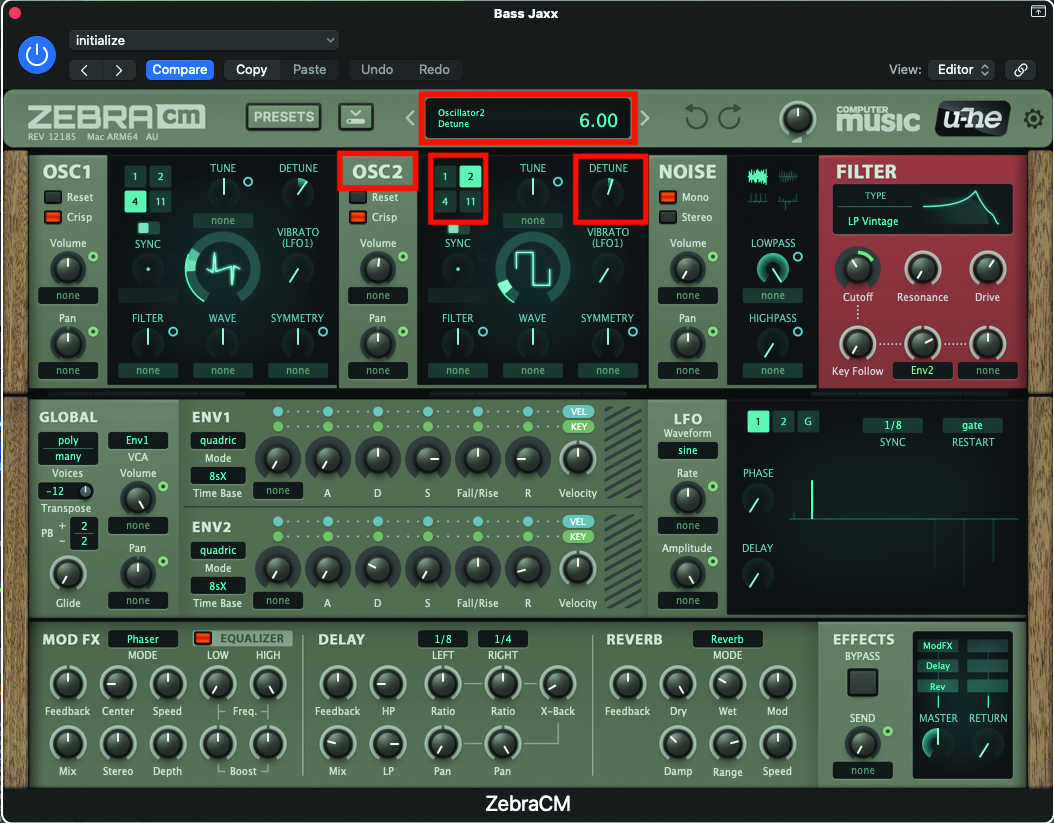
Much like OSC1, we can fatten up the sound further by inducing some aliasing, so select the number 2 within the Aliasing section. We will also need to detune the waves, to eliminate any phasing, setting the Detune pot to a value of +6.
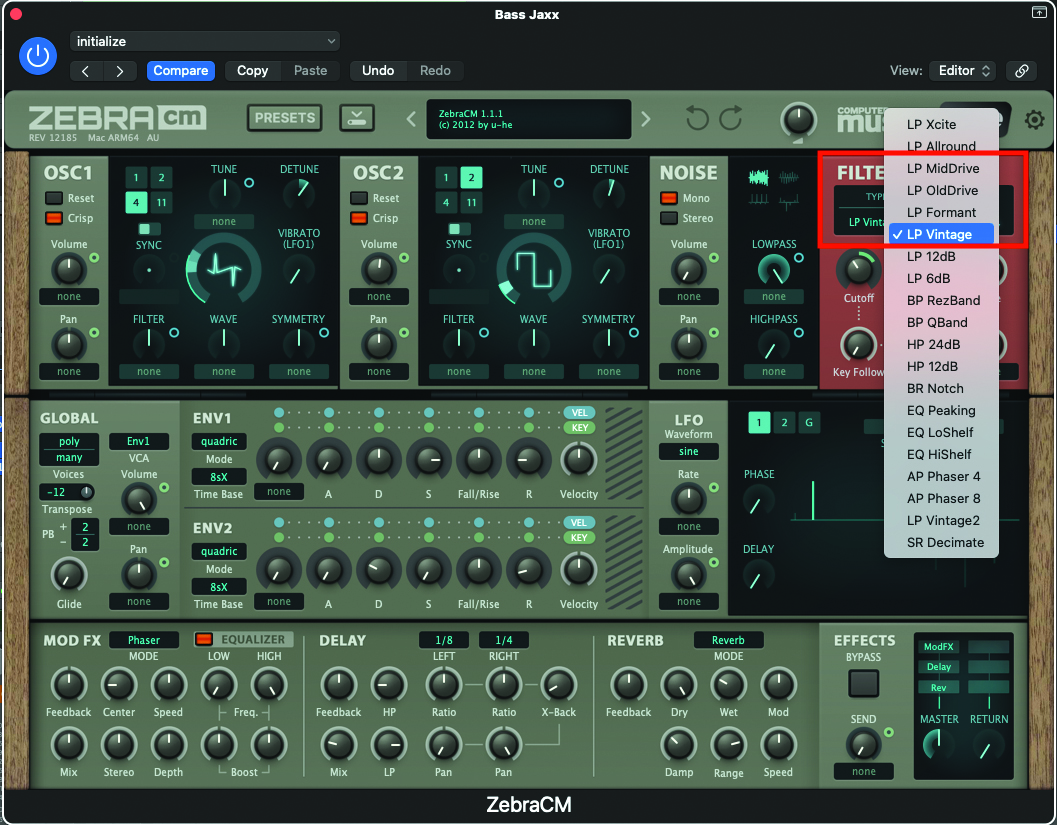
As with all of the patches that we make using the ZebraCM, the choice of filter really does heavily affect the sound. Ideally, we want a filter that can induce overdrive, so we’ve plumped for the LP Vintage filter, from the Zebra’s drop-down menu. You can, of course, opt for other filter types, if you’d prefer a cleaner sound.
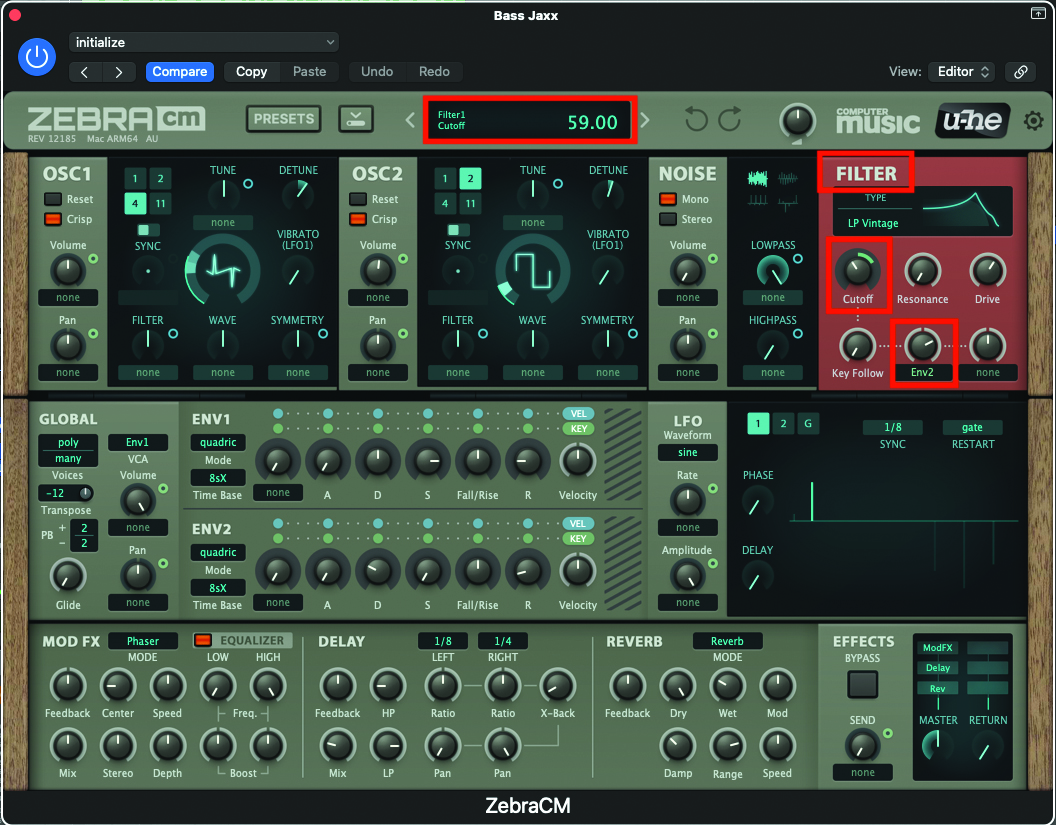
Let’s make a couple of adjustments to the filter, beginning with the Cutoff pot, which we want to set to a value of 59. We will also be introducing some cutoff modulation, which we can employ by adjusting the default-assigned ENV2 pot. Set this to a value of 62.
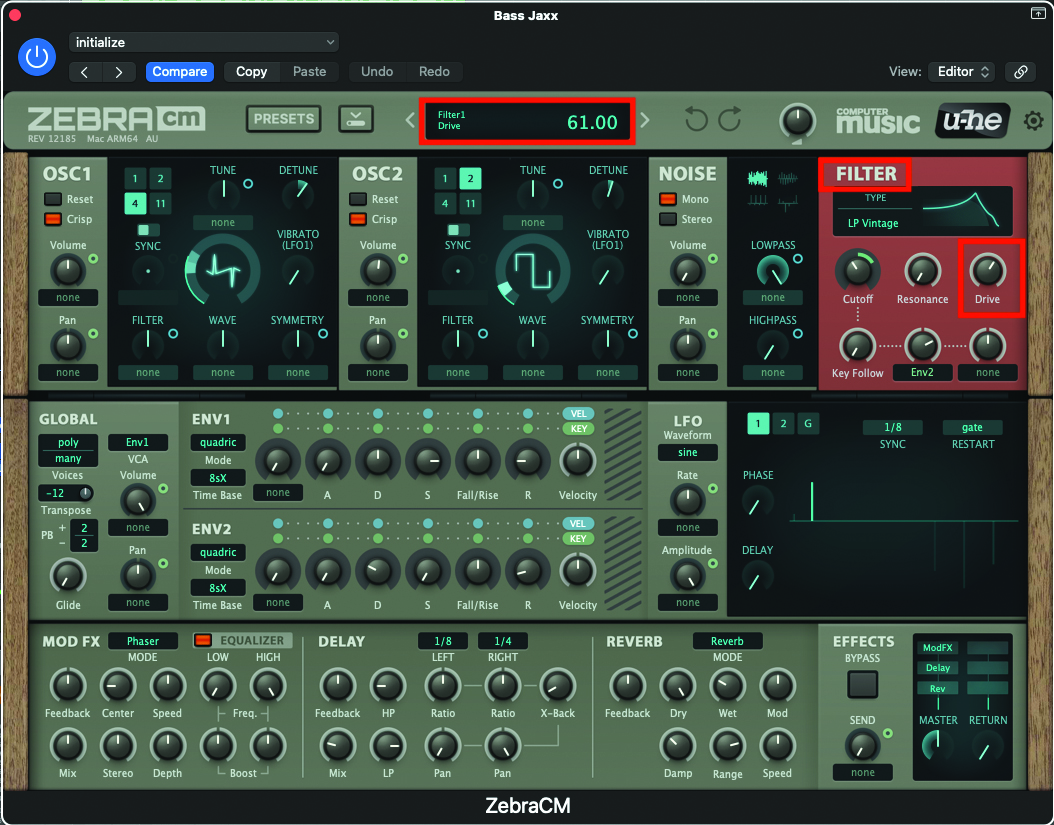
Let’s make a couple of adjustments to the filter, beginning with the Cutoff pot, which we want to set to a value of 59. We will also be introducing some cutoff modulation, which we can employ by adjusting the default-assigned ENV2 pot. Set this to a value of 62.
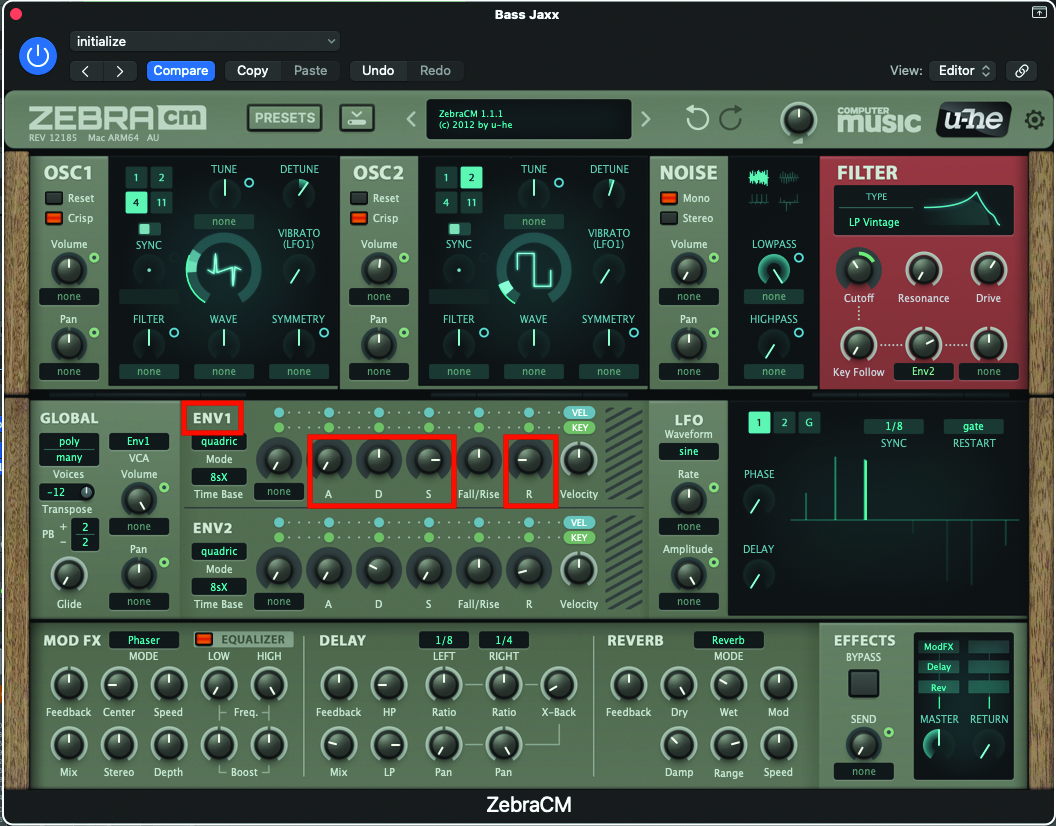
Time to switch up the envelopes; beginning with ENV1, which controls the amplitude of our sound, we can leave the Attack pot set to its default value of 0, Decay at a value of 50 and the Sustain at 80. The Release pot will however need to be reset, to a value of 20.
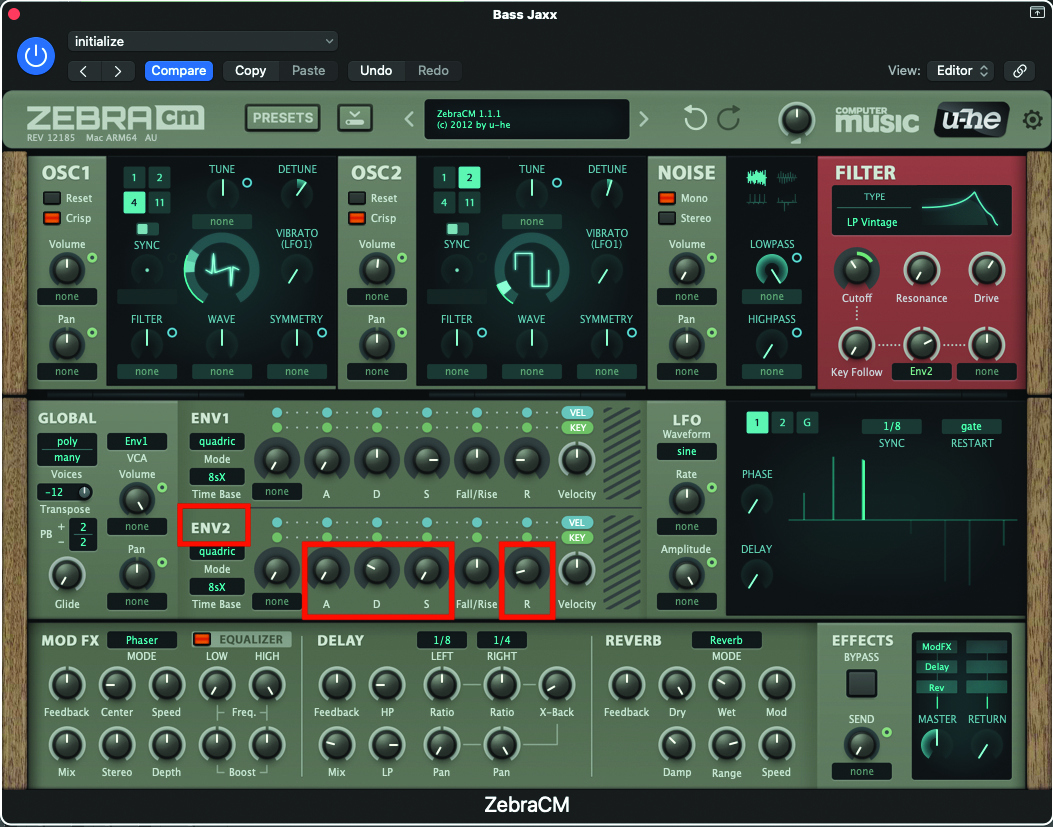
ENV2 is going to be modulating the Cutoff, within the filter section. Leave the Attack pot set to its default value of 0, but then set the Decay pot to a value of 29, set Sustain to a value of 0, and finally set the Release pot to a value of 15. The harsh attack and decay will sharpen the brightness at the front of each note.
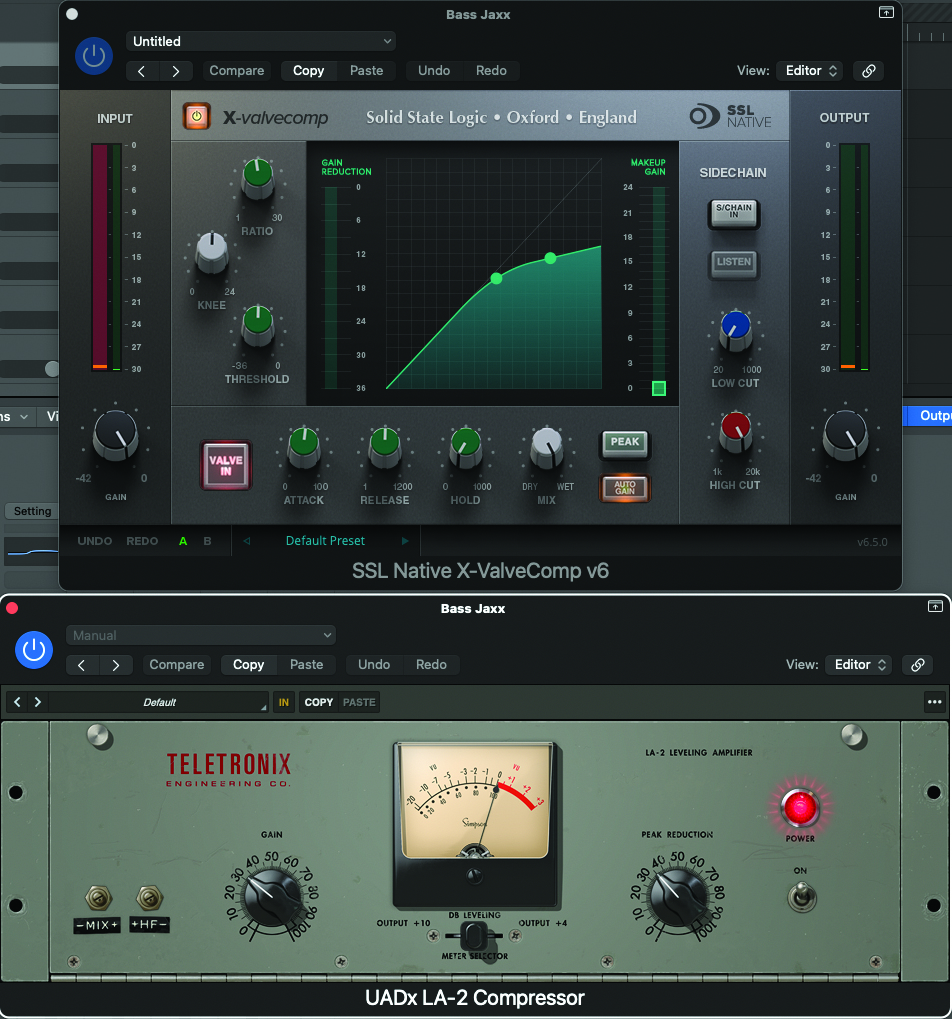
Our patch is complete, but will benefit hugely from the application of compression. In keeping with the vintage filter, some form of vintage-modelled compressor should sound fantastic. Think 1176/FET-style or LA2, although we also really like the SSL X-ValveComp, which adds compression and impurity, in equal measure. If you're a Logic user, the DAW boasts some excellent analogue-modelled compressors based on classic gear.
Pro tip
As any mix engineer will tell you, getting the bottom end of a mix to sound just right is no easy feat! There are, however, some time-honoured techniques which you could definitely use, to get the best out of your new bass sound. In just about all forms of commercial music, the association within the mix, between the kick drum and your bass instrumentation, is vital to mix success.
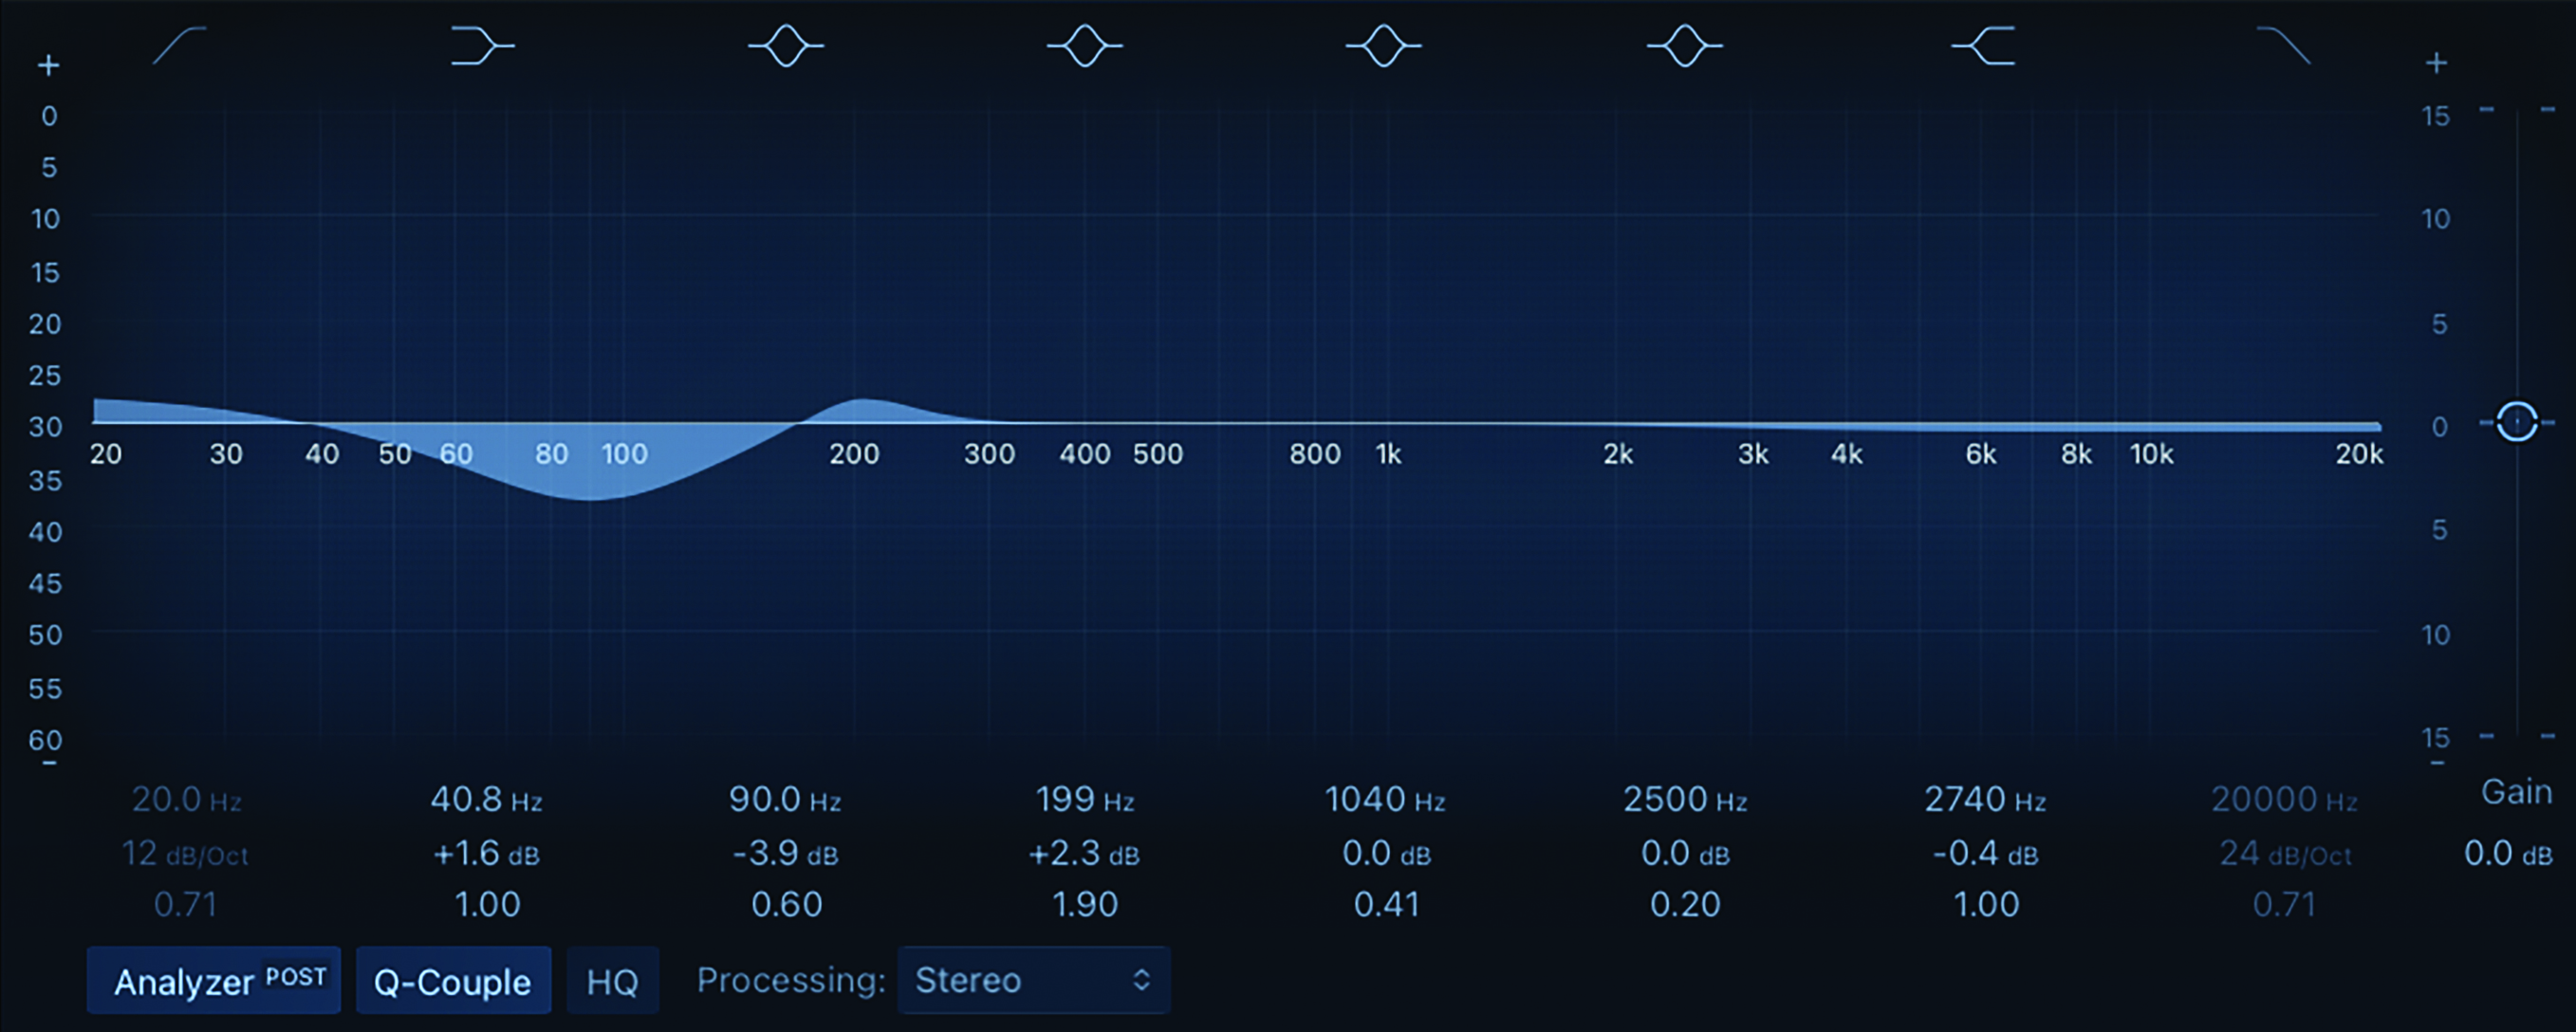
Depending on your kick drum sound, one technique, heard everywhere, is to scoop out a small frequency plot, in the lower echelons of your bass drum sound. This scalloped void can then be filled up by your bass sound. You may even want to increase these equal and opposite frequencies within your bass EQ.
The net result of these actions is that you’re neither accentuating or depreciating the lower frequency band of your track, keeping things relatively flat, which will hopefully act as a great foundation to your mix.
Get this right, in your commercial mix, and the plan is that all the other elements will fall into place, building on the earth-shaking, low-end foundation.
Recommended listening
1. Jax Jones & Calum Scott - Whistle
The exposed bass sound in the chorus, alongside the kick, provides the perfect 'commercial' backing to the whistle-based hook from this track.
2. Calvin Harris & Disciples - How Deep Is Your Love
This seminal classic is a good example of how to use plenty of bass-sound punch, therefore leaving space for the vocal to rise above the low-end weight.