
If the synthesiser is the primary melodic instrument of electronic music, then the sampler can be thought of as the tool that has single-handedly defined the punchy, repetitive rhythms that we now take for granted.
Here, we've put together a list of six techniques that will help you to creatively manipulate your drum one-shots in a sampler.

Tip 1: A sampler allows you to adjust the coarse tuning (in semitones) or fine tuning (in cents) of a loaded sound. Tune your drum samples to extremes for creative effects, or detune them over smaller scales to help gently pitch the hits to fit the other parts.

Tip 2: To adjust the length of a drum hit over time, you’ll want to familiarise yourself with your sampler’s amplitude envelope. If a hit is too long and sustained, for example, simply pull back sustain to minimum, then set decay length to dial in the perfect amplitude shape.

Tip 3: Many drum samplers allow you to adjust the decay or sustain curve response over time. As drums are relatively short in duration, this can be a great way to precisely shape a kick drum’s dynamics, giving you the perfect length that then sharply cuts out of the mix.
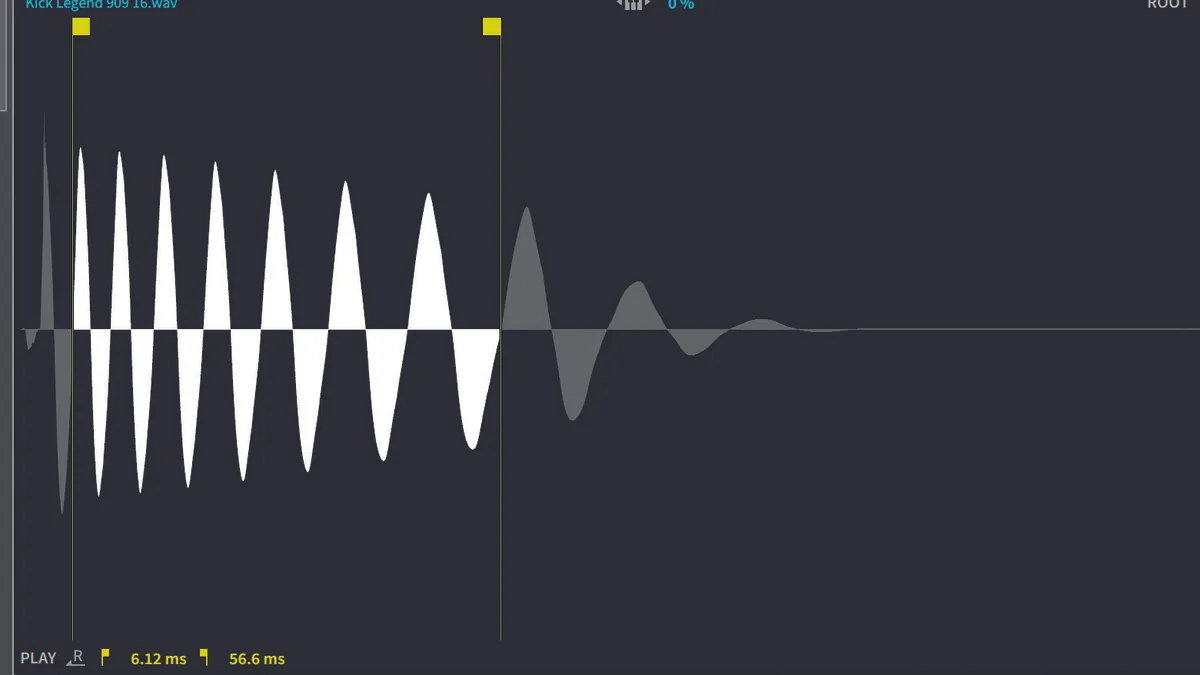
Tip 4: A sampler lets you fiddle with a sample’s start and end point. Mess around with settings to remove the sharp nose of a clicky drum hit, or chop off a lengthy tail to isolate only the sustain section you need.

Tip 5: All samplers feature a filter of some description, providing you with a rapid way to shape a drum hit’s tone. Quickly dial in a high-pass filter to remove undesirable bass frequencies from a hi-hat or percussion sample, or pull down a low-pass filter to dull an overly bright signal.

Tip 6: Other common sampler features pertinent to drums include a reverse function, which can be used to transform sharp sounds into reverse ‘whip’ effects; velocity sensitivity controls to help customise playback force in line with your style of playing; and looping features for extended playback. We’ll go deeper in the next tutorial…
