10 ways to sidechain the sidechain
Processing a compressor’s external sidechain input opens up a huge range of ways to tweak its behaviour. Here are a few suggestions…
Want all the hottest music and gear news, reviews, deals, features and more, direct to your inbox? Sign up here.
You are now subscribed
Your newsletter sign-up was successful
The signal a compressor listens to and analyses to dynamically control its gain adjustment circuit is called the sidechain. While feeding an external signal into the sidechain is a ubiquitous creative effect these days, in standard usage, the sidechain signal is simply an internally generated duplicate of the input – ie, the compression applied to the signal is controlled by the dynamic movement of the signal itself.
Like any signal, the sidechain can be processed using EQ, effects and audio editing, and doing so dramatically alters the response of the compressor. Here are some of our favourite techniques - for even more, check out Ultimate Mixdowns in the April edition of Computer Music.
1. Go beyond de-essing
Wanna turn a compressor into a de-esser? Boost sibilant frequencies (8kHz-ish) in the sidechain only, so the compressor responds mostly to those frequencies. On a similar note, create a ‘de-harsher’ by tuning the sidechain EQ lower, between about 2-5kHz. This can work especially well on sources like trumpets or female vocals, taming strident high notes without dulling the overall tone, as an EQ cut in that region probably would.
2. Low-passed sidechaining
A high-pass filter on the sidechain is pretty standard and often built into a compressor’s signal path. These are great when you want to prevent the compressor from overreacting to low-frequency content - but what if you use a low-pass filter instead? This makes the compressor disregard higher frequencies - the click of a kick drum or the snap of a snare, for example - which can result in a ‘clickier’ or snappier compression style.
Some compressors or channel strip plugins (such as FabFilter Pro-C 2) enable you to set this up internally. Otherwise, you’ll need to route a filtered signal to the compressor’s sidechain input to trigger gain reduction.
3. Unboxing compression
Tuning the sidechain EQ lower and boosting low-mid or bass frequencies can be a great way to reduce boxiness, muddiness or boominess without losing fatness or fullness of tone, or weight and depth. A fairly wide and gentle boost can work well in this case, when combined with a fairly gentle compression ratio of around 2:1 to ride the overall dynamics. As always, though, you should tailor your settings to the problem in hand: if you need a sharp sidechain boost and a high compression ratio to take firm control of specific events, don’t be afraid to do it.
4. Double compress
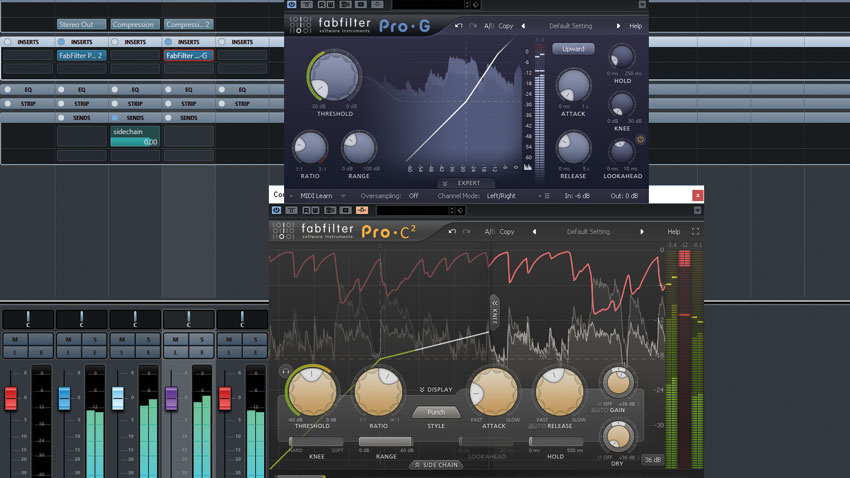
Let’s get a bit more adventurous and swap the sidechain EQ for another compressor. That’s right - we’re going to compress the signal that our compressor is listening to! The effects of this are complex: first of all, we’ll be reducing the resulting compression ratio, as the sidechain signal already has a smaller dynamic range. You can compensate for this with a higher ratio for the main compressor, but it’s still probably better to stick to relatively low ratios for the sidechain compressor, and set the threshold to a similar level on both. If the sidechain compressor has a faster attack than the main compressor, the main compressor will react less to fast transients, which might be useful over a full mix when you want ‘glue’ but don’t want to affect the attack of your drums.
Want all the hottest music and gear news, reviews, deals, features and more, direct to your inbox? Sign up here.
5. Transient booster
Next, tweak settings so that the sidechain compressor has a slower attack than the main compressor. This will tend to exaggerate the transients in the sidechain, making the main compressor react more aggressively to them. This can be a good way to create a very punchy compression style that won’t squash the overall dynamic range too much. When both compressor thresholds are set to about the same, the combined compression result will be punchier. If you set the sidechain compressor’s threshold a little higher, and maybe increase the ratio a bit as well, you can create a compression style that becomes punchier for louder signals.

6. Transient smasher
If you want to really smash the compression, try delaying the sidechain by a few milliseconds. The most obvious effect of this will be to dramatically exaggerate transients, as the compressor will react too late to catch them. This is what many people mistakenly believe the attack control does, but in fact, it’s much more extreme and dramatic than adjusting the attack time: even just 1ms of delay will make a big difference, while settings of around 50ms can create an enormous ‘thump’. Of course, the overall effect will also depend on the compressor’s attack time, so you’ll probably want to tweak the two settings together to tune the results.
This technique can sound a bit too extreme on its own, but blending in the compressed signal in parallel can be a great way to add a bit more snap or punch to drums.
7. Set the limits
Limiting or clipping the sidechain signal can be similar in effect to using a range limit control. Preventing the sidechain levels from ever exceeding a fixed limit effectively sets a maximum amount of gain reduction that can be applied. Of course, not all compressors provide range limit controls, and even when they do, they’re unlikely to give you much command over the knee shape.
If you’re using a limiter rather than a clipper, be aware that longer release times will start to affect the compression in other, more complex ways. If you’re using clipping instead, consider activating oversampling for the clipper if it’s available, as aliasing in the sidechain can affect the compression, even though you don’t hear it directly.
8. Gentler bus compression
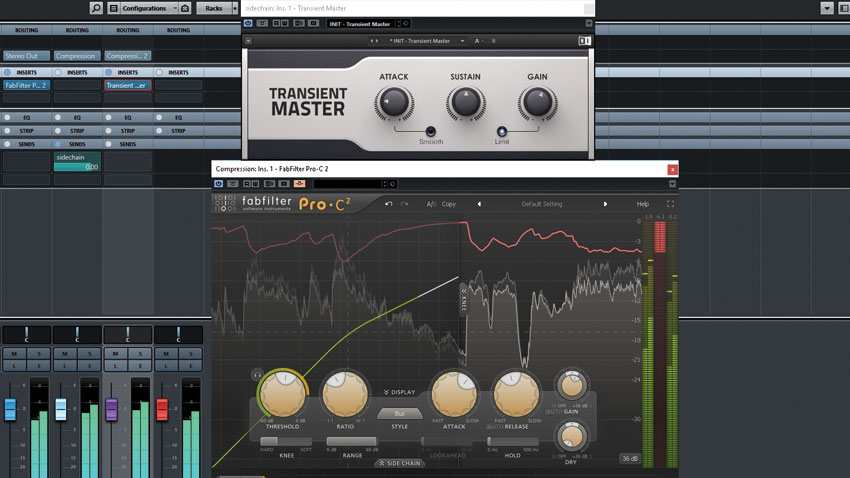
What if we swap the sidechain-squashing compressor for a transient designer? This can have some very interesting effects. For example, try taming all the transients by turning the attack knob down. This has a similar effect to the compression in tip 4, making the main compressor react less to those transients as it hears less of them. This can be a create way to create super-smooth and gentle mix bus compression. But as the transient designer is threshold-independent, it won’t affect the overall compression ratio at all, and it’s a bit easier to set up, too. The resulting sound will be subtly different, giving us another flavour of compression with which to experiment.

9. Upward expansion
Now let’s try some upward expansion over the sidechain signal. Combine this with a high ratio for the main compressor, and set the expander’s threshold a little higher than the compressor threshold. Now we have hard, almost limiting-style compression kicking in at the compressor threshold, but when the signal reaches the expander threshold, the compression ratio will increase further, pushing into over-compression ‘negative ratio’ territory if desired. This can be great fun with drum room mics.
For super-aggressive compression, use a fast attack for the expander, with a bit of lookahead, if available, to catch the very beginning of each drum hit.
10. Multiband tweaks
Multiband compression or expansion for the sidechain can be difficult to get your head around, but remember that whatever you do to the sidechain will likely have the opposite effect on the overall compression. If you compress a specific band of frequencies in the sidechain signal, the overall compression ratio will be reduced for that band.
TDR’s Kotelnikov plugin is the only compressor we’re aware of that can do frequency-specific ratios internally without a sidechain input. But more importantly, you can change the character of the compression for specific bands, in all the ways detailed above: set a fast attack for the low frequencies in the sidechain, and the main compressor will react a bit less aggressively to low-frequency transients like kick drums.
Computer Music magazine is the world’s best selling publication dedicated solely to making great music with your Mac or PC computer. Each issue it brings its lucky readers the best in cutting-edge tutorials, need-to-know, expert software reviews and even all the tools you actually need to make great music today, courtesy of our legendary CM Plugin Suite.
