10 creative tips for working with samples
Ways to make more of your sampled sounds in your DAW
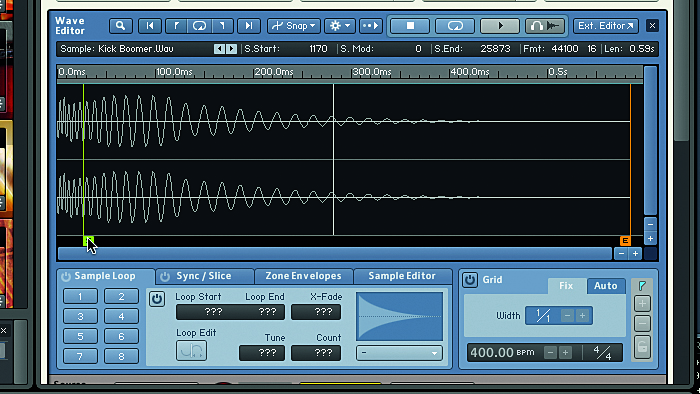
1. A new start (and ending)
Changing the sample start and end points of drum samples is a quick and elegant way of changing how they sound.
Typically, the transient (the start of a drum sound) is where the majority of its high frequency information will be, so move the sample start-point to occur slightly later, to alter the character of its attack. Increase the attack and/or release parameter to reduce clicks/pops.
2. Crossfade
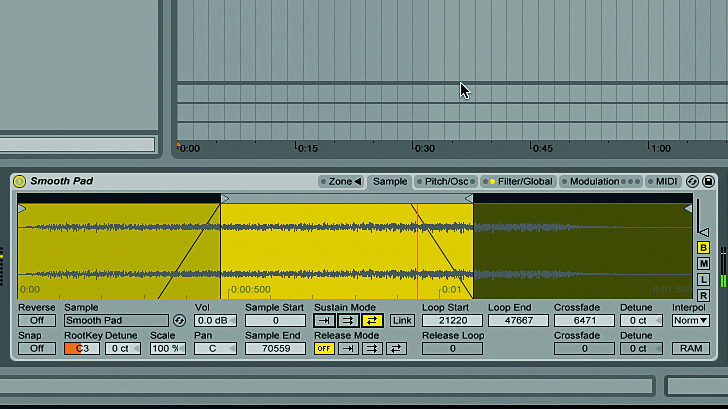
If you’re struggling to loop a pad, chord or lead sample smoothly, try using your sampler’s loop crossfade parameter (if it has one) to make the loop point less obvious.
You may also find your sampler has a forwards-backwards (or “ping-pong”) looping mode, which may give you a more natural sound and interesting feel, especially when used with crossfade looping.
3. Resample
Resampling – that is, recording a sound to a new audio clip and loading it into a sampler for playback – can be a powerful way of manipulating any kind of sound.
Spend some time developing a fast resampling workflow. For instance, in Ableton Live, you can quickly Freeze any audio track, Flatten it, then drag the resulting clip into a Simpler instrument.
4. Repitch
If you’re using your DAW’s audio track to timestretch drum loops or breakbeats to fit your project tempo, you may notice that the granular processing it uses has an undesirable effect on the beat’s lows and transients.
Want all the hottest music and gear news, reviews, deals, features and more, direct to your inbox? Sign up here.
You might find that using a sampler in standard ‘repitch’ mode to play the beat back slower or faster gives a better result, though this will of course change its pitch as well as its tempo.
5. Stretch yourself
Samplers that offer real-time timestretching can play back pitched loops on different notes – great for creating new riffs. If your sampler doesn’t offer this kind of capability, consider downloading the free, cross platform ROMpler UVI Workstation. This instrument can load regular audio files as well as its own proprietary ROMpler patches, and will automatically timestretch them to play at the same tempo on every note.

6. Quality control
Some soft samplers offer a variety of quality modes to work with. Higher settings are useful to preserve the clarity of the sound when playing purer tones higher up the keyboard, while lower settings can give you a crustier timbre reminiscent of old-school hardware samplers.
Check out Kontakt’s MPC60 and SP-1200 modes if you’re after this kind of retro vibe.
7. Distorted view
When using distortion on a polyphonic sample, you can get different results if you add per-voice distortion in the sampler itself as opposed to the channel. Because each voice of the sampler is distorted separately, you’ll achieve a much cleaner sound than using a single distortion on the channel, which only distorts the sampler’s summed output.
8. Perfect harmony
If your sampler can automatically timestretch samples to maintain a consistent tempo no matter which note is played, you can use this functionality to quickly create artificial vocal harmonies.
Load the part of the vocal you want to harmonise into your sampler, activate its timestretching mode, and add the harmonies you want on the sampler’s MIDI track.
9. Starter's orders
Some samplers (such as Reason’s NN-XT) offer sample start position as a modulation source. This is a really great tool for creative sampling, and it works especially well when it comes to samples that feature a lot of movement, such as filter sweeps and vocals.
To modulate the sample start-point in NN-XT, simply turn up the Sample Start knob in the Velocity panel. Now the velocity of each note is able to determine where the sample starts!
10. Modulate effects
Some samplers have built-in effects that can be modulated. These are great tools for getting the kind of complex, moving sounds found in styles such as dubstep and DnB, but can add interest to any type of sound.
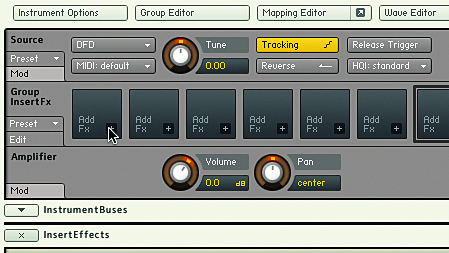
You can use a sampler like Kontakt and its onboard effects which can be modulated. Click the spanner icon to bring up the instrument’s parameters, and in the Group Insert FX panel, click the + button on the first slot.
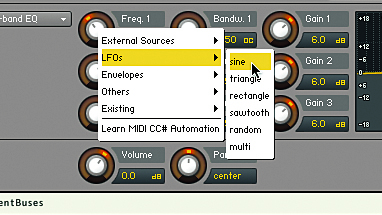
Select EQ » 3-band EQ, and the effects parameters will appear. Set each of the EQ bands’ Gain to +6dB, then right-click each of the Frequency knobs, selecting LFOs » Sine. This creates an individual LFO for each frequency band.
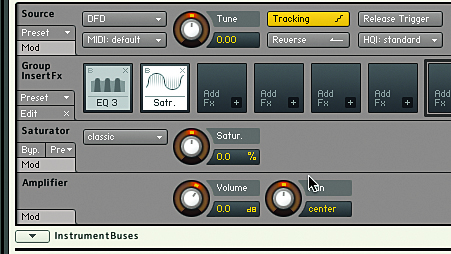
Now adjust each band’s LFO Speed, Frequency and Amount values to taste. To get yourself an extra crunchy effect, why not add in a Saturator after the 3-band EQ and whack the Saturation parameter up to 100%?
Computer Music magazine is the world’s best selling publication dedicated solely to making great music with your Mac or PC computer. Each issue it brings its lucky readers the best in cutting-edge tutorials, need-to-know, expert software reviews and even all the tools you actually need to make great music today, courtesy of our legendary CM Plugin Suite.
