Since the earliest days of electronic music, enterprising producers have been pushing audio signals through the filters and amplification circuitry of analogue synthesisers, in order to capitalise on their frequency-shaping and distorting potential.
With version 9 of Cubase, Steinberg has added the ability to emulate this technique with certain of its integrated VST instruments, including the powerful Retrologue 2. In this tutorial, we'll take you, step by step, through the process of plumbing a sampled loop into Retrologue’s sidechain input.
You can discover more of the Cubase 9's new features in the April edition of Computer Music.

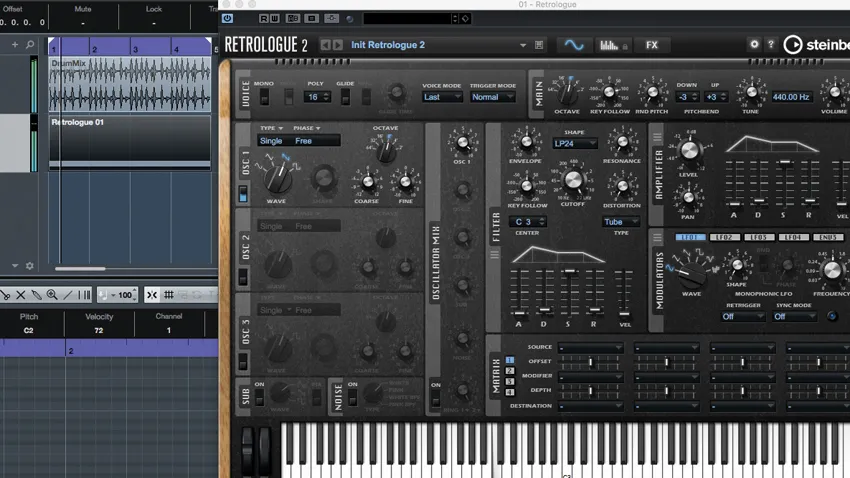
Step 1: Cubase 9 now allows sidechaining with some of its included instruments. Retrologue 2, with its luscious analogue filters, is an obvious choice. Here, we’ve got Drums.wav on an Audio track. Let’s instantiate Retrologue in the project on an Instrument track.
Step 2: Add a single note - say, C2 - in Retrologue’s piano roll editor to trigger the synth. It should sustain for the entire length of your playback loop. Kick off playback using Cubase’s new transport section at the bottom of the screen.

Step 3: Next, we need to enable the Activate Sidechain button at the top of the plugin. Now, reduce the level of Osc 1 in Retrologue’s Oscillator Mix section. While we’re there, increase the Input level. We’ll not hear any change just yet, as the audio isn’t routed into the synth. We’ll get to that!

Step 4: Turning to the drum loop track, go to the Inspector and completely reduce the volume of the channel. Now we hear nothing at all, even though the project is playing. The next step is to open the drum track’s Sends and select Side-chains - 01 - Retrologue as the destination bus.

Step 5: Click the Send slot’s top-left button to activate the Send, and the Pre/Post Fader button to make sure the signal is routed before the track’s fader (which we’ve just turned all the way down). Now we can hear the drum loop through Retrologue. Give Retrologue’s Filter Cutoff knob a downward spin.

Step 6: Now we can do all manner of interesting things to our filtered drums, such as modulating the filter cutoff with an LFO. Here, we’ve selected LFO1 as a modulation source and the filter’s Cutoff as the destination in Retrologue’s Matrix, and selected a tempo-synced random waveform. Very cool!
