Want all the hottest music and gear news, reviews, deals, features and more, direct to your inbox? Sign up here.
You are now subscribed
Your newsletter sign-up was successful
It doesn't matter how well-honed your guitar chops are, the way your instrument is set up will have a huge effect on how challenging it is to play. And that's a very individual thing; many of us prefer a low action, or at least the idea of one. Others want the tonal response and sense of digging in that a higher action can offer. The good news is it really isn't difficult to lower or heighten the action of your guitar strings to experiment in finding the right setup for you.
But first we need to explain what 'guitar action' actually means and how it can affect your playing experience and tone.
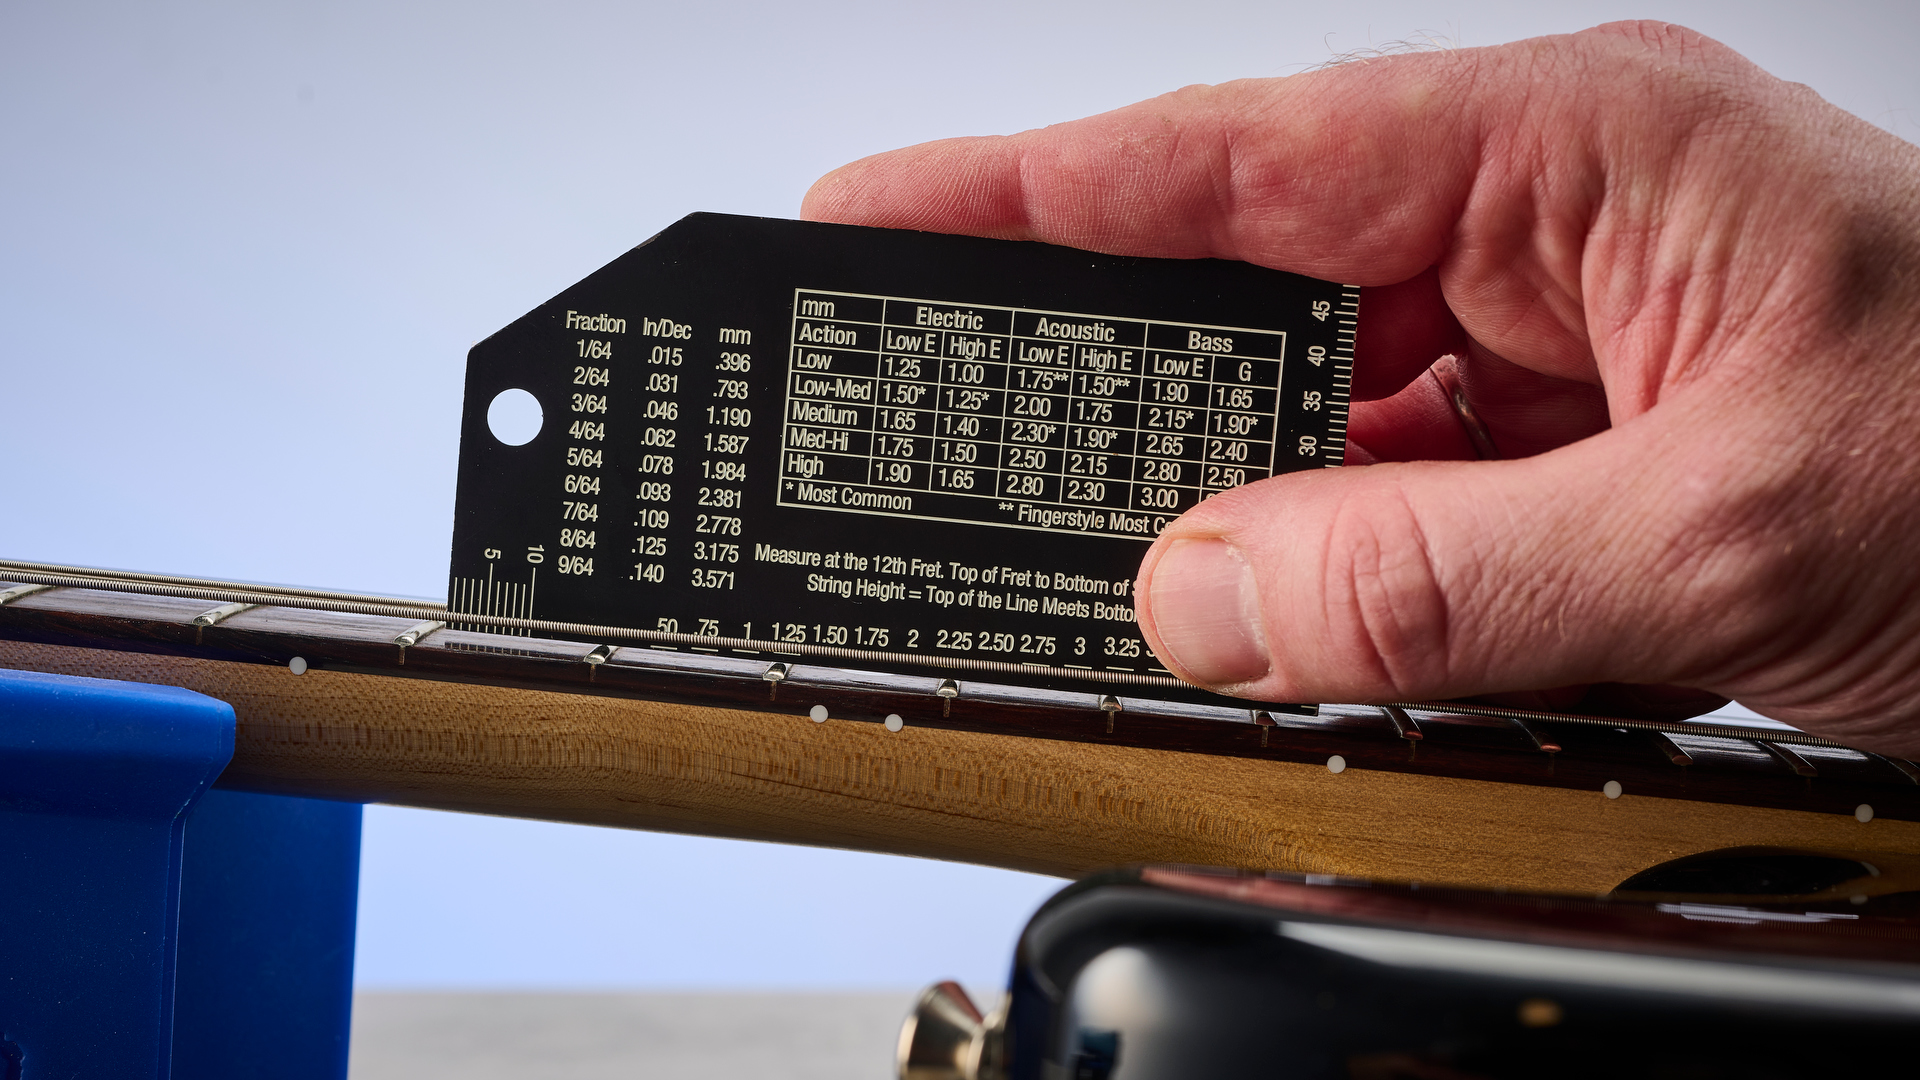
Put simply, it's the height your strings are set from the guitar's frets. If the strings are higher, they become harder to push down with your fingers – and that means the guitar is harder to play. When the height (action) is lower, the strings are easier to fret (push down). So surely all players would want lower action – why make your guitar harder to play?
Because higher action doesn't just affect how hard your guitar is to play. If your action is low it can highlight uneven frets that can cause the dreaded fret buzz, or even choked notes where the combination of low action and and high point in the fret metal prevents the note from ringing out properly when you play it. But even if you don't have fret issues (and we'll be talking about how to solve those in a future how-to) there are other possible advantages for some players to having higher action.
It could be a game-changer for a guitar you've never bonded with fully before
Higher frets can allow the strings to ring out more with greater clarity as they have more space to vibrate, and be played more aggressively. It's a very personal thing, and when your string gauges are on the heavier side that also affects how physically harder it is to play. But it's certainly not a choice between high and low – there are all areas in between. Personally I like a low action, and I'll make sure my frets are even and well-polished to negate as many of the possible drawbacks as I can (we'll get to that). A lower action allows me to play faster, and encourages me to play with a lighter touch – and I just like that combination.
Whatever your preferences, or those you'll discover when you try different actions on your guitars, you can set them relatively easily by following a simple process and measuring your action and fretboard radius with the right tools. It could be a game-changer for a guitar you've never bonded with fully before – it may have simply been waiting for you to change the action.
Let's get started!
Want all the hottest music and gear news, reviews, deals, features and more, direct to your inbox? Sign up here.
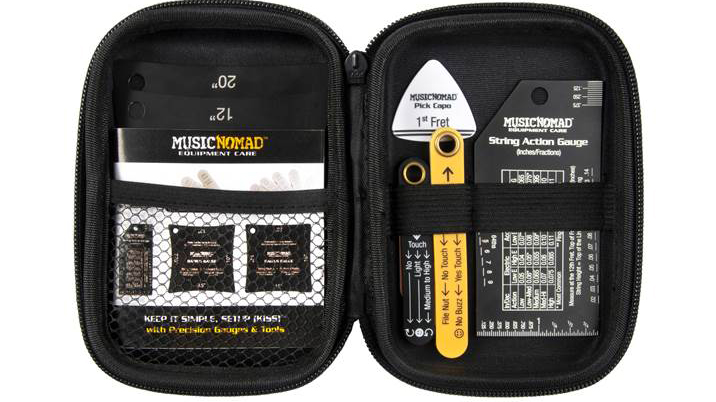
I don't say this lightly, but I think the six-piece MusicNomad Precision Setup Gauge Set shown above is one of the best investments you can make as a guitarist. It really is that useful. It has everything you need to set your guitar up – including finding out if your truss rod needs adjusting.
While the kinds of tools found in the kit are available separately elsewhere, I can vouch for the quality here from years of use setting up my own guitars. And the company's KISS system (Keep It Simple, Setup) outlined in the included booklet is a great, foolproof way to keep your guitars playing well. It will pay dividends.
Choosing a starting point
We're starting from the point of any required truss rod adjustment being done already (find out how to do that here). First, we'll consult the MusicNomad string height gauge / fret rocker's chart shown below to find out the kind of heights we need to aim for to achieve different actions. They refer to the heights of the low and high strings only – and I'll explain why soon.
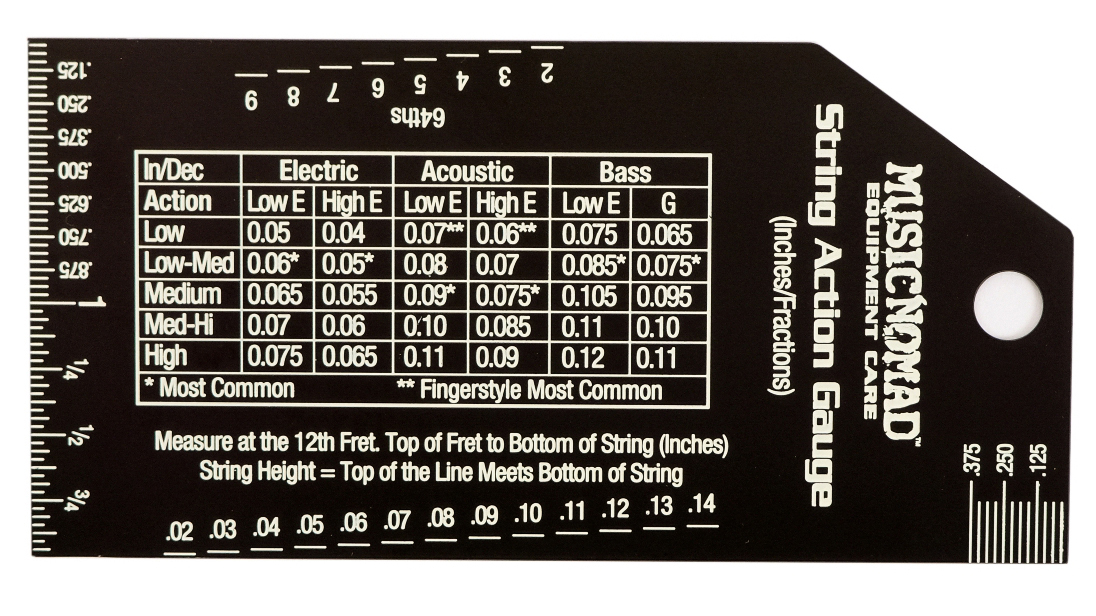
If you're not sure how low or high you want to go with your string action, the low-medium or medium-high measurements are a good place to start. The MusicNomad gauge provides a scale from .02 - .14 of an inch to make it easier to get the height right by eye. You'll need to keep the gauge flat on the 12th fret and get down to eye level to check. But you'll also need to make sure of two other things too.
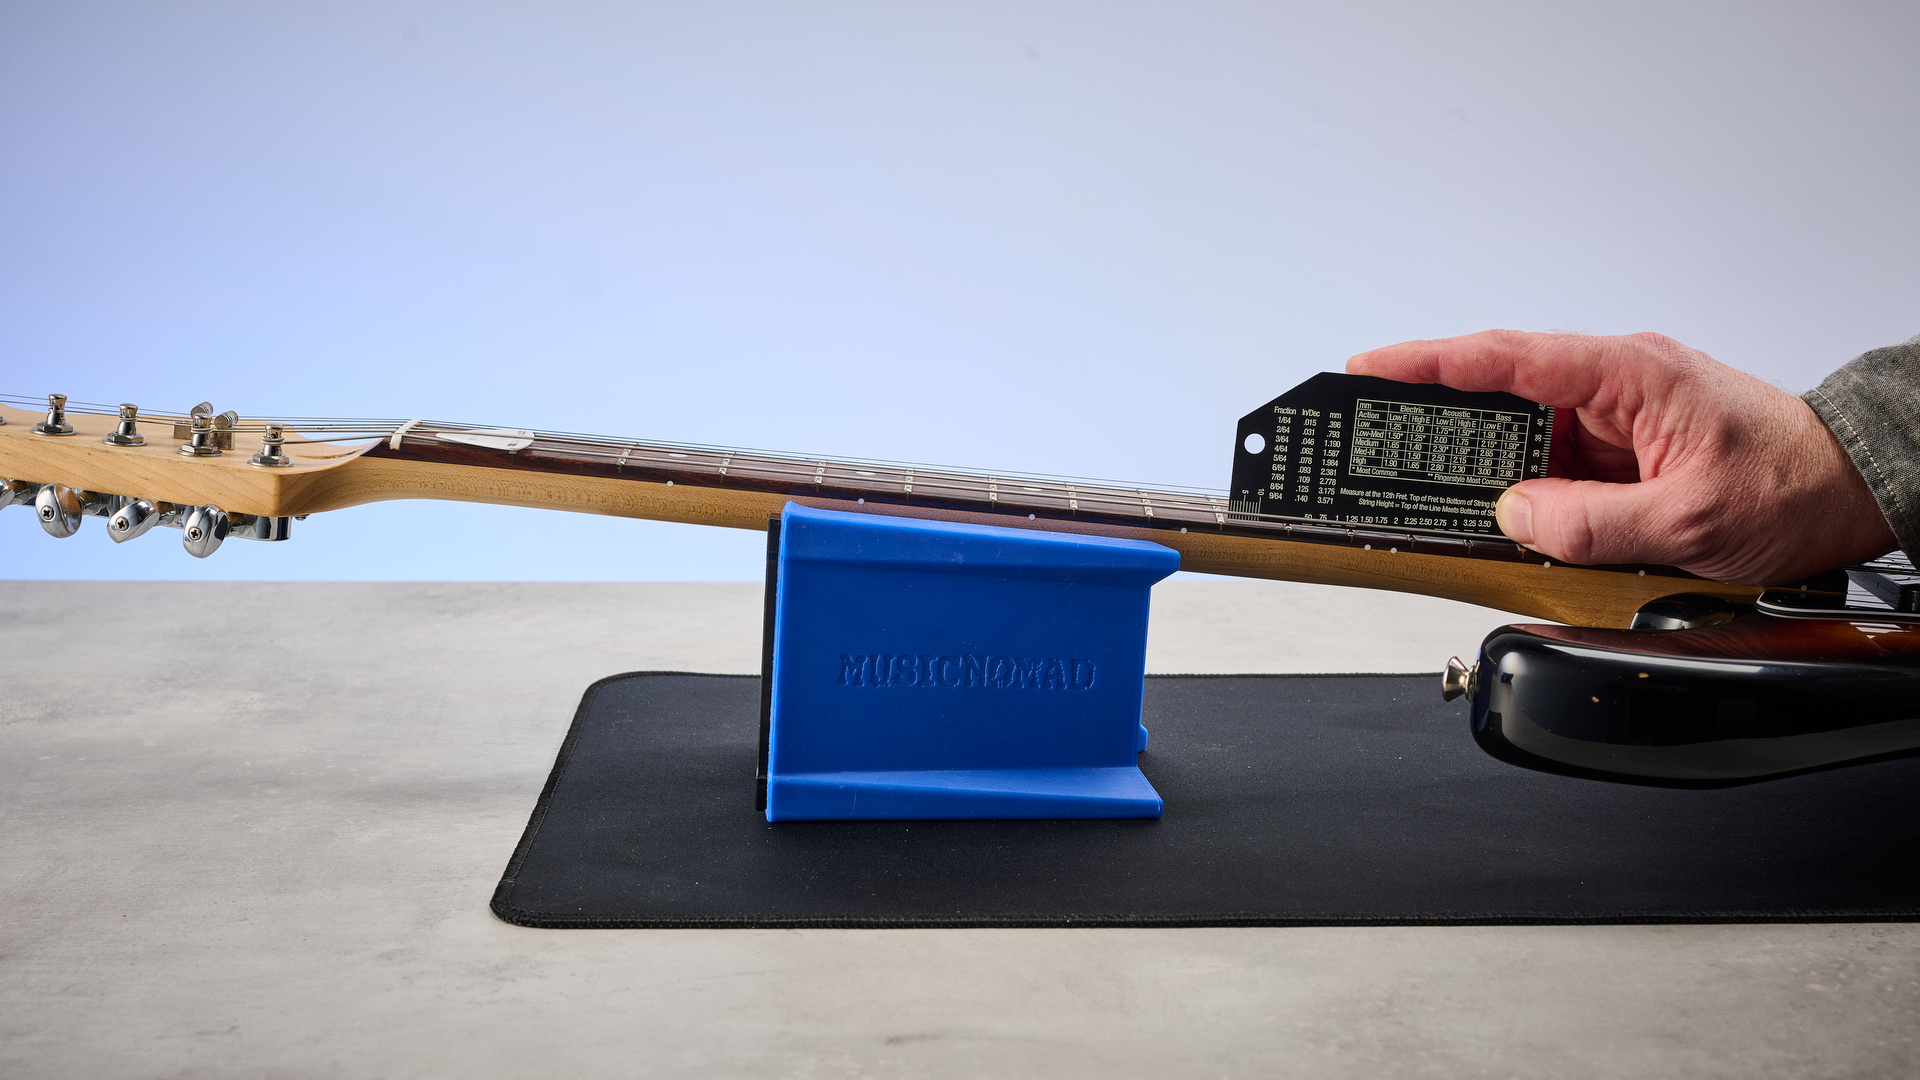
You'll need to hold down the low E at the first fret while you're taking the measurement at the 12th. MusicNomad provides a special guitar pick in the Precision Setup kit to do this but you can use your own, or even a finger or guitar capo to hold the string down. You'll need to do the same for the high E string when taking that reading and monitoring the changes too.
Remember to measure from the top of the 12th fret to the bottom of the E strings.
How you adjust your string heights will depend on the type of bridge fitted to your guitar.
Main types of guitar bridges and adjustment
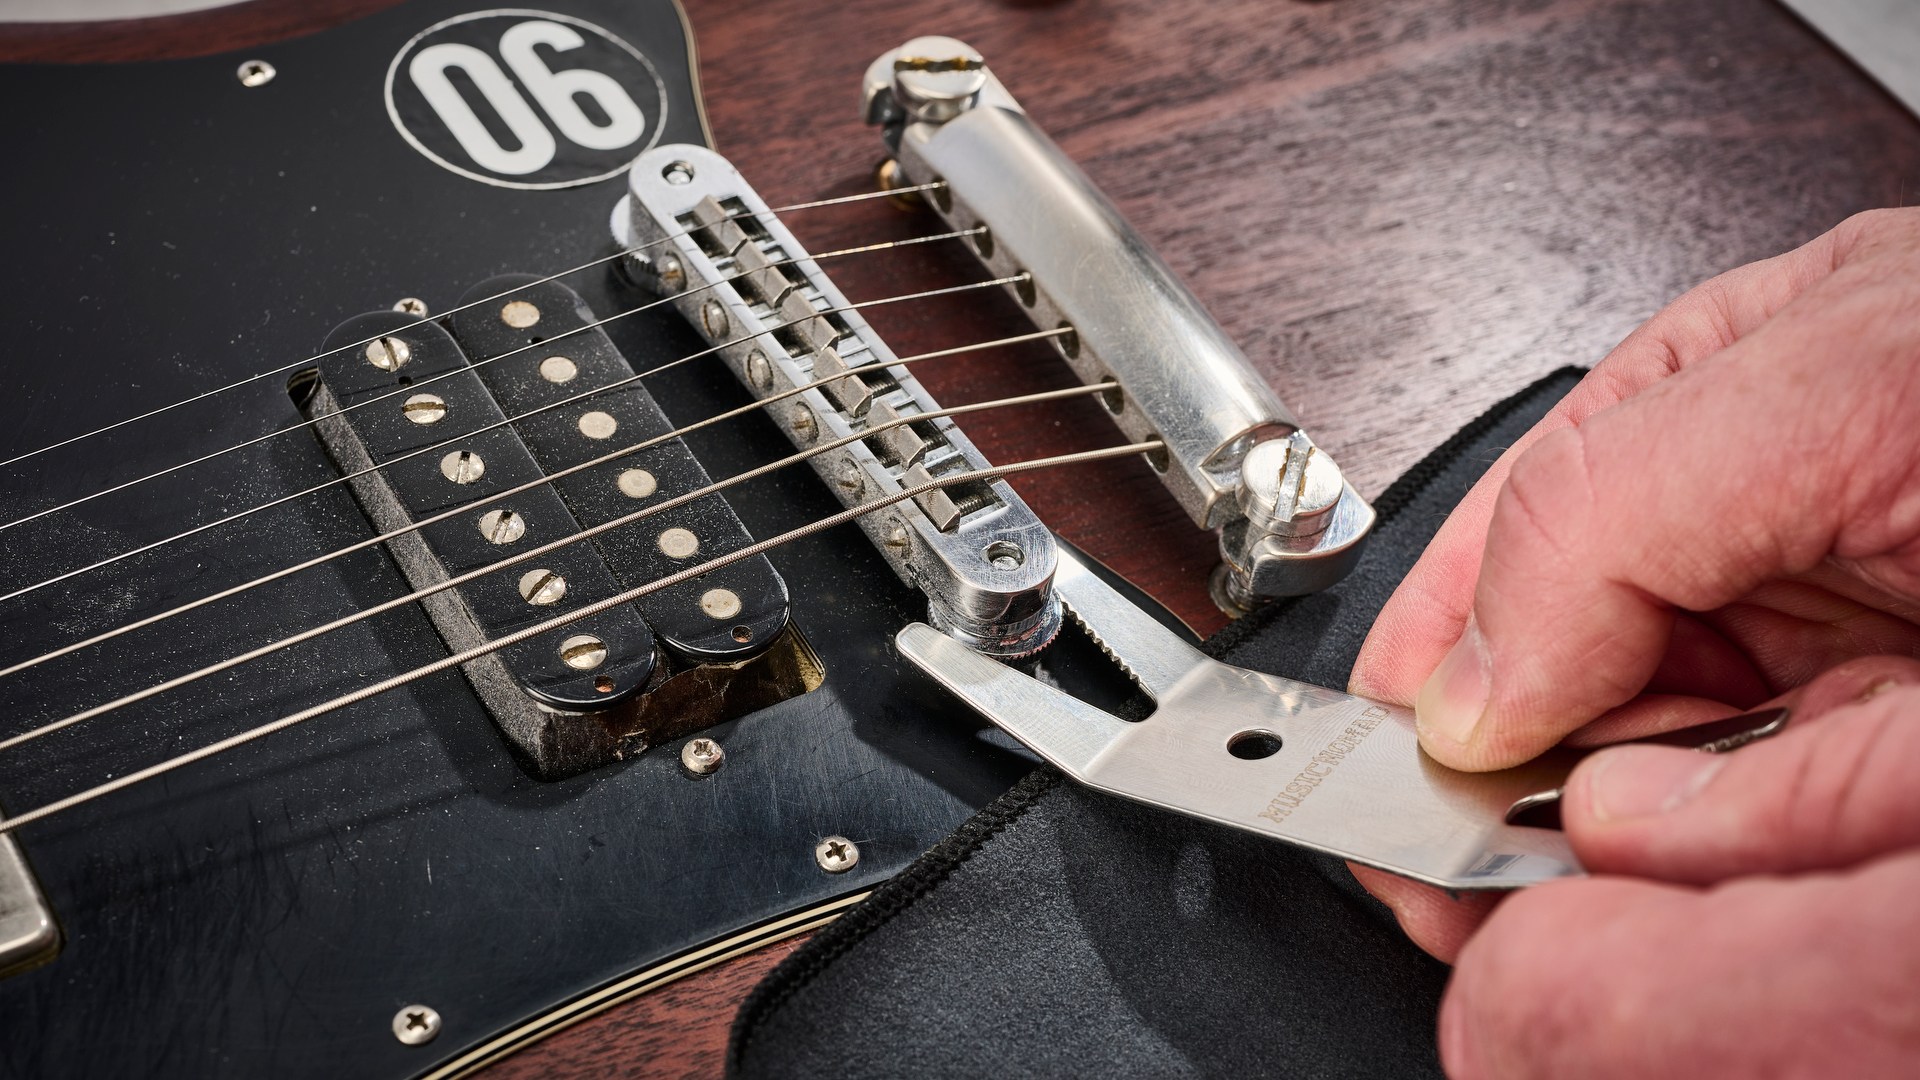
For a Tune-O-Matic bridge, commonly found on Gibson guitars like our SG Special Faded above, you'll need to lower and heighten the low and high E string using the thumbwheels on the bridge posts.
Turning the thumbwheels counterclockwise raises the string action, and turning them clockwise will lower it. Take it slow and adjust in small increments, checking the gauge after each adjustment.
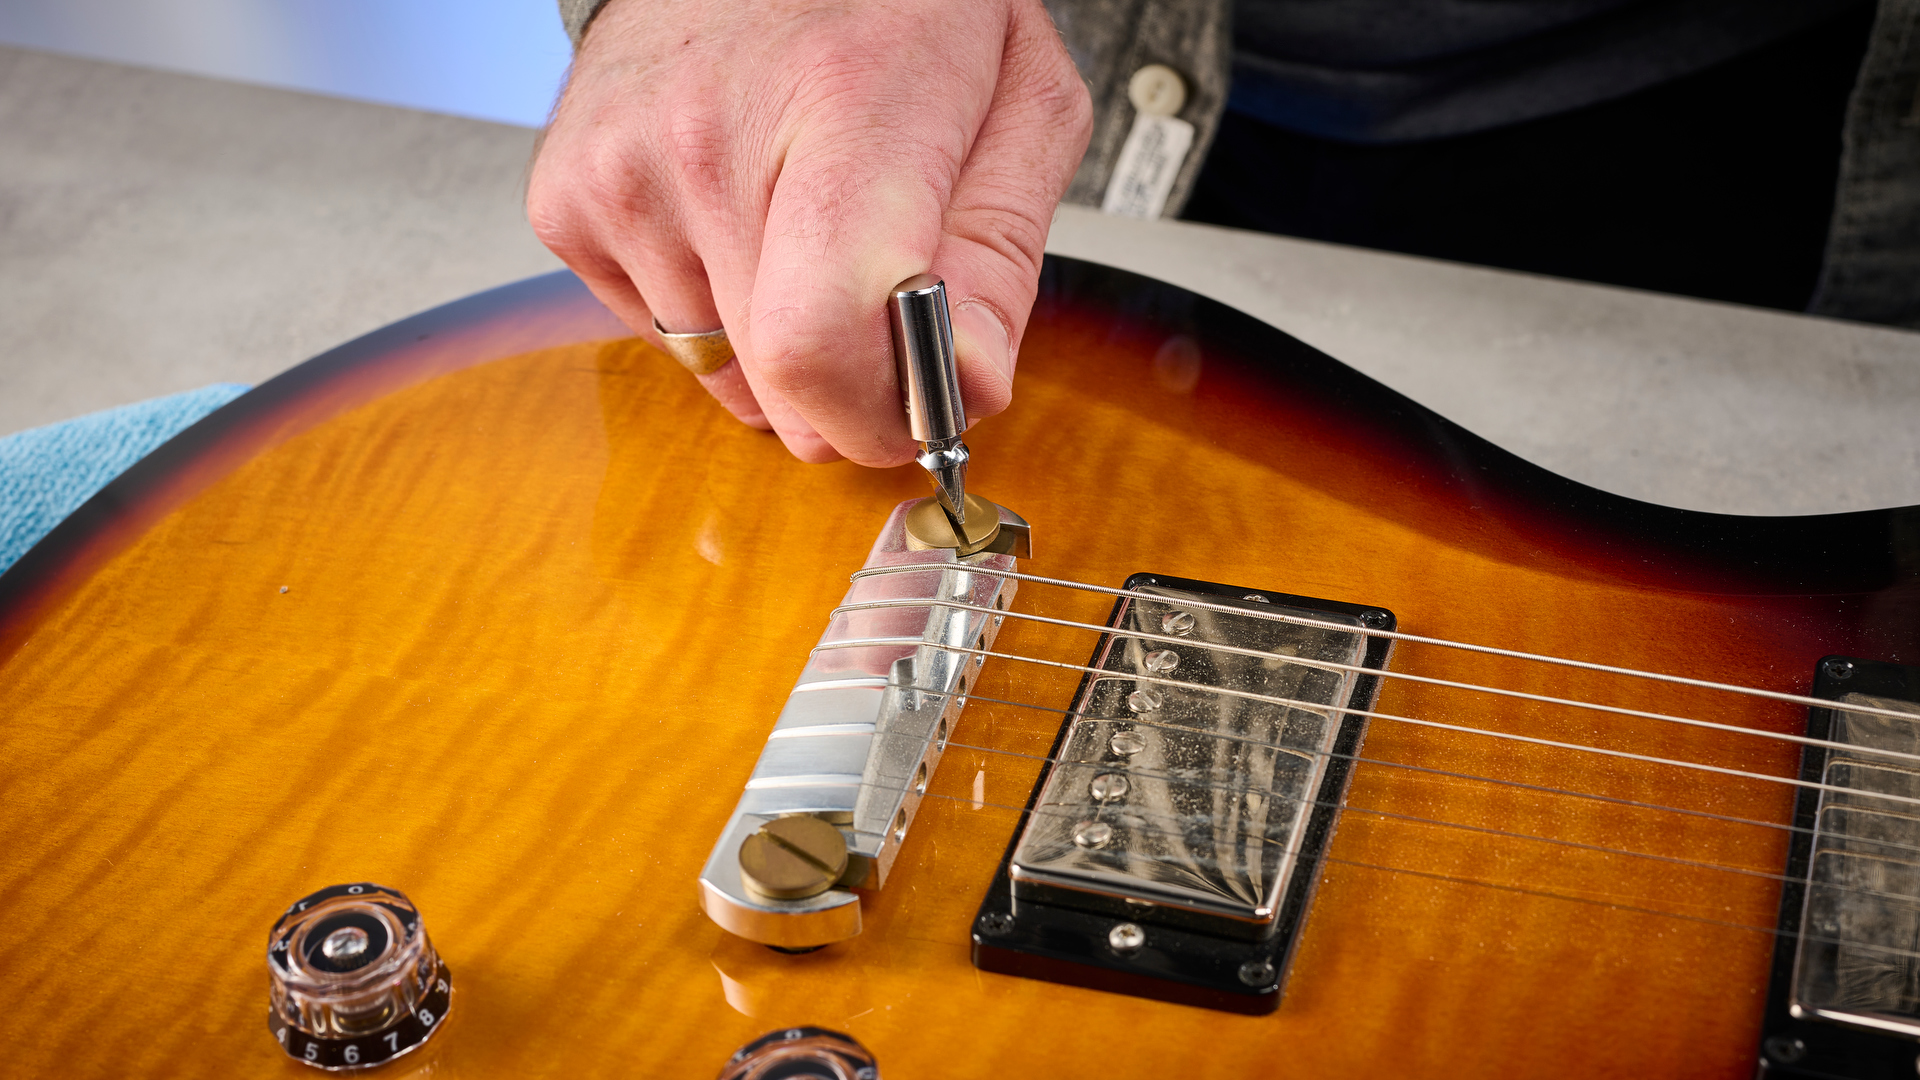
For the stoptail type bridge like the PRS guitar above you can adjust using a large flathead screwdriver or a coin like a quarter to turn the studs. I'd recommend you reduce the string tension a little when doing this by temporarily tuning down, and on the Gibson-style bridges too. It just makes it a little easier to adjust the hardware.
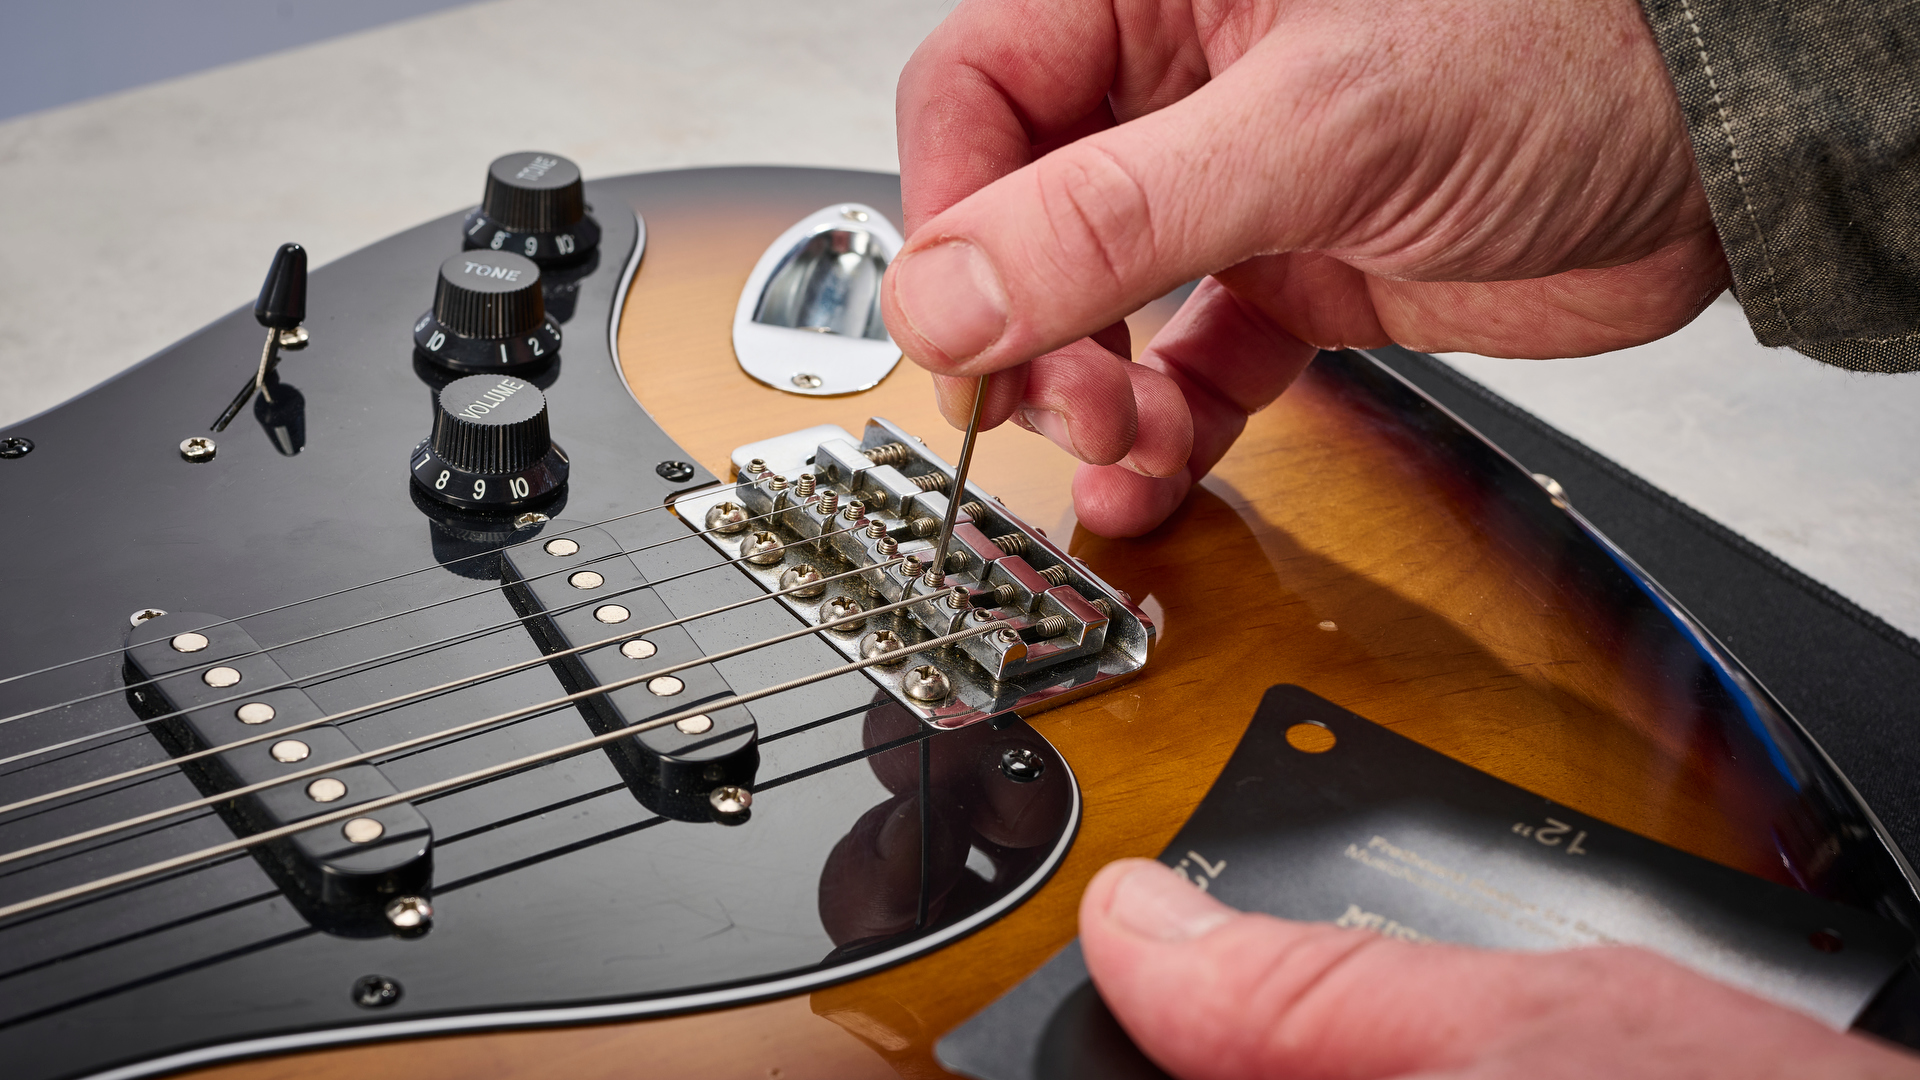
The individual saddles found on many Fender guitars like our old Squier Strat below require a small hex/allen key to adjust the string heights – usually included with the guitar when you buy it new. All six strings have two adjustable screws each, but we're just focussing on the low E and high E for now.
Remember, adjust in small increments and keep checking your measurements – and remember to make sure the string you're measuring the height of is fretted at the first fret with a capo, pick or finger. Then we have to think about the heights of the other strings…
Fretboard radius
This is where the concept of fretboard/fingerboard radius comes in; this is the curvature of the fretboard. The lower the number, the more curved it is. So a 16-inch radius acoustic fingerboard will feel flatter than a 7.25-inch vintage Fender. Our strings have to follow this curvature too or they're at odds with the fretboard and the wrong relative heights. They won't feel right if they don't reflect the guitar's radius, so this is when we need a radius gauge.
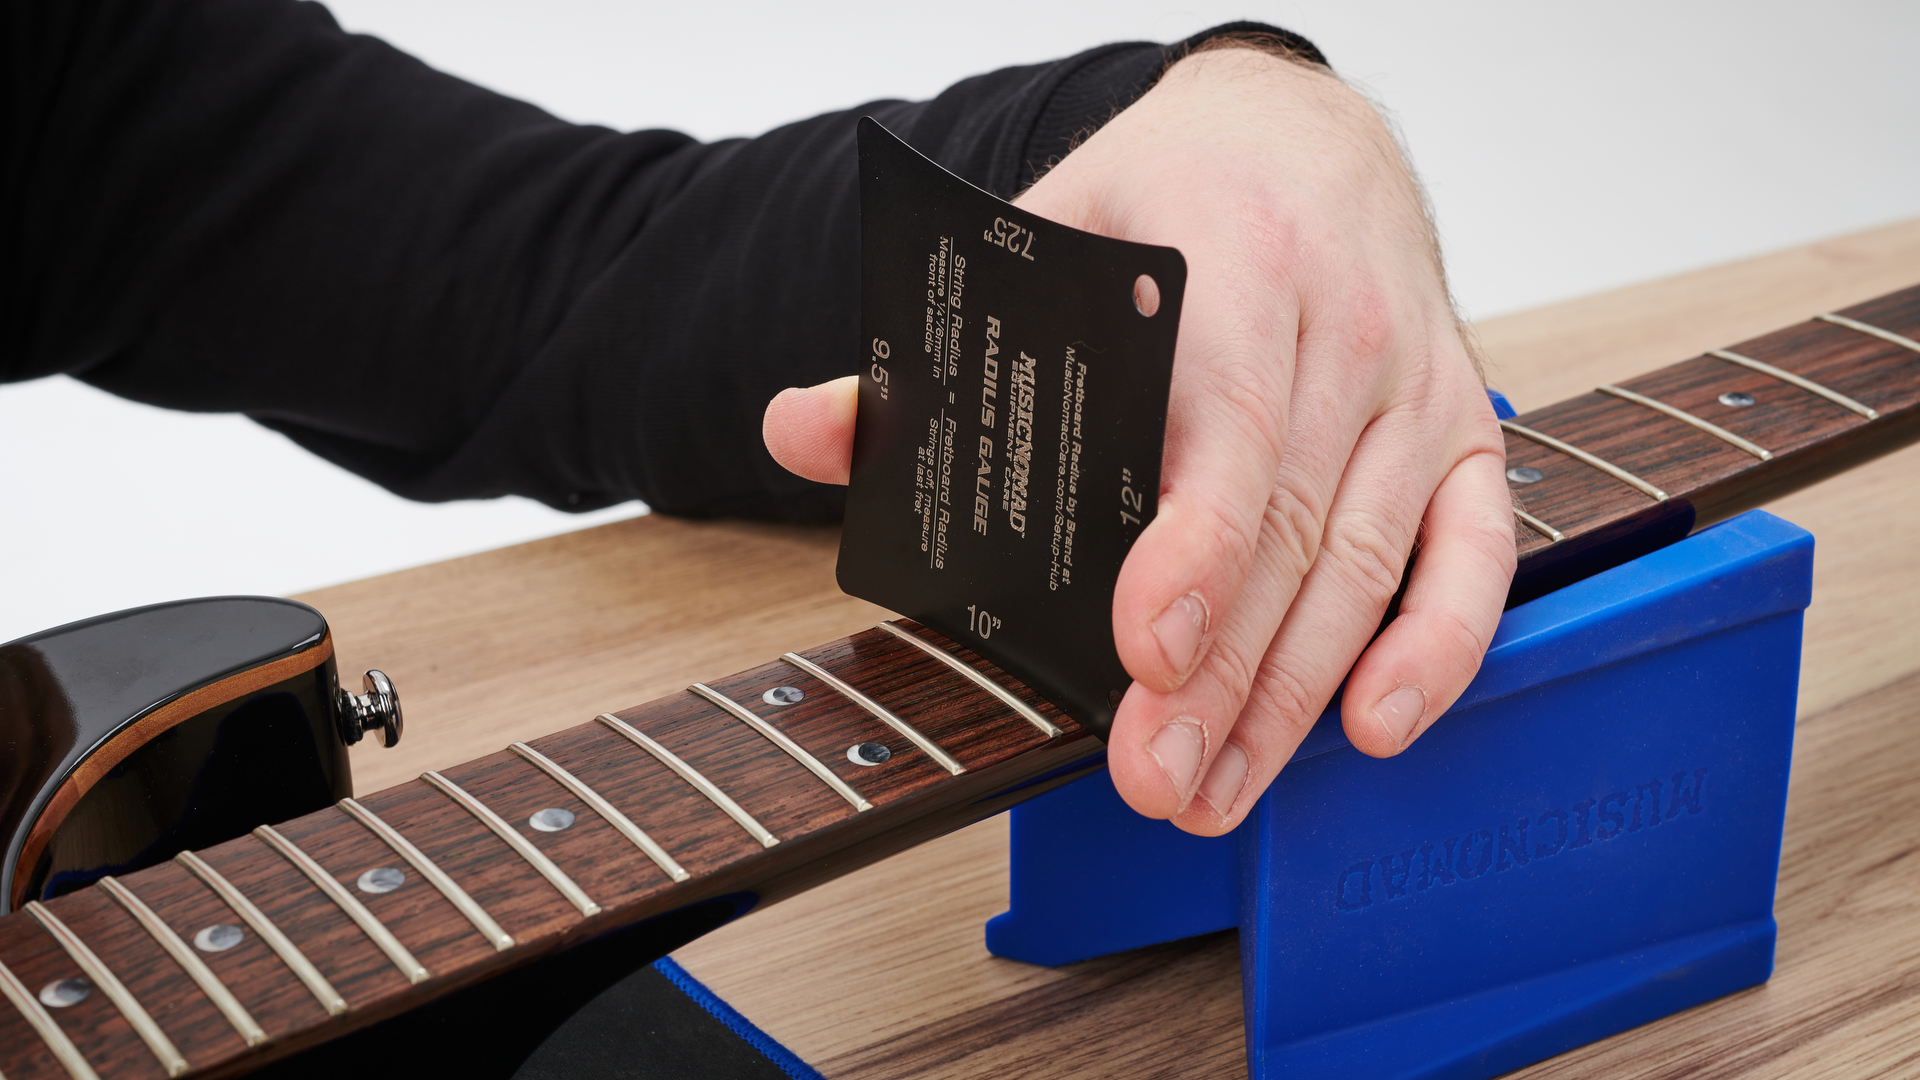
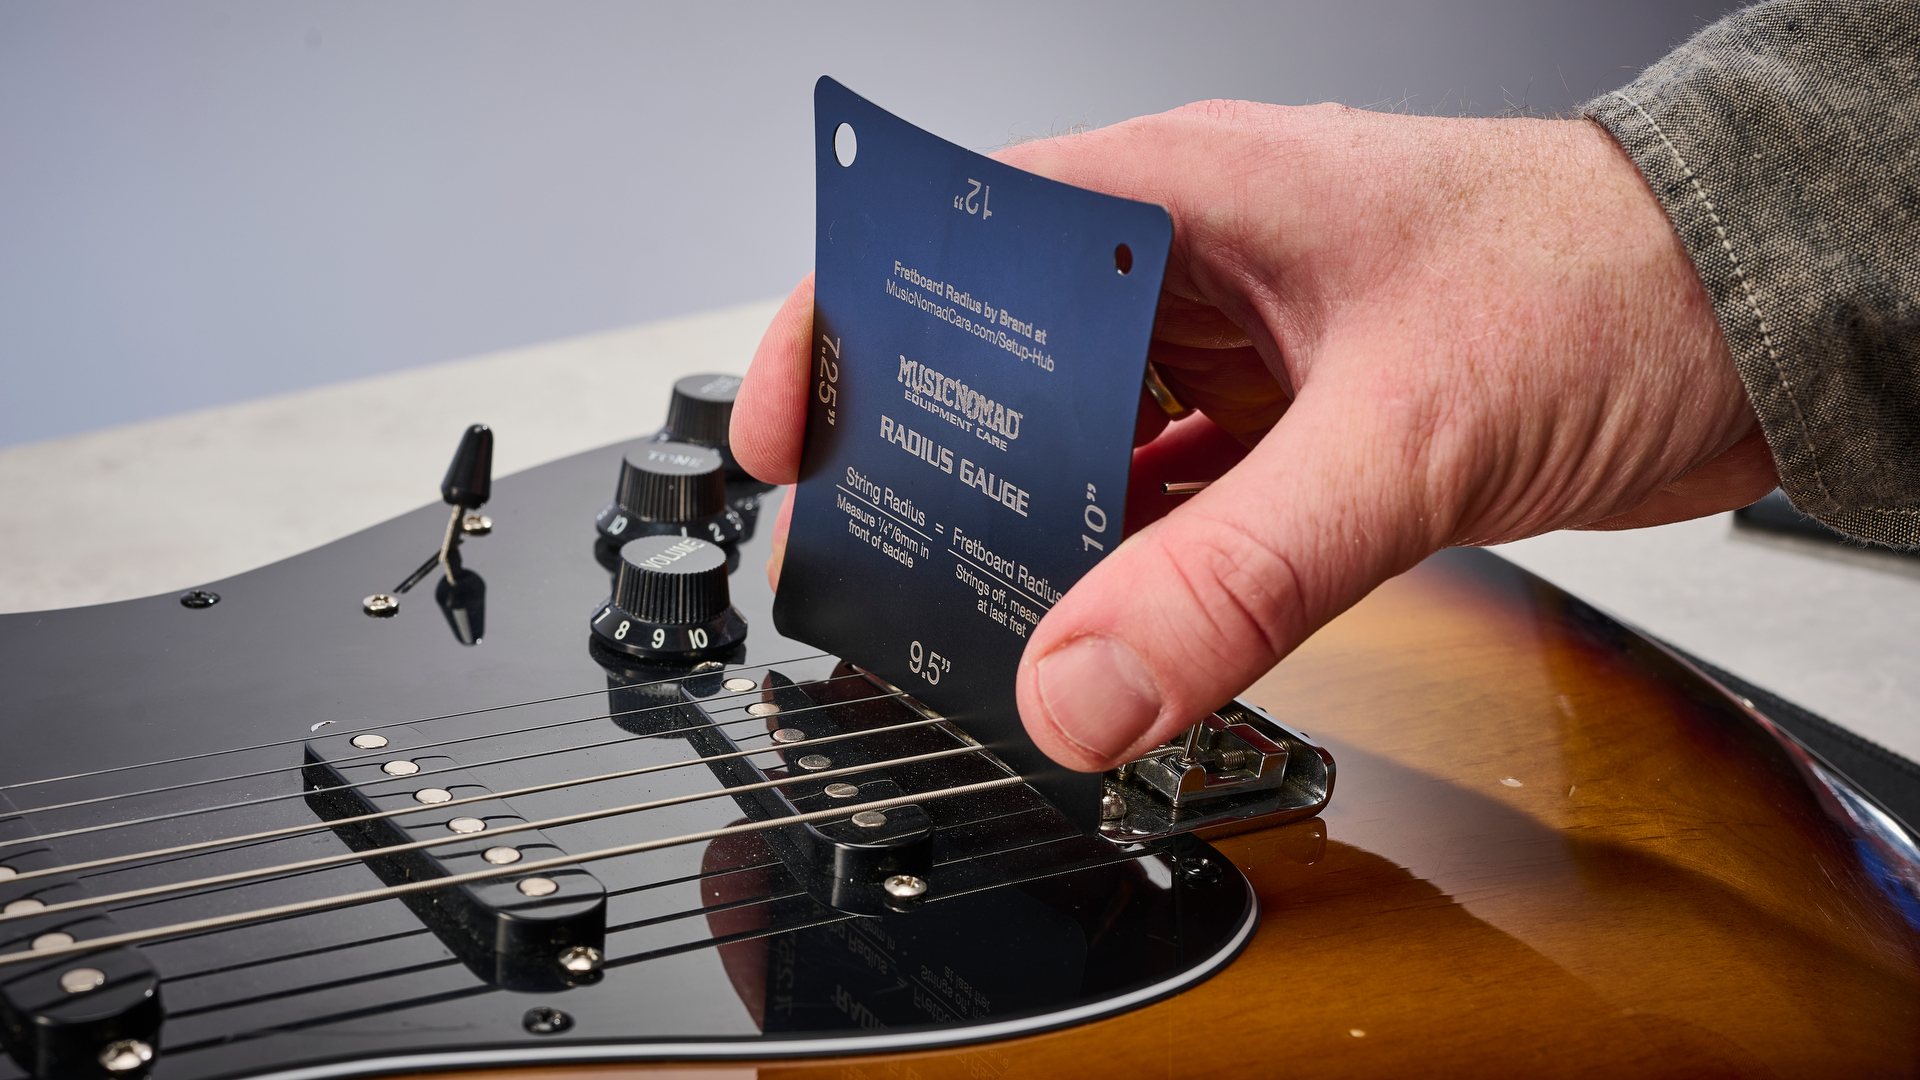
A radius gauge has two primary uses for us here; it allows us to confirm the correct radius of our guitar if we're not sure, and also set the correct heights of the other four strings in relation to the low and high E strings (once we've already set at those two strings at the height we want them).
Most manufacturers will state the fingerboard radius for each model guitar, so it will be easy enough to check online if you're not sure. The most common are 9.5", 12" and 10" but occasionally an inaccurate radius might be stated in a guitar's specs – it's rare but I've found it can happen when I've double-checked review guitars, especially with cheaper brands. To be sure, you need to test the gauge on the fingerboard when the guitar has had its strings removed.
The radius gauges from our MusicNomad set above are four-sided with each side having a different curvature gauge. Other manufacturers may produce individual gauges. Lay it flat on the fretboard and look for gaps – if the gauge is too curved you'll notice them appear between the wood and the bottom of the gauge. The gauge that matches will sit the flattest to the 'board.
Adjusting string heights to a radius gauge
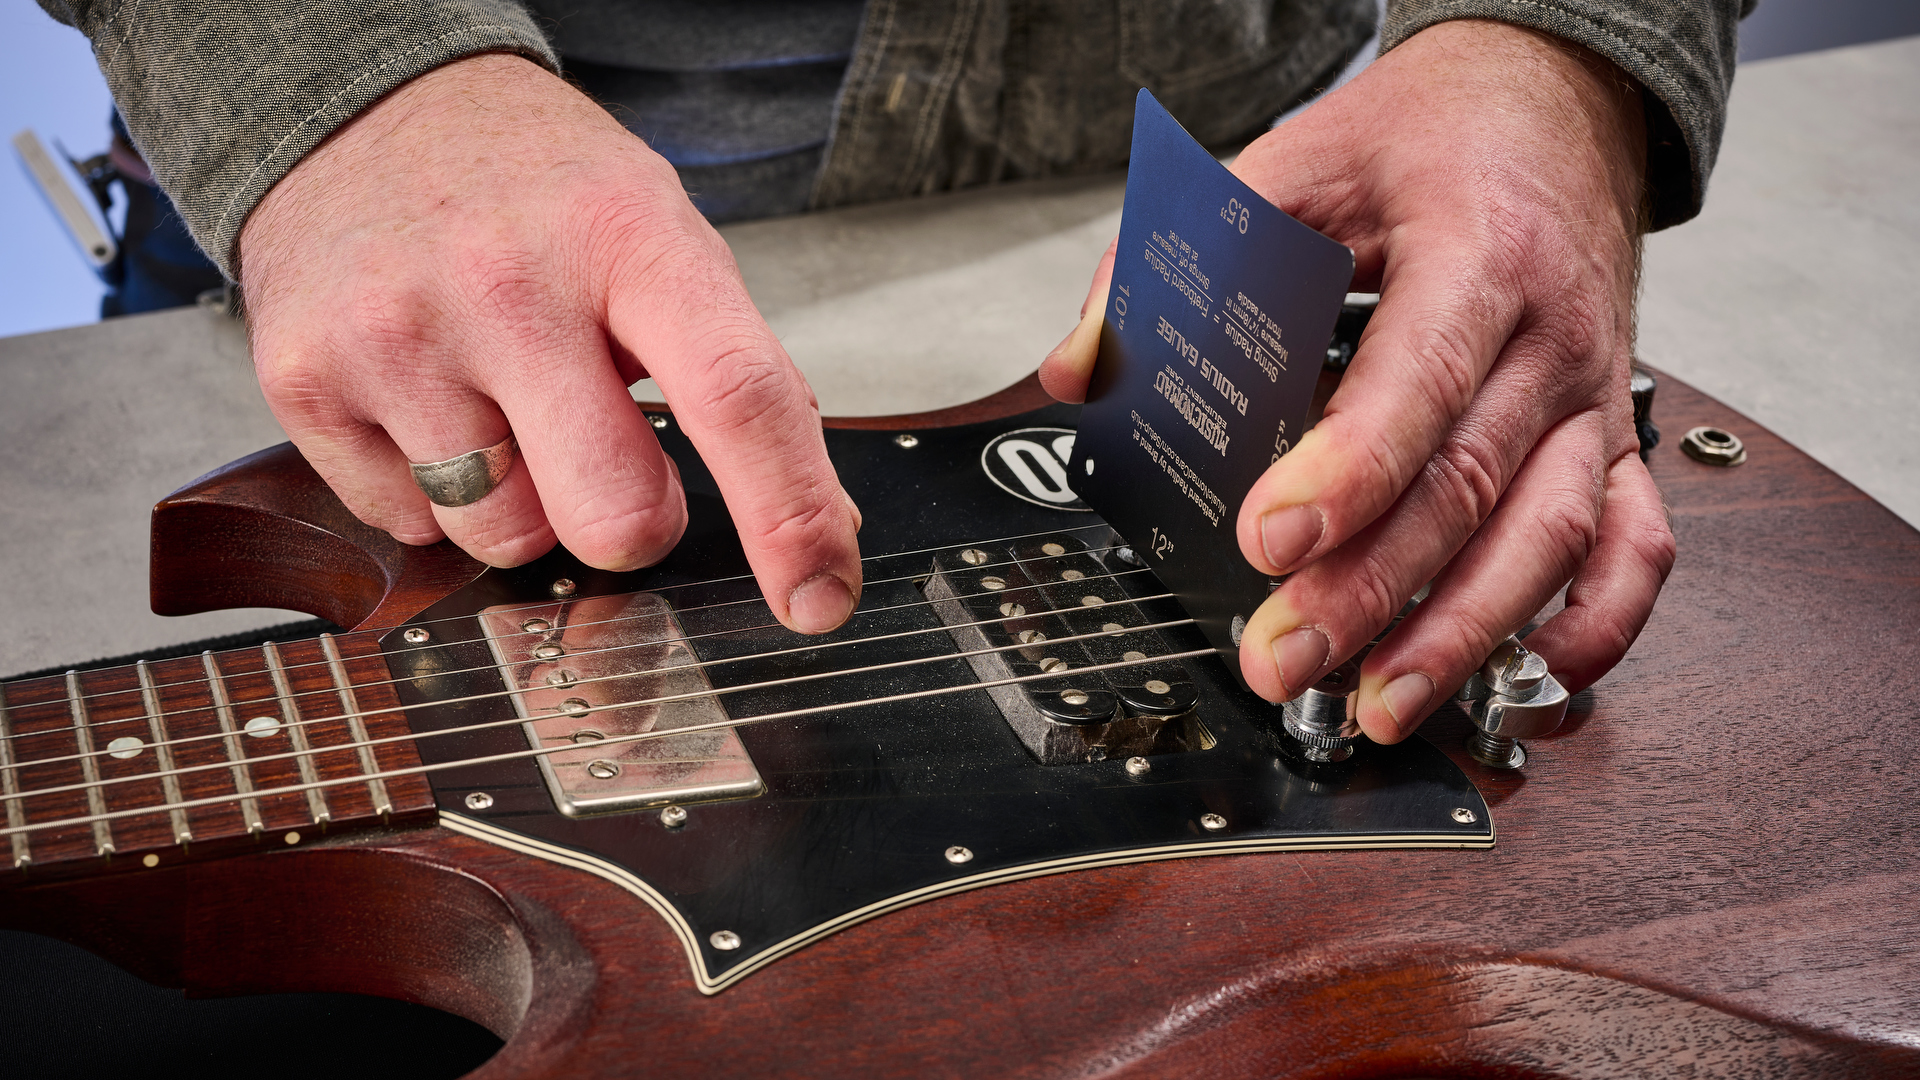
To set our A,D,G,B string heights we're using the gauge when the strings fitted. I set the gauge around 1/2 inch ahead of the bridge and play each string to check if they're touching the bottom of the gauge. The low and high E should already be muted by the gauge touching them, you then need to adjust the other strings up or down to get the same result.

Trust the process – I can't emphasise this enough when it comes to anything regarding setting up a guitar. If you've got the right gauge for your radius, trust it to guide you.
If you find the action is still too high or low for your preferences after adjusting all the strings and playing for a while, you may want to change the height of your E strings again. That will mean you'll have to repeat the whole process again with the guage to keep everything relative and in line with the radius of your guitar. The more you do this process the more it will become like second nature – it certainly did for me.
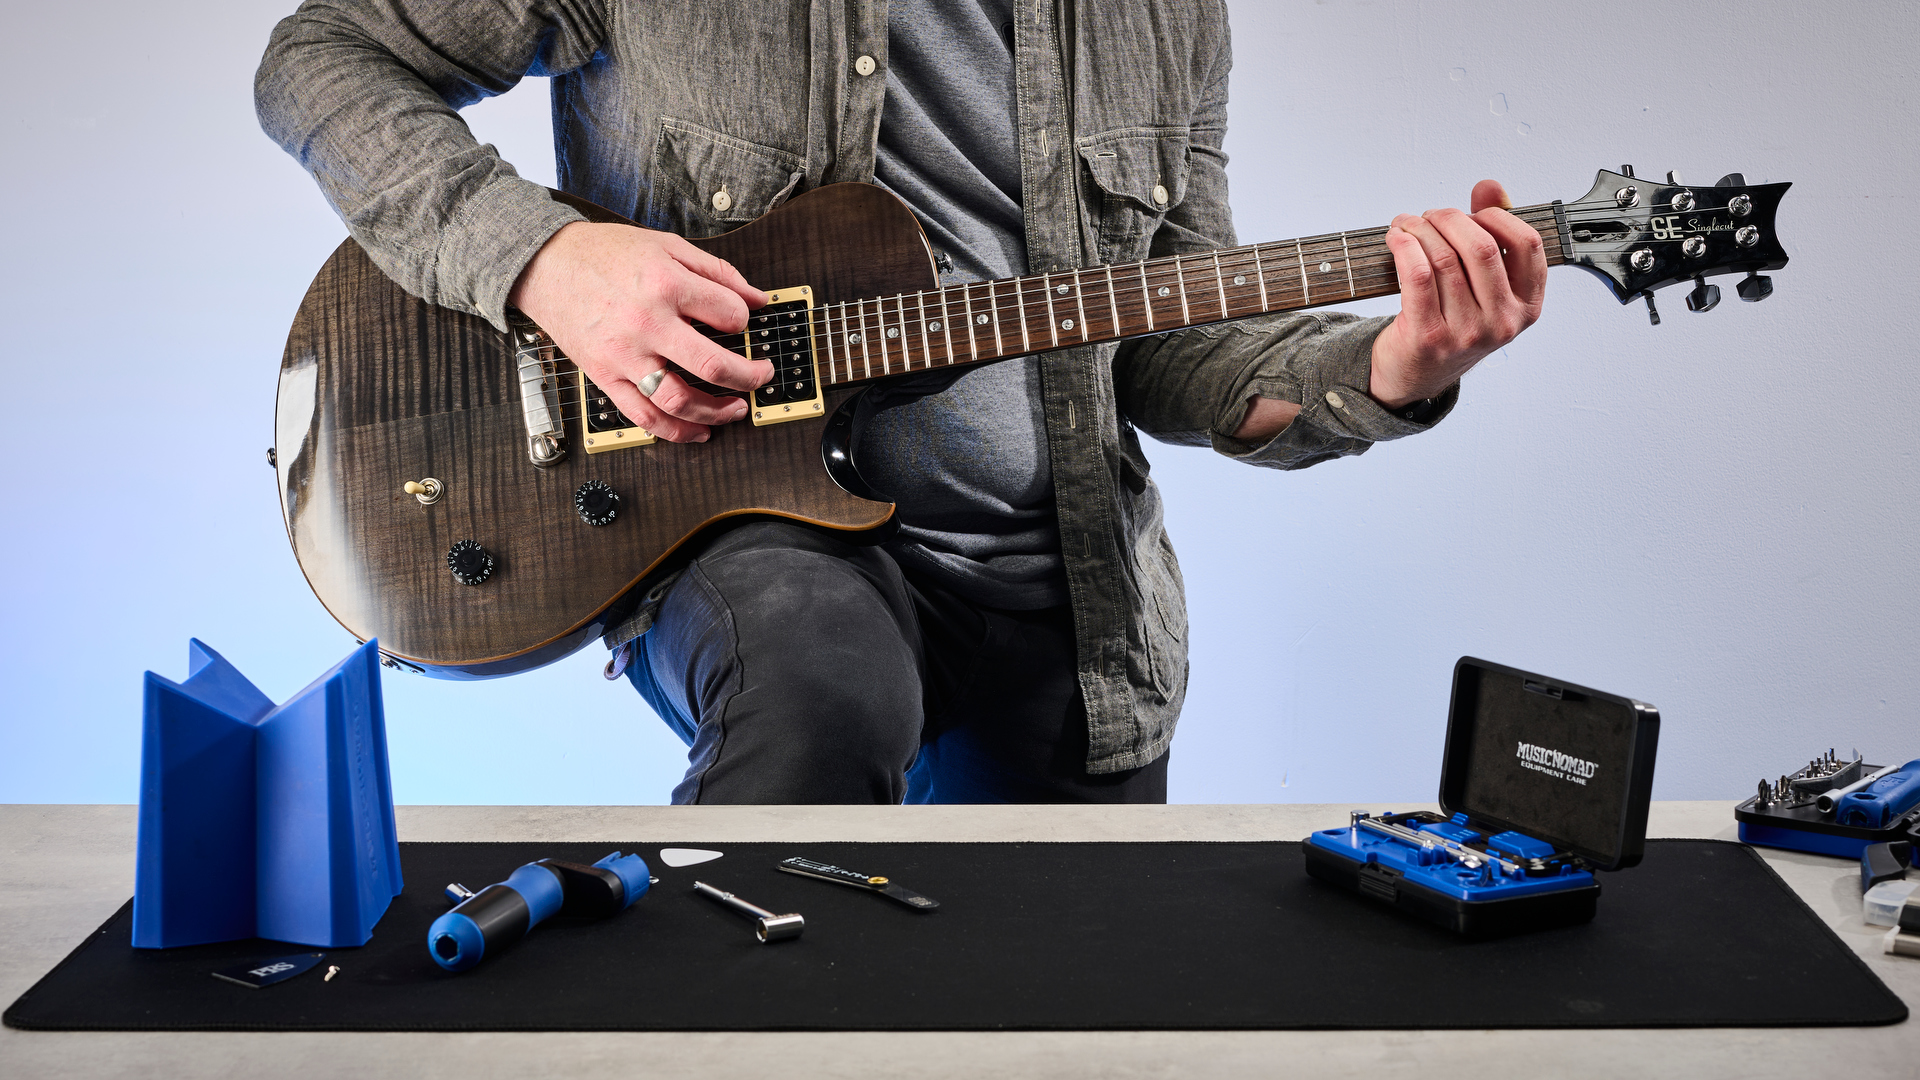
Fret buzz
Fret buzz can affect guitars and players in different ways
You will probably see the phrase 'fret buzz' mentioned a lot on guitar forums; it's an issue caused by the string vibrating physically against a fret when you play. Fret buzz can affect guitars and players in different ways – some of us can obsess over it, and it can be very frustrating for those players. It can also be massively dependent on how hard the individual player picks or fingers notes, which is why it can be difficult for a guitar tech to predict when they're asked to set someone's action low.
I like a very low action myself – some would say too low! – and I sometimes have to do my own fretwork to address the issues in my guitars that it exposes (high points frets are not uncommon). But I tend not to worry about minimal buzz too much these days unless it comes through the amp. The biggest challenge with buzz is finding the root cause as it can vary, but on the whole, lower action will usually result in a higher chance of fret buzz as your strings are vibrating closer to the frets.
Adjusting intonation
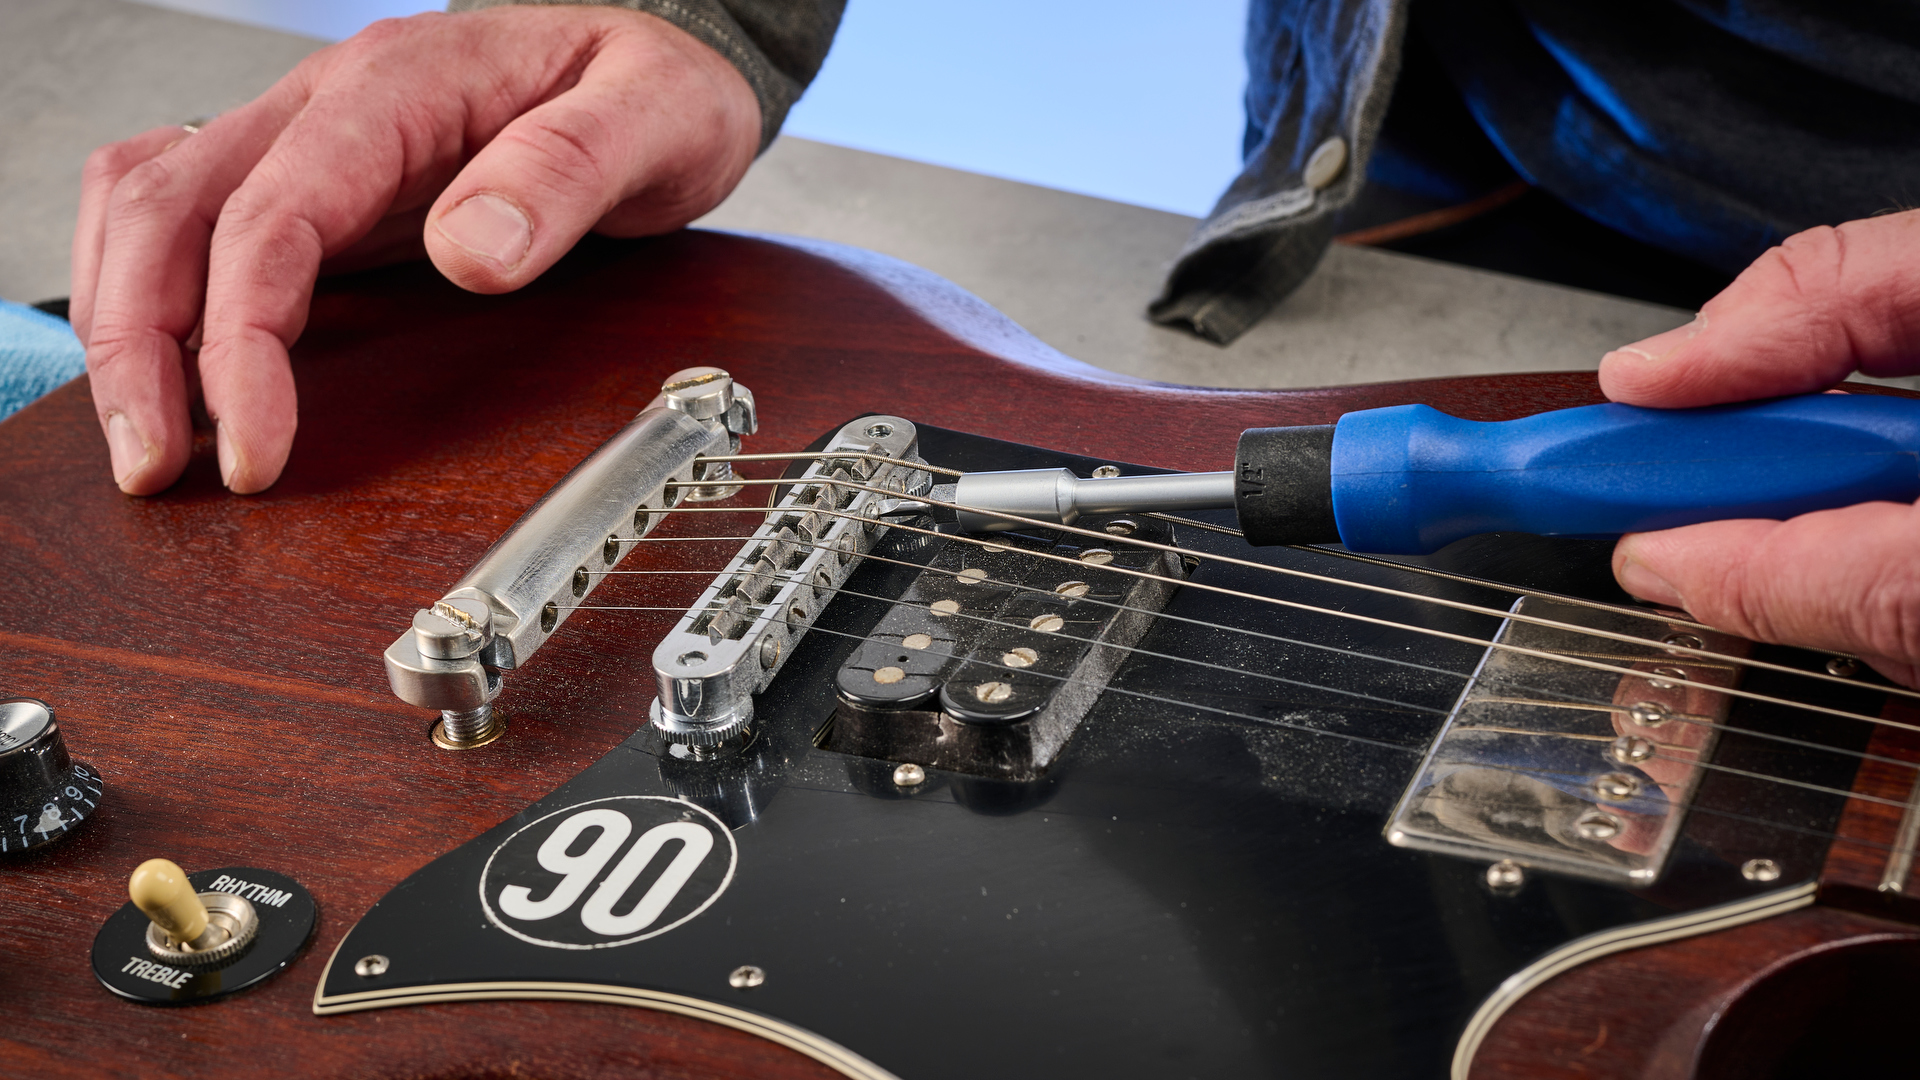
Once you have an action you're happy with, it's important to check and adjust the intonation of each string to allow for its individual scale length . Don't skip this part because If a guitar is not intonated it will not play in tune well – especially when you’re in the higher frets.
For this you'll need a guitar tuner and a screwdriver – preferably the higher accuracy of a pedal tuner but work with what you have. Focus on adjusting the intonation for each string before moving to the next. Tune the string, play it open and then fret the same string and play it at the 12th fret. They need to be the same reading on the tuner; staying in tune.
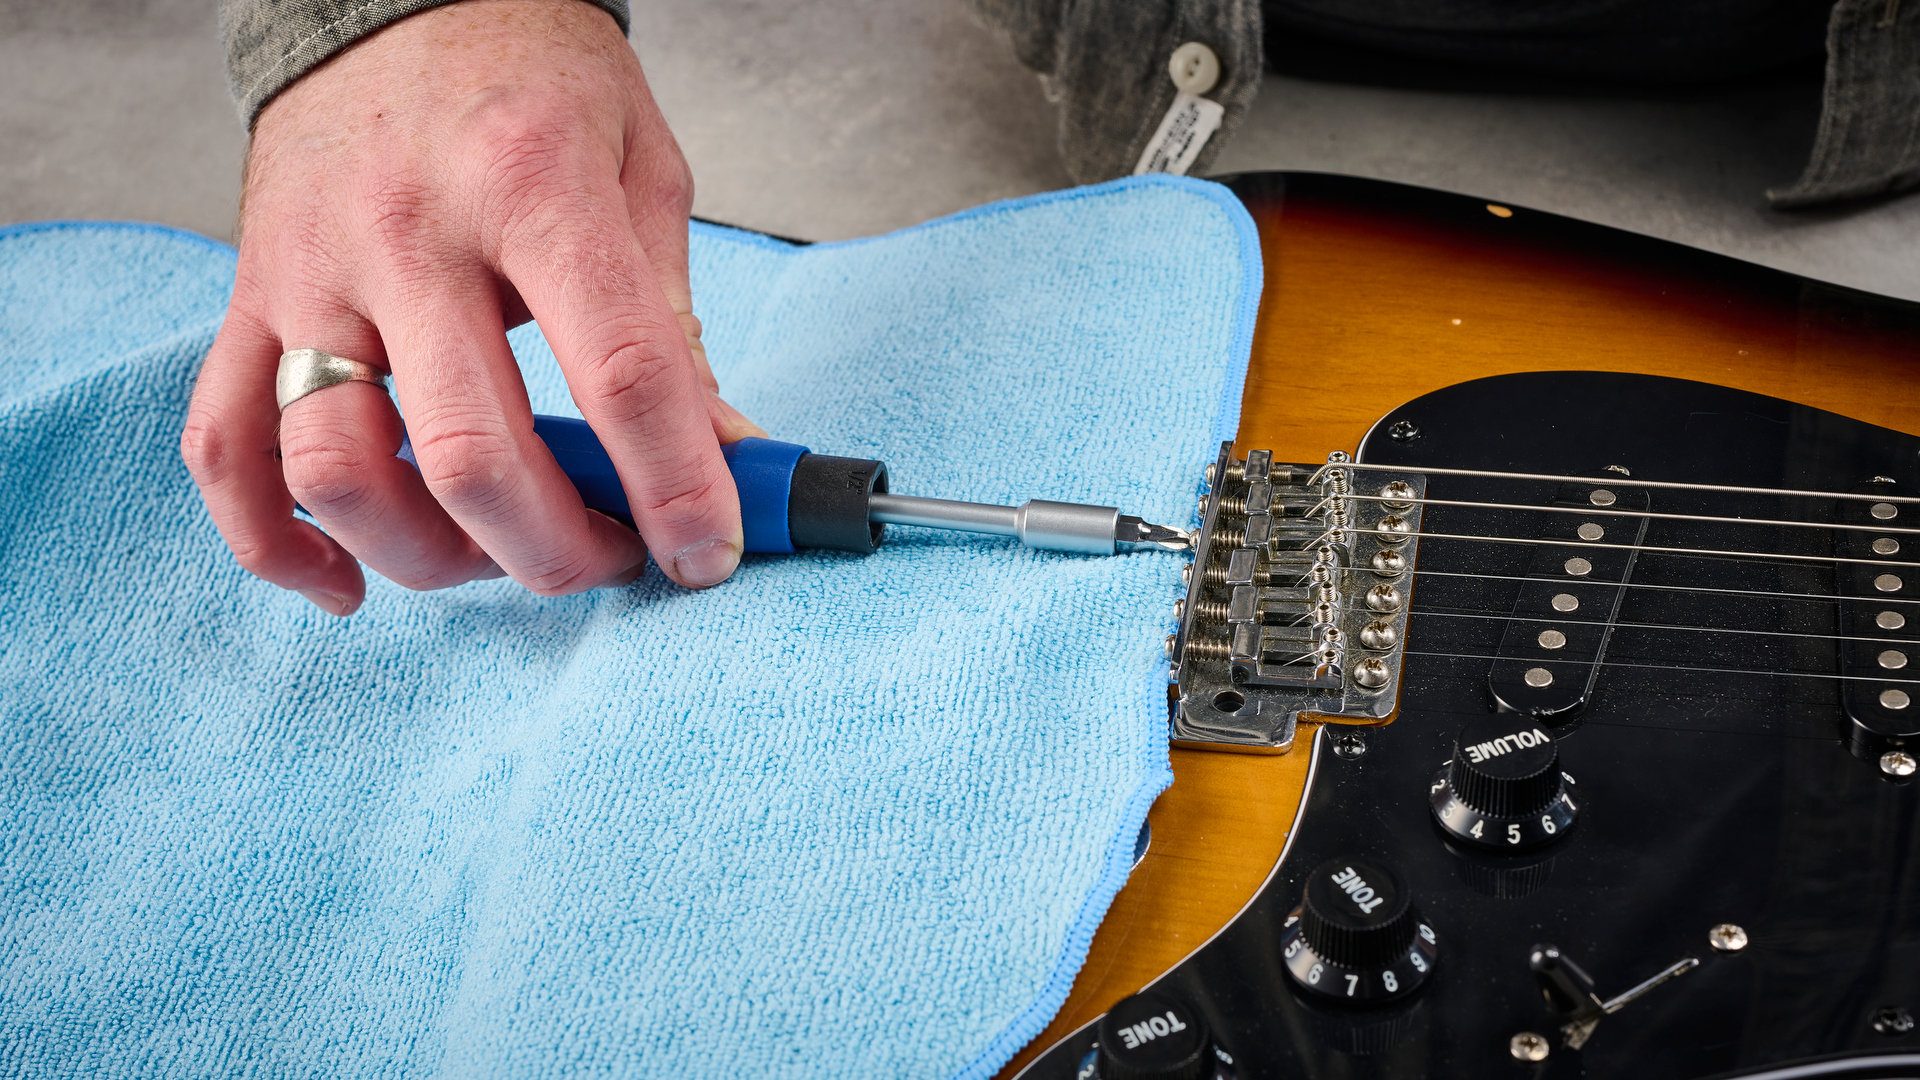
Always check a few times to achieve consistency. Depending on the reading you get on the tuner, you need to adjust the string saddle accordingly (some bridges don't allow you to adjust individual strings) in the following way:
• If the fretted note is reading as sharp on the tuner compared to the harmonic you need to move the saddle back towards the bridge by adjusting with a screwdriver.
• If the fretted note is flat you need to move it forward towards the headstock.
Take your time, recheck… and check again. Getting this right will result in a guitar that plays and sounds great.
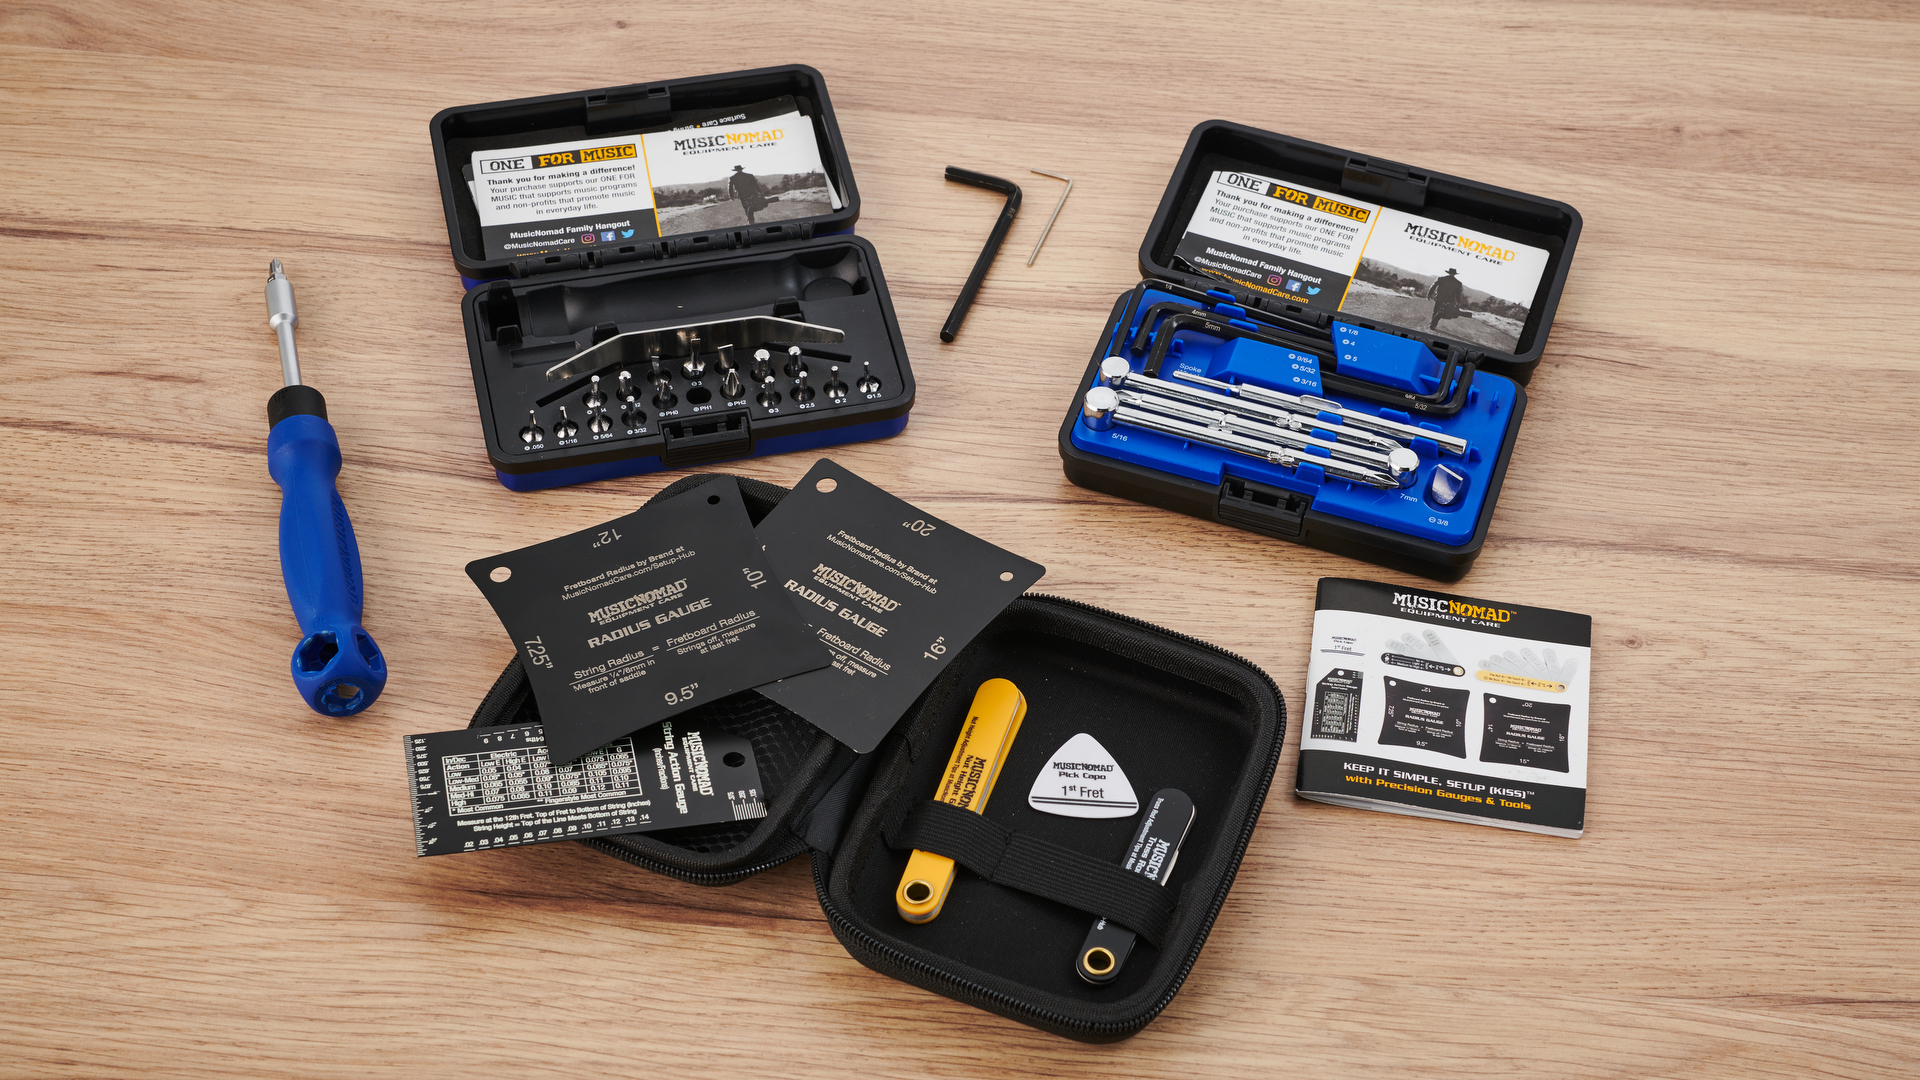
- Thank you to MusicNomad for supplying the tools for this guide. You can find out more about its range of guitar maintenance tools and accessories at musicnomadcare.com, Thomann and Sweetwater

Rob is the Reviews Editor for GuitarWorld.com and MusicRadar guitars, so spends most of his waking hours (and beyond) thinking about and trying the latest gear while making sure our reviews team is giving you thorough and honest tests of it. He's worked for guitar mags and sites as a writer and editor for nearly 20 years but still winces at the thought of restringing anything with a Floyd Rose.