How to use basic LFO parameters
A lower frequency low-down
Want all the hottest music and gear news, reviews, deals, features and more, direct to your inbox? Sign up here.
You are now subscribed
Your newsletter sign-up was successful
In the video above and the step-by-step below, we demonstrate the basic functions of an LFO using freeware synth TAL-Elek7ro II.
Imagine a violinist introducing vibrato into a note - they do so by gently wiggling the string, producing small variations in its length and thereby altering the pitch of the note up and down by a small amount.
Essentially, the note's pitch is oscillating around its normal, centre value, and the wobbles occur at a rate depending on the speed of the violinist's finger movements. A typical rate in this case might be, say, six wobbles (or cycles) per second, ie, 6Hz.
This is modulation at a fundamental level - a sound is altered by a periodic movement that affects one of its properties. In the above case, it's the pitch that moves up and down regularly; other examples of modulation include periodic changes in a sound's volume and timbre.
Translating the scenario over to a synthesiser, this kind of regular, periodic change is achieved by the use of a dedicated oscillator that's been designed to emit frequencies at a low rate, typically below 20Hz (ie, the lower bound of human hearing). Practically every synth in existence features at least one such LFO, or Low Frequency Oscillator.
For more on using modulation and LFOs in synthesis, check out the July issue of Computer Music (CM192) which is on sale now.
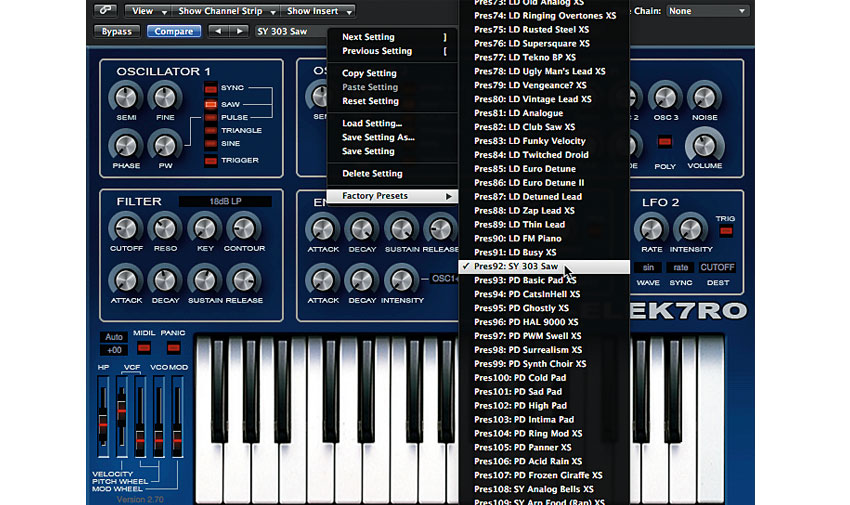
Step 1: To demonstrate the basic parameters of an LFO, we're going to use the TAL-Elek7ro II freeware synth (available for PC/Mac). This synth has two identical LFOs, both with a frequency range of 0.1Hz to 400Hz, but for now we're just going to concentrate on LFO1. Load the synth up in your DAW and select the SY 303 Saw factory preset.
Want all the hottest music and gear news, reviews, deals, features and more, direct to your inbox? Sign up here.
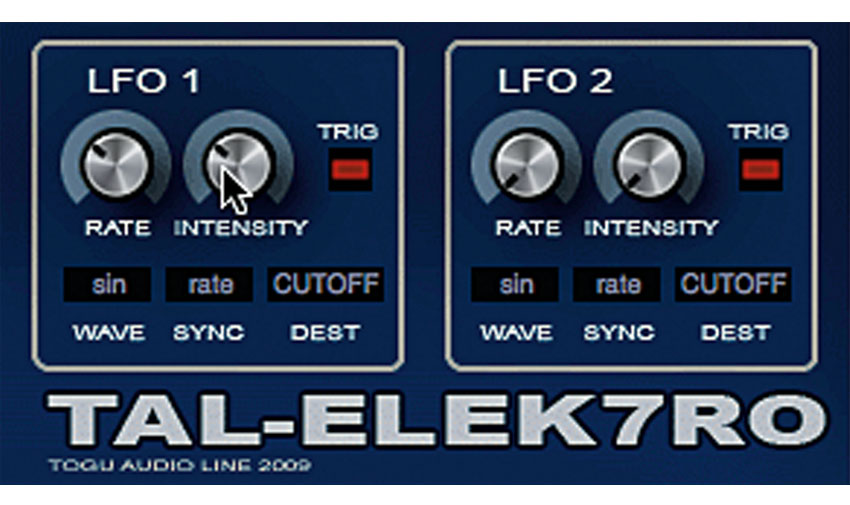
Step 2: Play a sustained note and notice how the tone flattens out after the initial "eyaw" phase. This is because both LFOs are currently inactive, shown by the fact that their Intensity knobs are set to zero, resulting in no modulation. Set LFO1's Rate and Intensity controls to the 10 o'clock position and play another sustained note. In some synths, intensity will instead be called depth or amount.
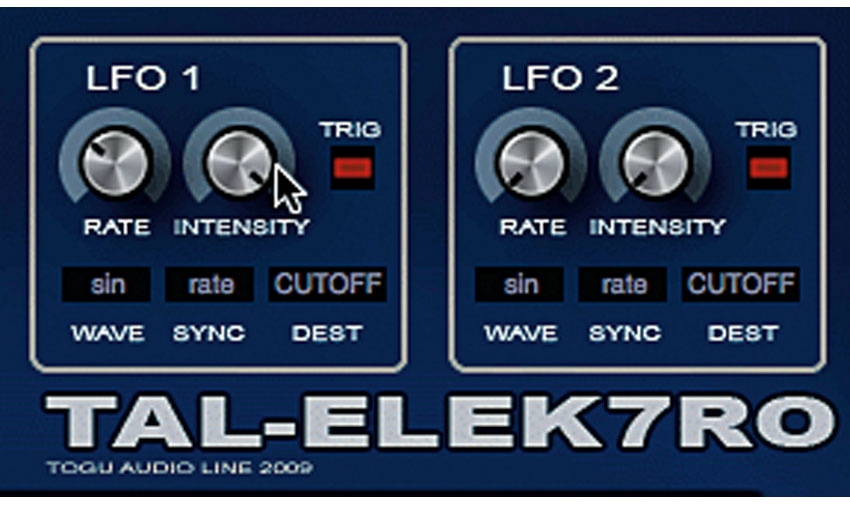
Step 3: The "wowowow" that you're now hearing is due to the LFO using a sine wave to modulate the cutoff frequency of the filter. This is because the Wave parameter is set to 'sin' and the Dest parameter that sets the modulation's destination is set to CUTOFF. With a note held down, turn up the Intensity control. The effect gets more pronounced the higher you go.
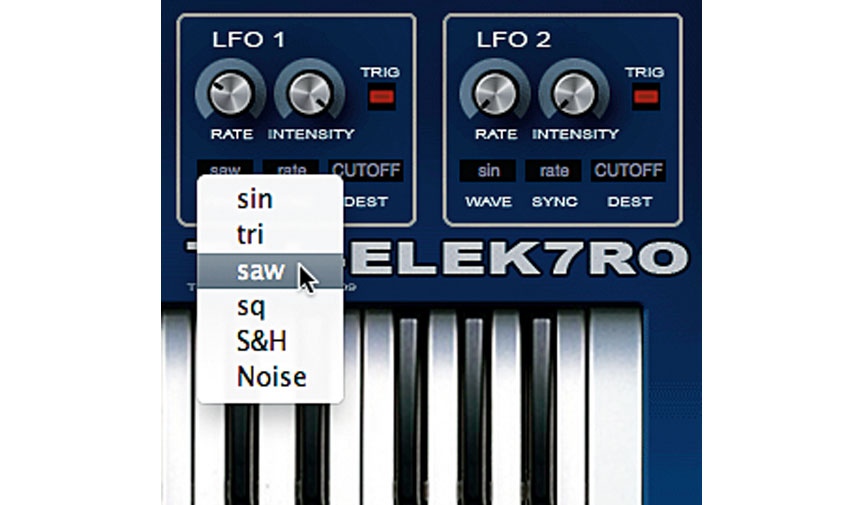
Step 4: With Intensity set at about one o'clock, turn the Rate control up and down, taking in its full range of values. Past the halfway point, you can distinctly hear audio rate modulation coming into effect. Turn the Rate to 9 o'clock, then change the Wave from sin (sine wave) to saw (sawtooth wave) to hear the modulation change from a smooth wobble to a repeating rising shape.
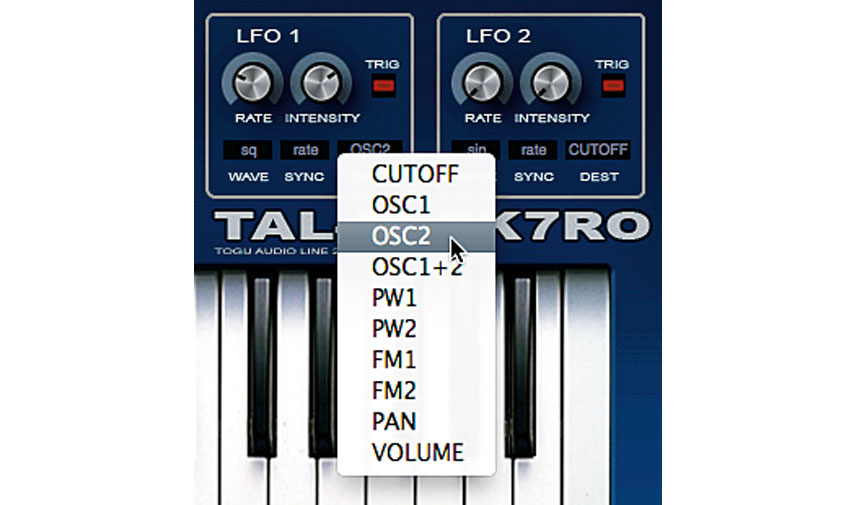
Step 5: Set the Dest parameter to OSC2. The LFO will now modulate the frequency (pitch) of the oscillator producing the sound. With sq (square wave) selected as the wave shape, set the Rate around 10 o'clock and the Intensity about 2 o'clock - tweak the latter 'til you hear an octave interval. With higher Intensity values, the two pitches the oscillator modulates between move further apart.
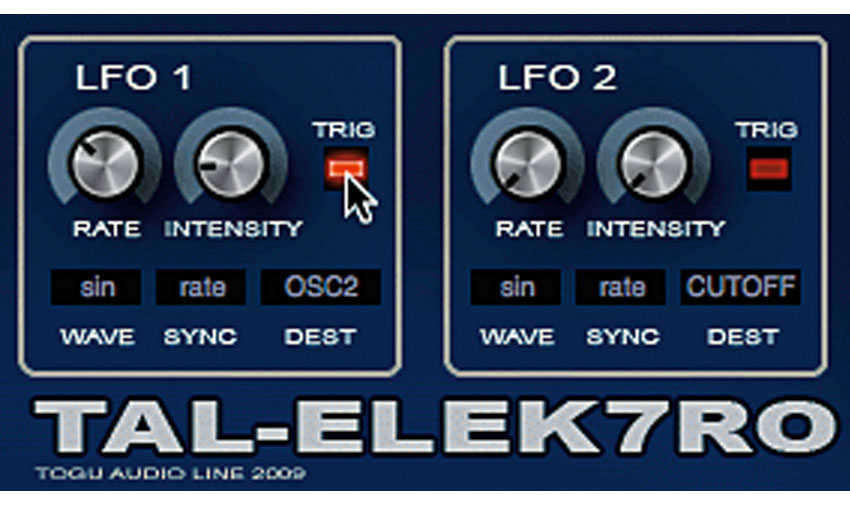
Step 6: Change the Wave back to sin, set the Rate to 9 o'clock and the Intensity to its maximum setting for an extreme, slow up and down swoop. Gradually turn the Rate up to 11 o'clock and the Intensity to 9 o'clock for a more playable, constant gentle vibrato. Enabling the TRIG switch ensures that the LFO's phase is reset each time a key is pressed.
Computer Music magazine is the world’s best selling publication dedicated solely to making great music with your Mac or PC computer. Each issue it brings its lucky readers the best in cutting-edge tutorials, need-to-know, expert software reviews and even all the tools you actually need to make great music today, courtesy of our legendary CM Plugin Suite.
