How to make a drum 'n' bass beat in Ableton Live
A step-by-step guide
Getting started
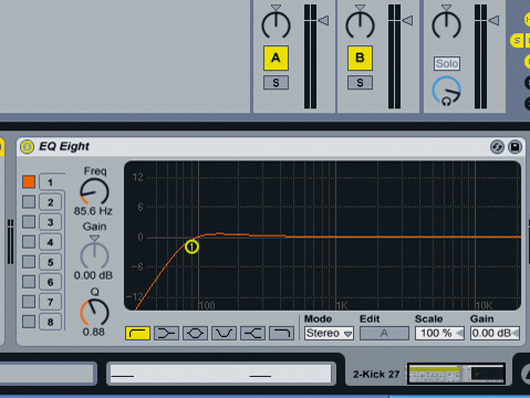
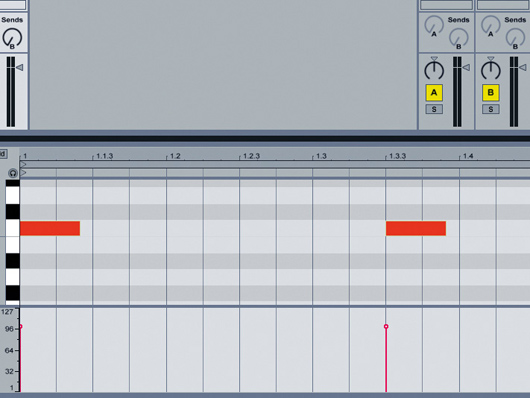
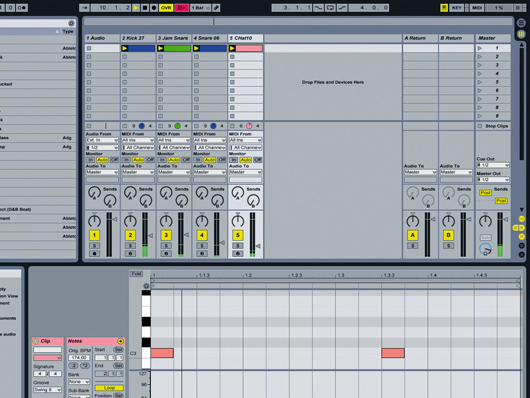
Step 1: Fire up Live and create a new project. Set the tempo to 174BPM and open a Simpler on a MIDI track. Drag Kick27 (right-click to download) into the Simpler. Create a MIDI clip and place kicks on the first and sixth eight-notes. The length of the MIDI notes is important – hold Alt so that the end note doesn't automatically snap to the nearest eighth-note.
• For many more Ableton Live guides go to our massive learning hub: Learn Ableton Live and Ableton Push: music production tips and tutorials
Adding the snare
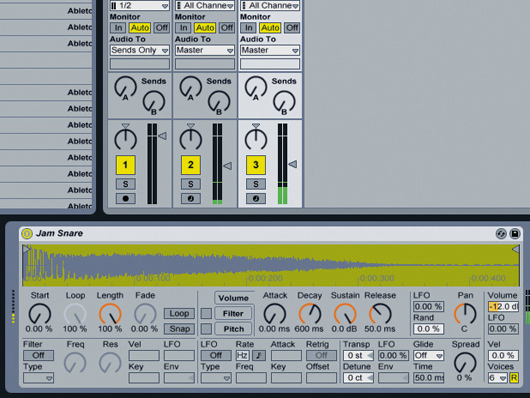
Step 3: Create another Simpler track. This time load up Jam Snare (right-click to download) and program hits on the second and fourth beats. Set the kick track's volume level to -15.2dB and the snare track to -14.4dB.
More snare hits
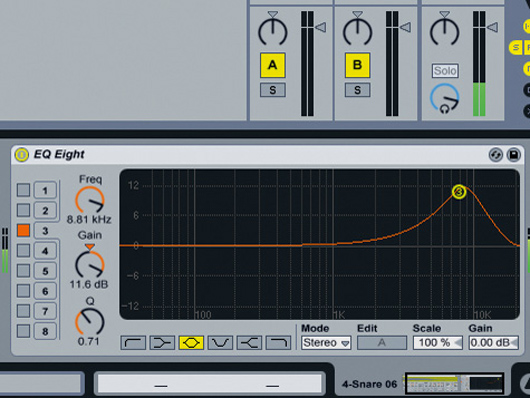
Step 4: Add another Simpler track. Load the Snare 06 sample into it (right-click to download) and create another MIDI clip with hits on the second and fourth beats. Insert Live's EQ Eight effect and bring up the high-end using the settings shown here. Set the channel volume to -19.2dB.
Adding a hi-hat
Step 5: Now we have a basic kick and snare, but the kick could use a little more top end. Rather than using EQ to achieve this, let's mix in a closed hi-hat instead. Create a new Simpler track and drag in the Chat10 sample (right-click to download). Trigger this on the same beats as the kick and turn the channel volume down to -32.2dB.
Adding a ride cymbal
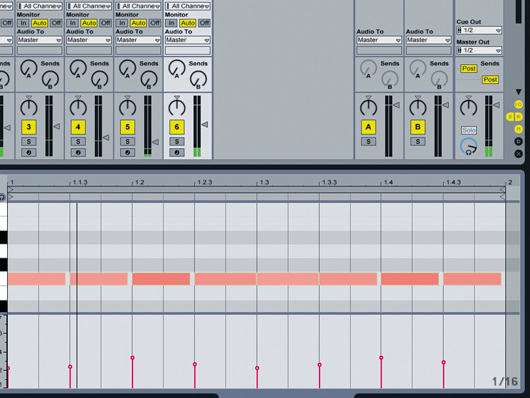
Step 6: Let's add a ride cymbal to our basic two-step beat to keep this thing rolling. Load the Ride 01 sample (right-click to download) into yet another Simpler and program a rhythm like the one shown here. Observe the velocity level and note length variations. If you'd rather, you can simply load up the Rides MIDI clip (right-click to download).
Tweaking the ride
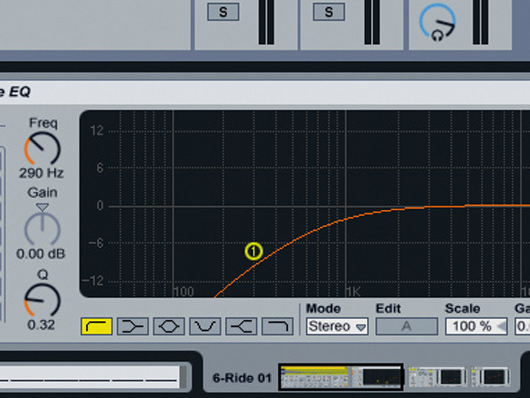
Step 7: We want to create a smooth wash with the ride sound, so rather than playing it right from the start of the sample, move the sample Start point in Simpler to just after the initial attack. Insert an EQ Eight after the Simpler and set the first band's setting to high-pass. Set its Frequency to 290Hz.
Tweaking the ride
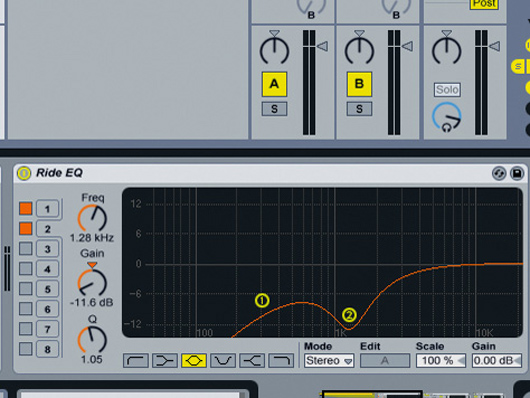
Step 8: Select the second band and set it to cut 11.6dB at 1.28kHz. Cutting the low and mid frequencies like this helps bring out the highs and stops the low and mid frequencies of the beat from sounding messy and cluttered. However, we still have work to do before the ride sound is finished.
Tweaking the ride
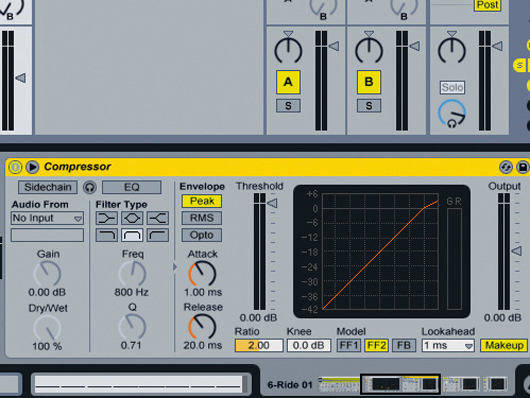
Step 9: Drag a Compressor onto the ride channel, after the EQ. We're going to compress the ride with a sidechain input from the kick drum. This will cause the ride's volume to be lowered whenever the kick plays. Click the triangle at the top left hand corner of the Compressor's interface to bring up its extended options.
Tweaking the ride
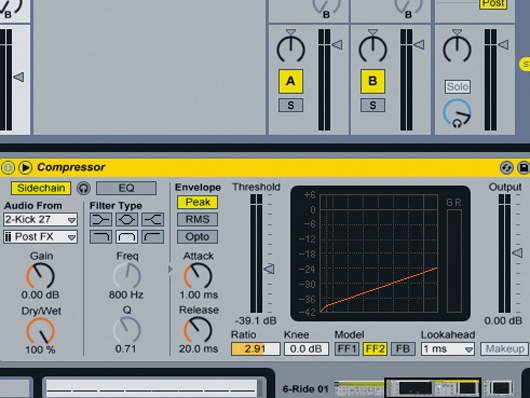
Step 10: Set Audio From to the Kick drum channel, the Threshold to -39.1dB, and the Ratio to 2.91. This 'ducks' the ride every time the kick drum plays, making the kick appear louder and the beat less messy. However, we still need a more consistent overall level for the ride, so add another Compressor.
Tweaking the ride
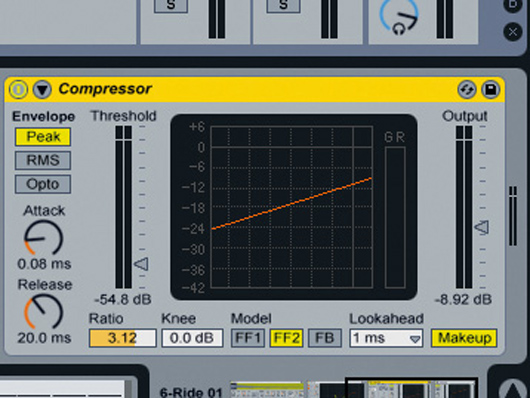
Step 11: Set the Threshold on the new Compressor to -54.8dB, the Ratio to 3.12 and the Output to -8.92dB. The super-low threshold means the signal is compressed almost constantly, giving it a smooth feel. This makes the ducking effect less obvious, but if you bypass the sidechained Compressor you'll certainly hear a difference.
Adding a break
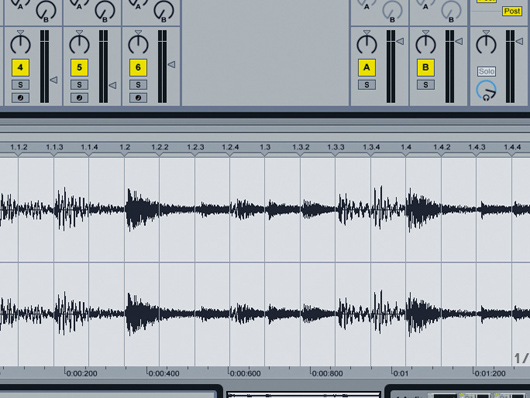
Step 12: Now that we've got our programmed drums sounding loud and clean, let's throw a break into the mix to dirty things up. Drag OldSkoolBreak.wav (right-click to download) onto an audio track. This break has been chopped and sequenced at 174BPM, so Live's timestretching won't 'damage' it too much.
Tweaking the break
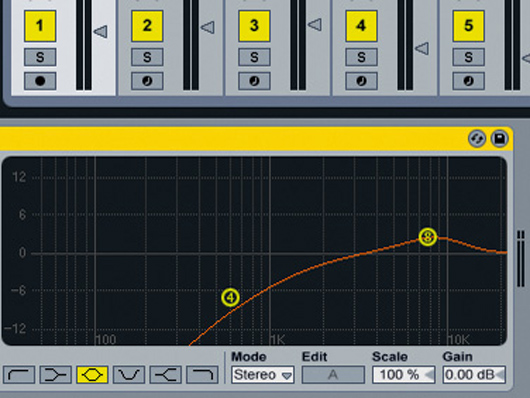
Step 13: This break doesn't sit well with our drum mix in its current state. Drag an EQ Eight onto the channel and set the first band to high-pass the break at 587Hz with a 0.33 Q setting. With the next band, boost 8.48kHz by 2.46dB with a 0.71 Q. These settings should leave us with primarily high frequencies.
Tweaking the break
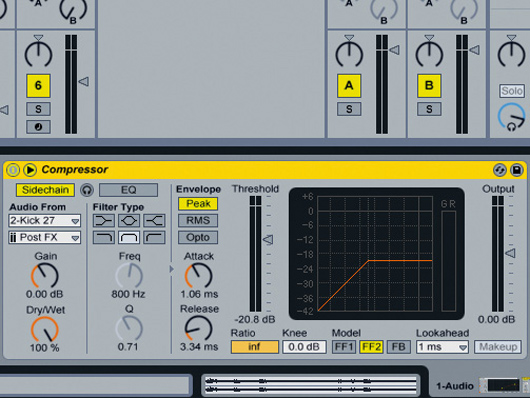
Step 14: Like the ride, we want the break to be a constant presence, so let's break out more Compressors. First, add one to the channel and set the sidechain input to the kick channel, just as we did with the ride. Copy the settings shown here, which will cause the break to duck heavily when the kick is played.
Tweaking the break
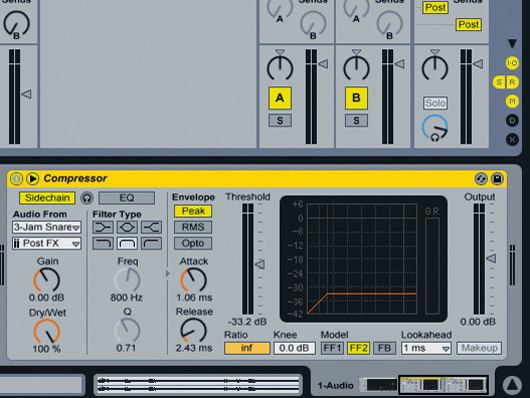
Step 15: Add another Compressor and this time route the snare channel to the sidechain input. Copy the settings we've used here, which again create a heavy ducking effect. If you solo the breakbeat channel now, it sounds awful, but the idea is to make a smoother-sounding drum mix overall, which it does.
Adding effects
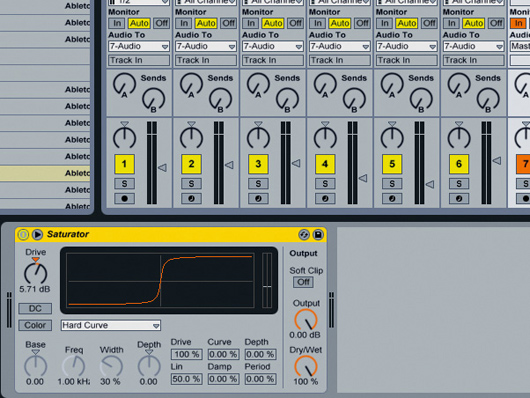
Step 16: Create a new audio track, for use as a bus. This enables us to apply individual effects to multiple sounds. Set the Audio To on each of the previous tracks to route them to this new audio channel. Drag a Saturator effect onto the bus channel and copy these settings. Be warned: this will boost the volume level significantly!
Finishing off
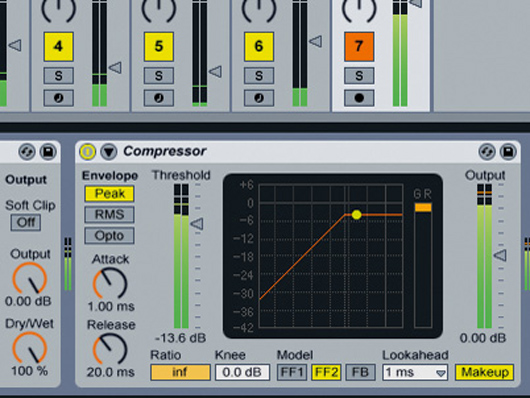
Step 17: Finally, drag a Compressor onto the bus channel, after the Saturator, and copy these settings. The infinite Ratio means the compressor acts as a limiter. The Threshold control determines the balance between preserving transients and overall loudness, so don't turn it down too much or you'll take away from the impact of the kick and snare.
Computer Music magazine is the world’s best selling publication dedicated solely to making great music with your Mac or PC computer. Each issue it brings its lucky readers the best in cutting-edge tutorials, need-to-know, expert software reviews and even all the tools you actually need to make great music today, courtesy of our legendary CM Plugin Suite.
