How to get the synth from Example's Changed The Way You Kissed Me

Intro
In this neat little tutorial, we're looking at the synth ramp which occurs two-and-a-half minutes into Changed The Way You Kissed Me by Example.
This track is hugely popular, as its 18 million-plus views on YouTube to date suggests. The ramp in question is used as a springboard to plunge into the climax of the song and is a great example (ahem) of how a drop can be used to build anticipation and drama.
As ever, once you've followed the steps and watched the video below, look for ways to make a trick like this your own, with different oscillator shapes, varied filter patterns and alternative effects processing just three of many techniques you could try.

Subtractive synth
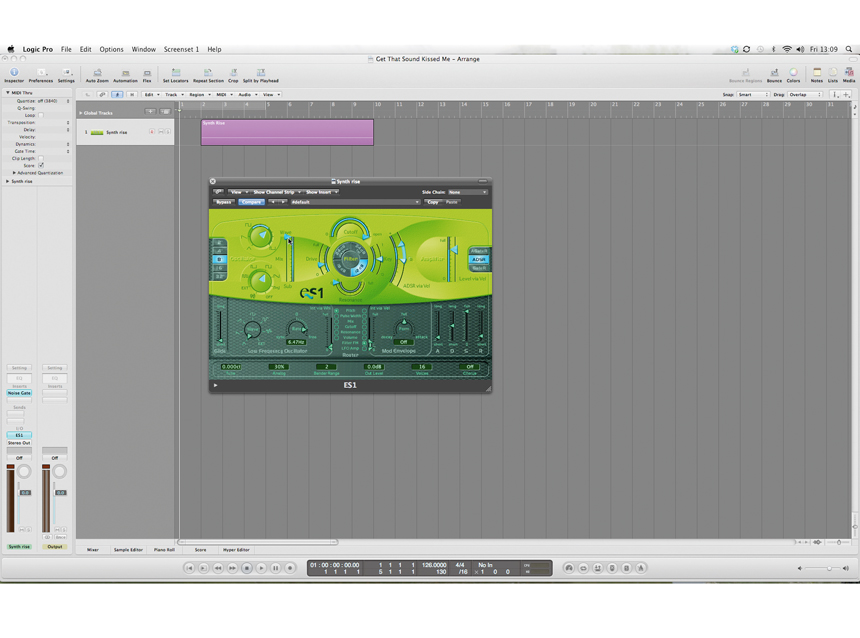
To make a sound like this, you’ll need a subtractive synthesizer which allows you to blend the sound of two oscillators together.
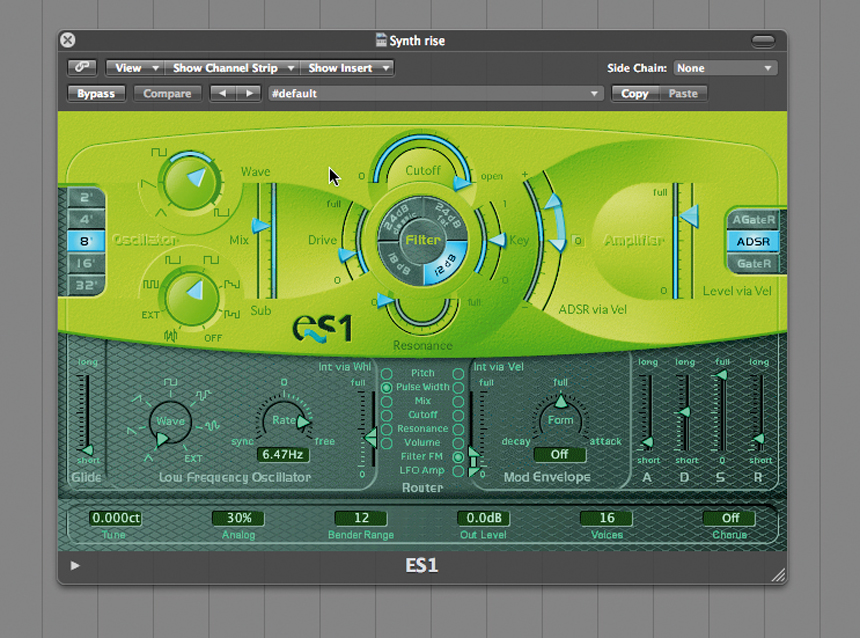
Almost all subtractive synthesizers allow you to select a waveform which is a square wave but whose pulse width can be modified and that’s what we’re selecting for Oscillator 1, placing the dial halfway between a regular square wave and one whose pulse width is modified to its maximum setting. For now, we’re only listening to this first oscillator, setting the Mix (Balance) slider so that none of the Sub (or second) oscillator is heard.
Then, we’re setting the low-pass filter to wide open and to ensure that even the highest frequencies are heard fully, we’re selecting a 12dB/octave filter to ensure that the few frequencies still being filtered are at a minimum. Then, we’re modifying the envelope so that the sound attacks quickly but sustains fully.

Modify pulse width
The next step is to modify the pulse width of the first oscillator so that there’s a more detuned feel to it.
For this, we’re using an LFO, using a ramp shape and a speed of around 7Hz to interrupt the Pulse Width and provide it with modulation. This gives the sound a richer feel, which you might choose to enhance even further with a Chorus effect. If your synth doesn’t have built-in chorus, you can employ it via an insert effect instead.
Next, we’re selecting a square wave as the Sub Oscillator shape and using the blend dial to bleed some of this Oscillator into our sound. Do note that this isn’t a 50/50 balance – most of what you want to hear is coming from Osc 1. This second oscillator is detuned an octave so if your synth doesn’t do this by default, simply tune it down 12 semitones.

Pitch bend
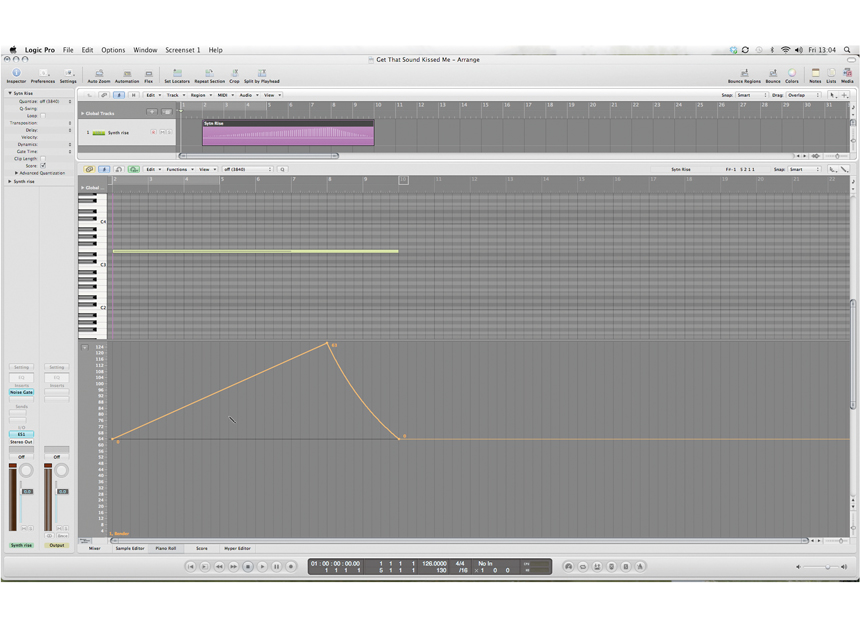
Next, we’re setting the Pitch Bend range of our sound to 12, so that we can draw in a pitch ramp which takes the sound up an octave and back down again.
If your synth allows you to set an independent bend range up and down, make sure that both values are set to 12. Then, we’re drawing in a note which lasts for eight bars and creating a pitch ramp so that the note rises to maximum through the first six bars and then drops back to 0 over the last two. Remember that pitch bend data isn’t like modulation or other MIDI CC data which uses a 0-127 range.
The default value for pitch-bend data is right in the middle, so you won’t want to add information lower than the central 0 line. If your DAW allows, you can curve your pitch-bend for less linear ramps.

Noise gate
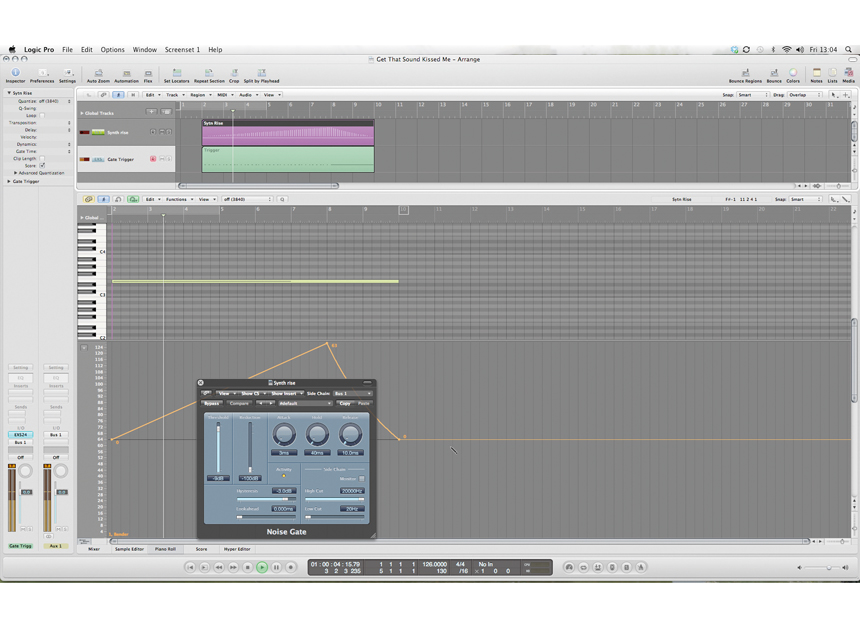
The gated nature of the Example pitch-bend rise requires a second part which will be used as a silent noise gate trigger for the ramping synth.
The pattern being played uses a syncopated, rhythmic figure playing as the bend sweeps up but a more sustained effect as it ramps back down, so use any control source with immediate attack, full sustain and quick release.
Then, play in the pattern you want to use as the trigger. Switch off its output routing, making sure that you’re sending it to a place where it can be used as a trigger. Then, set up a noise gate on the ramping synth part and route your trigger sound in, adjusting threshold so that the gate opens and shuts properly.
Future Music is the number one magazine for today's producers. Packed with technique and technology we'll help you make great new music. All-access artist interviews, in-depth gear reviews, essential production tutorials and much more. Every marvellous monthly edition features reliable reviews of the latest and greatest hardware and software technology and techniques, unparalleled advice, in-depth interviews, sensational free samples and so much more to improve the experience and outcome of your music-making.
