One of the best things about plugin synths and effects is the ease with which they can be automated in the host DAW. As well as your usual filter sweeps, delay feedback rises and the like, recording or drawing in parameter movement can enable truly radical sonic changes to be made in real time.
In this tutorial, we're going to take a basic Sylenth1 string-type tone and use automation (of it and a reverb) to transform it into something completely different. Let's morph…

Step 1: By automating multiple parameters simultaneously, we can seemingly morph one sound into another. Let's see how this can work with LennarDigital's Sylenth1. Load the synth onto a MIDI track, click the Menu button, and select Init Preset. This gives a basic sawtooth-based patch to play with.

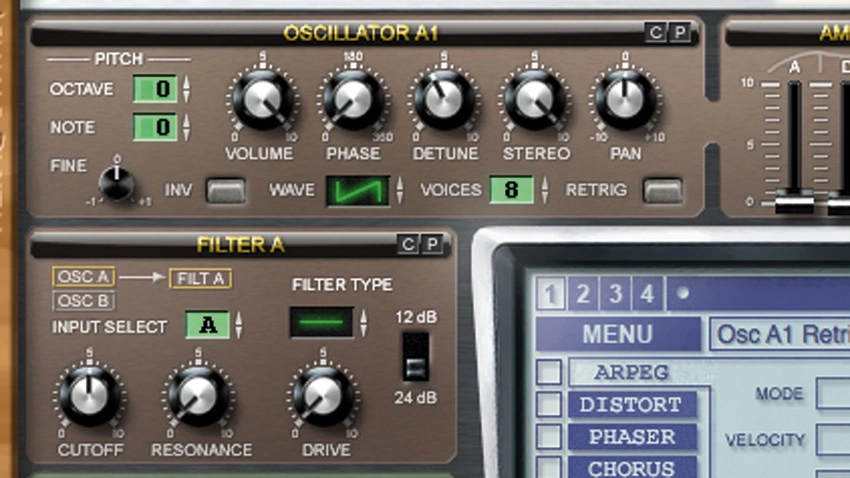
Step 2: In the Oscillator A1 panel, set the number of Voices to 8, and turn the Detune knob up to 4.00. This gives us a simple "supersaw" sound, with a punchy attack at the start of each note. We don't want this punch, so click the Retrig button to set the voices to free-running mode, giving us a smoother sound.

Step 3: If you play the sound in the octave of C5, you'll hear it sounds like a very simple synth string. We can make it sound a whole lot more realistic with some reverb. Sylenth1 has its own reverb effect, but we can get better results using a separate plugin. Add any reverb to the Sylenth1 track - the one included with your DAW will be fine.

Step 4: Set the reverb effect's Dry/Wet level to 100% Wet, and turn its Decay time up to 6 seconds. This gives us something approaching a convincing acoustic string sound, and we can make it sound more authentic by adding a chorus effect before the reverb. Now we've made our string sound, let's see how we can morph it into something more intense.

Step 5: Sequence a four-bar F5 note, and automate the Reverb's Dry/Wet level to drop from 100% Wet at the start of the second bar to 100% Dry by the end of the fourth bar. This creates an effect akin to the string coming out from the background right up into our faces!

Step 6: Now automate Sylenth1's Detune parameter to rise from 0.4 up to the maximum value over the same stretch - ie, the end of bar 1 to the end of bar 4. This increase in detuning makes the synth increasingly intense and frenzied-sounding, perfect for putting the frighteners on your unsuspecting listener!
