How to control a mix with sidechain compression
Tighten up your tunes with our dynamics tutorial
Want all the hottest music and gear news, reviews, deals, features and more, direct to your inbox? Sign up here.
You are now subscribed
Your newsletter sign-up was successful
The key to good mixing is finding space for different elements to breathe. To this end, panning, levelling and EQing crossover frequencies are used to avoid clashing. Sometimes, though, no matter how careful you are with EQ or levels, some sounds will interfere with each other - such as kick and bass, vocals and guitars - and other times, one-off hits and crashes might simply not cut through.
The solution to all these problems can often be found in sidechain compression. Why not make certain sounds duck imperceptibly whenever the lead sound/vocal occurs, for example? That way, the lead or vocal sound will appear clearer and more distinct in the mix. This is exactly what sidechain compression offers.
Whether using a specifically routed compressor (on a guitar part being ducked by a vocal line, perhaps) or a sidechain trigger bus controlling ducking on a number of sounds (enabling sound effects or specific phrases to be used as key inputs, so that any sound can be made prominent), the idea is to hear only what you want to hear, without listeners realising any ducking is happening.
All accompanying tutorial files can be downloaded here.
For more on sidechaining, pick up Computer Music 219 today!
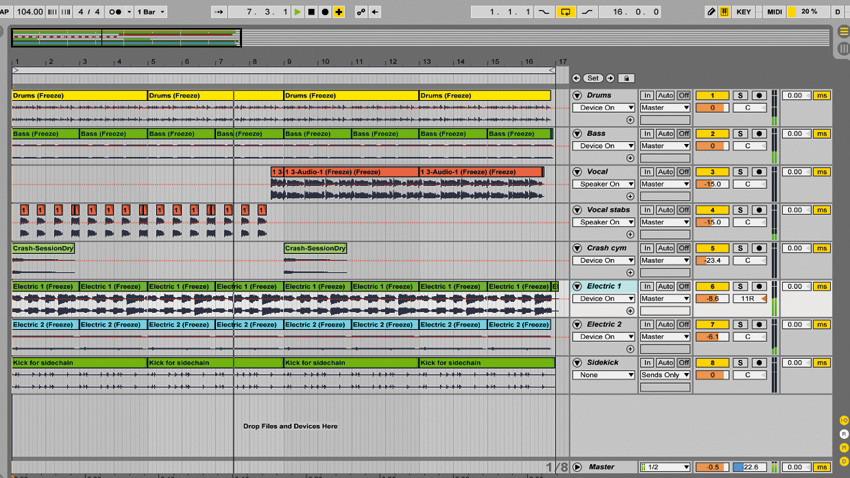
Step 1: Let's have a look at sidechaining for mixing in this Live 9 project. The track features drums, bass, two guitars, a crash, a reverse, vocals and a muted sidechain trigger. All sidechaining is currently disabled, but we've used Live's QWERTY keymapping to set up the 1 key to toggle all the sidechained compressors - press it now and compare the two.
Mix with no sidechain correction
Want all the hottest music and gear news, reviews, deals, features and more, direct to your inbox? Sign up here.
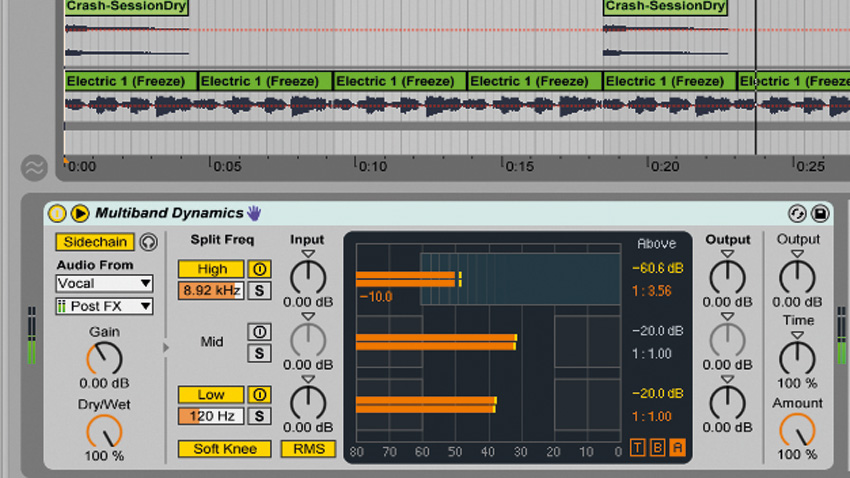
Step 2: With the sidechained compressors active, the vocals pop out, and from bars 1 to 8, the track jumps up and down with them. The vocals trigger sidechaining on the guitar parts, ducking them out of the way. To avoid noticeable pumping, the release times are set short. A multiband compressor on the drums subtly ducks the upper mids and high frequencies.
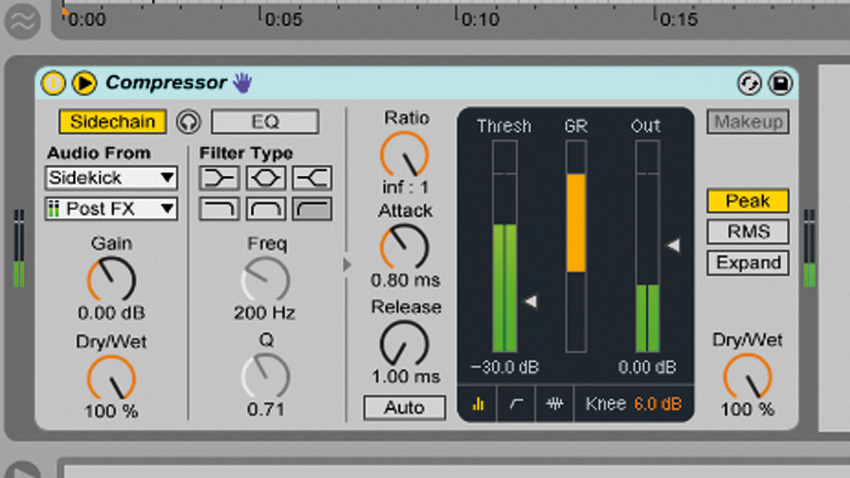
Step 3: Our bassline has more identity and clarity because we've used the muted kick to quickly duck it. We use very fast release and attack, as the idea is simply to let the kick's transient cut through, which has the effect of making the bassline more distinct, too. We also have similar ducking on the guitar parts, further accentuating the kick strikes and, therefore, the groove.
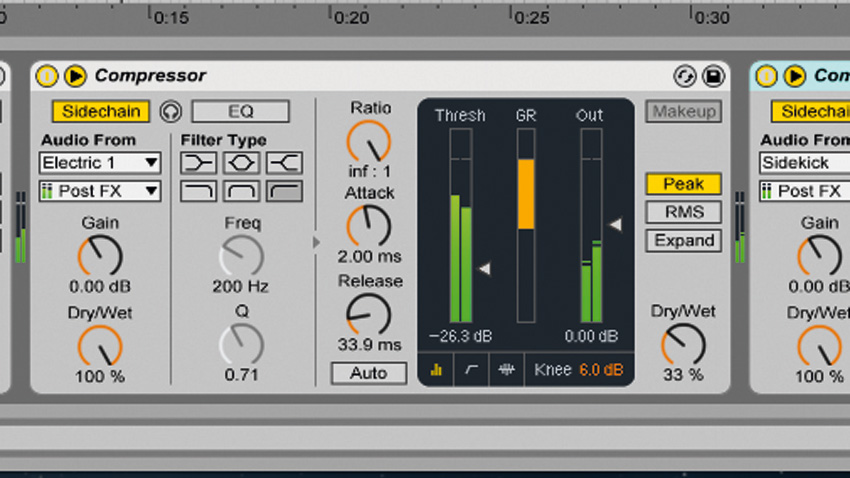
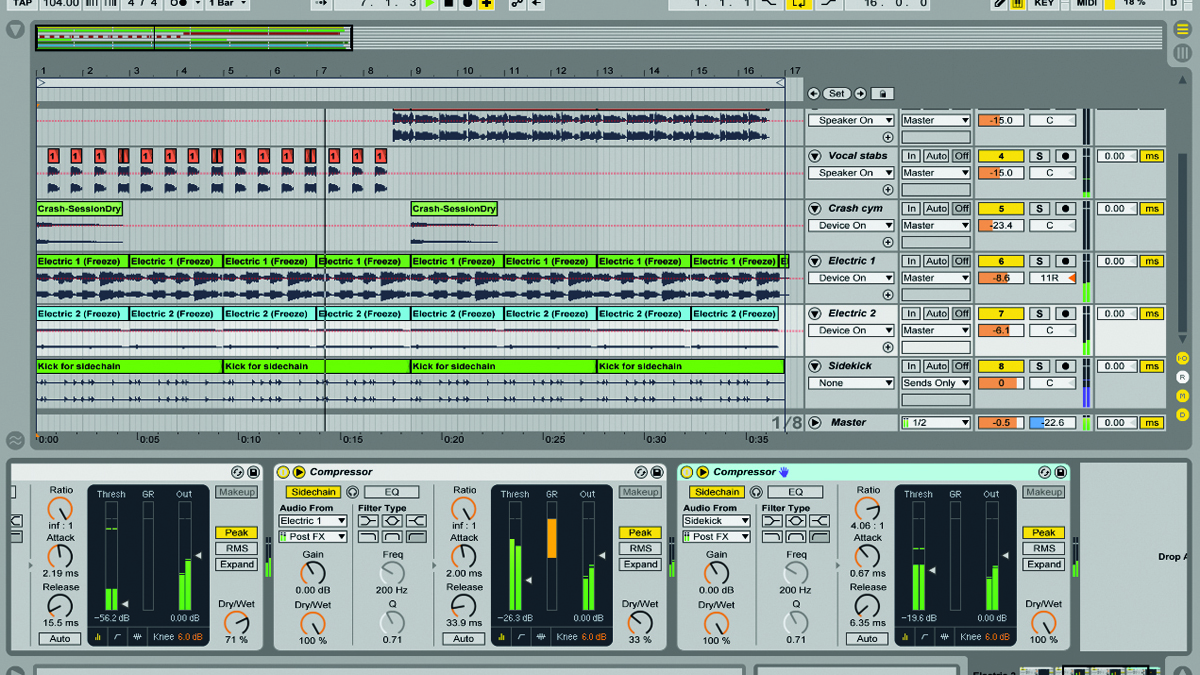
Step 4: The guitars are occupying similar space. Electric 1 is a more driving lead, so we've used that to trigger fast ducking on Electric 2. The second, lighter guitar fills in the gaps of the first now. To sum up, the key is usually to apply strong ratio and threshold settings and use the release and dry/wet controls to tailor the effect.
Mix corrected with sidechain
Computer Music magazine is the world’s best selling publication dedicated solely to making great music with your Mac or PC computer. Each issue it brings its lucky readers the best in cutting-edge tutorials, need-to-know, expert software reviews and even all the tools you actually need to make great music today, courtesy of our legendary CM Plugin Suite.
