How to record guitar on a PC
A step by step guide for computer musicians


1. Plug the guitar into whatever effects pedals you want to use. It's standard procedure to go from a distortion pedal into any modulation effects and then a delay. Don't go too wild with the delay - there are much more powerful software delays in your computer that sync delay repeats exactly to track tempo. Remember, you can't undo a recorded effect, but you can always add effects after recording.
2. Plug the guitar into the preamp. Set the preamp so that the meter doesn't go into the red when you play the guitar really loud, but make sure the level is high enough when playing softly as well. If you're using an amplifier, plug the guitar into the amp, and then the output from the amp into the preamp.
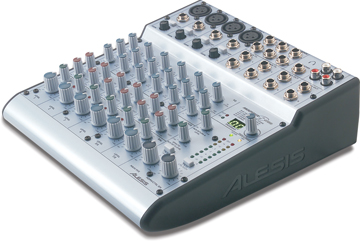
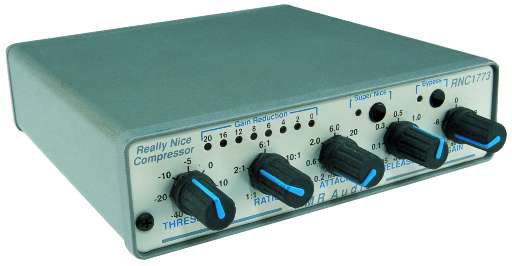
3. If you're using a hardware compressor, run the output of your preamp into it. Some preamps have an insert jack socket, which means you can insert the compressor using a special insert cable. If you're using a mixing desk, it'll also probably have an insert point.

4. Now plug the output from your preamp, mixer or compressor into your audio interface. If your card has a zero-latency direct monitoring option, then you'll be able to monitor without latency. If your card doesn't have this option, we recommend routing the signal via a Y-cable back to the mixer for monitoring in real time.
5. Set your software up to receive the guitar signal. If you want to use effects plug-ins, insert them into the input channel. Remember, your computer and audio interface have to be fast enough to handle input monitoring with effects at low latency, otherwise there's going to be a delay between when you play and when you hear the results, which can
make performance very difficult.
6. If you don't have a hardware compressor, you'll want to compress the signal on the input channel in your software. Recording guitars without at least a little compression will result in an uneven signal, meaning you'll have to do a lot more work at mixdown to fit it into the track.
Want all the hottest music and gear news, reviews, deals, features and more, direct to your inbox? Sign up here.
7. Some engineers like to roll off some of the signal at around 80kHz to eliminate unwanted ambient noise. To do this, insert a high-pass filter or EQ into the input channel. Your preamp or mixing desk may well include just such a filter, designed for precisely this purpose.
8. Reverb and/or delay are very important for monitoring - especially when recording solos. If you're using a mixing desk, add the reverb there solely for monitoring but don't record it. If you're going directly into the computer without a mixer, set up a reverb/delay on a send/return bus in your recording software and make sure it's only set to be heard for monitoring purposes and not recorded.
9. Be sure to label the track, indicating what type of guitar part it is - rhythm, lead, solo harmony, etc. When you've recorded your eighth guitar track and none of them are labelled, you're going to waste a lot of time working out which is which, so write everything down. It's also a good idea to note down your effects pedal settings, in case you have to go back at any point and add to or fix one of your tracks.
Set up effects in advance
Load up your guitar channels with any effects you're going to want to use before you start recording, so you can simply enable them as you need them. You don't want to be drilling down into plug-in menus while you're on a creative roll. Do everything you can to keep the creative juices flowing.
Mic your amp up in advance
When it's time to play, you don't want to be running cables all over the place and trying out mics and amps. Take care of that ahead of time. Find out which mic sounds the best on your amp and leave it there. All you'll then have to do is patch the mic into your audio interface and get riffin'!
Keep essential accessories handy
Treat your recording process like a business, and you'll get professional results. It doesn't look good if you break a string and have everybody waiting around while you empty guitar cases looking for a new one. If a cable breaks, you should have one ready to go before it even happens. And if you use a capo, keep various types within reach - capos for 12-string, nylon string, steel string acoustic, electric, etc.
Write down tunings and effects chains
You'll feel pretty silly if you have to go back a week after a session to punch in on that slightly flawed guitar solo, and you can't remember what effects settings you used to get the sound all your bandmates are raving about. Write them down, take photos, do SysEx dumps - anything, as long as it lets you recall exactly where all those knobs and buttons were. The same goes for tunings: Do you think you'd have a chance of remembering the strange open tuning of D G D G B F? (Yup, truly horrible - we're just using it to illustrate the point.)
Double parts on a different guitar
After you've recorded your first rhythm part, try doubling it with a completely different sounding guitar. For example, if you use a Fender Stratocaster for the first track, double it on a Les Paul.
The fake banjo
If you need a banjo sound in a hurry but don't actually own a banjo, place a piece of paper under the strings by the neck of an acoustic guitar. Fold the paper so it doesn't fall out. If you play the guitar with a banjo-style rhythm and EQ out the low mid and bottom frequencies, it'll sound pretty authentic.
Two acoustics with one mic
If you have another guitarist available to you, this can create a great sound. Set your mic to an omni or figure-of-eight response pattern, and sit on opposite sides of it. Work out a
combined and complementary rhythm part between the two of you and get recording. Each part will bleed into the other, and if the parts are played well you'll get an excellent 'natural chorus' effect. Pan the parts left and right for extra pizazz. If you're into the Phil Spector '1000 guitars' sound, double the parts and hard pan them to opposite sides of the soundstage. Sometimes more really is more...
Keep everything!
Don't edit any of your recordings until after you've played the entire song a few times. What you're recording may not sound great as you're playing it, but when you listen back you'll hear it with different ears. Don't just give up on a take after three bars, because it can take longer than that just to get a good feel for the song.
Use direct and amped sounds
Why choose between the two when you can have both? Split the signal from the direct box, sending one to the amp before going on to the computer, and the other directly to the computer. Combining the distorted amp signal with the clean DI signal can result in a more musical sounding power chord track than just the amp output alone, for example.
MusicRadar is the internet's most popular website for music-makers of all kinds, be they guitarists, drummers, keyboard players, DJs or producers.
GEAR: We help musicians find the best gear with top-ranking gear round-ups and high-quality, authoritative reviews by a wide team of highly experienced experts.
TIPS: We also provide tuition, from bite-sized tips to advanced work-outs and guidance from recognised musicians and stars.
STARS: We talk to artists and musicians about their creative processes, digging deep into the nuts and bolts of their gear and technique. We give fans an insight into the actual craft of music-making that no other music website can.
