
Getting your guitar set up and maintained properly is vital to playing well and sounding great. If your guitar strings can’t resonate and intonate properly you’re automatically at a disadvantage. So let’s get your electric guitar set up for a great year of playing – with the right tools and approach, it’s easier than you might think.
We’re going to take the process in manageable stages to cover string changes, fretboard and fret cleaning, guitar body cleaning, truss rod adjustment, string height and intonation, plus pickup height. All these factors affect how well your guitar plays; and different guitars will need different approaches that we’ll explain.
Having the right tools for the job is essential and we’ll explain what you need as we go along. We’re going to be using products from Music Nomad’s wide selection of cleaning, care and maintenance ranges for this tutorial as we’ve found them to be a great investment for working on our own guitars. They offer pro quality tools that will cover everything you need to get your guitar set up and looking good.
Cleaning
Tools you will need

- Music Nomad five-piece Premium Care System: including The Guitar One clean polish and protection spray for nitro and poly guitar finishes, Pro Strength Guitar Polish for dull, scratched or scuffed guitar finishes; Fretboard F-One Oil natural cleaner, conditioner and restorer for all unfinished fretboards; Guitar Detailing Towel: microfiber towel for cleaning and polishing; Microfiber Suede Cloth: lint-free for using with F-One oil
- Wire cutter
- A towel or mat to lay your guitar on to protect it from scratches
- Recommended: a cradle for holding the guitar’s neck
- Music Nomad Frine Fret Polish Kit or Fret polishing papers and card template or Micromesh pads
- Masking / painter's tape
Cleaning the fretboard and frets

We’re starting with a crucial area; the part of the guitar your hands make the most contact with. Fretboards and frets can bear the brunt of skin oils, dirt and inevitable oxidation so giving them regular TLC is a must to keep everything clean. With a bit of attention you can get your fretboard and frets looking and playing good as new.
1. Remove the strings

We’re going to need unobstructed access to the fingerboard, so start by loosening and then snipping your strings carefully with wire cutters to remove them. Our Music Nomad GRIP Cutter is specifically designed for the job with a side cutter design we can use to snip excess string when we fit a fresh set later.
2. Cleaning and polishing the frets

Traditionally, 0000 grade steel wire wool has been a popular choice for polishing guitar frets but it has a significant drawback; it leaves tiny metal filings that get stuck on magnetic pickups. You can protect them using masking / painter’s tape but there are other cleaning and polishing approaches available too.
- Music Nomad offers the comprehensive Frine Fret Polishing Kit that includes a specially formulated polish with micro-fine polishing compounds to remove dirt, oil and oxidation. The kits also includes fretboard guards and a microfiber cloth.
- Micro-Mesh is a finer alternative to sandpaper (and uses a different grading system) for precision work and offers a multi-grade fret polishing kit with fret protectors.
- Planet Waves offers a Fret Polishing System including fret polishing paper sheets and a cardboard template to protect the fretboard around each fret when polishing.
Whichever system you use, take your time, follow the included instructions with the product for application and focus on one fret at a time before moving to the next one.

We’d recommend covering the fretboard between frets with masking / painter’s tape in addition to using any included templates. You can’t be too careful and it’s a simple way to get peace of mind and another layer of protection for the wood if there’s any particles removed from the frets during the cleaning and polishing process. It will also protect maple fretboards from the risk of any discolouration.
3. Treating the fretboard
With our frets cleaned and polished it’s time to remove any protective tape and move on to the fingerboard. What happens next is dependent on whether you have an untreated wood ‘board (including rosewood, ebony, pau ferro, laurel, cherry, walnut, purple heart) or lacquered (usually maple). It you have a maple ‘board you can use a lightly damp cloth to clean your fretboard. Any cleaner designed for untreated wood risks dulling the finish and damaging its protective qualities.
There’s a wide selection of products out there for cleaning and nourishing untreated wood fingerboards. These woods should never be left to get too dry and we’d always advise choosing conditioning and cleaning substances that are made from 100% natural ingredients to avoid any risk of long term damage to the wood’s integrity.
It’s good practice to wipe down your board and strings with a clean rag after any gig or practice session. For more intensive cleaning, Lemon oil is consistently popular for removing dirt and the remnants of sweat from playing but can contain d-limonene, which has been argued to be too strong for guitar use. As a result some opinion is divided on it. If you do choose to use lemon oil, it must be wiped off immediately after application avoid excess.

And that last point is true of any fretboard conditioner; when players complain of excess smell from the cleaning product it’s often because they’ve used too much rather than a little to check how much is absorbed before wiping off excess promptly.
Before treating with any oils, I like to use naphtha fluid as a cleaner – aka Zippo lighter fuel. No we're not doing a Hendrix and setting light to it. After adding it to the fretboard you may notice the wood looks drier with some white marks – fear not, it's ready for you to put the goodness of a conditioner back in.
Beware; it's highly flammable and please use in a well ventilated space due to fumes.
We're using Music Nomad’s F-One Oil here as a conditioner for unfinished woods. It uses 100% natural oils and doesn’t use lemon oil extracts, waxes, silicone, petroleum distillates or water. F-One Oil penetrates and conditions the fretboard wood, and we’ve found a little goes a long way.
Shake the bottle well before use. Put a small amount of oil on a microfiber cloth or directly on the fingerboard. If the board is especially dry or grubby leave the oil for a couple of minutes before wiping down so it has longer to soak in. Remember, it’s better to use less oil and work in stages so don’t rush things as you work down the fretboard, section by section.
4. Cleaning the guitar body

It’s inevitable for your guitar to pick up scratches from use and for sweat, dirt and anything else its picked up to dull and smear the finish. Cream guitar polishes can help to revive finishes with a deeper clean.

If you have a nitro finish on your guitar make sure you choose one that won’t react with it. Music Nomad’s Pro Strength Guitar Polish that we’re using here is silicone and wax free; suitable for poly and nitro finishes. It can also be used to remove oxidation from hardware including pickup covers and frets.
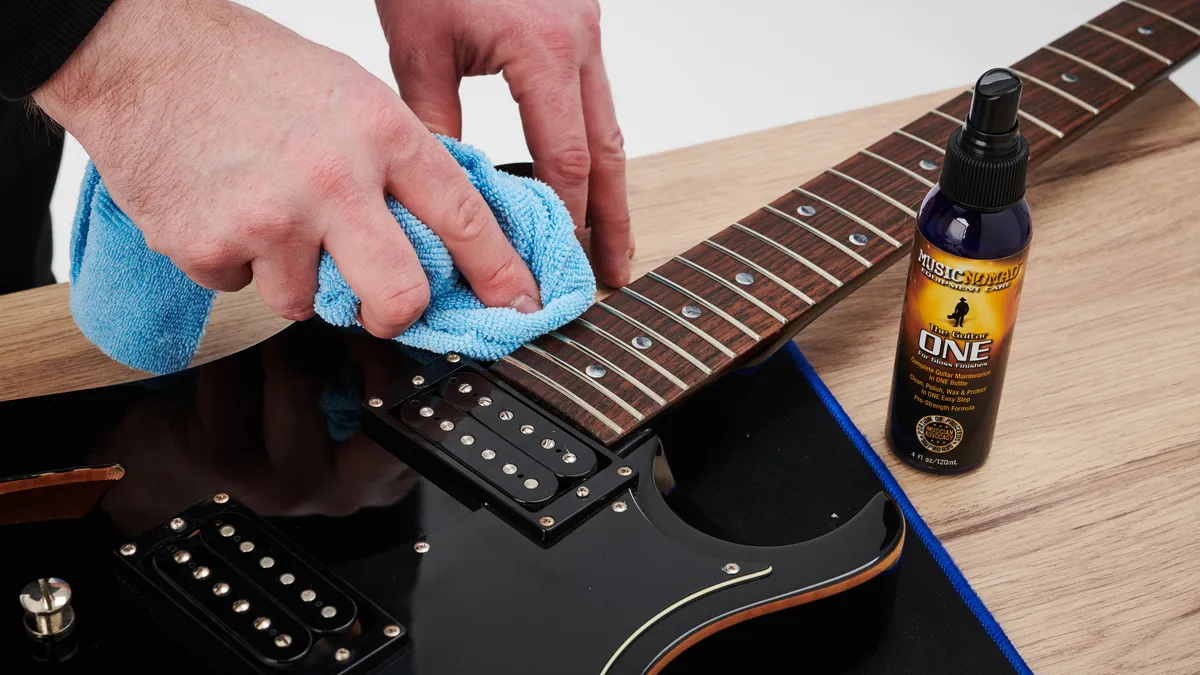
Some spray polishes are better for a more regular treatment to bring shine to a gloss finish, in addition to cleaning. We’re using the Music Nomad Guitar One here with the soft microfiber towel. It leaves the guitar smelling nice too!
Changing strings

There’s still some confusion out there about the best way to fit new strings. Learning an order of best practice will stand you in good stead as changing strings something you should be doing regularly as a guitarist. It's also a good opportunity to check and maintain the hardware that your strings come into contact with to ensure everything is moving smoothly and resonating well.
Firstly, when you’re not cleaning the fretboard or frets we’d advise removing and fitting one string at a time. This means there’s a minimal change on your guitar in terms of tension and your new strings will settle in quicker. Because we’ve cleaned our frets and fretboard that won’t be the case for us, but by following these steps, it will help things go without any hitches.
You will need

- New set of strings
- Music Nomad Tune-It String Instrument Lubricant
- Wire clippers that enable side cutting
- String winder
- Headstock tuner
- Phillips screwdriver
- Flat headed screwdriver
- Wrench to fit
1. Check your tuners

Because we've already removed our strings for the cleaning stage, now is a good opportunity to check our tuners aren't loose. Check any rear screws to make sure they're tight, as well as the 10mm hex bolt that can be found on many Fender guitars that are common culprits for looseness.
Our Music Nomad GRIP Peg Winder includes a handy 10mm wrench for that very purpose. And you can also use it to tighten pot and jack socket bolts too. Some tuners buttons can also become loose and benefit from tightening if there is an external adjustment screw.
2. Lubricate the string contact points

Anywhere on the guitar where the string makes contact needs attention. Smooth and unimpeded contact reduces risk of breakage and tuning problems, while aiding the crucial resonance that guitars needs as the strings vibrate. This is where products including Big Bends Nut Sauce, Planet Waves LubriKit Friction Remover and the Music Nomad Tune It String Instrument Lubricant prove to be essential for any guitarist's toolkit.

We’re adding a small amount of Tune-It to the nut slots, bridge and saddle contact points and string tree of our guitar with one of Music Nomad's included applicators. These are great for efficiently applying Tune-It to narrow spaces. Again, a little goes a long way with this stuff so it's a worthwhile investment.

Do you have the right gauge string?
That’s a bit of a trick question – there is no hard truths on right or wrong string gauge when it comes to acoustic or electric guitar strings. But you need to find the set that feels right for you on a particular guitar and set up for it accordingly.
When it comes to choosing string gauges, the general school of thought is any player down-tuning will need a heavier gauge than usual. And if you want to maintain tension on shorter scale guitars you may want to consider a slightly heavier gauge. But the latter isn’t even something you have to follow because it’s a very personal choice of how slinky and easy you want bending to be Vs enough string tension to avoid the strings feeling too flappy and causing excessive buzz or rattle.


The best electric guitar strings: guitar string sets for all styles and budgets
The good news is there’s a huge range of choice of acoustic and electric guitar strings out there. Don't be afraid to try new things. Be prepared to experiment a little. For example, I use Ernie Ball’s Turbo Slinky 9.5 gauge strings on My Gibson SG because we like the lighter feel on the 24.75-inch scale. But if I was tuning down a lot we’d opt for a set of 10s at least. Other players might opt for 11s.
The gauge directly affects the amount of tension on the neck that we then adjust our guitar’s setup to. So if you move up or down string gauges it's a good idea to do a general setup and truss rod adjustment to allow for the change in tension on the neck.
We’re hoping our setup guide will give you the confidence to adapt to any new gauge you want to try but there’s no doubt certain guitars tend to resonate and play better with specific gauges.
3. Check your new strings

As you remove each new string from its packaging, check it for any unexpected kinks – these can cause issues with tuning and rattle and you need to avoid fitting any string with an issue like that out of the pack. It’s rare to find any but it does happen.
4. Measuring the string length you need

So let’s address the big question – how many winds? There’s no definitive answer but there's two methods we follow, and the aim of both is to achieve consistency with each string having the same amount of turns around the peg.
The first achieves two winds around each peg. Measure the length to the tuning peg above the one you’re fitting to (as shown above); that’s how much you need to thread through. You’ll have to estimate for the final string on a six-a-side headstock or on the D and G strings for a three-a-side. Which is a significant drawback for some so you can try what our contributor and guitar tech pro Jack Ellis advises.

This method creates more winds, but is consistent too; place your hand in a karate chop at the 12th fret, holding the new string under the thumb of that hand and threading it through. Once you’ve threaded it through the peg hole, kink it on the playing side before winding. Both methods are trying to achieve the same ends; that consistency of winds and elasticity for bends.
5. Wind the string

We’re using the Music Nomad GRIP Peg Winder here. It uses precision bearings inside for speedy and smooth winding. It also has a rubber lined head for added security and grip – it won’t scratch your machine heads and fits acoustic, electric and bass guitars as well as banjo and ukuleles. Simply attach it to the machine head and wind it up.
6. Clip off the excess string

Once your strings are wound on and tuned approximately so they have the correct tension, it’s time to trim the string ends with our string cutter as close as possible to avoid sharp ends poking out that could damage the inside of your gig bag or, even worse, hand. Bend down any exposed edge with your flat-headed screwdriver.

7. Stretch

Don’t skip the stretching stage! This will help settle the string so it will bed in faster. At the base of the neck pull the string firmly but not excessively – it will drop in tune. Repeat this for all the strings. Now tune up to pitch and prepare for the setup!
The setup

Plenty of players leave guitar setups to a pro technician and that’s fine, it's a professional skill that's worth paying for, but you can save money and time by learning to do some integral parts of the process yourself when this isn't an option.
For more involved jobs like fret work (levelling high frets that can cause buzzing issues), nut replacement or nut filing, we’d always advise taking your guitar to your local repair person unless you’re confident.
There are brands such offer high quality tools for those that are feeling up to the task – for example, the Music Nomad Diamond Coated Nut Files are designed to make the process as stress-free as possible, especially using the Precision Nut Height Gauge the company offers on its own or part of its Precision Setup Gauge Set. The gauge can help diagnose issues caused by a nut slot being cut too low or high; including buzzing on open strings or action that feels too high for a particular string.
The latter kit is pictured below and we'll be using it for a number of the tasks we'll be doing in this setup.

It's proved to be a very useful set indeed. We’re going to be using it here to gauge the truss rod adjustment, radius, plus string and pickup height. And Music Nomad’s handy guide with the Precision Setup Gauge set helpfully offers us an the order in which we approach these adjustments. This workflow is important and is slightly different depending on what kind of electric guitar you’re setting up. Let us explain:
Setup order for a guitar with individually adjustable saddles (eg Fender guitars):
- Truss rod
- String action
- String radius
- Nut height if applicable
- Intonation
- Pickup height
Setup order for guitars with a fixed radius bridge (eg Gibson Tune-O-Matic)
- Truss rod
- String radius
- Action of strings, angle between stopbar and Tone-O-Matic if applicable
- Nut height if applicable
- Intonation
- Pickup height
Trusting the order and the process while using accurate gauging tools takes the guesswork out of guitar setups. Buying quality gauge tools is an investment, and while it may not seem as exciting as buying something like a new overdrive pedal, it pays off.
Music Nomad calls its system KISS; Keep It Simple, Setup, and It will save you time and you’ll be able to get your action just the way you want it – hopefully making you play more and play better! Let’s get started…
Adjusting the truss rod
What you will need

- Music Nomad Precision Setup Gauge Set: truss rod gauge with pick capo, string action gauge, radius gauges, string action gauge (alternatively you’ll need a capo and a .007 gauge for a different method at the truss rod gauge stage, plus something to measure string and pickup heights accurately).
- Phillips screwdriver to fit your guitar’s saddles – we're using the Music Nomad Premium Guitar Tech Screwdriver and Wrench Set.
- Guitar tuner
- Correct Allen key / socket wrench for your guitar – we’re using Music Nomad’s 11-piece Premium Guitar Tech Truss Rod Wrench Set that covers most requirements – it even includes a tool for spoke wheel-type truss rod adjustment.
Understanding the truss rod

Strings apply a constant tension to the guitar neck that the truss rod inside of it helps to counter by setting the curvature of the neck and enabling us to play comfortably. The wood of the neck can also move due to humidity temperature changes so the truss rod can help to adjust for that too.
Your guitar's truss rod is not something to be afraid of; providing you make small adjustments and exercise patience with the process. Confidence in adjusting your truss rod is a vital key towards having a consistently great playing guitar.
Speaking of keys, you’ll need an Allen key or hex wrench for your guitar depending on the type. Most come with new guitars but if you’ve lost it or it was missing, you can buy them separately or as a kit in the case of our 11-piece Music Nomad kit here.
Check the curvature

You may have seen guitarists looking down a guitar’s neck to judge the curvature of the truss rod – it may give them a rough idea but it’s simply not accurate or consistent enough alone to be certain for a setup. We need a feeler gauge to check which way we need to adjust our guitar’s truss rod.
There’s two approaches we’re going to explain here. One is the Music Nomad method for using with the the Precision Guitar Setup Gauge Tool Set (and its Truss Rod Neck Relief Gauge Tool that’s also available to buy separately too) and the other is suited to anyone buying a separate general use feeler gauge

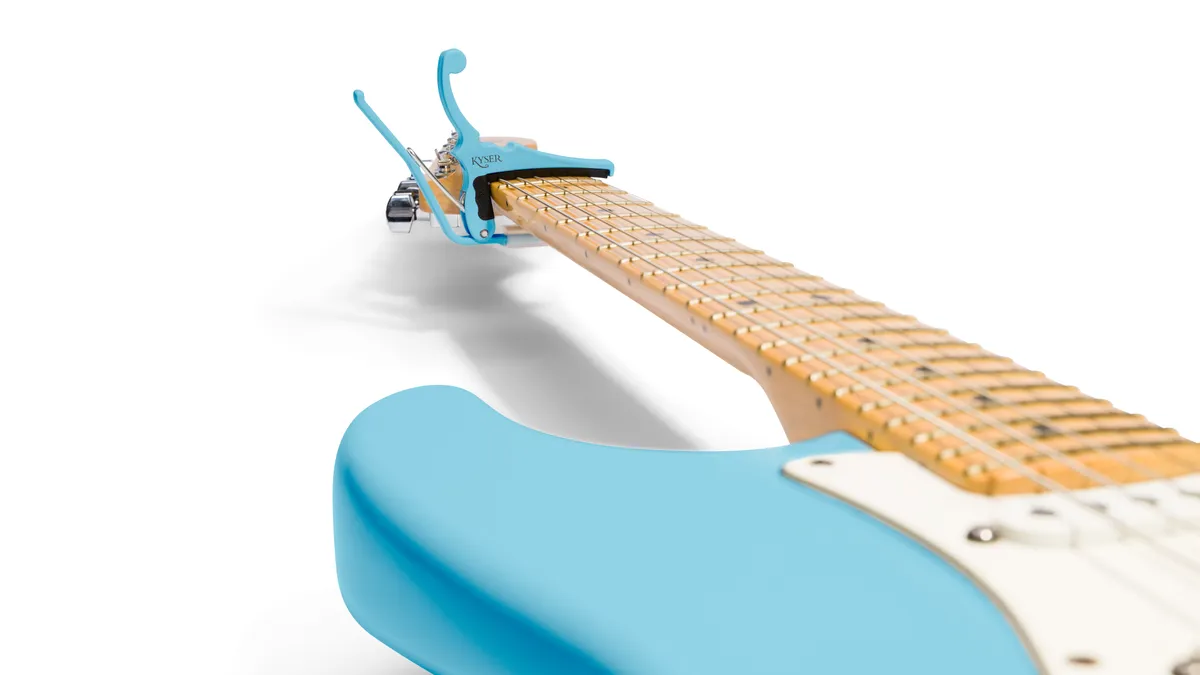
Music Nomad’s Relief Gauge Tool features the three most common truss rod relief dimensions for electric, acoustic and bass guitars; .006", .008" and .010", respectively. It also comes with a pick capo that you slot over your guitar’s E string as part of the gauge process as follows:
- Tune the guitar.
- Use the pick capo to hold down the low E string against the 1st fret (slide under the A string and over the low E and D to do this).
- Choose the feeler gauge for your guitar type – we’re using the 006" for electric guitar here.
- With your finger press the low E string down at the 12th fret.
- With your other hand slide the feeler gauge under the Ed string and on top of the 6th fret.
- Look carefully at the string when sliding the gauge under while at a flat angle:
If the gauge doesn’t touch the low E string, turn the truss rod nut clockwise by ⅛ of a turn then check again.
If the gauge lifts the low E and is resting heavily on the fret, turn the truss rod nut anti-clockwise by ⅛ of a turn and check again.
If the gauge rests lightly on the fret and touches the low E string no adjustment is needed.

Remember to make those small turns and check each time and you’ll be fine. Yes it is possible to break a truss rod in extreme cases but that’s usually as a result of turning too far all at once against significant resistance.
The alternative method is for anyone using their own feeler gauge with a standard capo. And it isn’t much different but makes allowances for a different feeler gauge.

- Tune your guitar
- Attach a capo at the 1st fret and hold down the low E string at the 15th fret (or use a second capo here instead if you have one).
- Use a 0.007 gauge at the 8th fret and follow the touch process.
So that’s a great start point but as with a lot of things in the world of guitar, personal preference comes into play when it comes to the finer details of guitar neck relief. If you’re a heavier hitting player may want a little more of a gap, so you may need to loosen the truss rod more ever so slightly.
It’s important to recheck your truss rod each day for the next few days as it settles down, adjusting again slightly as necessary. When dealing with the constant tension a guitar neck and strings are under, this is essential. And with our truss road set we can now move on to the next stage; string action.
String action and radius

High string action can be an immediate turn off for some players, just as low action can inspire or put others off. So being able to adjust it to your personal preference is really important – and it’s not rocket science either.
Here we’ll show you how to get started for both individually adjustable saddle guitars and fixed bridge. We need to set the height of the lowest and highest string before then adjusting the other strings with a radius gauge.
You can measure your string height with a ruler or a special gauge – we're using one from our Music Nomad Precision Setup Gauge Set here. It's really important that whatever you use is accurate because we're going to base everything from the measurements we take from the high and low E strings.
1. Get into position and choose the height
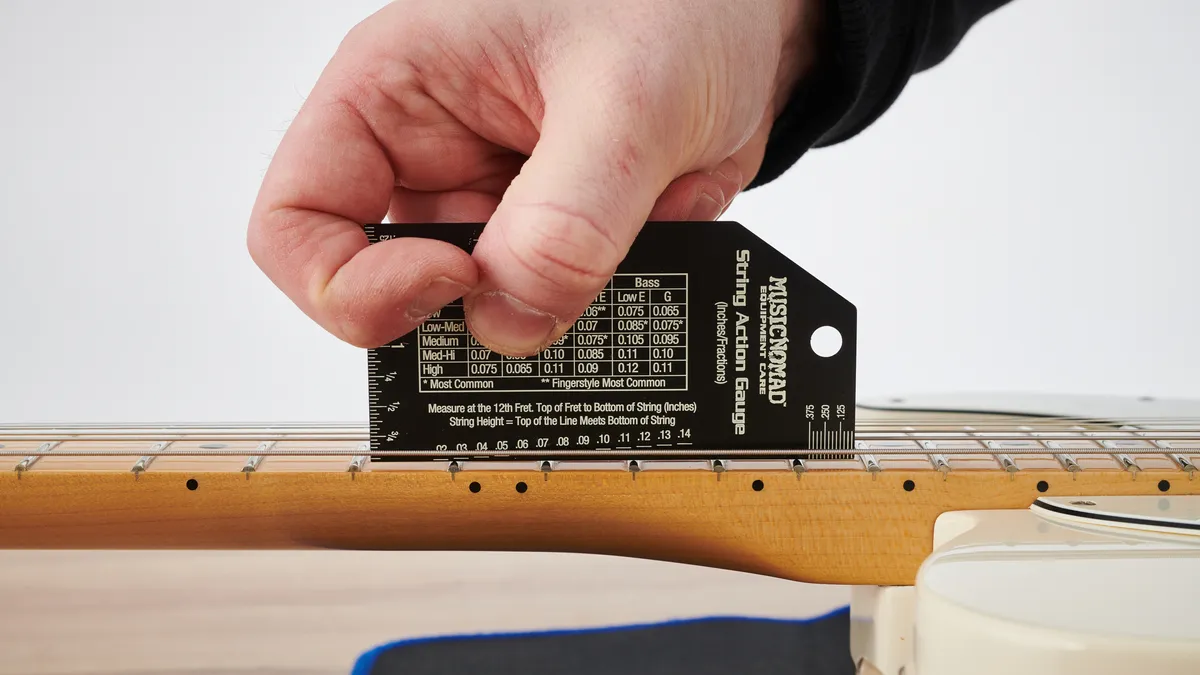
With your guitar in tune, fit the Music Nomad pick capo again on the low E string at the first fret, placing the Music Nomad string action gauge at the 12th fret. Alternatively, if using another brand’s string action gauge, hold down the strings at the first fret with a capo.
Setting the recommended height depends on guitar type and preference; as you can see on the chart of the gauge. We’re going to go for a low action (0.05 on the low E and 0.04 on the high E) measuring from the top of the 12th fret to the bottom of the low E string first and then moving on to the high E string (again holding it down at the first fret).

On our Music Nomad gauge, the top of the line for the measurement chosen should meet the bottom of the string at the 12th fret.
2. Make the adjustment at the saddles

For individual saddles you’ll need the correct Allen key to adjust each saddle grub screw to turn and raise the saddle higher or lower. Keep checking the string height gauge after each adjustment.

For a guitar with a fixed bridge you’ll be turning the two adjustment wheels to set the heights of the low and high E strings (in the playing position turn the wheel left to raise the height and right to lower it), but first you need to skip to the next step for setting the string radius and then come back.
The break angle

For Tune-On-Matic style bridges with a stopbar tailpiece, the break angle between the two can affect tuning stability, and if the angle is too steep the string can buzz on the back of the bridge.
Reducing the break angle can also make string bends feel a little easier. The break angle will also be affected by whether you choose to wrap your strings over the stopbar (as Joe Bonamassa does), this will allow you to lower the stopbar more than if you thread your strings through the traditional way.
There's no set answer when it comes to the 'right' break angle as the neck angle of a set neck guitar is fixed and cannot be adjusted later with a shim. So you have to work with whatever it is out of the factory.
We’ve found most guitars will have a sweet spot for players with the height but it’s important to slacken the strings before making any adjustments and keep both stopbar posts level with each other. We’d advise using a coin carefully to adjust (a UK 50p piece is good) as a flathead screwdriver can ruin your chrome or nickel.
String radius

All guitar fretboard have a radius – this is the curvature of the fretboard. The most common sizes for electric guitars are 12” (most Gibsons), 9.5” (many Fenders) and 7.5” (vintage Fenders) with other brands often being 9.5” and 12”. Acoustic guitar fingerboards tend to be broader radius.
You can look up the radius spec for your specific model online and confirm it with a radius gauge – this is a template we’ll need for setting the heights of the other four strings at the saddles so they match the neck radius.
Radius gauges are usually one of two types; the type above left that can go under slackened strings to doublecheck your radius or the type pictured above right that combines four radius templates in one. These will require the strings to be removed to check the fretboard radius. You will know you have the correct template for your fretboard when the gauge rests of the fretboard without rocking in the middle or creating a gap in the centre.
Guitars like Les Pauls have a pre-set bridge radius and making any required adjustments if the radius doesn’t match the fretboard is a more involved process that we’re going to talk about first.
Adjusting the radius of a fixed bridge eg Tune-O-Matic

Select the radius template that matches your guitar – the string radius needs to match this. Each of the four strings between the high and low E need to touch the template equally.
Hold the radius template over the strings around ¼ inch in front of the bridge. All the strings need to make contact with a radius gauge. If they don’t you can only set the bridge height as low as the lowest saddle or you’ll get fretbuzz. There’s a few options of how you can address the issue further.

You may need to file the highest saddles down so the radius can touch the lower strings – this is re-radiusing the bridge. It’s involved work that requires the correct size of nut file and very careful adjustment. If you file too much you’ll have to readjust the other saddles to compensate. We’d advise you to get a specialist to carry out this work. The other option is buying a whole new bridge replacement.
Setting the radius of a bridge with individually adjustable saddles

You've already set the top and bottom string in the previous step. You now need to raise or lower the other four strings so they are touching the underside of the radius template equally - without you having to push the radius gauge down.
We tend to go for medium contact rather than full muting. Position the radius gauge ¼ inch in front of the saddles to check this and adjust each string’s pair of saddles at a time, making small adjustments each time before checking the radius template again.
Intonation

If a guitar is not intonated it will not play in tune well when you’re in the higher frets. Setting it involves compensating each string’s individual scale length to be in tune. Thankfully, it’s a pretty simple process that usually just requires a screwdriver and guitar tuner.
I’d advise plugging into a pedal tuner or other electronic guitar tuner for this if possible – to ensure maximum accuracy and speedy response.

Work on one string at a time and play a harmonic at the 12th fret. Now compare that by playing a fretted note at the 12th fret. They need to be the same. Repeat this a few times to make sure you’re getting consistent responses and are playing the notes accurately. Now make the following adjustments depending on the result:
- If the fretted note is reading as sharp on the tuner you need to move the saddle back towards the bridge by adjusting with a screwdriver.
- If the fretted note is flat you need to move it forward towards the headstock.
- Make small adjustments, rechecking multiple times to make sure the results are consistent.
Pickup heights
It’s the final hurdle! Pickup height is a massively underestimated factor in your guitar tone – EQ response and sensitivity especially. Again, personal preference comes into play, especially so when you consider many pickups allow individual pole pieces to be raised or lowered to accentuate the response of specific strings and therefore high, mid and low frequencies. But let’s get to a starting point that you can then work from.
It’s also worth noting that if your pickups are too close to the strings they can create unwelcome overtones, interfere with intonation readings, as well as physically hitting them when fretted to create buzz.

Press the two E strings down at the highest fret as you adjust the bass and treble side.

Using a ruler or pickup height gauge adjust the pickup to the following starting point heights by turning the mounting screws:
- Single-coil (Strat-style) 2.4mm on the bass side, 1.6mm on the treble side
- Single-coil (Tele-style) 1.6mm bridge pickup, 2.4mm neck
- Humbucker: 1.6mm for bridge pickup, 2.4mm for neck pickup

Play chords and notes across the fretboard clean and with overdrive through your setup and adjust the heights further to taste. Check the balance between pickup levels and the individual strings too.
