
Often overlooked and somewhat dwarfed by the more popular Floyd Rose tremolo the Kahler design has held its ground offering a unique feel and operation throughout the Whammy Wars of the 80s.
What’s particularly cool about the Kahler is the low friction feel when using it, the low maintenance and how it affords wild dive bombs on electric guitar. It’s got to be said though that all tremolo systems have quite a few parameters that can go out of whack - this guide is aimed at demystifying the underdog Kahler 2300 tremolo design and what better guitar to have it in than a 1985 Carvin V220!

This is a top loading tremolo and it’s installed with routing to the top of the instrument only, it fastens with 4 wood screws and the rest is self contained, pretty neat. It’s pumped full of hi spec parts including ball bearings, cams, fine tuners and rollers. Its features are vast including: variable string spacing, adjustable radius, arm tension, locking/fixed bridge setting, intonation bolts and fine tuning thumb wheels.
So yeah, plenty of parts, let’s start at the top and lay out how to wrangle with your whammy!

Tools
- Fresh set of guitar strings
- String cutters
- String winder
- Tuner
- Jack lead
- Radius Gauges
- Allen keys” 5/64” .050”
- Philips screwdriver PH1 / PH2 as required
- Action ruler

Righty let’s get started, so first things first, let’s restring. Pick your regular set and wind them on.

We have the locking nut system here too for the purposes of this set up we’ll leave the lockers undone for now. Brass nut too….80s all the way! Tune to pitch in whatever tuning you’re going for.

Fine tuners can go missing very easily so be careful. When tuning up we always level these, get them all the same in the middle of their travel so when done you can raise and lower the pitch when the locking nut is tightened.
There's no point being maxed out. If this is a feature you don’t want to use you can either tighten in all the way or just unscrew them. That gets them out the way so you have a lower profile bridge too.

The ageing Carvin had been fully dismantled for a respray and over the years the Kahler had gone completely out of whack due to fiddling… make sure you take a look at the string spacing on your guitar and check everything’s ok. You want to have the strings lined up over the pickup’s polepieces accurately with an eye to suiting your fretboard edges too.

This wee bolt is responsible for fastening it; loosen it and you’re free to move the saddle right and left to suit - spend some time on this. The saddles all share a bar so make sure you push it back down.

It may sound odd but we're going to set the intonation now. This is normally done later as string height adjustment messes with the intonation but in this case the steep angle of the saddles upwards messes with the string height more. Let’s set the intonation so we don’t go round in circles.

This Philips bolt locks the saddle in place and when loose you can pull the saddle forward. Plug into a tuner; let’s set the intonation. Play a harmonic at 12th fret then compare it to the fretted note at 12th fret.
Look closely at the tuner reading, if the tuner reads sharp when fretted move the saddle backward if it's flat move it forward. Try a best of three at the 12th fret to establish a true reading as it’s very easy to fret it badly. You must get these fellas straight when you lock them back in place as they do like to wobble unless they’re locked. Again, spend some time on this, it’s worth it!

Be sure that your truss rod is set as well as your guitar nut height; both these things affect the bridge saddle heights drastically. Action! Let’s set the string height on the outer E strings first, get that string out the way and use a .050” allen wrench to set the grub screw height.

Where to set the bridge’s height though? A good medium setting for all occasions is 1.5mm on the high E and 2mm on the Low E. That’s from the top of the fret to the bottom of the string at 12th fret. You can get away with lower if you are partial to shredding and you play lightly or have a true fretboard.

This is a good rough height for the saddles to be, note the upward angle. With a decent angle there’s a healthy amount of down tension on the roller saddle to keep the string in place. If your saddles end up sitting lower (flatter) then the string can start to hit the intonation lock bolt or jump out when played. The only way to adjust this is to change the angle of your neck with a shim.

We haven’t talked about the central strings yet so let’s set the height on those now. Figure out the fretboard curvature on your neck using a radius gauge (as shown in pic above and below). This awesome tool will show you the curve equally on the top and bottom. On our Carvin V220 here is a 12” radius.

With the radius gauge resting under the previously set E strings, we can now set the middle four strings following the curve. We like to start with them high and then drop down listening to the plucked string, achieve the same amount of buzz against the tool on each saddle and the curve will be bang on.
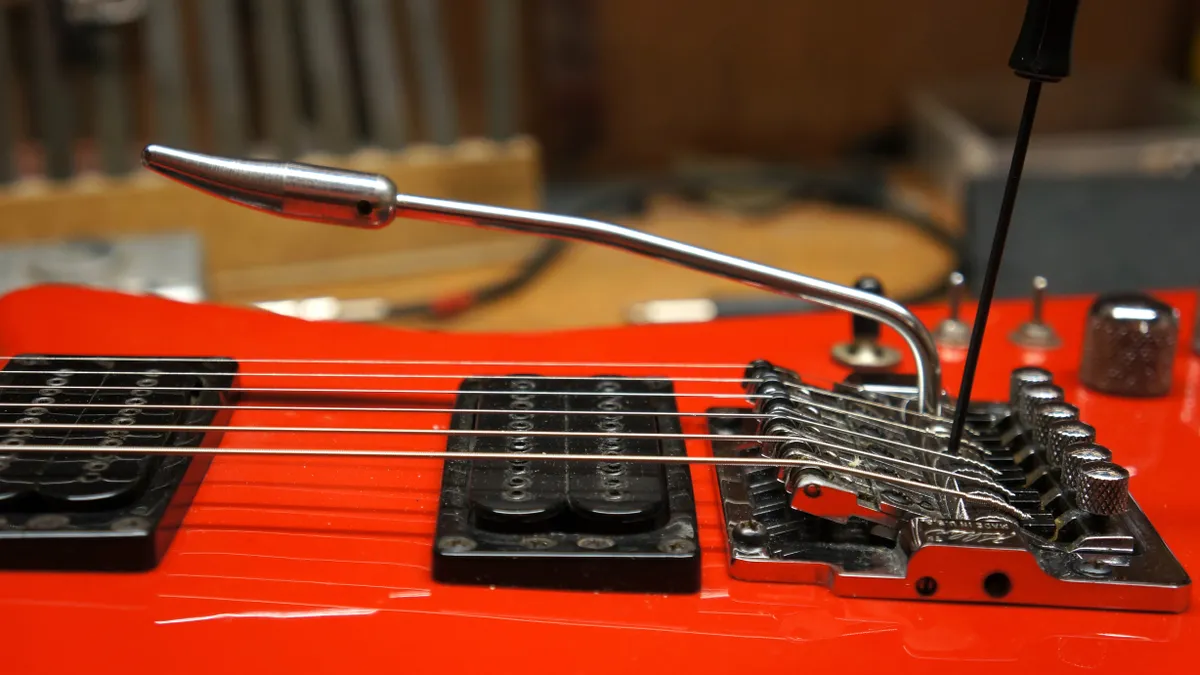
Finishing up now, we can play with the spring tension of the tremolo and therefore the angle of the tremolo arm. Using an allen key, adjust this tension - it’s the hole in the centre of the cam! Be aware that this bolt is not specifically for the arm height/angle; it’s for preloading the spring inside. It is possible to go too far and the grub screw can fall out - watch it!

Stretch your strings in, lock up your clamps at the headstock locking nut and give the tremolo a whirl, see if that’s the right height for you. Isn’t that better?
How to set up a Floyd Rose tremolo
