Understanding the fundamentals of EQ
Getting to grips with EQ is key to getting a perfect, well-balanced mix. Here we study the fundamentals of the process
Want all the hottest music and gear news, reviews, deals, features and more, direct to your inbox? Sign up here.
You are now subscribed
Your newsletter sign-up was successful
Equalisation (EQ) is one of our most important mixing tools, but it’s important to use it in ways that improve our overall mix, and understanding its various forms can really help with this.
Today, we're moving beyond basic EQ techniques to look at the EQs themselves and how their shapes and behaviours can assist us getting the results we want. Rather than discuss how to EQ specific instruments, we’ll focus on the underlying behaviours, which you can then use for your own decisions.
There are lots of EQ plugins available, and sometimes a basic design can get the job done. However, in this masterclass we’ll need something a bit more flexible, so seek out an EQ plugin that includes peak and shelving shapes as well as high- and low-pass filtering. Ideally all bands should have adjustable Q. If your DAW doesn’t deliver, there are some excellent freebies and we use one in the walkthroughs.
Of course, this does exclude a number of classic analogue emulations, and we’re certainly not ruling these out. In the Pro Tip we look at a few popular designs and what makes them special. Let’s get to it.
Understanding EQ
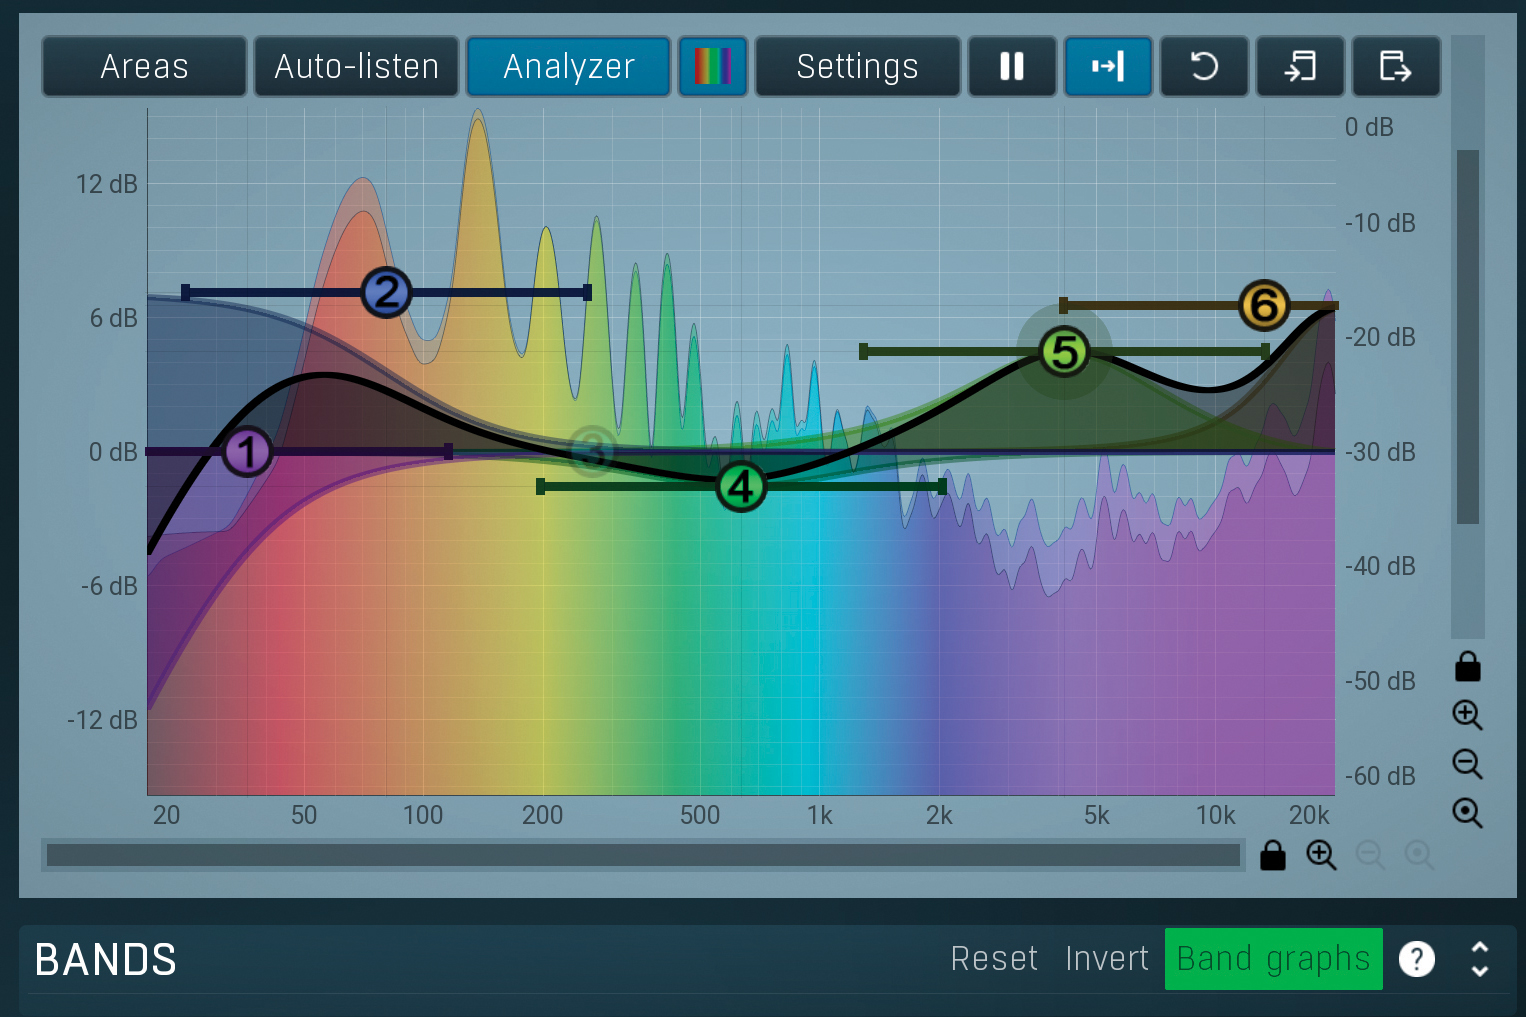
As suggested in the intro, a flexible EQ allows you to create a variety of shapes. Here, we’ve loaded up a flexible and free EQ (Melda MEqualizer). This has all the typical shapes you need including peak, shelving and filters all with adjustable Q. There are also some handy extras (notch and band pass) and a frequency analyser.
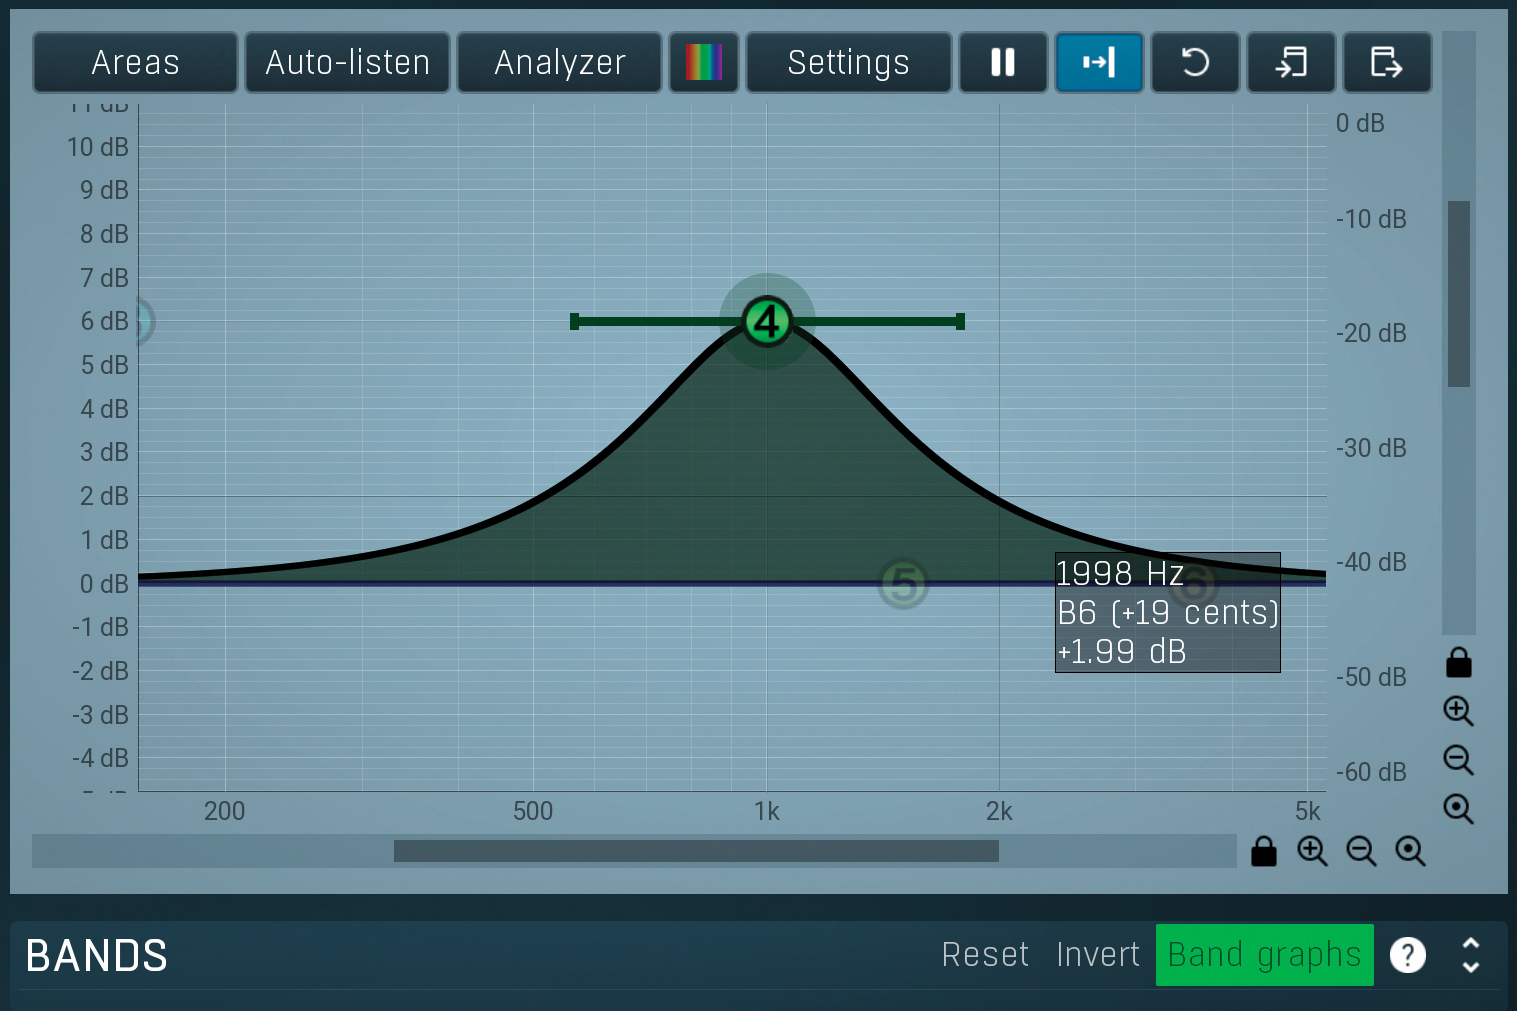
In a typical mix, we expect to use all three main filter shapes (peak, high/low shelves and high-/low-pass filters) with peak shape being the most popular. For a basic peak filter set the Q to 1.0. You’ll see that if you apply 6dB of gain the filter is noticeably affecting an octave either side of the selected frequency.
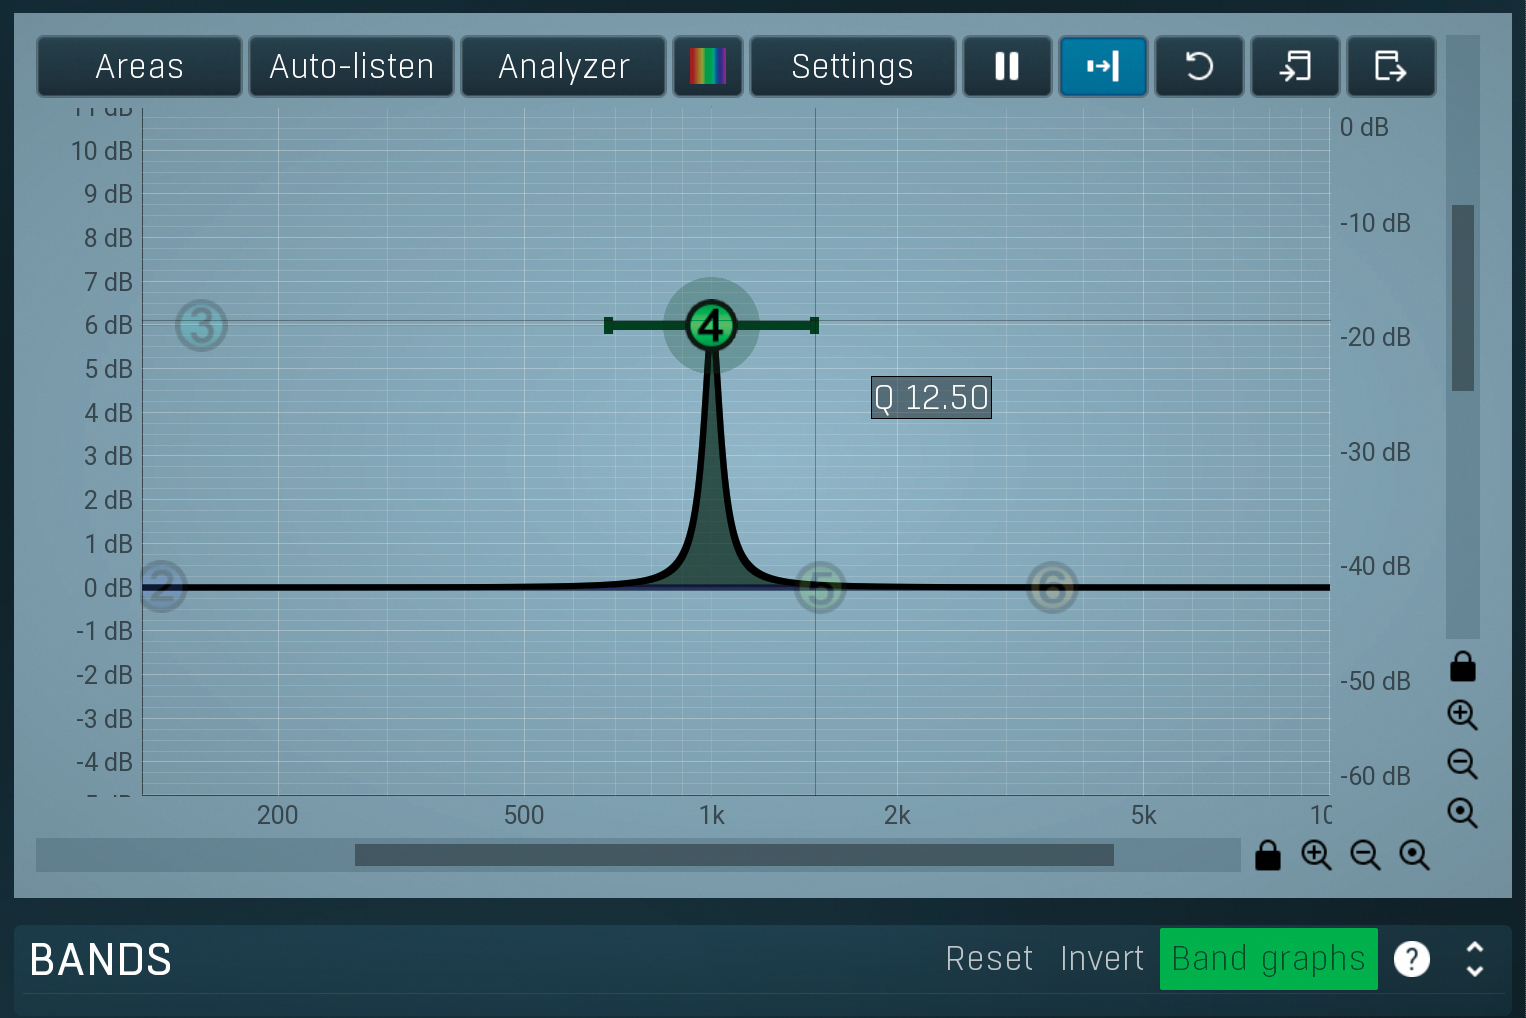
From this point, try lowering the Q. You’ll see the filter gets gradually wider until it affects most of the spectrum. Meanwhile, increasing the Q value creates a narrower filter. Get the Q value above about 10 and you’ll have an extremely sharp peak that’s great for cutting but will impart a very ringy or honky sound when boosting.
Want all the hottest music and gear news, reviews, deals, features and more, direct to your inbox? Sign up here.
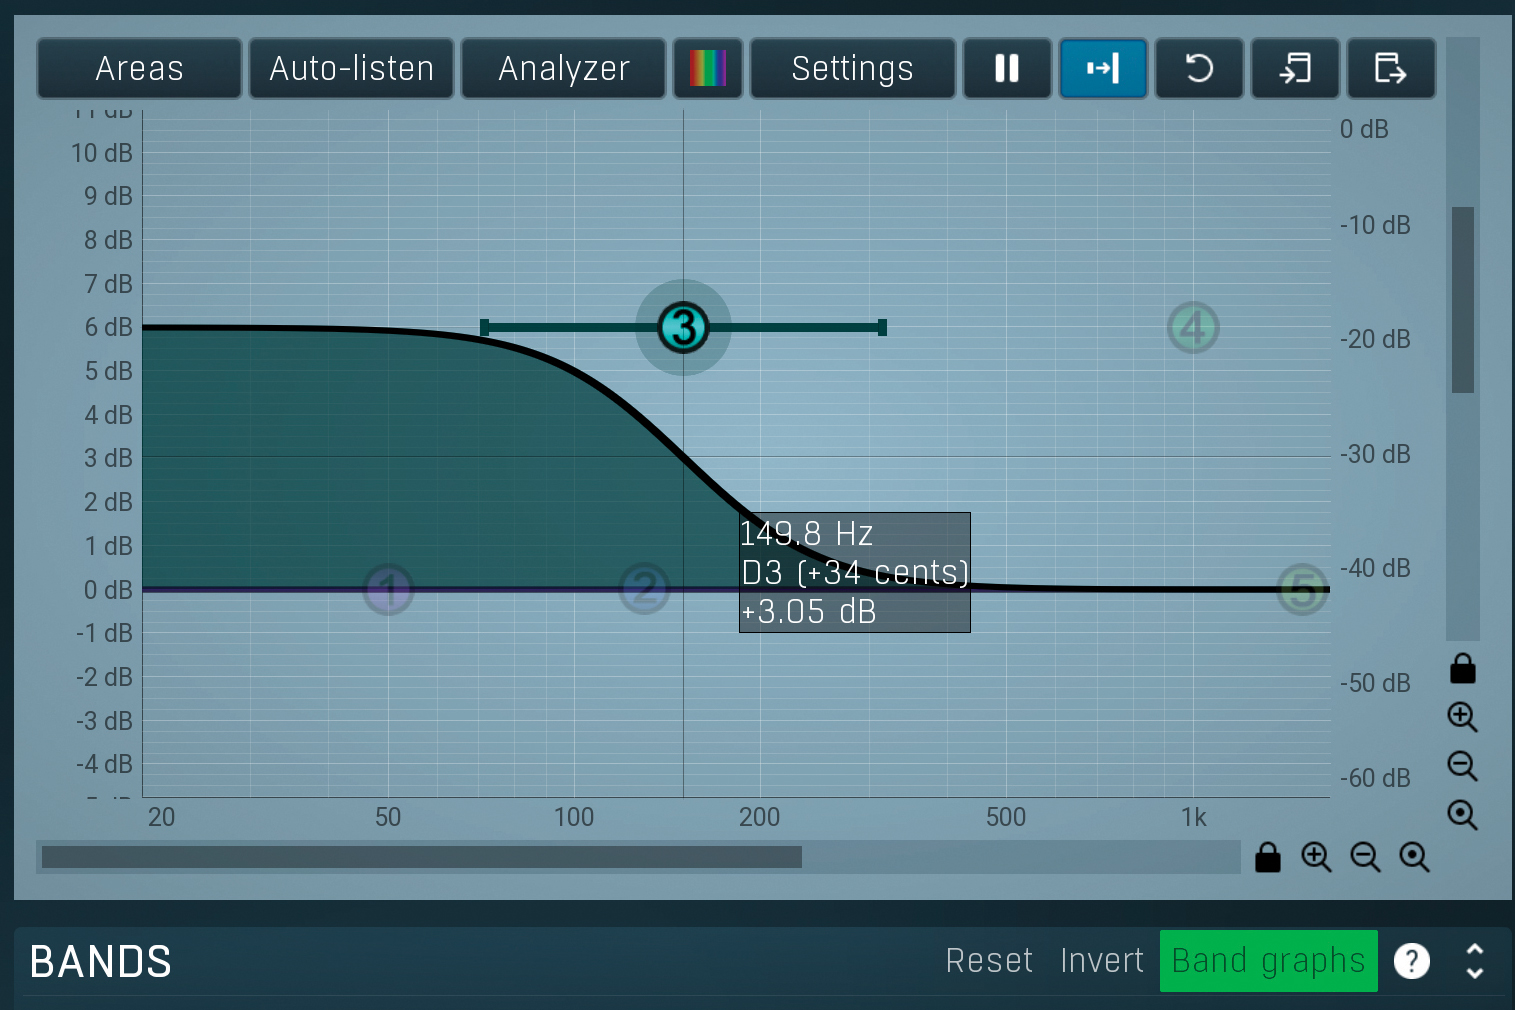
Shelving filters come in both high and low incarnations, affecting the spectrum above or below respectively. The selected frequency is a midpoint of the transition, so here by applying +6dB at 150Hz we actually get +3dB at 150Hz. What happens either side of that is set by the Q, which affects the slope of the transition.
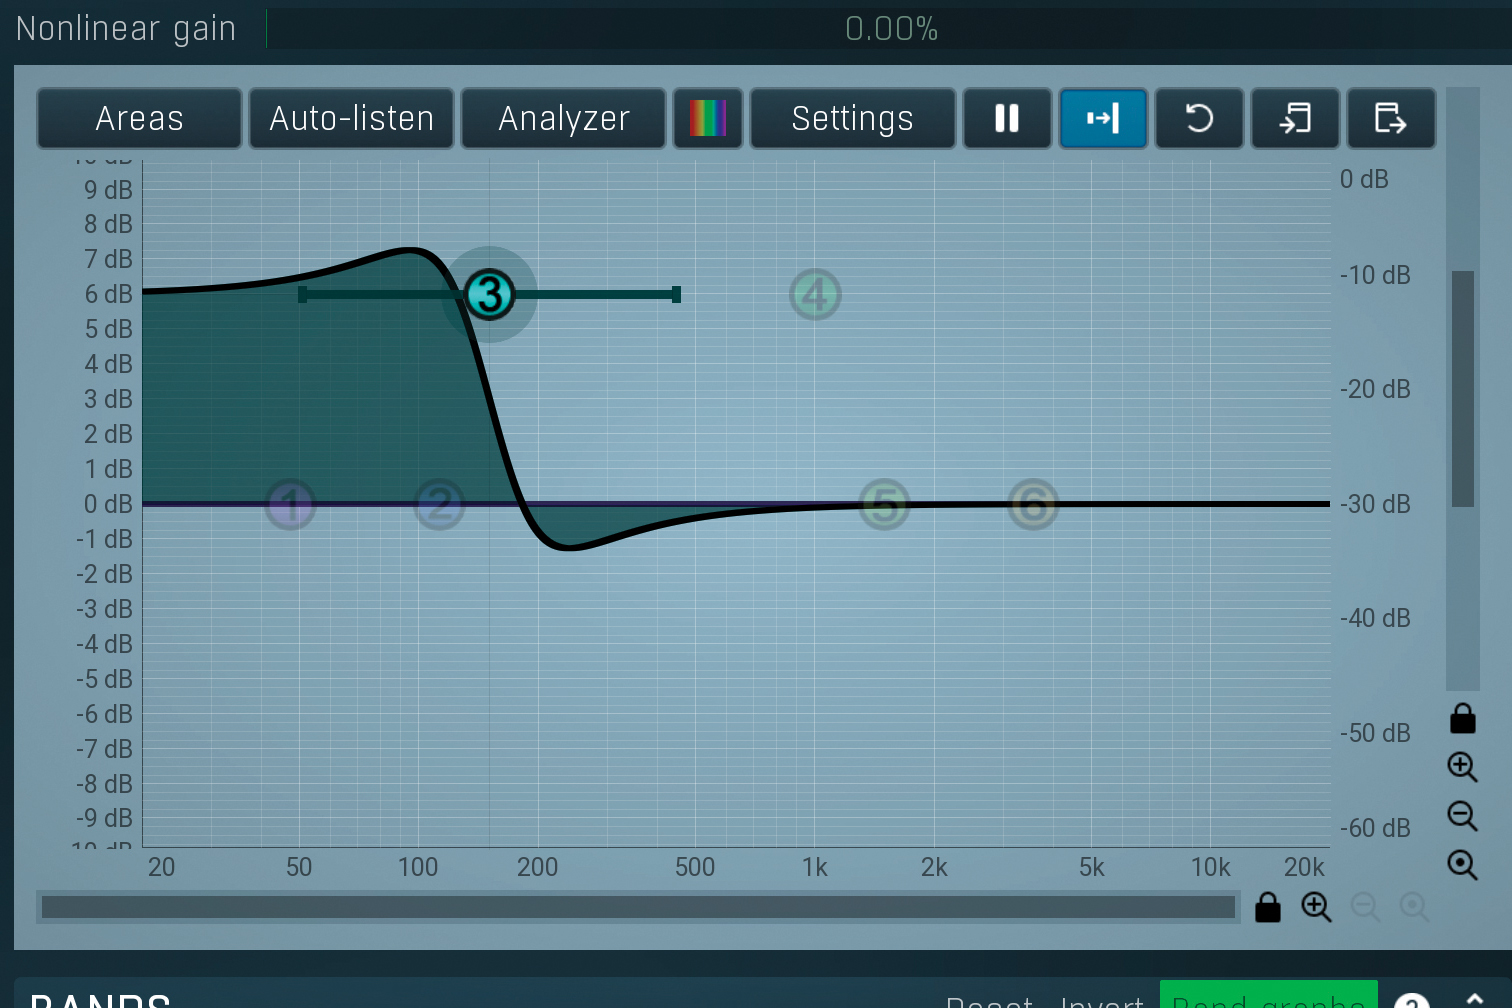
Being able to adjust the slope (Q) makes the shelf design incredibly flexible and potentially extreme. Try some lower values and you’ll see it creates a gradual ramp, while higher values often impart over or undershoot combined with a resonant peak that exceeds the gain amount. Modest levels of over or undershoot can be handy.
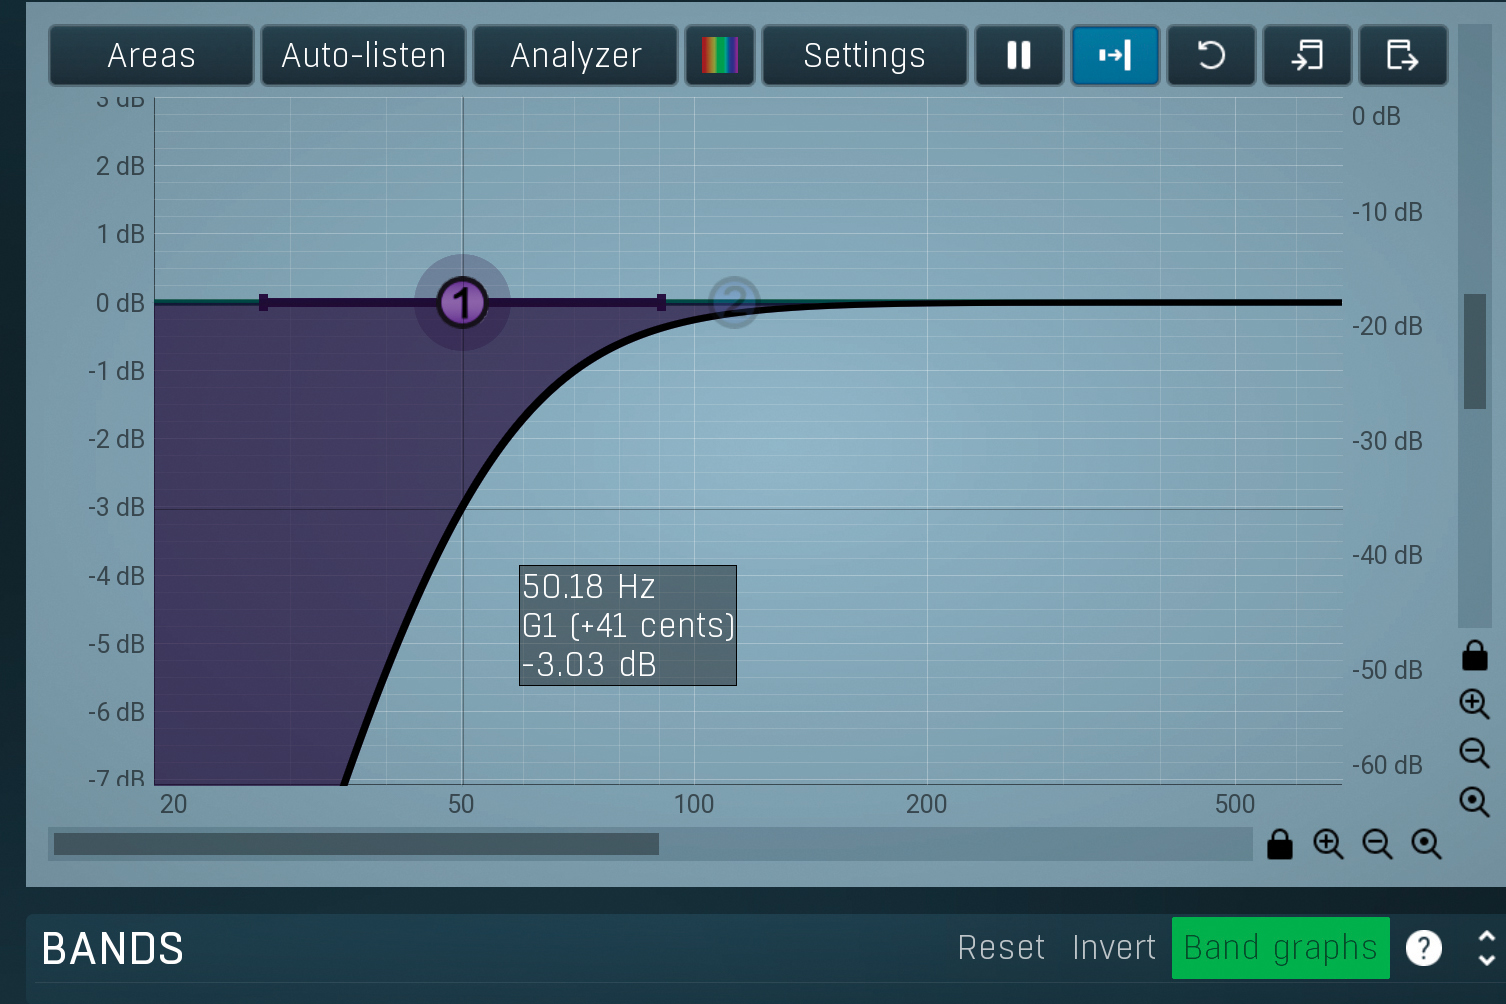
Finally, we have high- and low-pass filters, and these offer the most aggressive way to cut frequencies above or below certain points. These come in different slope (steepness) options and this time the selected frequency is the -3dB point. Be aware that if you have adjustable Q, higher settings will add a resonant peak.
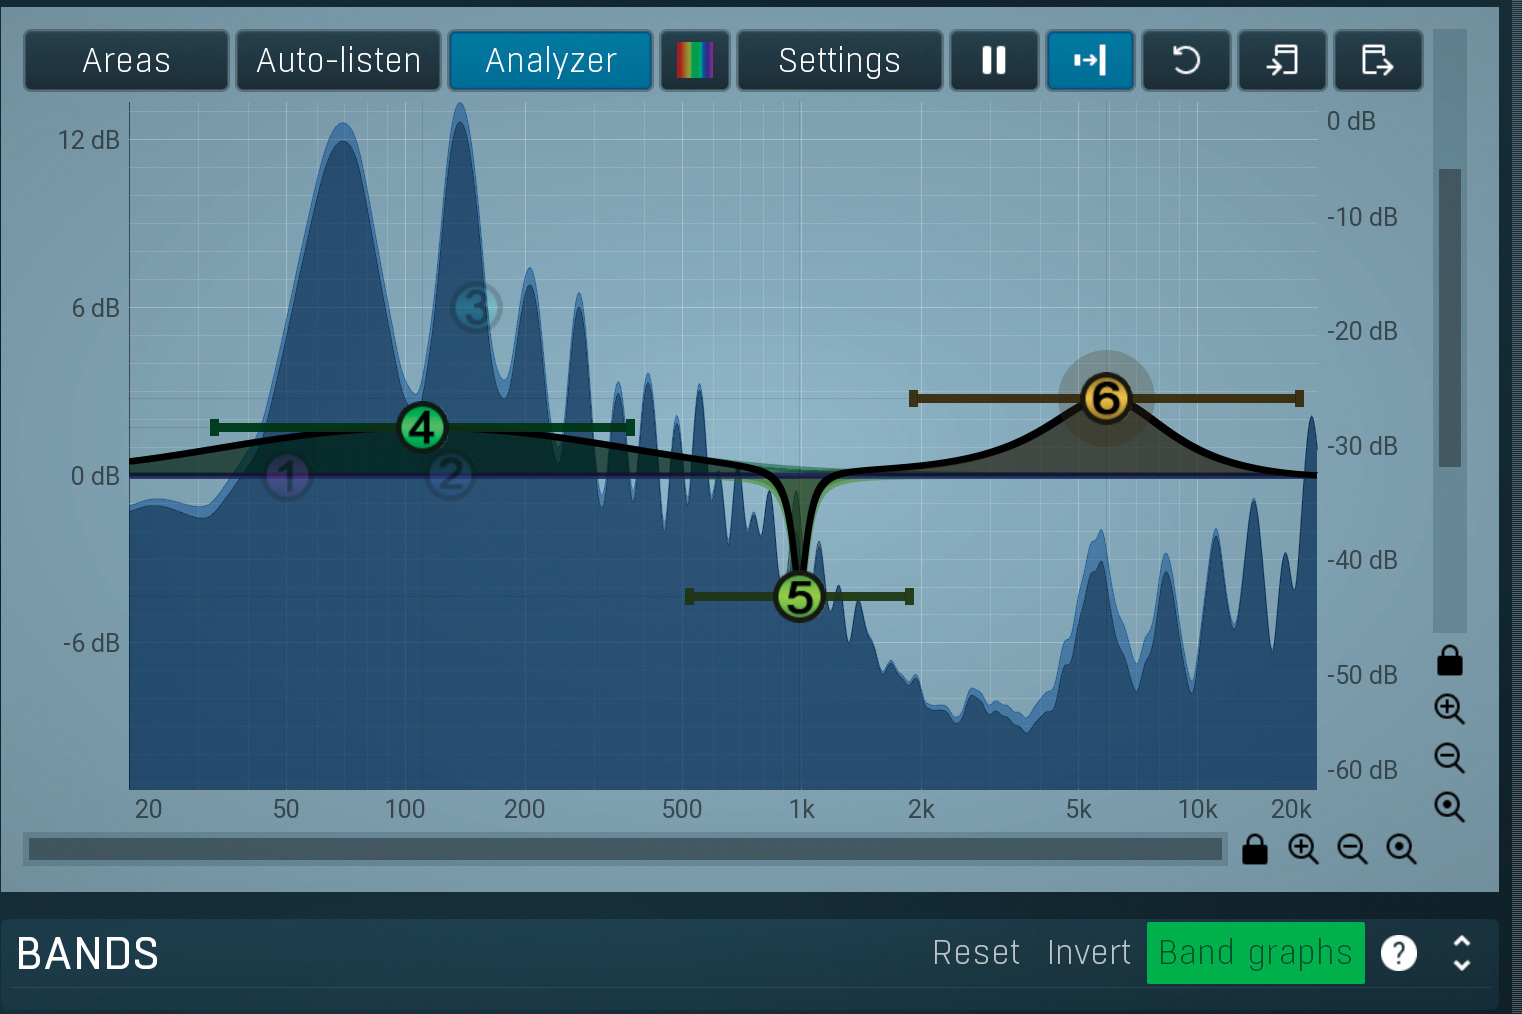
There’s an old adage for EQing that suggests we should boost using a broad shape and cut using a narrow shape. This certainly doesn’t apply in all cases, and we’ll look at more unusual EQ treatments in a later masterclass. Nevertheless, whatever EQ you apply, bypass and A/B as you go to make sure you’re making things better.
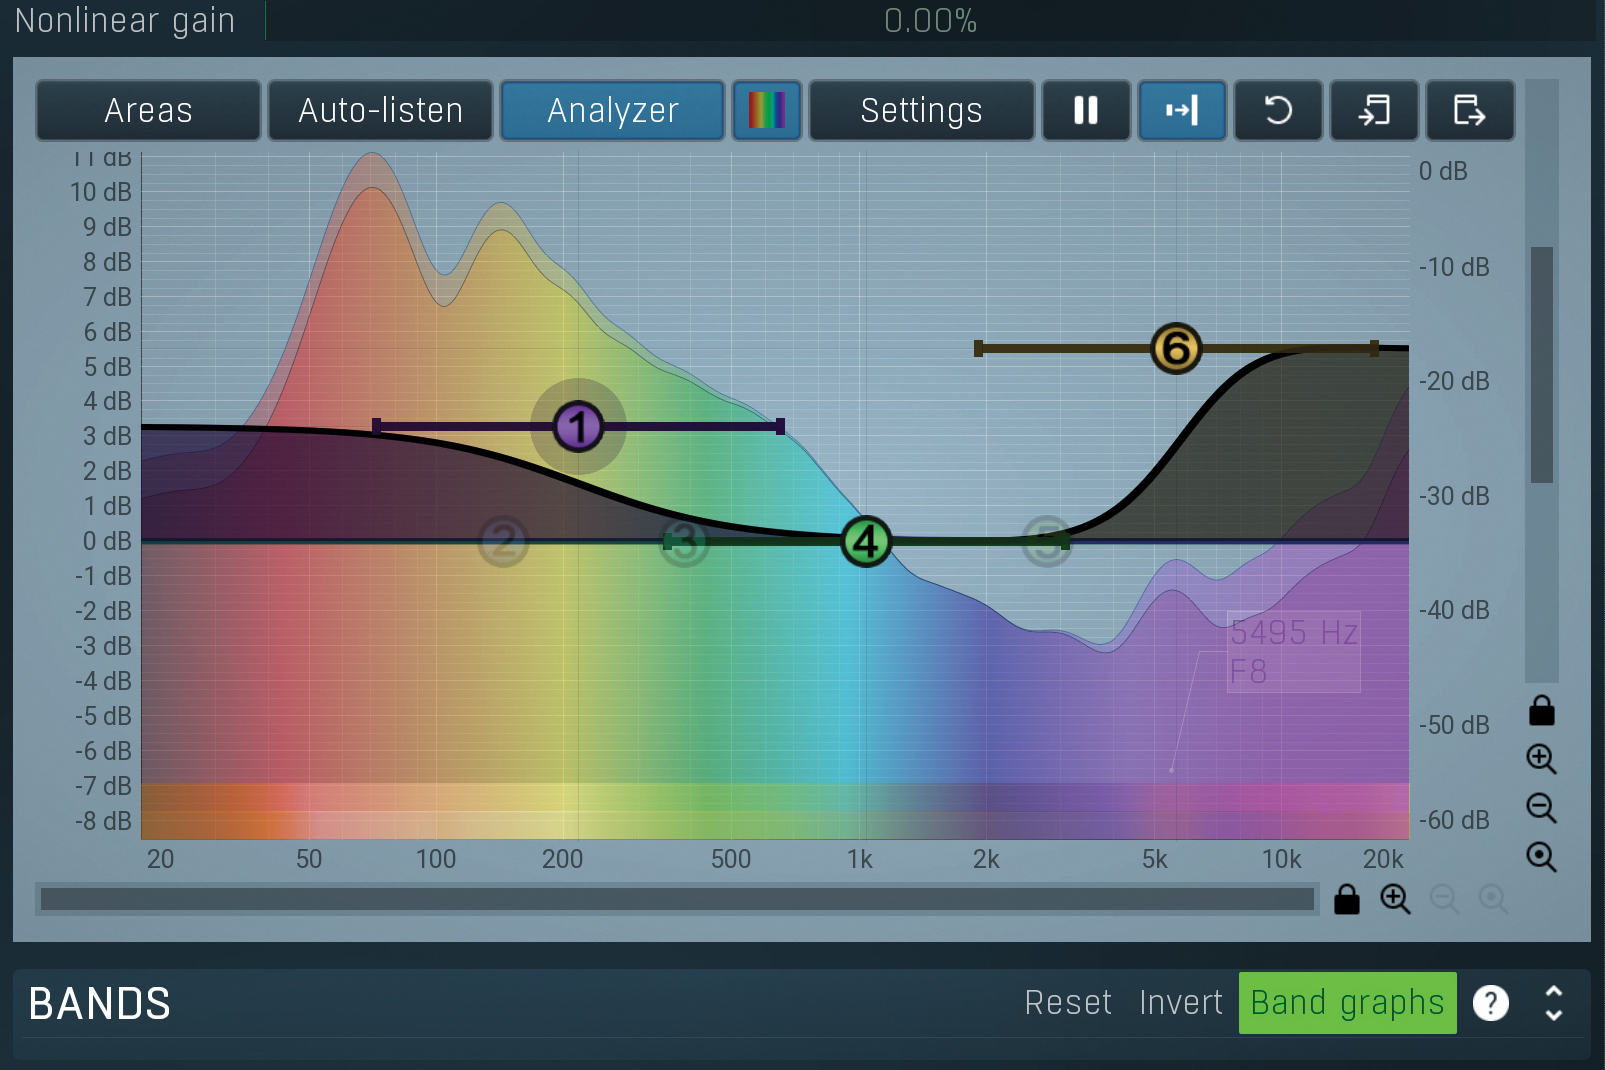
Shelves are a good place to start as they offer a simple and natural sounding way to change to the lower and higher frequencies. This is great for sub groups, overall mixes, or basic enhancement of sounds. But you’ll reach a point where it no longer provides the differentiation you require.
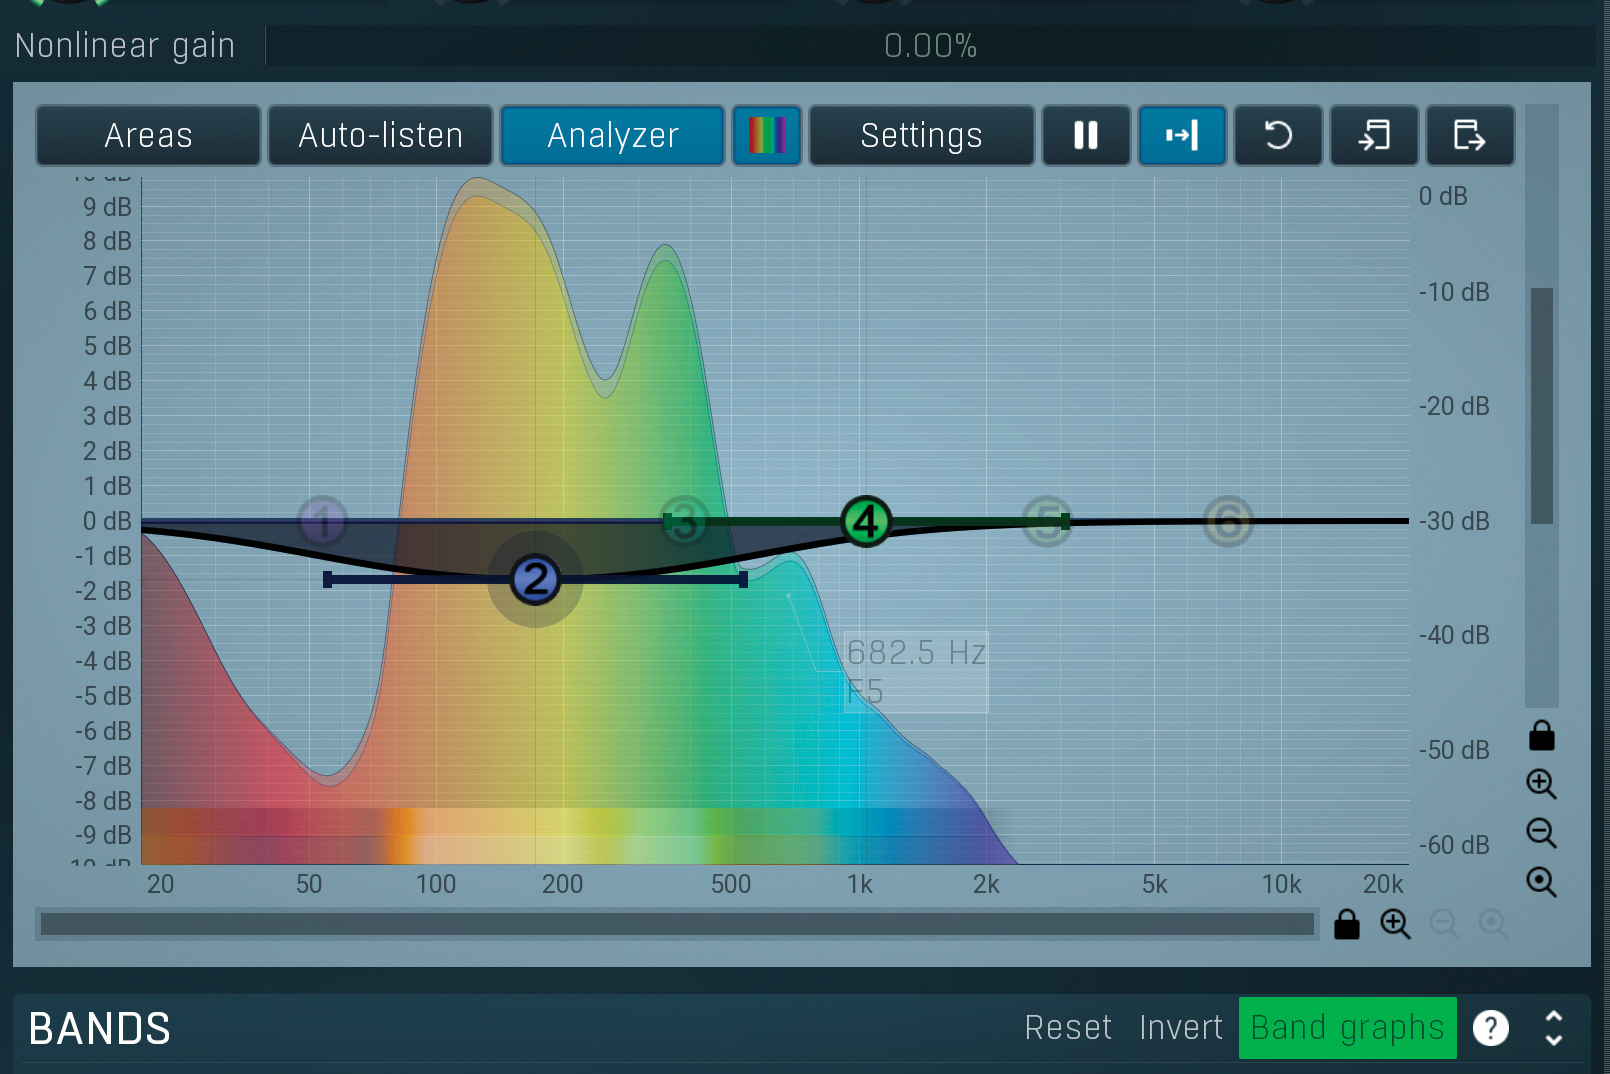
This is where peak filters become more attractive. These offer you more precision, so you can think about adding a broad boost in the upper mids (2-6kHz) to enhance lead instrument attack or presence, or a broad cut in the low mids (250Hz-500Hz) to remove boominess from a vocal or thickness from a pad.
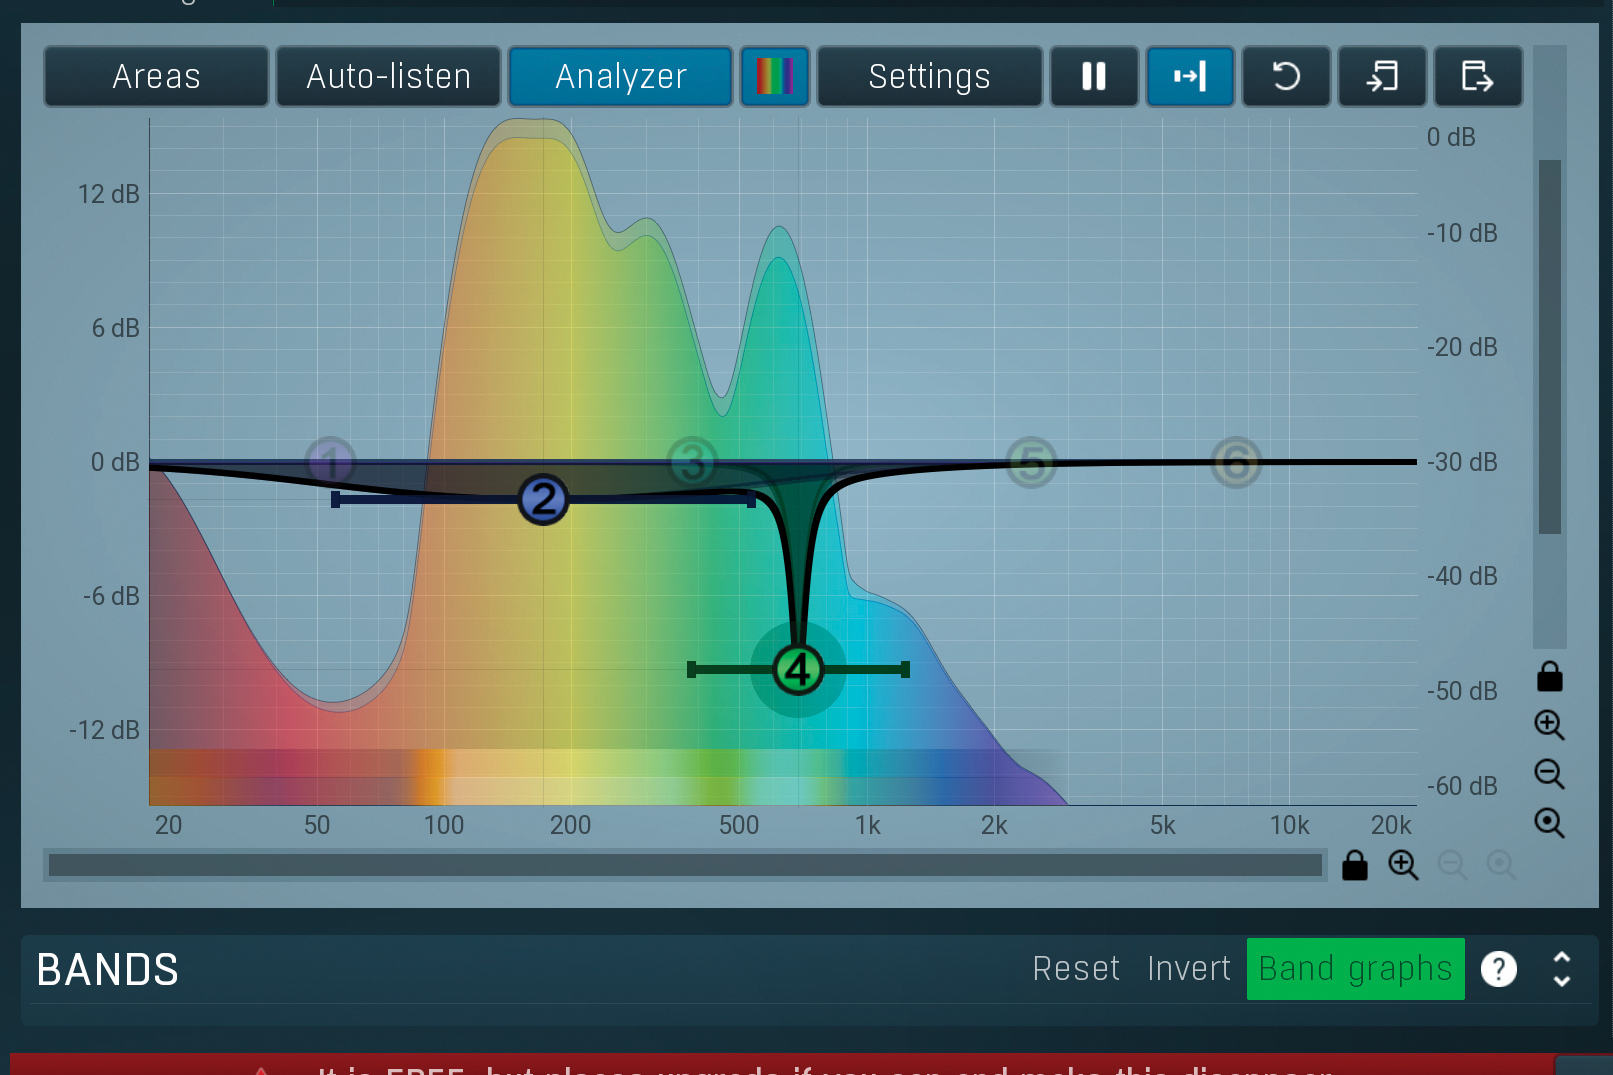
Now you’ve taken this step with a peak filter, why not use it to fix an annoying frequency or resonance in something? Say, a piano. Use the sweeping technique and frequency analyser to pinpoint the problem area. Then use a narrow Q (10 or higher) and large cut (-10dB or more). This will sound pretty natural and will minimise the problem.
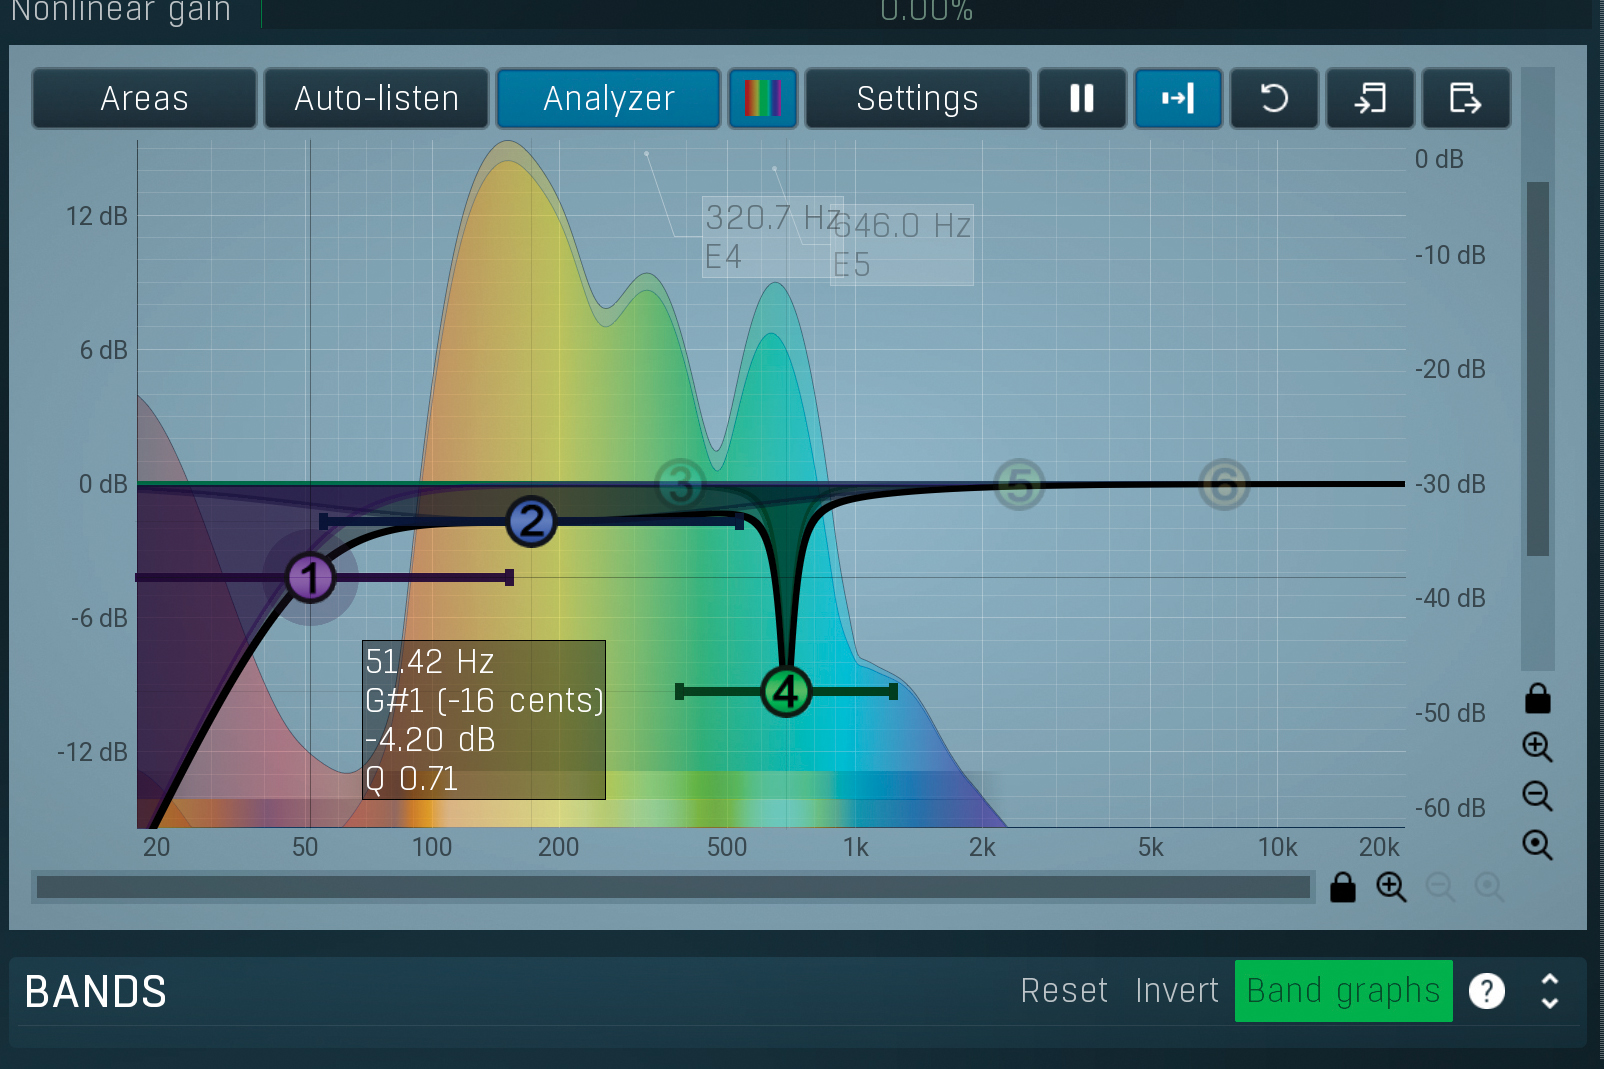
For problems at either end of the frequency spectrum, use a shelving cut for modest more natural-sounding changes and a filter when you need something more aggressive. In a mix, the most common technique will be using high-pass filters to remove rumble from live recordings or reduce sub bass (20Hz to 60Hz).
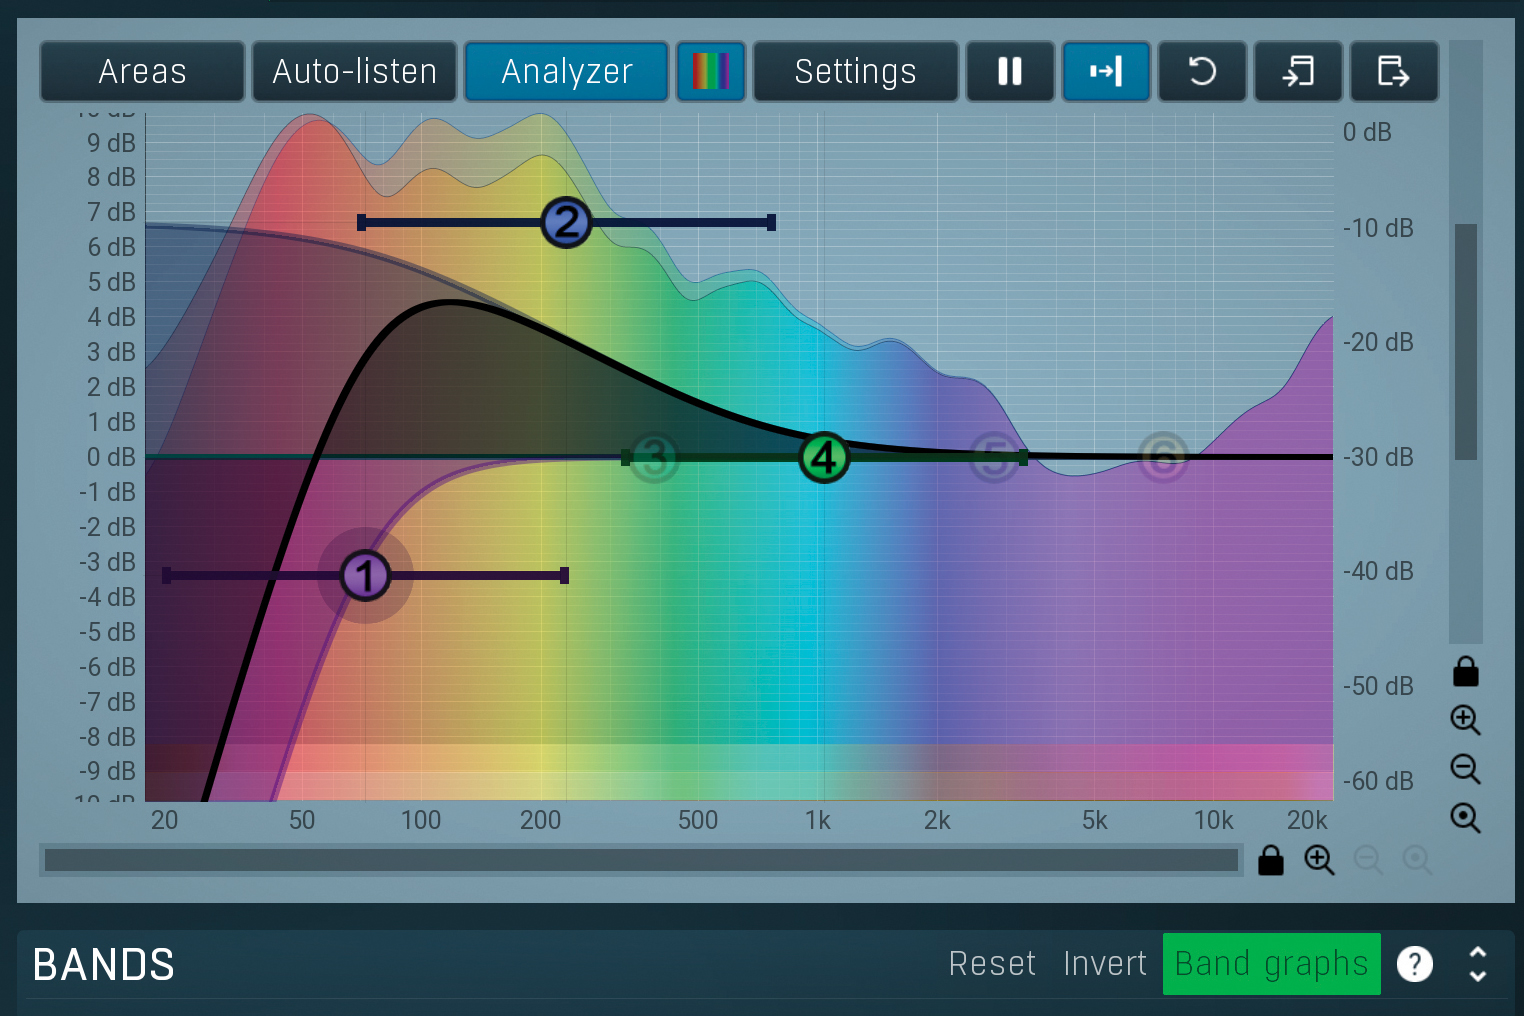
Finally, sticking with the low frequencies, combining a high-pass filter and low shelf is also a common technique particularly suited to bass sounds. By tailoring the shelf shape to either enhance or curtail the bass region (60Hz to 250Hz), we can then fine tune the subs, creating a tailored, lopsided curve.
Pro tip: classic EQs
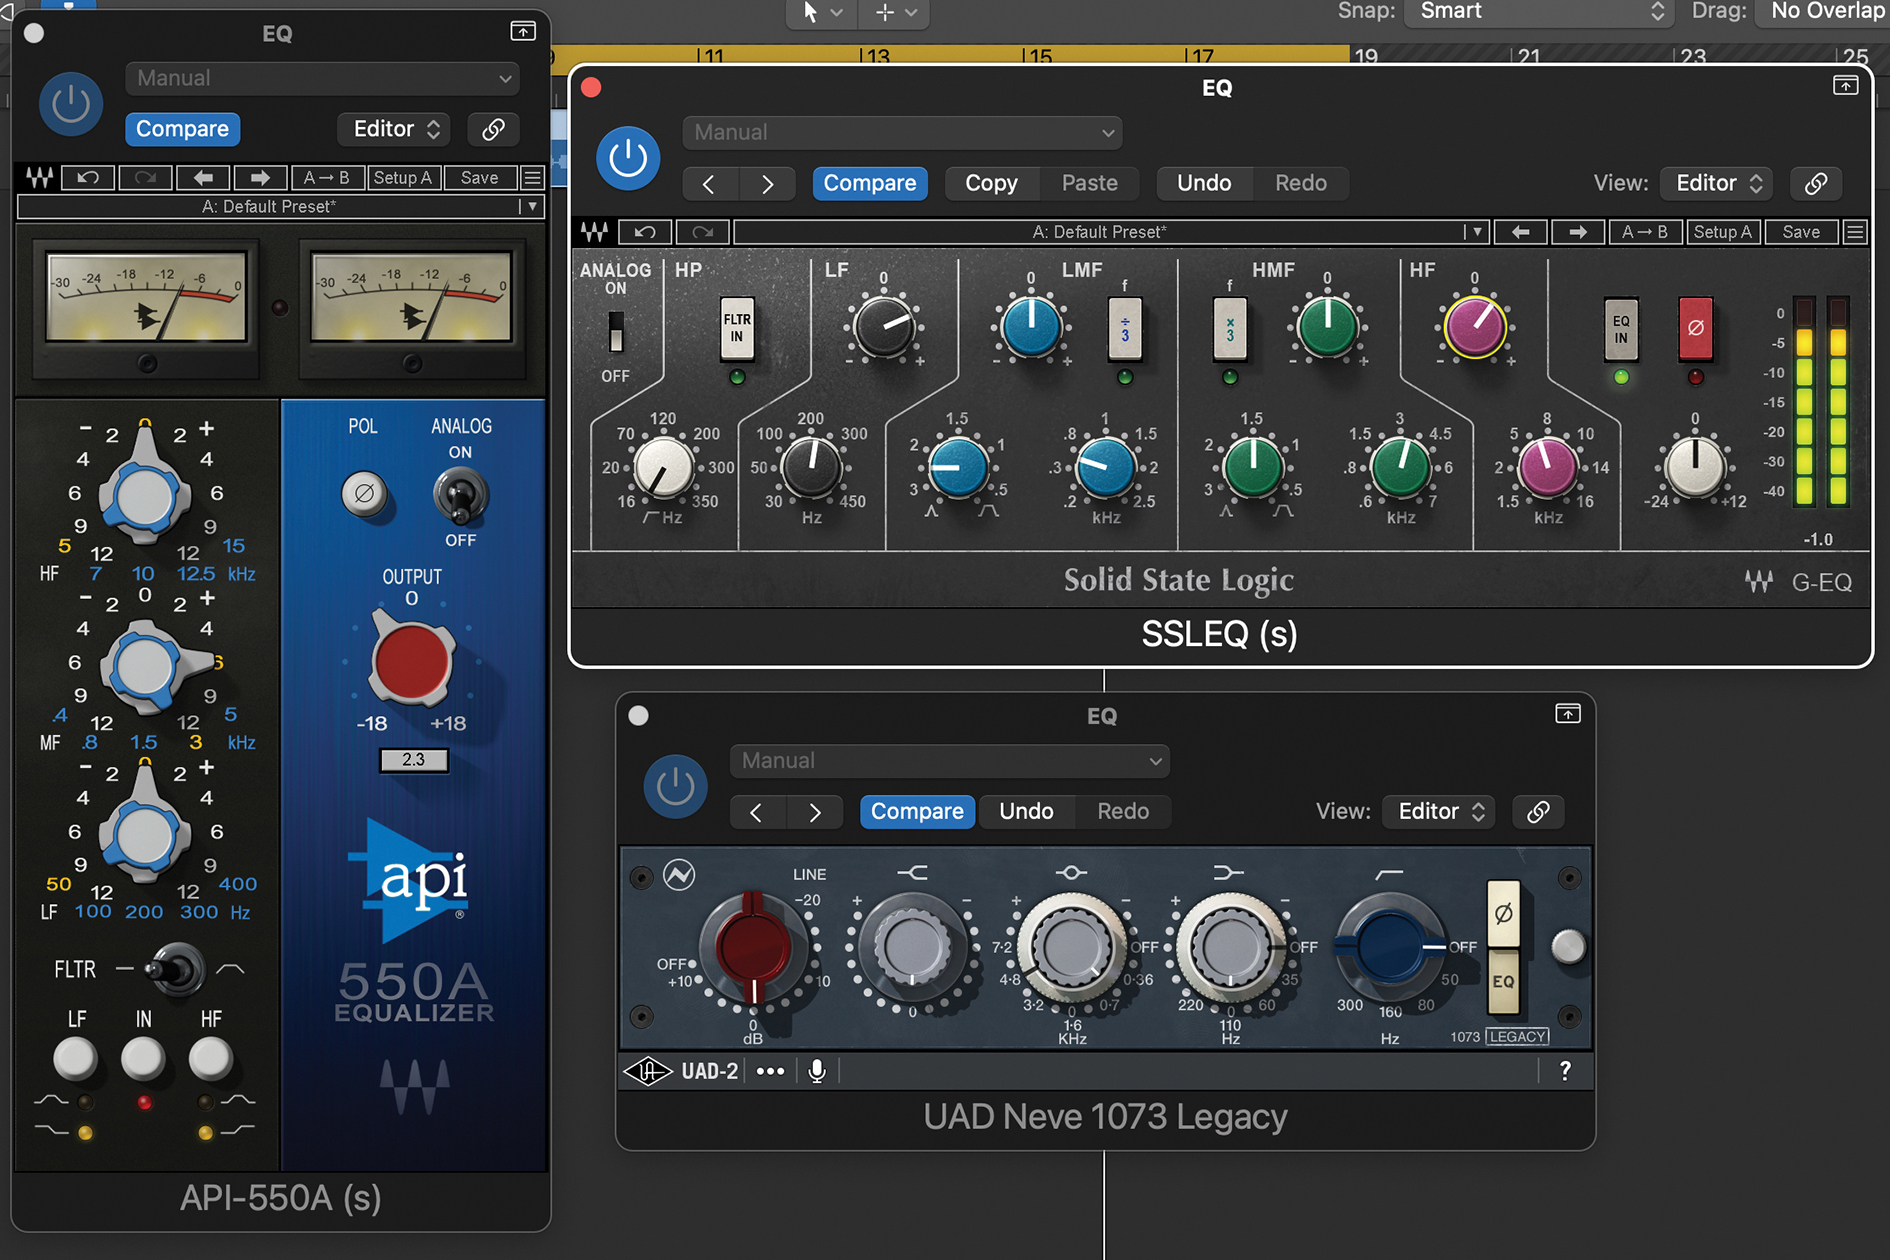
Given the power available in a modern, flexible DAW EQ, a more limited, hardware emulation might seem like a backward step. But the combination of familiarity, sound and behaviour mean they’re still very much in the running. Let’s take a look at a few examples.
Neve’s 1073 module is revered for its creamy sound, but its mid-band EQ also has its very own character, and a bandwidth that gradually changes both with gain and frequency. At the highest frequency (7.2kHz), maximum gain (boost/cut) delivers its most focused shape, while at the lowest frequency setting (360Hz), maximum gain delivers a broader bell shape.
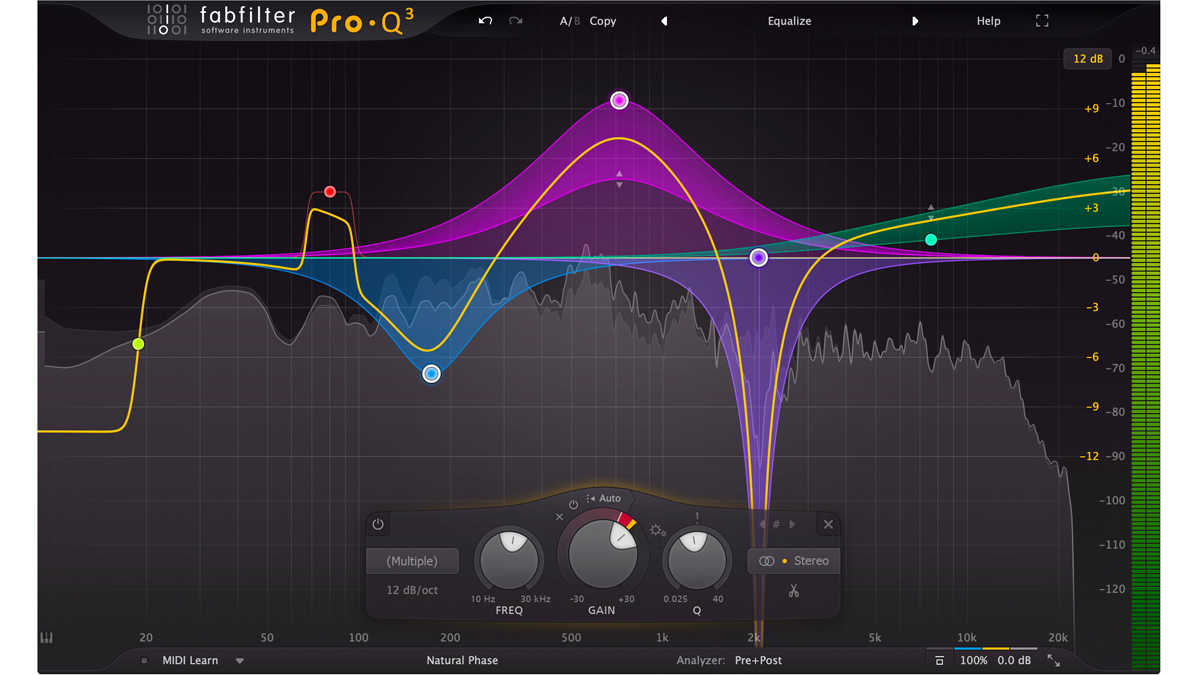
Best EQ plugins: Mix, create, repair, and master with these 13 amazing equalizers
Gain-related Q width is a feature you’ll find in plenty of other classic EQs. API call this proportional Q and it’s one of the peak filters on API’s 550 series. Meanwhile, the much revered, inductor-based Helios 69 EQ takes things one step further. Here, the peak and trough switching of its mid-band delivers broader boost and narrower cut outcomes.
SSL are well known for their clever and powerful EQ designs, and none more so than their G Series. The peaking filters employ an interrelated gain and bandwidth where higher gain results in narrower bandwidth. Meanwhile the shelving bands incorporate a modest amount of overshoot or undershoot for more precision.
Jon is a London based platinum award winning mixer, producer, composer and club remixer with a diverse CV that spans dance, pop, rock and music for media. He’s also a long term contributor to MusicRadar's music technology tutorials and reviews. Whether working alone or collaborating he usually handles final mixdowns, so you’ll also find MusicRadar peppered with his handy mixing tips.
