The ultimate beginner's guide to Ableton Live 11 Lite: mixing two sends and automation
Get going with Ableton Live 11 Lite with our ongoing tutorial series - and snag a free download with this month's issue of Computer Music
Want all the hottest music and gear news, reviews, deals, features and more, direct to your inbox? Sign up here.
You are now subscribed
Your newsletter sign-up was successful
Ableton Live is a DAW that needs no introduction, and its combination of performance and production features mean it’s as popular with performers and DJs as it is with creators.
Live 11 Lite is a cut-down version of Ableton Live, with all of the essential workflows, instruments and effects, but with limited track count, and for many years this has been bundled with apps and hardware products. This month, you can grab a free copy of Ableton Live 11 Lite with the latest issue of Computer Music Magazine.
To mark this momentous occasion and also to get you started using this fabulous software, we’ve put together a series of tutorials that run through everything you need to get acquainted with Ableton Live 11 Lite, so you can learn how to build a track from scratch.
Our tutorials are primarily for new users, but that said, we’ll also flag some of the new features you’ll find in Live 11 Lite, so even if you’ve used Live Lite before, there may be some things for you to learn here.
Finally, although Live 11 Lite is awesome software, there are more fully featured versions of Ableton Live available on Ableton's website. So, let’s get creating in Live 11 Lite!
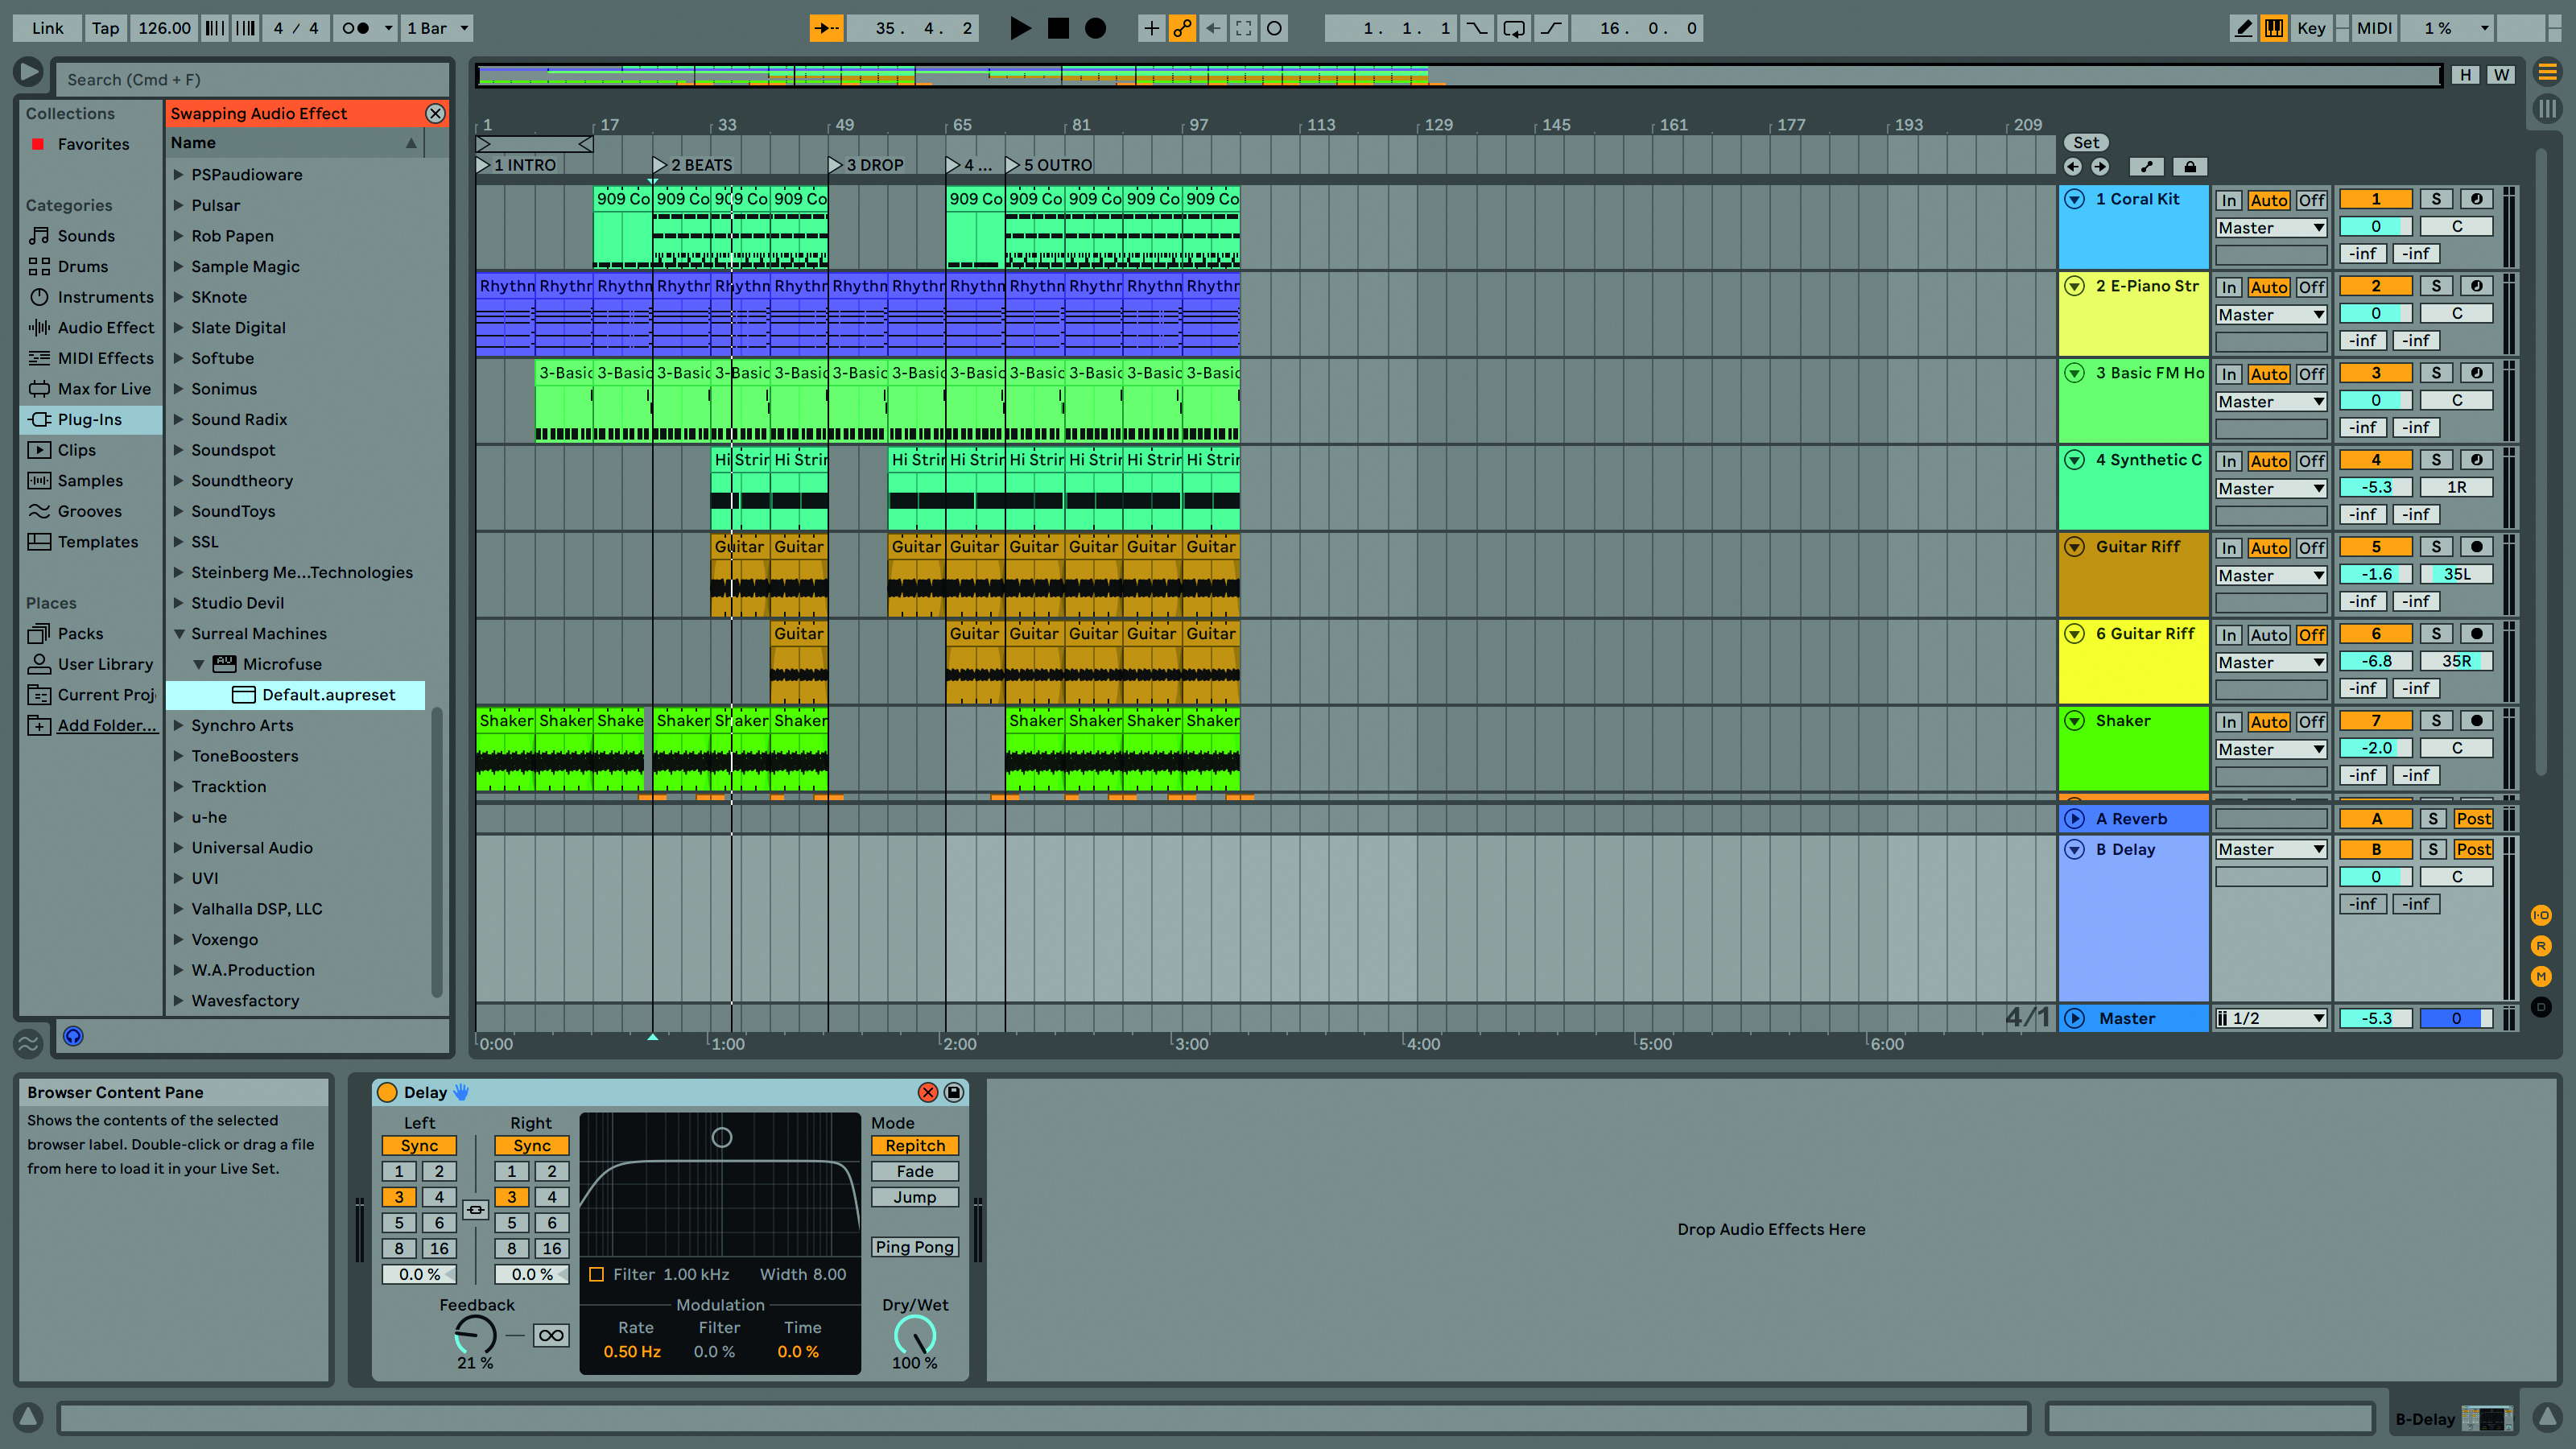
Step 1: Your Live Lite Set already contains two send effects, A Reverb and B Delay. We’re going to keep the reverb and replace the delay with a CM Studio classic, Microfuse reverb from Surreal Machines. You can get this from the Computer Music Studio Plugin Suite at FileSilo, and once installed, use the hot swap icon in the Delay to grab it from the Plug-Ins menu.
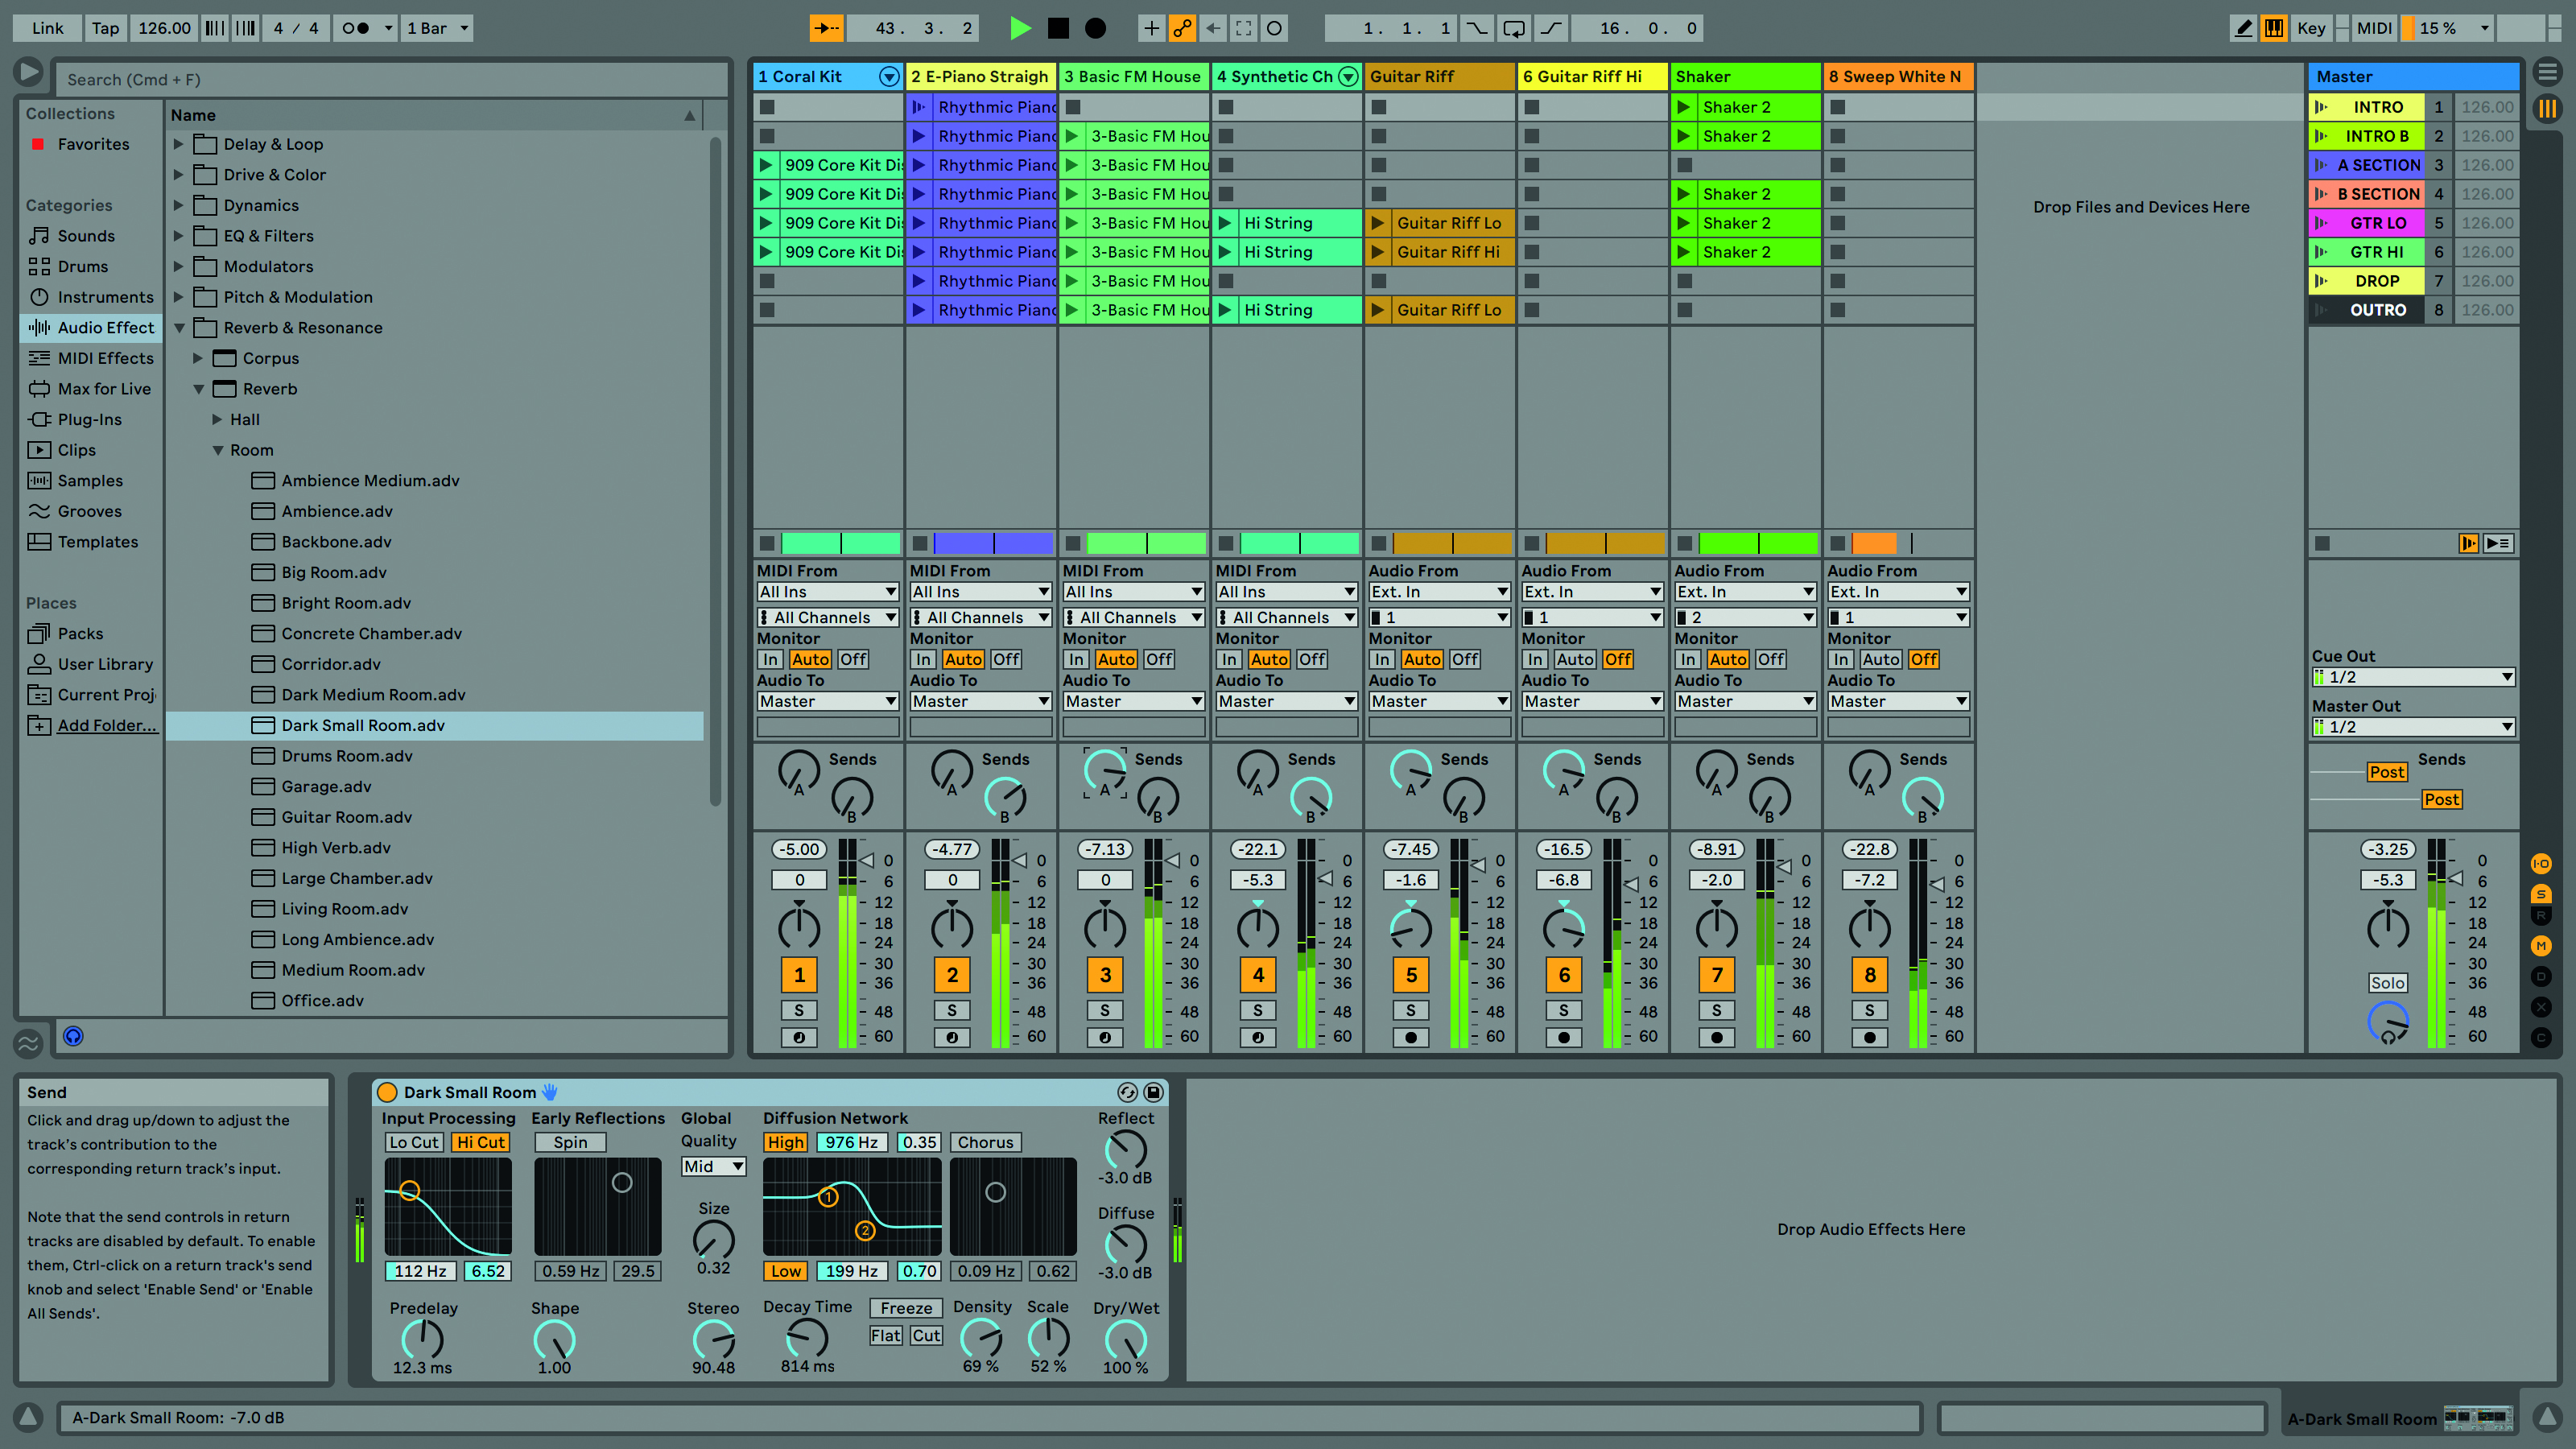
Step 2: For Send A Reverb, we want a short reverb and we’ve loaded up Dark Small from the Reverb>Room folder. This is great to add a bit of space to the bass and guitars. Set the send level just below the level and pan on the track header. We’ve set both our bass Send to -7.0dB and guitars to -6.0dB.
Want all the hottest music and gear news, reviews, deals, features and more, direct to your inbox? Sign up here.
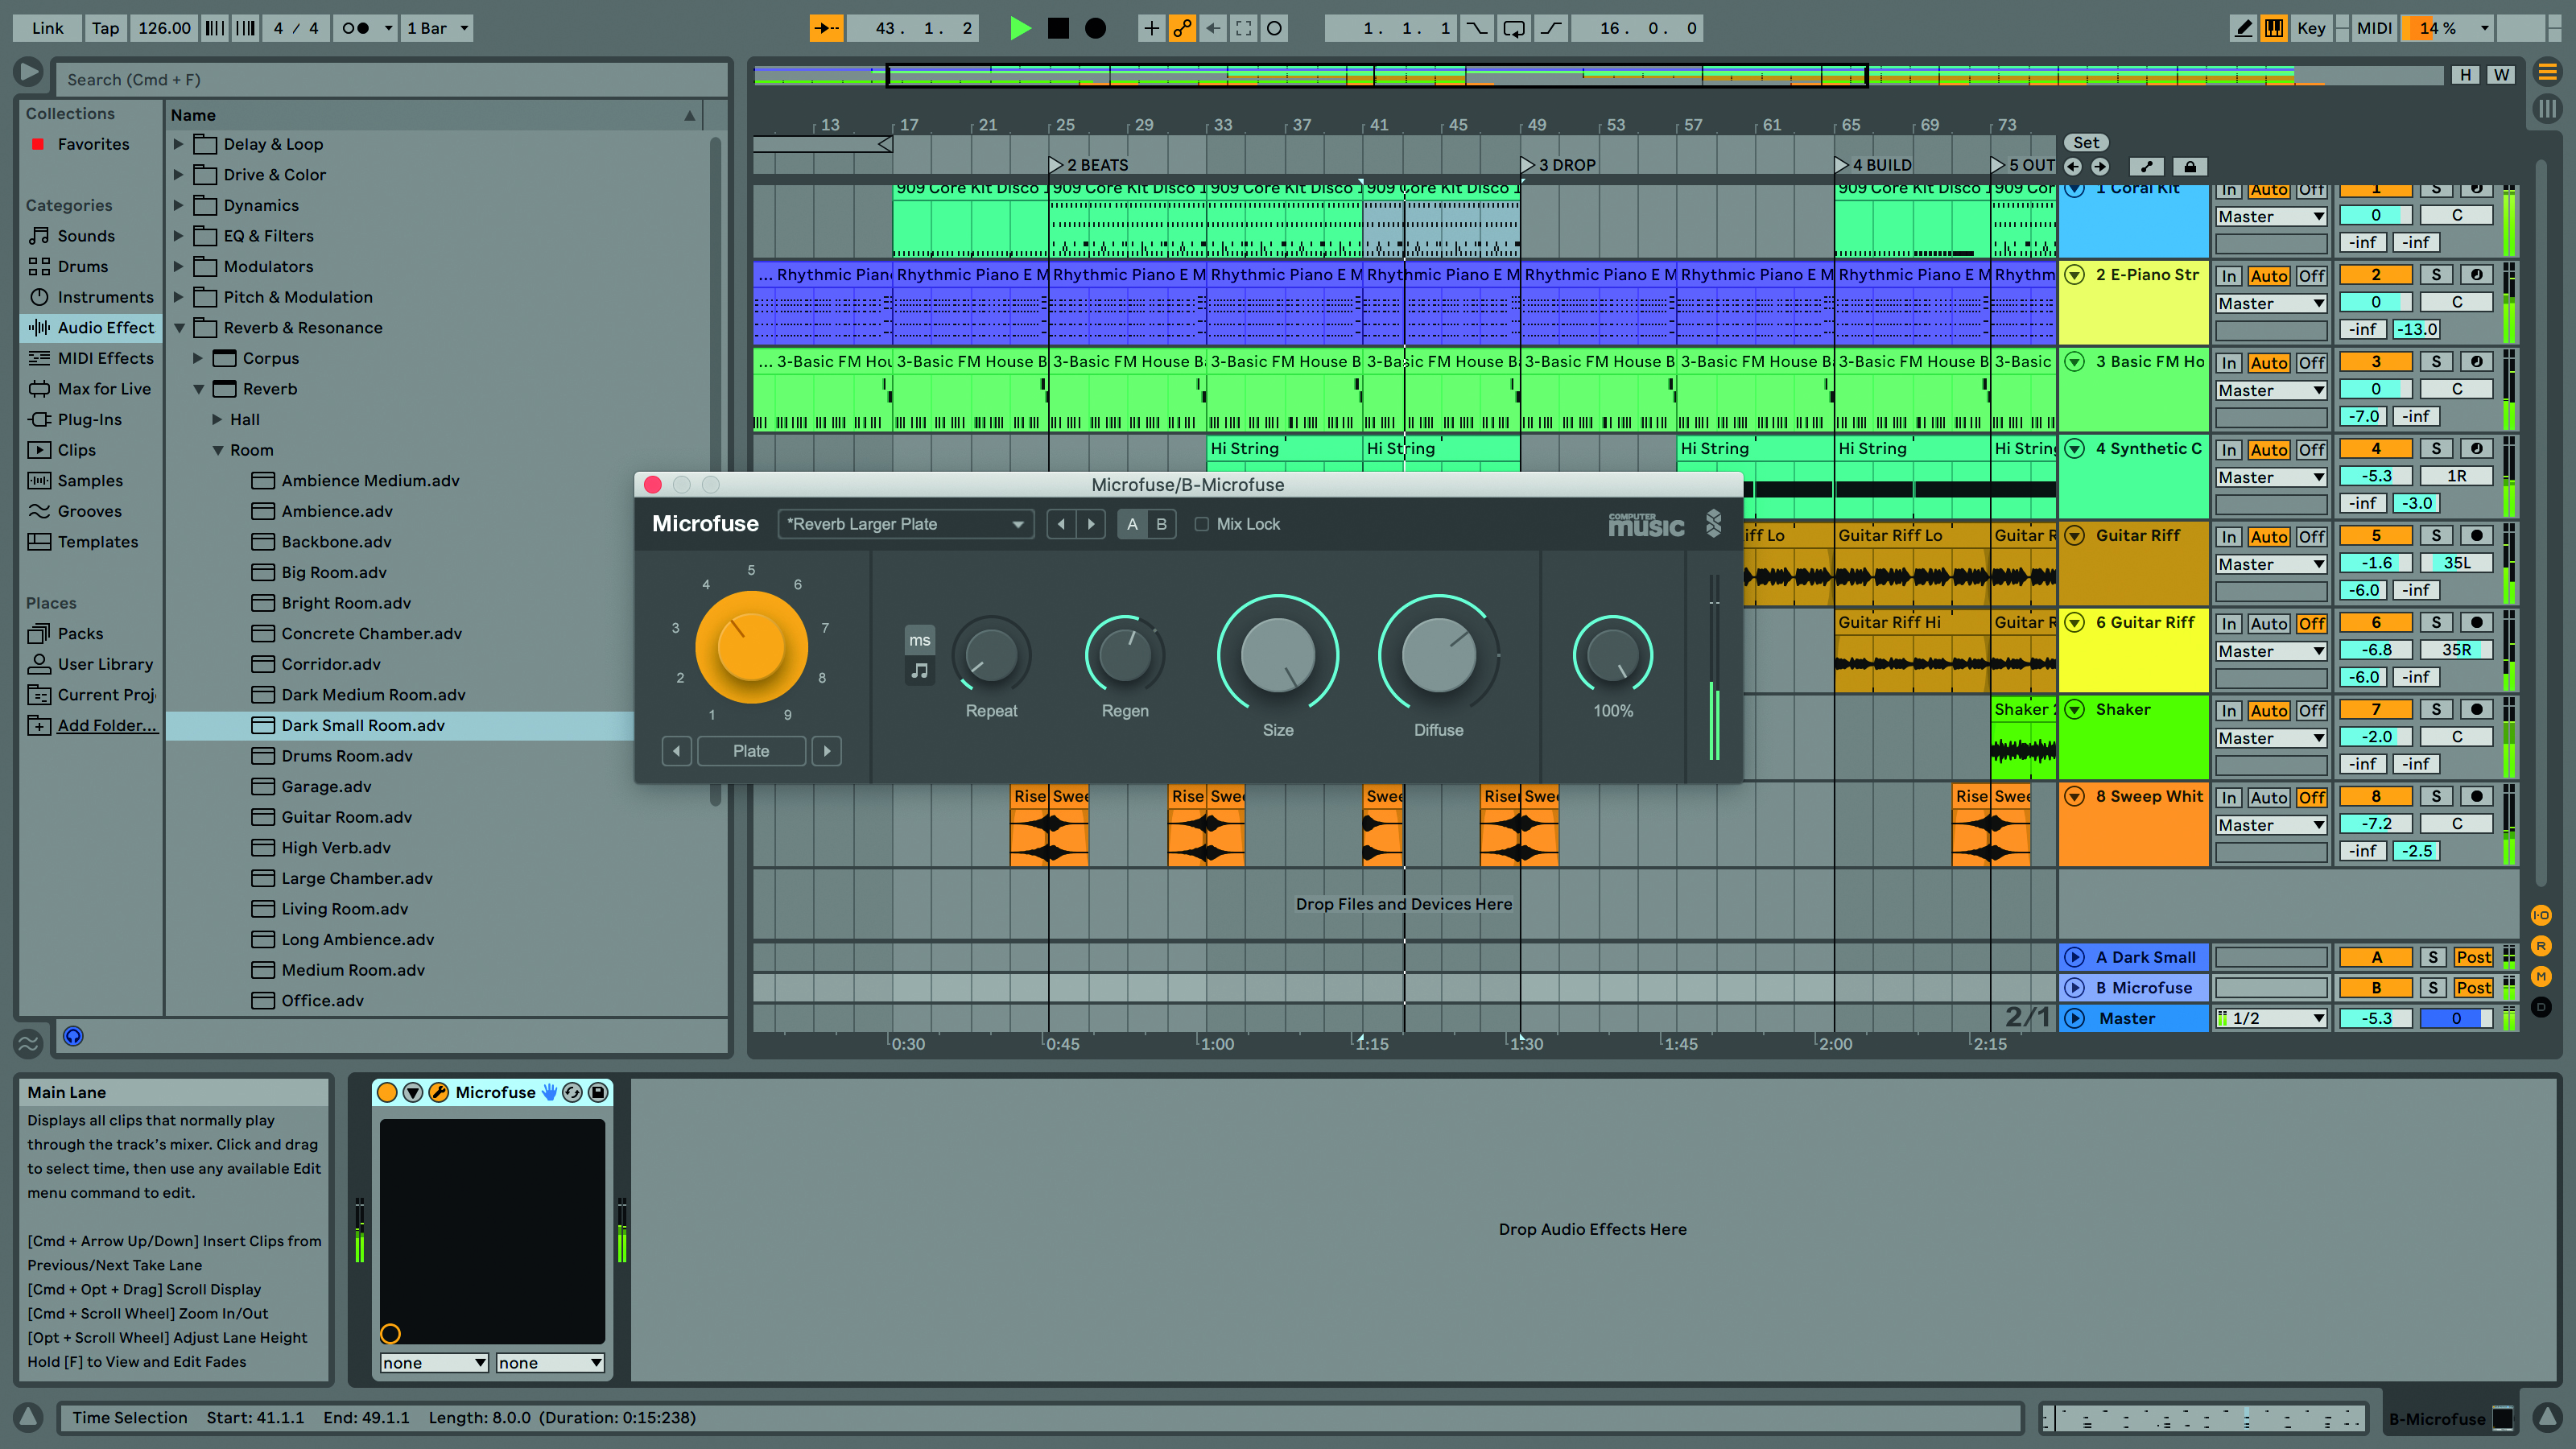
Step 3: To access the Microfuse presets, click on the spanner icon in its device title bar. This opens the plugin and from there we’ve opened the Reverb Larger Plate preset, setting the Mix to 100%. We’re adding this reverb to the string (-3.0dB), white noise sweep (-2.5dB) and rhythmic piano riff (-13.00dB).
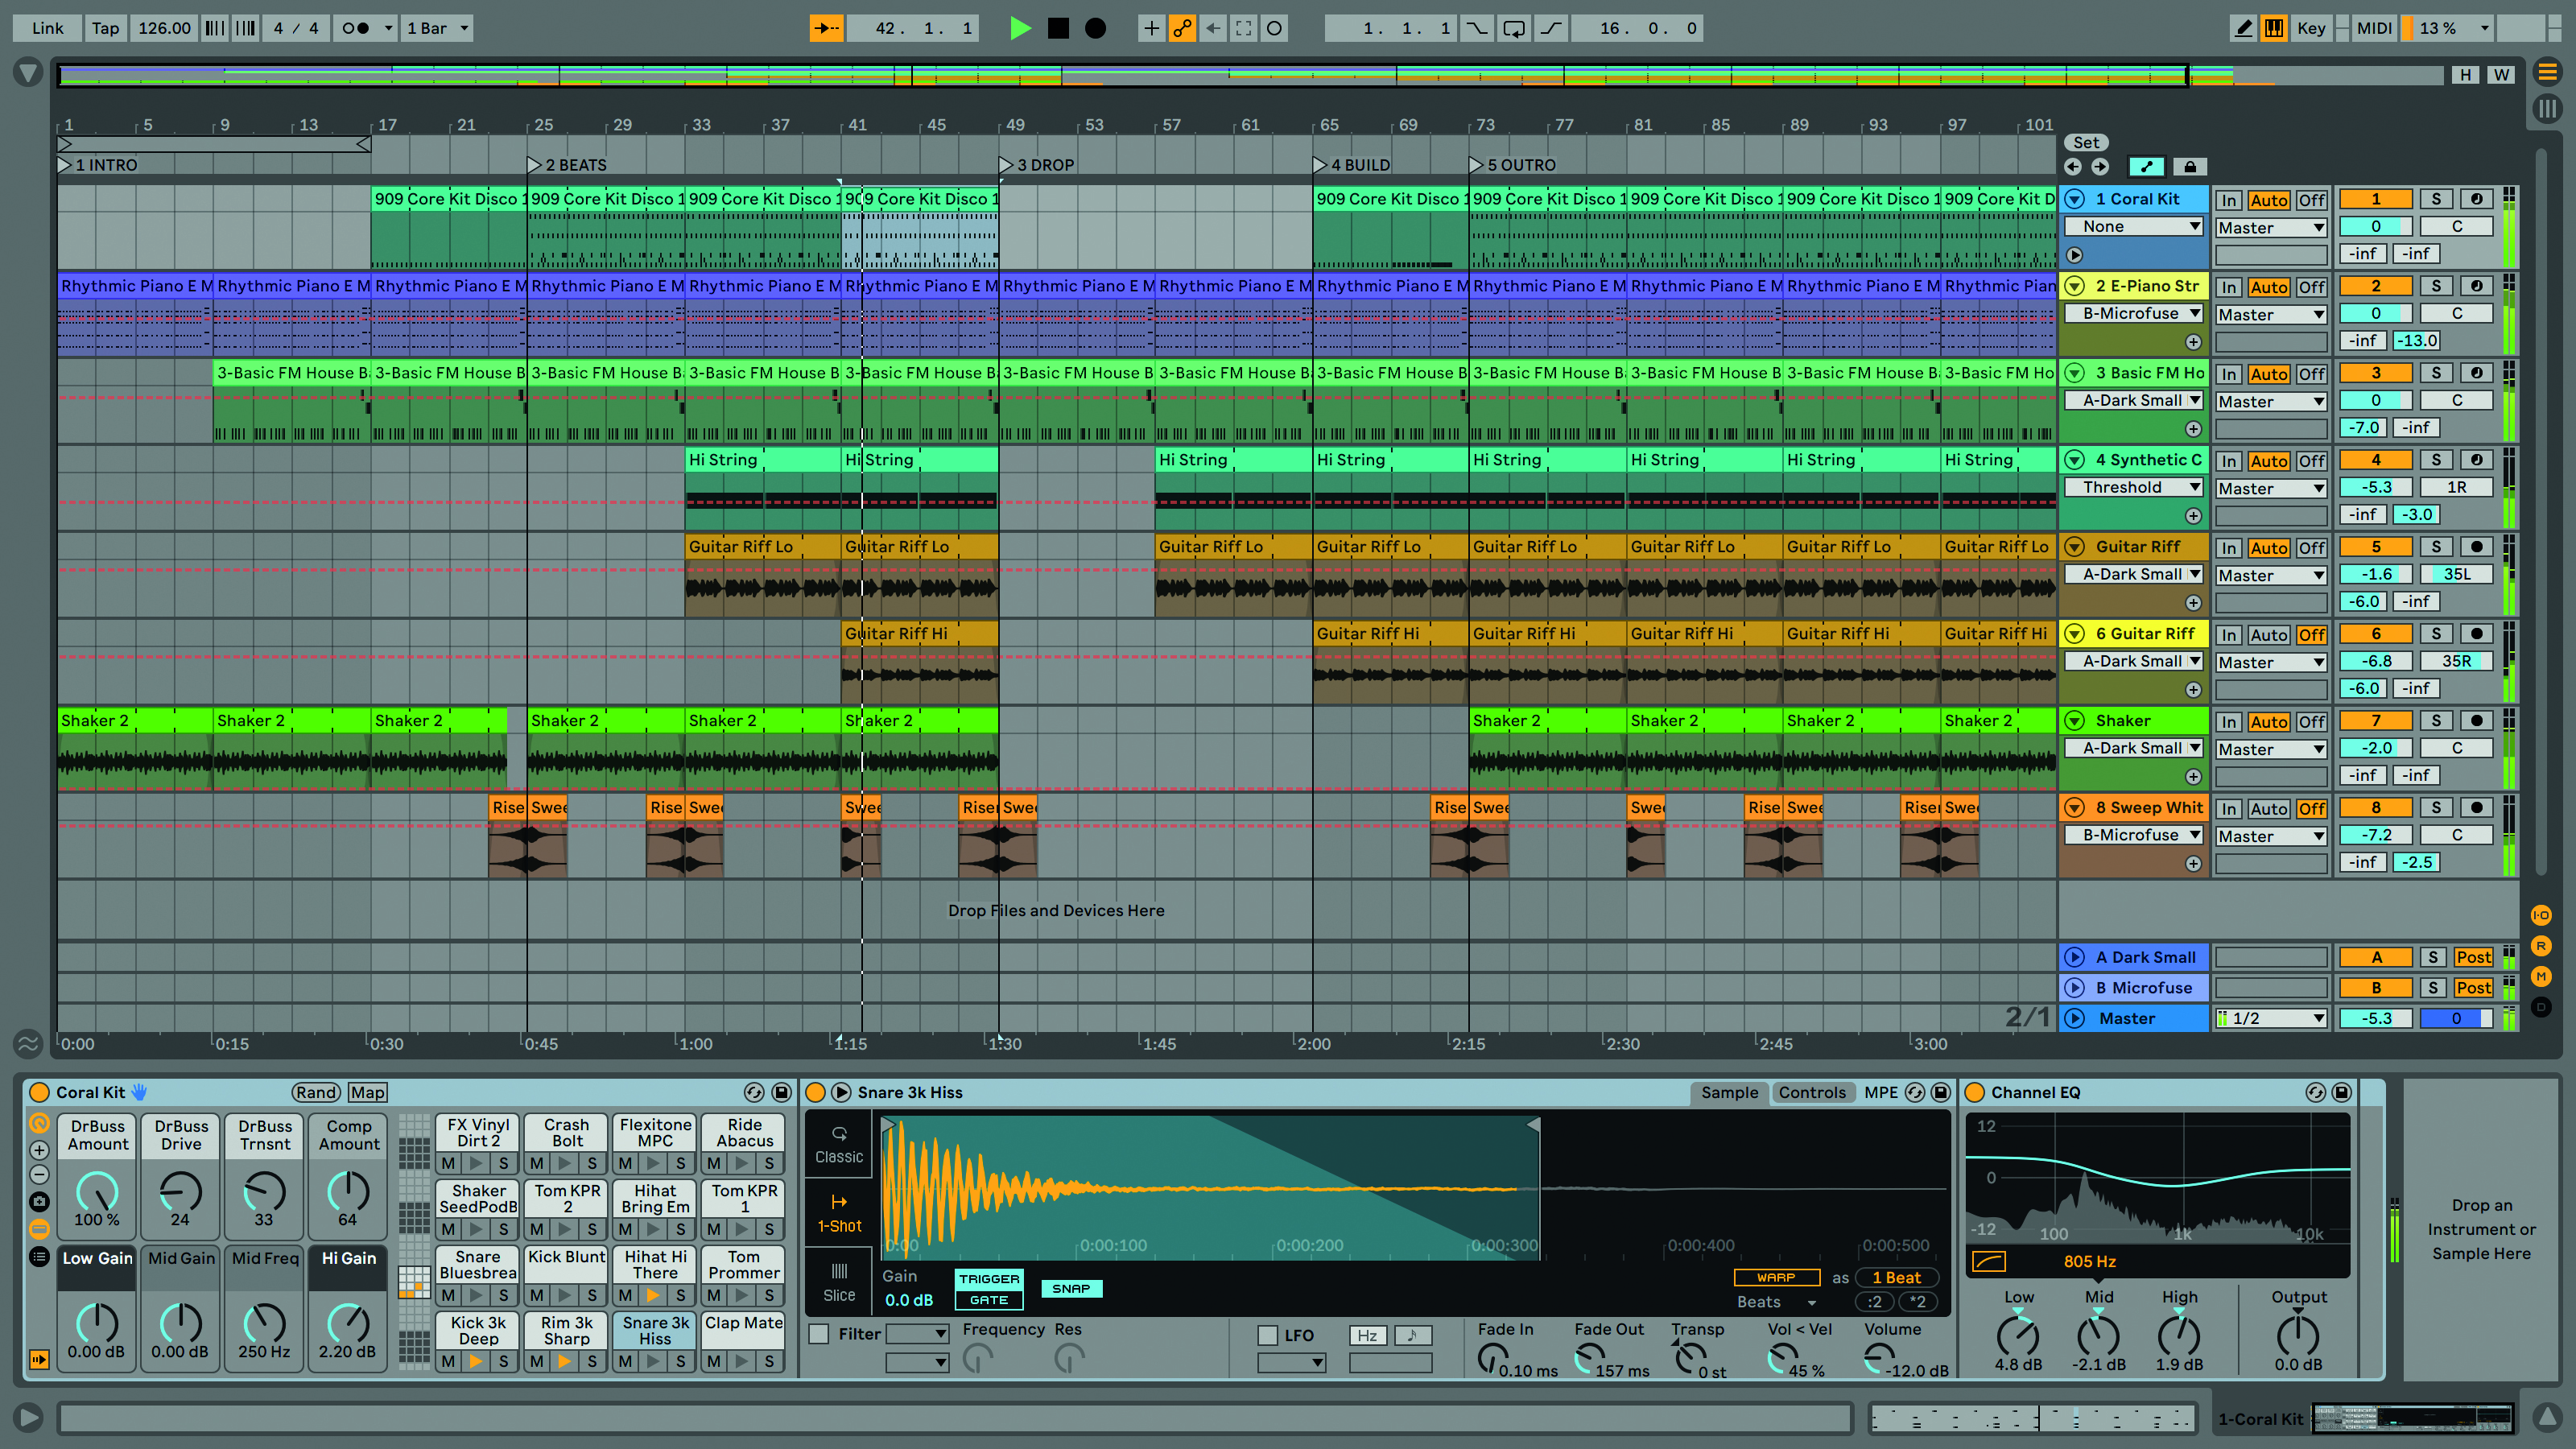
Step 4: To further finesse our track we need to use some automation. Arrangement view is particularly well suited to automation as we can have multiple lanes open in each track so it’s easy to see what’s happening. To activate automation, click on the icon next to the padlock at the top of the track headers.

Step 5: Once automation is active, you’ll see a drop-down menu on each track header. This is the automation control chooser and includes all the automatable parameters for the track. Initially we need the level and send parameters, which you’ll find in the Mixer entry in the list.
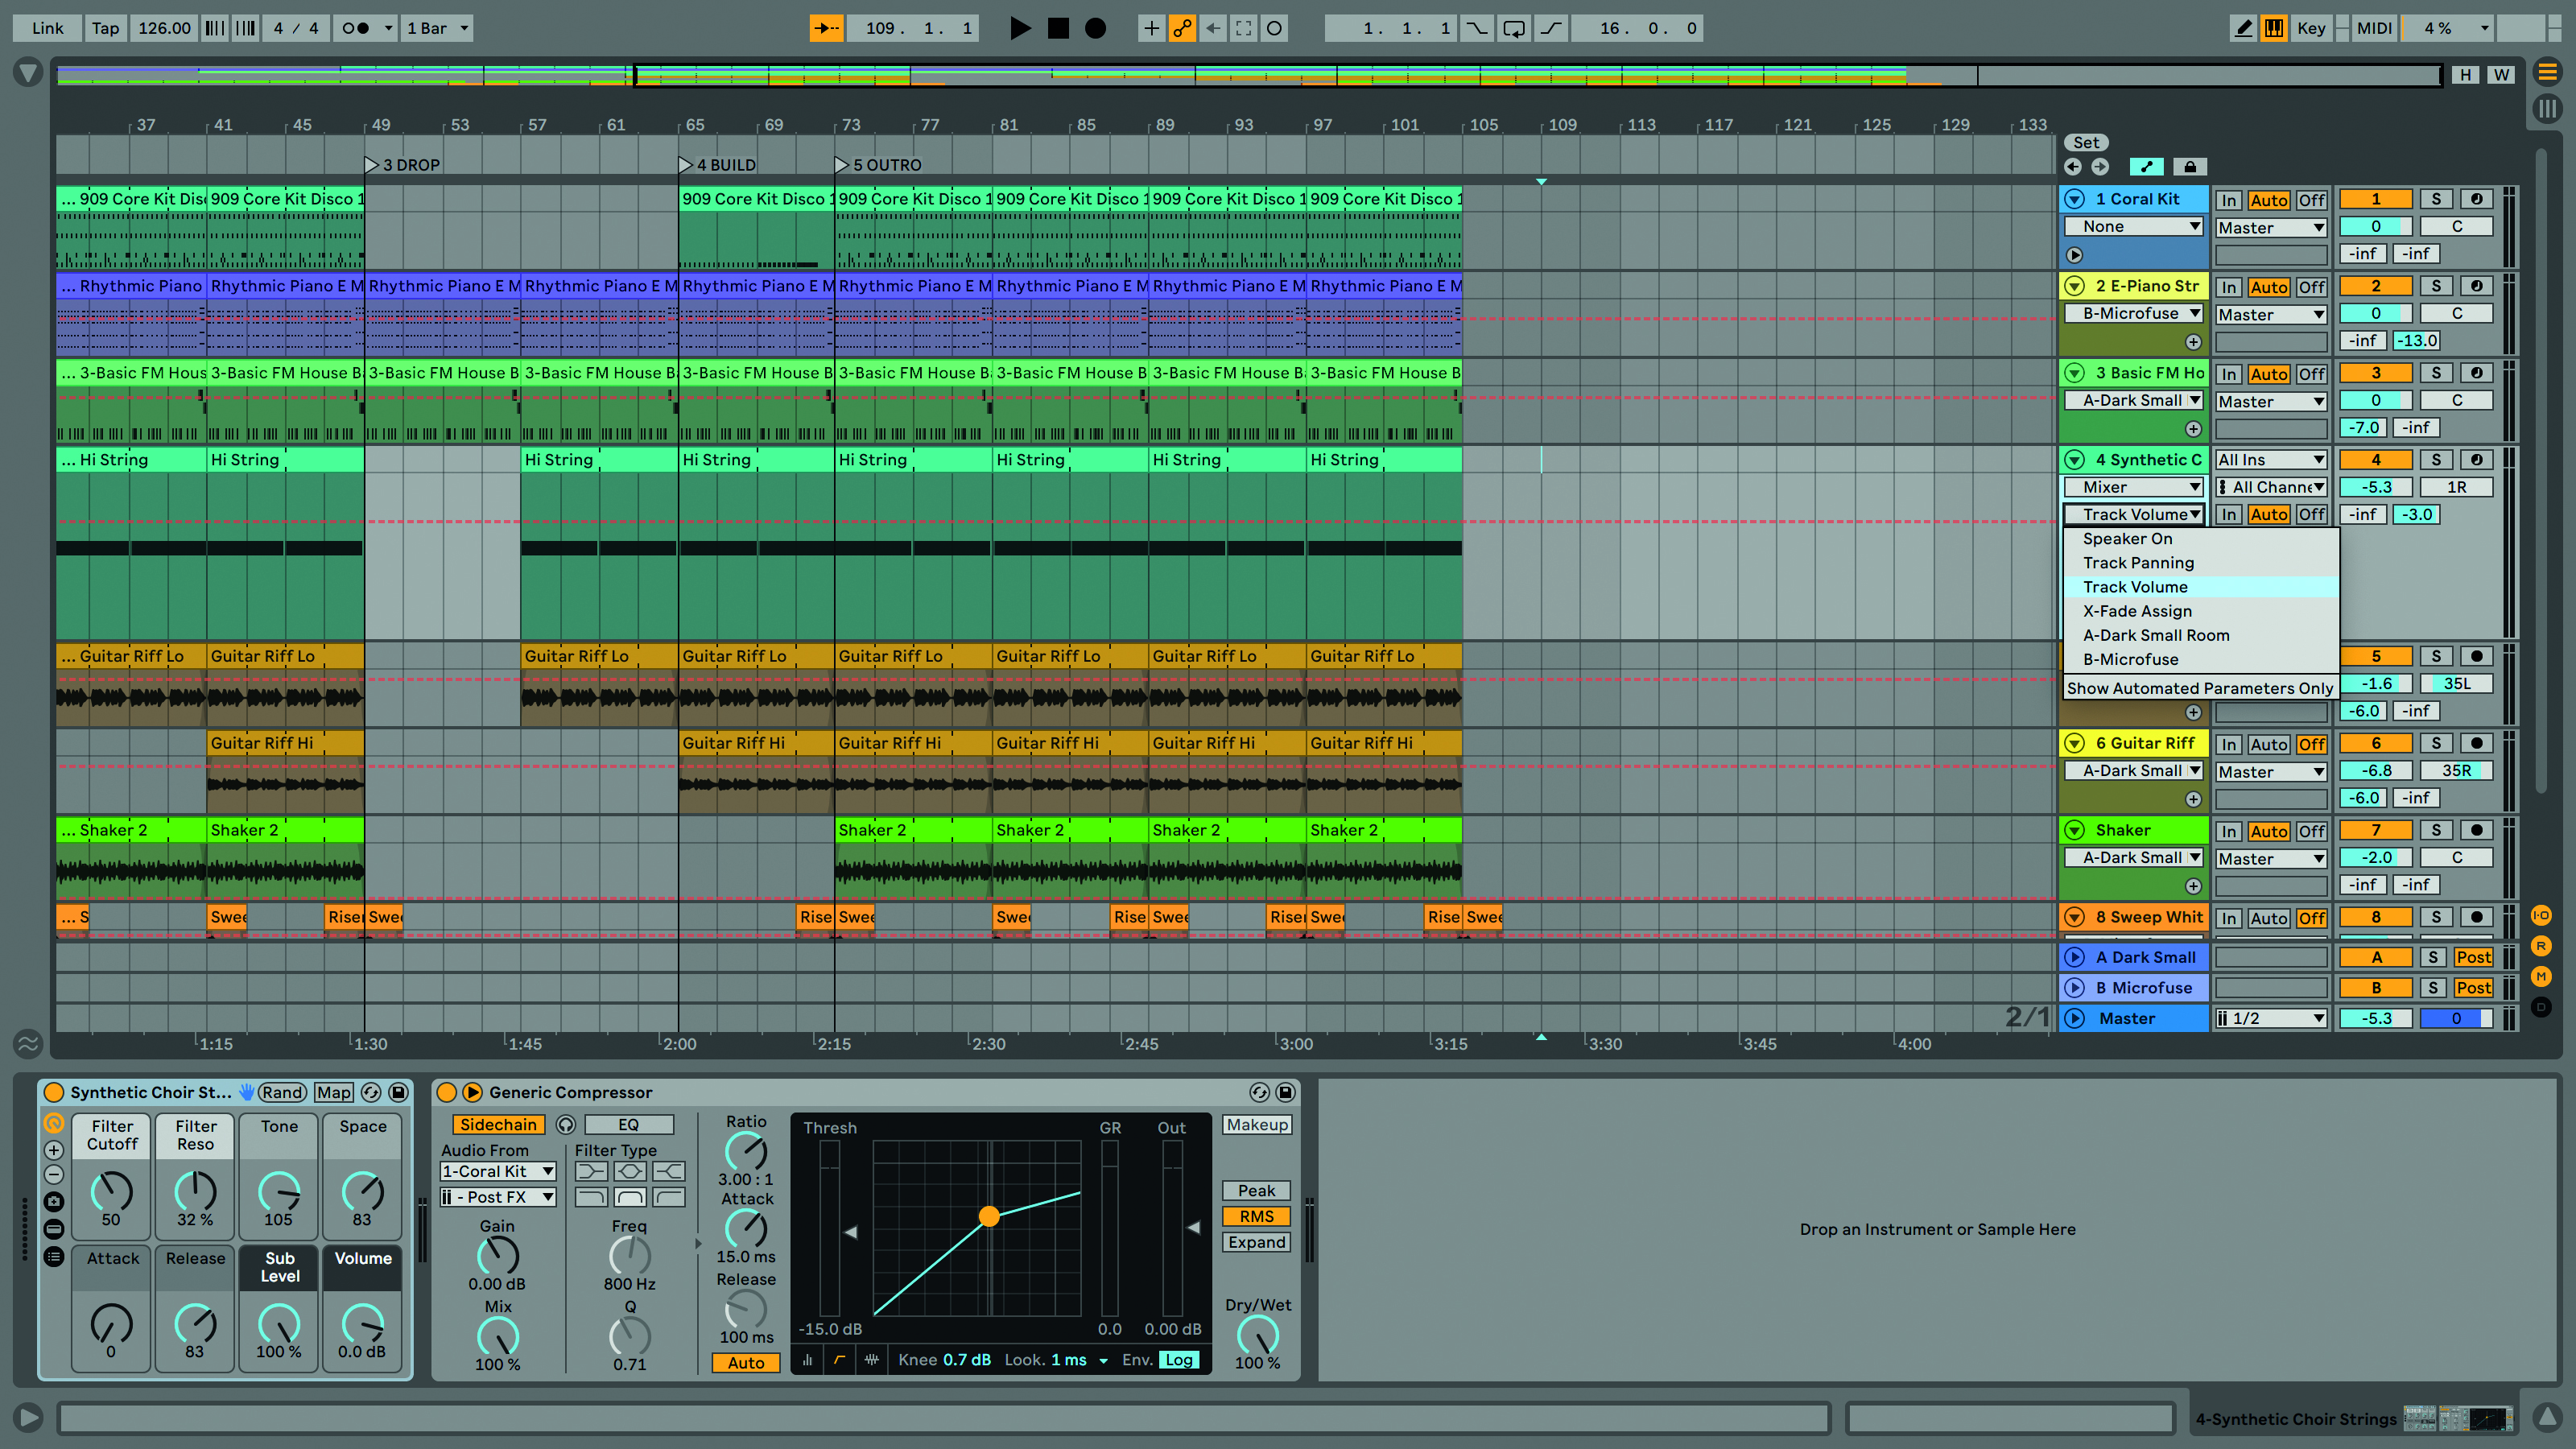
Step 6: Our first job is to adjust the volume level of the string in the drop-down section. On the string track, use the control chooser to select Mixer and then Track Volume from the list. You should now have a dotted line in the arrangement area for volume.
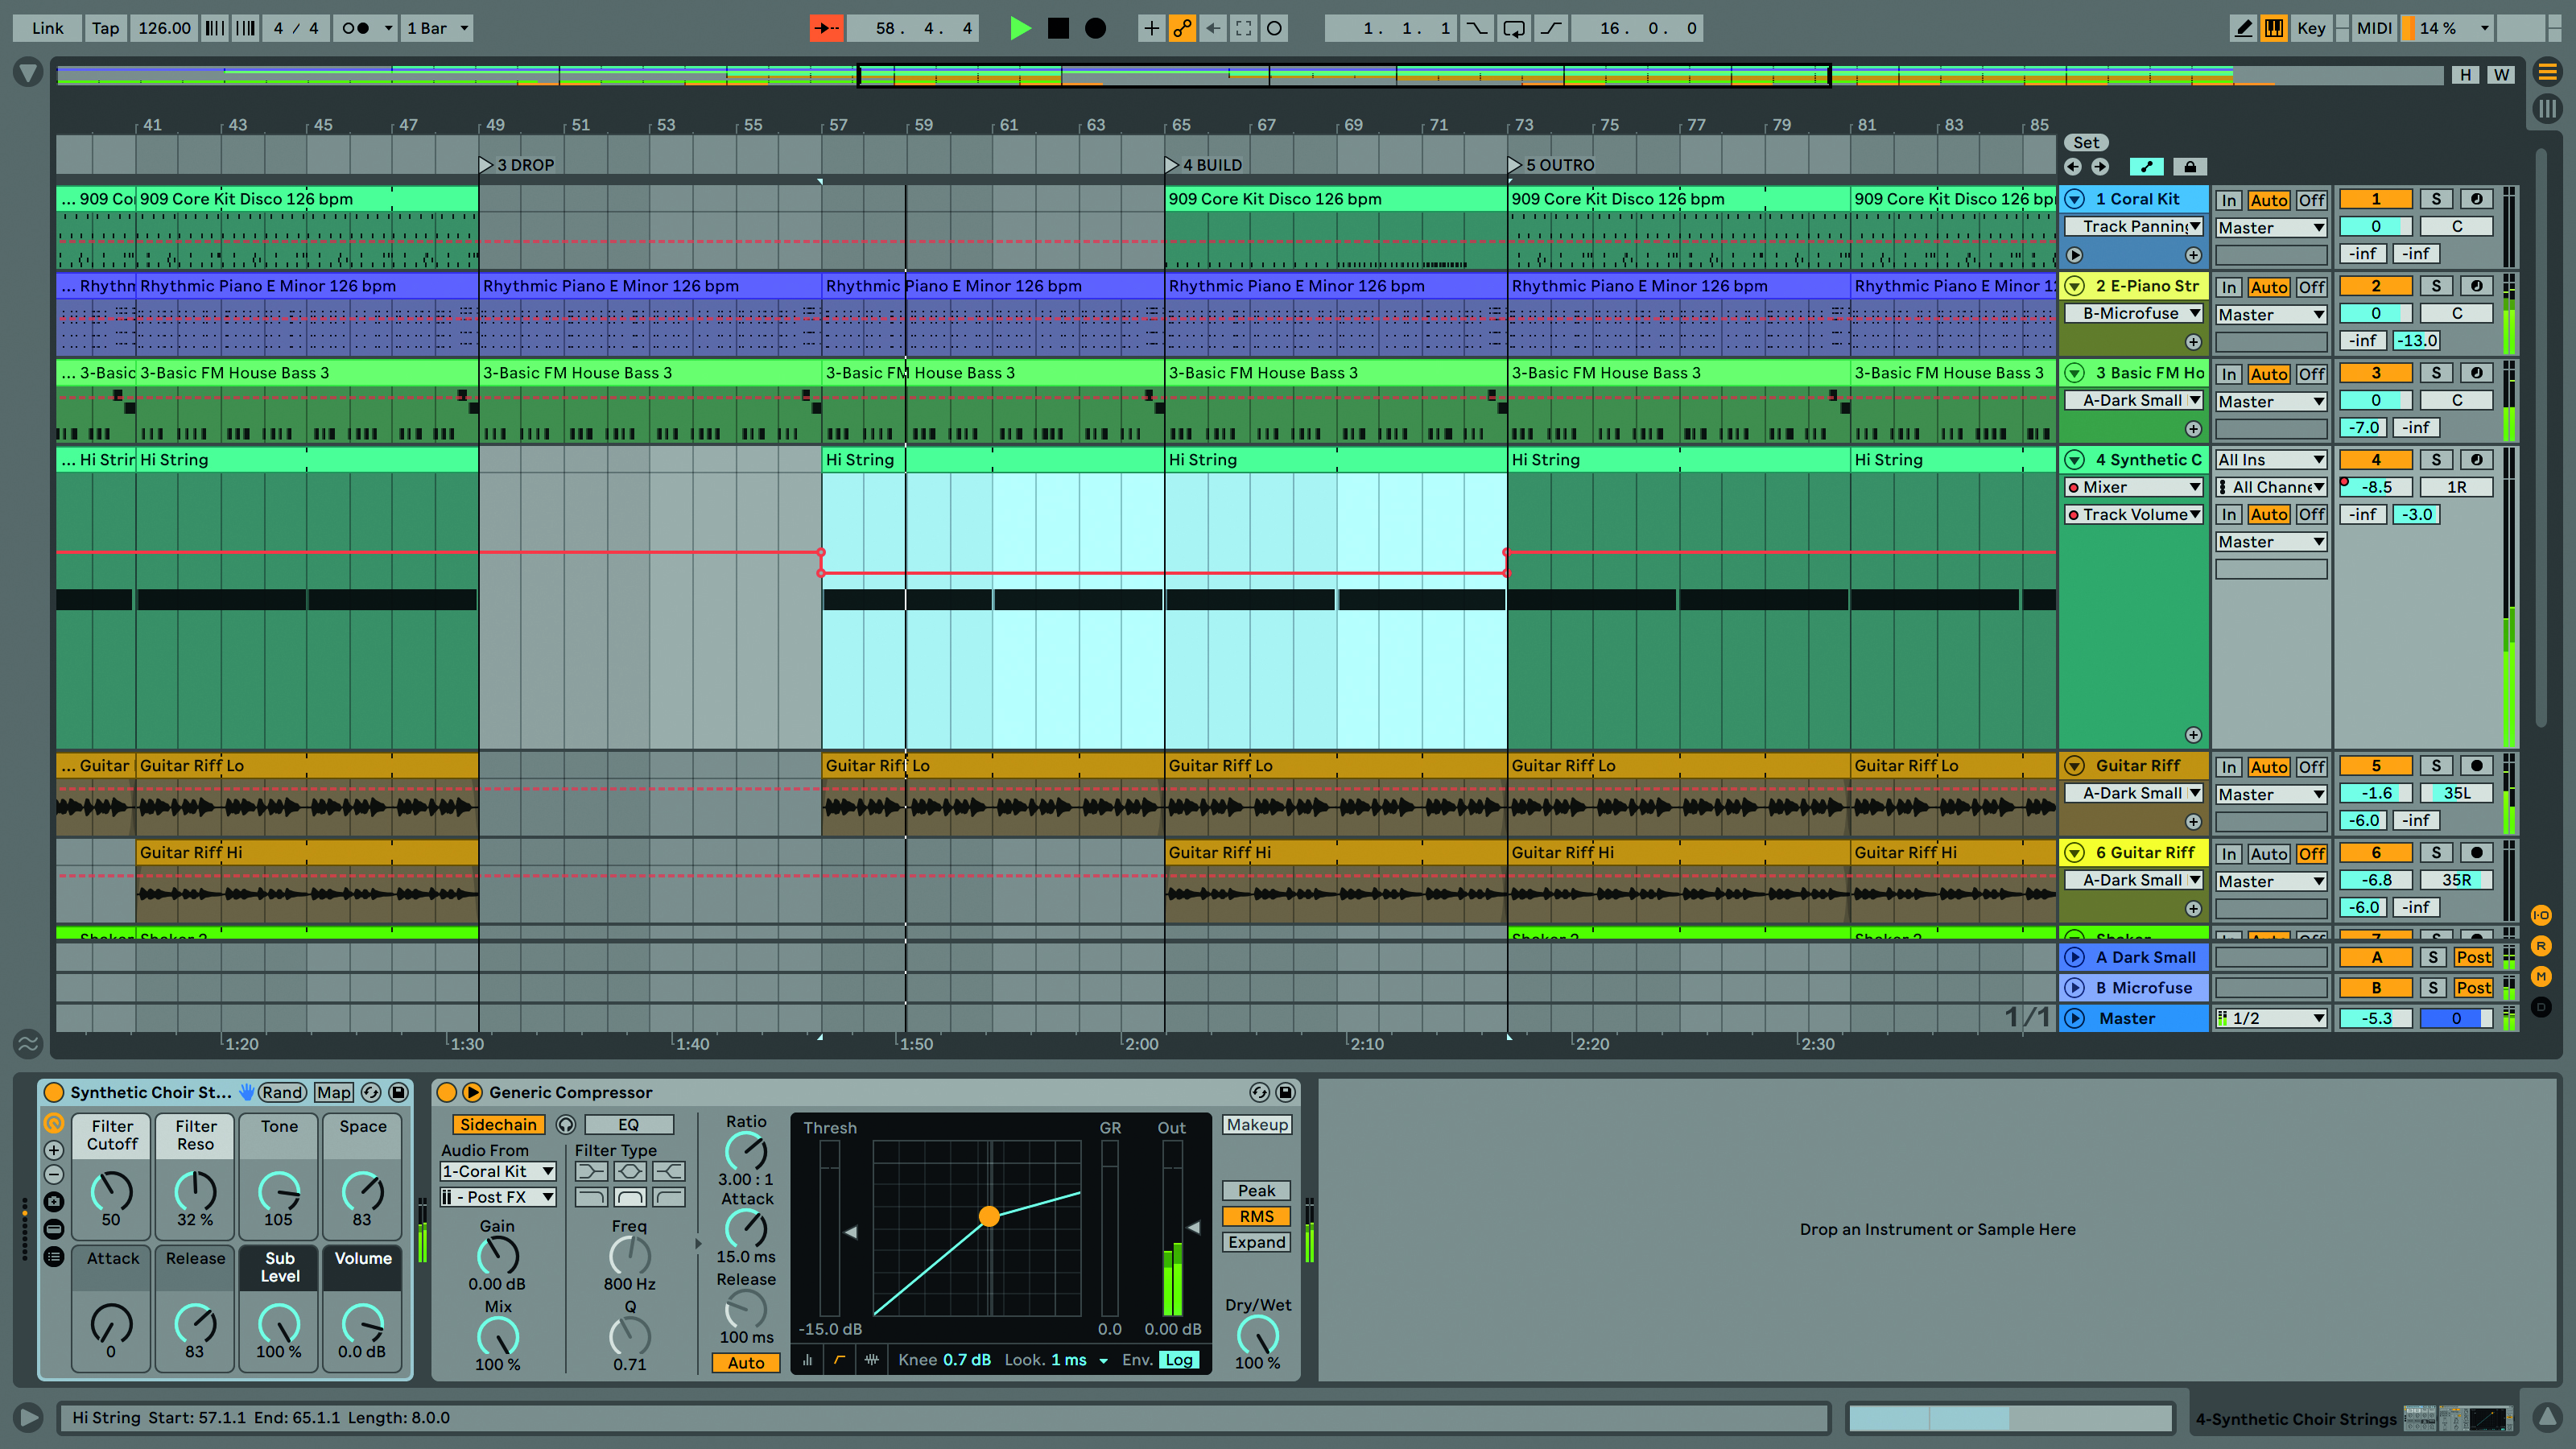
Step 7: You can simply click on this line and create individual break points to adjust the volume automation. A much quicker option is to select the clip and use the context sensitive arrows. We’ve grabbed the middle arrow and reduced the string level in the drop to -8.5dB.
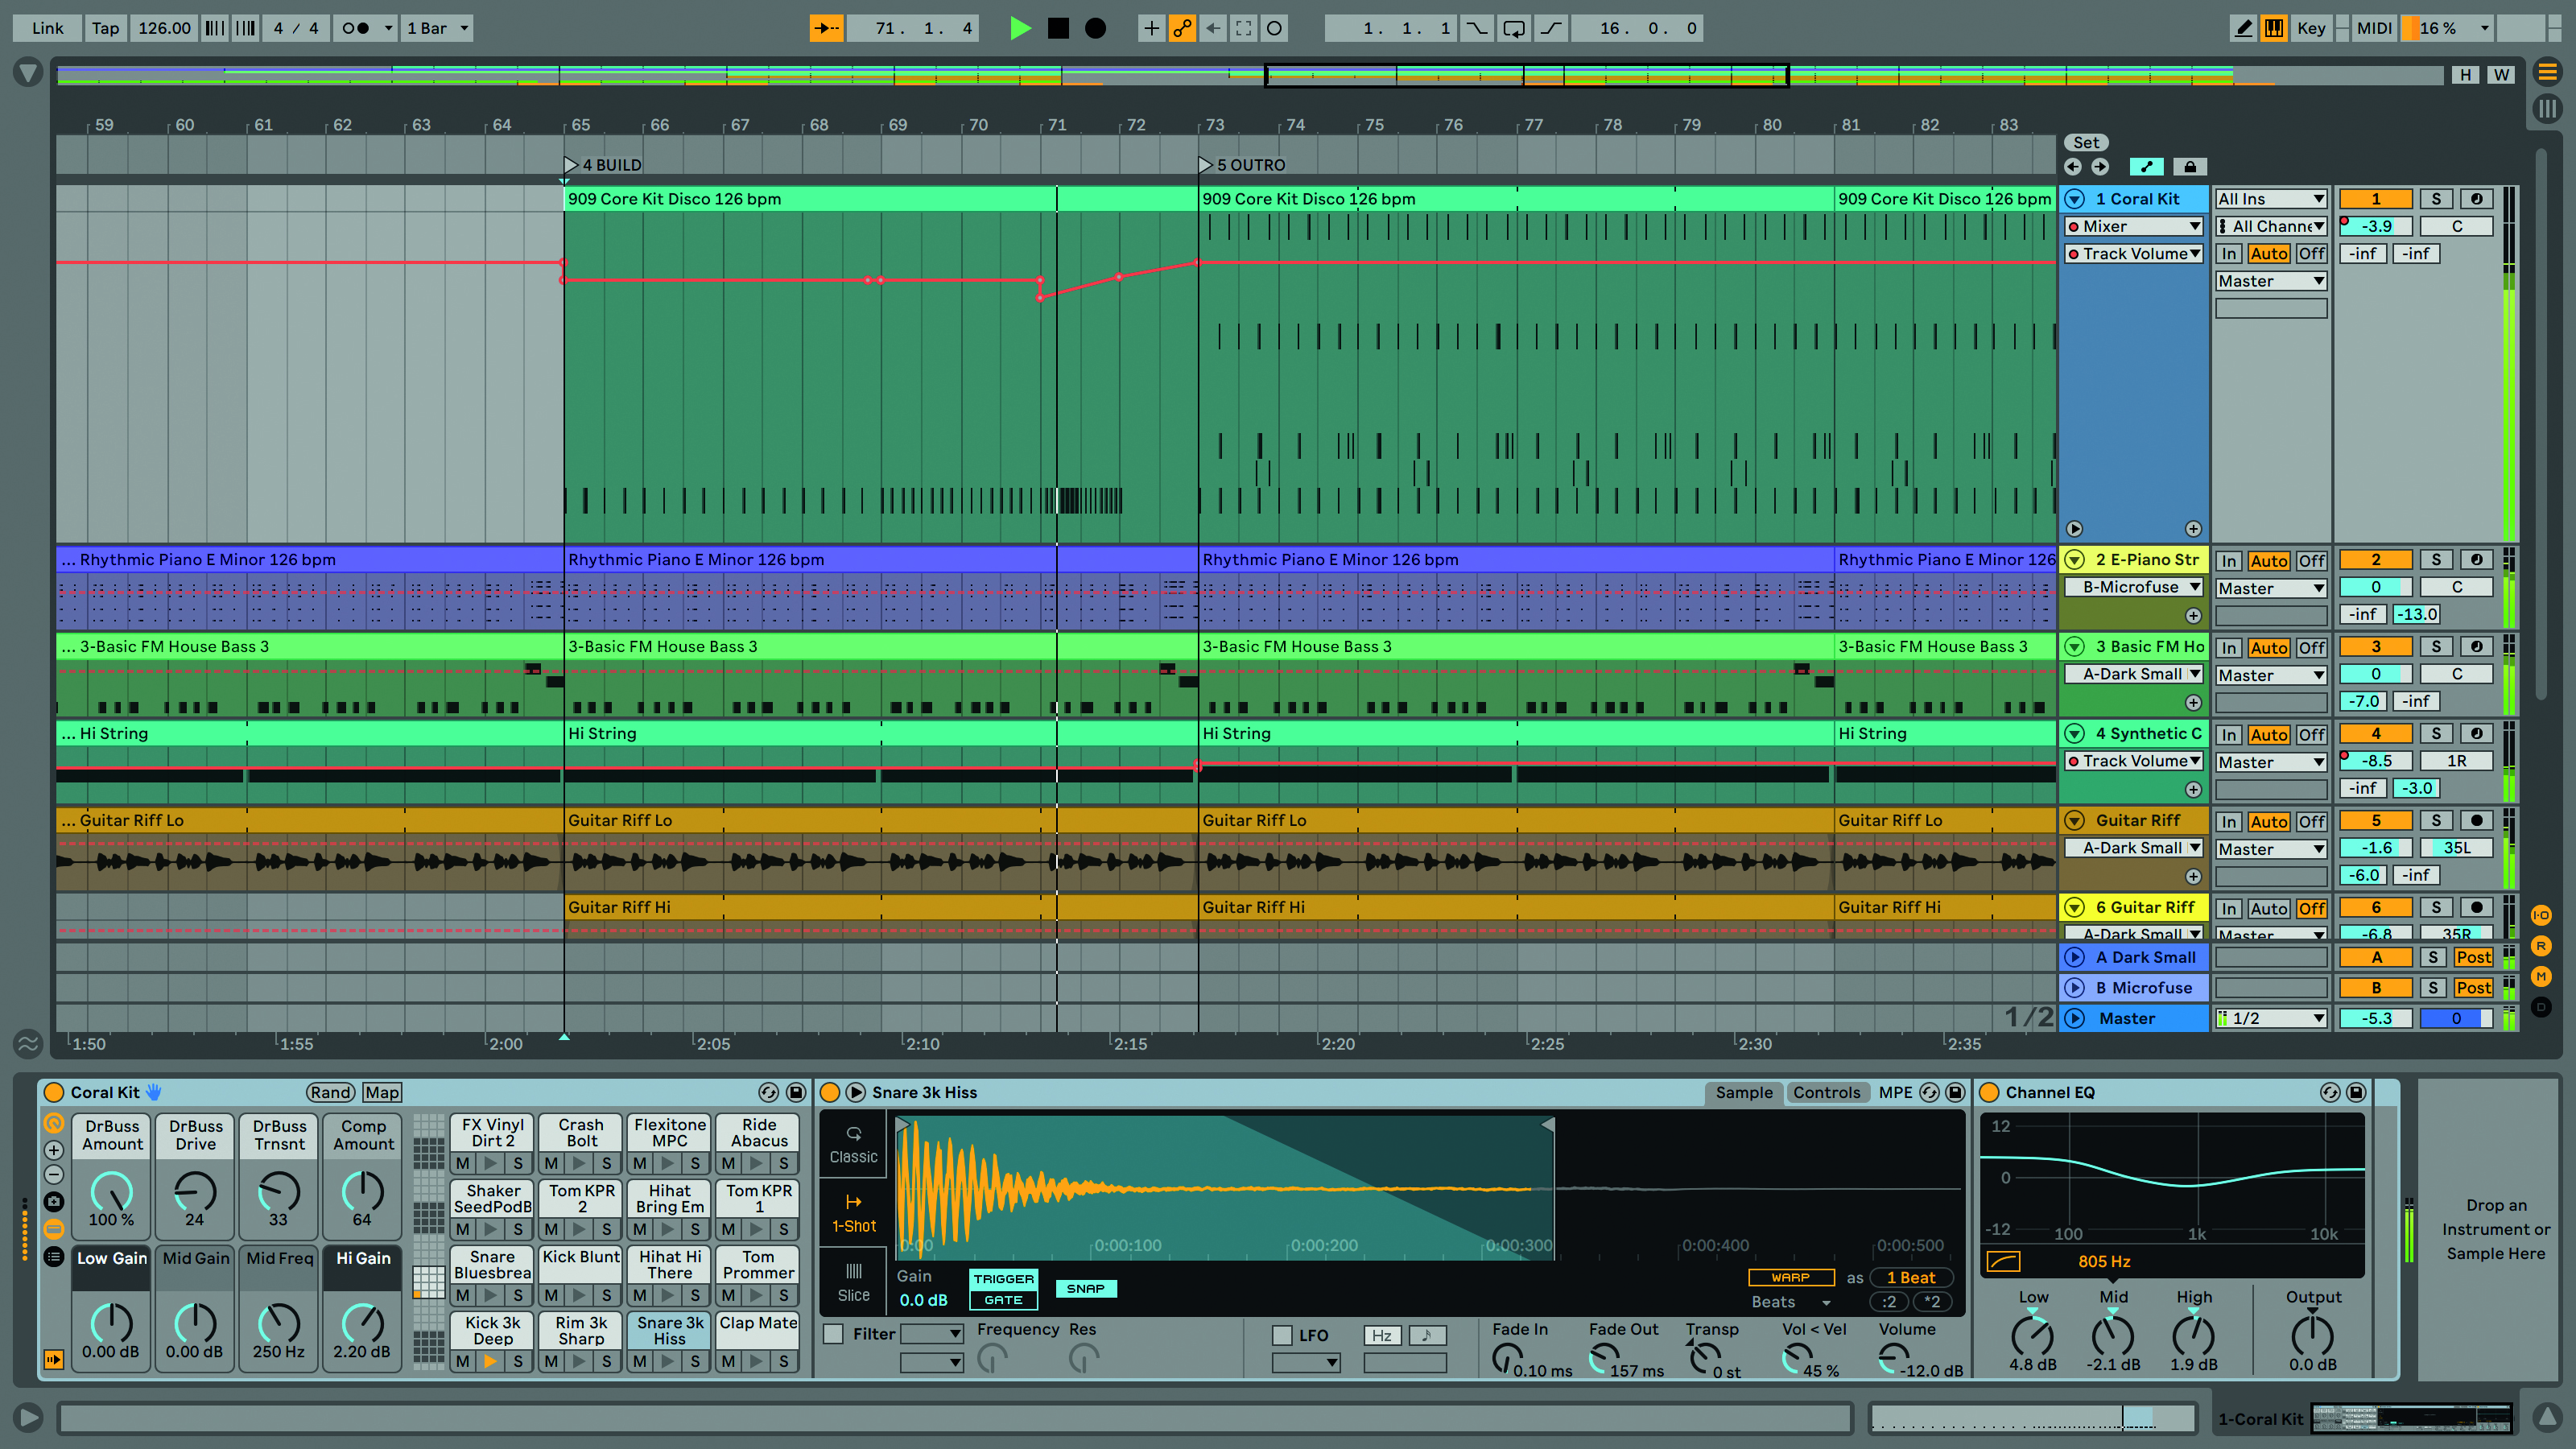
Step 8: The kick needs similar treatment in the drop-down but with some more precise tweaks. As you can see, we’ve reduced the level slightly (-2.0dB overall) and then done some final tweaks including a fade up as it comes to the end of the drop.
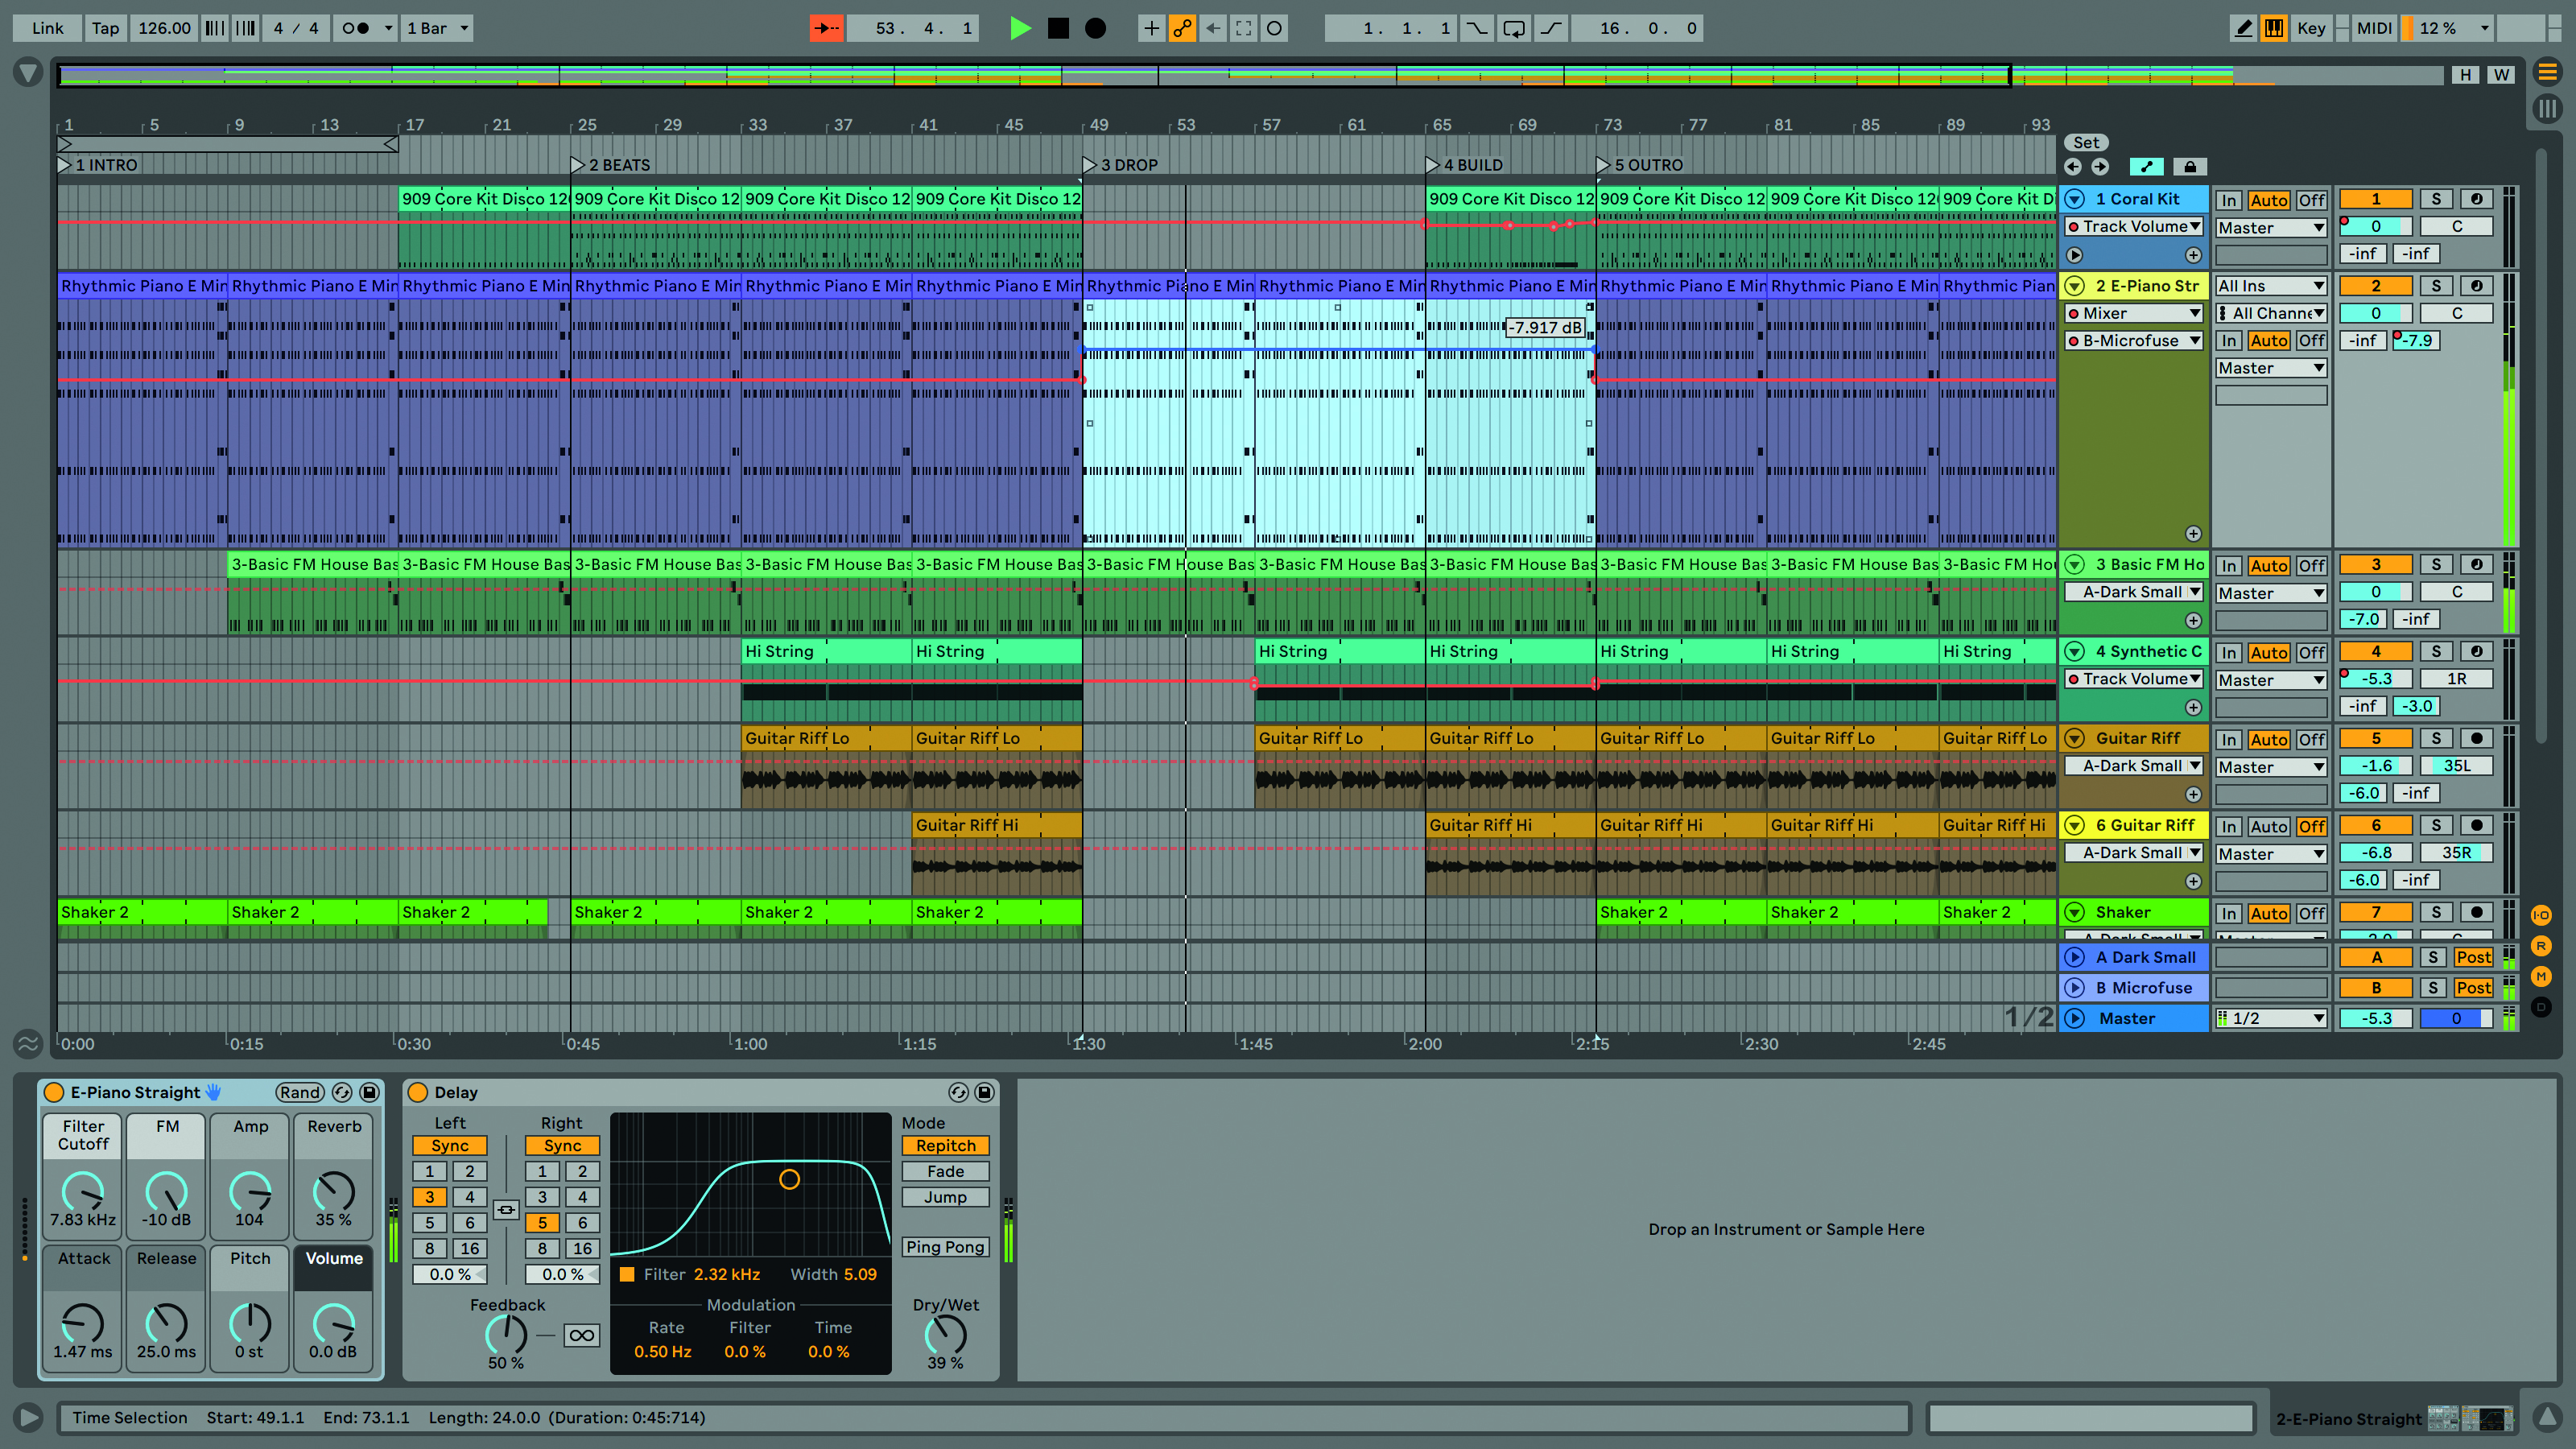
Step 9: We want to try one more automation move in the drop section. We added some of our Microfuse reverb to the rhythmic piano part. In the drop section we can automate this send level higher to create a more spacey feel. We’ve selected the B send in the automation chooser menu and adjusted it to about -9dB in the drop.
Computer Music magazine is the world’s best selling publication dedicated solely to making great music with your Mac or PC computer. Each issue it brings its lucky readers the best in cutting-edge tutorials, need-to-know, expert software reviews and even all the tools you actually need to make great music today, courtesy of our legendary CM Plugin Suite.
